A friendly hello…..

20170105_21065720170105_210706

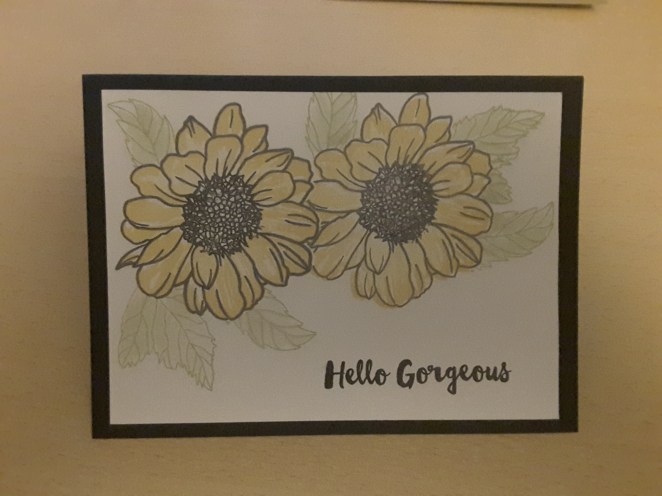
I love this stamp set from ‘Altenew’ Spring Daisy. When the image is stamped, it looks like a water colour effect. I tried stamping it in black, but the image was too severe, so I stamped it in grey, and I think it looks better that way. When the centre part is stamped – as it’s a two layer stamp – I found the image was a little too much like a water colour, so I took my water brush to it and added the colour separately.  I like the water colour effect after I have blended the colours a little more. I think it’s softer, especially around the leaves.

I used a masking effect, to make it look like the flowers are in two layers, and the same masking with the leaves I stamped, to look like the leaves are underneath the flowers, again using a little water colouring effect.

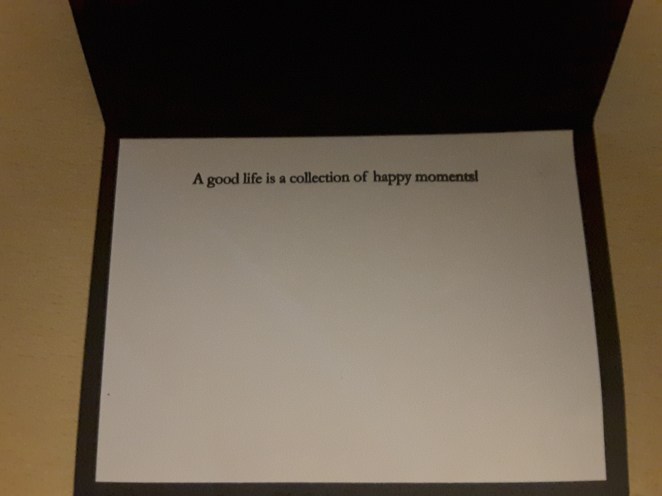
The sentiment on the front, and the phrase on the inside, are from another Altenew stamp set.

I sent this card to a couple of friends we had spent New Year’s Eve with, and wrote inside ‘thank you for adding to our collection’……(of happy moments).

I usually don’t do very ‘sweet’ cards, but am finding more and more that a simple card, sent just because you can, for no specific reason, is a great opportunity to make cards, and to send a personal and friendly ‘hello there’ instead of using text messages etc.

I have used this card to enter into the ‘Altenew’ inspiration challenge for January 2017, as the inspiration picture reminded me of spring, with the white and yellow colours, a darker background, and using the Daisy stamp just all seemed to fit.


Just because cards…..

I was playing around with some dies and found this one again. From ‘Stampin up’, a very cute ‘detailed floral’ thinlit dies. They are so cute, and don’t really need anything doing with them – other than a contrasting background card.

There are two dies, with one edger die which I used to cut the detail at the bottom of the floral design. I made them in bright red, and a deep purple colour, and to add some detail I taped some ribbon to the top wider white area.

It still looked a little plain at the top, so added a sentiment from a Christmas stamp set, which I think works quite well as a ‘just because’ card. Of course, I just had to stamp that with my ‘Misti’ tool, just in case I didn’t stamp it properly the first time, or I wanted a deeper colour. I tend to use my ‘Misti’ a lot, so I don’t waste cards. great tool – I do so recommend it….

On the card with the dazzle gem attached – I made a little boo boo! I smudged some ink – so – one had to cover that up, didn’t one? Dazzler attached. All good.

As a small bunch of everyday cards, just to send someone because you want to, for no specific reason other than to get in touch with them, I think they work quite well…..

Christmas cards for next year

I can’t believe it’s been so long since I last published anything on here. How does time go so fast? I have been making cards for the charity ‘Neurocare’ to sell, and had a bunch to make for a ‘Ladies Night’ they hosted – so much so that I was running behind making my own Christmas cards for my family and friends.

I was on such a roll making them, that I have some left over that I will save for next year. I have expanded my card making repertoire……I now stamp and colour as much as die cut and mat and layer. I have found I quite like using colour, in particular around Christmas time, but I also play with colour and other stamp sets too.

You can see my original style above – the monochromatic cards with the angel and Christmas tree on them, and then alongside them are the colourful cards using a lot of stamping, but very few layers.

I am glad I have found I can diversify – we can always do with trying something different……I usually see a card I like on Pinterest or YouTube. That gets my creative juices flowing. Sometimes I start by doing what is shown, but I always seem to veer off in my own direction. Generally it’s a different colour, or different layers. Sometimes it is the shape and size of the card, as I like to make larger cards for my family and friends, and smaller cards for Neurocare to sell. The smaller cards are easier and cheaper to post, so I generally don’t put too many layers on them, and therefore it keeps the postage weight down.

All-in-all I have been enjoying playing with different ideas, and different card making techniques. Hopefully, I will be able to share them regularly…..that is one of my New Year resolutions, anyway.


Charity Christmas Cards

I have been playing and making cards for the charity to sell, and have some friends at work wanting simple cards for Christmas. I played with Stampin Up products I have, as well as Crafters Companion, and an Altenew sentiment stamp.

The monochrome reindeer cards are from a Stampin Up set, which includes the punch to cut the reindeers out, making the cards so quick and easy to make. The other red reindeer card I added a printed Christmas vellum to the back, and a sentiment from Creative Expressions own Phill martin.

The Santa card is also a Stampin Up die, to which I added a glittery background using double sided sticky sheets, and a sentiment from an Altenew set I recently bought.

The Christmas Tree is a ‘Create a Card’ die from Crafters Companion, one complete die, which I added to a basic card blank for a simple and quick card.

Some very quick and simple cards, which hopefully people will find they can use for Christmas.

Anniversary card

20161001_112250

I have been having a fun-filled card making couple of days, and this is the first card I made. It is for my mother-in-law and her husband, married now for 20 years. She always enjoys seeing what card I make for them, and what techniques I come up with. I tend to stick to the die cutting cards when it comes to family, a little more involved than the cards I make for the charity to sell.

This card is a 8” x 8” base, with a layer of card I adhered double-sided sticky sheet to, added the first layer which I had die cut the top of with a Crafters Companion border die, then stuck glitter to the sticky areas which were left.

The top layer I also used the border die, for a matching accent, stamped a bride and groom in black embossing powder, then added a sentiment, which I also embossed. I had been bought a roll of silver sparkle twine, which I added for additional sparkle.

All-in-all, I think is a simple card, but I feel it is quite elegant, especially with the monochrome appearance of it.

I have entered this card into the ‘Crafty Friends Challenge Blog’ for the theme of Special Occasions, and Robyns Fetish challenge blog with the theme of ‘Square Cards’.


Cute Christmas

20160921_191142

I am definitely in the card making frame of mind, and Christmas cards in particular. I am still making cards for the charity – Neurocare – and also have been asked by some of my work colleagues for some of the more simple range of cards.

Unfortunately for my bank balance, Crafters Companion have just opened a brand new store within 15 minutes of me! I was there last Saturday – spending has never been so easy – and picked up this little stamp by Stampendous. This is from the House Mouse series – aren’t they cute? There is a whole range of stamps, but for some reason this took my fancy.

I stamped it and embossed in black, and coloured with my Zig Clean Colour Water brush pens. I love the way the pens made it so easy to colour, and the fact that it doesn’t need to be too neat and tidy!

I shall be adding some more cards I made, a variety of occasions, as I have been having a lot of fun stamping and playing.

I hope you enjoy looking at this cute little card, that I have also entered into Crafty Hazelnuts Christmas Challenge and Christmas challenge extra.

Quick and simple cards

As I continue to make cards for the charity at my place of work – Neurocare – I made a whole bunch yesterday. Why so many at one time? Well, I have just been away for a couple of weeks to beautiful Quebec City – and wasn’t able to do much crafting. The sights in that city are amazing, the food is superb – and the people very friendly, but not time for crafting as enjoying getting out and about there.

So on my return, I had a lot of card making mojo to express. You may have noticed a change in the style of cards from my previous blog posts – I have become better at my stamping! In part to the quality of products I use now, also by enjoying playing with my ‘MISTI’ stamping tool – and wanting to make quicker and more simpler cards for the charity.

I have put one of my recent cards which has a lot of die cutting on there, using the Sue Wilson/Creative Expressions dies with glitter, but the others are using a lot of stamping, trying out a variety of colours and images, using a masking technique on the tulip cards, and generally playing around with the stamps I have accrued over the past few months.

Most of the Stamp sets are from Altenew – love those stamps, especially the layering stamps, and their ink pads are ideal as they tend to come in a set of four for the mini inks – which all tone together and create the ideal colour and tone for the layering stamps.

As you can also see, there are a couple of stamp sets from Altenew all about coffee, and I thought they make ideal quick cards for saying hello to someone, for sending a card just because you can, almost like sending a little note.

There are also cards made form stamps and inks from ‘Stampin up’. This company has many, many stamps and inks and cards which are of good quality, and makes it quite difficult to choose what you want. I did have a day at my house with some friends and a ‘Stampin up’ demonstrator, playing with several stamp and die cutting sets. Even the none crafters enjoyed their time.

One other card – the wreath card – is made from a box I ordered from Stamp Nation. Though the postage and customs from the USA added an extra £15.00 (!!) the collection is fabulous to play with.

So – a very crafty day yesterday. Highly enjoyable, peaceful, and I think I created a good bunch for the charity to sell.


Wings and things


20160522_201922.jpg

This card was to provide something a little different. I had a great time playing with my dies, and a great time making the matching stick pins.

The base layer is a white 8” x 8” card stock, with a close fitting blue layer. I die cut the Sue Wilson/Creative Expressions Noble ornate pierced design for the white accent, including die cutting the ornate inner segment. On top of that I placed the embossed middle section in blue, and die cut the Happy Birthday sentiment with white foam. The foam I backed back and front with a double adhesive sheet, enabling me to glitter the sentiment, and also to stick the sentiment straight down on the front of the card.

The die cut butterflies had double sided sticky sheet attached to the front, so I could add glitter to them both, but only attached the middle of the butterflies to the card, so they could have some movement. The flowers were made and doubled-up – two layers – before sticking them to the card, and the two flourishes were then added to add further detail.

The three stick pins were made to match the colour of the blue, and to reflect and cause some added sparkle, and stuck into the backing foam underneath the blue middle section. I always like to add dimension with foam, and the foam also provides a good sticking point for any stick pins I add – also securing with glue.

I have entered this card into the ‘crafty calendar challenge’ with the theme of ‘things with wings’, and ‘crazy 4 challenges’ with the theme of white flowers, and the ‘allsorts challenge’ with the theme of Happy Birthday.

Pink Christmas

For my entry into another card making challenge, it took a little thinking about. The theme was for a Christmas card incorporating the colour pink. As the Crafty Hazelnut’s challenge blog says – not usually a colour associated with Christmas, but why not?

I started with a white base card, and layered a Blackberry Bliss card stock layer, which I embossed with a ‘Heart Lattice’ embossing folder. I then added a sheet of silver vellum which had Christmas trees and Merry Christmas on it, and stuck that down with glue dots.

At the top of the vellum, I covered the glue dots with sparkly dazzlers, and at the bottom I covered the glue dots with a length of pink ribbon I layered with a sparkly ribbon. I wanted a two level effect and the ribbon separated the layers.

The three Christmas trees were embossed onto pink card with pink ‘Wow’ embossing glitter, and cut out using the matching punch. The snowman was from the Tim Holtz/Sizzix ‘Snowman Blueprint’ – stamped and embossed in white embossing powder, and cut out using the matching die. The sentiment was stamped with white embossing powder, and cut out using a scalloped circle punch. All these were added to the card with foam pads, to add some shadow and dimension.

I found incorporating the colour pink into a Christmas card was quite easy – once I had got over thinking that Christmas cards only needed to be the usual Christmas colours of red, green, gold etc.

Stampin up: ‘Festival of Trees’ stamps and matching punch, scalloped circle punch, Blackberry Bliss card stock; Sizzix/Tim Holtz: Snowman Blueprint stamp and die set; Wow: embossing powder; Creative Expressions/Sue Wilson: ‘Heart Lattice’ A4 embossing folder; Dazzlers, white embossing powder, Christmas vellum from my stock – unknown maker


Hello Sweet Friend

20160515_101408

It’s been a few weeks since I posted, but I now seem to have recovered from my card making block. I joined Stamp Nation, an on-line community where there are literally thousands of videos and ideas to encourage and support you. I have been going through the site slowly, but seeing all the ideas, and the people has stirred by crafting senses again – all good!

I enjoy card making challenges, as it gives me a topic or a reason to make a card, as I make them for personal use, and have also started to make quick cards for charity. A valuable web site for me is Paper Playful. The web site is a group of volunteers who trawl the web for card/craft challenges, and post them. So – I only have to look in one place for a fabulous list to encourage me.

The card above is for one such challenge – My Time To Craft Challenge Blog – and the sketch for the current challenge reminded me I had a bag of ‘Twinchies’. Twinchies are 2 inch square , and ideal for this particular challenge. These particular ones are from Stamps Away and are white paper lined board – ideal for a mosaic effect.

I used a 5 x 5 inch square Kraft card base, and placed a layer  Blackberry Bliss card stock. On 4 of the Twinchies, I stamped third generation flowers, to give a faded and muted look. For the middle Twinchie, I masked an area the general size of the sentiment I was going to use, stamped around and over the masking, and then stamped the sentiment.

I had some ribbon from a Jane Means gift wrapping course I attended last year, which I wrapped around the base card, On top of the ribbon I added an Indigo Blu mount board rose which I coloured the same colour as my stamping, and added some Decadent Wine PVA dots. Maybe I should have used pink dots – but I thought they would have added too much brightness for what I was trying to achieve.

I don’t usually make flowery and pretty cards, but I really enjoyed putting this together.

products:

Stampin Up: Blackberry Bliss cards stock , Blackberry Bliss ink, Elegant Eggplant ink (sentiment), Old Olive ink, ‘Botanicals’ For You stamp set; Cosmic Shimmer: Decadent Wine PVA, from Phill Martin; Jane Means: chocolate and pink ribbon; Indigo Blu: Alter Ego Florals