Coffee Cup Shaker

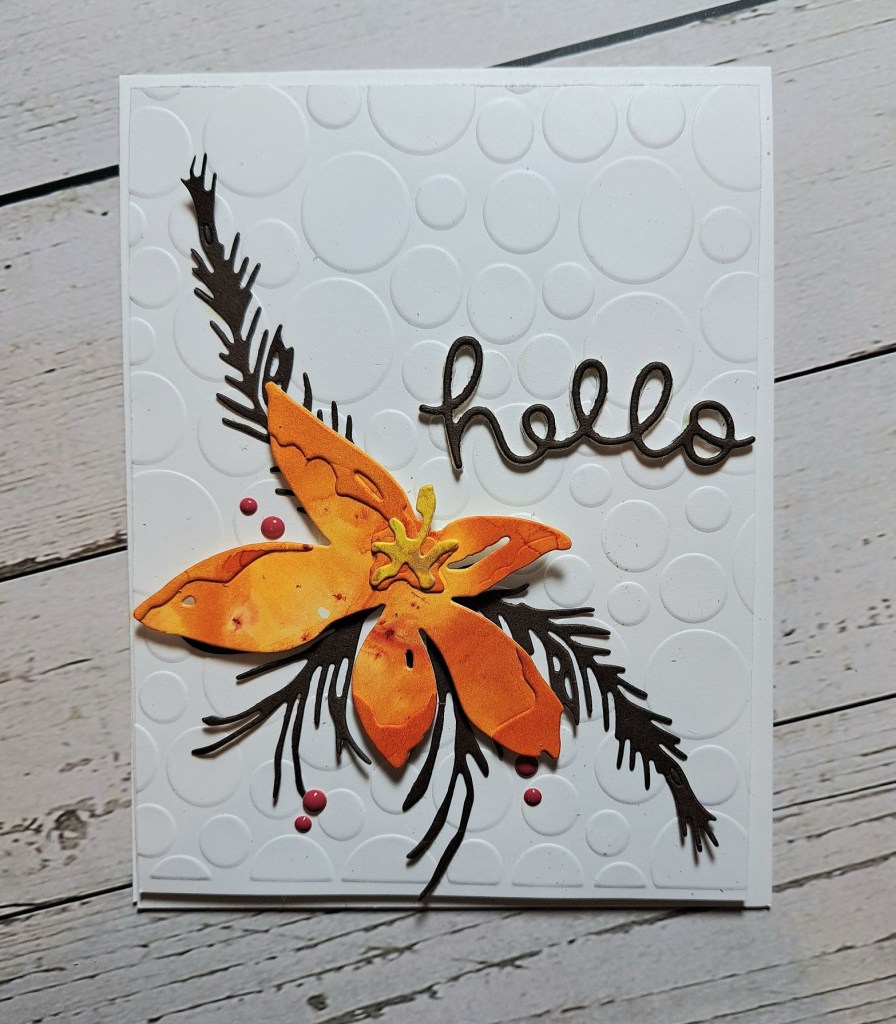
Hello. I have a card to share using a new die set from Time For Tea Designs:

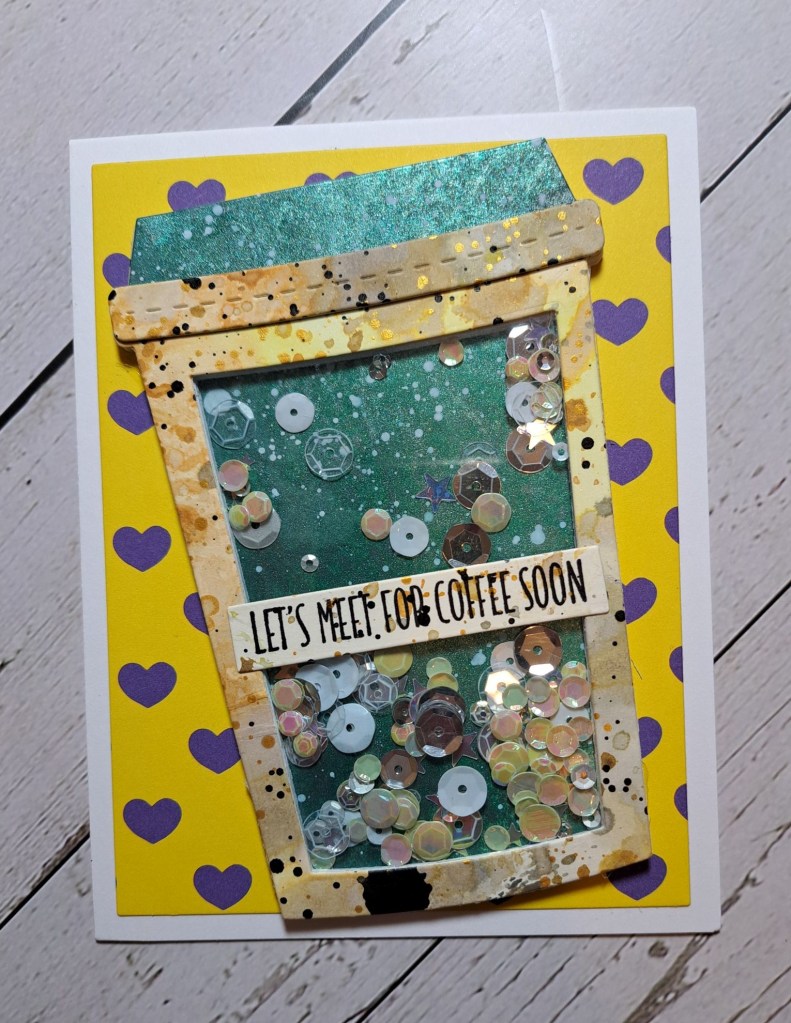
I die cut the coffee cup in a piece of card which had been sprayed with mica stain, this would act as the base which would be seen through the acetate.

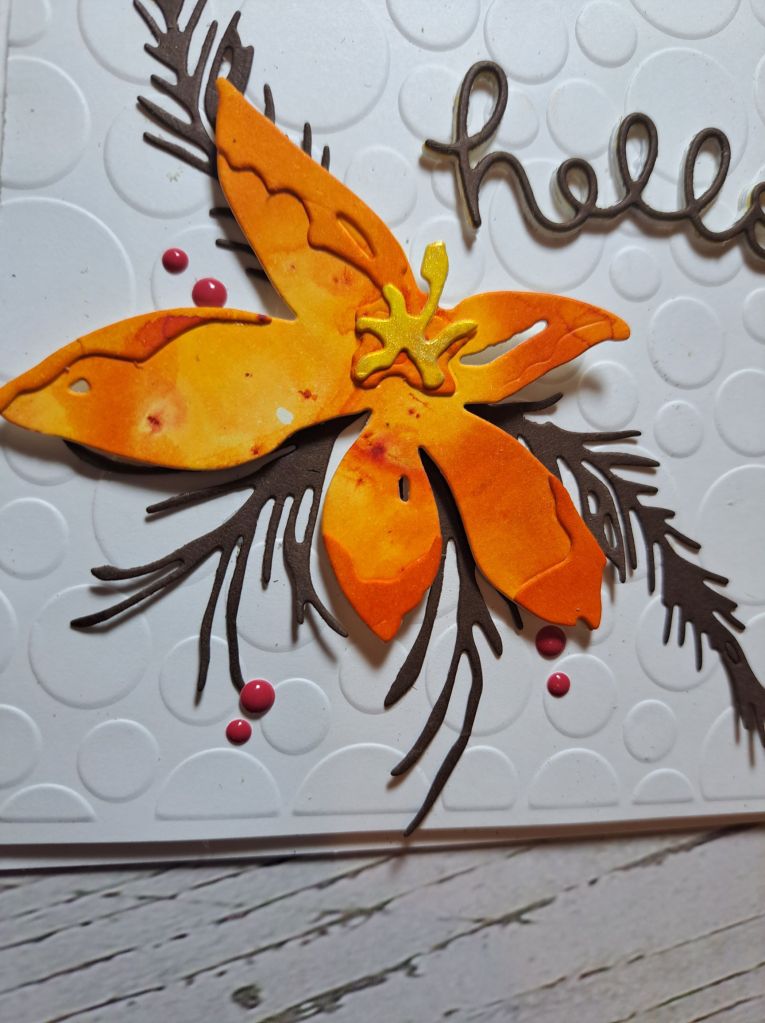
I then taped the coffee cup and window die together, and die cut both 5 times to create the walls of the shaker. I didn’t use 3D foam for the edges – I think stacked die cuts look cleaner when viewed from the side.

I glued four of the die cuts to the base, added sequins into the ‘well’, added acetate to the back of the top ink smooshed layer and stuck down. I wanted a brown-ish coffee cup, but not solid brown. The lid was die cut and added.

I stamped the sentiment, cut into a strip, and glued to the top of the acetate.

There are a few dies in this set I didn’t use – a gift card holder and slots, and a coffee cup wrap piece – but I thought the wrap piece would cover up too much of the cup and shaker for this project.

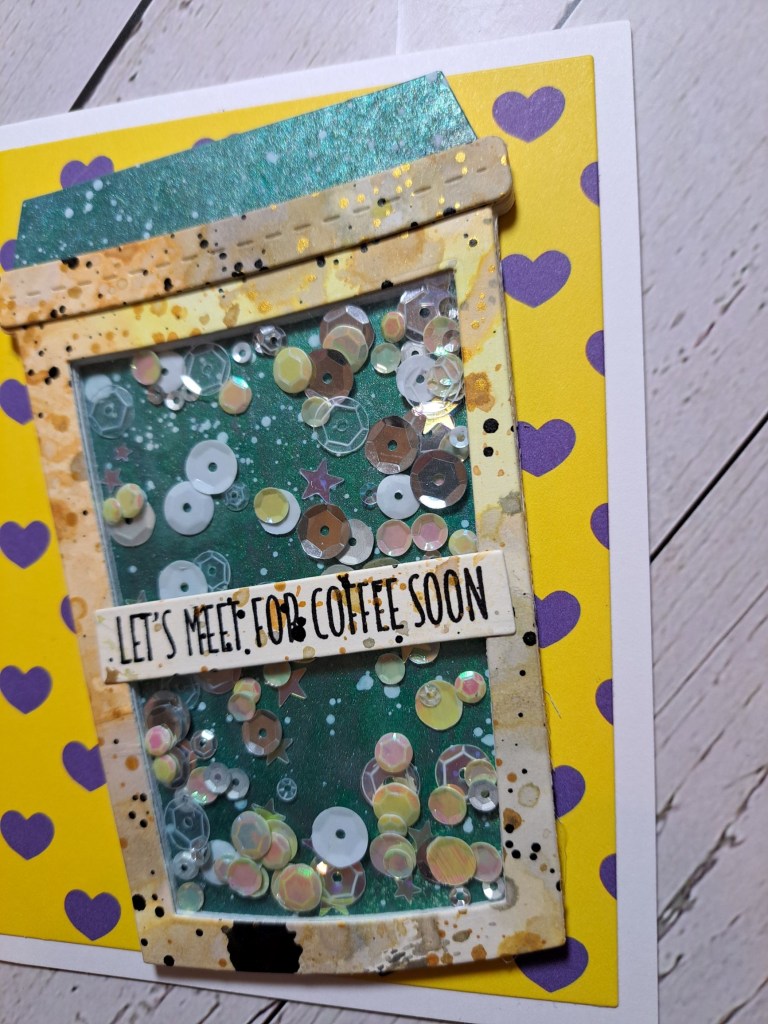
I wanted a background patterned paper which was quite colourful, so the coffee shaker would stand out, and chose one which had colours which seemed to be reflected in the sequin mix.

I shall be entering the following challenges:

Day Of The Month Card Club National Espresso Day

Cut It Up Challenge coffee – include a die cut

Creative Fingers anything goes

Lil Patch Of Crafty Friends anything goes

The Most Wonderful Time Of The Year

Hello. The new challenge has started at The Holly and Ivy Christmas Challenge. The theme is always ‘anything goes Christmas/festive’. Here is my card:

I die cut the Pinkfresh Studio snowflake panel in white and shiny red card stock, and adhered to the base card. I ensured the red was aligned with the white and cut the extra off the side.

I then used a Pinkfresh Studio snowflake die with a red non-shed glitter card, and with the same red shiny card, and layered the snowflakes – some shine and glitter on each of the three snowflakes I used.

The sentiment is gold heat embossed and die cut using the matching die set.

Once all was adhered to the card base, I added some gold gems to the centre of the snowflakes, and then two more sets of three.

I hope you can come and join us – I look forward to seeing you in our challenges. xx

I shall be entering the following challenges:

Beyond The Blue – use some gold

Krafty Chicks – occasions

Peace On Earth Christmas Challenge – Christmas

Crafty Hazelnuts Christmas Challenge – Christmas

Daring Cardmakers – Shine

The Sisterhood Of Crafters – Christmas/winter

A Robin Christmas

Hello there. A little playing in my craft room yesterday created this card:

I searched through the Color My Life app for a die set I knew I had which contained Robins – but couldn’t remember the make and where I had stored it. I found it was a Creative Expressions die set from Lisa Horton – and an old one as the date on the back was 2017 – but at least I had remembered I had it somewhere.

I first die cut the robins using brown, Kraft and red card stock. I added their little hats – red and a white glittery card stock, then set aside.

The leaves and holly were die cut from a previous created mica sprayed piece of card, which I had also splattered with white Liquitex acrylic paint. The white glittery oval is die cut from a Gina K master Layout’s die set.

I then turned to the card base, added a brown layer, and a white dry embossed panel – a Spellbinders embossing folder – and then played with the layout of all my elements until I was happy, adding a previously foiled sentiment.

Here is a look at all the glitter and shine:

I shall be entering the following challenges:

Sparkles Forum Christmas festive things with wings

Daisy Chain Challenge Christmas is coming

Winter WonderlandChristmas and Robin Red Breast

Allsorts Challenge wings and/or tails

Make My Monday Challenge things with wings

CYHTPembossing folder – twist of thanks not taken

Merry Kittimas

Hello. A chance for me today to do a little more Copic colouring – in-between binge watching ‘Warrior Nun’ first season. Here is my card:

This cute little kitty and the presents are from a new stamp set from a new company to me, bought a few weeks ago at a Craft Show. I stamped the images, coloured with Copics, then cut out using my Scan-n-cut. I added some white gel pen to the presents just for a little more interest.

The patterned paper was adhered to the card base, the white stitched rectangle adhered using 3D foam, but before adding the kitty and presents with 3D foam, I stamped a sentiment from the same stamp set.

It’s interesting to me that I coloured the cat, when none of my current 4 cats have that colouring! How bizarre is that? I have two black and white cats, a tabby, and a tortoiseshell………weird the way my brain works sometimes…….

I shall be entering the following challenges:

Crazy For Cats Challengeanything goes with a cat

Fab’N’Funky ChallengeChristmas Animals

Crafty Hazelnuts Patterned Paper Challenge anything goes with patterned paper

Stamping Sensations Christmas Celebrations

Dragonfly Dreams Christmas

Cutie Pie Challengecute four legged friends

Lil Patch Of Crafty Friends anything goes

Happy Christmas From All Of Us

Hello. I decided I wanted to do some Copic colouring yesterday and part of that playtime was creating this card:

I stamped the image from Lili Of The Valley and coloured with a range of Copics, then used my Scan-n-cut to cut it out. This took several scan passes before it picked up the outline, but it finally did it.

The background is a piece of Heffy Doodle card stock, and a Lawn Fawn stitched snowflake die.

I added a black strip along the edge to represent the ‘wall’ the characters were all peeping round.

The sentiment is form the same stamp set, and once added I decided some bling was called for – so I added some reflective little stars to the middle of some of the snowflakes, and also added some white gel pen here and there.

I shall be entering the following challenges:

My Time To Craft Christmas with Elves or gnomes

52 CCTSanta and at least one of his friends

Crafty Hazelnuts Christmas Challenge anything goes Christmas

We Love StampingChristmas

Peace On Earth Challenge Christmas

Merry Little Christmas Challengeanything goes Christmas

A Classy Bird…..

Hello. I was in the mood for some messy crafting yesterday – some stencils and pasts and watercolouring – it’s always messy when I create some backgrounds for my stash. Here is what I created for a few challenges:

The background panel was created using Altenew embossing paste and adding green ink to colour it, then applying through a stencil.

Whilst that was drying, I stamped the image onto Distress watercolor card, then coloured using the Distress Watercolor pencils – playing around with colours and techniques. I stamped the image several times, as I wanted to play with the pencils, and see which technique worked for me. I found the best way for me to use these, was to use my watercolour brush – slightly wet – direct to the tip of the pencil, and then colour the image.

I added a base wash of colour, then touched the tip again for a more vibrant colour to create some shadow.

That was put aside to dry, and I then stamped the extra images and sentiment, and used the pencils to colour those – putting aside to dry.

Once I thought they were all dry – a couple of hours maybe – I used my Scan-n-cut for the owl, and fussy-cut the smaller images. I have no idea why I didn’t use the Scan-n-cut for those smaller images and sentiment, as I absolutely do not like fussy-cutting – but maybe my brain took a little holiday at that point…..!

I thought it would be fun for her to be holding the handbag, so I cut through that one part of the wing, cut a hole in the appropriate handbag area, and slotted it in.

The base panel and all the images were adhered with 3D foam, even the handbag.

Now – the shoes – she is wearing the high heeled shoes in the image, but I cut those off, and put the boots there instead, adding the shoes to the pile of shoe boxes…….I don’t know – cutting her wing, and then cutting her feet off……sounds kinda barbaric……!

I added some white gel pen to some areas mas highlights, and for her ‘dotty’ areas.

I shall be entering the following challenges:

Crafty Catz weekly challenge anything goes – option of Christmas not taken

We Love 2 Createanything goes mixed media

Cupcake InspirationsOwls

Dream Valley Challenge anything goes

Create Artiste Mixed Media Challenge anything goes mixed media

Creative Fingers Challenge anything goes

Just……..Hello…..

I have a CAS card to share which incorporates several of my favourite techniques – ink smooshing, die-cutting, and using embossing folders:

I dry embossed a white panel and stuck to the card base with 3D foam.

The Tim Holtz flower (Holiday Brushstrokes) was die cut from a previously created orange ink smooshed panel – the different small layers had some extra ink blending on the edges to make them a little darker – and glued together. The yellow centre is from another panel using mica sprays.

I also die cut the leaves in that die set from a brown card stock, then adhered these with a mixture of 3D foam and wet glue.

The sentiment if from Lawn Fawn, die cut three times in white, then a brown die cut on top.

I added some red enamel dots as extra accents.

I shall be entering the following challenges:

TTCRDanything goes

Krafty ChicksCAS

Creative Knockoutsanything goes

Color Throwdown red, orange, brown, yellow

Mix It Upanything goes – option to use a technique

Hello Friend….

A new challenge has started at The Alphabet Challenge. Having reached the letter ‘Q’, Melanie has chosen the theme of ‘Quilt‘. Here is my card:

I used Concord & 9th dies to create this very colourful card. A lot of die cutting and then gluing the triangles together – then deciding which colours to put where, in which pattern – goodness knows how quilt makers manage.

I used some dotty patterned paper for the triangles, adhered to the base panel, a black layer, then stuck onto a white card base.

The bigger orange sentiment has a slightly off-set black layer – and the shadow layer to make it stand out a little more – the smaller sentiment in black.

Just one itty bitty black gem for the tittle on the letter ‘i’ of friend – really because lost the die cut one and didn’t want to risk a black Nuvo drop…..

The Design Team has come up with some original shapes and colours – I hope you can come and join us. xx

I shall be entering the following challenges:

Lil Patch Of Crafty Friends anything goes

TTCRDanything goes

Crafty Hazelnuts Patterned Paper Challengeanything goes with patterned paper

Avenue 613 Create anything goes – option of fancy folds not taken)

Ally’s Angels – anything goes

Love To Craft anything goes

Thankful For Your Friendship

Hello once again. It’s my turn to host the new challenge starting at Cardz 4 Galz. I have chosen the theme of ‘stencils’. Here is my card:

This card is – obviously – a slimline card – but slightly longer than the usual. I started with the card base, and die cut the Pinkfresh Studio deco frame twice – it wasn’t as long as I needed it – but I knew I could cover the join with my other elements.

I dry embossed a panel to go inside the frame and adhered the frame with 3D foam – I wanted to add the elemenst with 3D foam, and to tuck them under the frame in certain places.

The birds and branches are from a stamp, die and stencil set from Pinkfresh Studio. I stenciled this several times with different colours of birds and flowers, then used the matching die, which created lots of separate pieces, and set about arranging them in my frame.

I knew I wanted to cover the join in the frame, so I started there, then looked for a sentiment and arranged everything else around that. Some of the leaves and flowers I trimmed down to fit, and added gold gems to match the sentiment.

I hope you can come and join us with your creations which include a stencil – I look forward to seeing your creations. xx

I shall be entering the following challenges:

Allsorts ChallengeAnything goes (option to add number/s not taken)

MMM Challenge thank you

Lil Patch Of Crafty Friendsanything goes

CYHTPembossing folder (wreath option not taken)

Crafts Galoreanything goes

Die Cut Divas anything goes with die cuts

Here Is A Place To Startanything goes – option words of thanks

Avenue 613 Createanything goes (option fancy folds not taken)

Stencil Funstencils (option fall colours not taken)

Simon Says Stamp Wednesday Challenge stencil it

Rainbow Christmas Lights

Hello. I’m quickly popping along to share a card created an older die set from Lawn Fawn:

I used the ‘mini string of lights’ and die cut out of silver glitter card stock, then die cut each light out of the rainbow card stock I had – a mixture of Heffydoodle card stock and an unknown brand from my stash.

The coloured pieces were glued onto the silver string and attached to the edge of the card.

The sentiment is a previously foiled strip from my stash.

I shall be entering the following challenges:

Clean and Simple on Friday CAS Sparkle

AAA CardsCAS – along the edge and rainbows