Hello everyone. I was lucky enough to be the winner for previous challenge at 52 CCT, and as such took them up on their offer to be Guest Design team member.
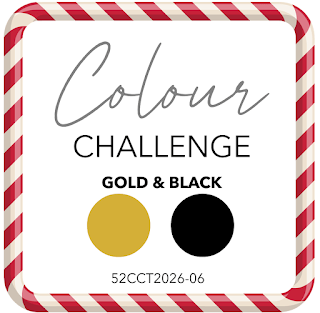
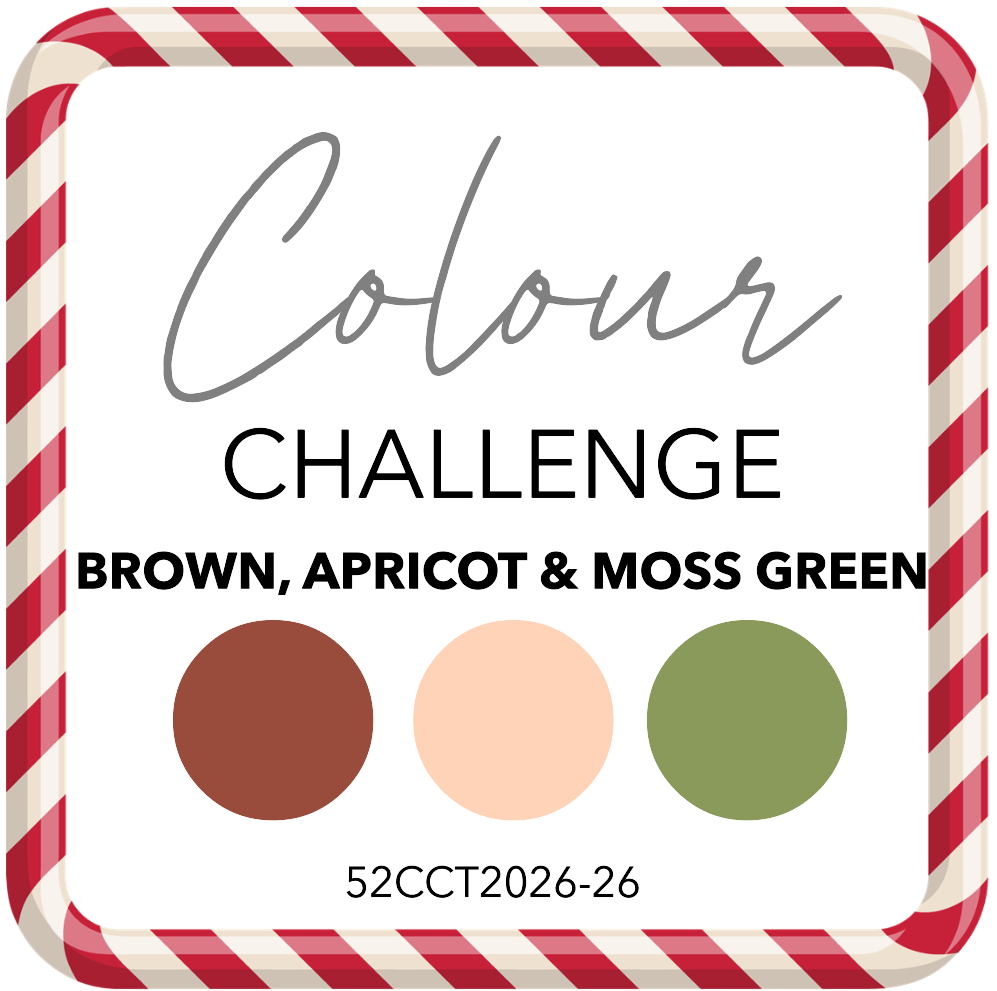
They have started a new challenge, and it’s a colour challenge – as long as you create a Christmas card using these colours (some neutrals are allowed) – you are good to go:
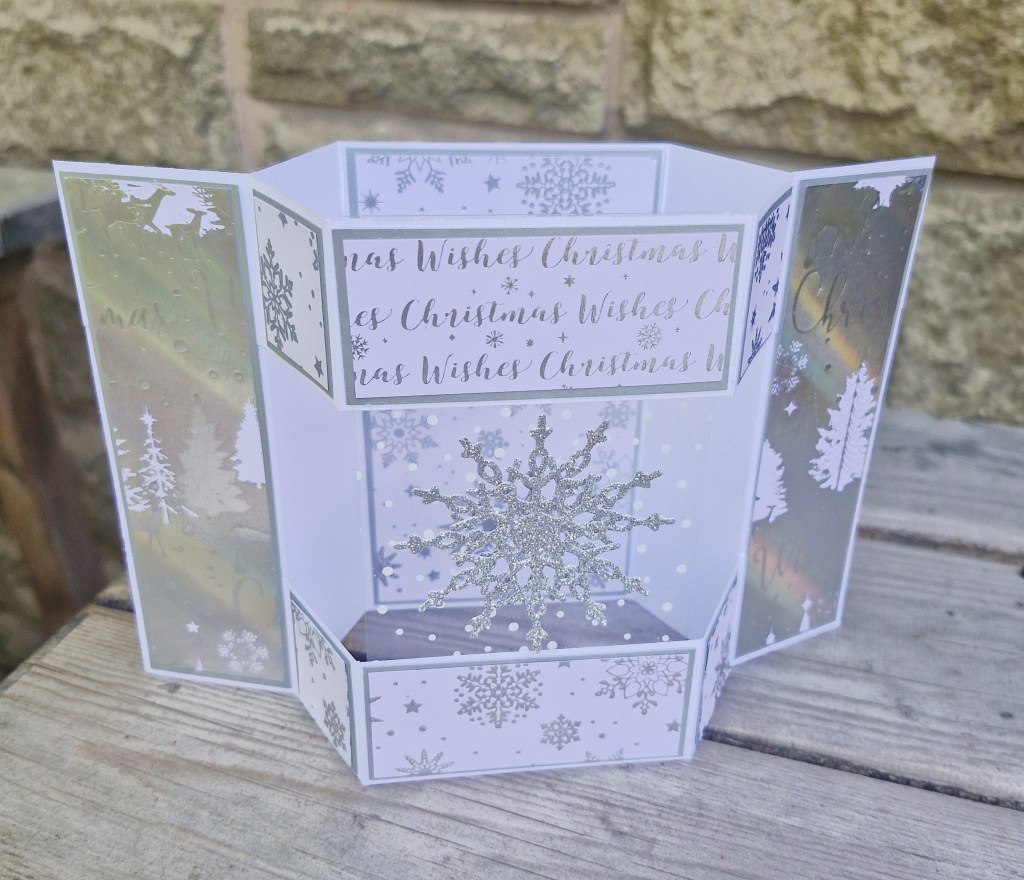
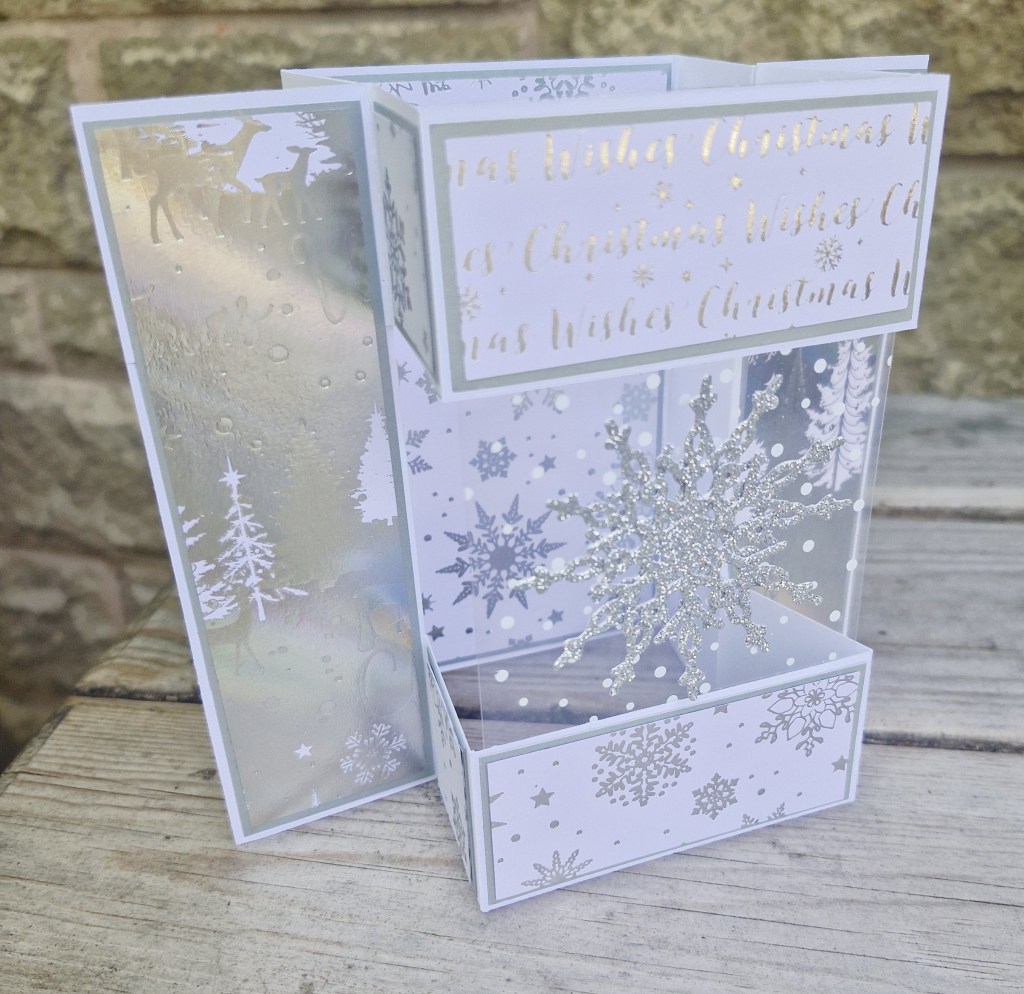
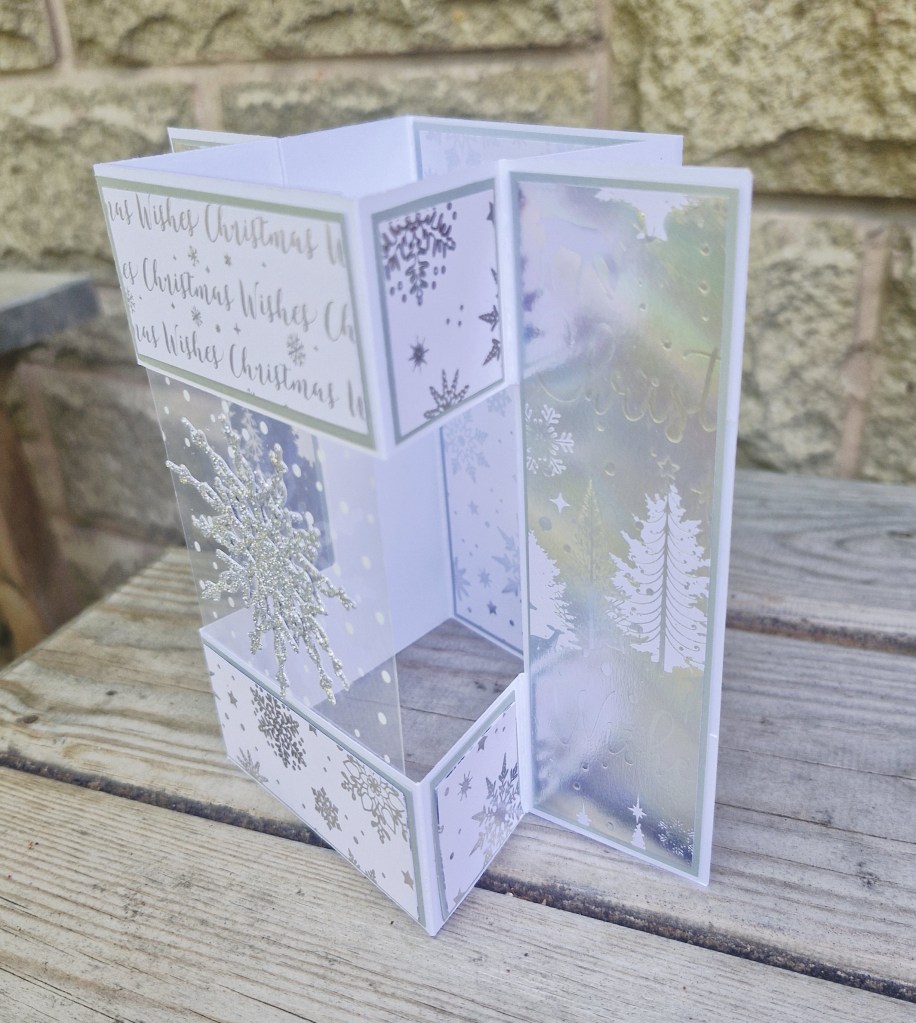
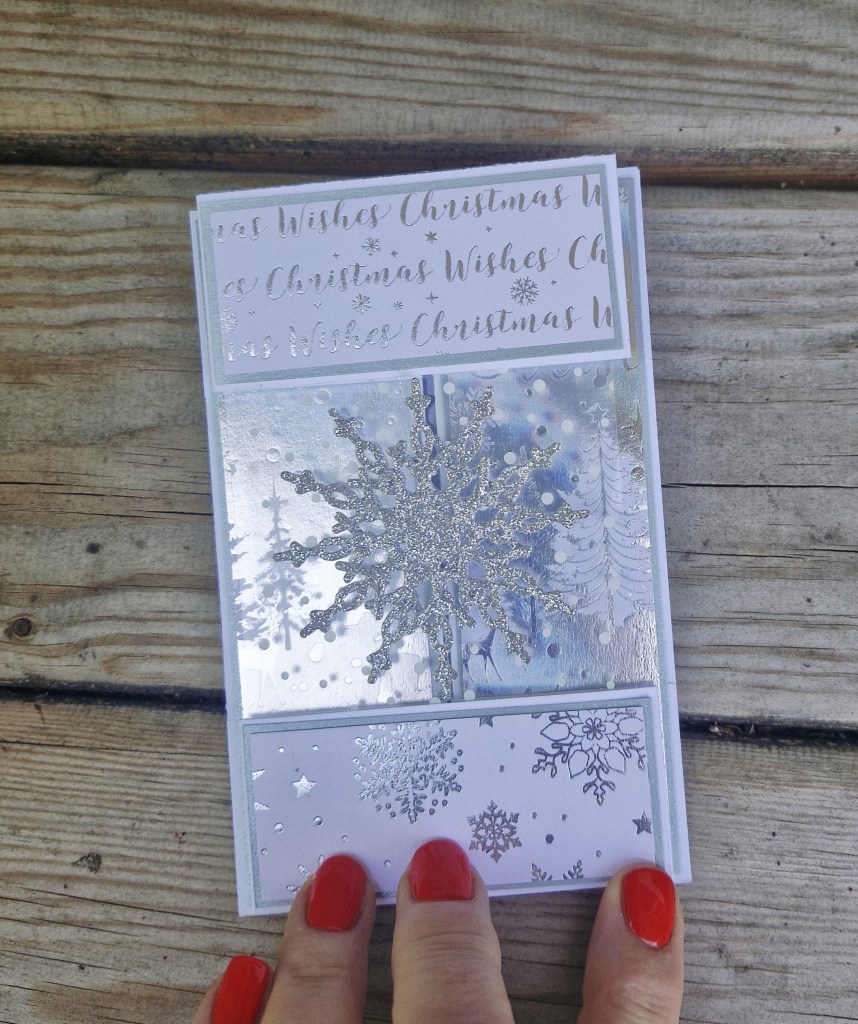
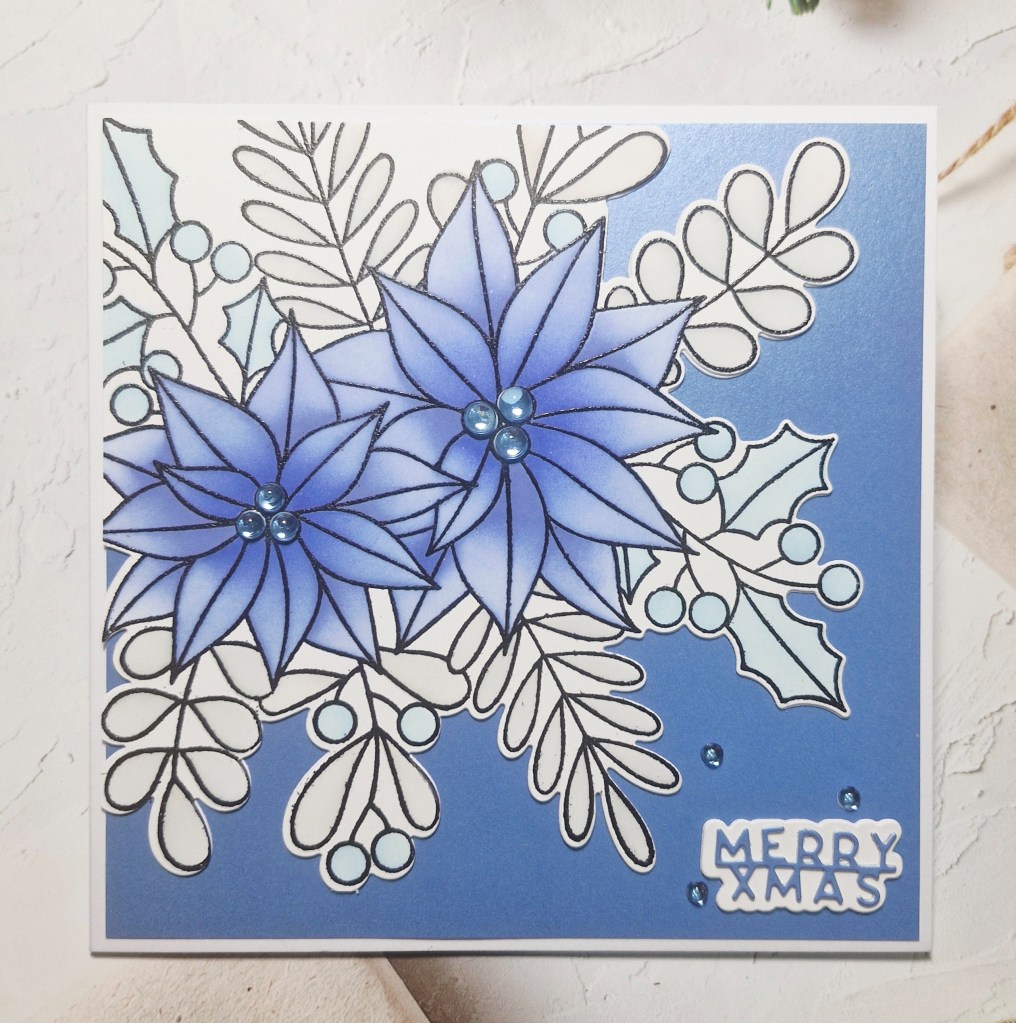
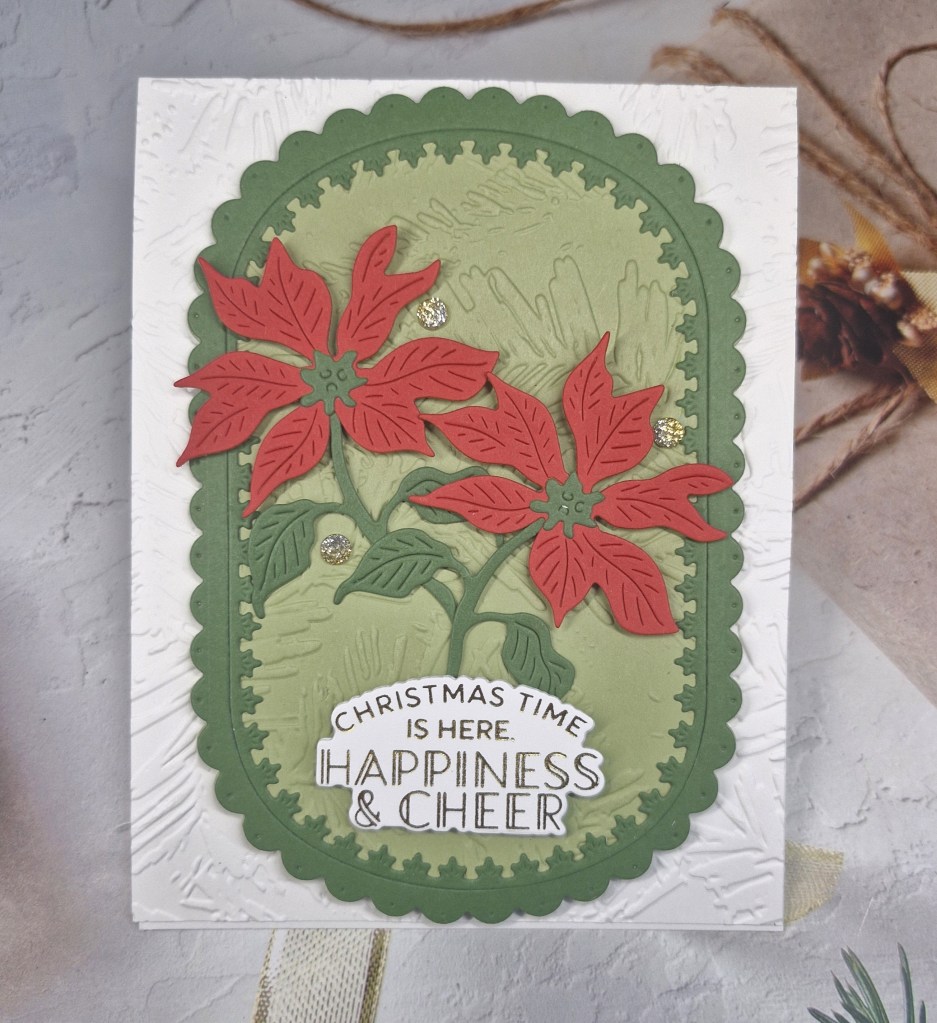
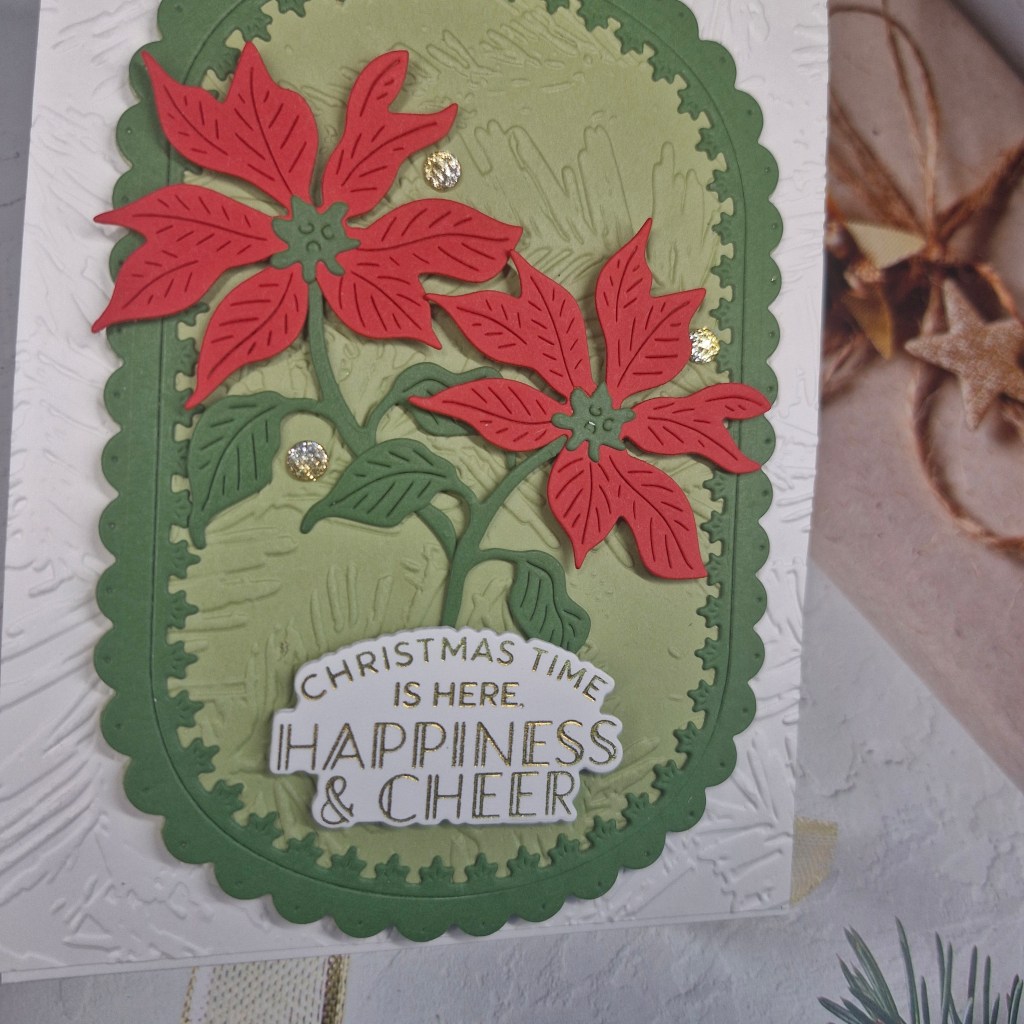
Here is my card:
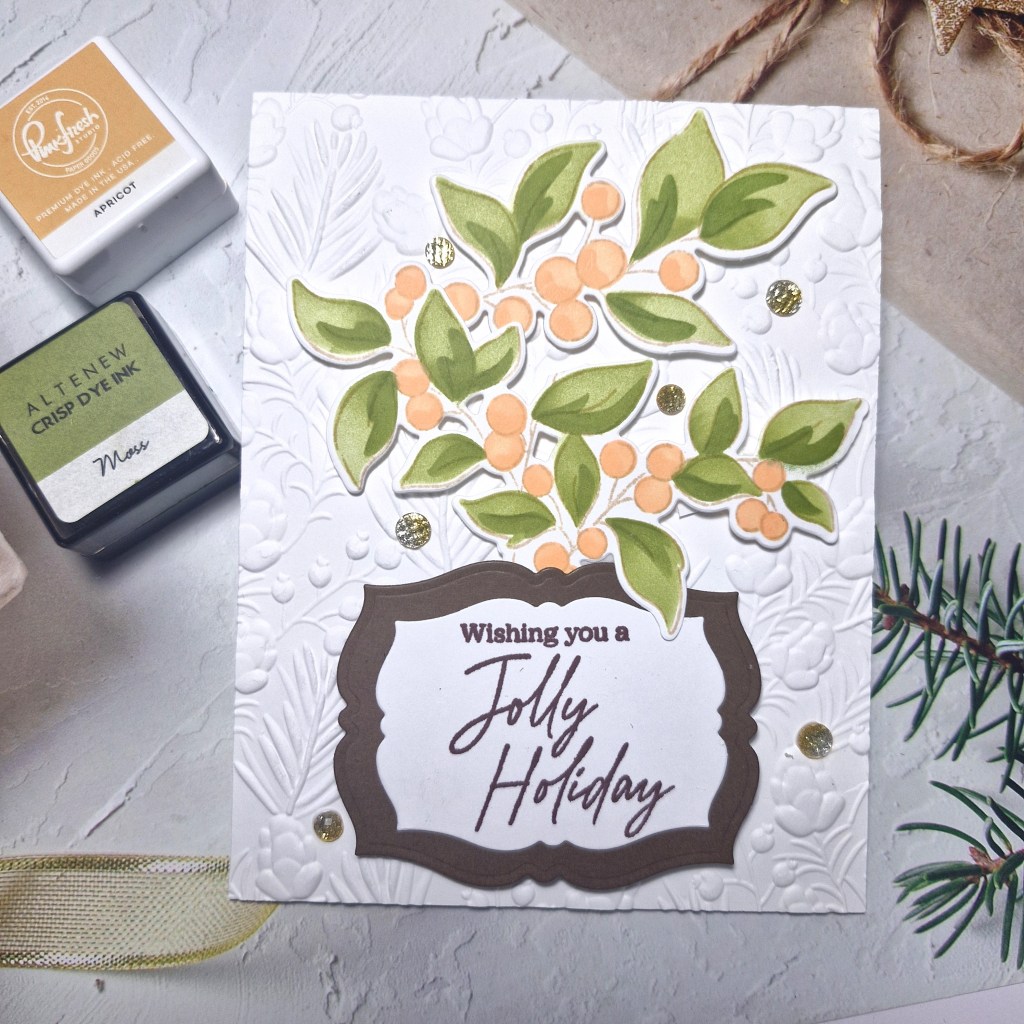
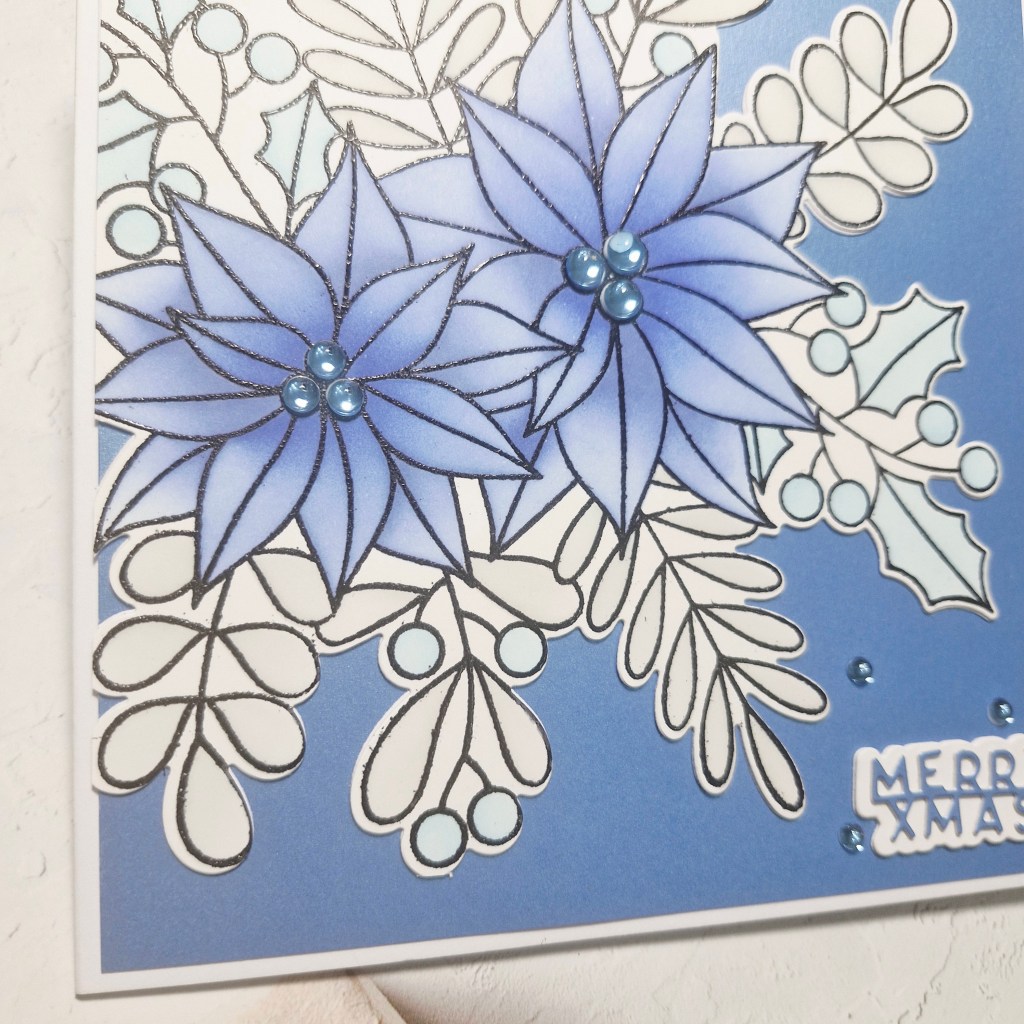
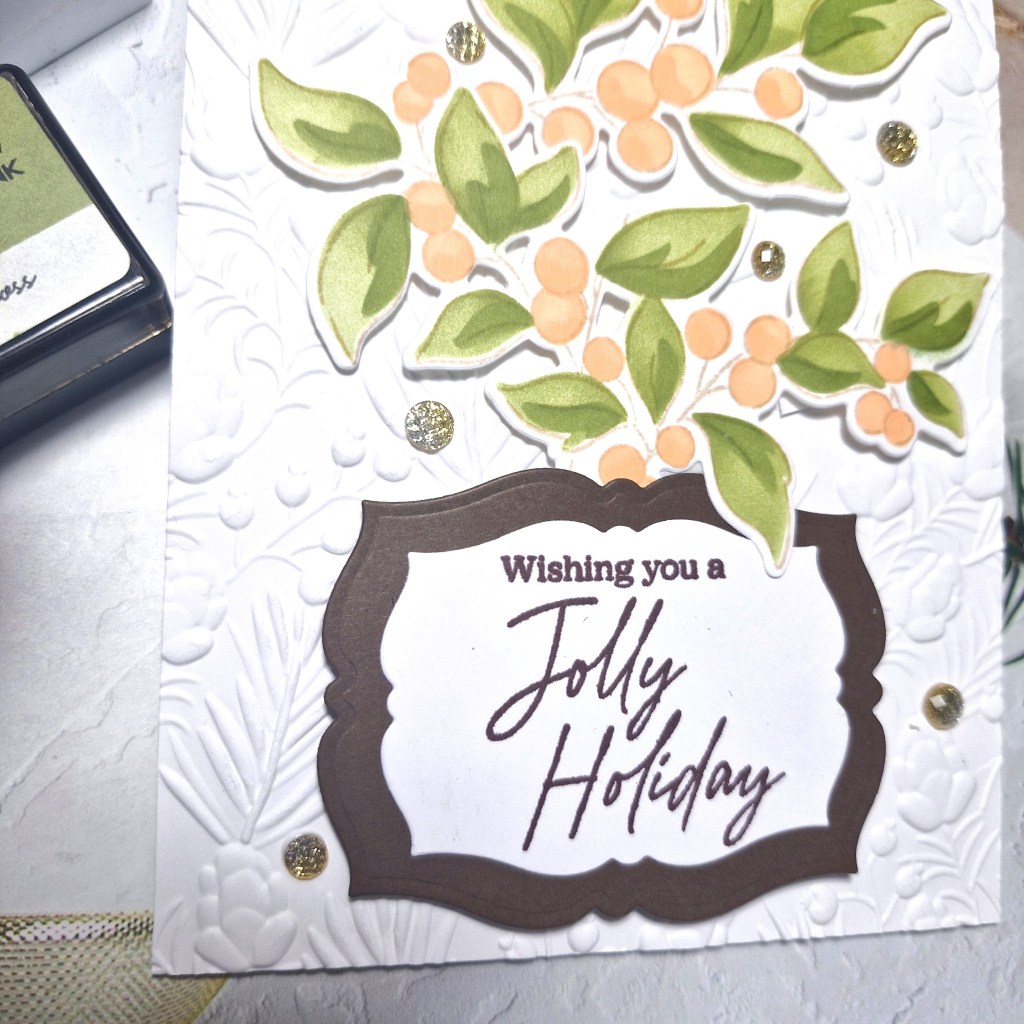
I used a stamp, die and stencil set from Pinkfresh Studio called ‘Berry Branch‘, stamping the image in a brown ink for a softer outline, then used the layering colouring stencils, then the matching dies.
The two inks I used you can see in the picture, making the first layer a lighter touch, and the second layer a darker touch of ink blending for the two colours.
The background panel was embossed using a Spellbinders embossing folder and attached to a card base.
I stamped the sentiment – from the same suite – in a dark brown ink, then die cut that piece and added a dark brown layer behind using a smaller Pinkfresh Studio ‘Fancy Labels Frames’ die set.
I did snip the branch a little so I could paly with the layout, and attached all the elements using 3D foam.
I couldn’t decide whether to use silver or gold gems, so I thought an ombre mix of the two would work. These are also from Pinkfresh Studio and some of my most used gems.
I hope you can come join the challenge, and I look forward to seeing what Christmas cards you create using these colours. xx
I shall be entering the following challenges:
Merry Little Christmas Challenge – anything goes Christmas
The Card Concept – summer by the sea or Christmas in July