Stitched Hello You……

The same friend that gave me the idea of using peonies for the last post, gave me some threads to stitch some of my stitching dies. I used to cross-stitch and sew tapestry many years ago, but when I started to need glasses and a spotlight to sew, I gave all my stuff away.

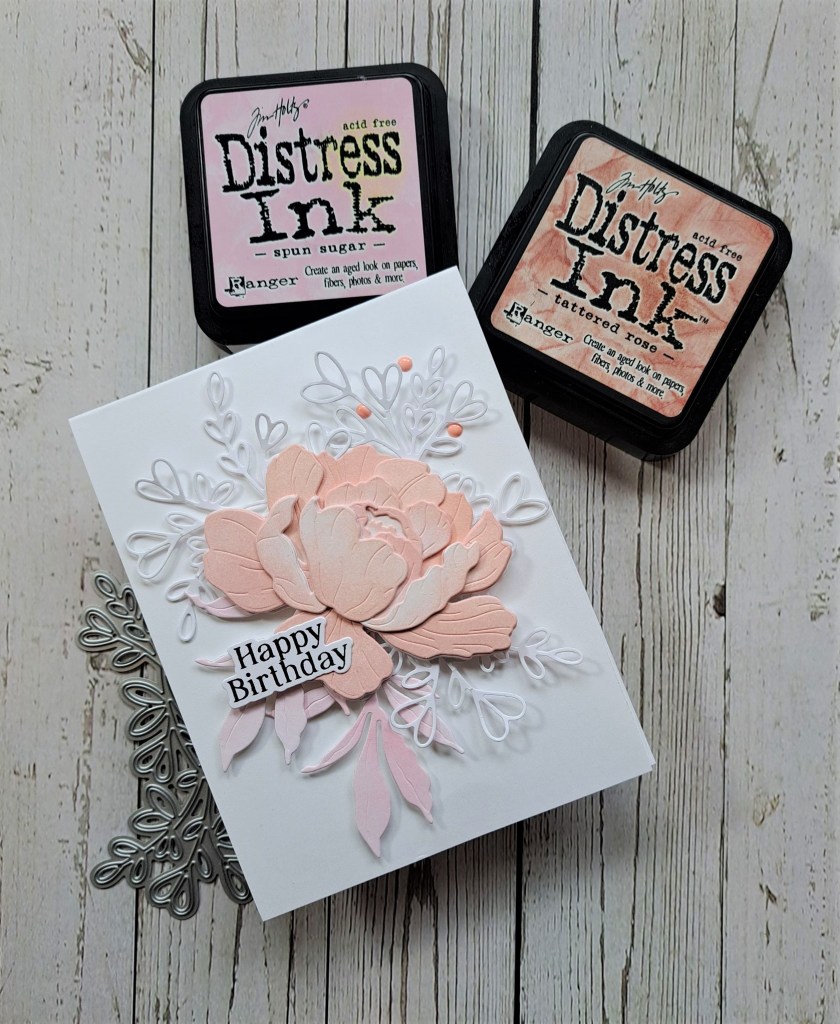
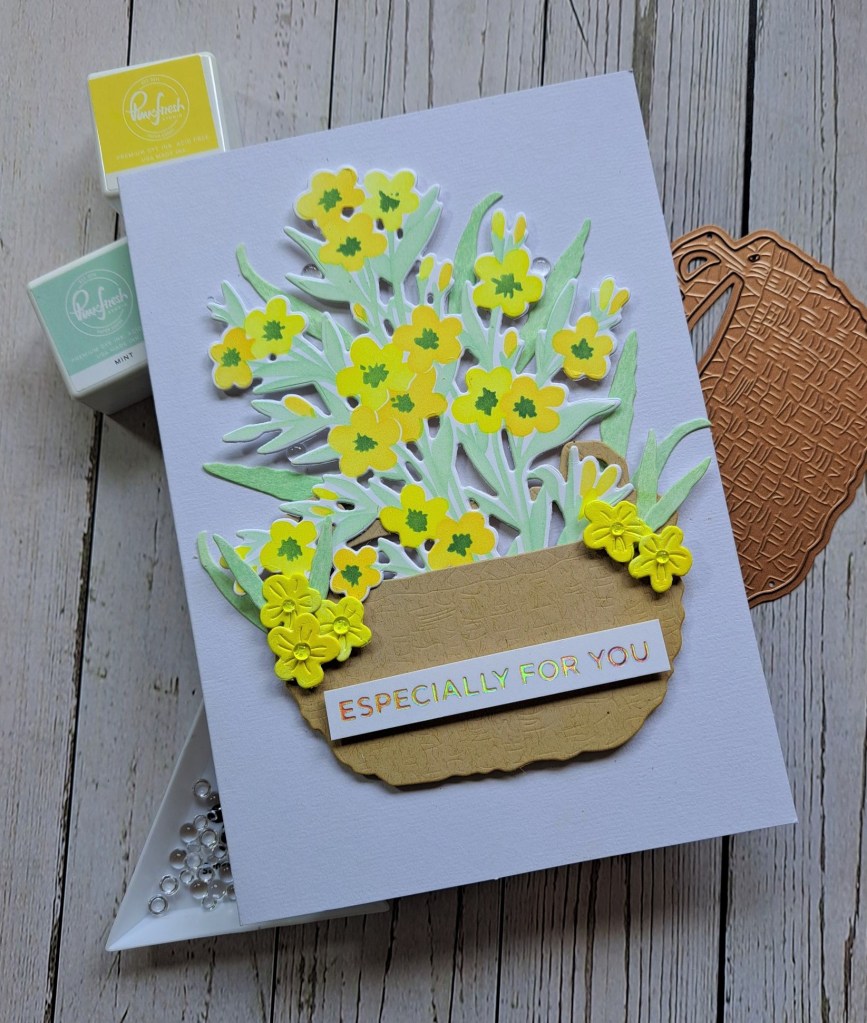
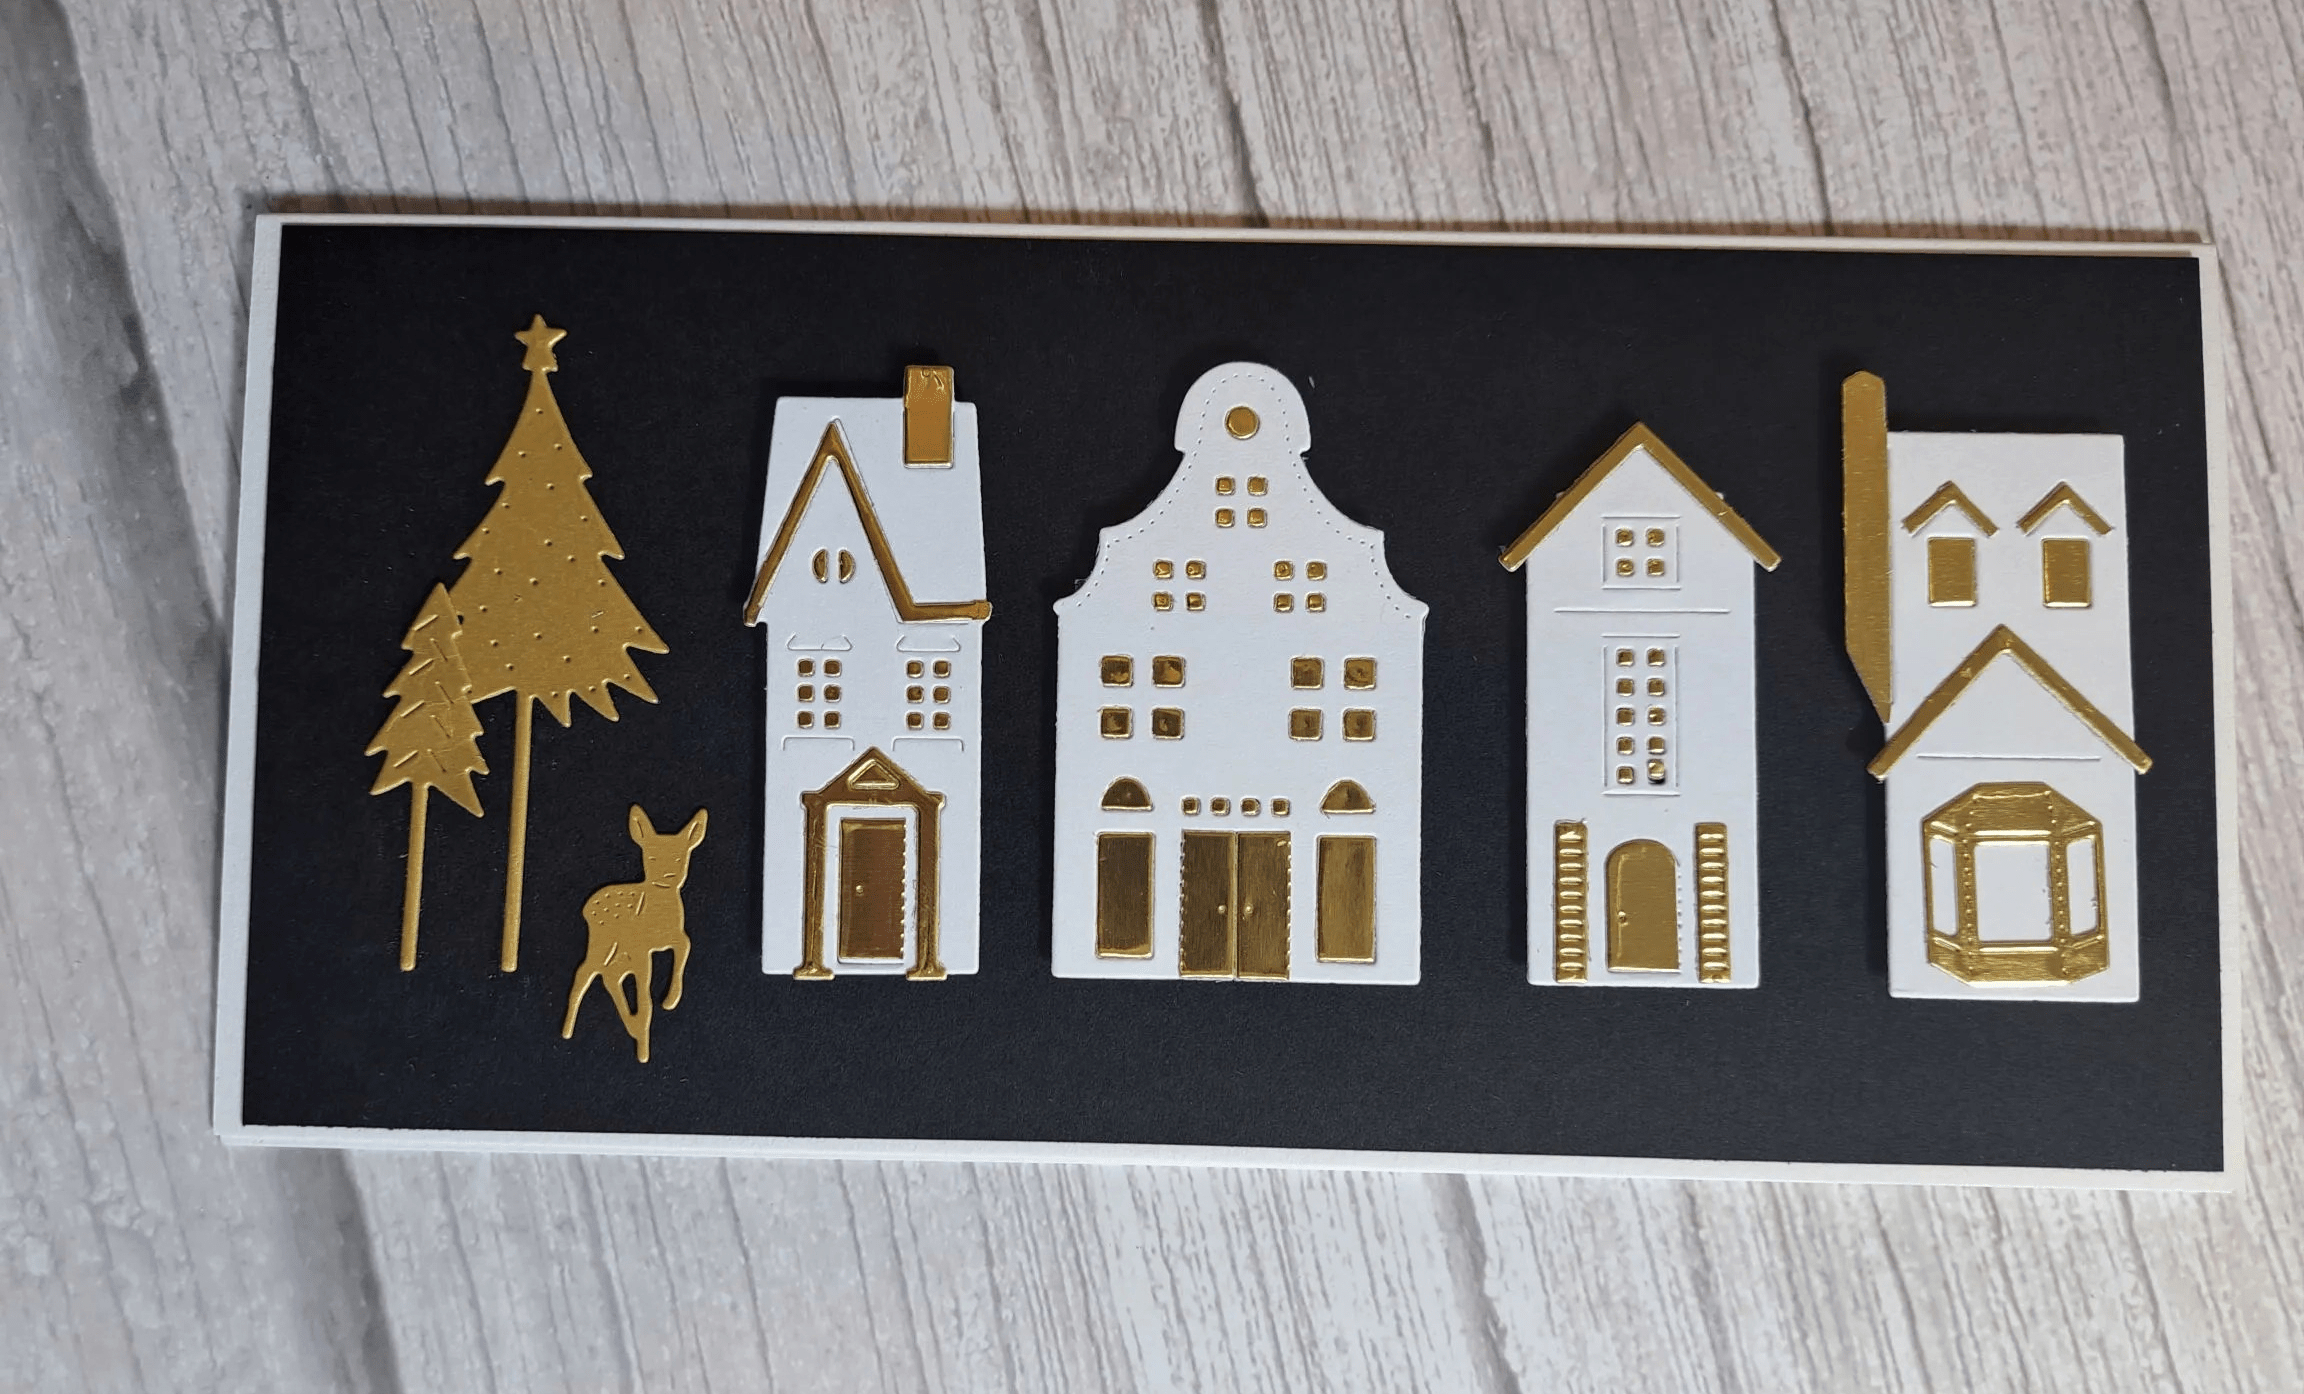
Here is what I came up with:

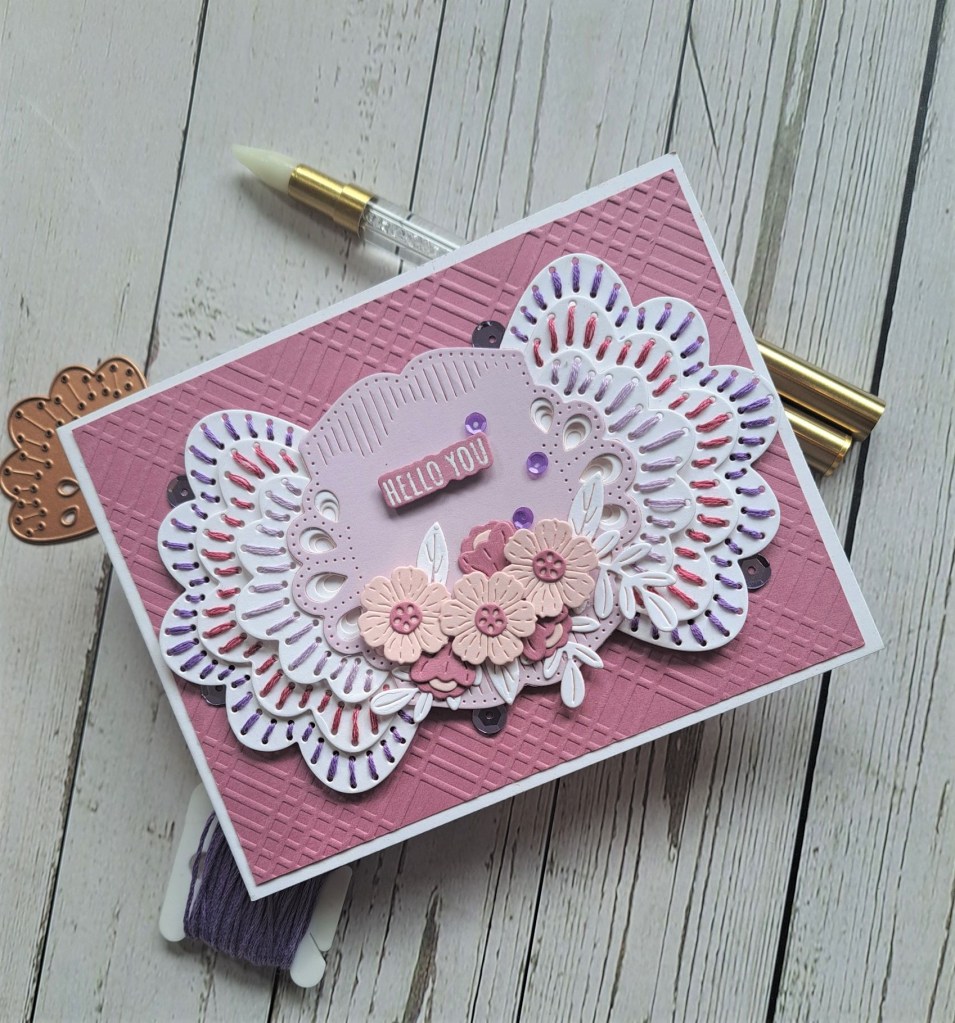
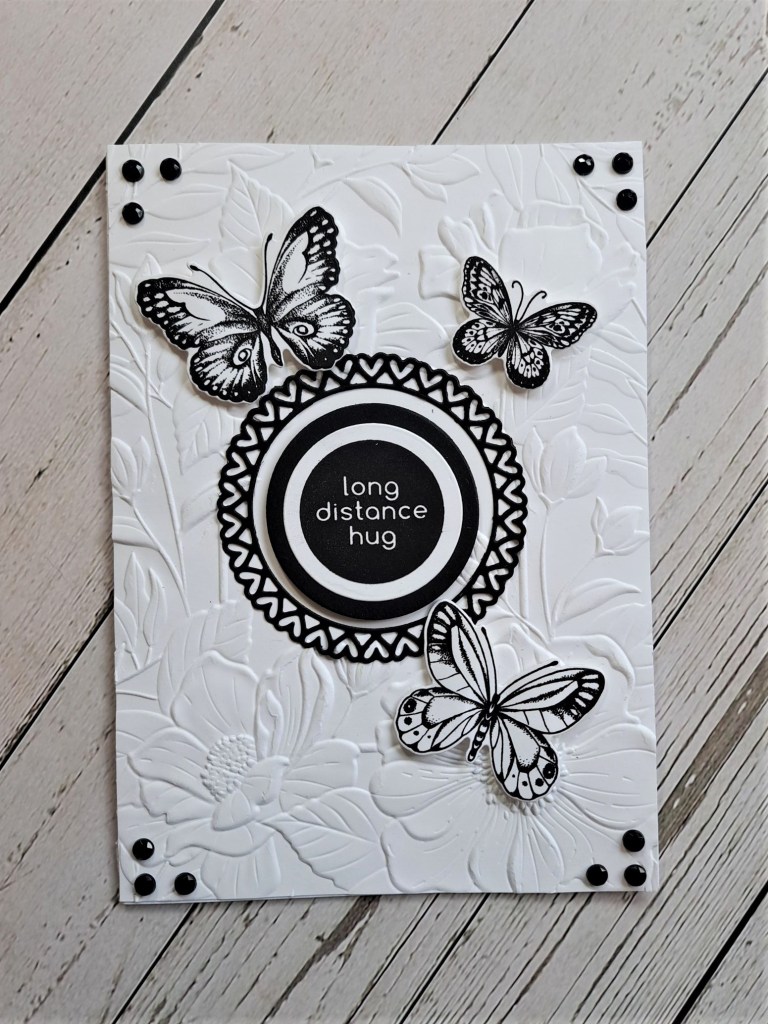
The stitching die is from Spellbinders, and the layers die cut out of white card stock. I wanted the embroidery to stand out.

All the coloured card stock is from Concord & 9th, using some of their new colours. Once the three layers were die cut and stitched with a lilac, a pink, and a darker purple, I die cut the centre panel, and attached the three elements together.

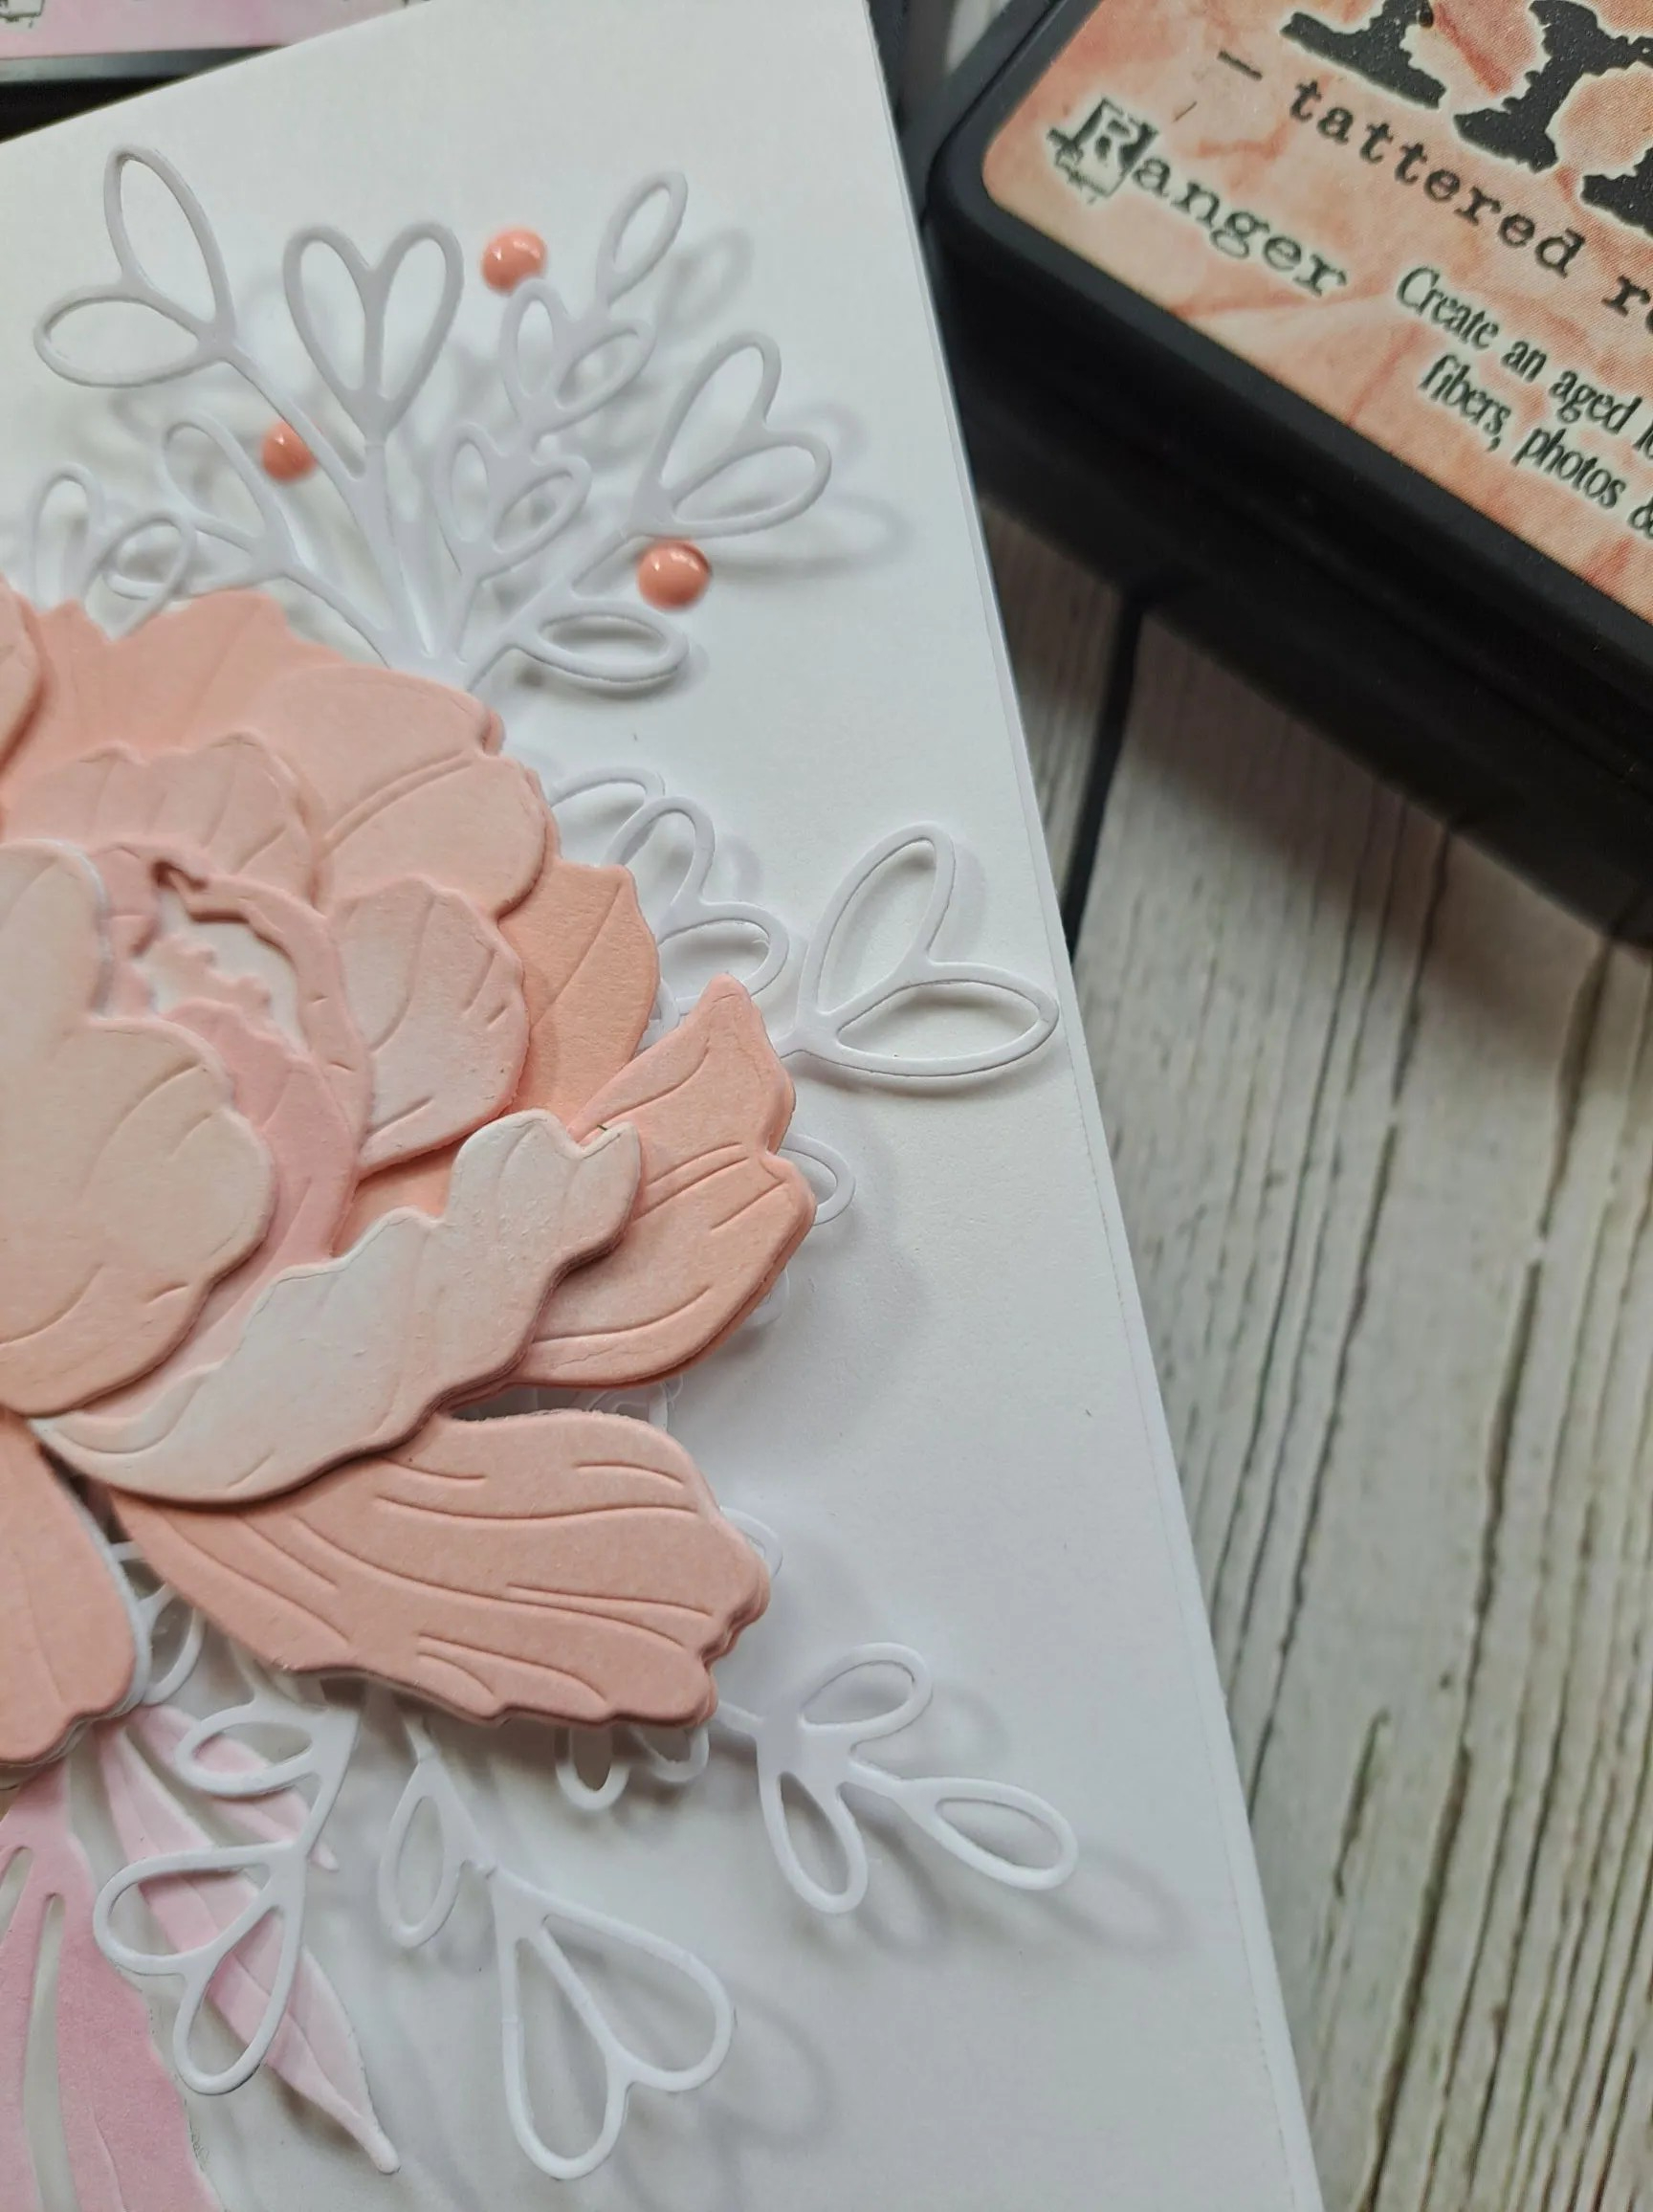
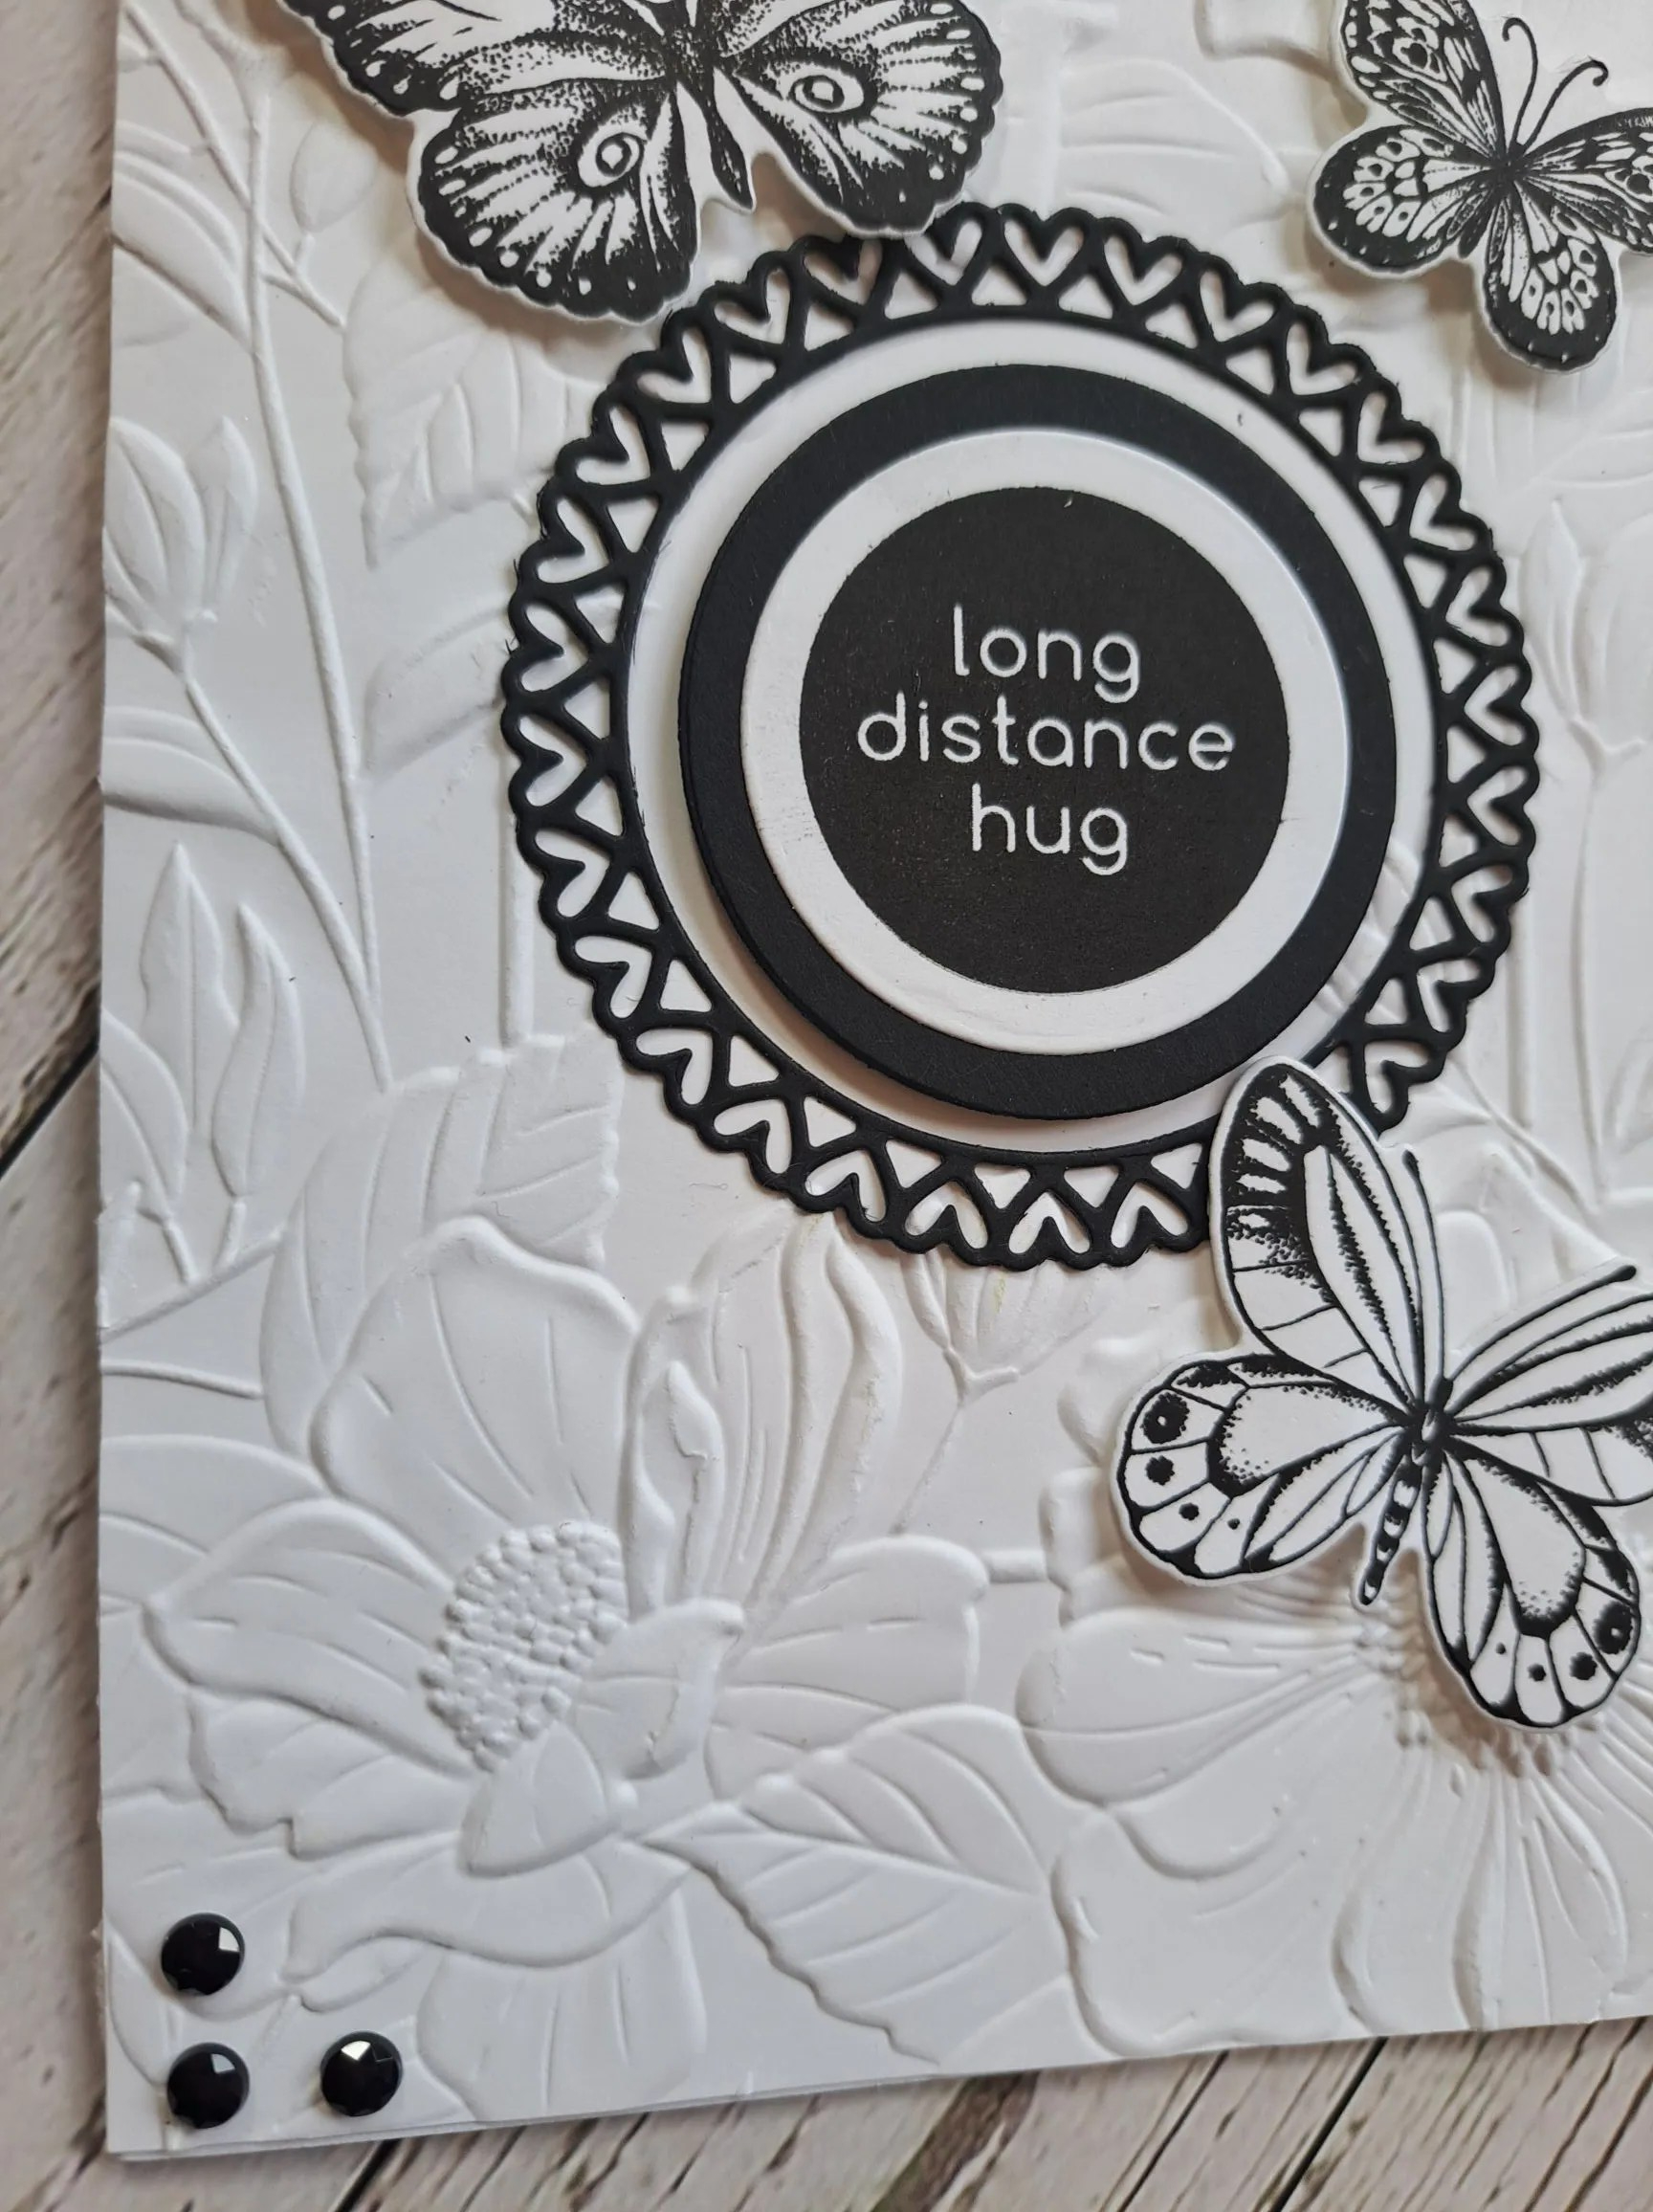
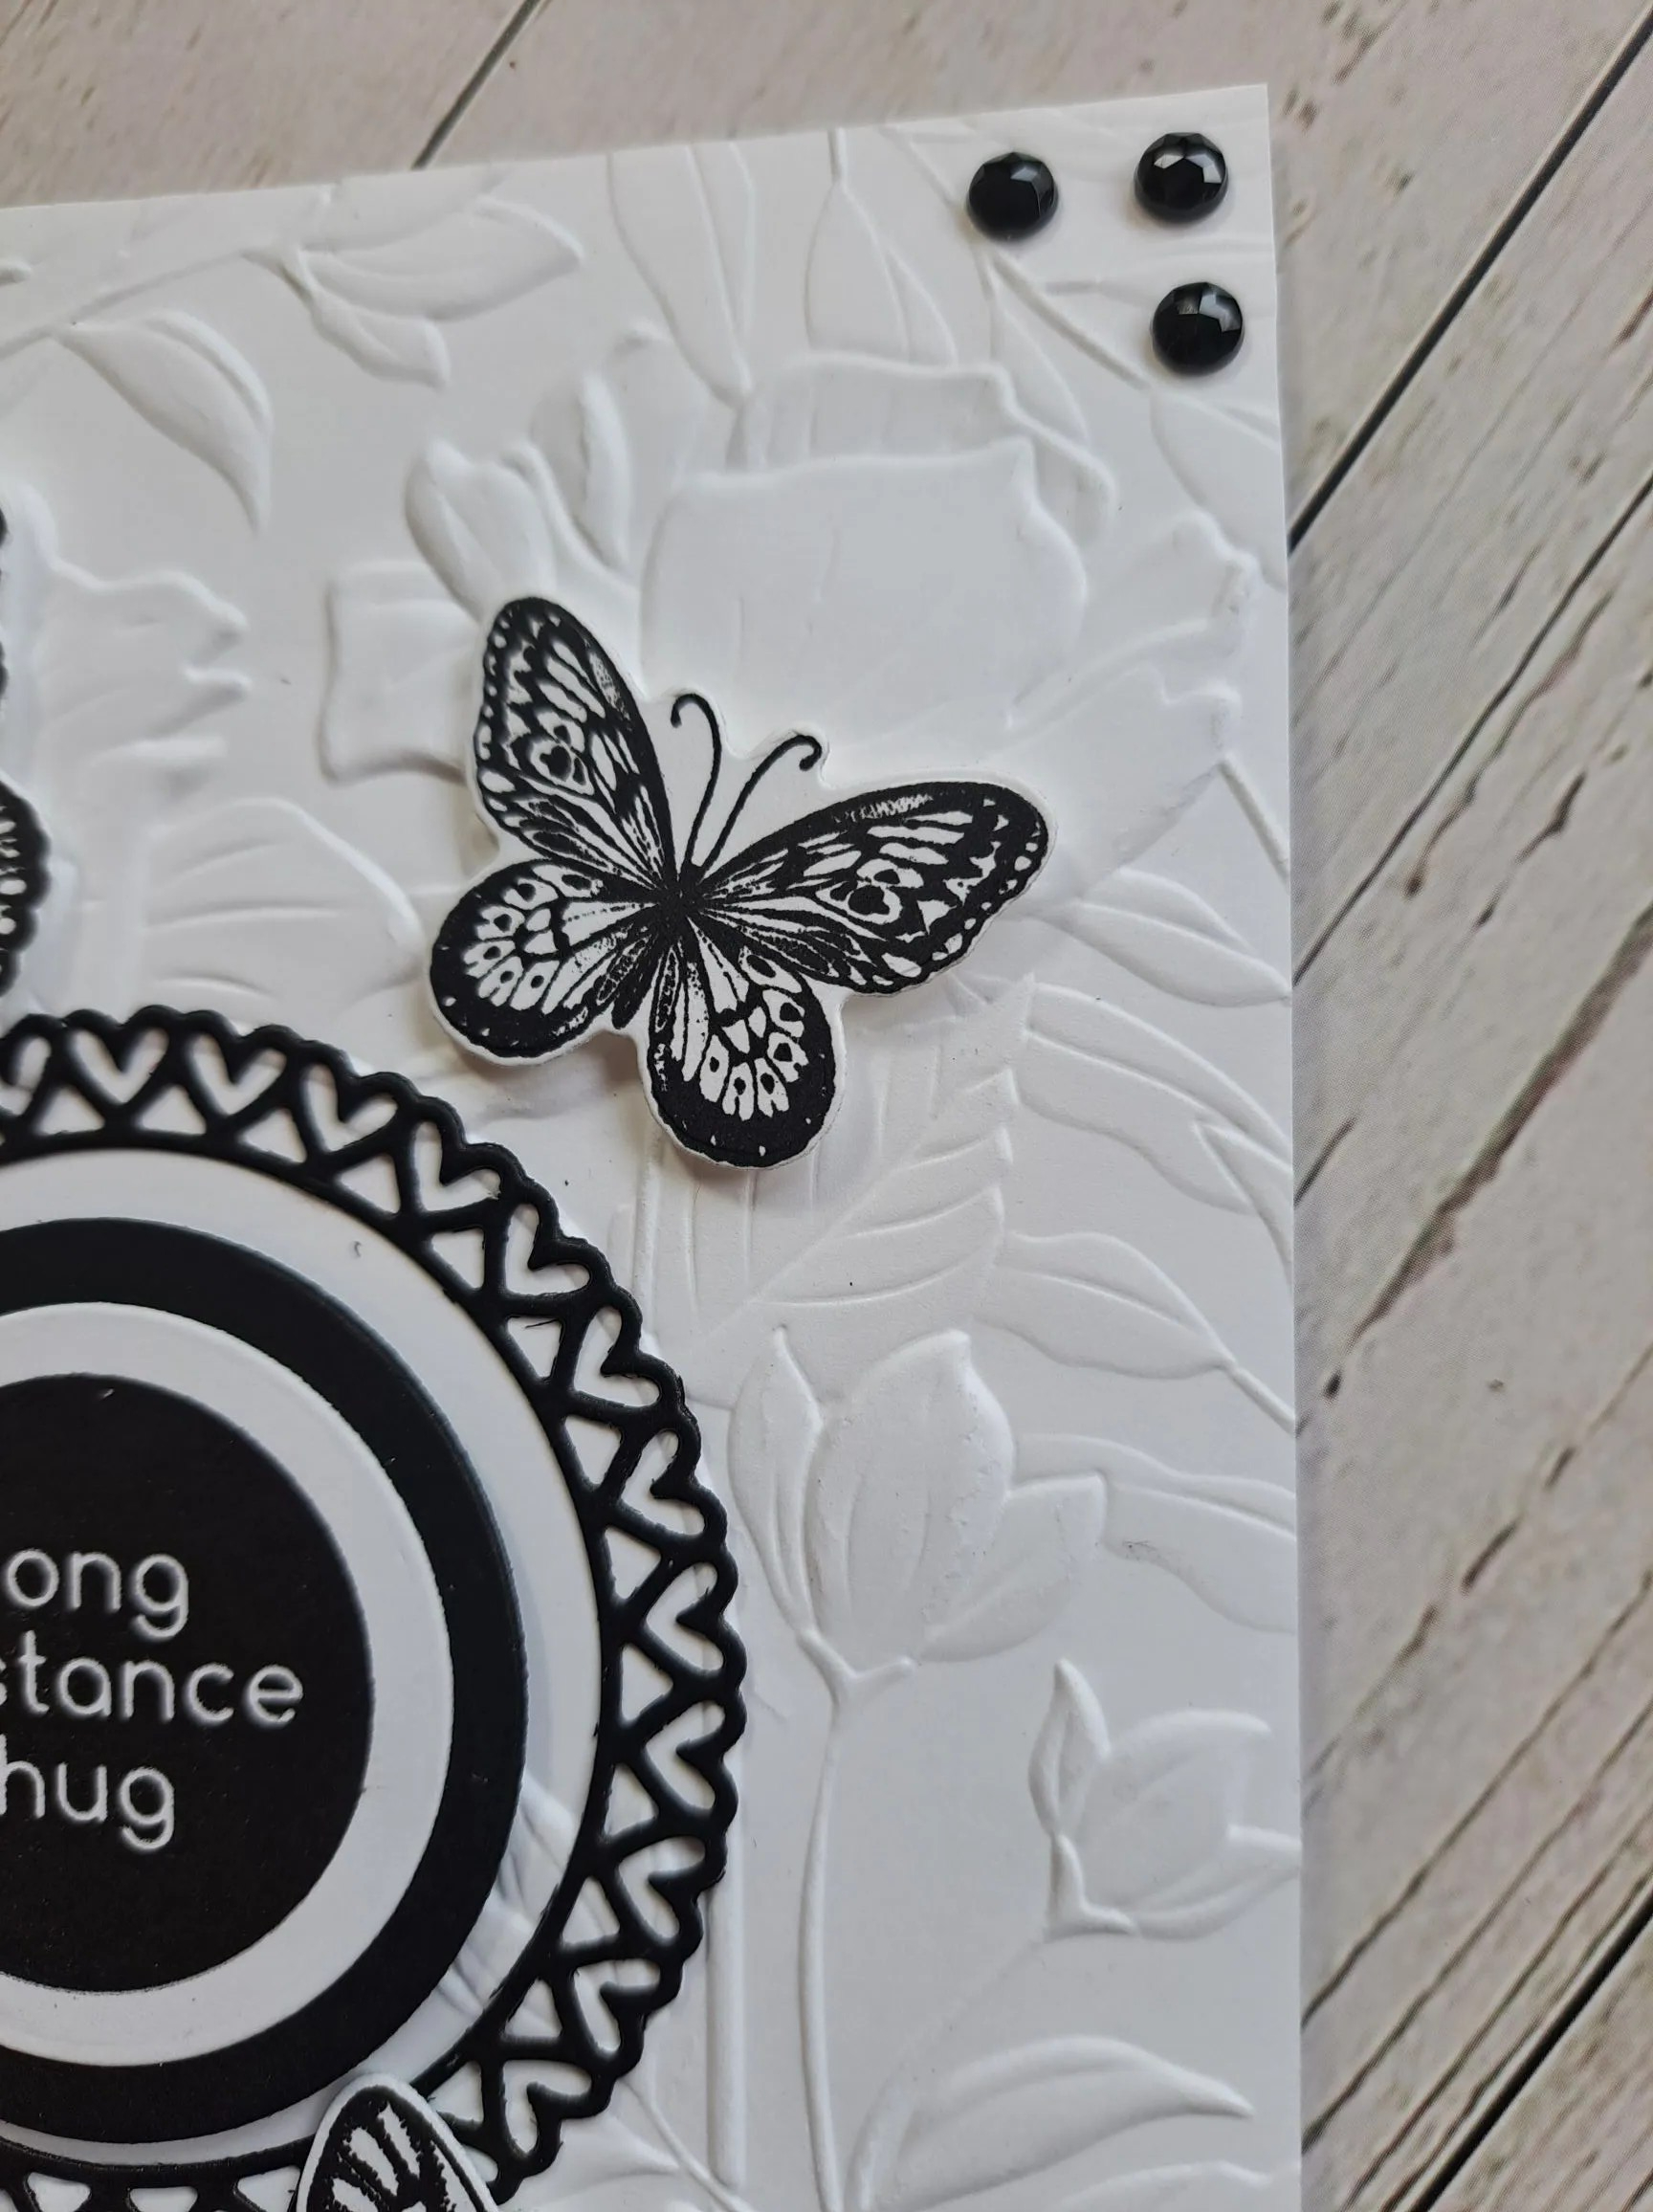
A Briar Rose panel was dry embossed using a Spellbinders embossing folder, attached to the white card base, and the three die cut and sewn elements were added with 3D foam.

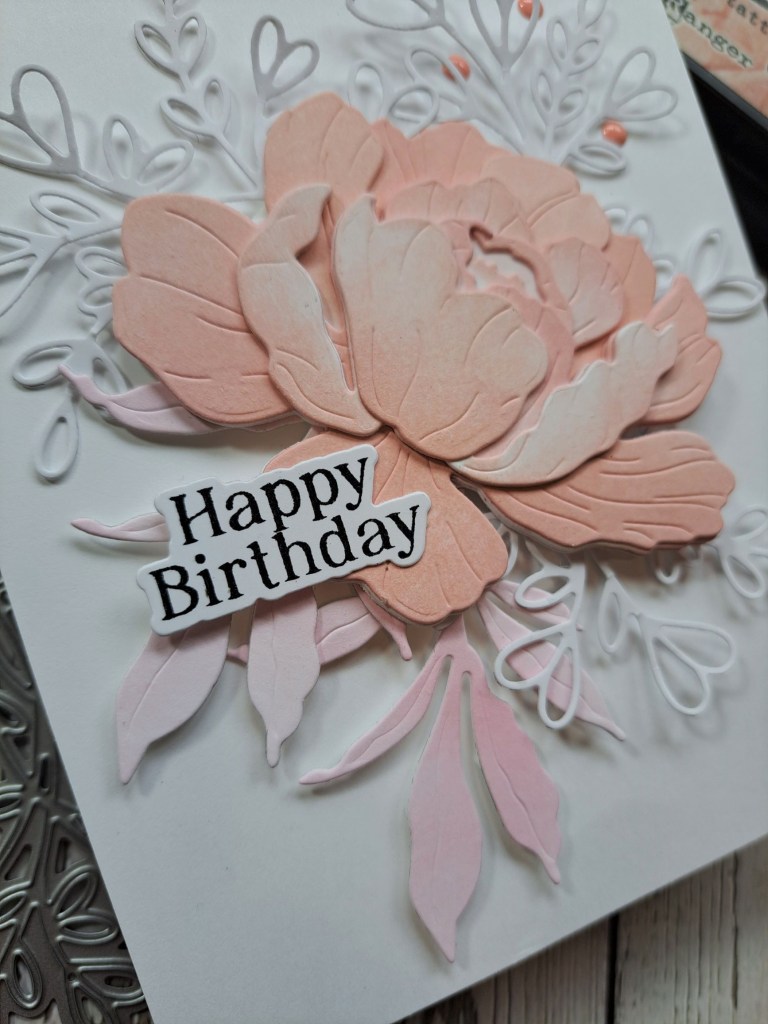
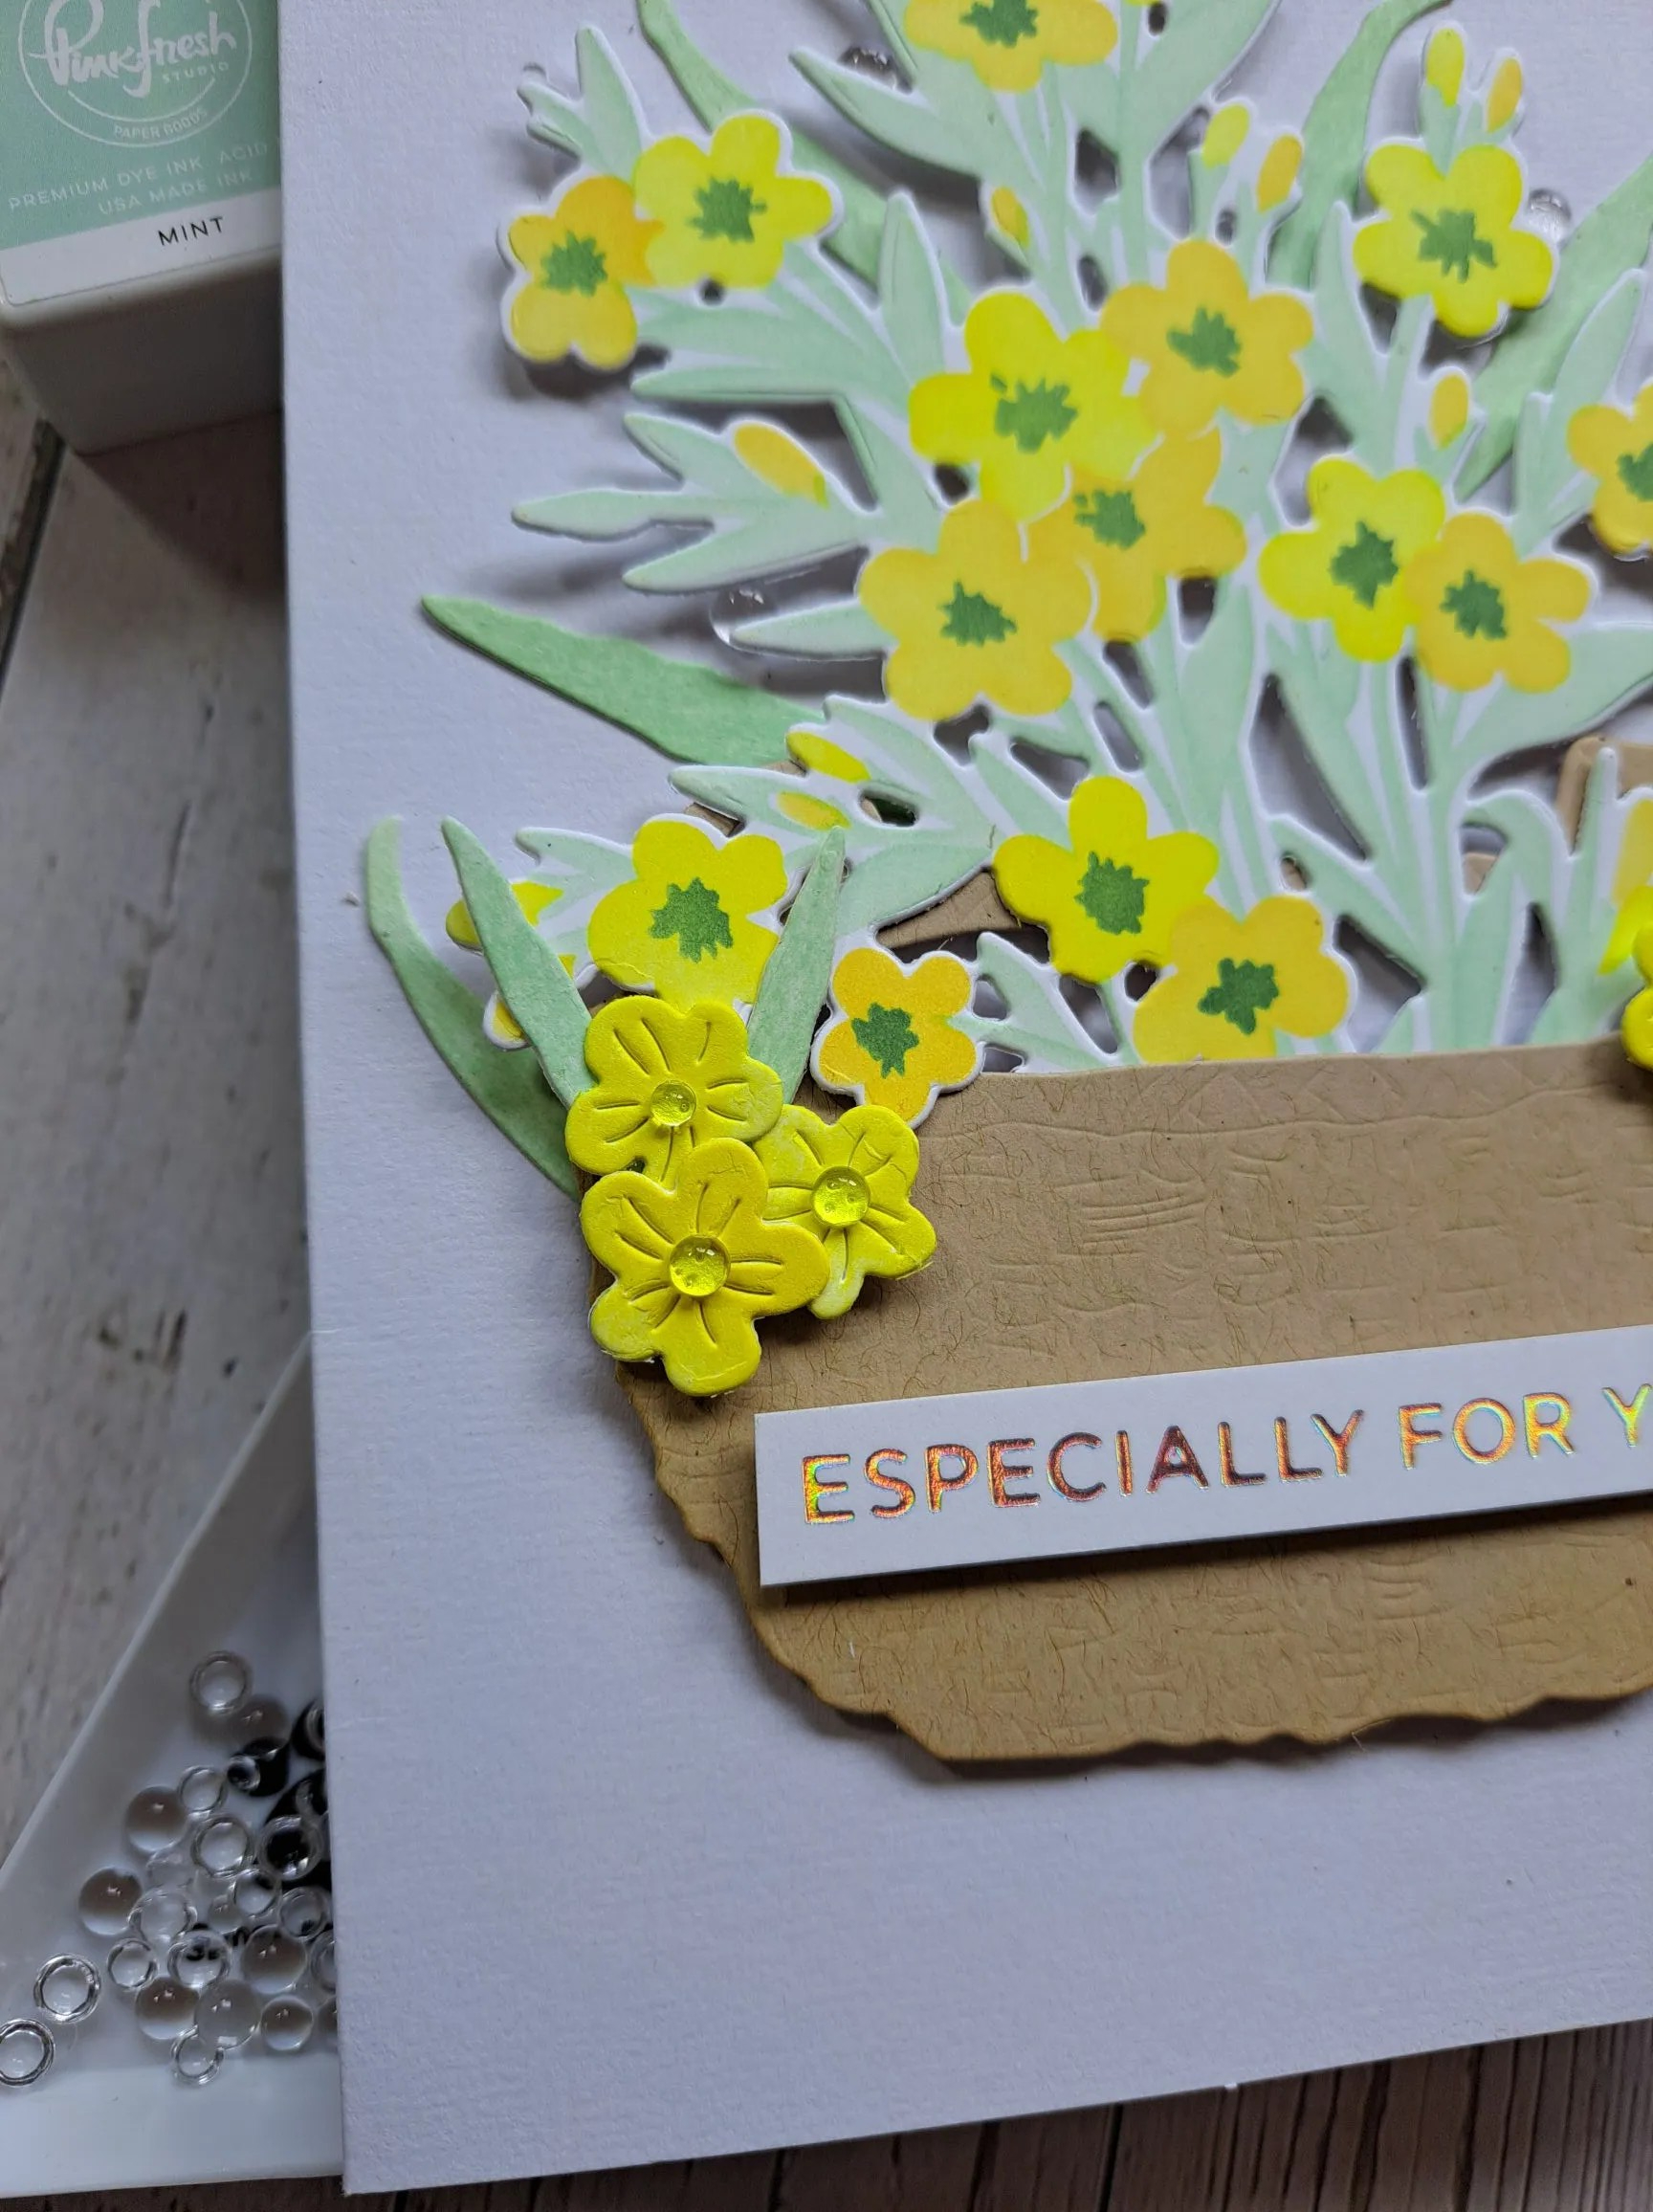
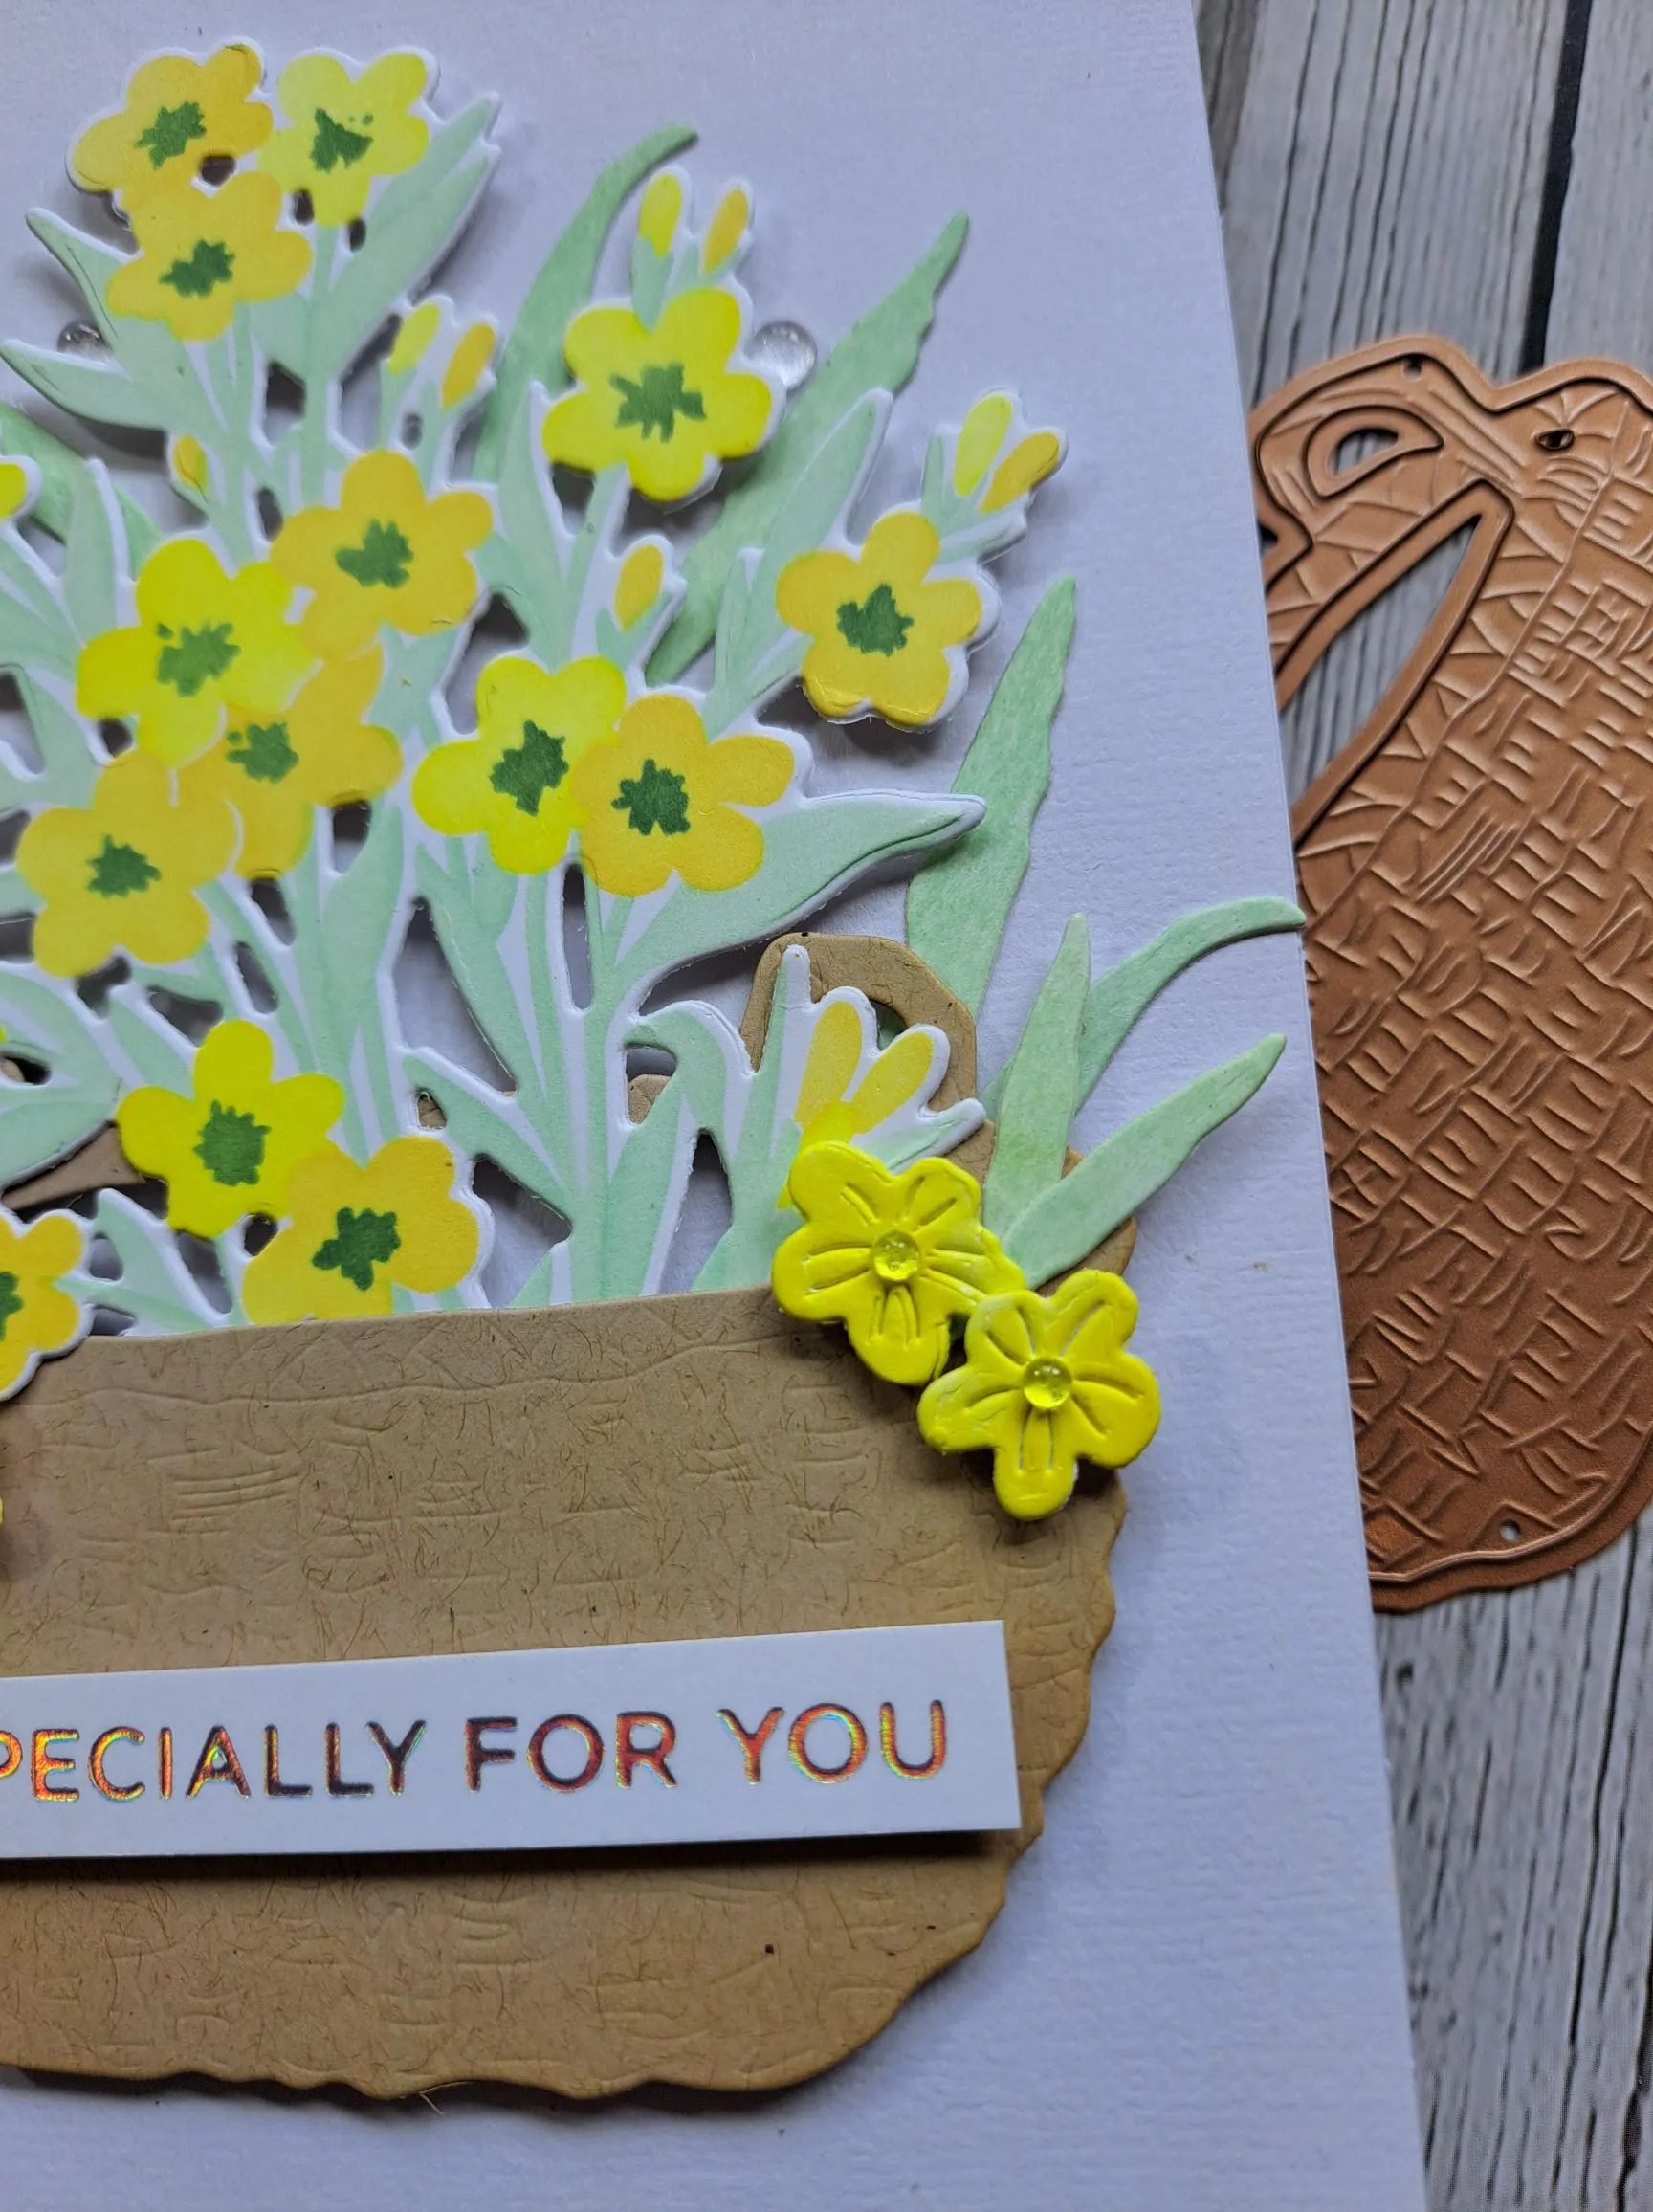
I then die cut some florals and leaves, layered them together and added to the centre panel. I decided to go with a landscape orientation, as I felt it suited the floral dies better.

The small sentiment is white heat embossed, and die cut with it’s matching die.

I added some purple sequins around the larger sewn piece, and three smaller purple onto the centre panel.

I shall be entering the following challenges:

Simon Says Stamp Wednesday Challengeanything goes

Lil Patch Of Crafty Friendsanything goes

Ally’s Angelsanything goes

Beautiful Blossomsanything goes flowers/florals

Ellibelle’s I Spy Challenge April showers or May Flowers

Birthday Peony

Hello. I have a card to share using some die sets from Honey Bee Stamps:

I wanted to use the three colours for the current Color Throwdown Challenge and was stumped. I mentioned the colours to a friend of mine, and she instantly said ‘peony’…….I searched the Color My Life app for what peony items I had (quiet a few actually) and this die set just spoke to me.

I ink blended a panel of Distress White Heavystock with Spun Sugar Distress Ink – keeping it quite light, and not being too perfect – and die cut the leaf from that due set twice.

On another panel I die cut the flower layers first, then ink blended the Tattered Rose Distress Ink afterwards – I wanted to vary how strong, how blended, and how smooth I wanted the blending to be, depending on which part of the flower showed when all layered together.

I die cut three of the ‘Lovely Layers Heart Vine’ outlines and arranged them behind the rose and leaves:

Once I had the placement I wanted, I used some ‘Press’n’seal’ to pick the whole arrangement up and attach 3D foam to the back, and then stick down. The leaves were not stuck down any other way and left loose to give even more dimension.

I stamped the sentiment then used the matching die to cut it out, and arranged as you see.

I also added some enamel dots to the top right corner.

I shall be entering the following challenges:

Color Throwdown blush, dusty rose, white

Simon Says Stamp Monday Challengemake your mark

Simon Says Stamp Wednesday Challenge anything goes

Krafty Chicksoccasions

Make My Monday flowers

Hey Chick….!

I have a fun card to share today:

The colour scheme is for one of the challenges I am entering, and as soon as I saw that yellow was in that challenge, I thought of chickens. No idea why – I don’t have chickens – but I remembered this Tim Holtz layering die set so I started from there.

I die cut the chickens from several shades of yellow card stock from Heffy Doodle. The egg was from the same Tim Holtz die set, and created using Lost Shadow Distress Oxide, and ink smooshed onto Kraft Heavystock. I loved how the oxide gave a mottled and chalky effect.

Once all the layers were glued together I decided I wanted to create a scene, so I ink blended Salvaged Patina Distress Ink and used a Lawn Fawn cloud stencil, and for the grass I used a Pinkfresh Studio green ink and a Lawn Fawn grass stencil again.

I also wanted a speech bubble and suitable sentiment, so I searched the Color My Life app and it came up with the speech bubble from Lawn Fawn which is meant to be part of a reveal wheel, and the sentiment from Stampin’ Up.

I die cut that stencilled panel with a stitched rectangle and adhered flat to a white card base.

I stuck down the two chicks and the sentiment with 3D foam, and wasn’t going to add an egg (I made three altogether) but decided to put it on at the last minute. In hindsight, I think I should have left it off the card. It kinda looks like the chick is sitting on a stone……..anyhoo. Hindsight is always 20/20….I think it’s cute and fun anyway.

I shall be entering the following challenges:

Color Throwdown celery green, yellow, aqua

Simon Says Stamp Wednesday Challenge things with wings

Crafty Catzanything goes – option of celebration not taken

Daring Cardmakersfeathers or something feathered

Stencil Fun stencils – option of patterns

Black and White Hug

The Alphabet Challenge has started a new challenge, and as we have reached the letter ‘B’, Veronica has chosen the theme of ‘Black and White’. Here is my card:

The base panel is embossed using a Spellbinders embossing folder – a lovely deep impression of all those flowers.

Into the centre I attached a die cut circle = also from Spellbinders, and part of the Maker Mania 5 kit we received. I layered that with couple of other circles – alternating black and white, then added sentiment.

The butterflies were stamped and die cut and added as you see.

I also added some faceted black gems in the four corners.

I hope you can come and join us with your black and white creations. xx

I shall be entering the following challenges:

2 Crafty Critter Craziesanything goes with a critter

A Perfect Time To Craftanything goes

Crafts Galore anything goes

Country View Challengethings with wings

Triple BBirds and/or butterflies and/or blooms

Birthday Cocktails

Hello everyone. Cardz 4 Galz has started a new challenge. Dawn is hosting this time round, and she has chosen the theme of ‘cocktails’. Here is my card:

I die cut the Pinkfresh Studio deco frame, leaving the inner part intact. Onto that piece I used a Lawn Fawn stencil to create some pink interest, then also used some glitter paste for a little sparkle.

Whilst that was drying, I die cut the MFT dies – from several sets – to create the cocktail glasses, inner drink from an ink smooshed panel, and also the garnishes – which were extremely fiddly – but satisfying once completed.

Once layered, I played with which garnish to go with which drink, stuck them all together, then had a play with placement onto the now dry stencilled background.

The glasses were stuck down with 3D foam, then sentiment stamped and added, and then I decided to add some additional sparkle with these coloured sequins I found in my stash.

I also added some glossy accents to some of the garnishes.

I hope you can come and join us in your cocktail themed creations. xx

I shall be entering the following challenges:

Allsortsanything goes – option to create your own background taken

Seize The Birthdaybirthday and alcohol – drinks or inks

MFT Stamps Challenge colour challenge

AAA Birthday birthday with multiple layers

Stencil Funstencil – option patterns

Ready to do some gardening…..?

Hello. I have a CAS card to share today, using an older Sizzix die set:

I searched the tags in the ‘Color My Life’ app for any of my products with ‘garden’. Quite a few came up – I use tags a lot – and this older Sizzix die set came up. I am sure many of us are preparing and planning our gardens at this time of year – what to plant and where – and as I was searching for our wheelbarrow a few days ago, this die set seemed to speak to me.

I used a selection of different coloured card stock for the pots and watering can, with a silver framed wheelbarrow. The sentiment if from Spellbinders.

I was going to attach the die cuts to the base card, but I felt it needed a little something behind it, so I ink blended some blue that was left on my blending brush, then ink blended again using a stencil for some darker areas.

Although there are layers to this card, I feel they are clean layers, and therefore give an overall clean effect.

I shall be entering the following challenges:

Addicted to CAS – CAS garden

Clean and Simple on Friday – CAS Spring

Simply Less Is More – anything goes CAS

Christmas Skates and Greenery

Hello. The new Holly and Ivy Christmas challenge has started. Here is my card:

I have used a collection of die cuts from several companies to create this card. Lots of die cutting and assembling, but I enjoyed the process.

The card base and the snowflake design was created using die cuts and matching embossing folder from Simon Says Stamp (Refined Snowflakes) – die cutting and embossing the snowflakes, and adding them randomly around the background panel with wet glue to give dimension.

The sledge, ice skates, flowers and greenery are from Spellbinders – die cut, layered, and added as you see.

The sentiment was die cut into the banner, then die cut again with silver, and the letters pieced back into the banner.

I hope you can come and join us with your Christmas/festive creations. xx

I shall be entering the following challenges:

Krafty ChicksChristmas

CYHTP embossing folder option clouds not taken

Craft Rocketlayer it up

Aud Sentimentsembossing and/or flowers and a sentiment

12 Months of ChristmasChristmas – option favourite colour combination

Triple BBirds and/or butterflies and/or blooms

So Many Reasons To Be Happy

Hello. I have been creating using a card kit from Spellbinders – outside of my comfort zone – but loving the fancy fold:

I understand this is called a ‘seagull’ fold. I came across this when viewing one of my DT friends and her recent post. which linked to a video on how to create it. Her post is here.

More pictures:

I chose to use some Spellbinders patterned papers as the background pieces, and some die cuts from one of their card kits. I don’t usually use a lot of these die cuts, but I seem to have quite a collection going now – so I took the opportunity to create this little jumping bunny scene. I feel the bunny is protecting itself from the sun – though we aren’t having much at the moment here in the UK. I understand it is coming soon though…….

I added some enamel dots to the centre of the flowers in the front panel, then decided that those polka dots on the patterned paper deserved some too – once I start I can’t seem to stop adding them. The enamel dots are from Concord & 9th and from a previous online crafty event.

I shall be entering the following challenges:

Tic Tac Toeusing the top row – fancy fold, die cut, enamel dots

Crafty Catz anything goes – option for a child

2 Crafty Critter Crazies anything goes with a critter

Crafty Animalsanything goes with an animal

Crafts Galoreanything goes

Especially For You

Hello, some crafty time today created this card:

I chose a 5×7 inch card base so I could get the basket and the floral image in their full glory.

The basket is due cut from a light brown card stock with the Spellbinders die you see, and the edges inked slightly for a little dimension.

The floral image is from The Greetery, a stencil and die set. 6 layers in total, but I kept the floral layers two shades of yellow, with dark green centres and the leaves were all inked with the same mint colour from Pinkfresh Studio.

The main die cut image was inserted into the top of the basket and attached to the card base with 3D foam.

The die set also cuts some flowers, so I also ink blended those small flowers with a yellow ink, them added them to the top of the basket.

I thought some extra leaves were needed, so I searched the Color My Life app and found these leaves – also from Spellbinders – blended the mint green onto w white piece of card and die cut those extra leaves, adding them here and there throughout the back of the central image.

I added some clear gem thingies to the centre of the extra flowers, and also added three around the central image.

The sentiment is a previously foiled strip:

I shall be entering the following challenges:

Color Throwdownyellow, dark green, mint green, white

Lil Red Wagonat least 2 layers

Daring Cardmakers bloom and grow – flowers and/or plants

Craft Rocket layer it up

Triple Bbirds and/or butterflies and/or blooms

Ally’s Angels anything goes

ABC Christmas Challenge – H for Houses, I for Indoors

Hello. A new challenge has started at ABC Christmas Challenge. As we have reached the letters ‘H’ and ‘I’, we want to see your Christmas creations with HOUSES and/or INDOORS. Here is my card:

Onto a slimline card base I matted a black layer. All of the die cuts are form sets from Charlie and Paulchen, a German company I have placed a few orders with – very prompt despatch and delivery.

The houses were snipped and cut apart to create the gold elements, and all those very little windows were paper pieced back in…….after putting some double-sided tape on the back. Thank goodness for my Pinkfresh Studio jewel picker – part of our SWAG from their recent Create and Connect event.

I feel this is quite a CAS card – though it took some fiddling.

I hope you can come and join us – Helen is hosting this time round – and has an embossing folder and paper pad up for grabs for one lucky winner. xx

I shall be entering the following challenges:

Peace On Earth Christmas Challenge anything goes Christmas

Merry Little Christmas Challengeanything goes Christmas

Fab’N’Funkyuse die cuts

A Perfect Time To Craftanything goes

Christmas Cards All year RoundChristmas and four of something or a bird (4 houses)

12 Months Of Christmas Christmas – option favourite colour combination