Believe In The Magic Raccoon

Hello. I was proud to be the winner for the Christmas Craft Creations May 2023 challenge, and therefore offered a Guest design Team spot for July.

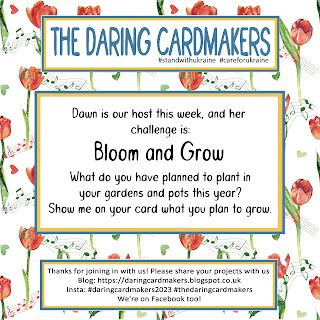
The July theme is ‘anything goes Christmas’.
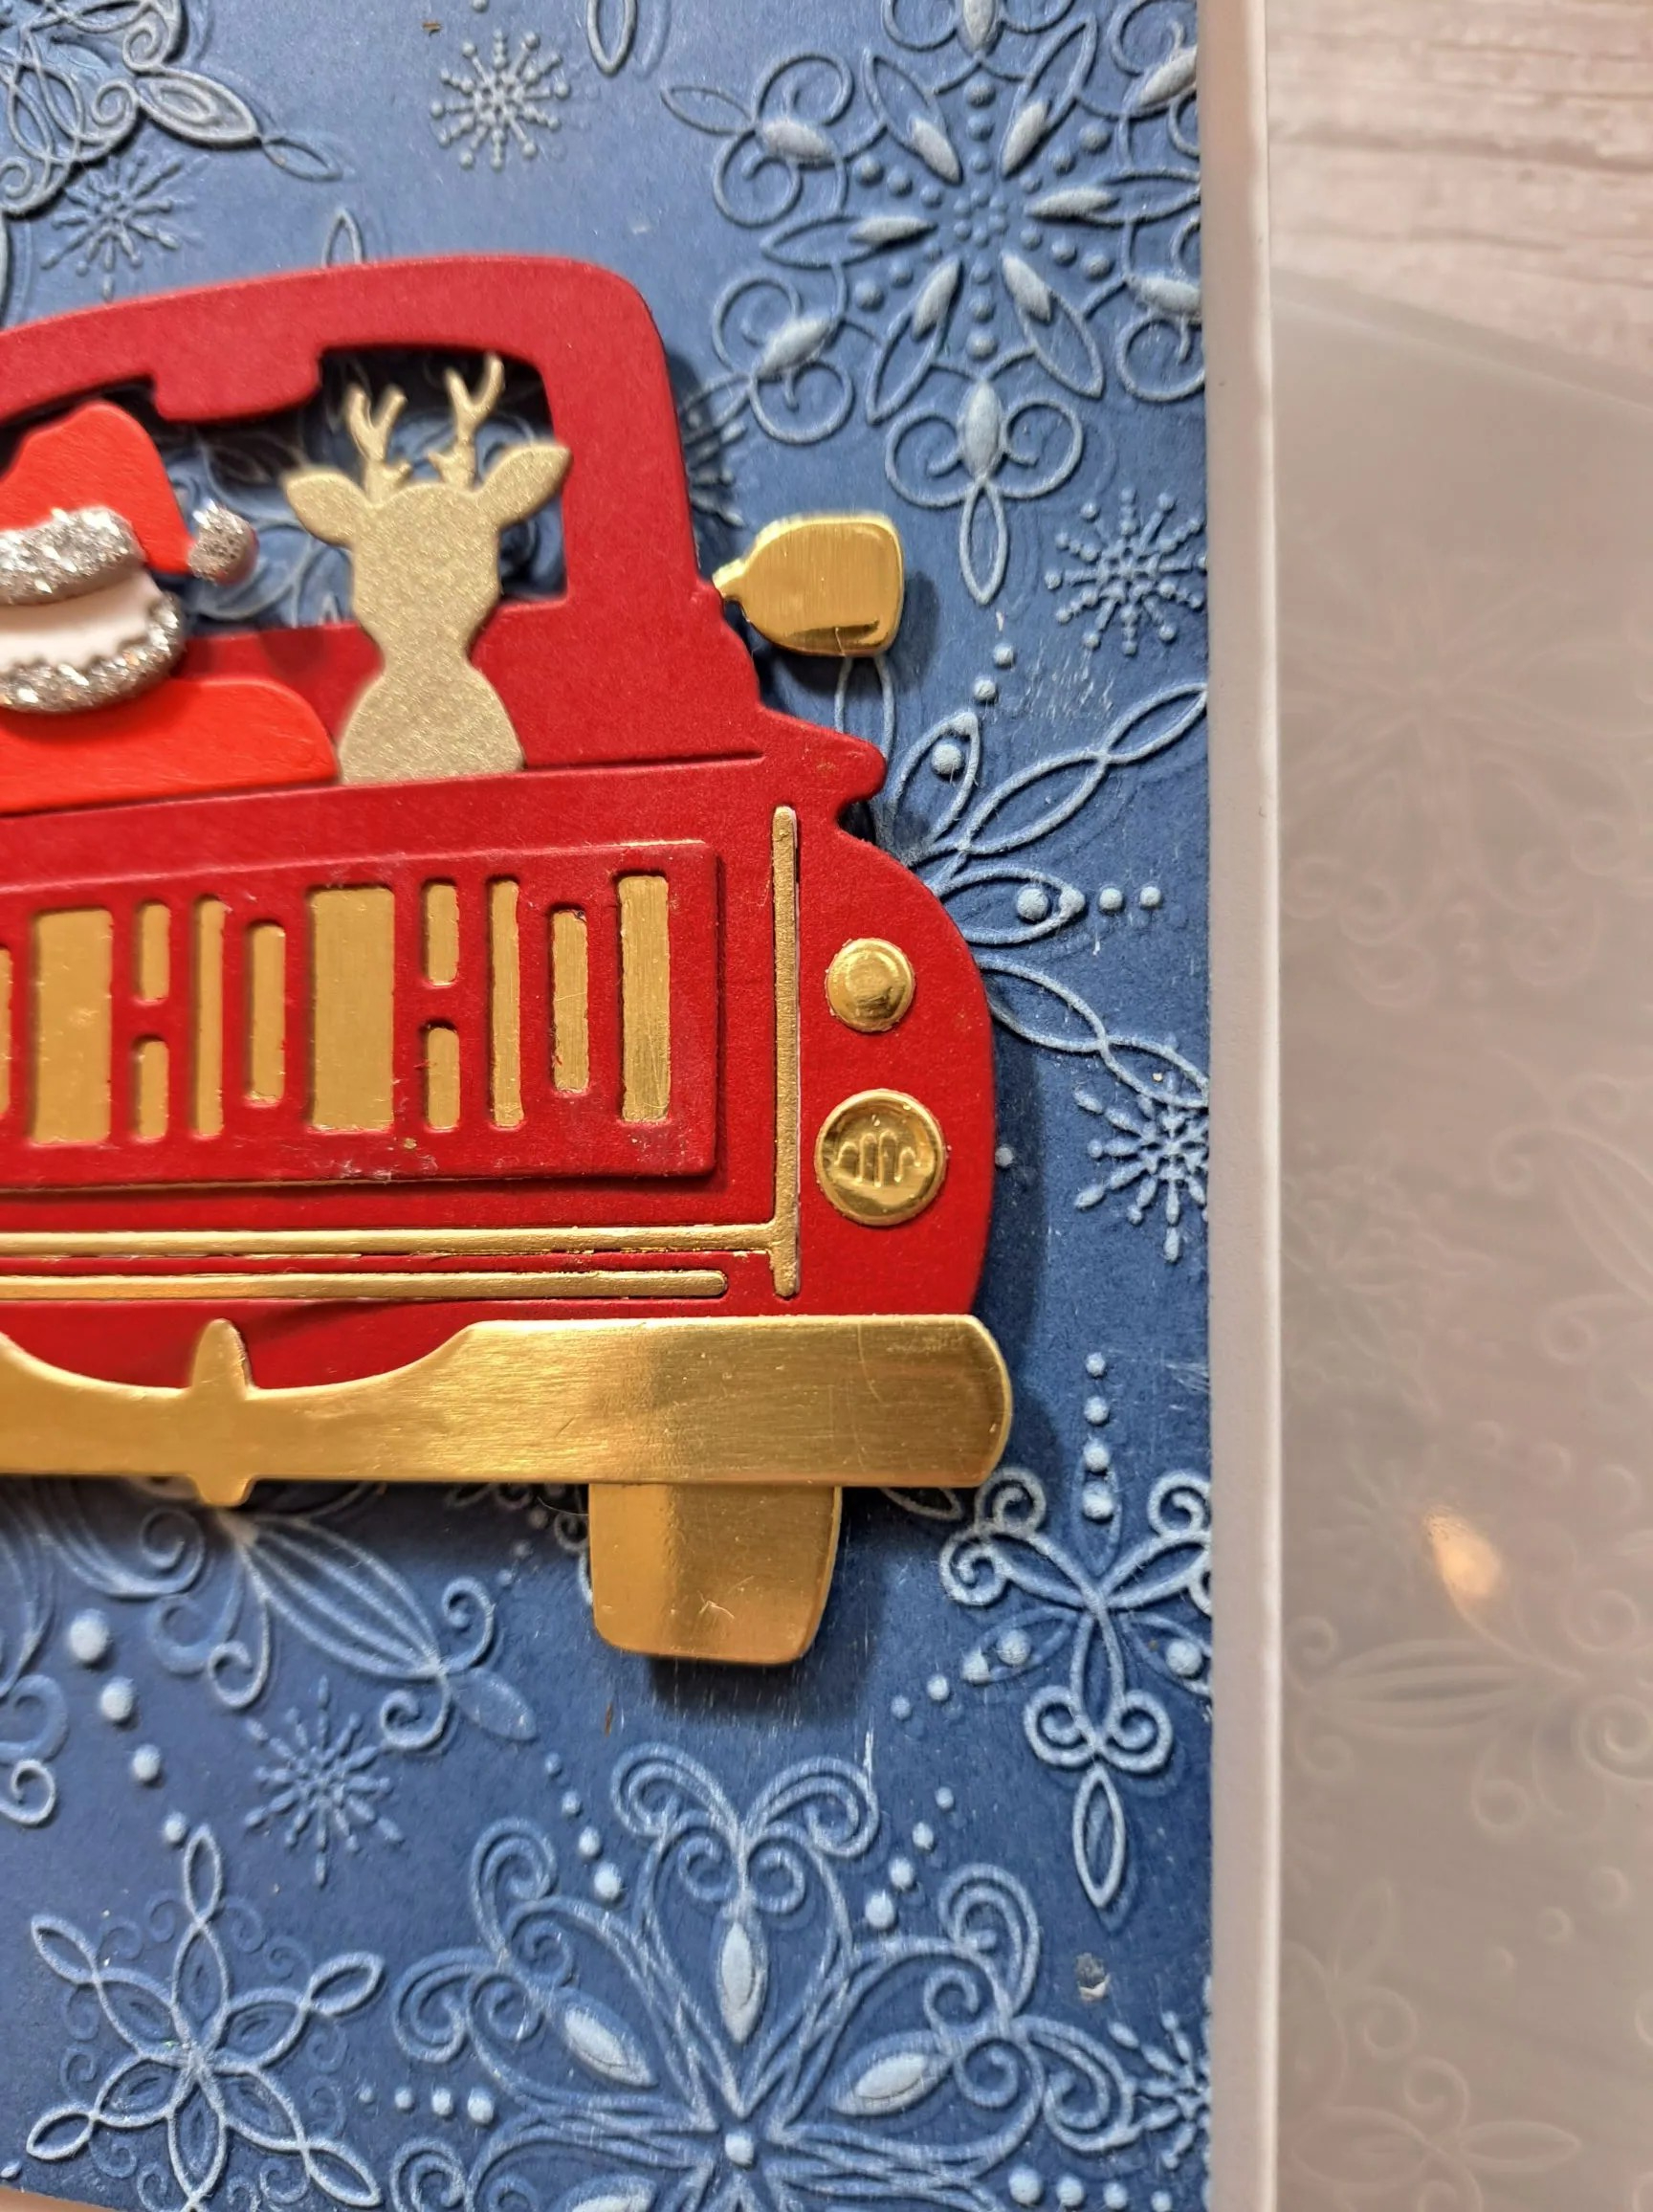
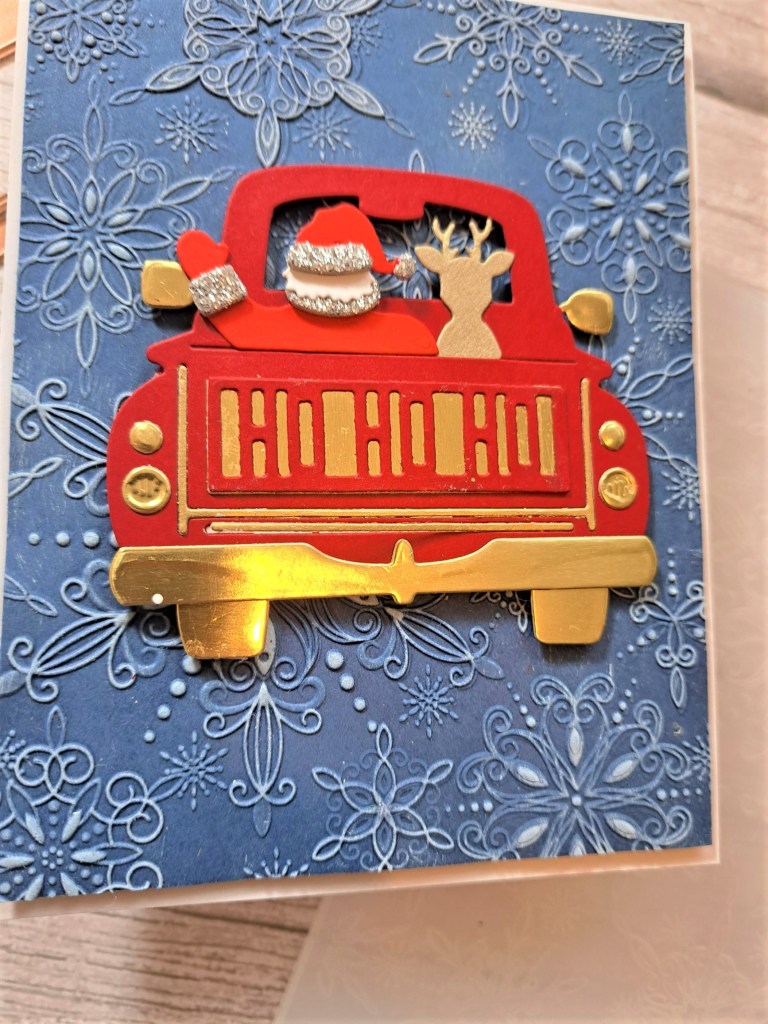
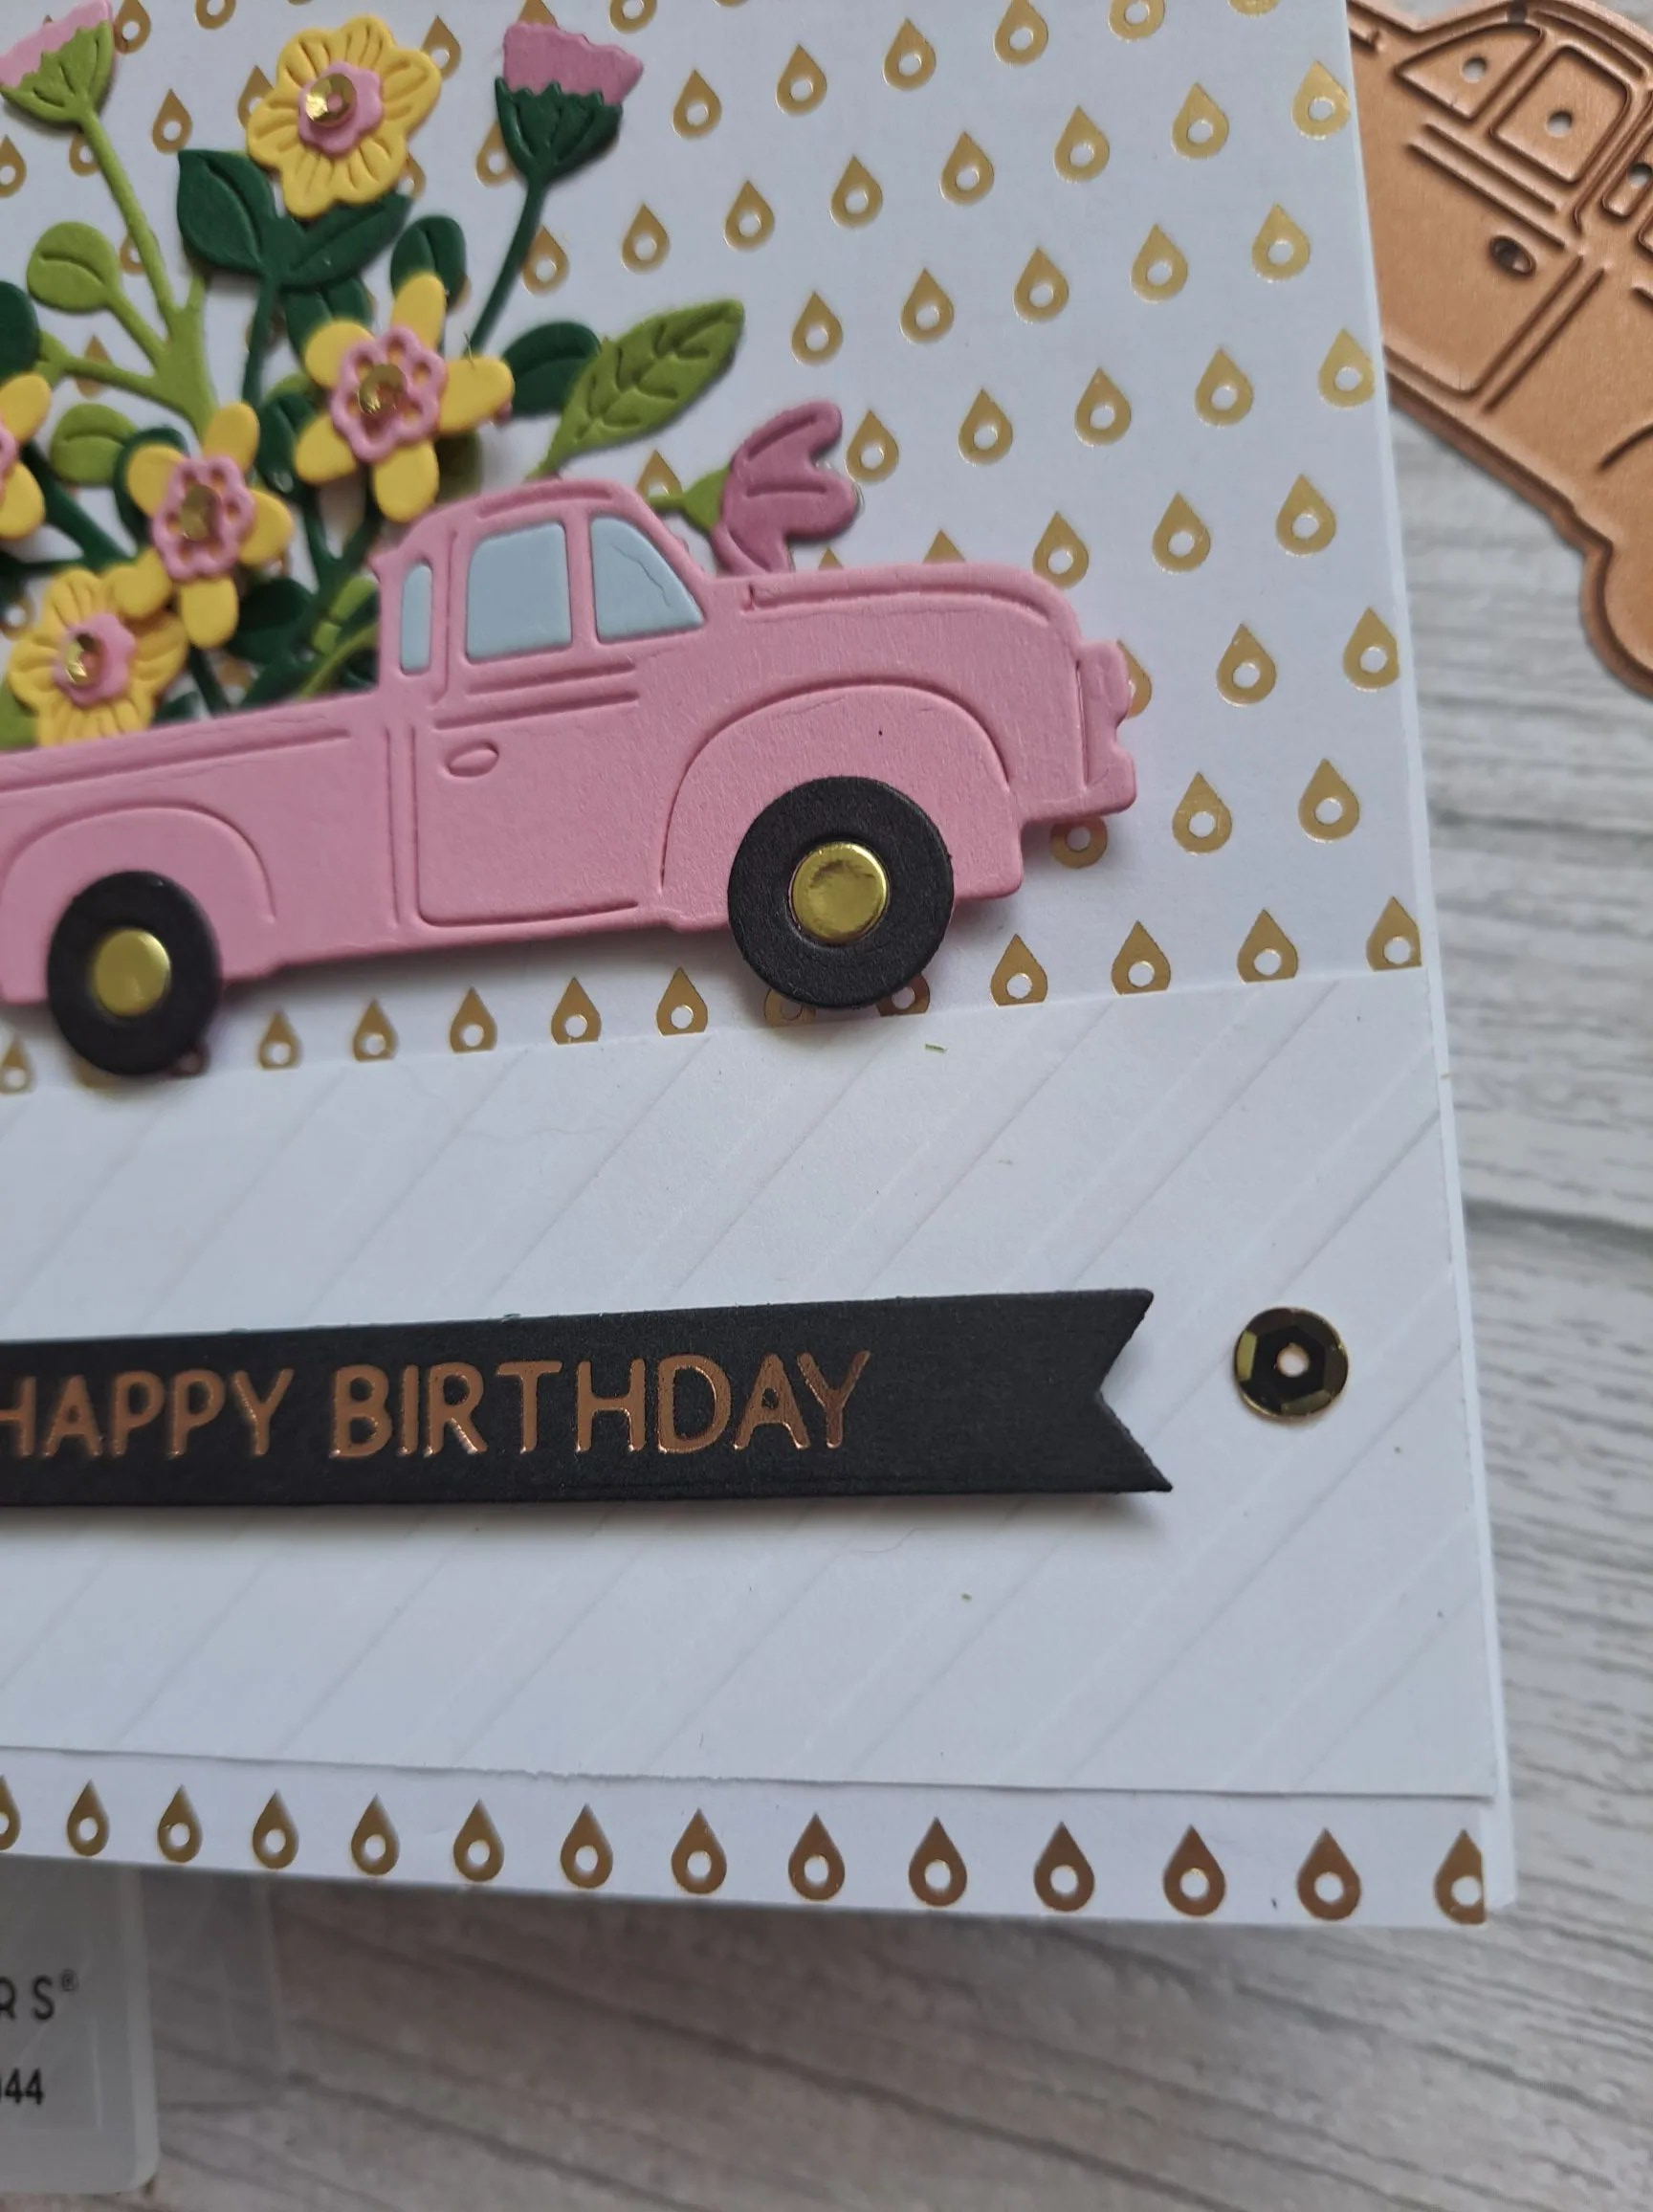
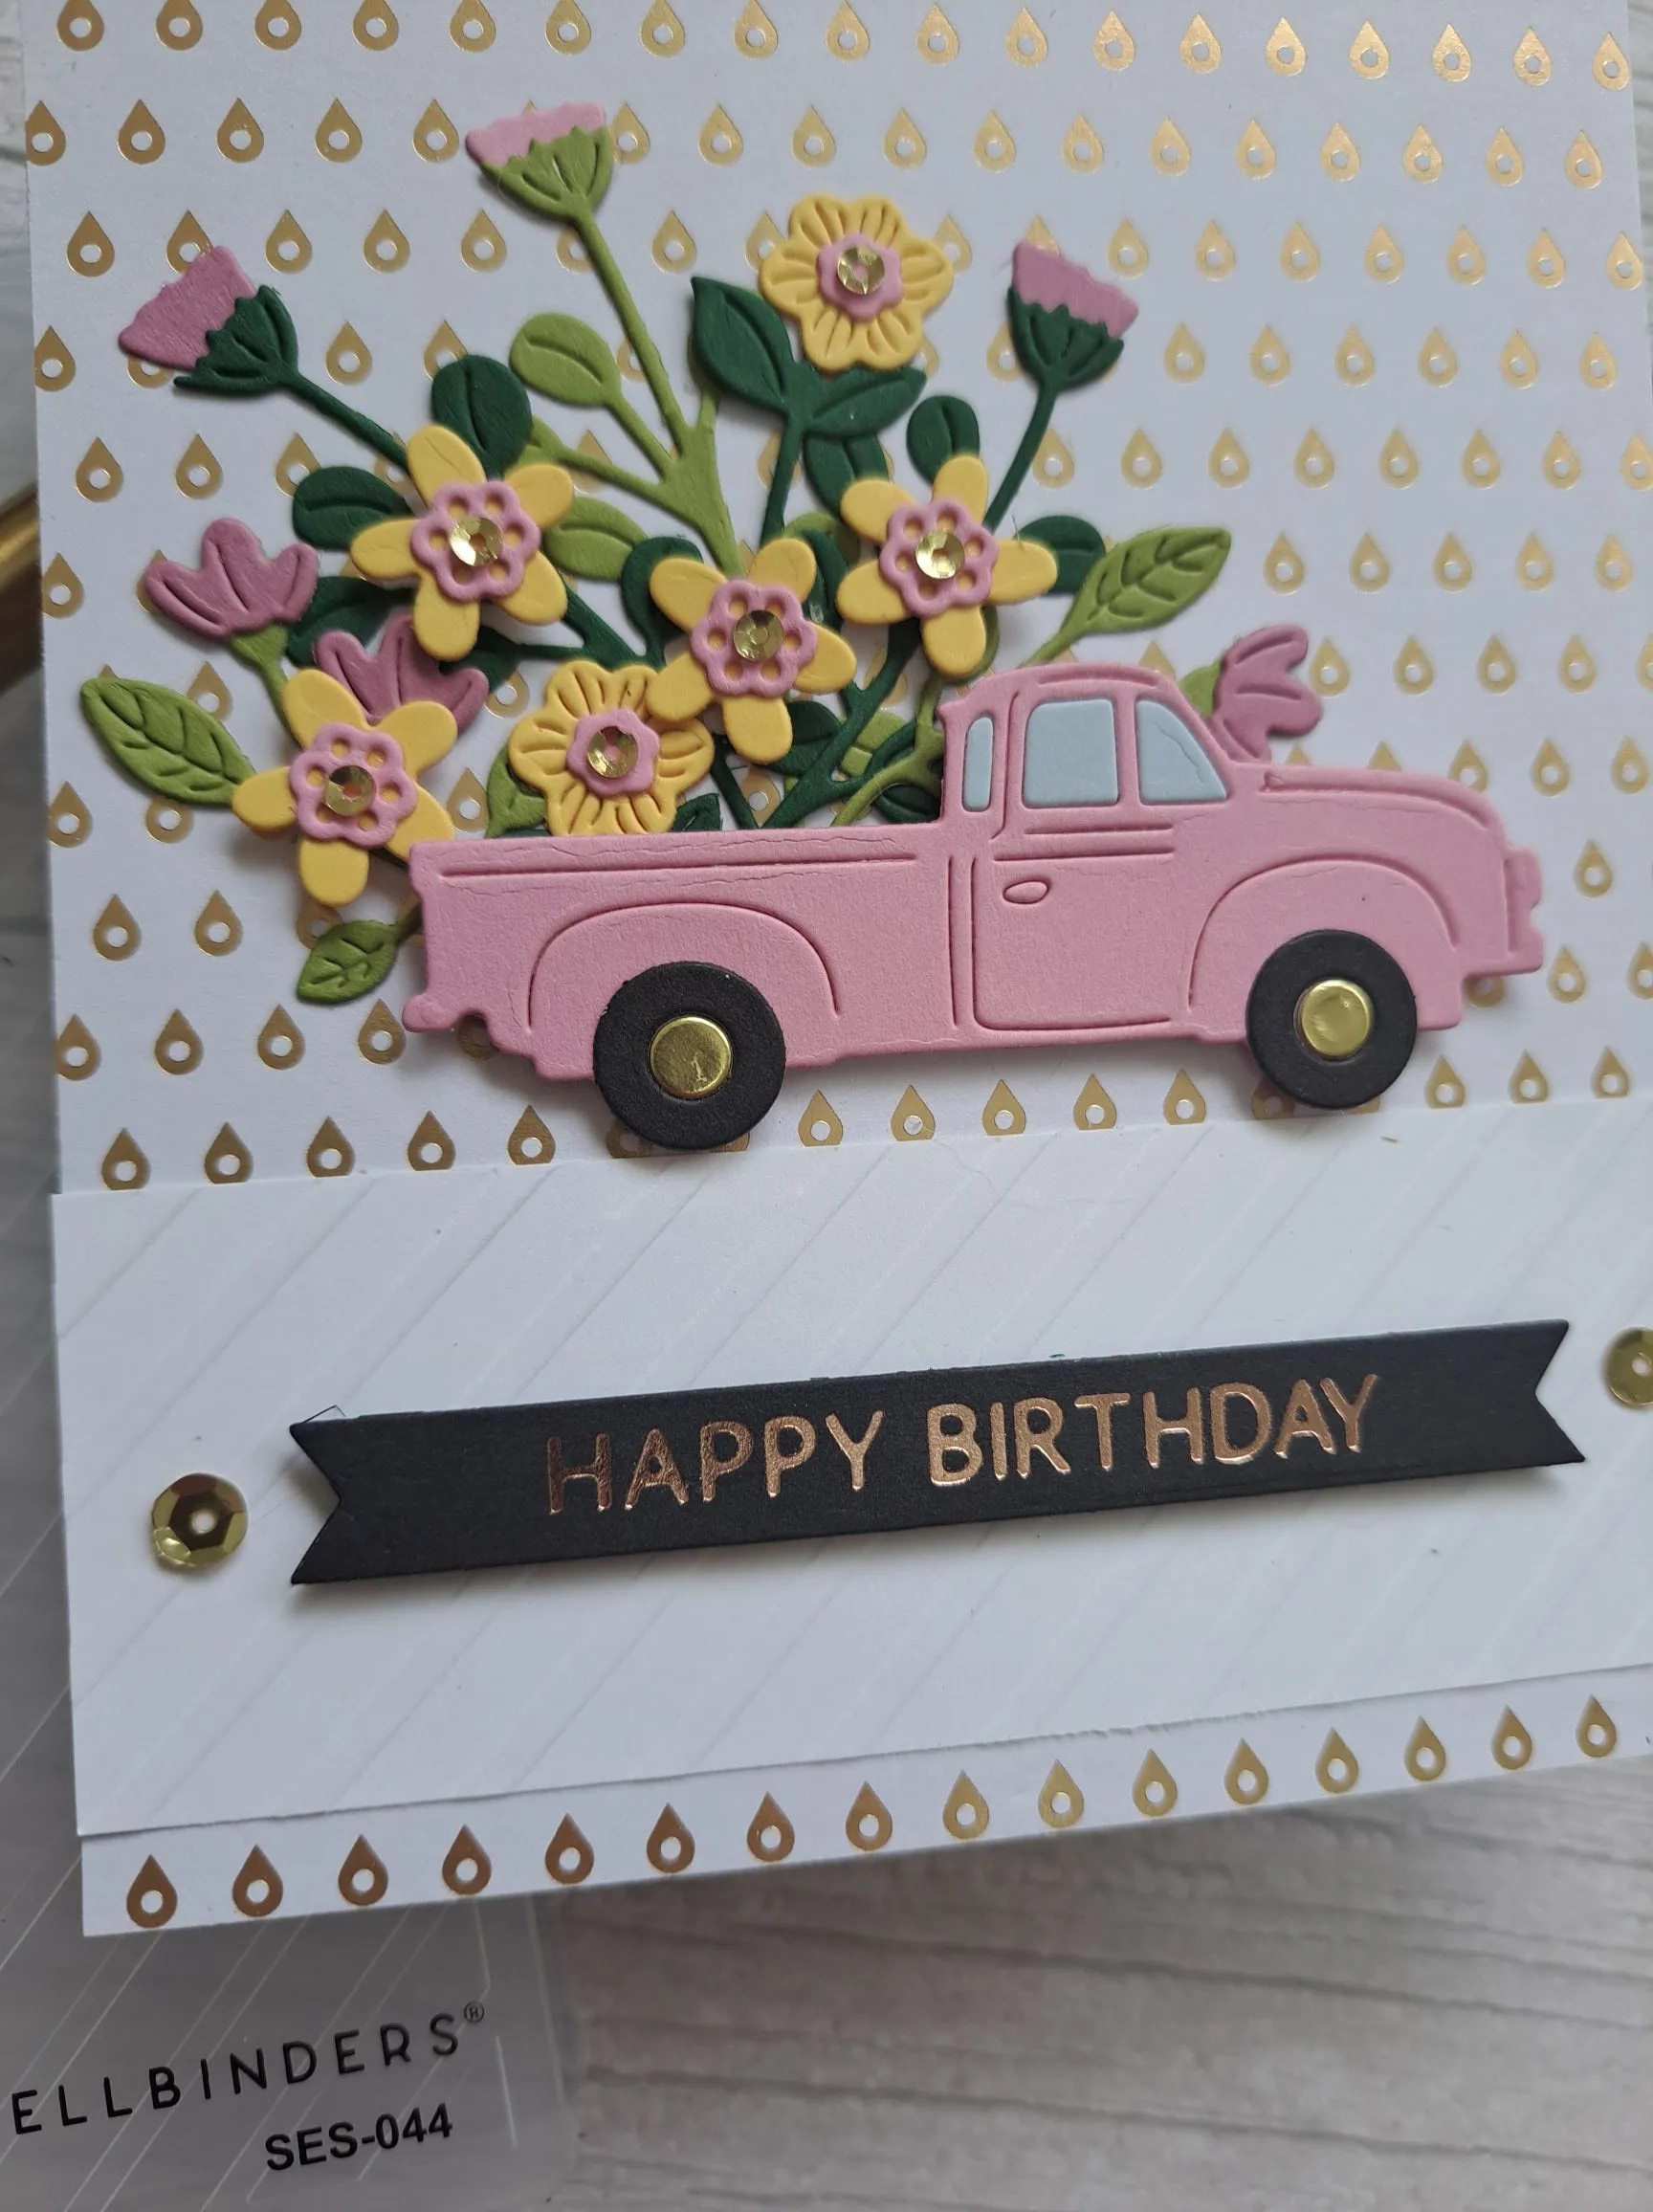
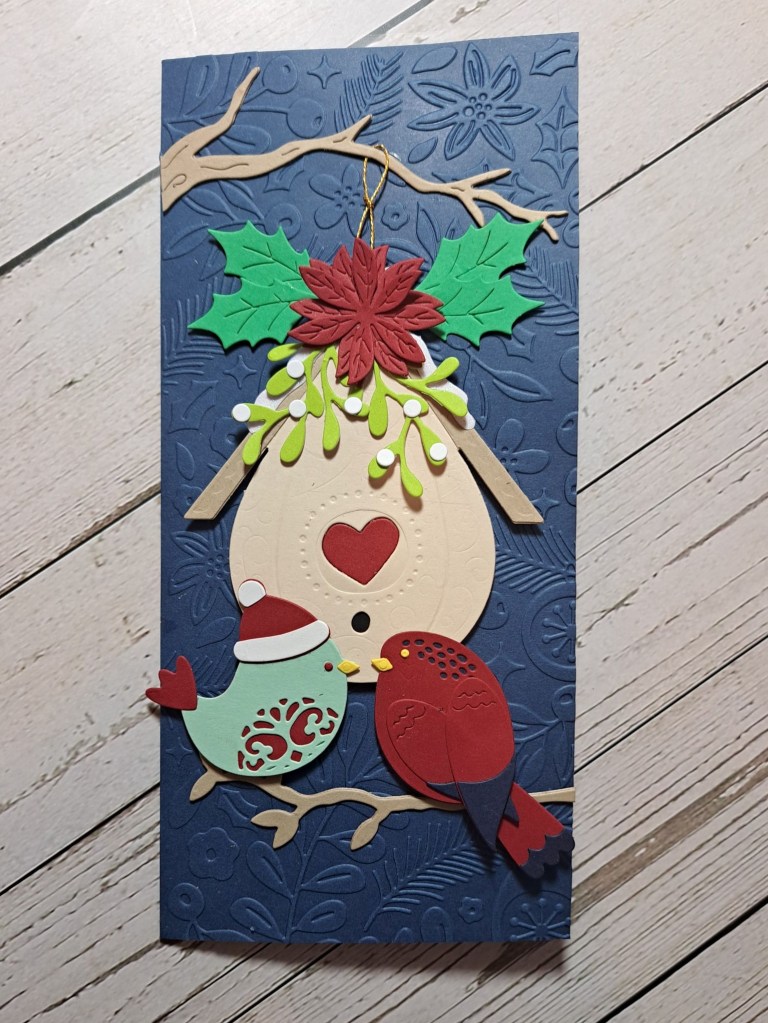
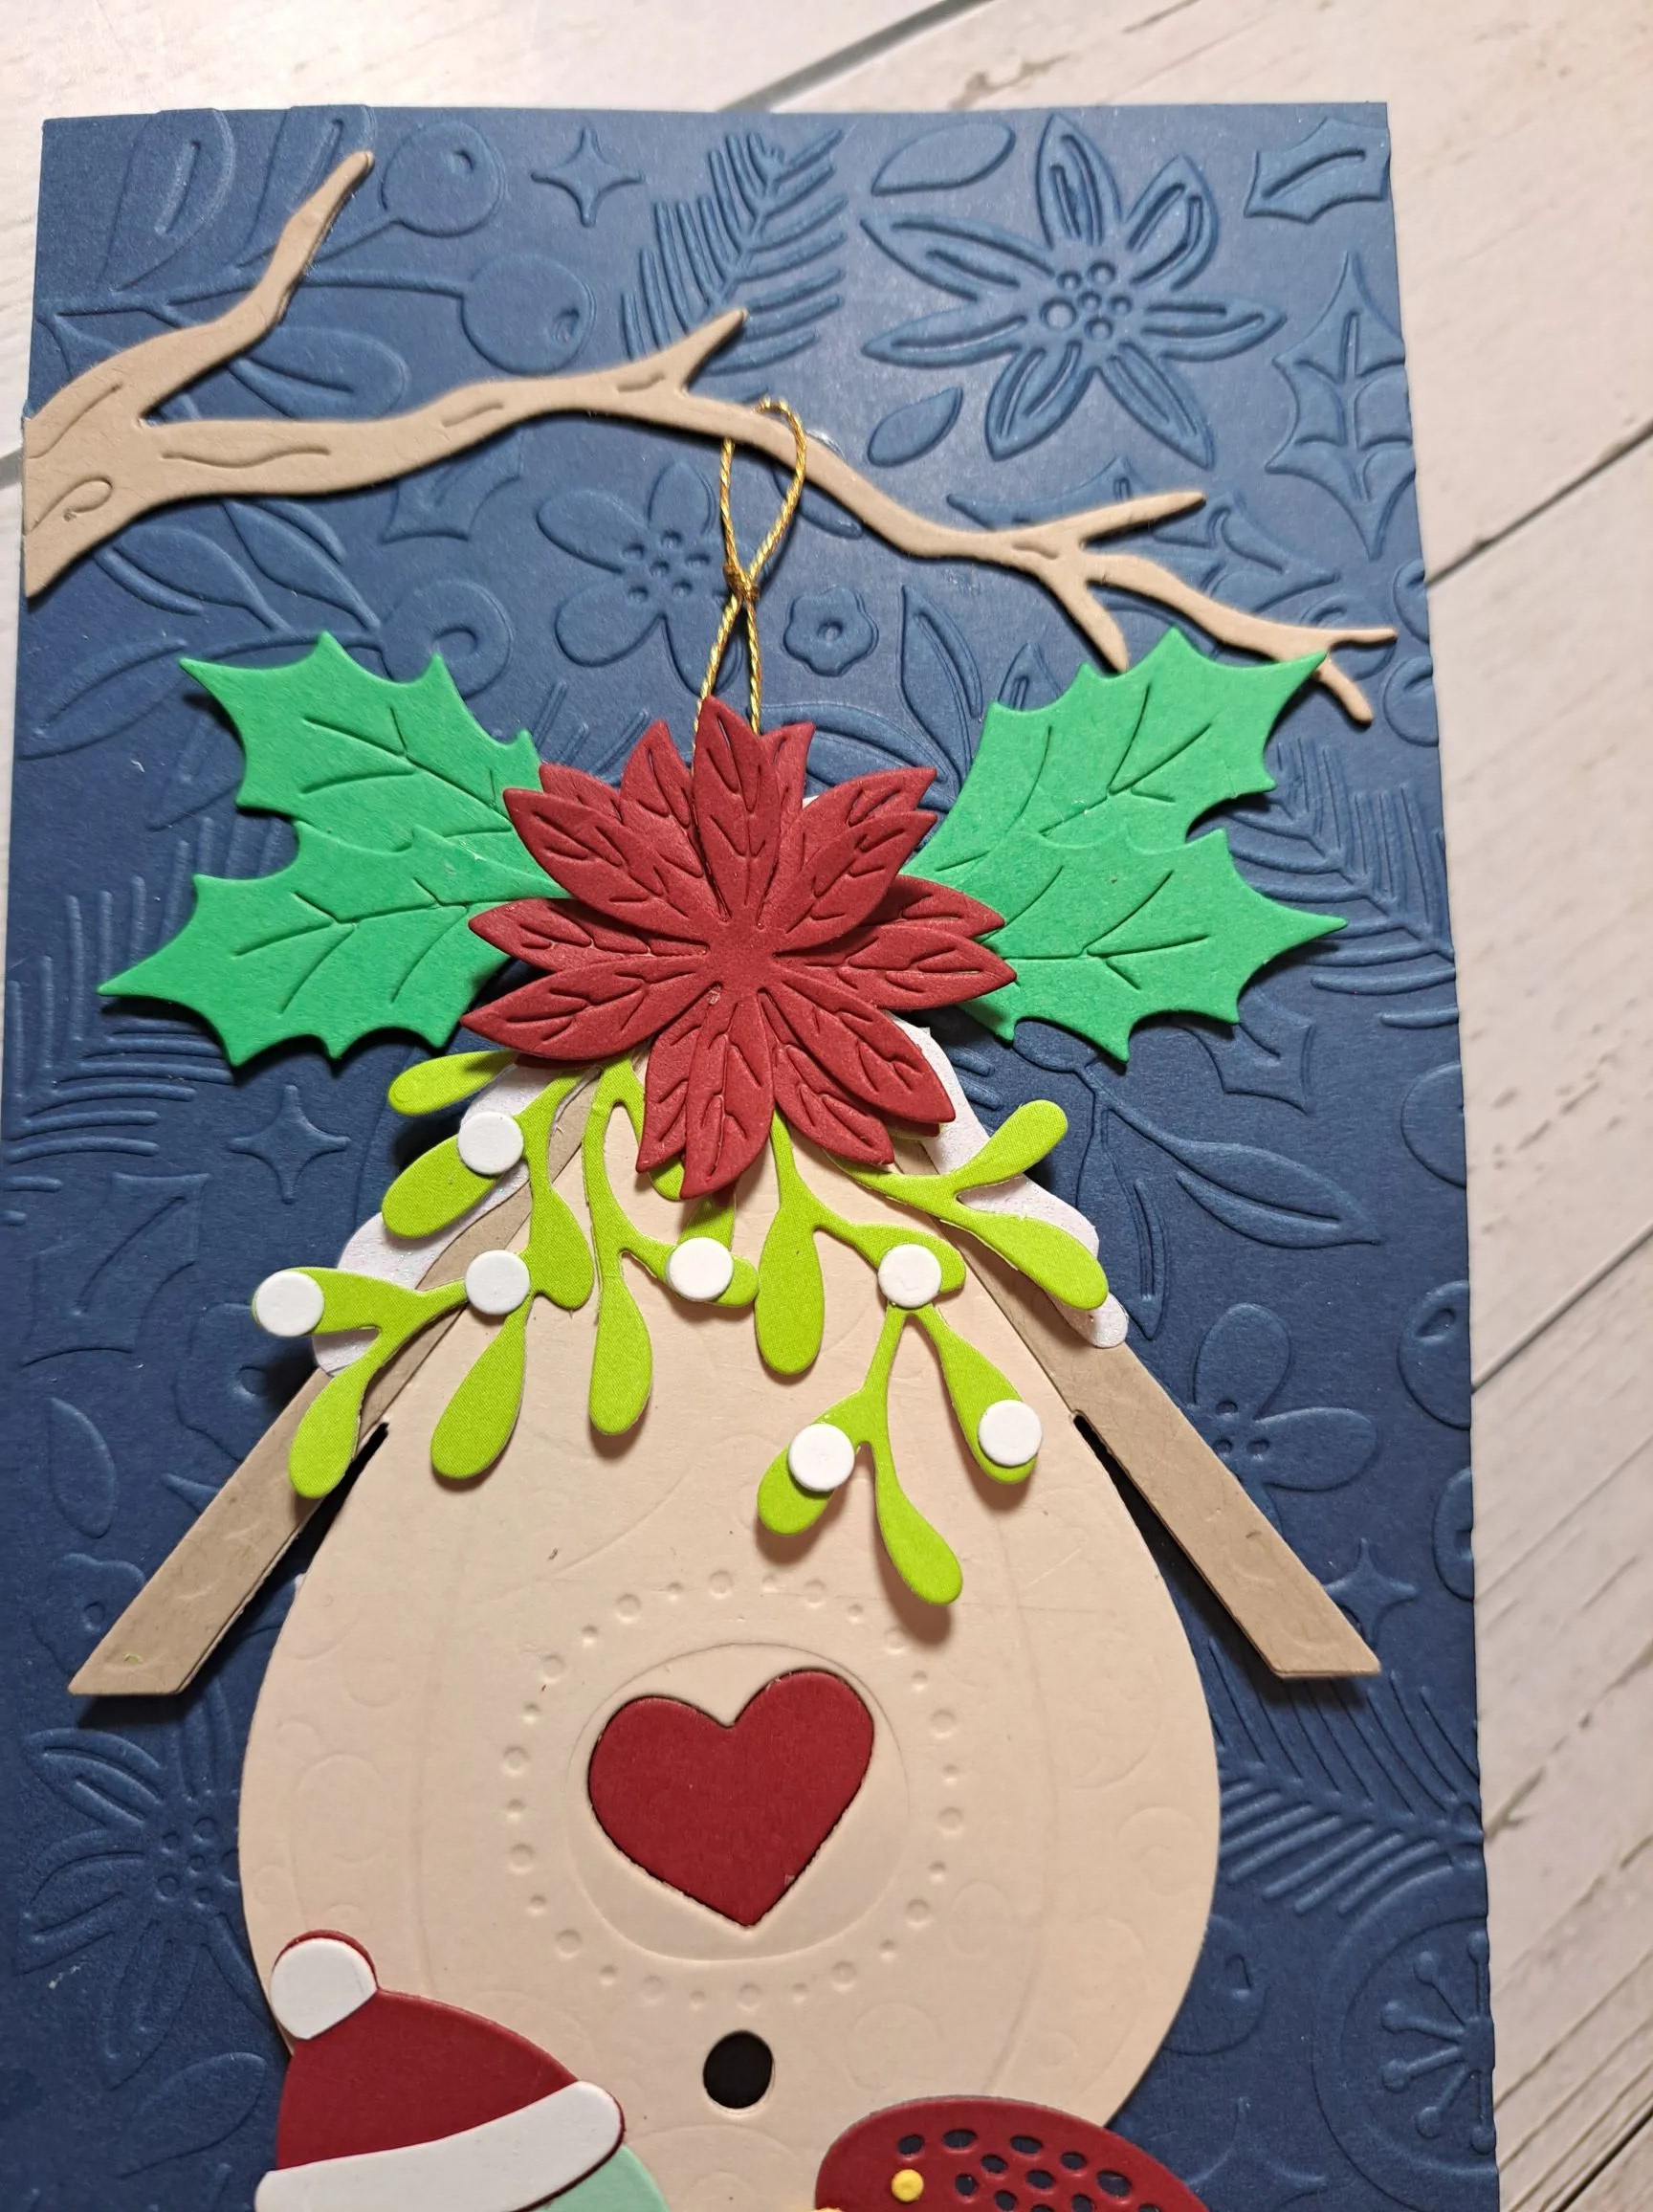
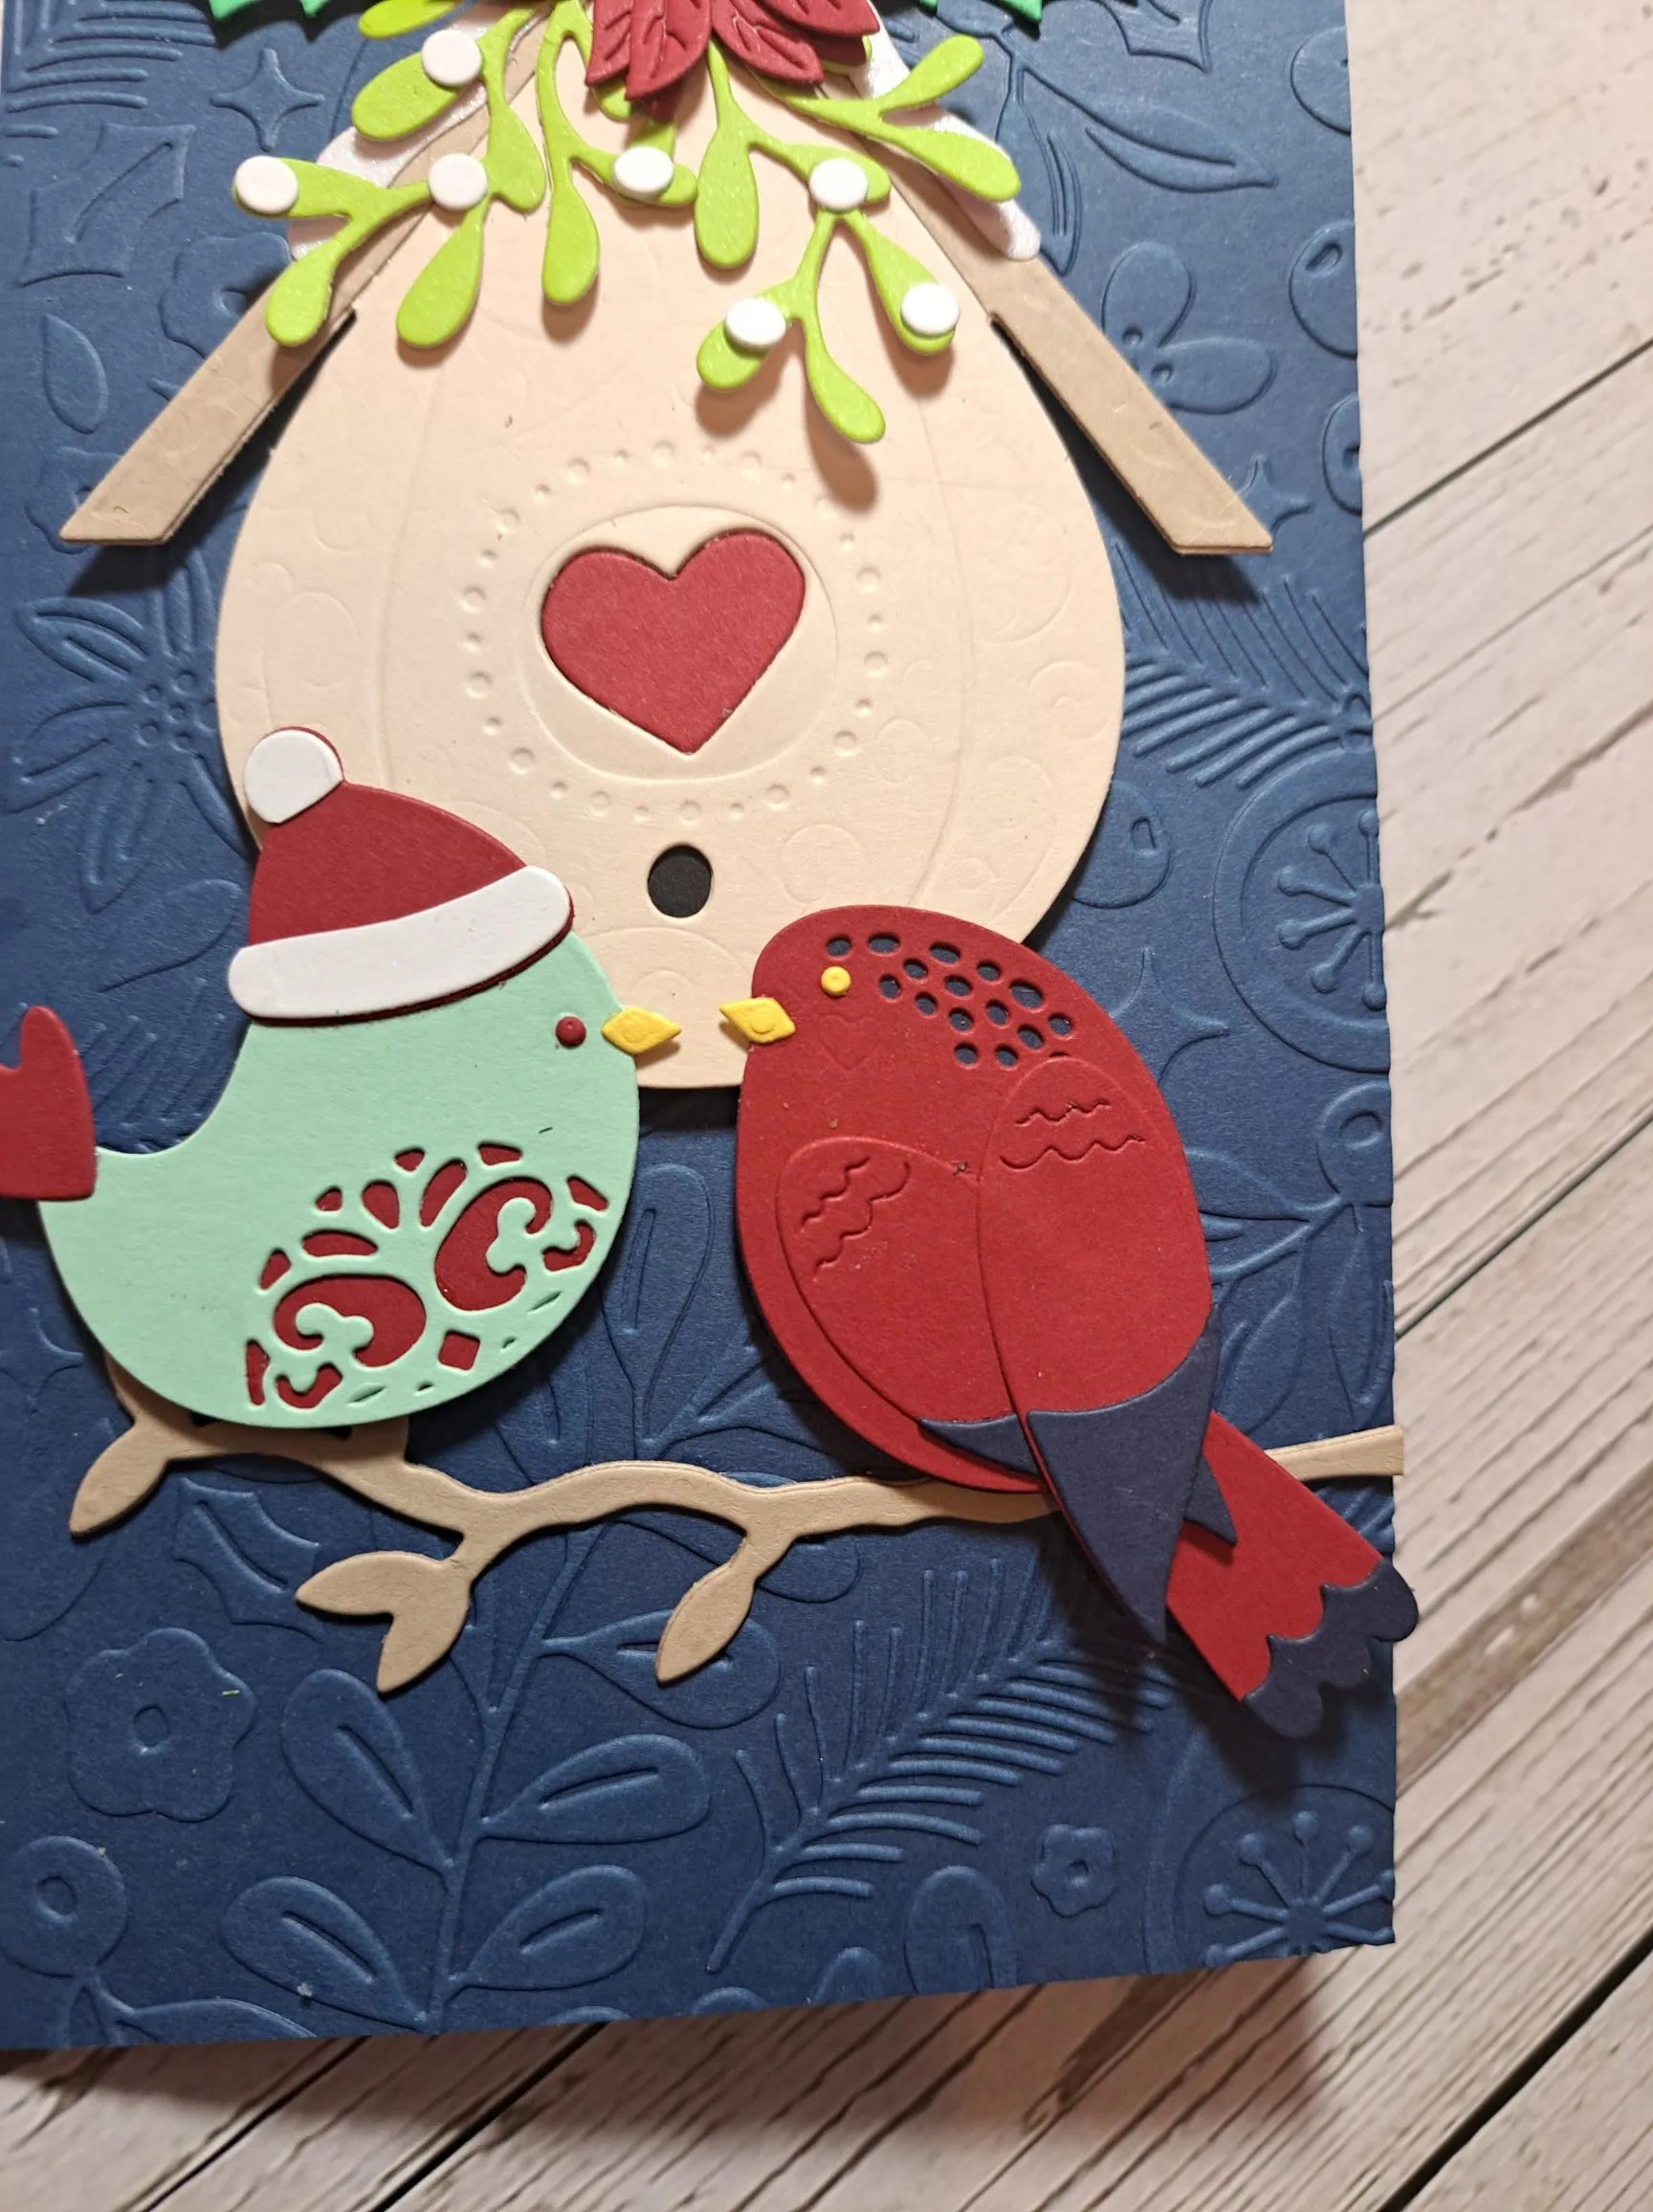
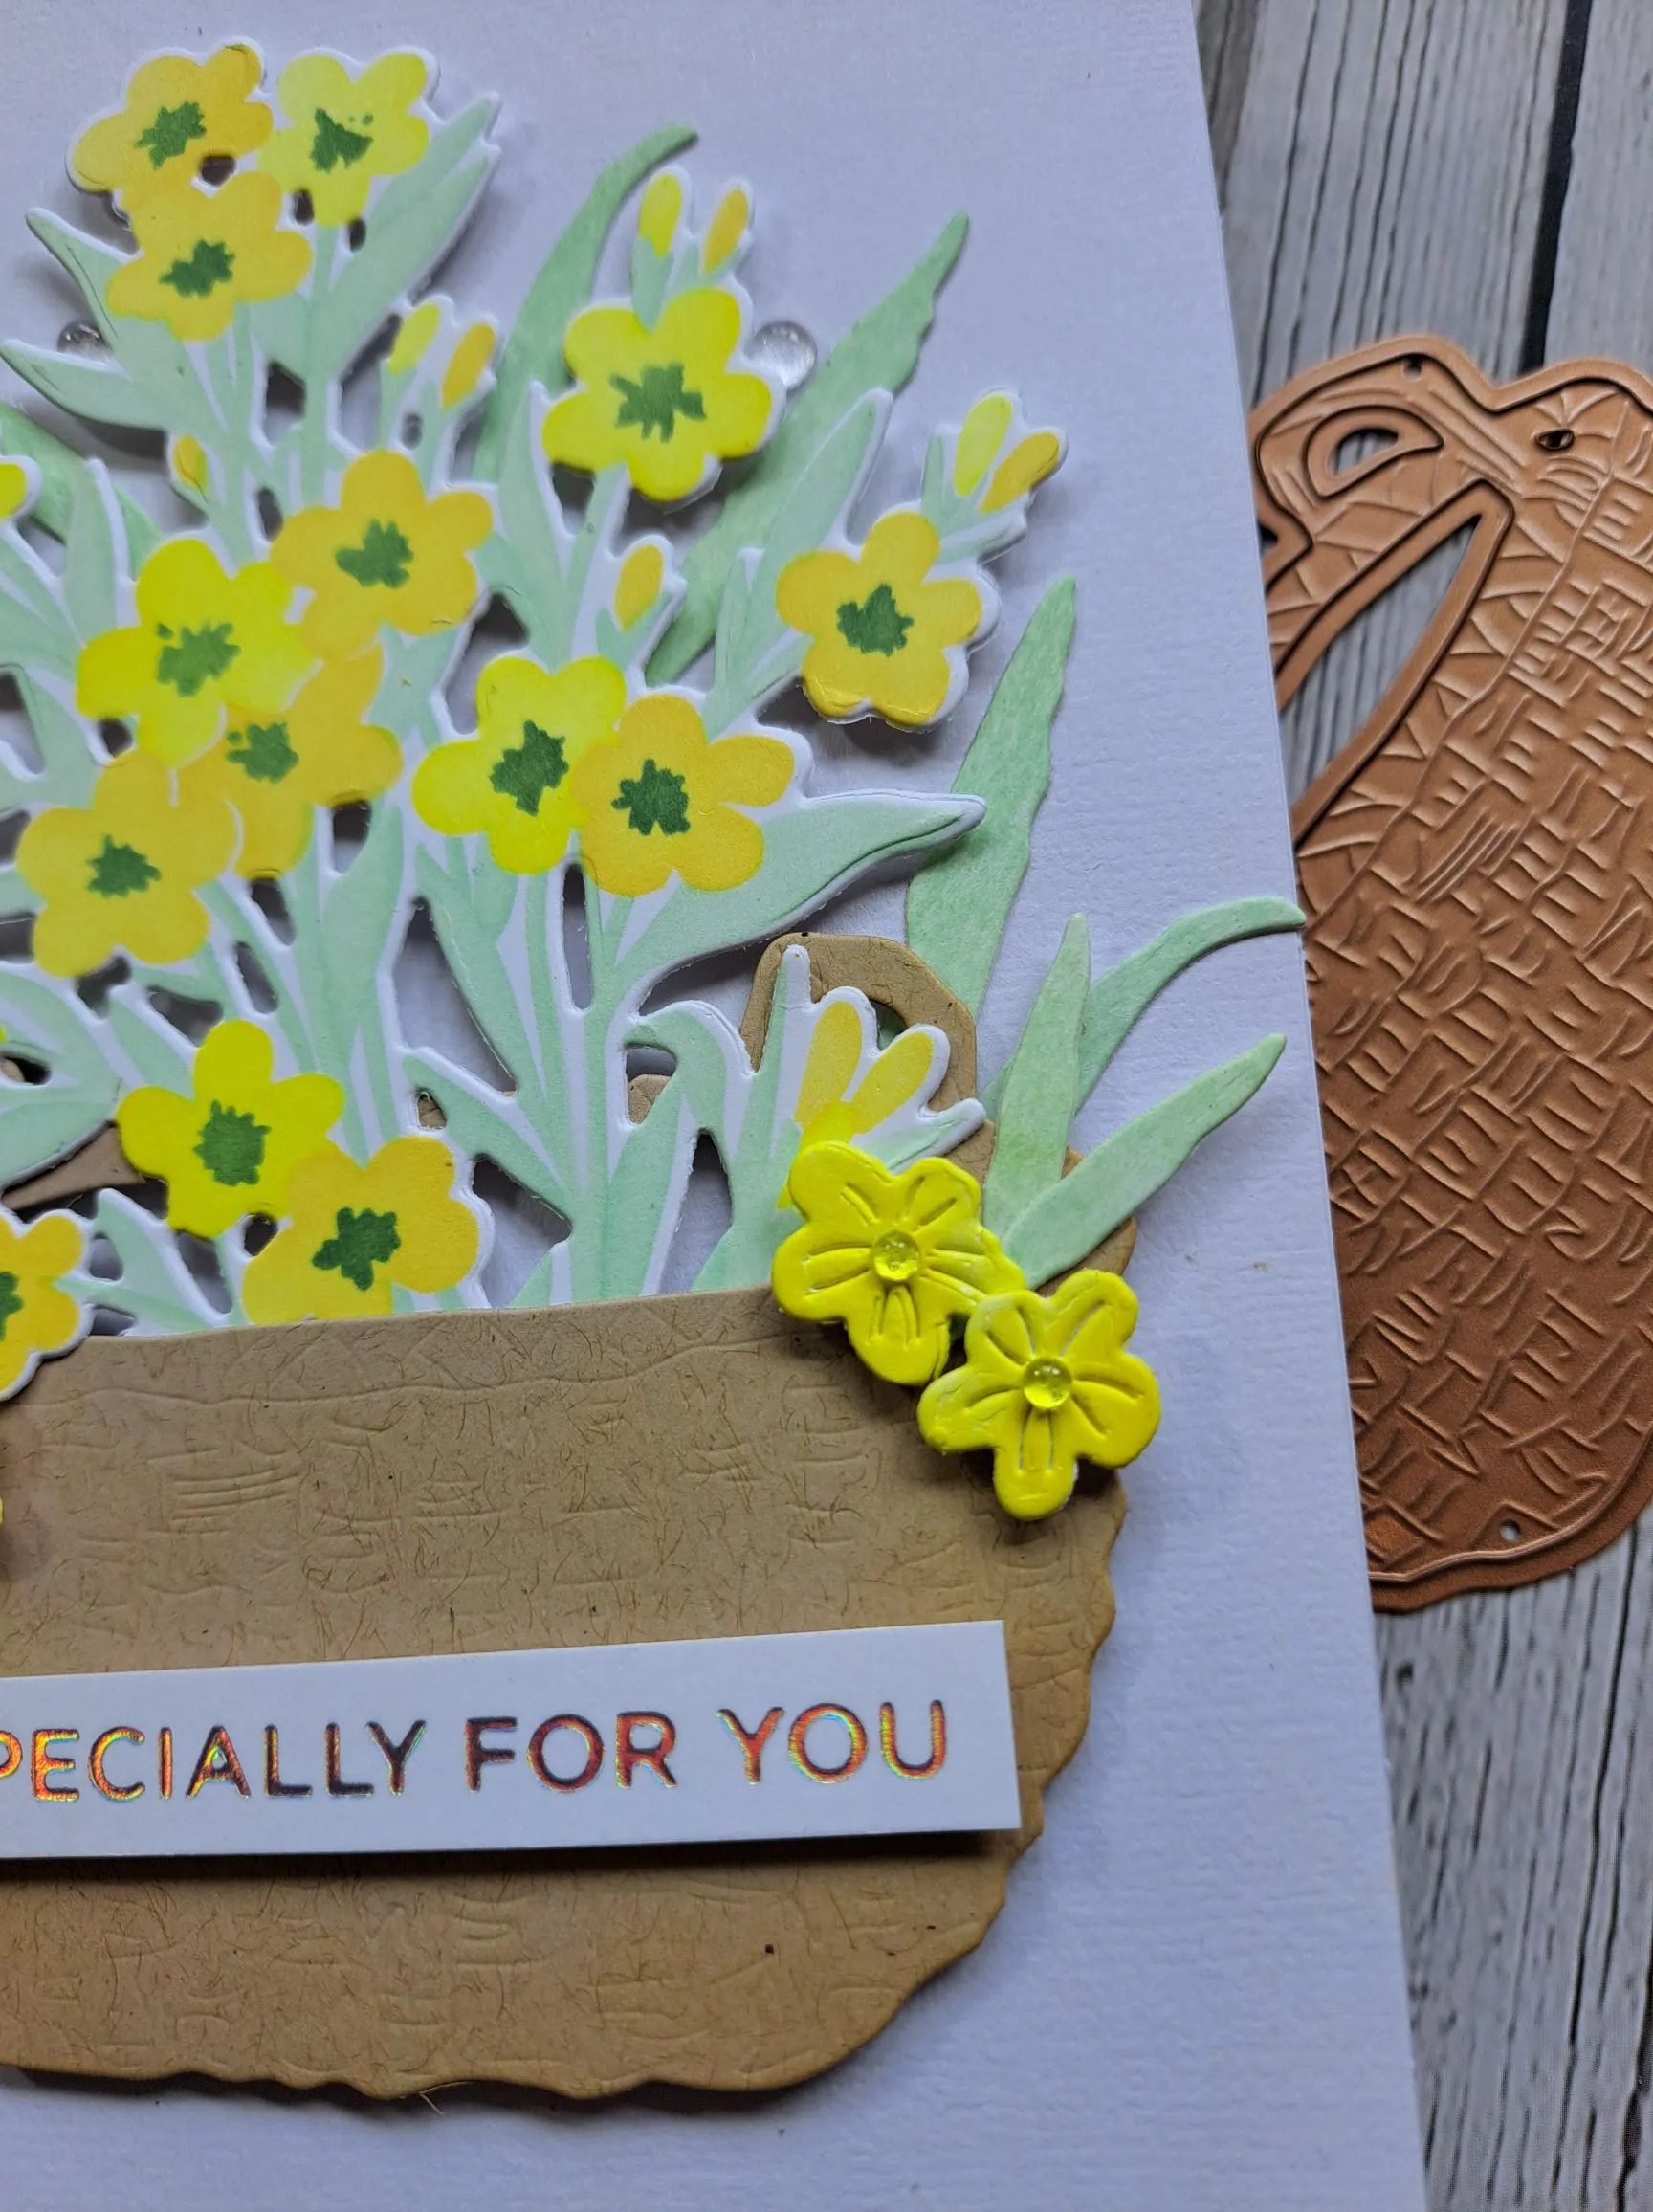
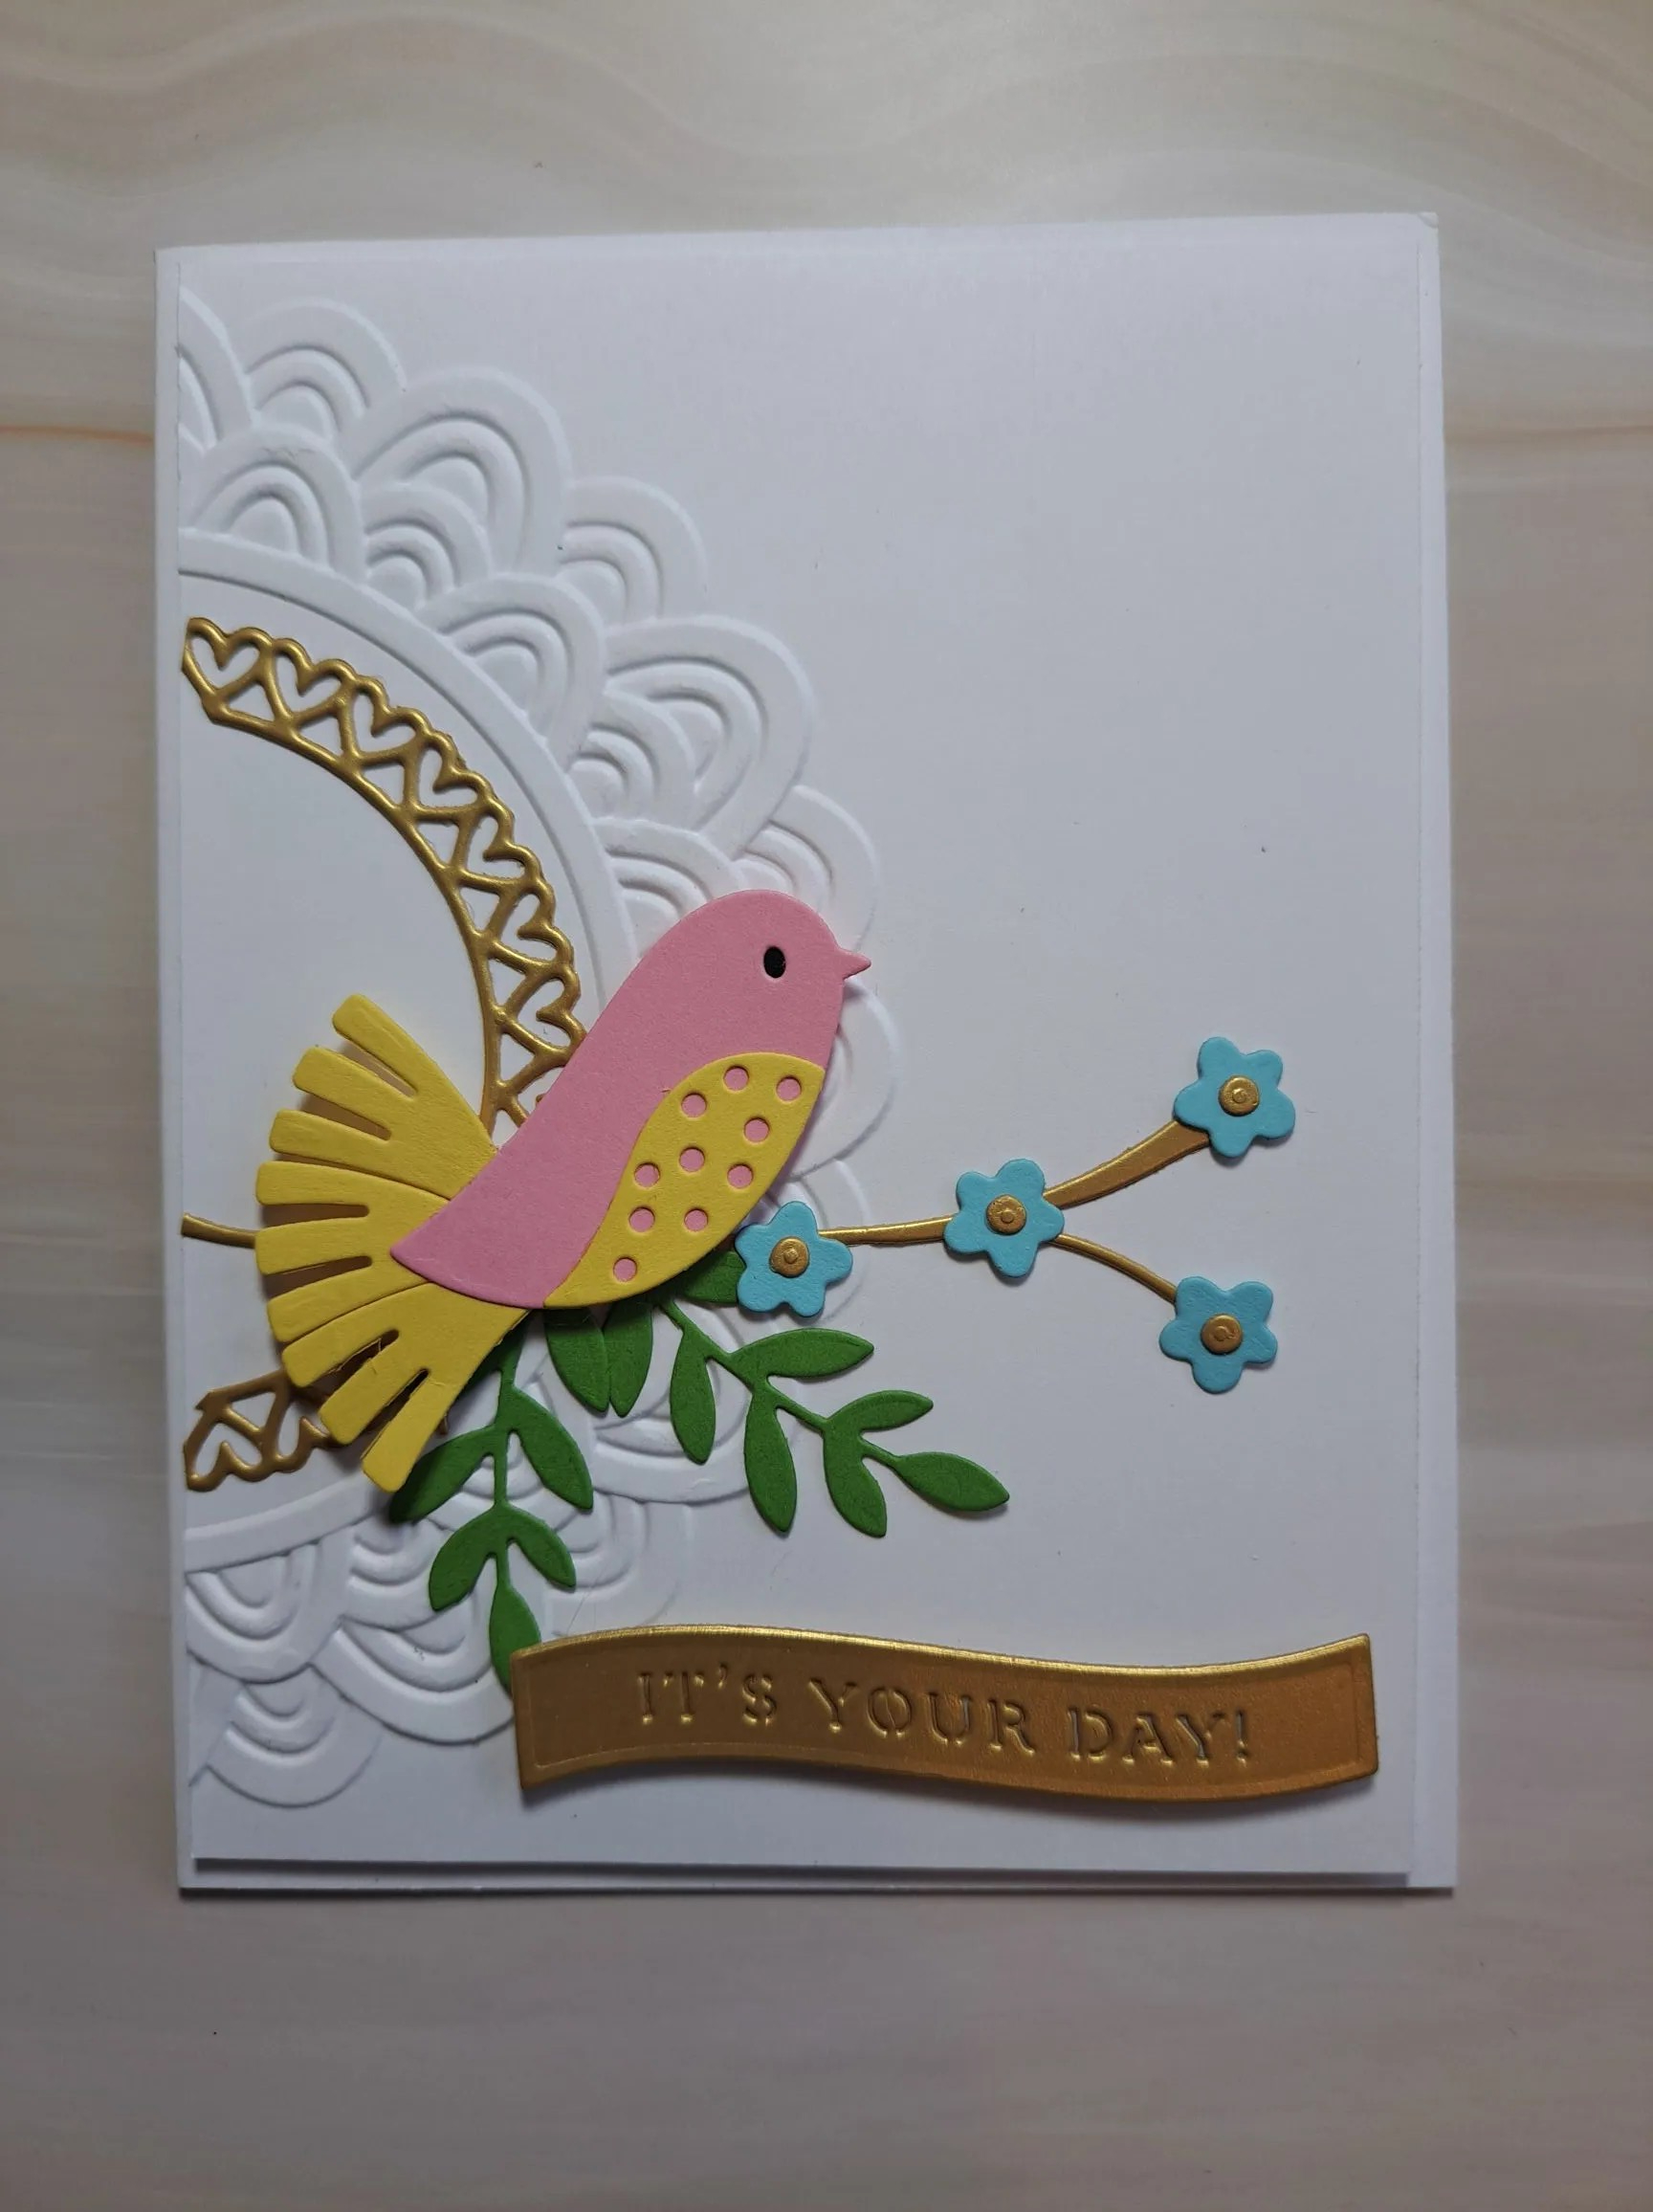
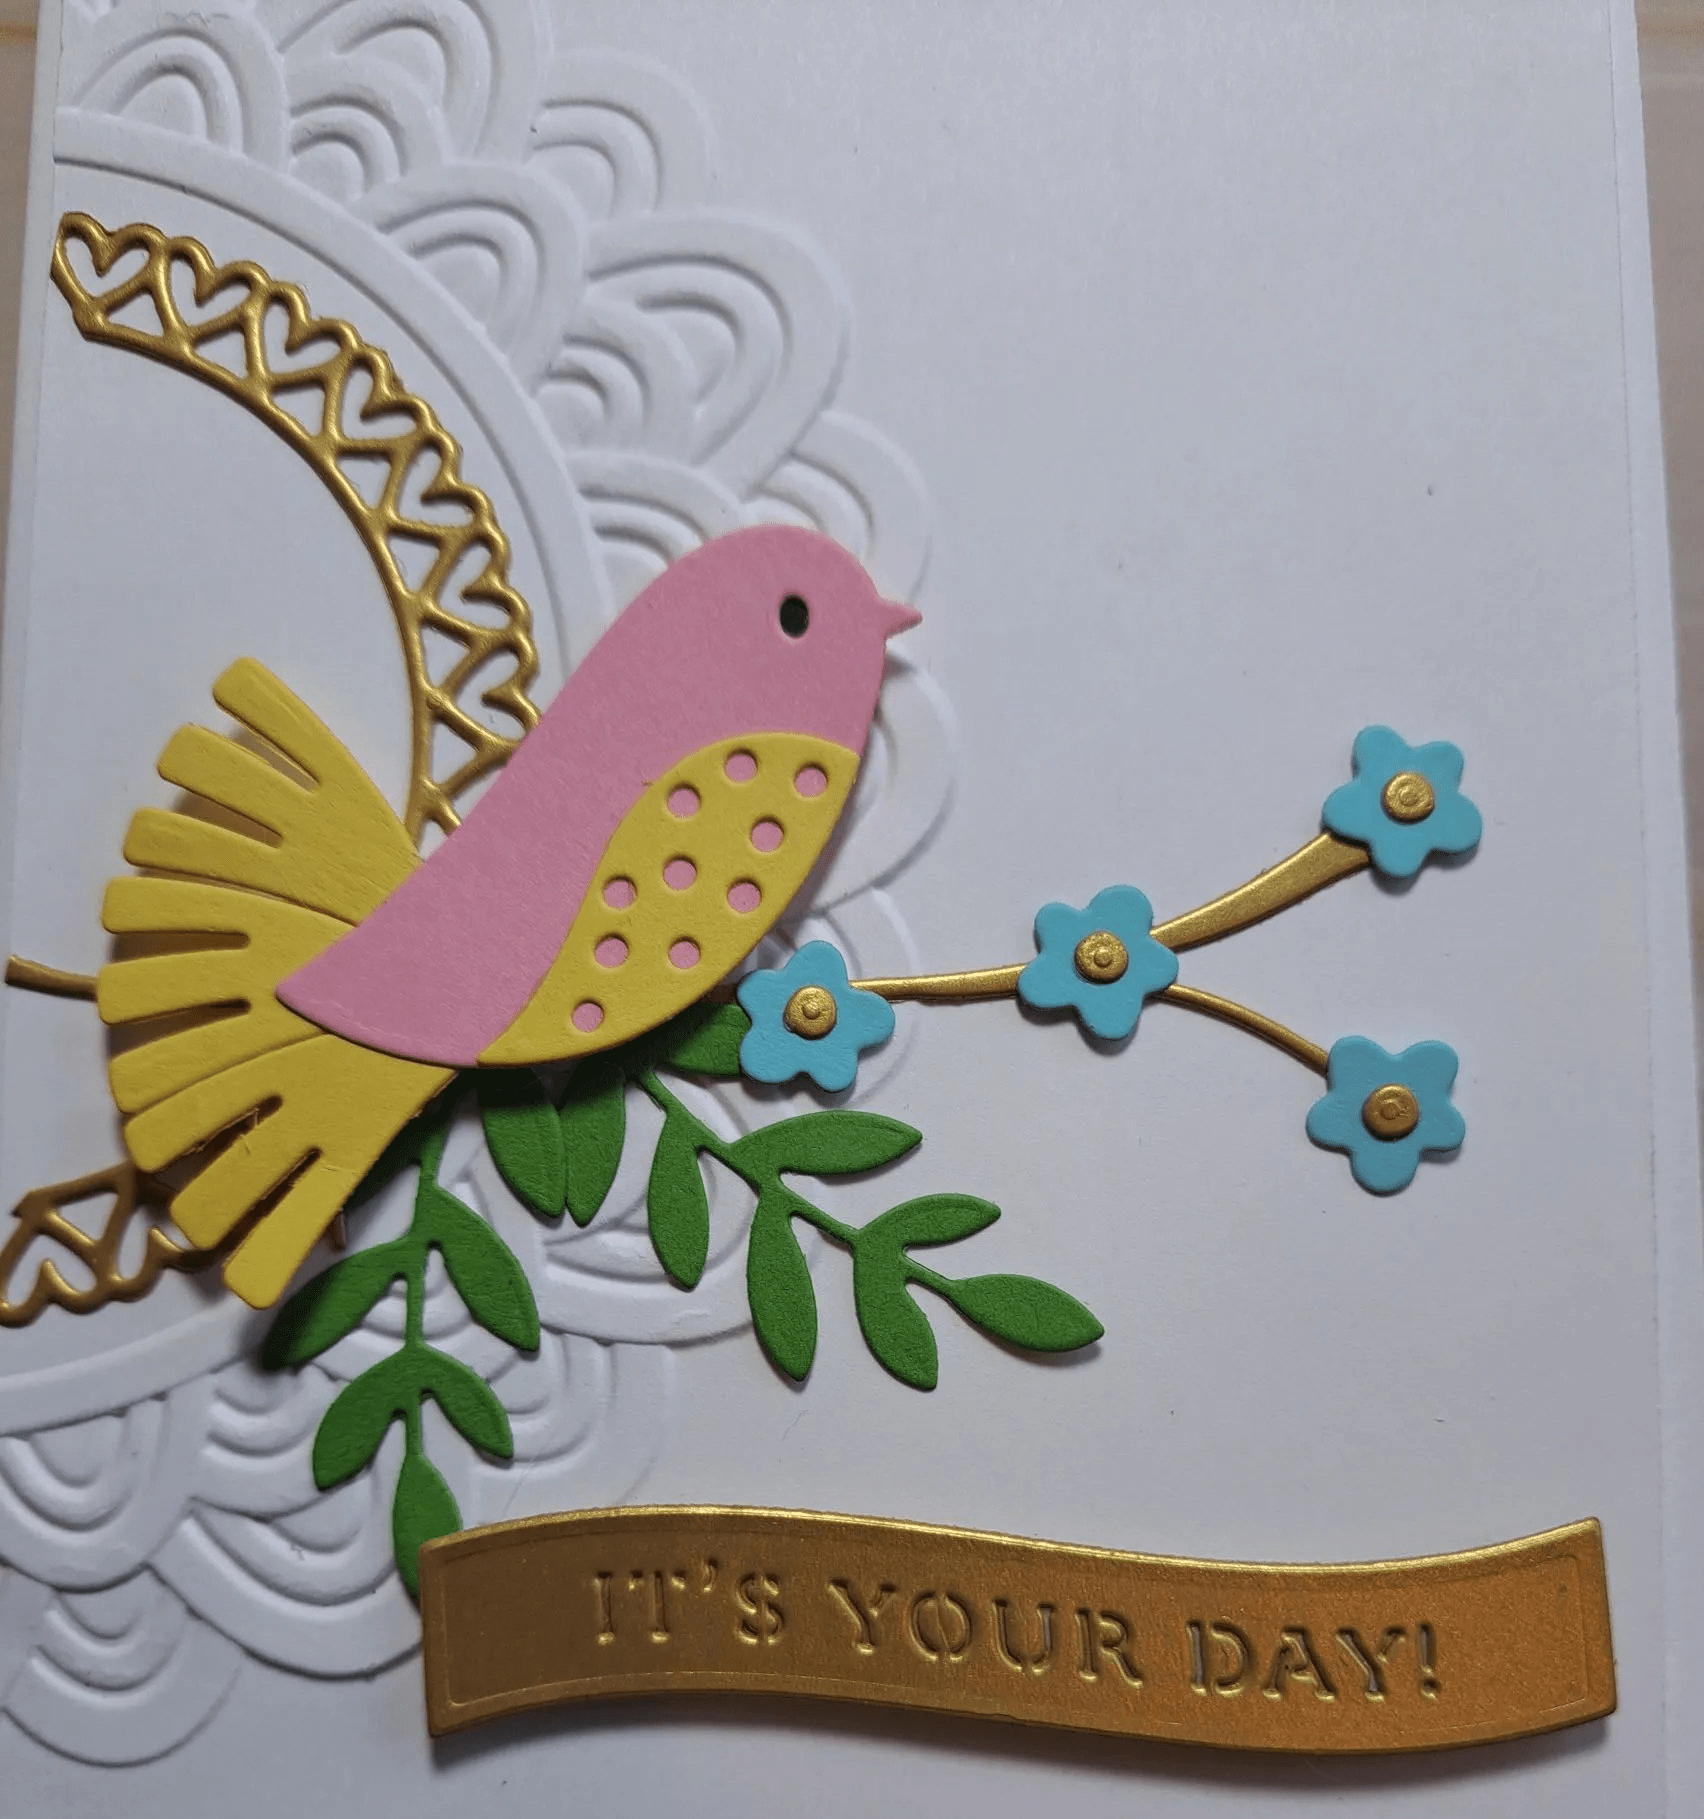
Here is my card:

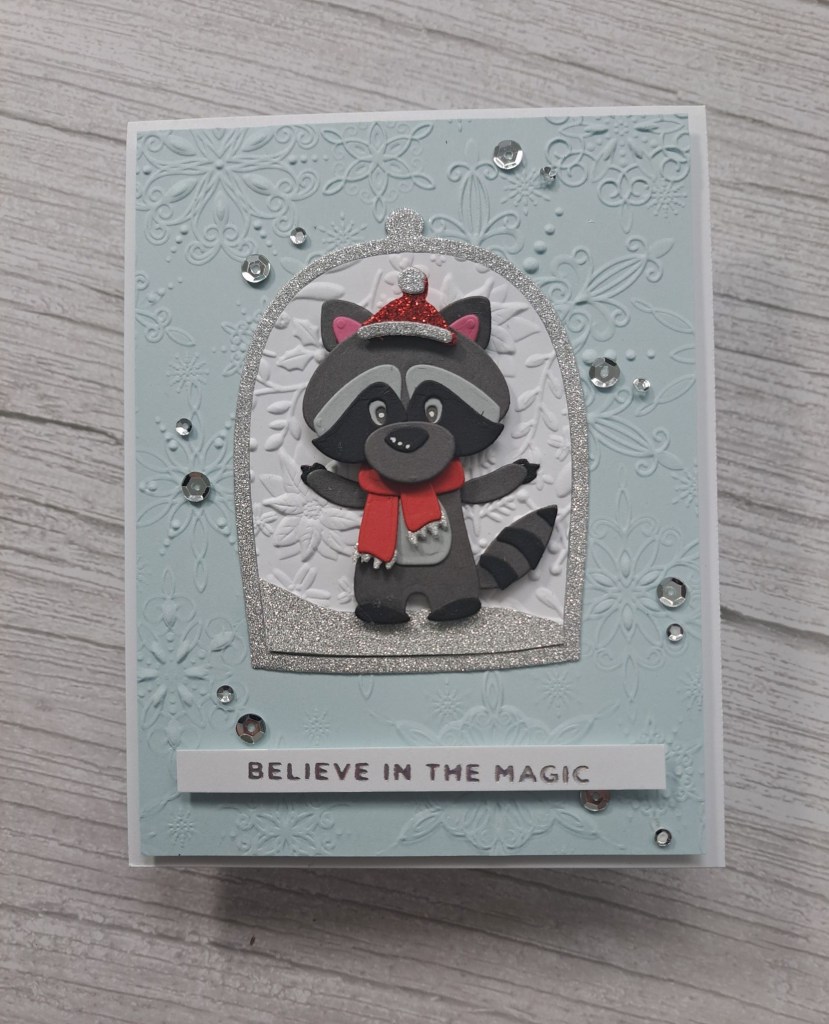
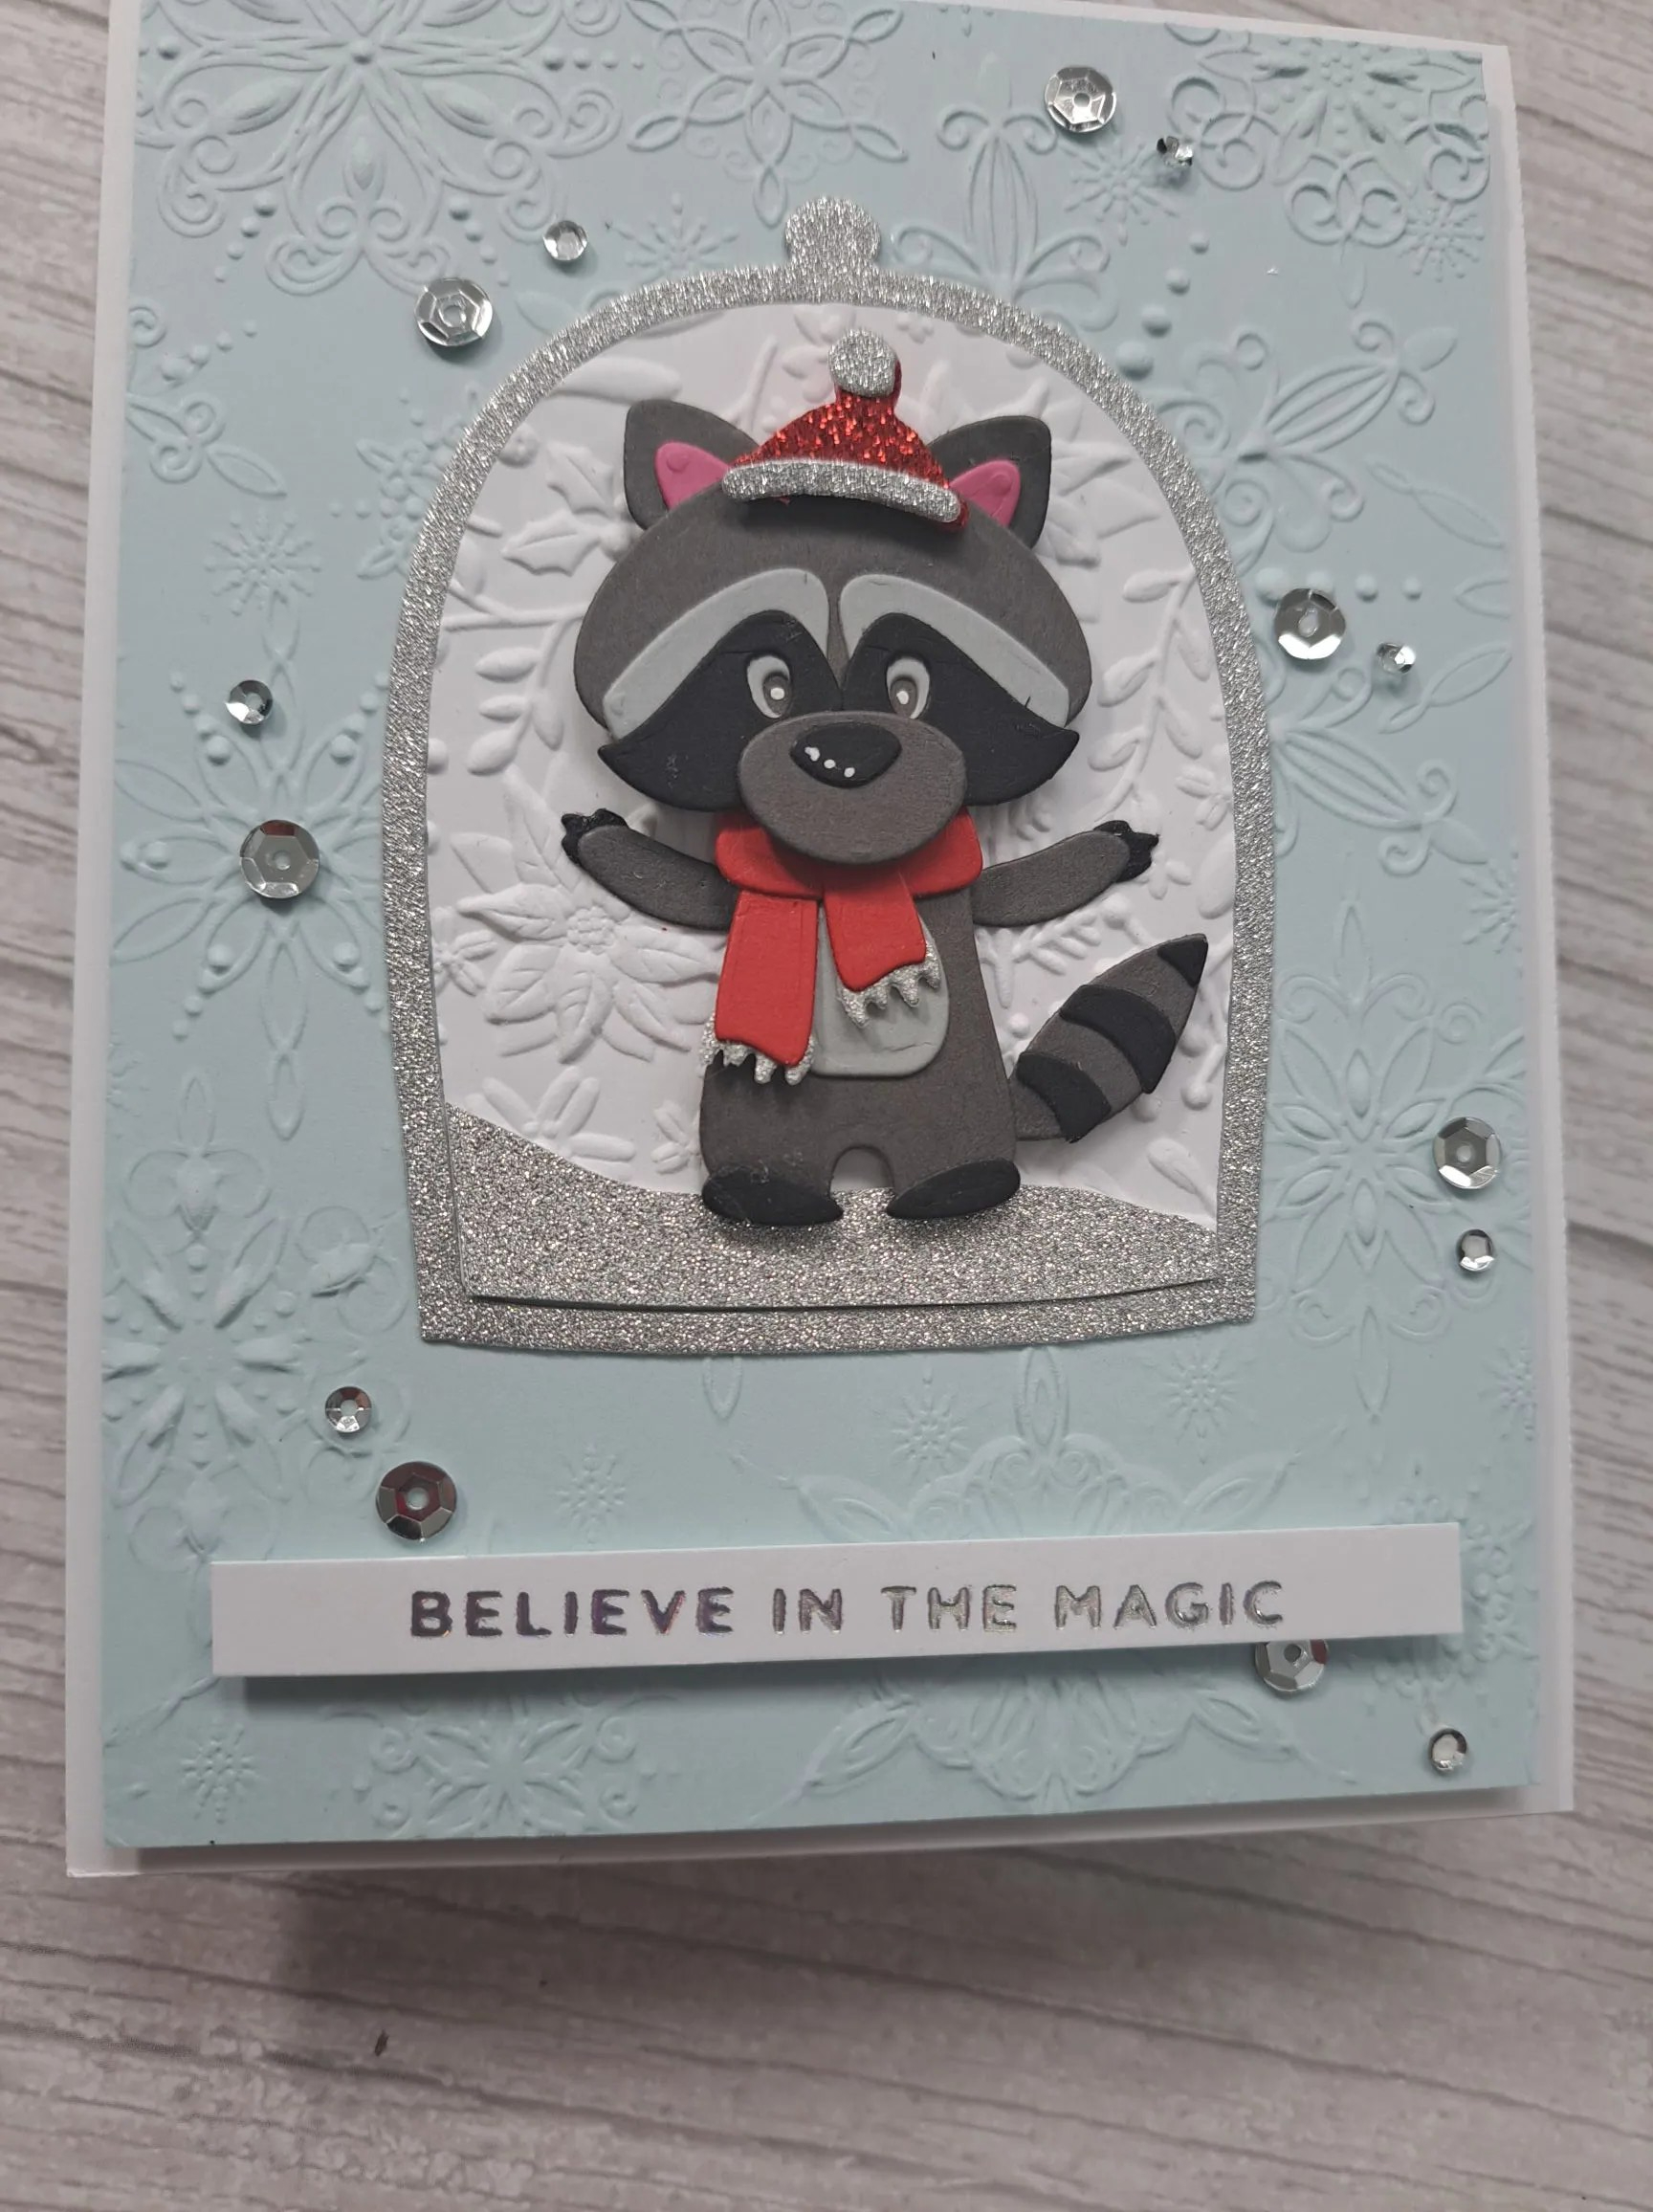
The background was created using a Simon Says Stamp embossing folder and some light blue card stock. I cut that down slightly and adhered with 3D foam to the card base.

I die cut the ‘Christmas Bandit‘ from Spellbinders layered together – fiddly but I persevered – and added some red glitter foam and silver glitter card for the hat.

I used another Spellbinder die set for the cloche, the frame itself from silver glitter card, and I die cut it again to get the white inner piece, and dry embossed that with another Simon Says Stamp embossing folder. I created a hill by cutting some glitter card to size.

The sentiment is a silver foiled strip, and I chose that sentiment because who doesn’t want to believe in the magic of a Christmas raccoon…….?

I hope you can come and join the team with your Christmas creations. xx

I shall be entering th3e folloowing challenges:

Inkspirational Christmas in July

My Time To Craft ChristmasChristmas and Christmas animals

Crafty Animals anything goes with an animal

Country View Challenge 4 legged friends

Merry Little Christmas Challengeanything goes Christmas

Ho Ho Ho

Hello once again. A new challenge has started at The Holly and Ivy Christmas Challenge. The theme is always ‘anything goes Christmas’. Here is my card:

The snowflake background was created using a Simon Says Stamp embossing folder with blue card, then swiping some white pigment over the top for highlights.

I cut this down slightly and adhered to a white card base.

Now onto the construction of the main image – lots of die cutting and layering, using different combinations of red and gold card stock.

I added some silver glitter foam die cuts to the hat and the cuff of Santa.

I hope you can come and join us with your festive creations. xx

I shall be entering the following challenges:

Most Magical Time of the Year anything goes Christmas or Halloween

Die Cut Divas die cuts and critters

12 Months of ChristmasChristmas – option inspired by Christmas Song

Inkspirationalemboss your background

Sparkles Forumno stamping allowed

Flowery Birthday Truck

I was inspired by a few challenges to create the following card:

One of the challenges I am entering was to create a birthday card with a car or a truck. I knew I had one or two somewhere, so I searched the Color My Life app and found this truck which came with last year’s Spellbinders Advent Calendar.

I die cut the truck with Concord & 9th card stock, then added the black and gold wheels. I added some light blue card stock to the windows.

The background was created using a piece of Spellbinders patterned paper which has some gold embossed detail to it, and a dry embossed strip – another Advent Calendar item – placed at the bottom to ground the truck.

The flowers are also from the Advent Calendar – die cut and assembled as you see – and added to the card so it would seem they are bursting from the back of the truck.

I added a foiled sentiment strip to the embossed area, and a couple of sequins, also adding some faceted gems to the centre of the flowers.

Another quite fiddly creation – but again – very satisfying.

I shall be entering the following challenges:

Addicted To Stamps and Morebirthday

Krafty Chicks occasions

Crafty Catz anything goes – option of for a baby not taken

Pinspirationalbirthday with a car or a truck

CYHTP embossing folder – option of butterflies not taken

Beautiful Blossoms flowers

Friendly Hibiscus

Hello once again. I have been playing with a new die set from The Greetery:

The ‘Botanicuts Hibiscus’ is a layering die set, with three flowers, a bud, and some leaves. I die cut the layers with Concord & 9th card stock, to create this central design.

I added a previously foiled back panel, created using a Spellbinders foil plate, and added a foiled sentiment – a black strip so it would stand out.

I feel it’s quite a simple card, with many layering elements. I gave the flower petals some dimension by curling them slightly.

I also toyed with the idea of adding some shading to each of the flower petals and leaves with Copic markers, but decided to keep the colour of the card stock as it was for a cleaner finish.

I shall be entering the following challenges:

Color Throwdownaqua, red, yellow

Simon Says Stamp Wednesday Challenge lots of layers

Allsortsanything goes option birds and/or butterflies and/or blooms

Beautiful Blossomsflowers

Sparkles Forumno stamping

Merry and Bright Lantern

The Holly and Ivy Christmas Challenge has started their next challenge. Our theme is always ‘anything goes Christmas/festive’. Here is my card:

The background panel is dry embossed using a very old We R Memory Keepers embossing folder, I then layered that with a gold panel – gutting the centre by die cutting the gold label die, to which I also added a white dry embossed layer.

The images and florals are all from Spellbinders, another mega die-cutting session, then layered together. I first adhered the lantern, then played with placement of all the images until I was happy, and adhered them with a mixture of 3d Foam and wet glue.

I then added some gold gems to the centre of the poinsettias, and a foiled sentiment.

I hope you can come and join us with your Christmas/festive creations. xx

I shall be entering the following challenges:

Merry Little Christmas Challengeanything goes Christmas

Inkspirationalseasonal

Peace On Earth anything goes Christmas

Creative Inspiration anything goes

Most Magical Time Of The Yearanything goes Christmas or Halloween

12 Months of ChristmasChristmas – option inspired by Christmas song not taken

Triple Bbirds and/or butterflies and/or blooms

Mistletoe Kisses

Hello there. ABC Christmas Challenge has reached the letters ‘J‘ and ‘K‘, and we want to see your Christmas/Festive creations with ‘J’ for Jingle Bells, and/or ‘K’ for Kisses (under the mistletoe)’. Here is my card:

I have some slimline card bases in this gorgeous dark blue and never think to use them – so I grabbed one, and embossed the front half with a Spellbinders embossing folder.

The birds, bird house, and all the floral elements were die cut and assembled, and the hardest part was deciding on where each of the elements were to go. Thank goodness I went for slimline so I could get everything on there.

I’m looking forward to seeing your Christmas/Festive makes following our themes. xx

I shall be entering the following challenges:

Beautiful Blossoms – anything goes flowers/florals

Sparkles Forum emboss it

Fab’n’Funkythings with wings

Creative Fingers anything goes

2 Crafty Critter Craziesanything goes with a critter

Most Magical Time Of The Year anything goes Christmas or Halloween

12 Months of Christmas anything goes Christmas – option Christmas Decorations not taken

Merry Little Christmas Challenge anything goes Christmas

Especially For You

Hello, some crafty time today created this card:

I chose a 5×7 inch card base so I could get the basket and the floral image in their full glory.

The basket is due cut from a light brown card stock with the Spellbinders die you see, and the edges inked slightly for a little dimension.

The floral image is from The Greetery, a stencil and die set. 6 layers in total, but I kept the floral layers two shades of yellow, with dark green centres and the leaves were all inked with the same mint colour from Pinkfresh Studio.

The main die cut image was inserted into the top of the basket and attached to the card base with 3D foam.

The die set also cuts some flowers, so I also ink blended those small flowers with a yellow ink, them added them to the top of the basket.

I thought some extra leaves were needed, so I searched the Color My Life app and found these leaves – also from Spellbinders – blended the mint green onto w white piece of card and die cut those extra leaves, adding them here and there throughout the back of the central image.

I added some clear gem thingies to the centre of the extra flowers, and also added three around the central image.

The sentiment is a previously foiled strip:

I shall be entering the following challenges:

Color Throwdownyellow, dark green, mint green, white

Lil Red Wagonat least 2 layers

Daring Cardmakers bloom and grow – flowers and/or plants

Craft Rocket layer it up

Triple Bbirds and/or butterflies and/or blooms

Ally’s Angels anything goes

Birdie Birthday

Hello. Happy Little Stampers anything goes birthday challenge has returned after a little break, and the first challenge for this year is now live.

Here is my card:

I started by taking a white panel and used the Altenew ‘Scalloped Frame 3D embossing folder’. The folder is the full circle, but I only wanted half of it on my card. It came as part of an online class with them – another class I haven’t fully completed.

I then took some Spellbinders dies and die cut, layered, re-arranged, die cut more, re-arranged again – you know it can get sometimes – until I was happy with the layout.

I used a combination of 3D foam and glue to adhere and layer the elements, and added a debossed sentiment from Spellbinders. I find I am loving these debossed sentiments. Sometimes my die-cutting machine has a little too much pressure and the words actually cut through the piece of card – no worries – either cut another, or layer a piece behind. Sorted…..

A Some of these dies came from the Spellbinders Advent calendar – and I will certainly be signing up for the next one…….

I hope you can come and join us with your ‘anything goes birthday’ creations. xx

I shall be entering the following challenges:

Crafty Gals Corner – add a heart (gold hearts in semi-circle die cut)

Seize The Birthday – anything goes birthday (option of red and white and one other colour not taken)

CYHTP – embossing folder – option of things with wings taken

Creative Fingers – anything goes

Crafters Caf̩ Рcute

Happy Fruity Birthday

Having just been a part of the Pinkfresh Create and Connect event this weekend, and being able to do two classes, I did watched a third class this morning and whilst the instructor was using more realistic colours, I decided to use the colours for one of the challenges I will be entering (sky blue, pink, red):

I gold heat embossed the stamp – a huge slimline stamp – then used the matching die to cut out all the elements. Before choosing which of the elements to use, I die cut the frame – also from Pinkfresh and a previous event – and die cut the inner piece but then dry embossed that inner piece with a Spellbinders embossing folder, and ink blended just a little of the light blue in the bottom corner – to try and ‘connect’ the images and the sentiment.

I inserted that piece then played with which elements to use, where to use them, how to arrange them. I chose a sentiment from this recent event, then adhered all the elements with a mixture of 3D foam and wet glue.

This stamp, die and stencil set also comes with the matching washi tape – another huge roll – and the die cuts out all the elements – playtime for another day…..

I shall be entering the following challenges:

Krafty Chicks – occasions

Here Is A Place To Startanything goes

Beyond The Blueuse one or more stencils – (at least 6 layering stencils with this stamp set)

Cupcake Inspirations – sky blue, pink, red

CYHTP – embossing folder – (option of things with wings not taken)

Floral Frame Birthday

After a busy week, I was able to create a card over the past couple of days, and completed today:

The base colour is cream from my stash, a Creative Expressions cream coloured card stock. I first took an A2 panel and dry embossed it with a Spellbinders embossing folder. I then attached this to the card base.

I then took another cream panel, and ink blended the floral frame (The Greetery) using the layering stencils. I used a light pink for all the flowers, stamping them twice for the base layer, and then for the added detail layer – using the same light pink – stamped three times to create a darker pink. I then used the outer and inner edge dies to cut the frame out.

I then took another stencil set from The Greetery and ink blended the two yellow flowers, using the die panel to cut those out.

I was going to attach the frame straight onto the embossed panel, but I thought the centre looked too busy with the dry embossing behind it, so I die cut the outer edge of the frame from another piece of cream card stock and attached it to the back using 3D foam tape – to create a more solid centre, and create some dimension and shadow behind the frame.

The yellow flowers were inserted, the sentiment stamped and the sentiment strip adhered with glue on the edges, and 3D foam on the centre.

I added some yellow dots to balance the yellow above the sentiment strip.

I shall be entering the following challenges:

Color Throwdownyellow, light pink, cream, green

CYHTPembossing folder option of hearts not taken)

Inkspirationaluse stencils

AAA Birthday birthday and use stencils

Unicorn Challenge birthday

Stencil Funstencils – option of hearts not taken

Beautiful Blossoms flowers and mood board