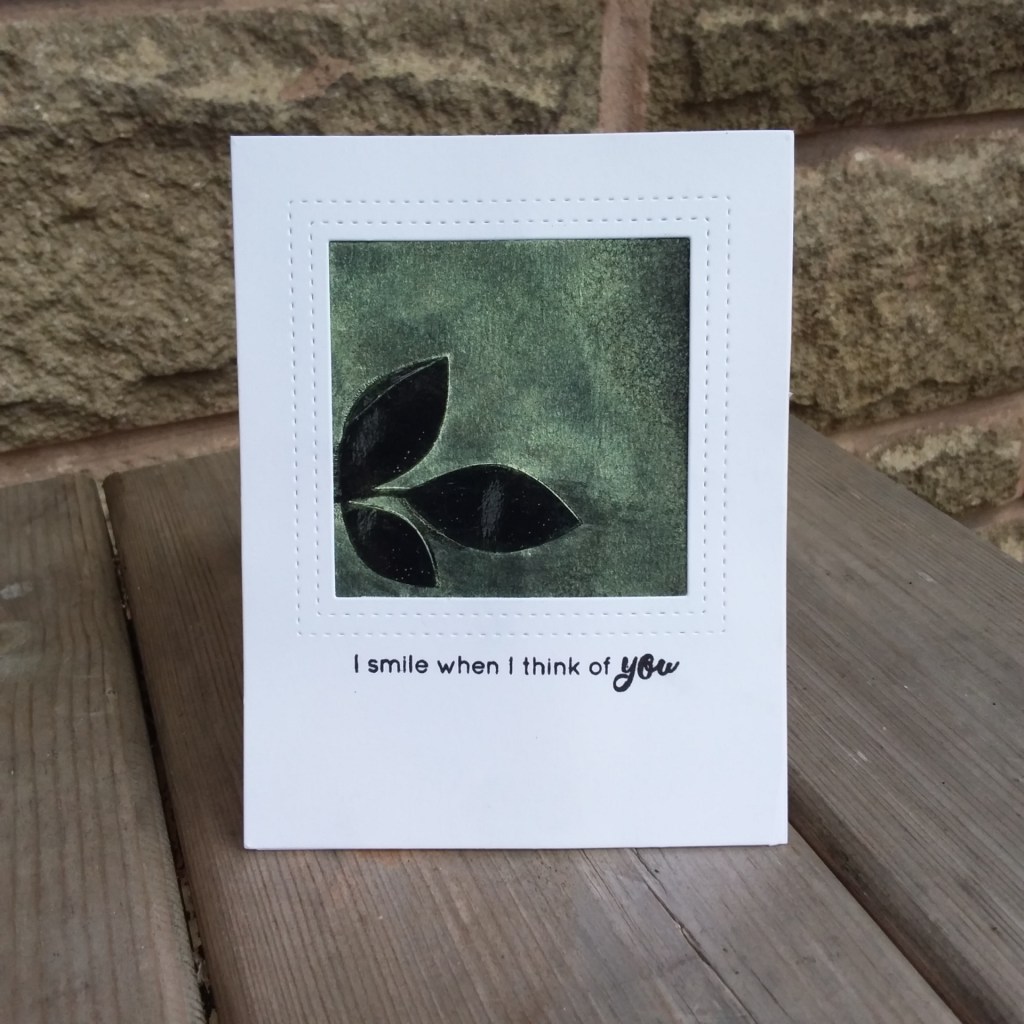
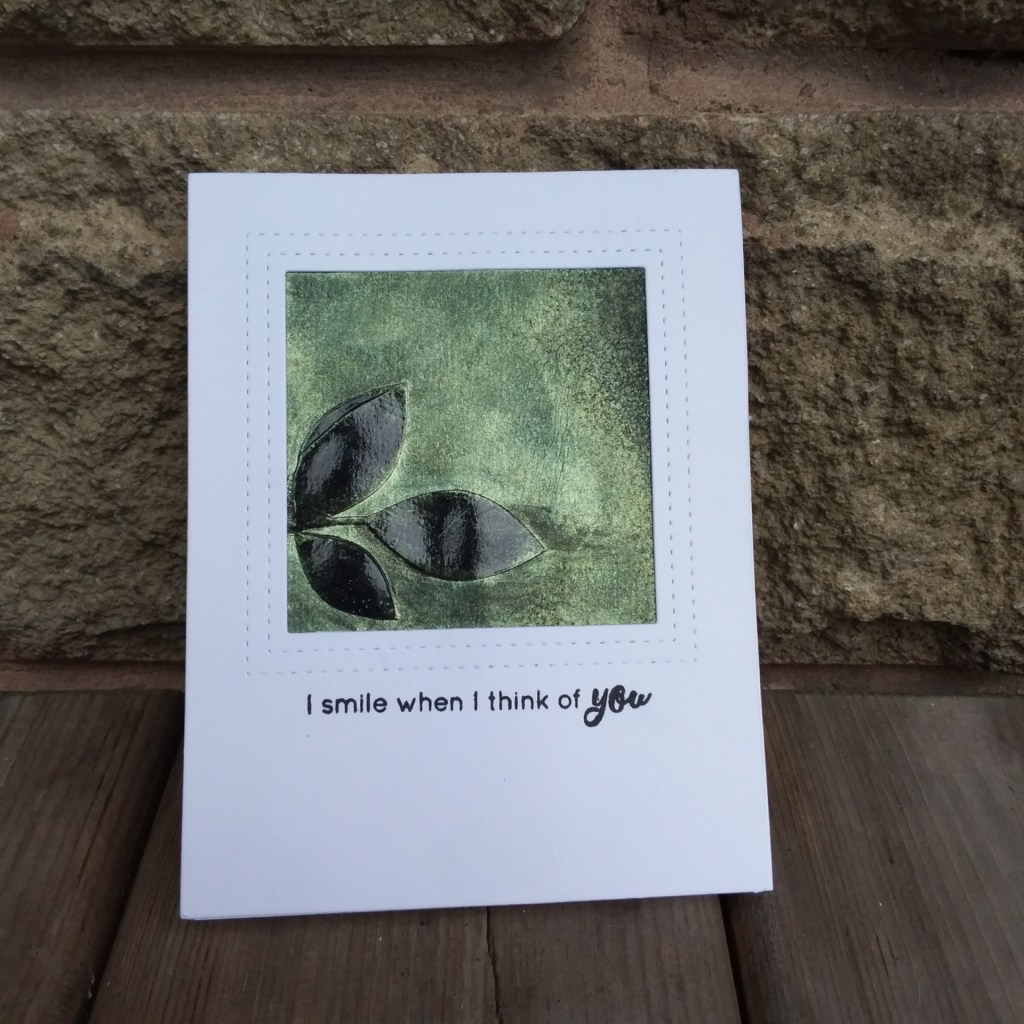
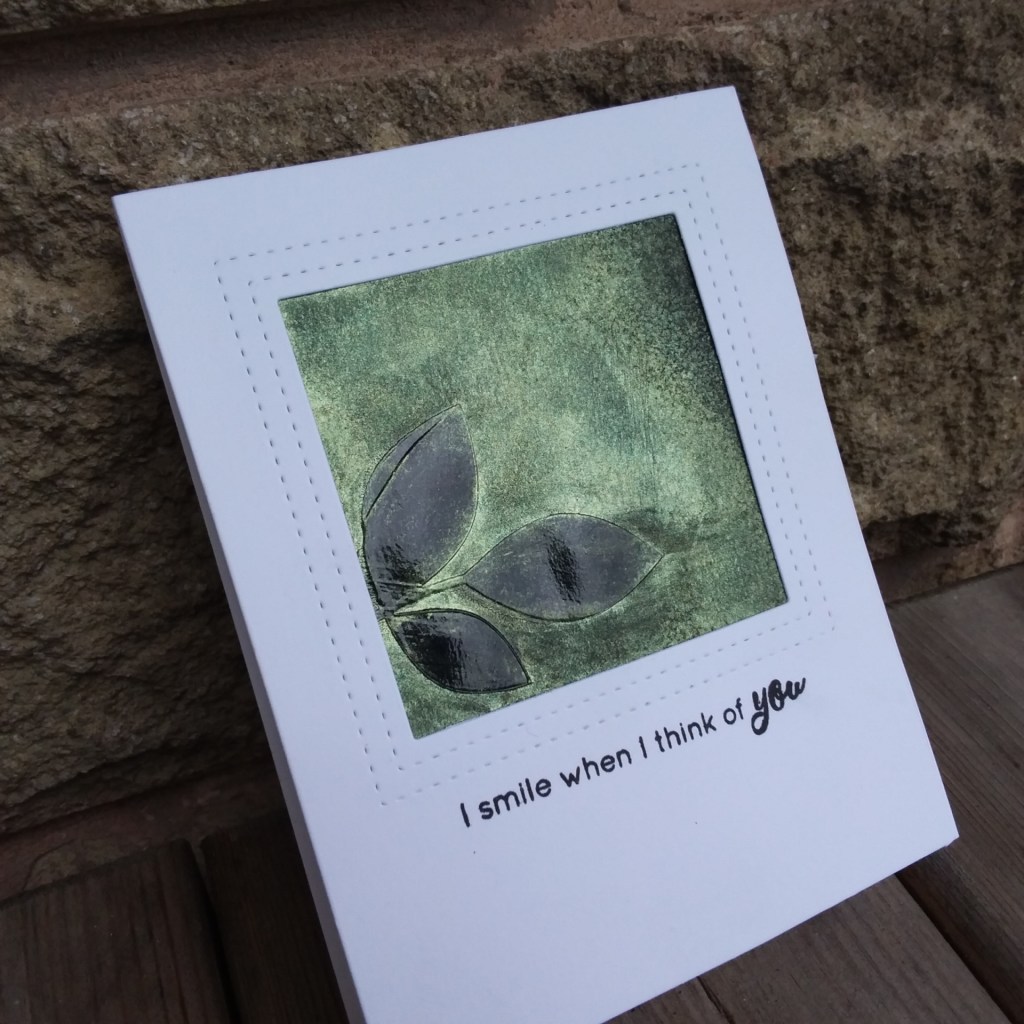
I tried to capture the shimmer and shine on the leaves, and the Lumi spray.
I took a black piece of card and stenciled some leaves using Indigo Blu ‘thick slap-it-on’ and let it dry.
I then sprayed – using short and sharp sprays, and then some longer finer mist spray – to try and get some variation in the drips and drops. The ‘slap-it-on’ resisted the spray – for the most part – leaving a black silhouette of the leaves.
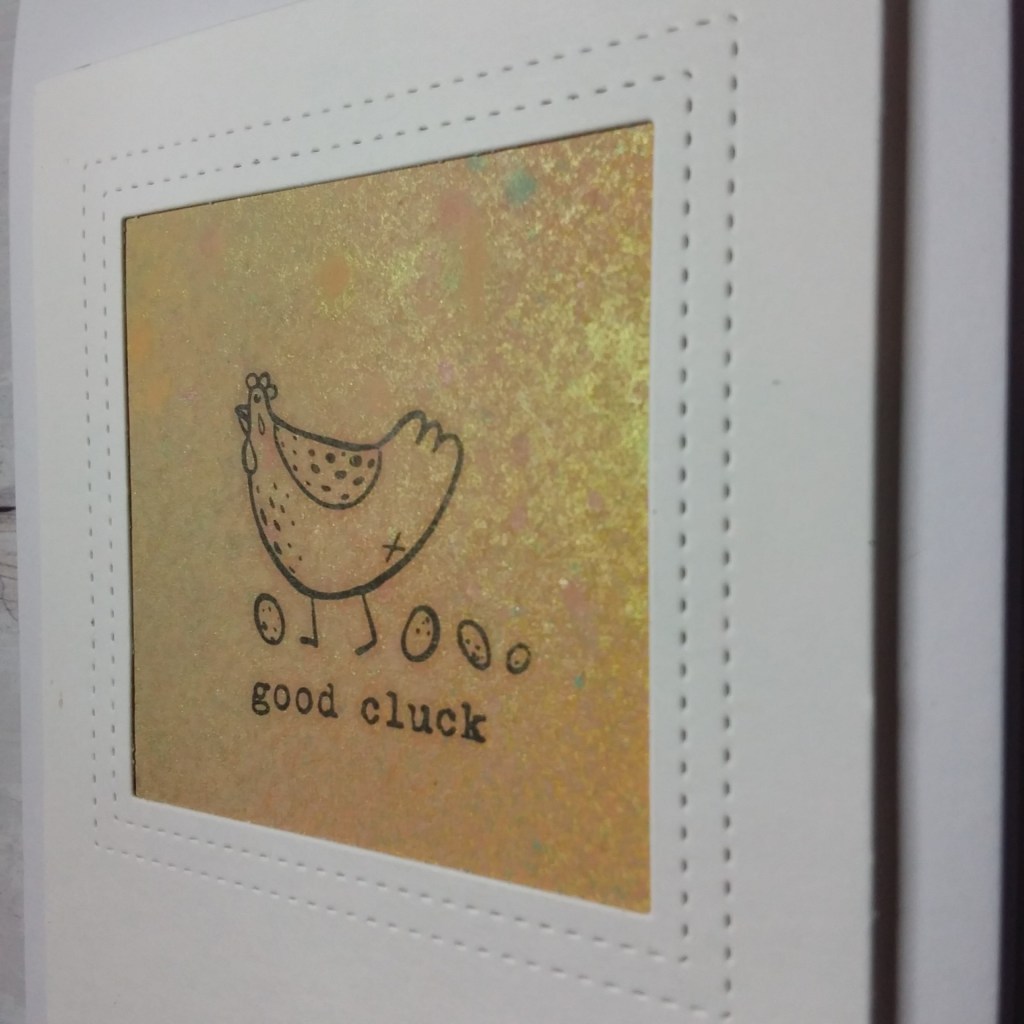
Whilst this was drying, I used the Reverse Confetti cover panel to create the window, and taped the square black and green image underneath – adding the whole to a white card base.
Hi there. I have a CAS card to share today using a background made with Distress Oxides Sprays, and Lumi Spray from Craftbox UK:
I made a few backgrounds at the weekend using the Tim Holtz Distress Sprays. I have had these for a while and not really played with them, but I like more muted look to them as compared to blending the Distress Oxide inks.
I also sprayed some Lumi Spray in green on top – the green became more muted – but the shine remained.
I cut a square out of the yellow toned piece of card, then stamped the chicken image, placing the square below the opening in the Reverse Confetti cover panel die.
I think a very CAS card, but quite effective with the yellow and shiny tone.
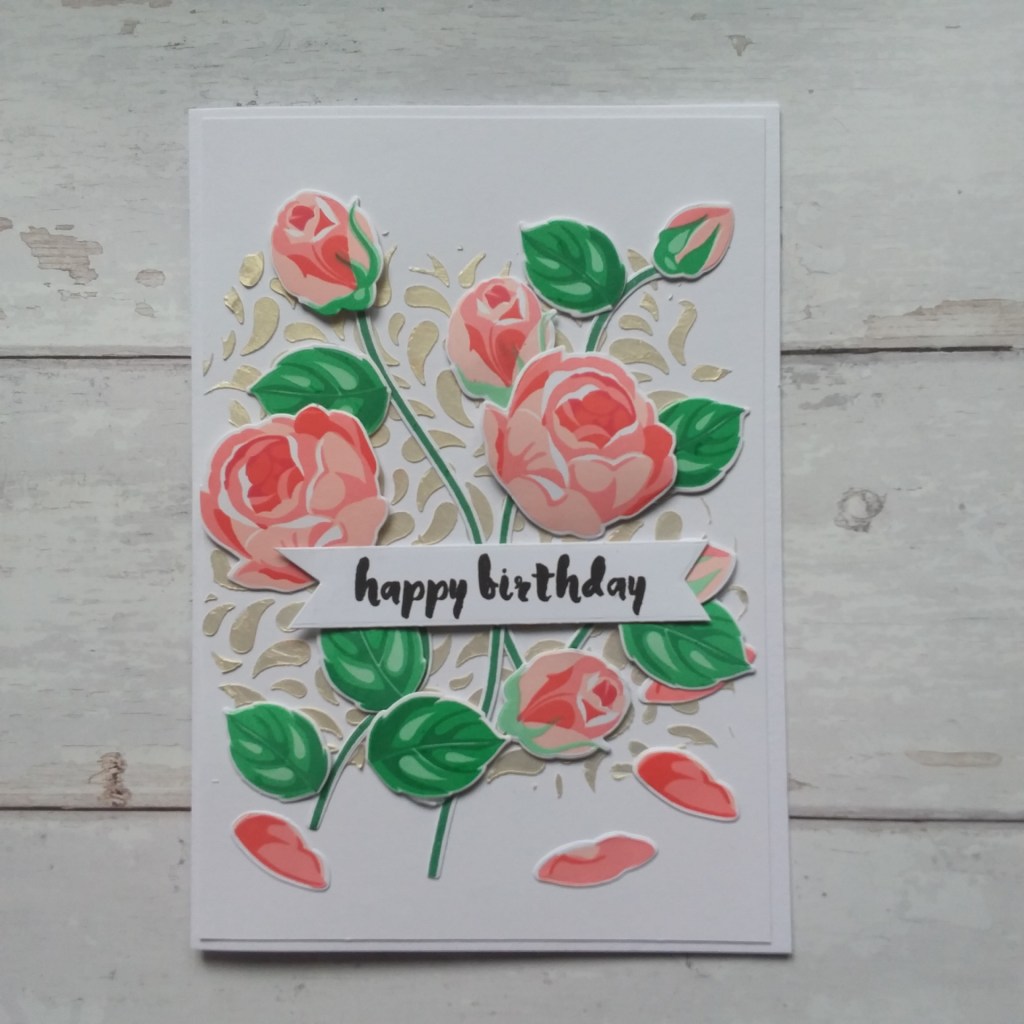
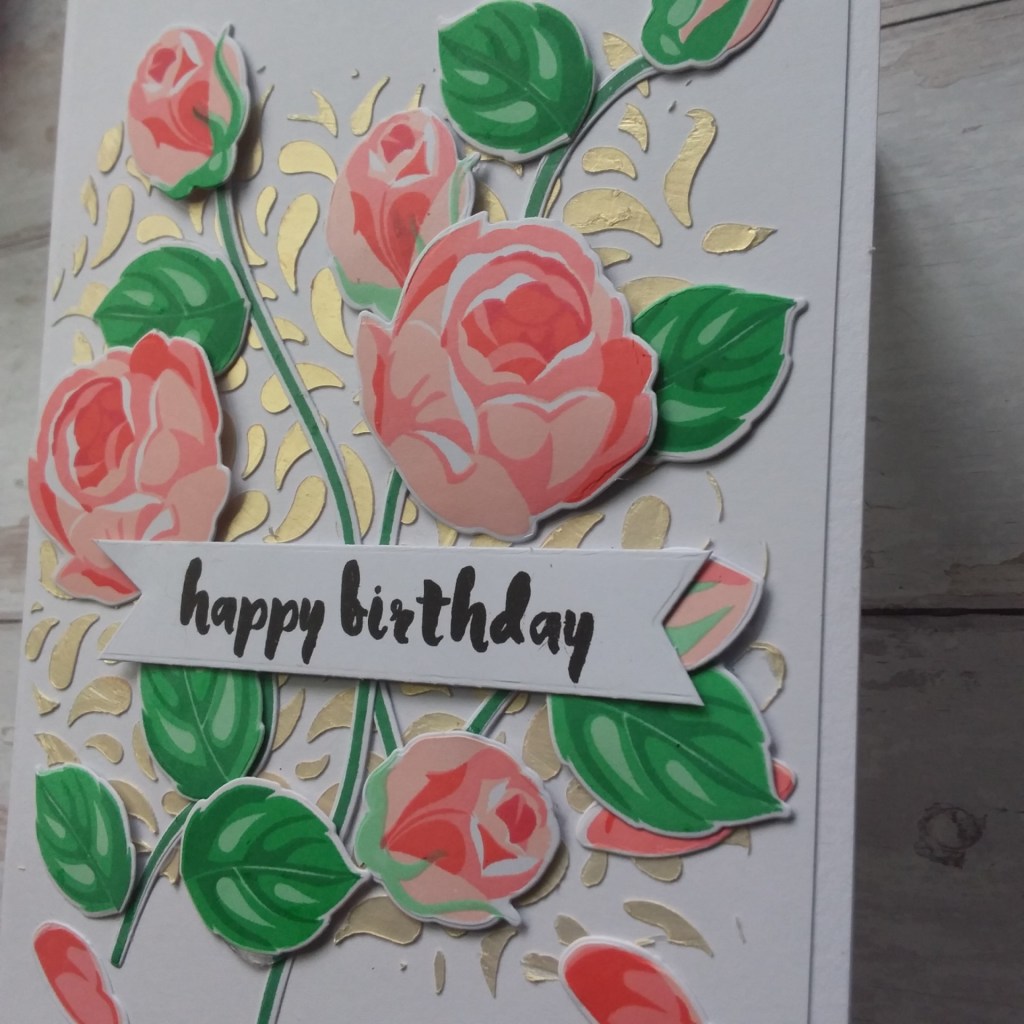
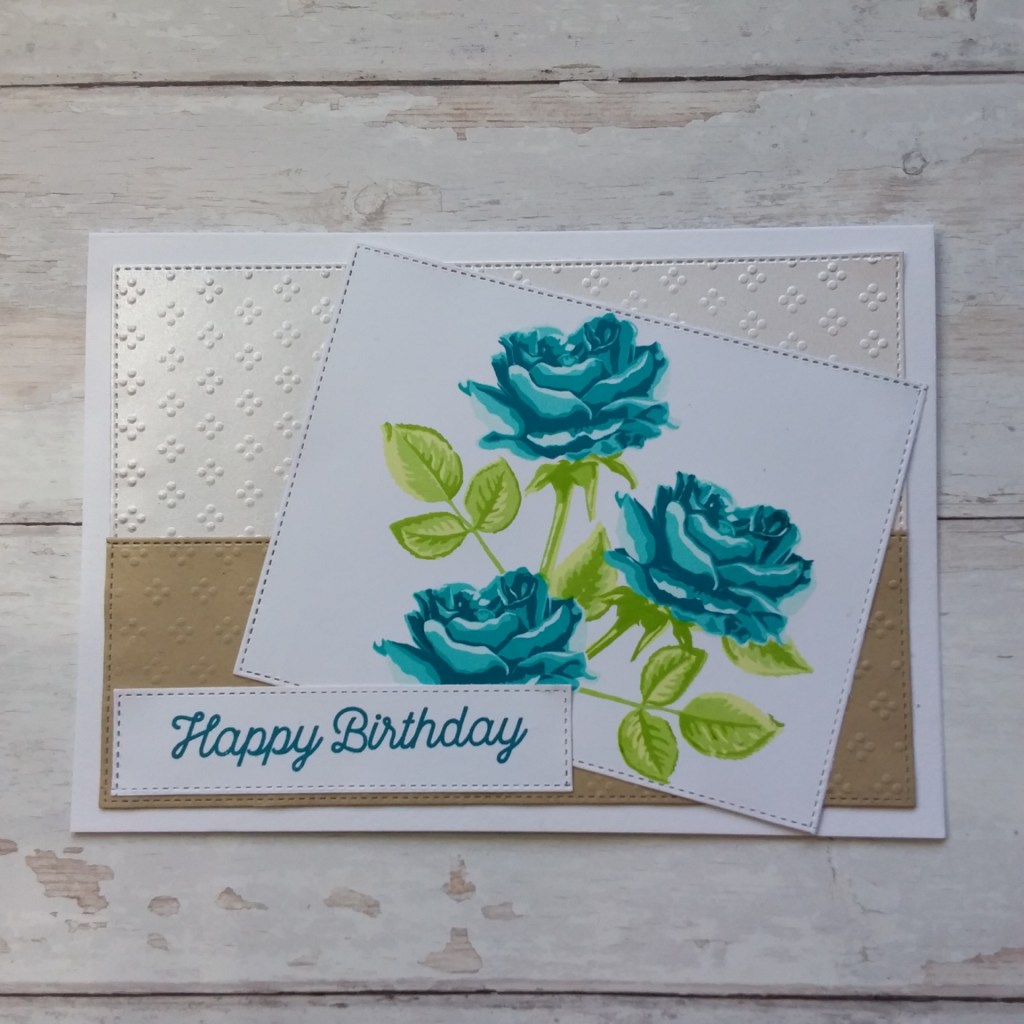
Hello yet again. I have a card to share absolutely brimming full with roses:
I started by using a Stampin Up stencil and Cosmic Shimmer Texture Paste on a base layer, and whilst that was drying, I stamped and die cut the Altenew ‘Rosy Outlook’ images several times.
The sentiment is also from Altenew – forgetting that the ‘y‘ from ‘happy’ has a fault in it – so I took a black art liner pen and coloured the ‘fault’ in.
I played with the arrangement several times, and used 3D gel and my ‘go-to’ glue – the Tonic Deluxe adhesive.
Hello once again. I have a CAS card to share today, which includes some fancy masking – for me it was fancy, anyway:
I mentioned previously finding the Tracy Hey Designs web site and the super-dooper cute stamp sets she has. This was another of my purchases, and fits right in with a few challenges I have been trying to create for.
I cut the base layer with some stitched rectangle dies, then stamped my dragon image with Gina K Amalgam ink. I stamped the image again on some masking paper, and set to fussy-cutting……..I don’t like fussy cutting, but when I knew I wanted to do some masking – you have to do what is required, don’t you?
So – this image – triangle spine thingies, star horn thingies………………not the most straight-forward I have cut out….but I must admit it was worth it….
Once masked – before I coloured just in case I messed it up – I found a circle stencil, and inked Distress Oxide through the stencil – And I just love when you reveal…….looks messy until you peel everything back, doesn’t it?
As I was happy with the masking and blending, I took some Copics and coloured as per the colours for one of the challenges – just a couple of the greens, and one yellow – simple. Then I took my colour-less blender and dotted it around the dragon – to try to give an impression of scaly skin. Do you think it worked?
So – the sentiment – on the same stamp set! I know – how fabulous is this sentiment? Love it – and there are more on that set I can’t wait to get working with.
Why a dragon I hear you ask……well, I was born in the year of the Dragon – so that could be 1916, 1928, 1940, 1952, 1964, 1976, 1988, 2000 – or even 2012 – but I’m not telling!!!!
In fact – when I post to my Instagram – I’ll have a cheeky little quiz and pressie for a few people…..maybe you want to go and check it out…….
Apparently, the dragon is the only imaginary animal in the Chinese zodiac too……..and something about being hot-headed…..hmmm…..maybe!
Hello yet again. There is a new challenge starting at The Alphabet Challenge. We are at the letter ‘B’ – and we want to see your cards that are made for a Boy………..
Here is my card:
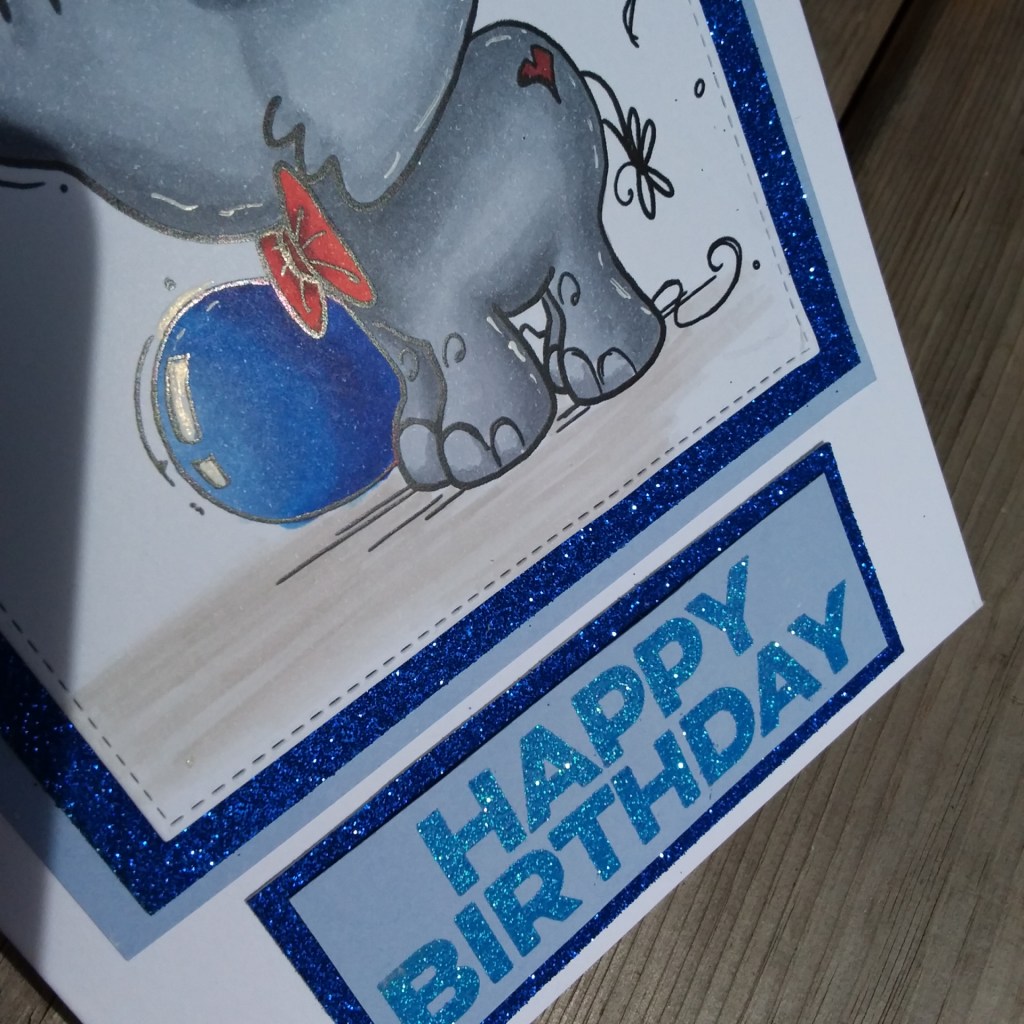
This is another challenge which was a challenge to me too. I don’t generally make cards for children, and struggle to know what to put together – but it;s all about being challenged, isn’t it? To maybe go outside your comfort zone?
I had a search through the Bugaboo website, as I have previously used their ‘Clyde Birthday’ digital image here – and found this very cute elephant digital stamp – so straight into my basket he went………
Once I had played with the size of the image, I printed him onto Make-It colour blending card – as per usual – then went at him with my Copics.
I obviously think of a blue card when I think of a young boy – rightly or wrongly – hence the blue balloons, but with some red to brighten the overall look of him.
I matted and layered as you see, and added a block birthday sentiment from my favourite sentiment set from MFT.
I hope you can come and join – I’d love to see what you create – and hopefully gain some inspiration for when I have make more cards for the youngest generation. xx
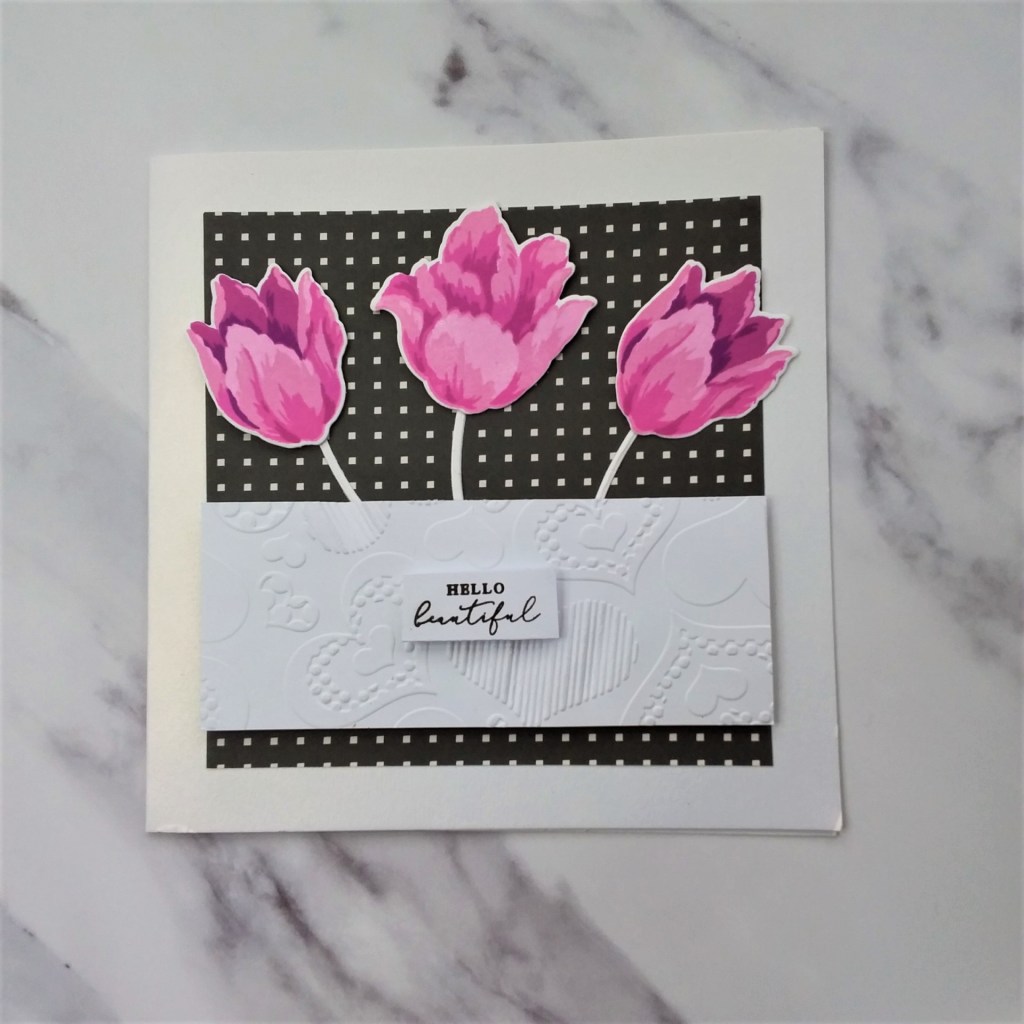
hello once again. A new challenge has started at Cardz 4 Galz, and this time we want to see your ‘black and pink’ creations. The creation can be anything paper-craft related, as long as it follows our theme – and you can enter up to three times.
Here is my card:
I stamped the tulips in a set of Altenew pink inks, then die-cut with the matching die set. I arranged onto a black and white background – I think the paper is from Stampin Up – then added a white panel I had embossed with a Crafters Companion embossing folder.
I hope you can come and join us this time round, and I look forward to seeing you in our gallery. xx
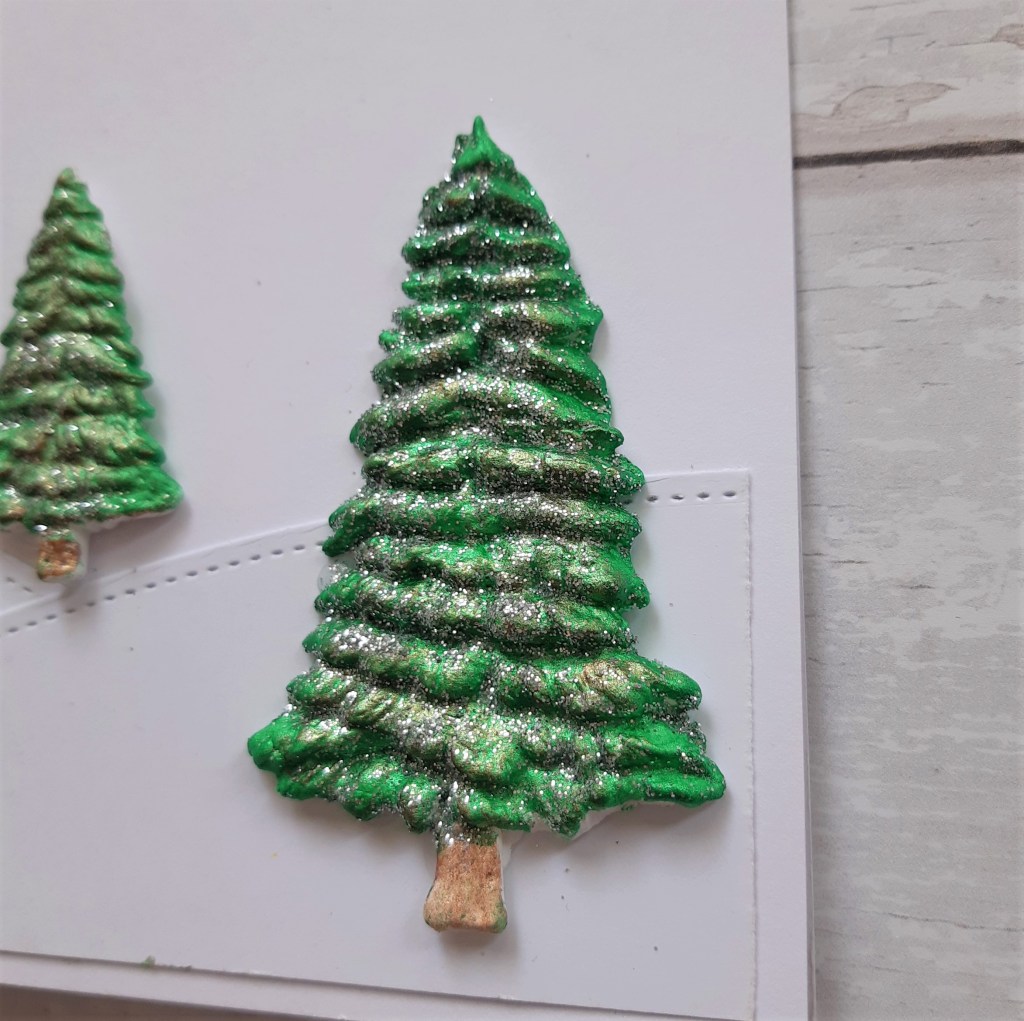
Hello there. There is a new challenge starting at The Holly and Ivy Christmas Challenge. The theme is – as always – anything goes Christmas. Any creation as long as it’s Christmas related. Here is my card:
The week before the lock-down, I went for a couple of hours to an air-dry clay workshop. I was so inspired by the moulds and the clay – I actually bought some clay from the lady – Jan Mason – and went onto Katy Sue Designs web site and bought some moulds.
During the workshop – I realised my hands get too warm and therefore sticks to the clay – so I tend to use the corn flour in the moulds, and also put some on my fingers during the course of playing – this seems to work to no detriment……..
I used the fir trees mould, some air dry clay, then let it dry until the next day. If you know me – the waiting is the most difficult part – so I made quite a few models of different types – and have put them away for future use.
The next day, I covered the clay in white gesso (not sure if you have to do this, but I did) then used some Indigo Blu paints in green for the base, then added ‘Goldfinger’ lightly on top, and then added some glue and glitter for some added bling and shine.
This clay is very, very light, so I felt there would be no issue with adding this to a card.
I played around with some dies, and used Lawn Fawn stitched border dies to create a couple of hills, then added the trees with some glue.
I think I’ll be playing with the other embellishments I made quite soon, especially in the current lock-down period – but I may have to think and play even more with the paints and other effects which are possible.
I hope you can come and join us, and I look forward to seeing you in our gallery. xx
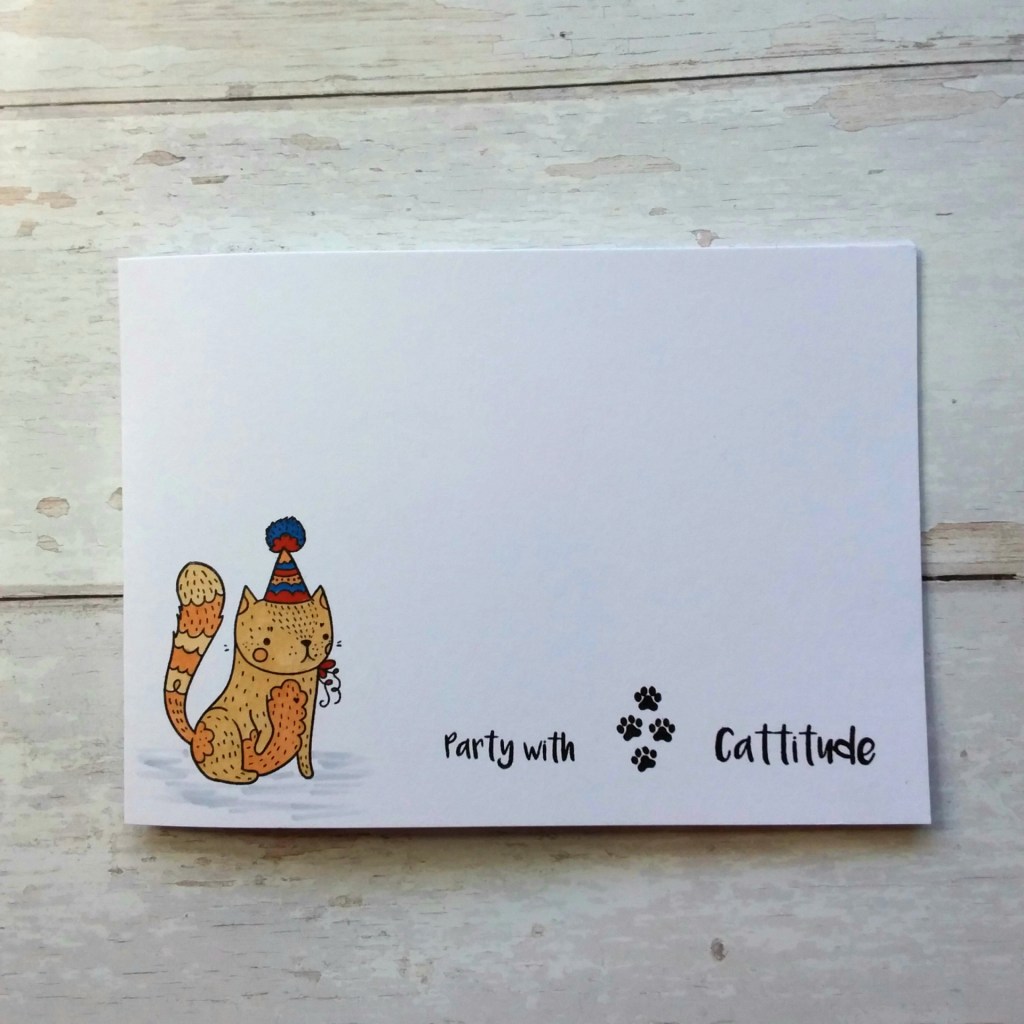
I have a CAS card to share today using a newly purchased stamp set from Funky Fossil Designs:
This also turned out to be a one-layer card…………
Once the image and sentiment was stamped with Gina K amalgam ink, I coloured with the three colours from the JUGS challenge. As it is one layer, I couldn’t do much shading – in fact none at all. I knew these Copics would bleed onto the back of the page – so I took it very gently, and not hanging around with the Copic too much.
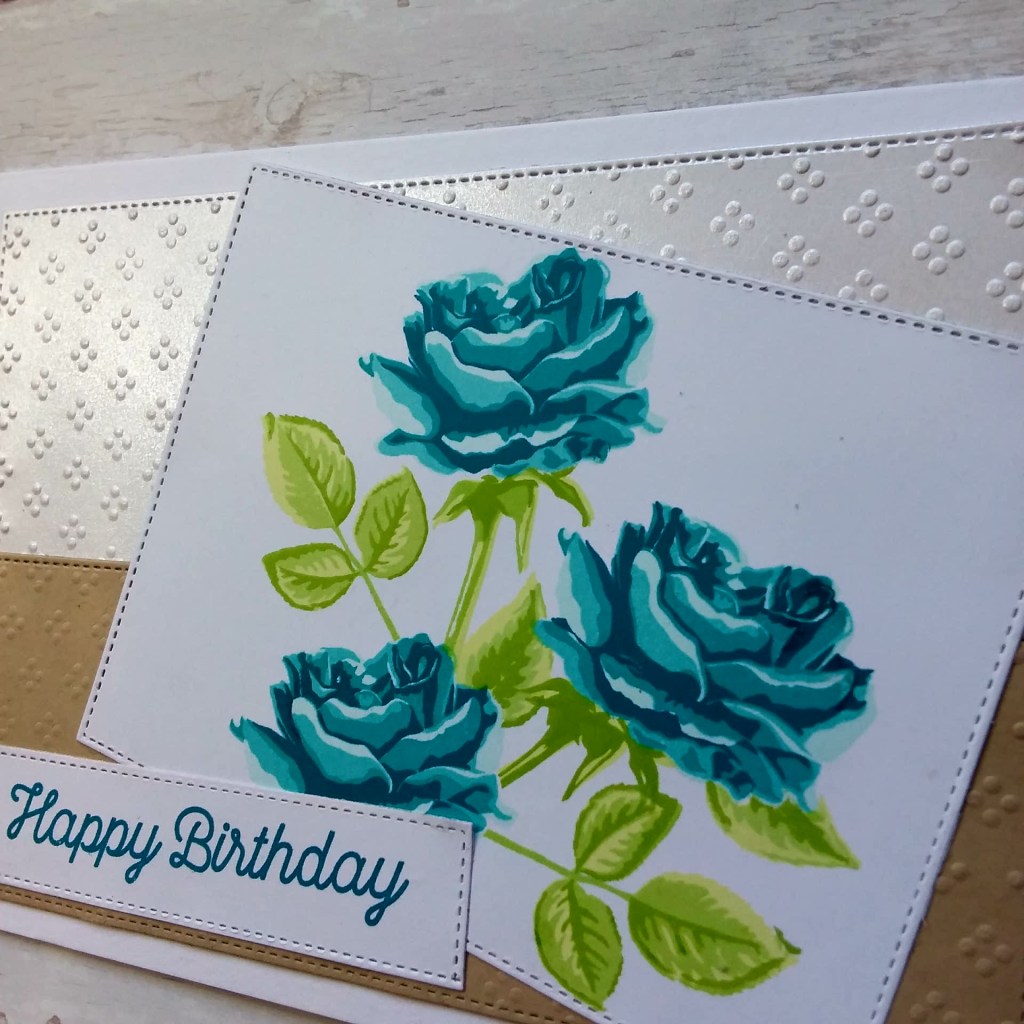
I have a card to share today, as I found this stamp set again when I was cataloging my stash on the newly released Android version of Color My Life. I have been waiting for this app to become available on Android since I saw Justine Hovey’s video about it. You can see her video here.
Here is my card:
I stamped the roses from Altenew’s ‘Classic Beauty’, then masked them off to stamp the leaves, using Altenew inks.
I then used a stitched die from ‘Card Making Magic’, but as the rectangle was a little too large, I then used one edge of one of the dies to cut the rectangle down – so the rectangle itself was outside of the die cut area.
The dots embossing folder from Tattered Lace was used on some light brown card, so the background could be neutral, and also some Centura Pearl white/silver card stock – to add a little shine to the background.
The sentiment is from my ‘go-to’ birthday sentiment set from MFT.
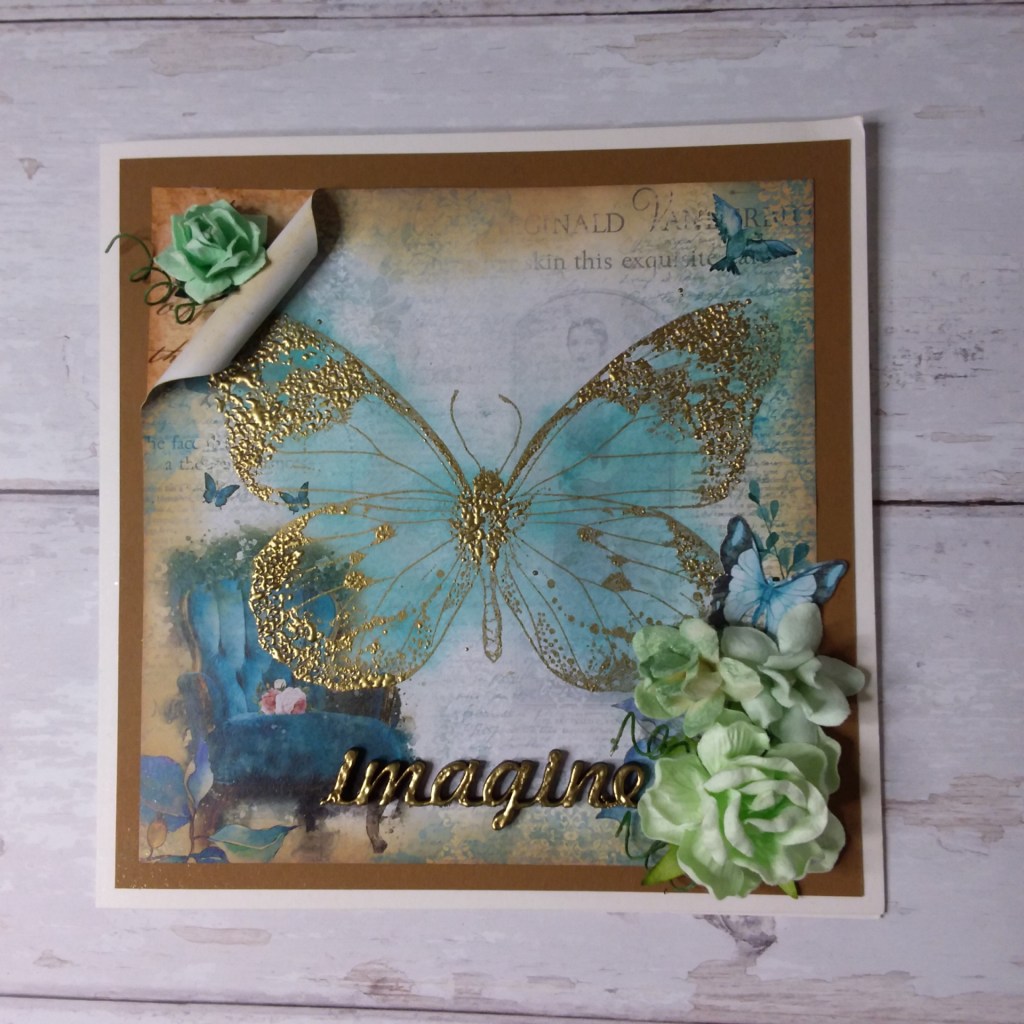
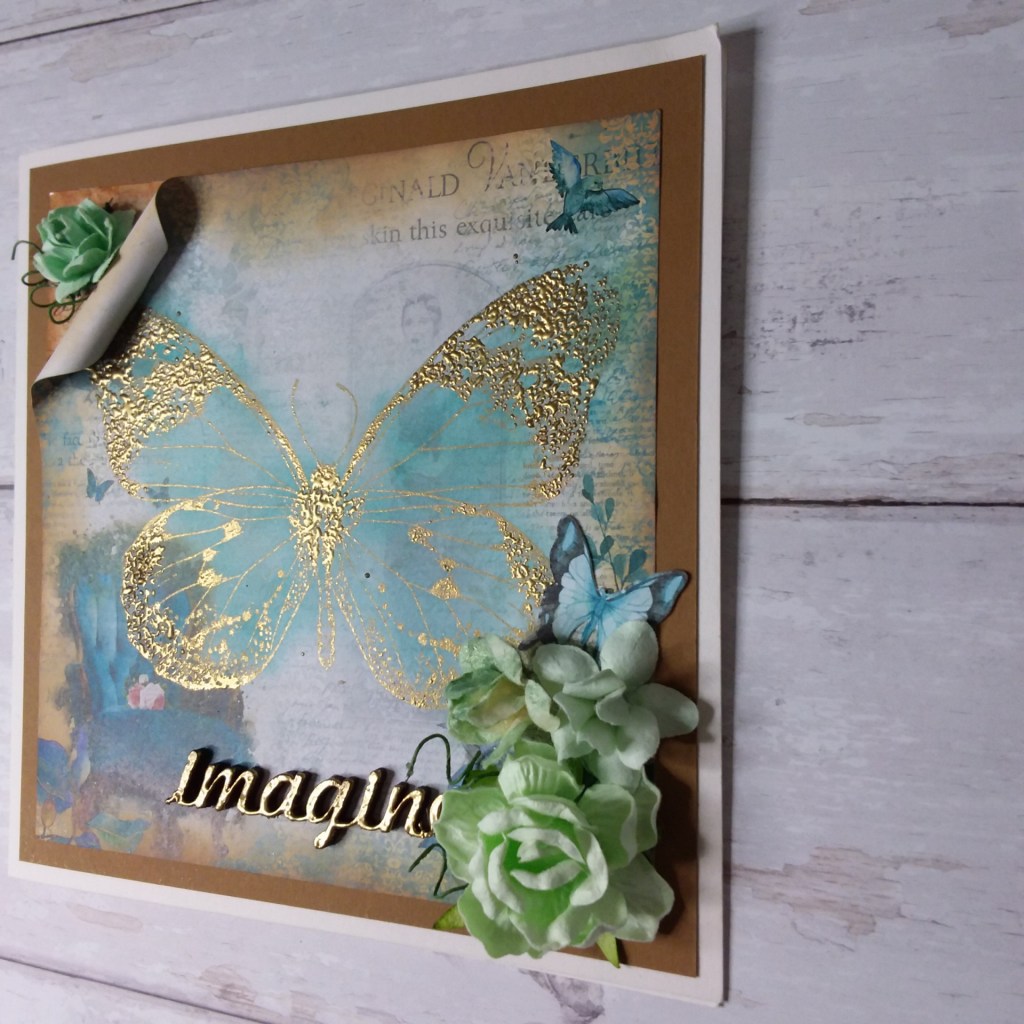
Hello once again. I have been playing with different products, recently received in the mail – so I thought I’d get away from the CAS this time – and went all in – for a card, anyway.
Here is the card:
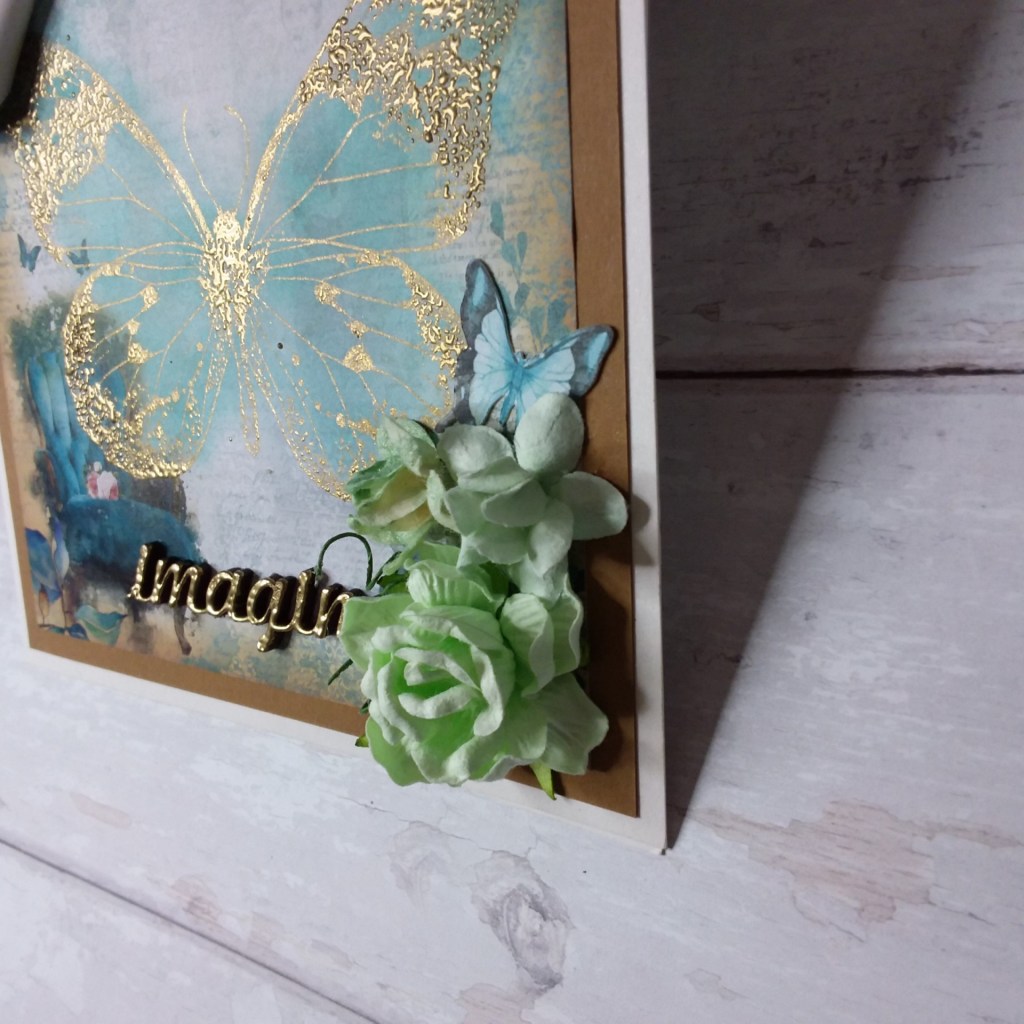
I began by stamping the Indigo Blu ‘Big Butterfly‘ onto some patterned paper from Craft Box. I used Ultra Thick embossing powder as I wanted a shabby looking butterfly – a little uneven in the embossing. I used the same embossing powder for the Funky Fossil MDF word ‘Imagine’.
I used Distress Oxides ‘Vintage Photo’ and ‘Old Paper‘ to add some shading to the outer edges for the top sheet of paper, and also added some shading to the the roll in the upper corner. Another little piece of patterned paper under the corner, then some brown card-stock as the layer on top of the base card.
I used an Altenew ink to lightly brush across the butterfly to bring more attention to it, then added some flowers from the same Craft Box kit, as well as another butterfly near the flowers.