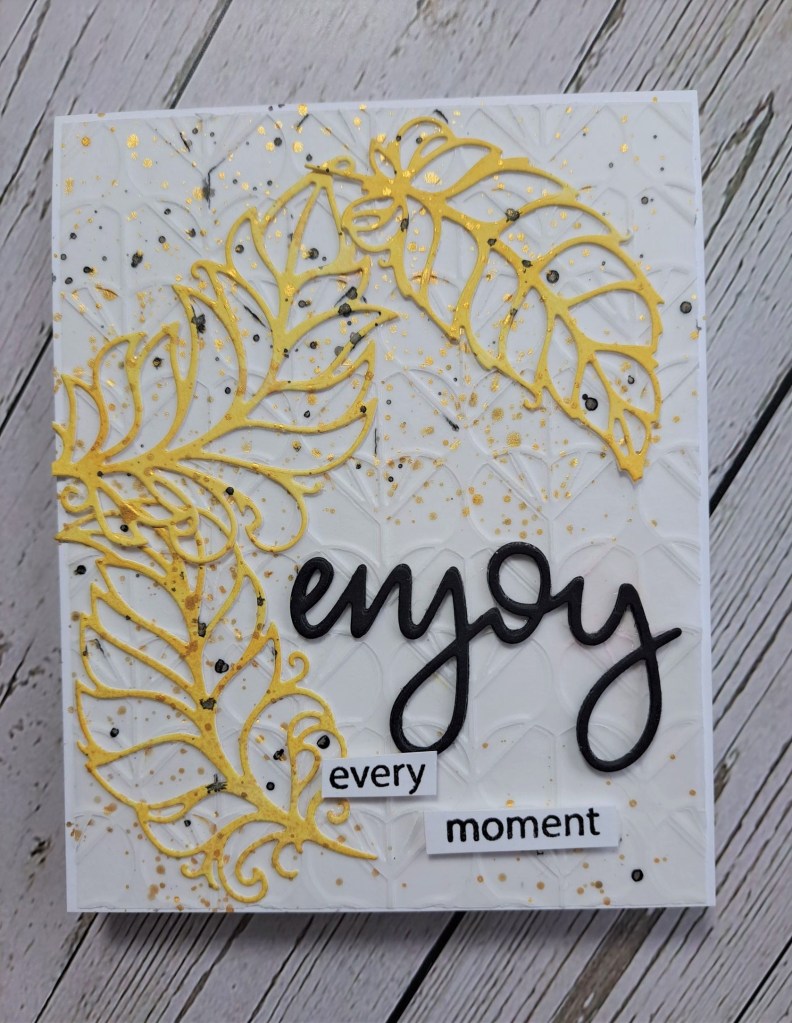
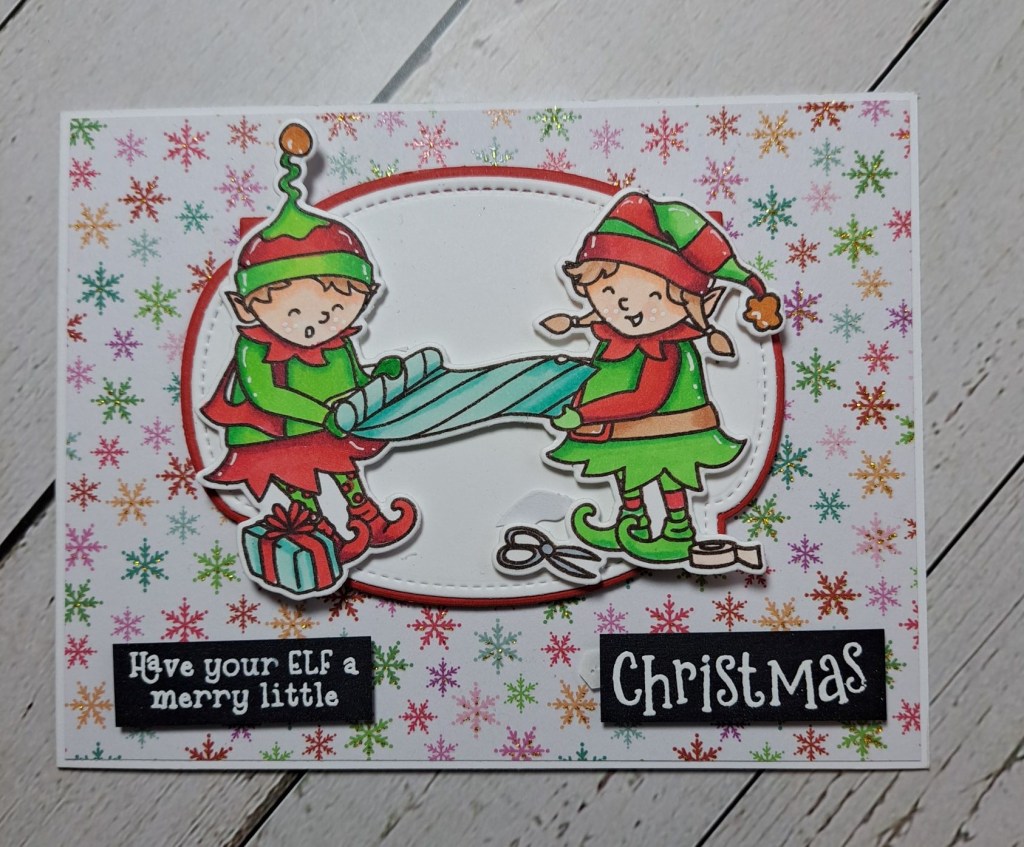
Hello. I have a card to share using a few of the products as part of the kit for the recent Crop and Create Virtual event:
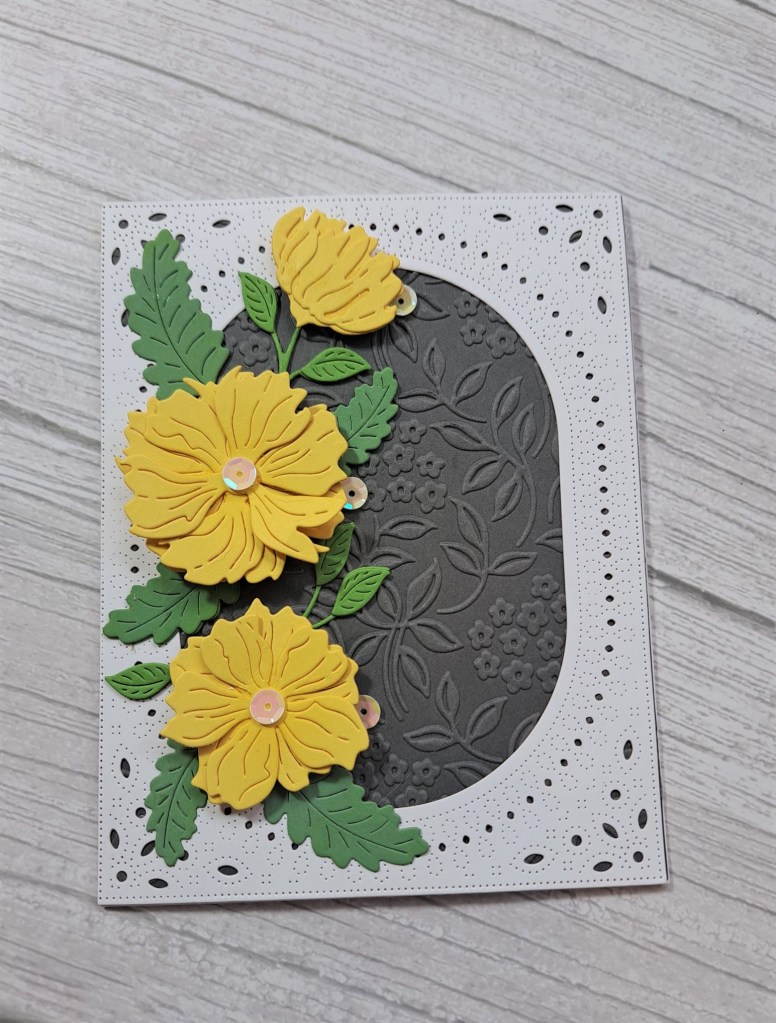
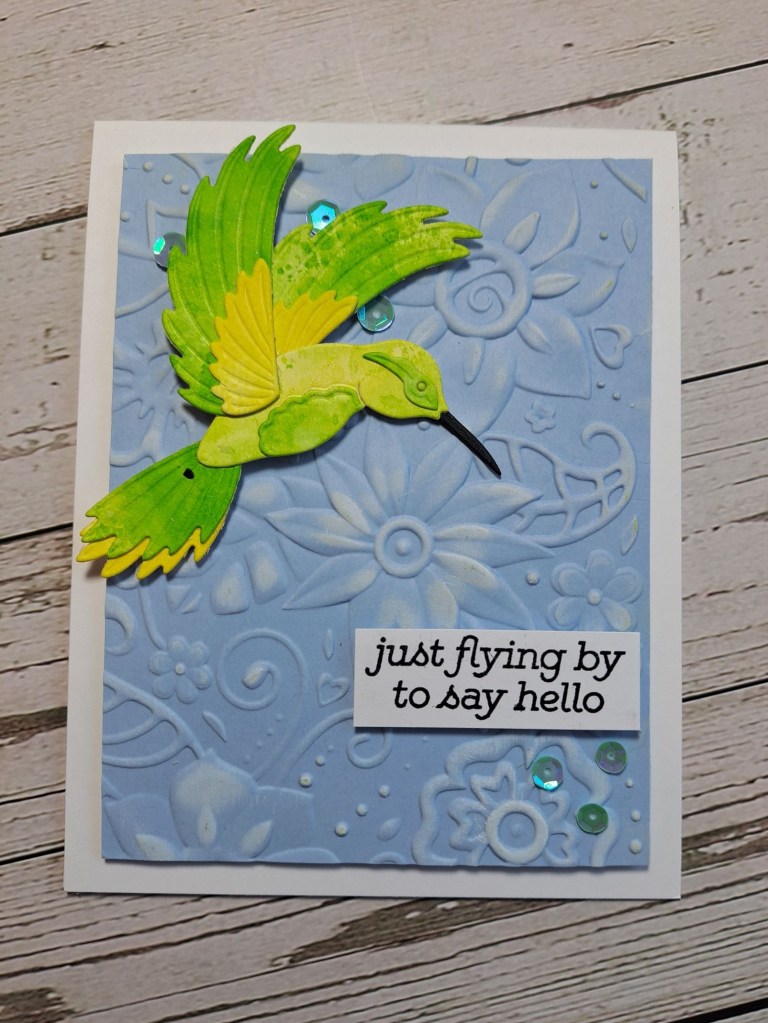
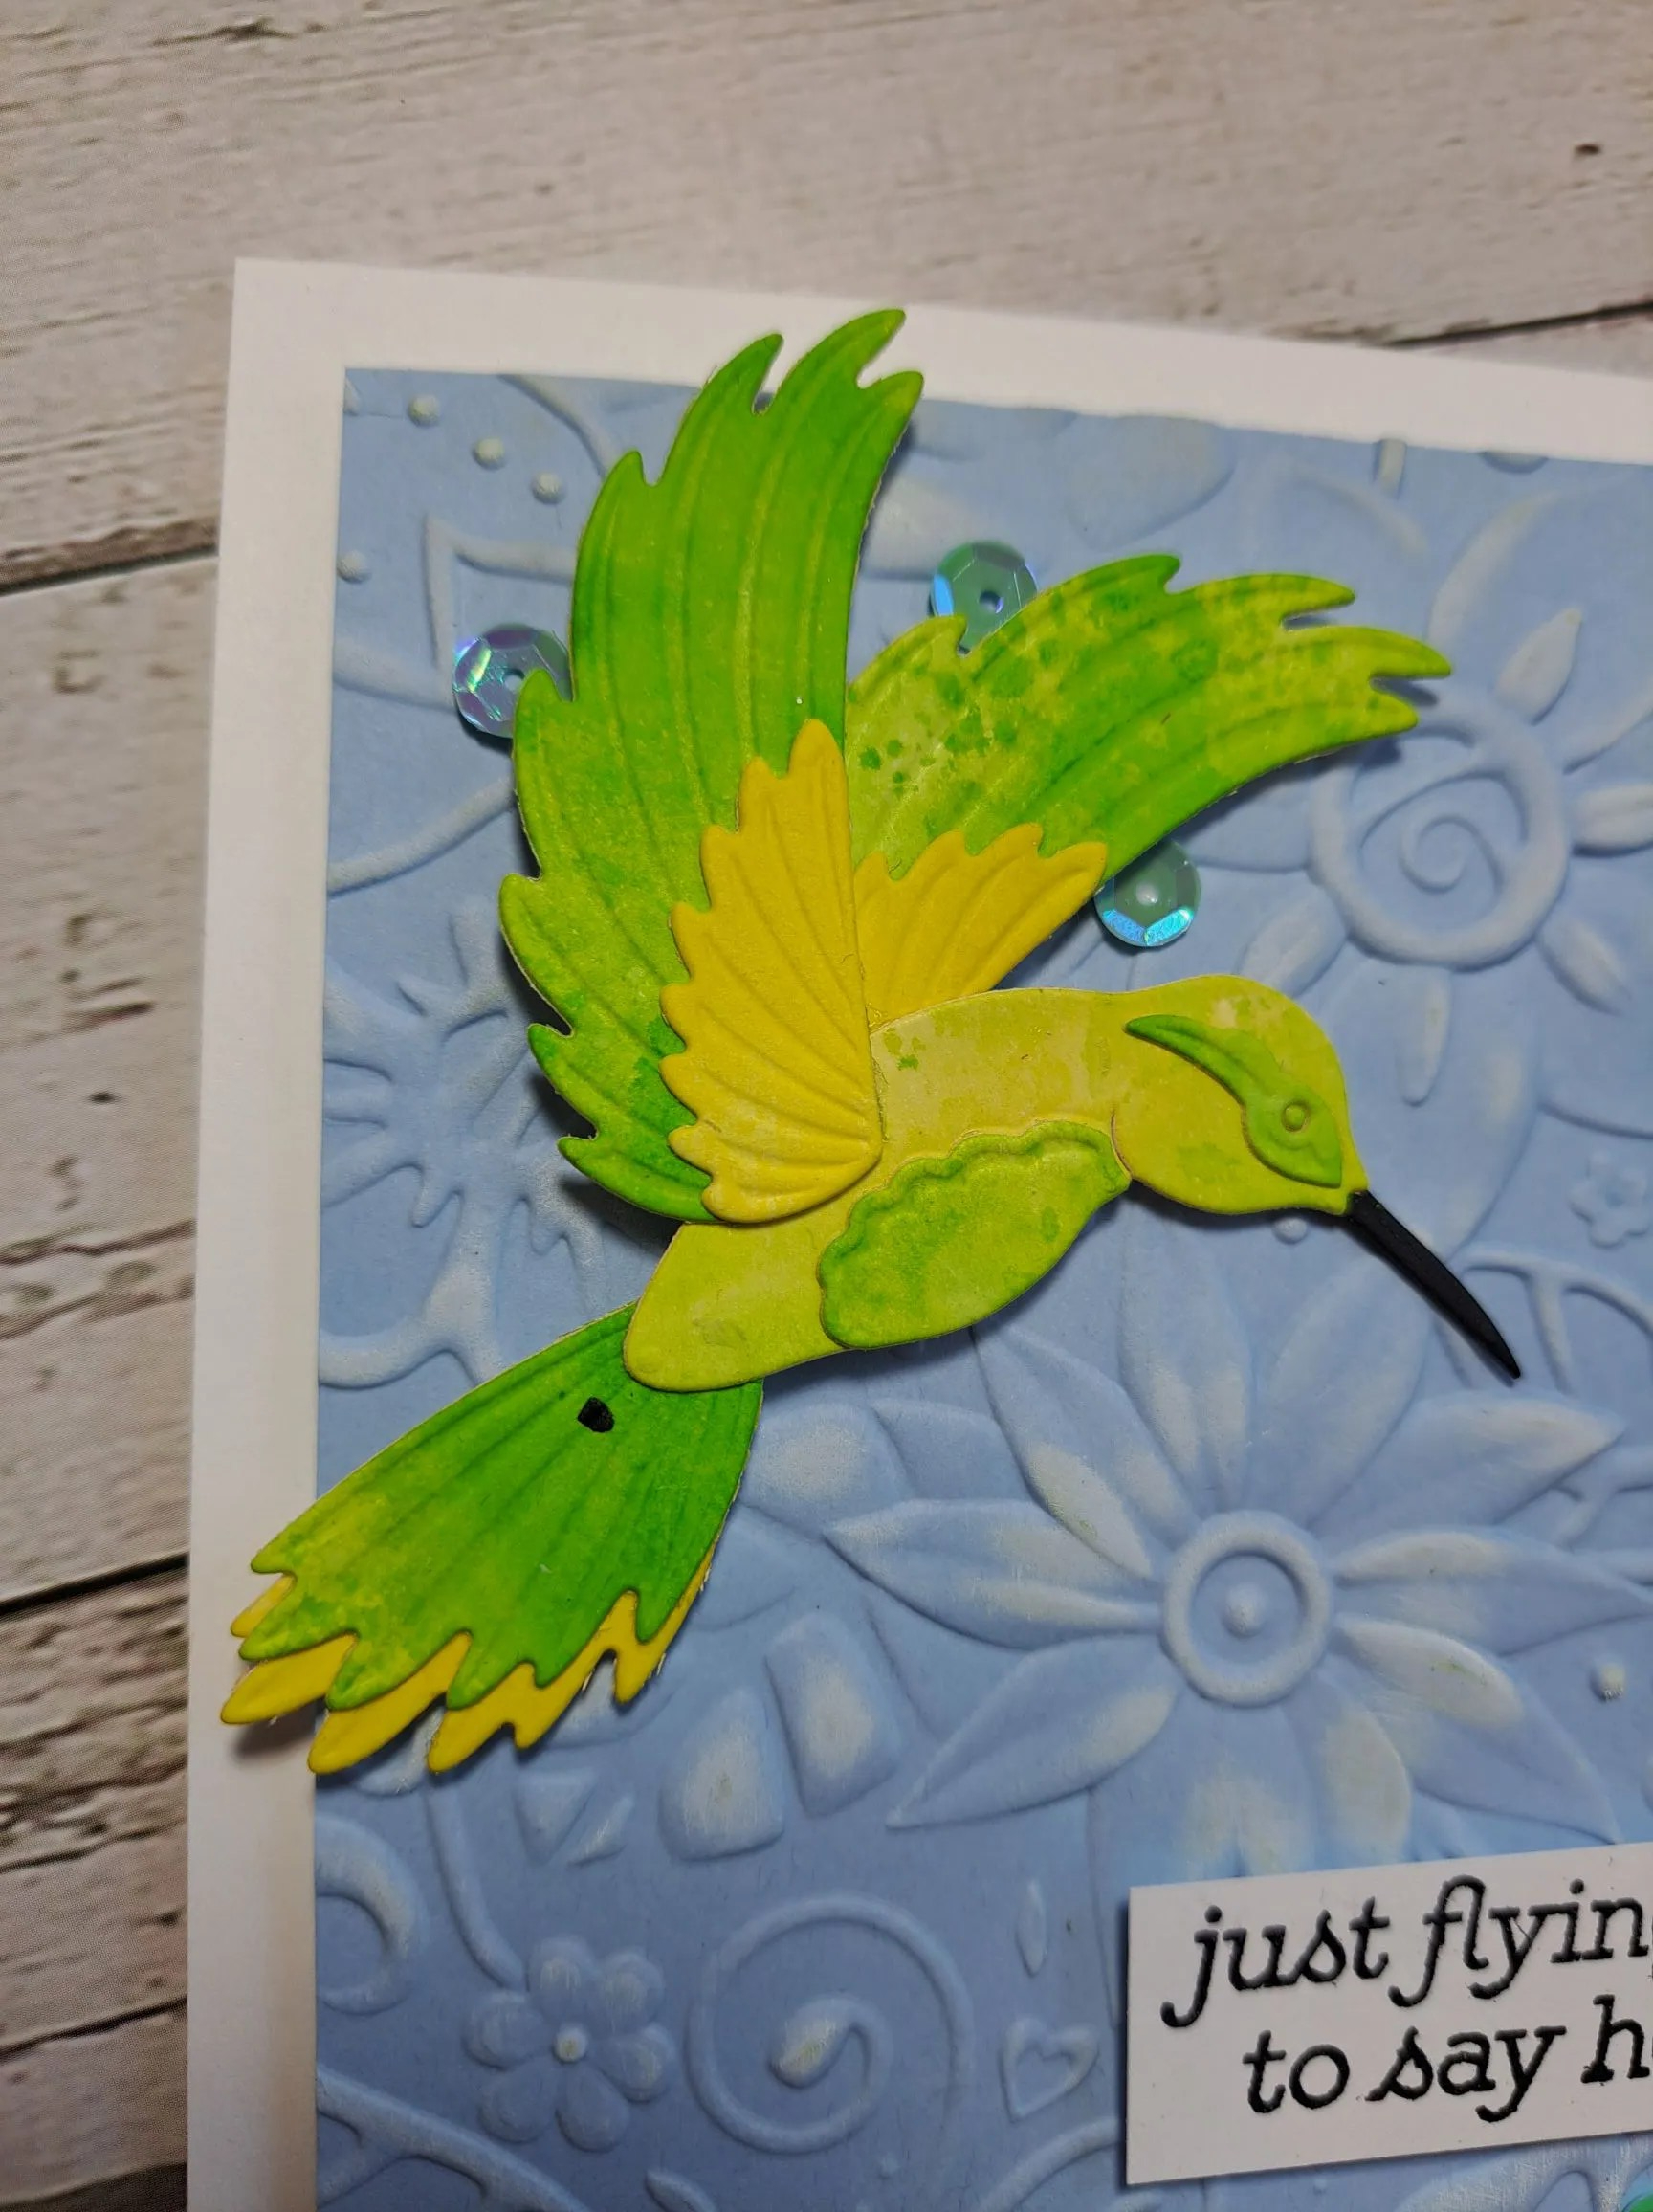
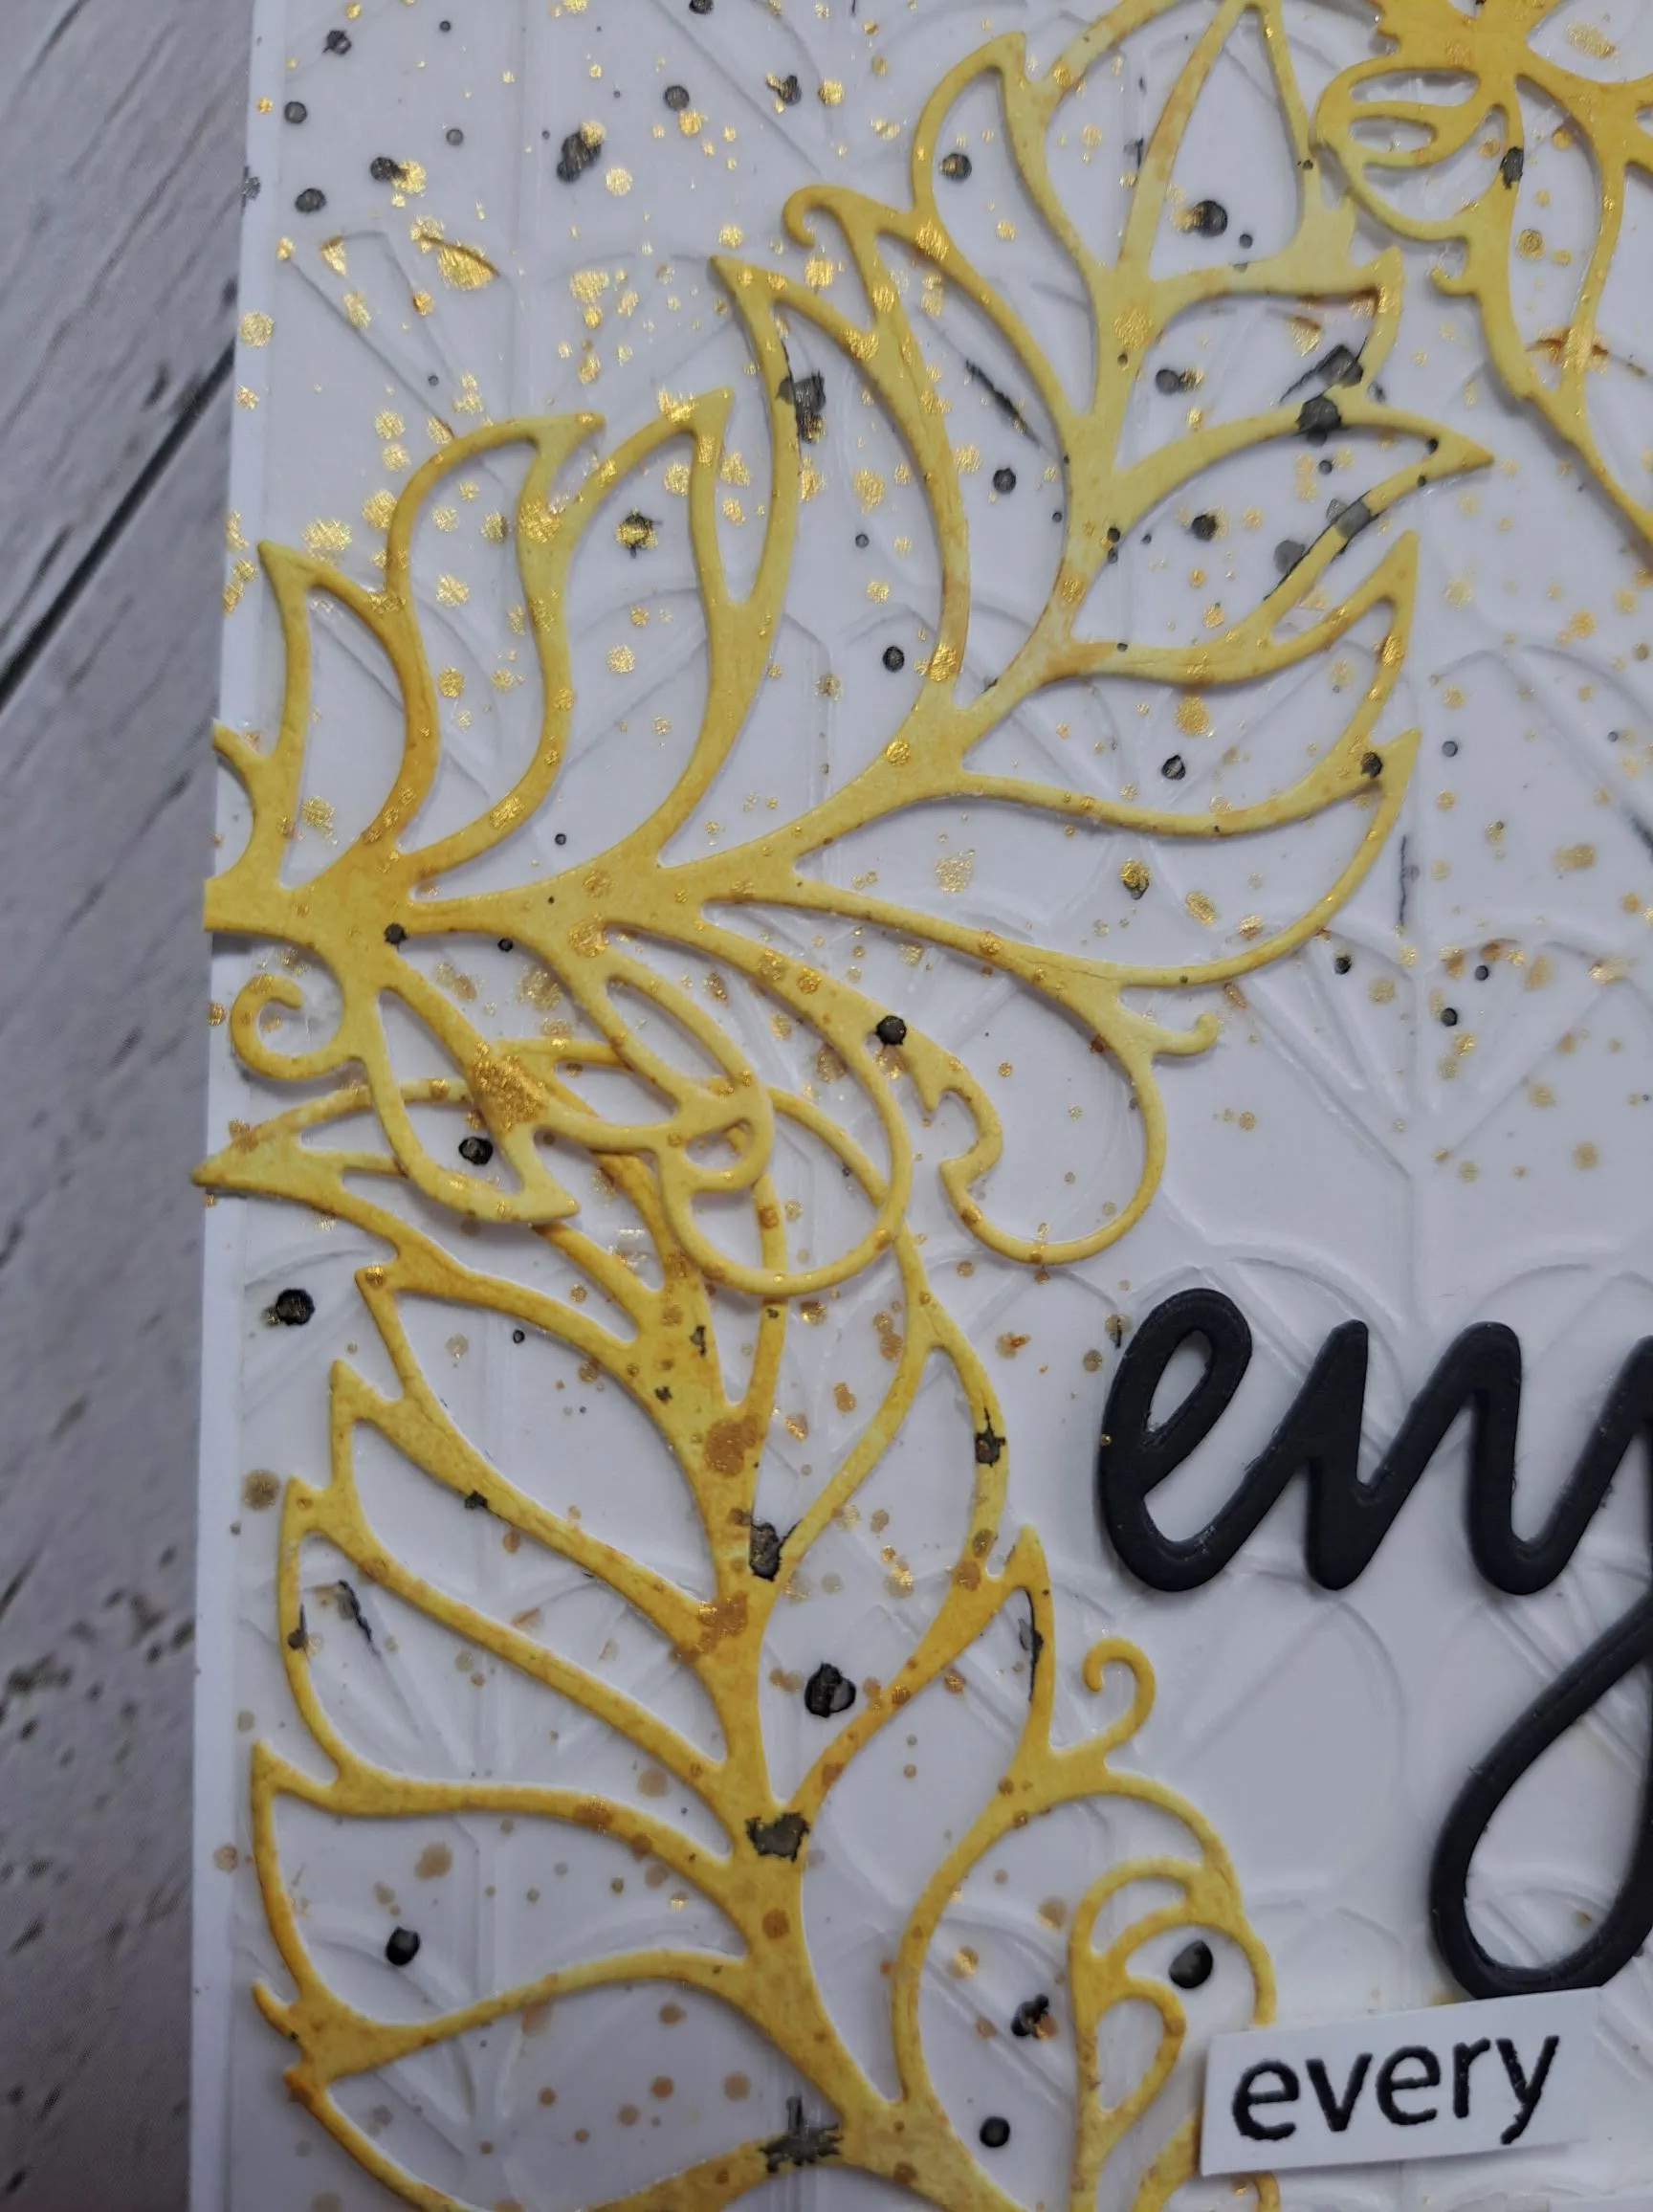
I dry embossed a grey panel with a Spellbinders embossing folder and attached to a card base.
The white pierced frame is also from Spellbinders – part of the event kit – and I used one of the three layers this die cuts out. This was attached with glue to the grey panel.
The layered flowers were die cut out of yellow, the leaves out of green, and I also ink blended a little Distress Ink in Bundled Sage onto the leaves – though it’s difficult to tell from the photos.
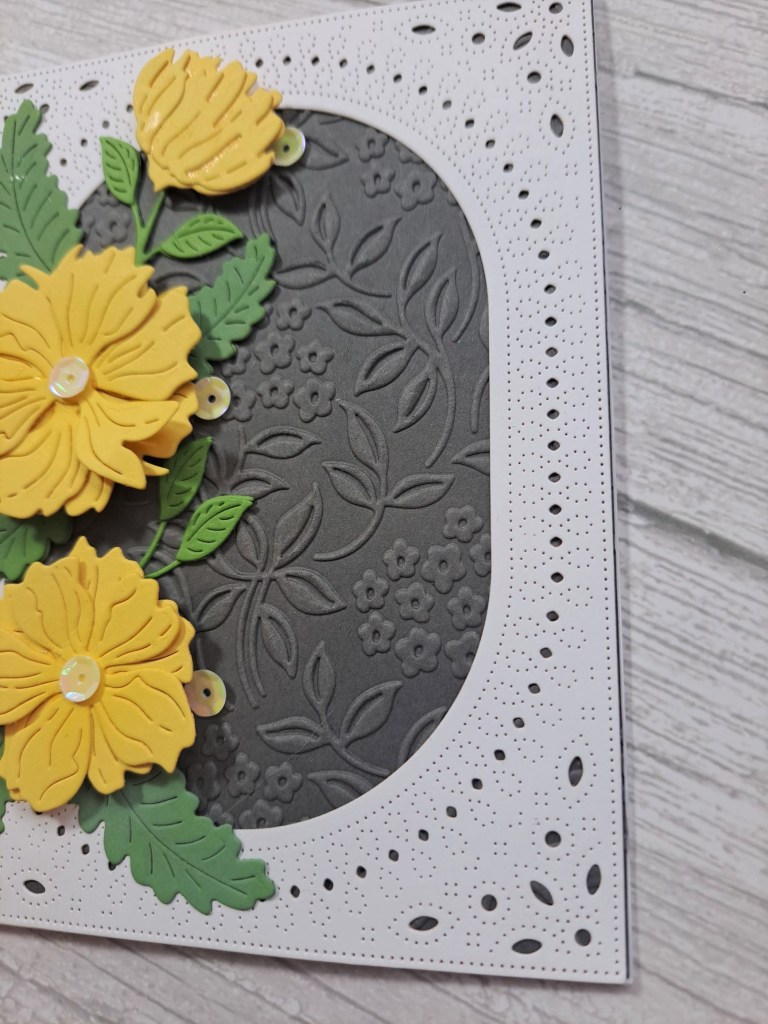
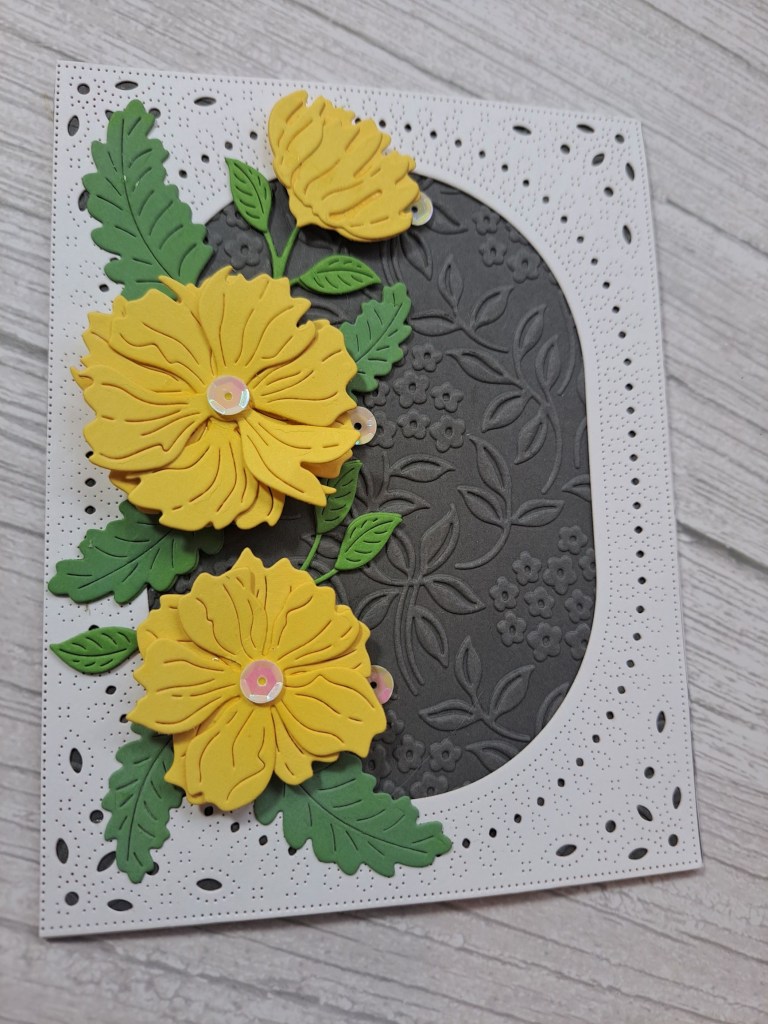
The floral die set comes with a flourish stem, but I cut that up to create some smaller leafy areas. The flowers were added with a small piece of 3D foam, the leaves were adhered using glue.
The centre of the flowers are sequins, and I also added three more just under each flower.
I don’t have a sentiment picked out just yet, this could be a ‘just because’ card, and I didn’t want to cover any more of the embossing detail.
I shall be entering the following challenges:
Lil Patch of Crafty Friends – anything goes
Fab’n’Funky – lots of layers
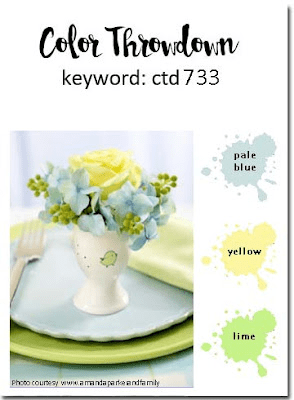
Color Throwdown – yellow, sage green, grey, white
Simon Says Stamp Wednesday Challenge – anything goes
Beautiful Blossoms – floral as main focus