‘Tis The Season…..

The new Holly and Ivy Christmas Challenge has now gone live, and the theme is always ‘anything goes Christmas/Festive‘. Here is my card:

I had quite a bit of messy fun creating this card – ink smooshing, die cutting, ink blending – and I like the outcome.

The background panel is a piece of ink smooshed card stock, with pink and blue Distress Inks, and when that was dry I used a Pinkfresh Studio background die.

I adhered that whole panel to the card base, then turned to the die cutting…….

The two critters are from Tim Holtz, and each piece die cut pout of an ink blended or smooshed panel. If I didn’t have the colour I wanted, I created one.

Before adding each layer, I did some more ink blending on them to make them different. All the brown pieces are from the same panel, but I ink blended a darker brown on them to create different shades – the antlers for instance.

The sentiment is also from Tim Holtz, stamped onto the same brown smooshed panel, cut out, then ink blending.

I adhered all of them with 3D foam.

I shall be entering the following challenges:

Jingle BellesChristmas and card stock – no patterned paper

Creative Fingers anything goes

2 Crafty Critter Craziesanything goes with animal as main focus

Crafty Animals – anything goes with an animal

My Time To Craft Christmas Christmas and something beginning with ‘R’ (red, reindeer)

Merry Little Christmas Challenge anything goes Christmas

Compliments Of The Season

The Holly and Ivy Christmas Challenge has started a new ‘anything goes Christmas’ challenge. Here is my creation:

To create the box, I used the Elizabeth Craft Designs ‘Shadow Box Frames’/ I watched her video to create the box, and once I got my head around the pieces, the folding, and the gluing I was pleased with the result.

I used some brown marbled card to create the box, as I wanted a darker frame, and once the box was created, I used some patterned paper as the base, and built everything from there.

I searched through all my Tim Holtz Christmas ephemera – of which I have a lot – and haven’t used very much. I’m currently going through my patterned papers and ephemera collection to try and use them as I bought them after being inspired by his and his creators posts – the style isn’t my usual – but I’m enjoying creating – just going with the flow!

I adhered poinsettias – from his ‘worn wallpaper’ around the outside of the frame, as well as bells and candy canes. The inside were some of his pocket cards – cut down a little – and other ticket ephemera, with a little button on the bottom corner.

I wanted to use the deer, and put some natural raffia – coloured with Distress re-inkers – behind to support the die cut, and lend a ‘woodland’ feel.

I hope you can come along and join us with your Christmas creations – I look forward to seeing you in our gallery. xx

I shall be entering the following challenges:

Crafty Animals Challenge anything goes with an animal

Paper Dragonfly Challenge – Christmas in July

Crafty Hazelnuts Patterned Paper Challengeanything goes with patterned papers

Creative Artiste Mixed Media Challenge anything goes with mixed media

Aud Sentimentsanything goes with a sentiment

Christmas Craft CreationsChristmas and patterned paper

Love To Craft – anything goes

Be You…..The World Will Adjust….

Hello. I have been wanting to use this Tim Holtz sentiment stamp set since I bought it – and in particular this sentiment. I created a different card to my usual style:

I had recently purchased a paper pack and I used a couple of pages from that pack for this card. I also used Gina K Designs Master Layouts die sets, as I knew I wanted some layering with the patterned paper. I chose to use black as the layers to coordinate with the papers.

The card base is 5×7 inches. I layered the light teal, black, and the striped teal and black layer. Out os the base light teal, I also cut the thick band across the centre, and layered that onto black too.

The light teal with a black scallop was then die cut, and out of another piece of paper I cut the image of the butterfly, onto which I stamped the sentiment.

Once all glued together – the base layers with glue, the band and circle with 3D foam – I added some teal flowers from my stash – two slightly different colours of teal – and because these had gems in the centre already, I added some extra gems onto the circular sentiment piece.

I shall be entering the following challenges:

Everybody Art Challenge use two colours (teal and black)

TTCRD anything goes

Crafting Happinessanything goes

Avenue 613anything goes – option black and white not taken

Crafty Hazelnuts Patterned Paperanything goes with patterned paper

Somethings new, and old

20180123_215410

Hello there. I quick evening posting for this card, which I made yesterday. I had a delivery of the latest Catherine Pooler Stamp of Approval box, and I also ordered some more of her inks. I love her inks. Easy to use, stamp beautifully even on new stamps.

This stamp set is a new one from Uniko, paired with the new ink from Catherine Pooler ‘Royal Treatment’. A clean and simple design, using just the one ink colour on the white background.

The sentiment is from Tim Holtz/Stampers Anonymous and stamped in the same colour.

I shall be entering the following challenges:

CASology late

Unikosomething old, something new

QKR Stampedeanything goes

Stamplorations CAS challenge CAS without optional twist


Inkspirational Guest Designer – ‘Trend’

20171028_113752

Hello everyone. This is my card as Guest Designer for the new Inkspirational challenge. I was contacted a few weeks ago as my ‘Wave’ card in September won Top Pick. I was sent the cue word of ‘Trend’. Now, this took more thinking about than little, I’ll tell you. There are so many options out there, I even ‘Googled’ trend, had a look through images, and dictionaries, but just couldn’t get my head around it.

So – the other way for me to get inspired is to look through my stash. I ignore what I have on my craft table – as I kinda know what’s there already – and searched through the drawers and the shelves. I wanted some arrows to stamp, to show an upward or downward trend, but I actually don’t have many arrow stamps. I wanted a distress background, and reached for my Tim Holtz Distress Oxides, then suddenly wondered about my stencils.

I thought I remembered an arrow stencil – I was right – but the arrows were all in different directions……..you know where I’m going with this, right? I am ‘bucking’ the trend.

I started with the Tim Holtz stencil, and the Distress Oxides, and just set to it. I haven’t got a clue what colours I used, or how many layers I did. I wanted orange arrows, then decided I wanted them all different, added colours, didn’t like it, added yet more colours, reverted back to mainly orange……

I did the background after the arrows, then went back in to do the arrows afterwards. So this is how it turned out, after I drew round each arrow and it’s detail with a black gel pen, for added dimension, and – of course – splashed some water on it.

The sentiment from Visible Image is stamped onto another piece of card I used the Oxides with, and splashed, and both die cut from the stitched rectangles from Lawn Fawn.

I hope you can play along, and I would love to see what you come up with. 🙂


Congrats

20170731_100055

Hi everyone. Quite a colourful card for today. I am working with someone this afternoon who will be expecting a new addition to their family in the New Year. I don’t make baby cards, and I have absolutely nothing in my stash which is specifically for this type of occasion, so I went with the flow and created this.

I took inspiration from several challenges regarding colour and theme. The first thing I did was to stamp my Concord and 9th ‘Stripe Builder’ stamp set. I used my Tim Holtz stamping platform, as this is one huge stamp, and used Catherine Pooler ‘Lime Rickey’ and Stampin Up ‘Tempting Turquoise’.

Now I tried stamping this several times, and it just wouldn’t cover all of the card. I re-stamped, stamped again, then decided to leave it as it was, as the photo inspiration from Inkspirational has greeny slats, and also one white slat, which all look quite weathered. So – the distressed stamping look it was. I quite like this effect. What do they say about mistakes – there aren’t any, just happy accidents? Well, there we are.

I then took my Sue Wilson ‘Noble Pierced Squares’ and cut a piece to cover the background, then die cut my Tim Holtz ‘Mixed Media’ in two corners, so the colours would show through.

After sticking these down, I die cut the ‘Congrats’ from Stampin Up ‘Sunshine Wishes’ in white card with double sided sticky sheet on the back, and cut that four times stacking them up, then die cut one from another piece I had stamped originally and didn’t like the look of. (Happy accident again)

I really like the colours on this card, and it goes with either boy or girl, I think…..do you agree?

I shall be entering this card into the following challenges:

Inkspirationalphoto inspiration

City Crafter Challenge something beginning with ‘S’ – (Sunshine Wishes dies)

House Of Cards challengestripes

Less is Morepiercing (Sue Wilson pierced squares)


White on White

I am so ready for the weekend…………It’s been a busy week at work, some later nights than expected, and now I can look forward to spending some time crafting. The joys of free time!

This card is inspired by the challenges from Cards In Envy and Addicted to CAS. Both themes are for white on white card. I have done some white on white card previously and found it quite challenging, but thought I’d have another go for these two challenges.

I stated with a ‘Next Level’ embossing folder from We R memory keepers. These embossing folders are the bees knees. I mean – how deep are those impressions? I shone a light at the card from above so you could see the detail which comes from this folder and just a plain piece of white card. This particular folder is called ‘woven’ and there are two folders in the package. I am sure I will be using the other folder sometime soon!

20170630_210740

After embossing the 6 inch square piece of card, I then die-cut three butterflies from Tim Holtz/Sizzix Bigz die ‘Butterfly Duo’, which also comes with a matching embossing folder. I must say, the hardest part was making sure the two die cut butterflies didn’t move when matched to the embossing folder. If you tape them, then the tape is also embossed onto the butterflies – so carefully does it. Don’t let them slip!

I added them to the base embossed card in a random fashion, as though they were climbing a trellis – again, this is ‘Loopyloo world’ so anything is possible!

The sentiment is a die cut from – I think – Hero Arts. I have lost the main package, so am not really sure. I think the detail and depth of the background also allows the sentiment to show with the shadows.

I shall also be entering this card into he following challenges:

4 Crafty Chicksanything goes

Monochrome Magicmonochrome with twist of butterflies


Bright resist

Happy Saturday everyone. Today’s card is quite bright for me, and I have put together this card based on a sketch from Paper Craft Crew, and a technique of resist from AAA cards .

Now, I played with the resist technique a few times, before I decided on the central image above. I used the same image, from Circa Design called ‘Fuchsia’, but tried different ways of ‘resisting’. I tried using water colour card, stamping and embossing the image, then using my Zig markers to colours parts if it – turned out a mess! I then tried stamping and embossing and putting my Brushos over it – turned out another mess! I tried stamping and embossing, covering the flower part of the image in masking fluid, colouring the rest of it with green, rubbed off the masking fluid, added some pink for the flowers – yep – another mess!

So – this is my fourth attempt. I stamped and embossed the image in white, then just ran my Catherine Pooler ‘Lime Rickey’ ink pad over the whole image. Worked very well, I think. I actually then went in with my water brush and removed some of the ink from the embossing to make that clearer, and liked it even more.

I die cut the image with my Sue Wilson Noble Dies ‘Double Pierced Circles’, and moved on to the rest of the sketch.

The card base is 7 inches square, so I cut another layer slightly smaller, and used my Tim Holtz/Sizzix thinlits ‘Mixed Media’ circle die cut to cut into that second layer. I then splashed some Lime Rickey ink around that layer – I don’t have lime green dots or perfect pearls – and then turned my thoughts to the twine and washi tape.

I added a green tape, then another red (ish) tape for a little bit of a different colour, and the twine was from a selection I have from We R Memory Keepers. As I can’t tie a bow to save anyone’s life, I used my Tattered Lace ‘Bow Maker’ and stuck the bow down at the front, and the ends down at the back.

To complete the card I added the main die cut image with foam pads.

I seem to be turning to my Catherine Pooler inks more and more for my projects. I like how they can be used for almost everything. They ink stamps well, they blend well together, they water-colour well – I haven’t really found anything they won’t do when I want them to do it. They are definitely one of my most favourite buys – even with the customs and postage cost.

I shall be entering this card into the following challenges:

Paper Craft Crew challengesketch

AAA cards resist technique

QKR Stampedeanything goes


Sketch and colours

Hi everyone. Today’s couple of cards are inspired by CAS Colours and Sketches. For this card, you had a sketch to follow, and also a selection of colours from Stampin Up. I didn’t have all the colours they suggested, and used Lost lagoon, Baja Breeze, and Watermelon Wonder instead. I hope they match enough for the challenge…….

I began with a 6 inch square white card base, and added a die cut from Sizzix/Tim Holtz ‘Scribbles and Splat’. I die cut the scribble twice and added it as a band as per the sketch, and decided to use the piece of card I used for die cutting as another band on a similar card – waste not, want not! I stuck the actual scribbles down using my little Xyron so I didn’t get glue all over the place.

For the main piece, I stamped the main flower from Stampin Up ‘Sunshine Sayings’ in the two different colours, and added some smaller flowers as fill-in from Catherine Pooler ‘Amazing Floral’ stamp set. I used all three colours at some point in the stamping.

The sentiment is from the same Catherine Pooler stamp set, in black, as I wanted a contrast to all the colours used, and I feel the flowers actually stand out more with the sentiment in black.

I think I’m getting the hang of less and less layers and embellishments, but I do like to revert back occasionally.

I will be entering the following challenges:

CAS Colours and Sketchessketch and colours

QKR Stampedeanything goes

Artistic Inspirationsanything goes with option of flowers

A bit more time to craftanything goes

Mix it up challengeanything goes with option of stamping


Shiny Christmas

It’s a cooler day here in Chesterfield UK, so I’ve decided to do a Christmas card. I have no idea where the logic came from in that sentence. It just seemed to fit. There are a few challenges out there with the theme of Christmas, so I’ve been playing with some of my crafty goodies.

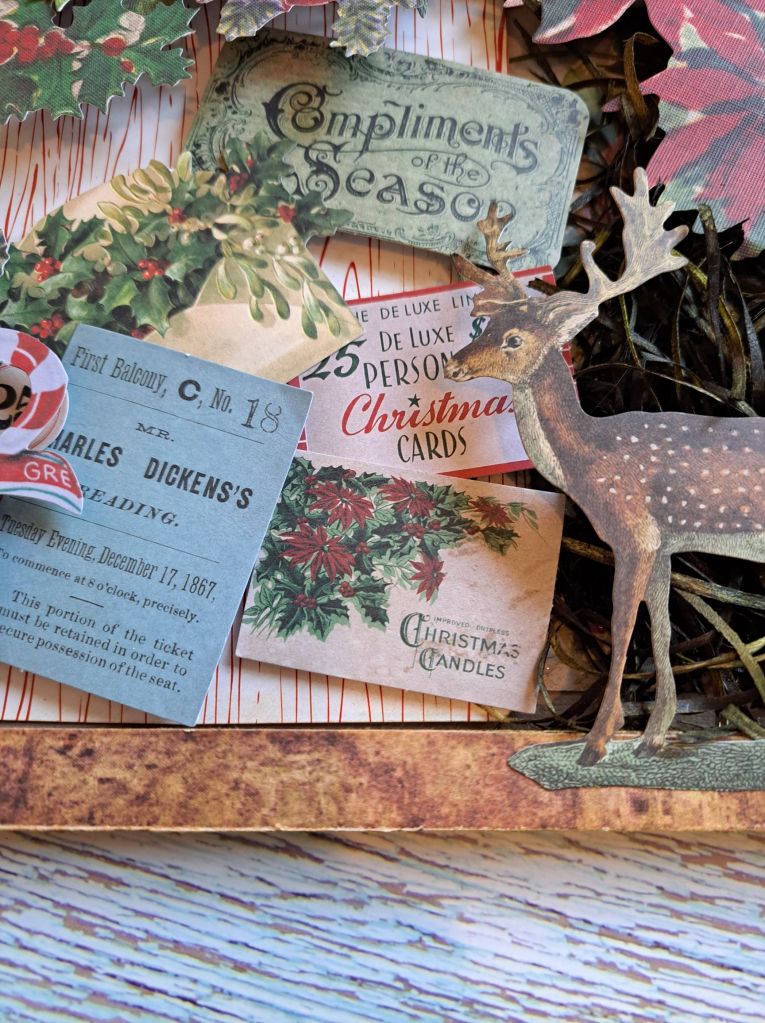
I have also tried another way of taking a photo. What do you think? My sister sent me a link to a blog by Yana Smakula – I think she is bored with my previous background!! – and I’ve had a play with out house wall and a stool outside…….do you think it works better?

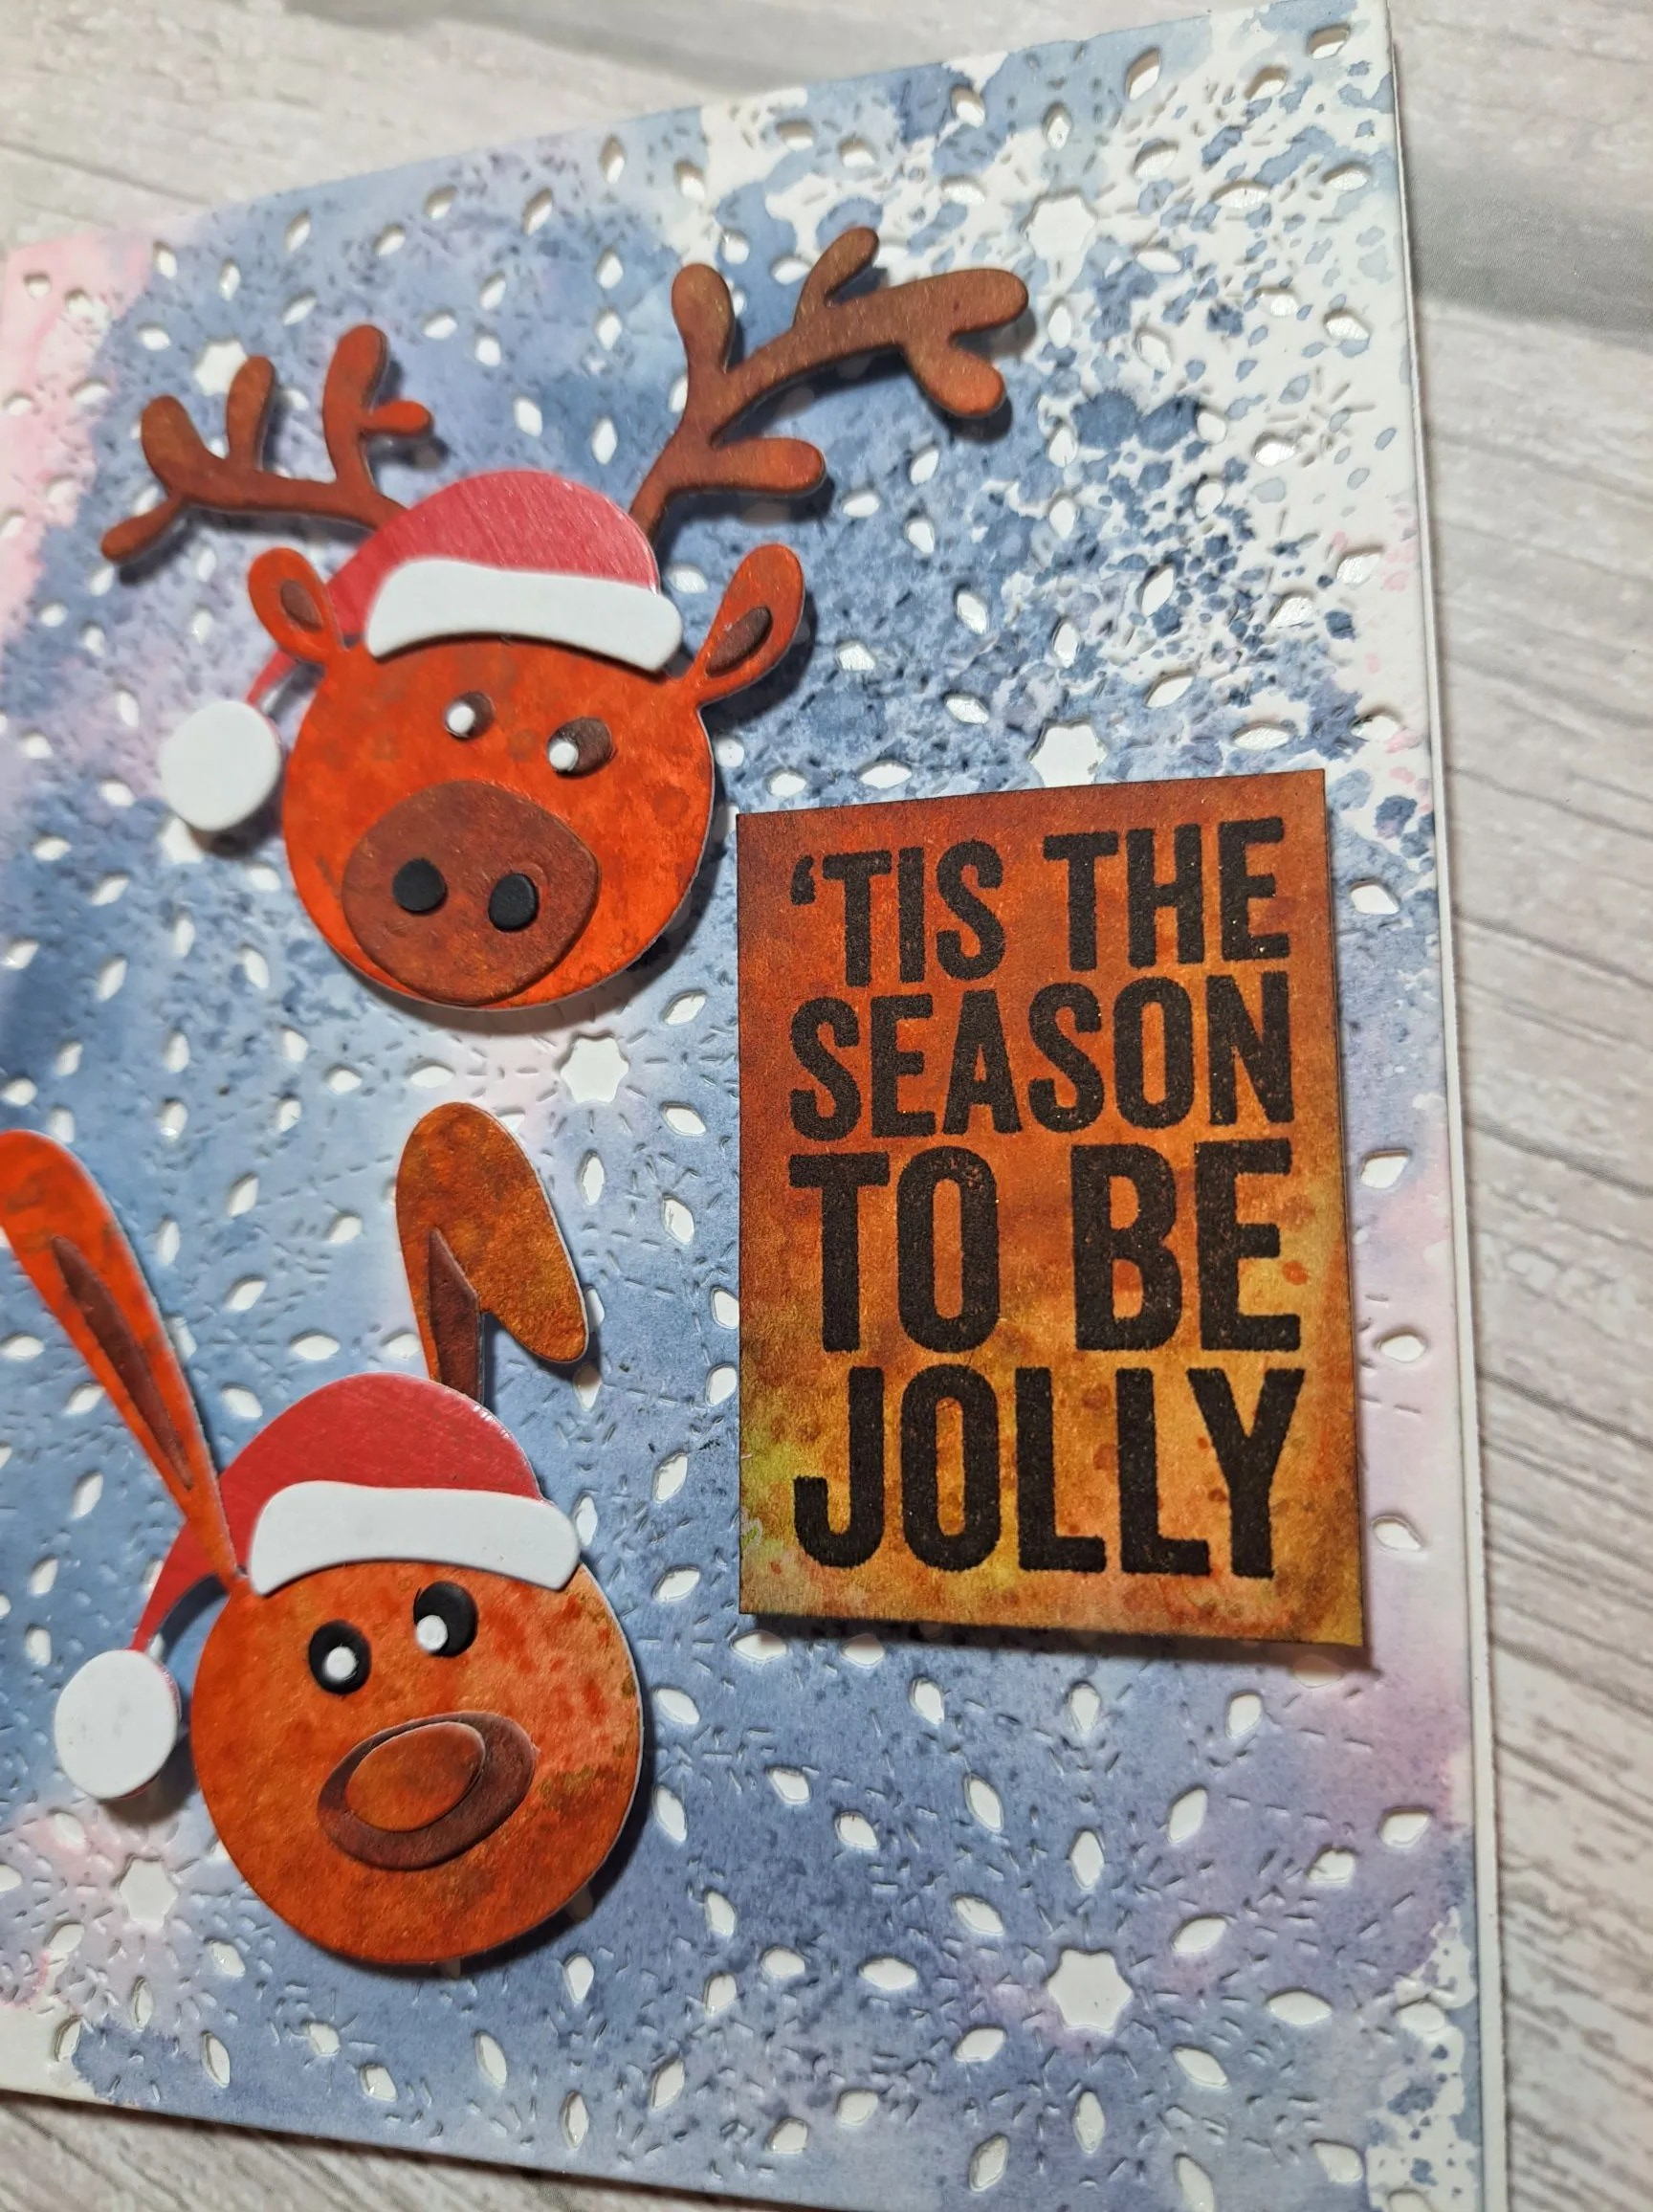
It actually took me a good couple of hours to conceptualise (what a word!) and come up with this. I wanted to do snowflakes, and I wanted them laying over the edge of the main piece of card, but other than that I just played.

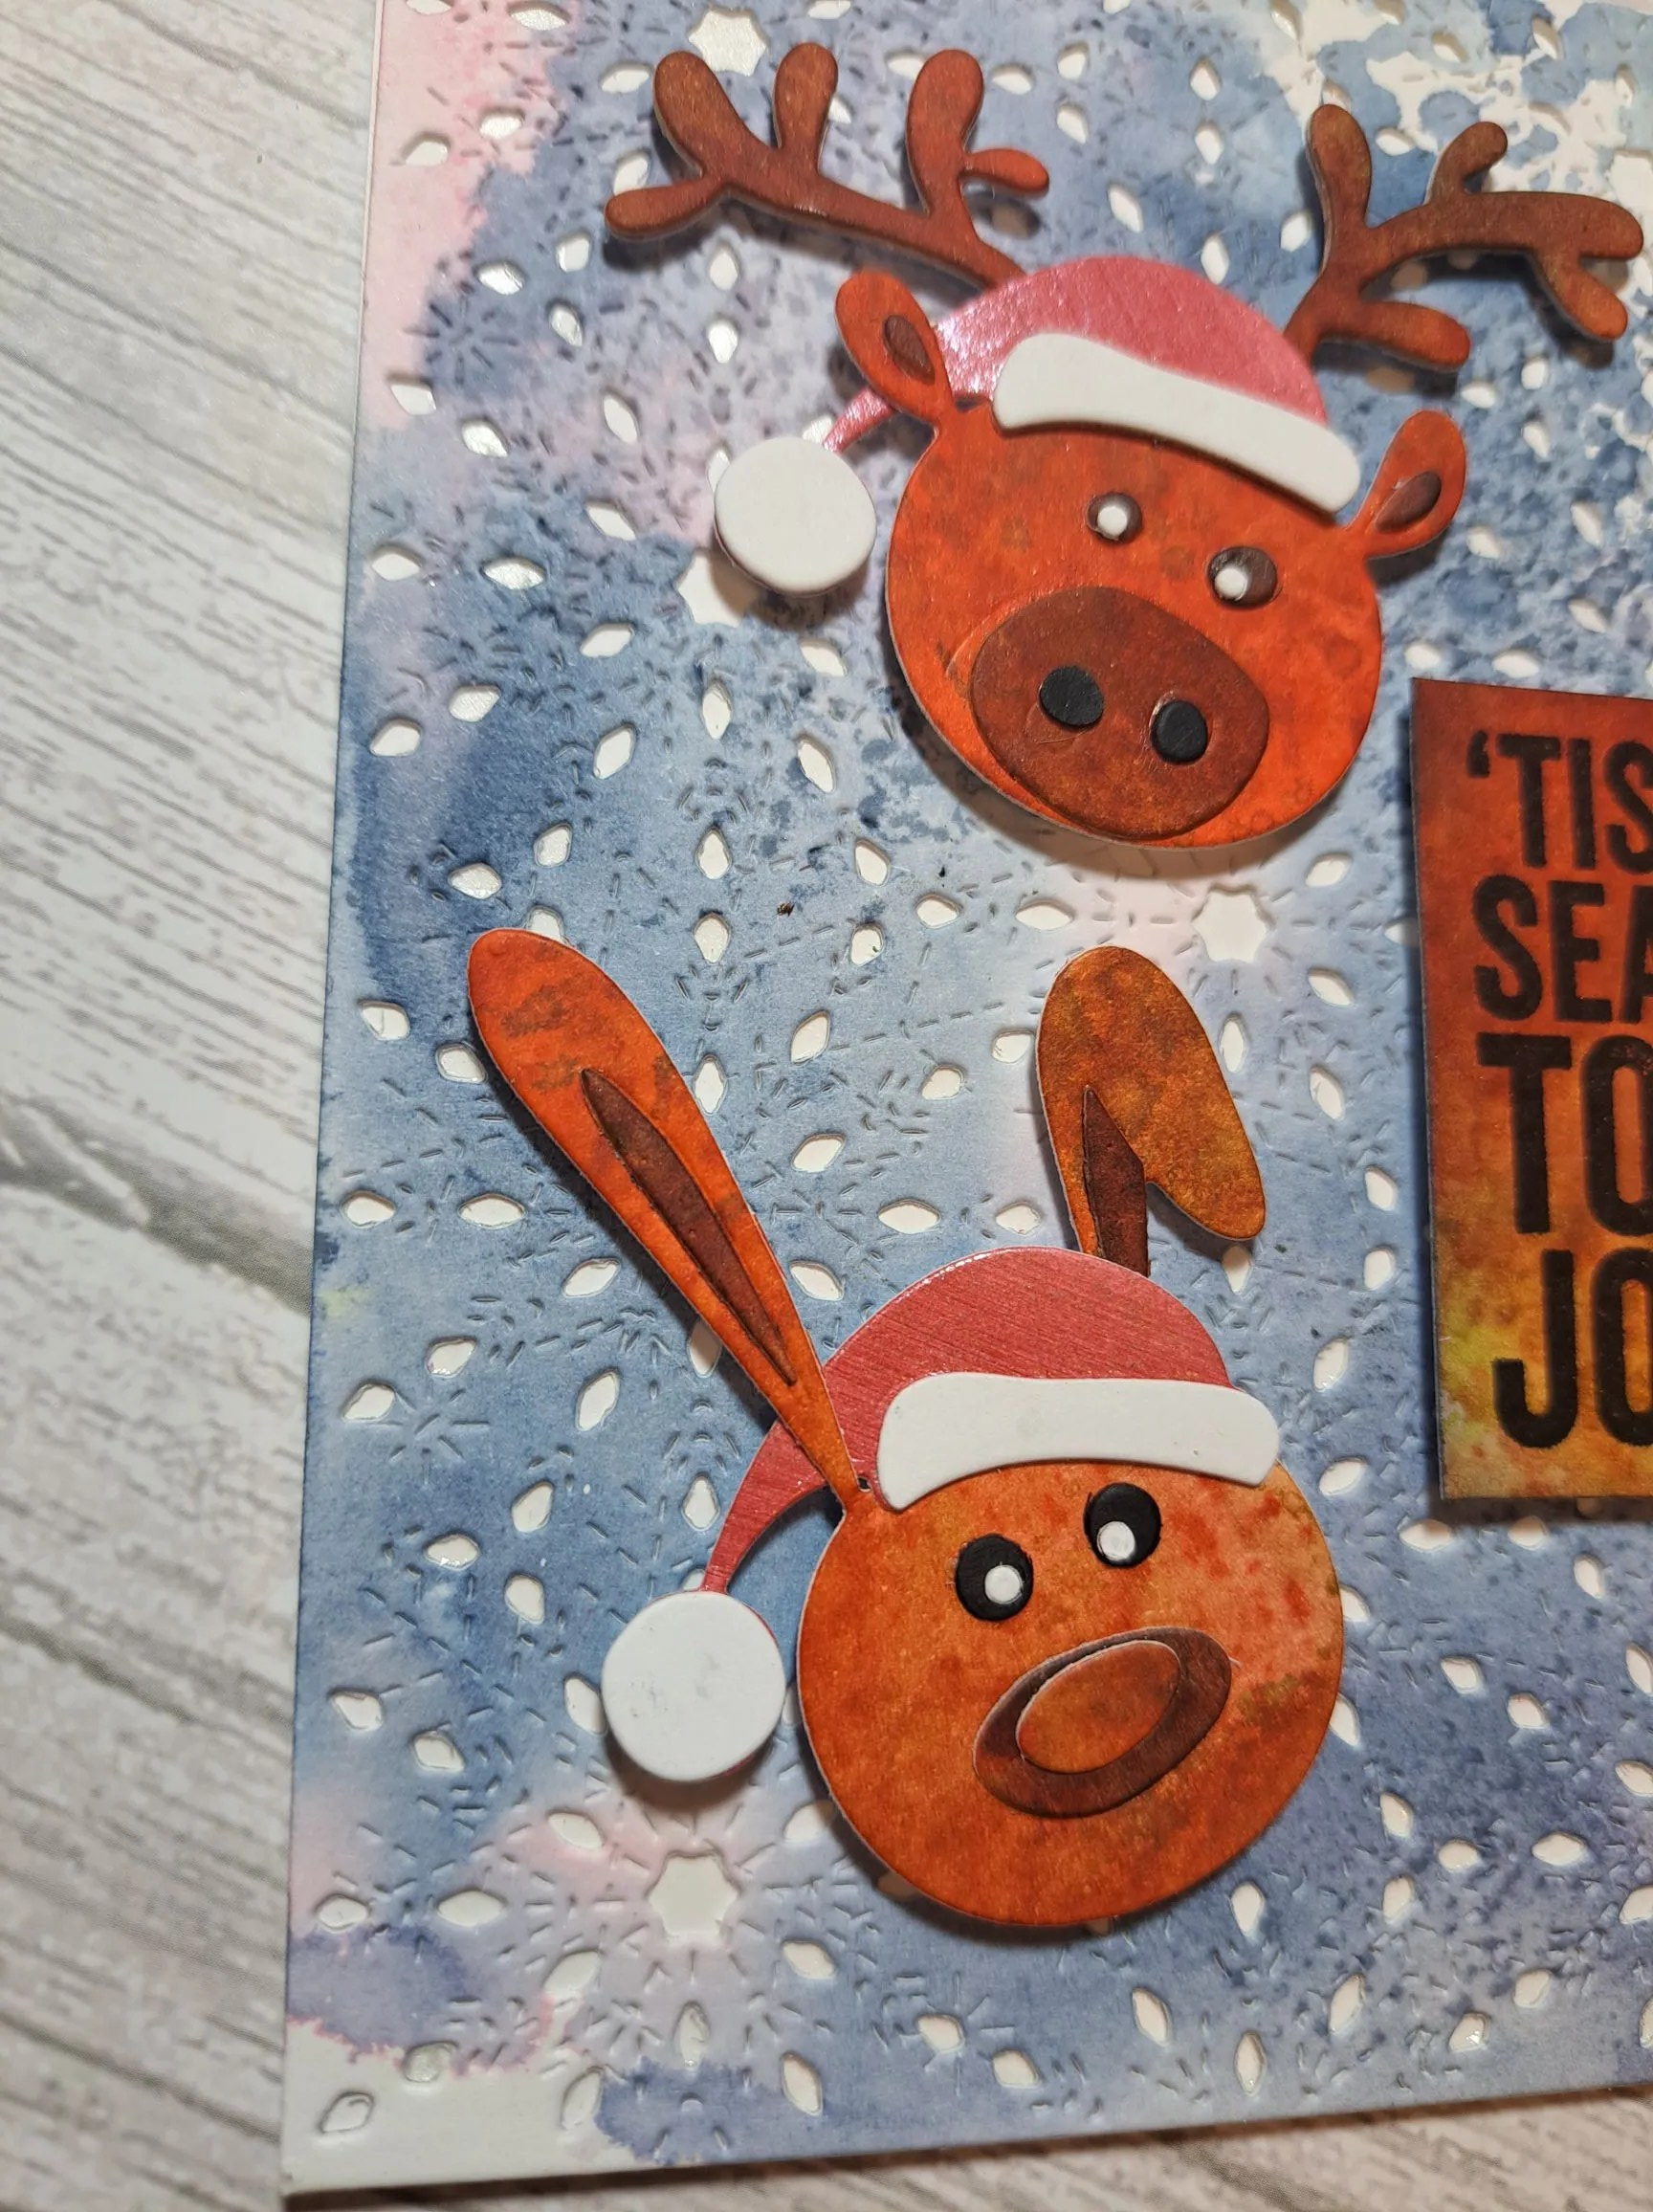
I started by die cutting all five of the snowflakes from Sizzix/Tim Holtz ‘Paper Snowflakes’ – randomly – from a piece of white card.  After die-cutting the snowflakes, I then stuck a piece of double-sided sticky sheet on the back, which meant I could add some gilding flakes to the apertures left by the die cuts. (I’ll be using those on another project)

I applied IndigoBlu ‘Yorkshire Dales’ gilding flakes as I liked the multi-coloured effect these created. After adding the flakes, I smooshed them down and then embossed the sheet with a Sue Wilson 8 inch square embossing folder called ‘Snowflake Mosaic’. Then I decided what size I wanted the actual card to be – 8.25 inches by 6 inches. (Pre-bought card bases)

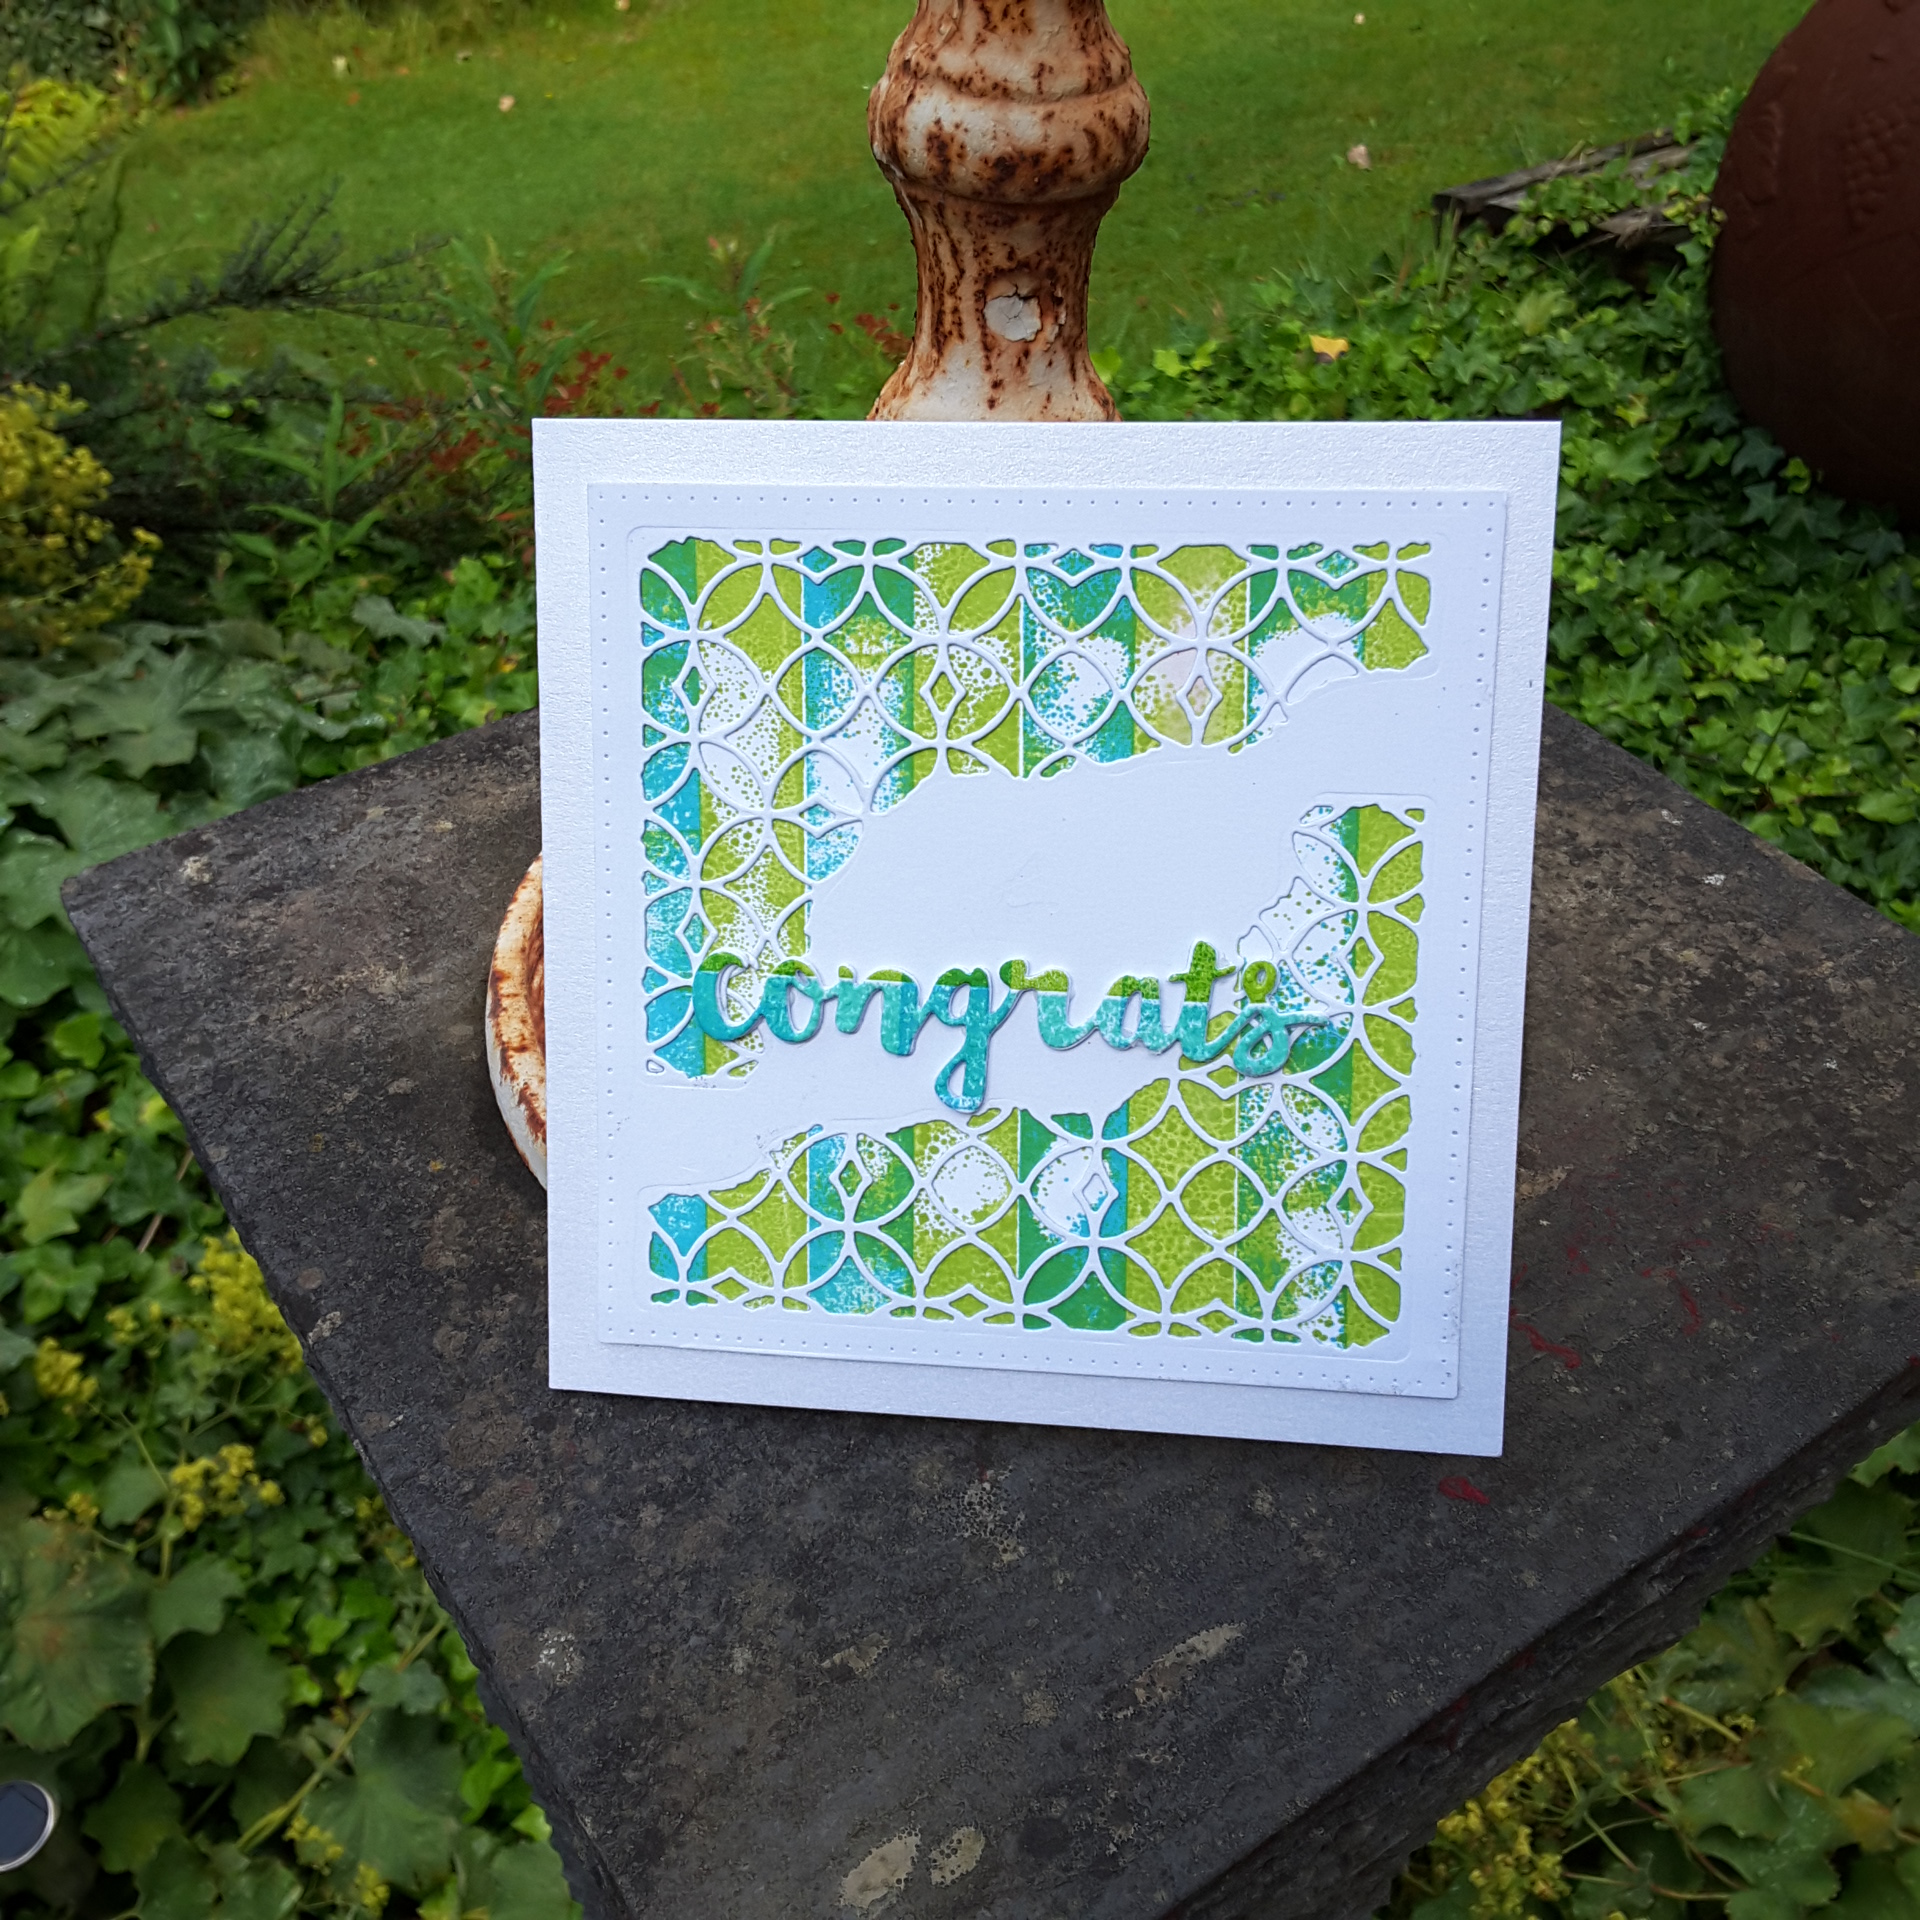
To follow the sketch from Atlantic Hearts Sketch Challenge, I then cut some circles from the MFT ‘Stitched Circle Frames’ out of the same ‘greeny’ card I used on my jungle themed challenge. I just love this colour – kinda shimmery, olive/greeny/browny.

I attached the circles to the bottom left of the card, leaving one of the smaller circles out for added interest so the circles weren’t so boring, and die cut one of the snowflakes out of Stampin Up glimmer paper, sticking that down with one of their dimensionals.

I cut the circles and snowflake to match the edge of the card, then peeled off the other side of the double-sided sticky sheet (already on my white card if you remember – and stuck that down to yet another layer of the greeny card, then onto white base card.

The sentiment is an X-Cut die, which I cut out three times from card with double-sided sticky sheet on each layer to make it easier to stick one on top of the other, then added to the card.

From the front, the sentiment isn’t quite that obvious – which I wanted – and doesn’t detract from the snowflakes, but turn it to the side and get the shine from the gilding flakes – I think it works well.

I shall be entering this card into the following challenges:

Altantic Hearts Sketch Challengesketch

Watercooler Wednesday challengeChristmas

Addicted to Stamps challenge Holiday

Mix it up challenge anything goes option embossing

Christmas Cards all year roundprecipitation (snowflakes)