Hello everyone. I am here to announce the new challenge starting at The Alphabet Challenge. We have reached the letter ‘Z‘, and Deborah has chosen the theme of:
Z is for Zoology
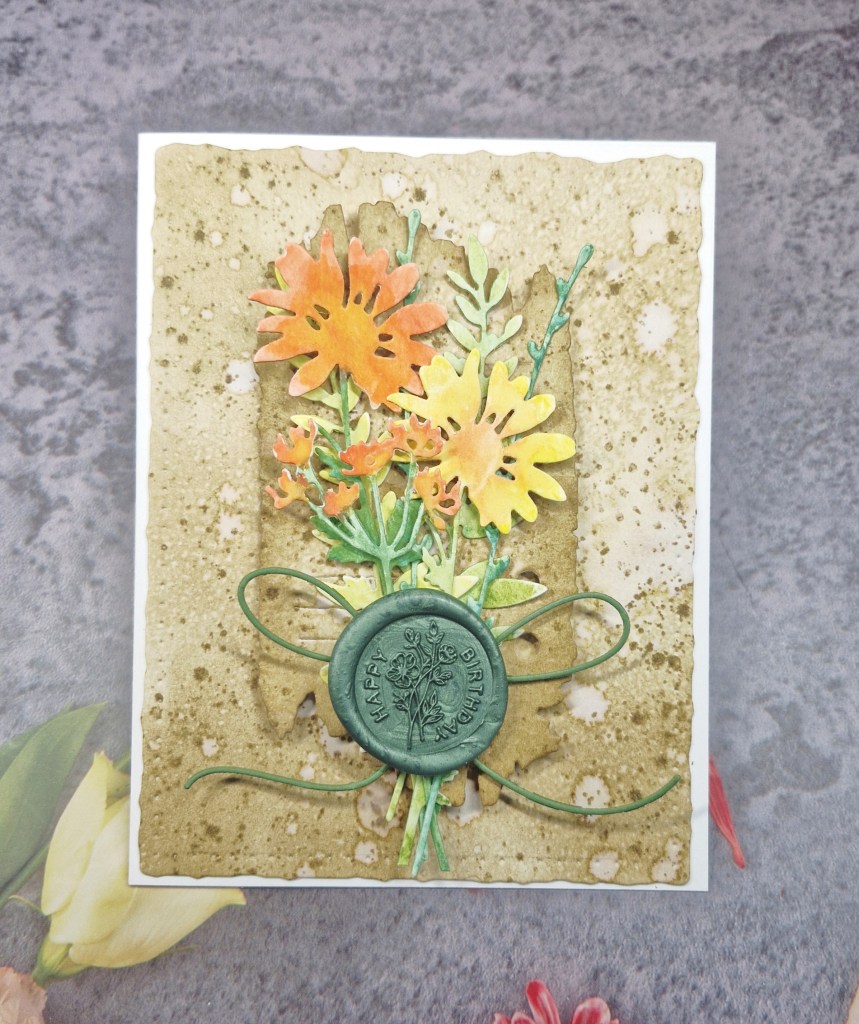
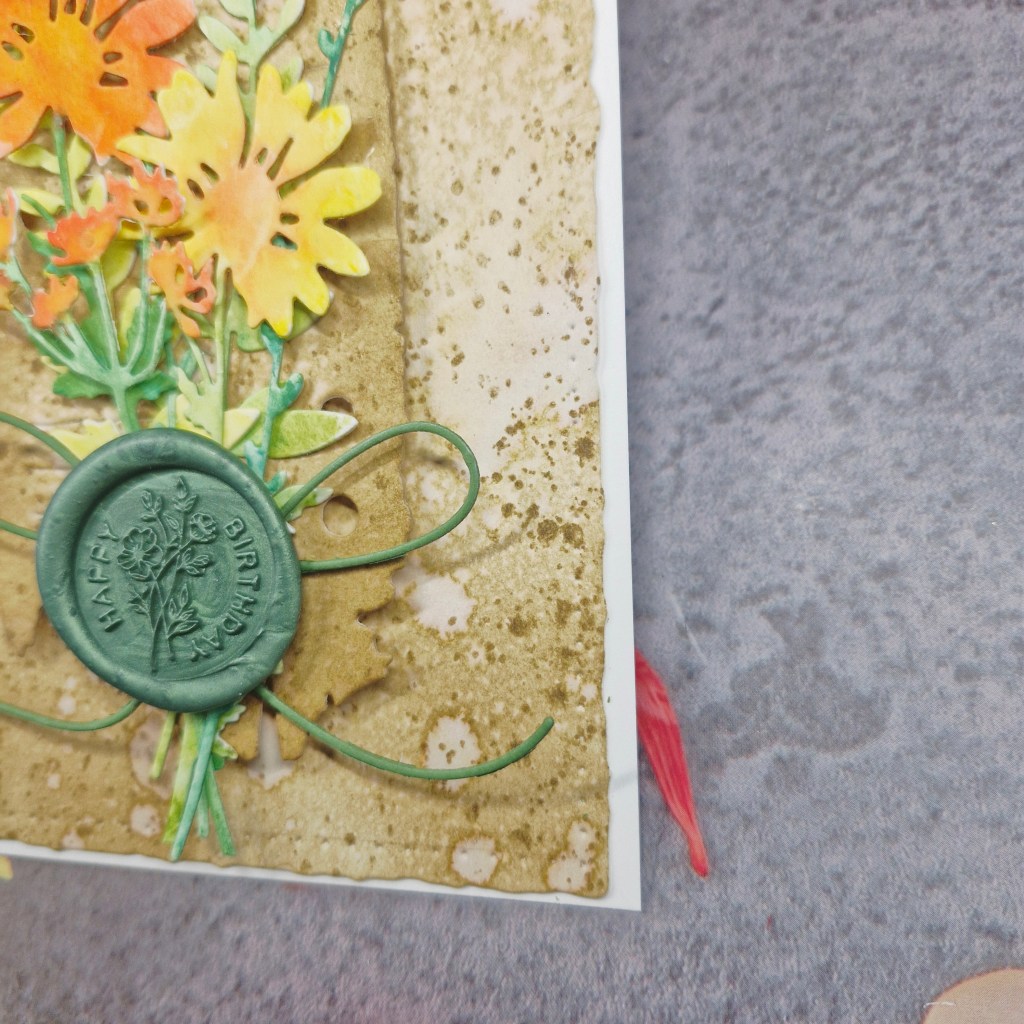
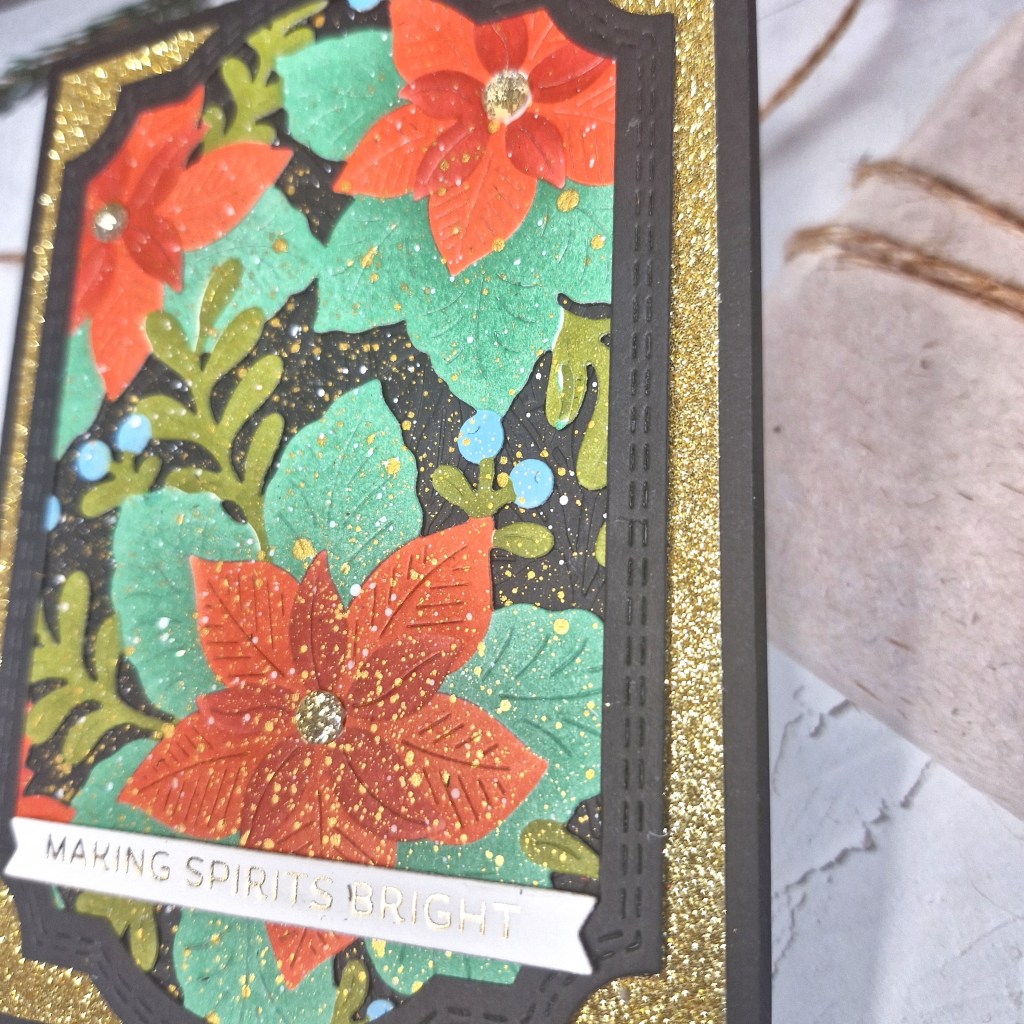
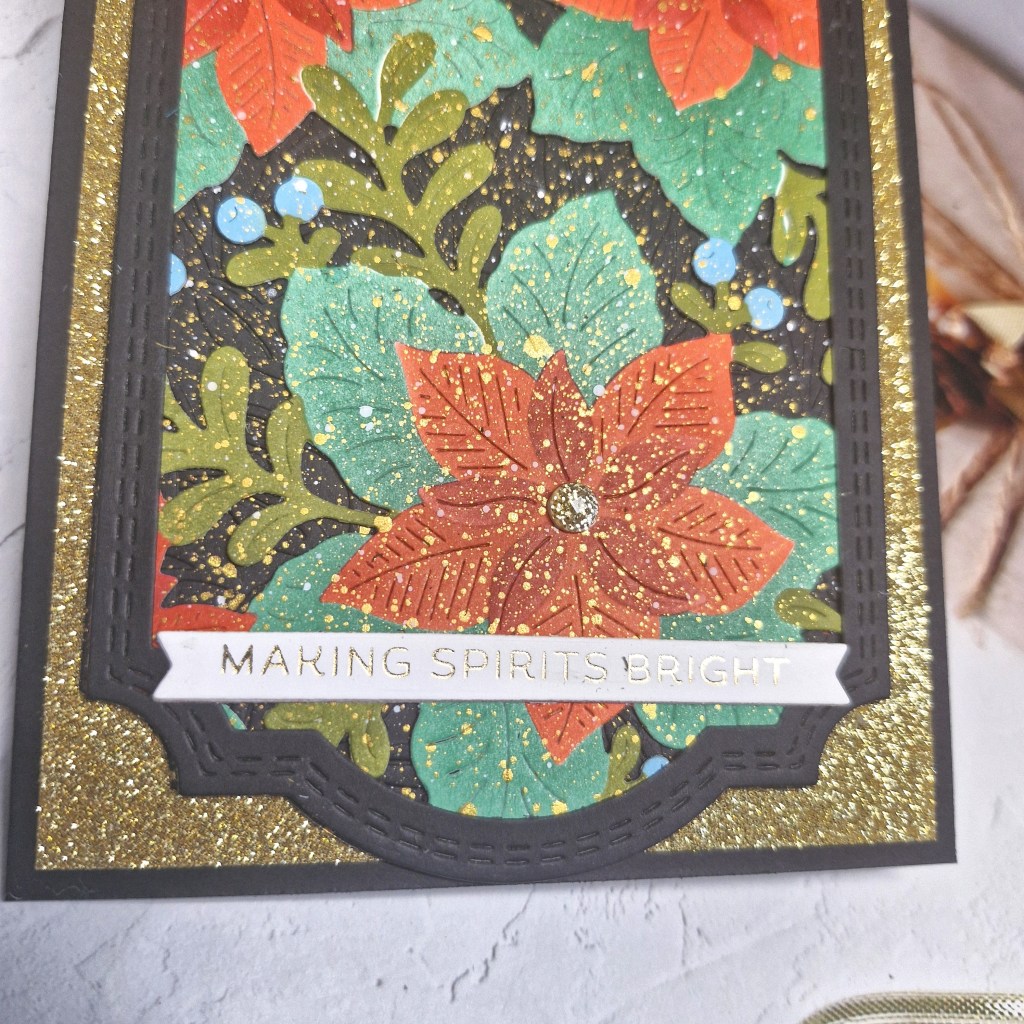
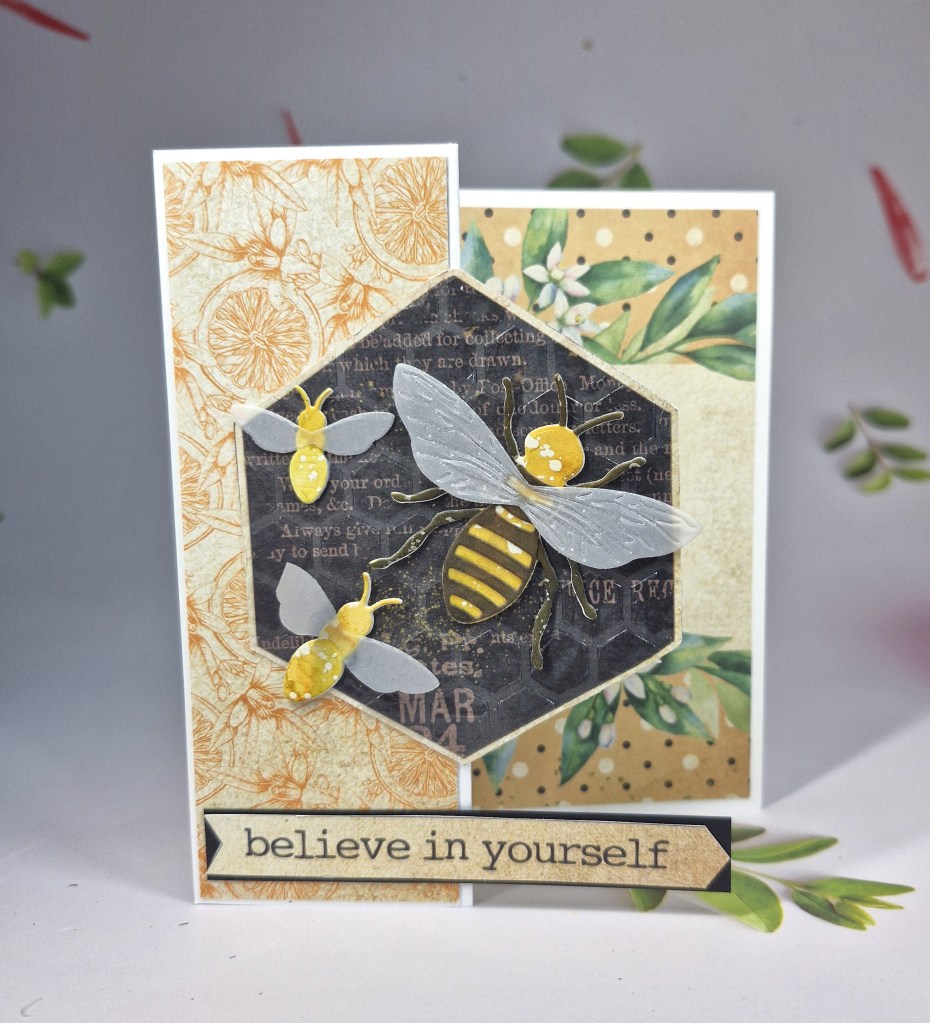
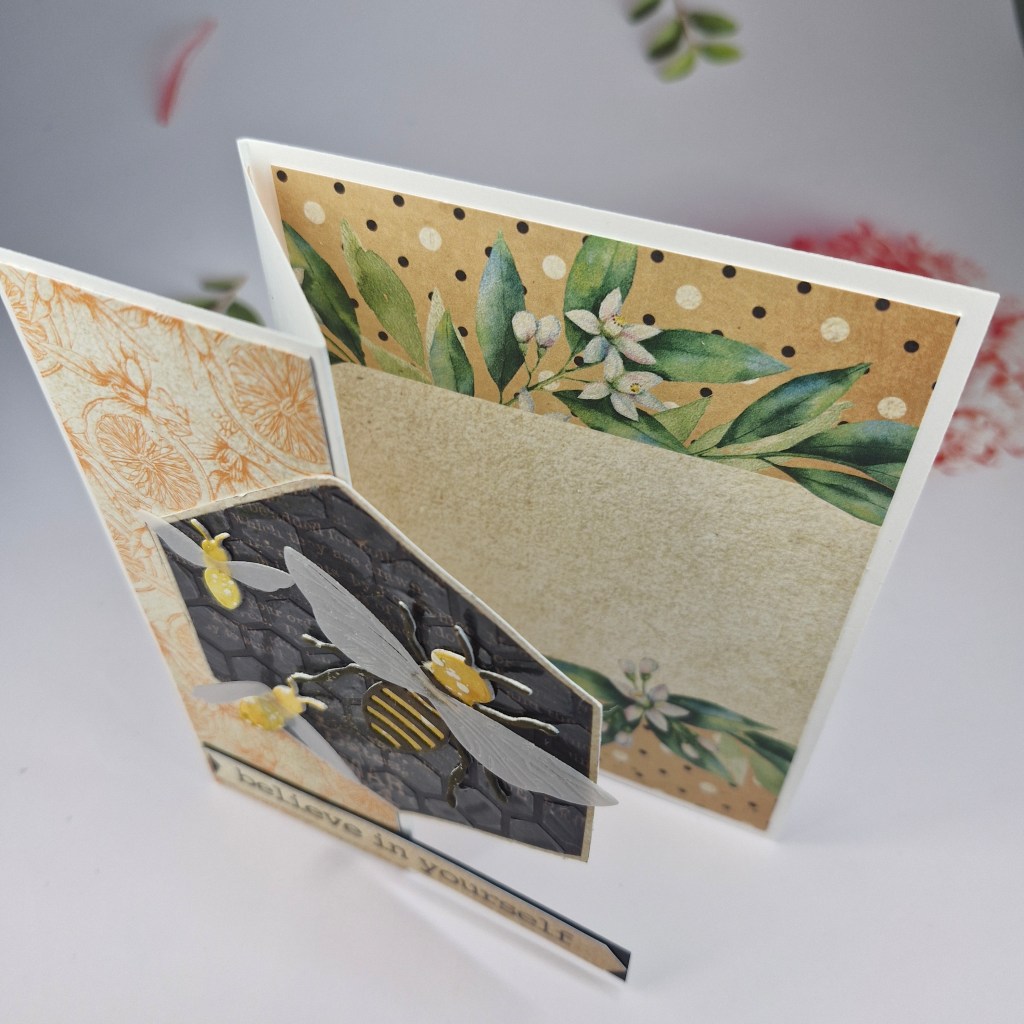
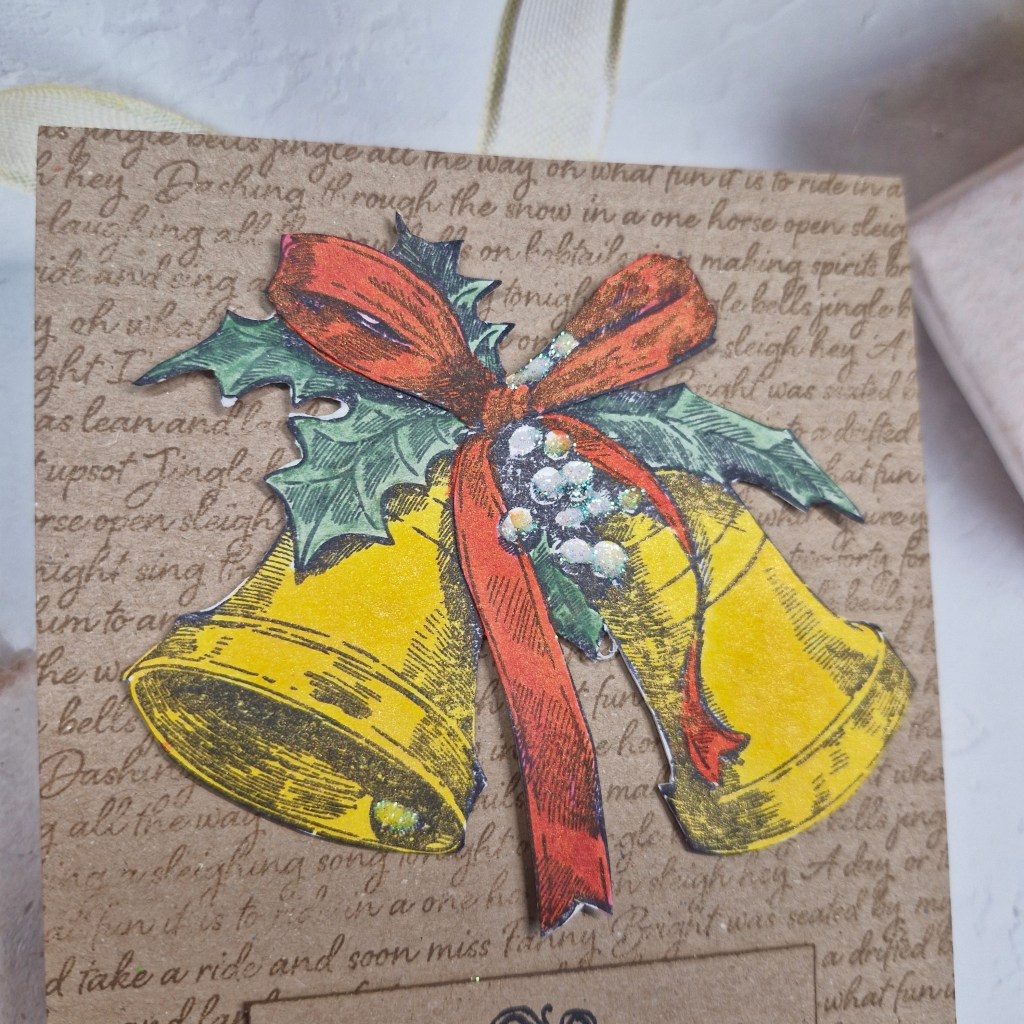
Here is my card:

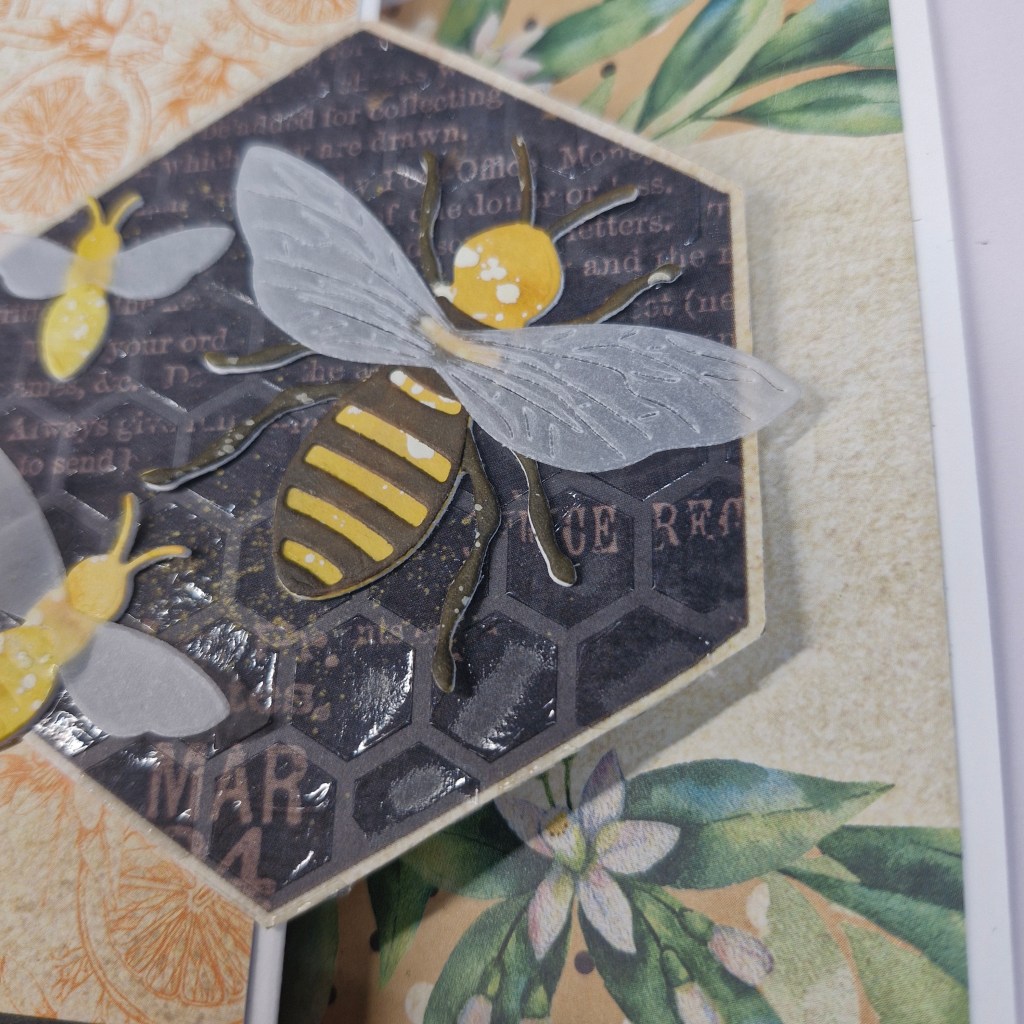
As you can see I chose butterflies, which – according to Google – are classed under the order of Lepidoptera.
I started by grabbing the Tim Holtz/Stampers Anonymous red rubber stamp set called ‘Flutter‘ and chose to go down the mixed media path.
I first grabbed my Distress Pencils, some water, and then coloured each butterfly stamp with the wet pencil nibs in a selection of colours, applied a spray of water to that, then stamped.
This gave a water-colour pattern, not precise, which is what I was going for. After that had dried, I fussy-cut them out…..yep, me, fussy-cutting…….!!
Now for the background panel.
This was created with a piece of Distress watercolour card, some script stamps, Distress pencils – using the same wet pencil to stamp technique, and stamped a couple of times.
This was left to dry whilst I hunted out more stamps I could use, and found a label stamp on which I used a light purple Distress pencil – same technique – wet nib then spritz.
Once the panel was dry, some splatters applied and left to dry – again.
I then used a stencil from Finnabair ‘Gothic’ script and some clear embossing paste – you can see a slight shine in some parts on the background.
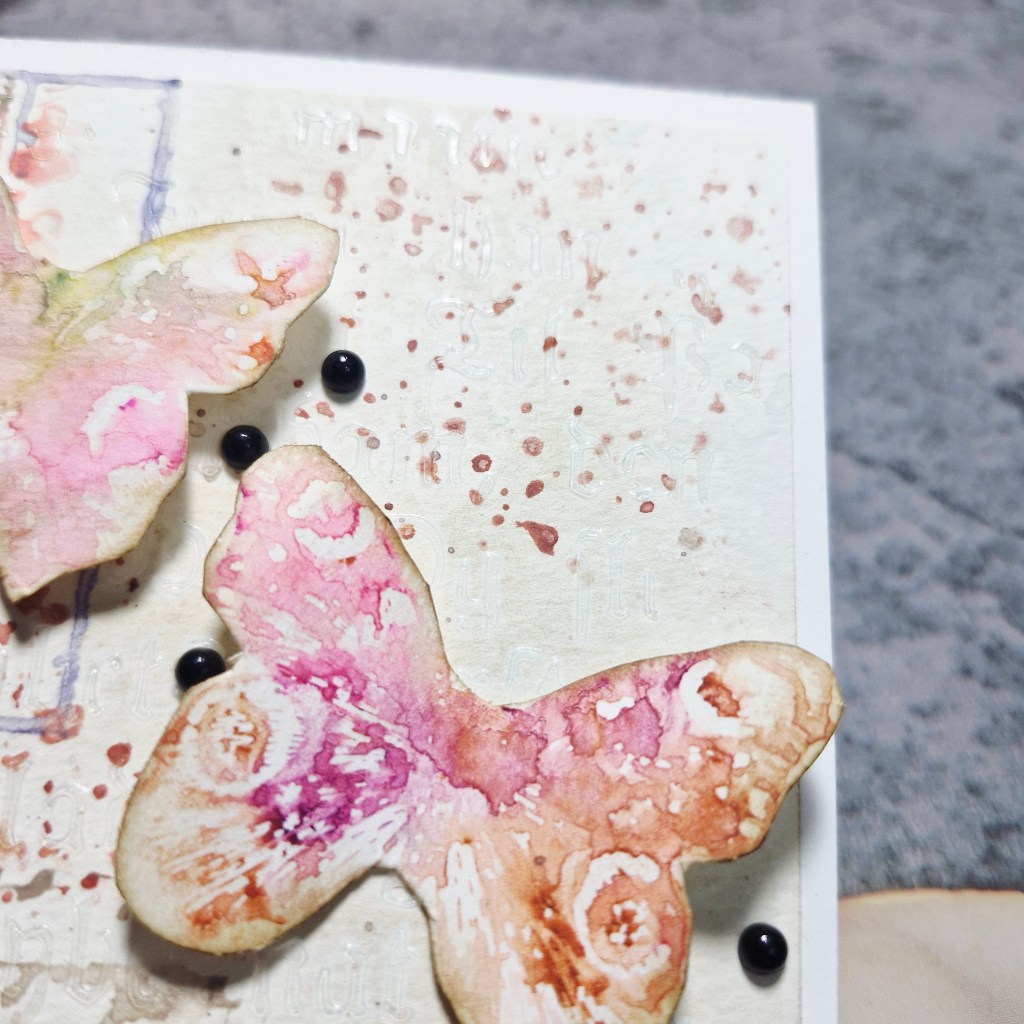
Once everything was dry, I attached the background panel to a white card base, created a little curve in the butterfly wings and attached with glue – 3D foam under each wing to maintain dimension.
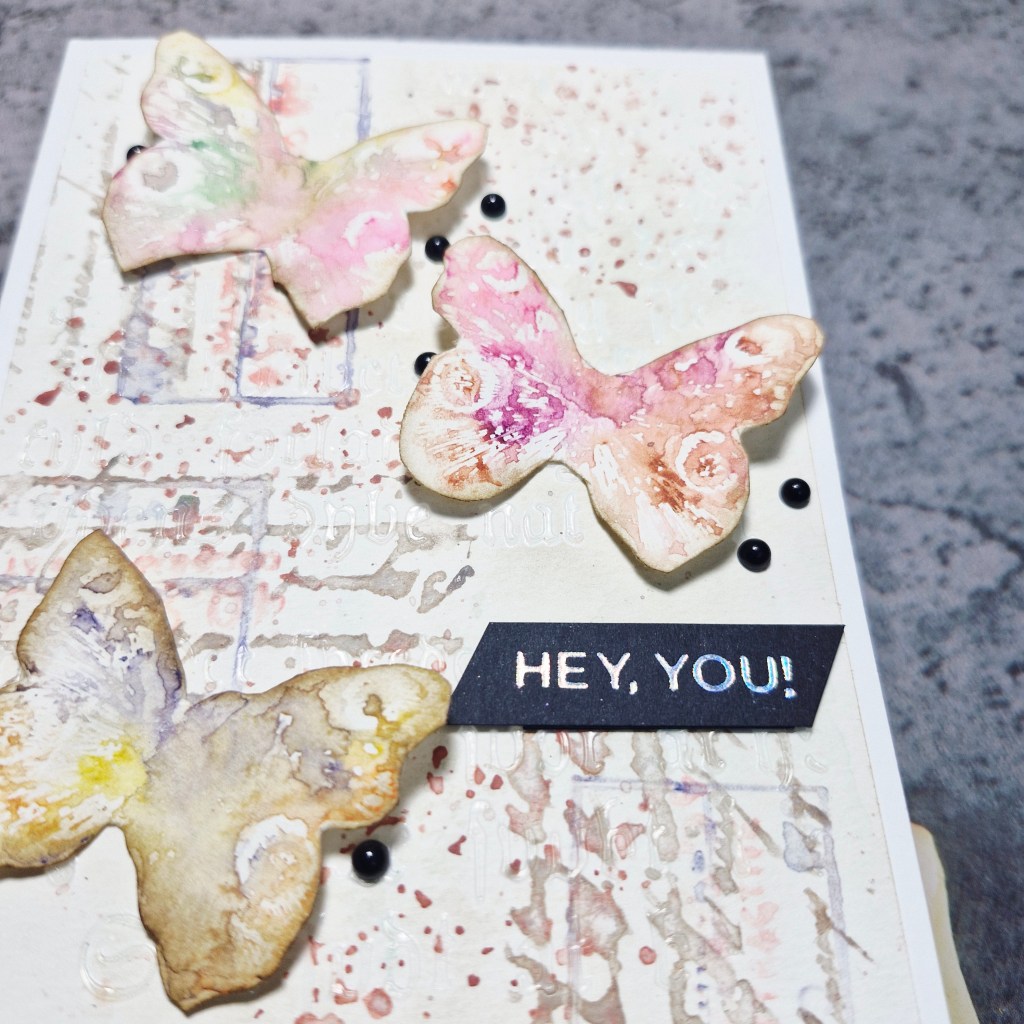
The foiled sentiment was added – silver on black – and little black gems stuck down as you see.
I hope you can come and join us with your projects following our theme. xx
I shall be entering the following challenges:
Just Add Ink – inspiration & colours – pink, brown – light and dark, white,
Addicted to Stamps & More – die cuts and/or stencils – stencil on background
Stamping Sensations – stamping and inspired by nature
Triple B – birds and/or butterflies and/or blooms
Ellibelle’s Corner Garden Party – anything in or from the garden