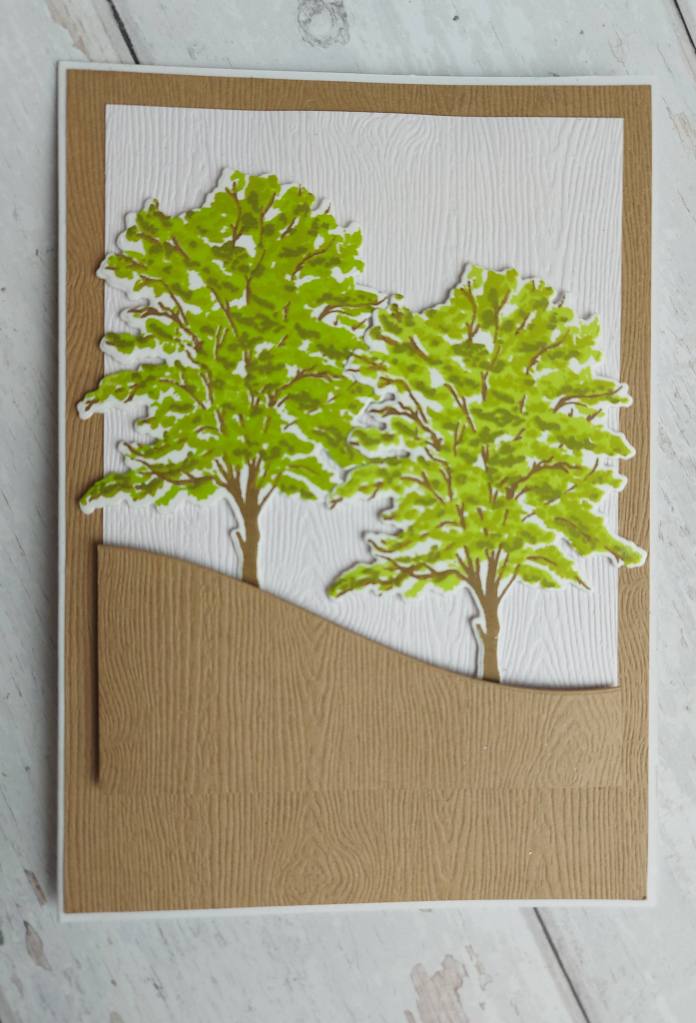
Hello. It’s my turn to host the new challenge started at The Alphabet Challenge. Having reached the letter ‘T’, I chose the theme of ‘Trees‘. Here is my card:
I used Lawn Fawn wood grain card stock to layer onto my base card, adding a hillside for the trees to stand on.
The trees themselves are from The Greetery – a new-to-me layering stamp set – then die cut with the matching dies.
I didn’t add a sentiment at this point, and I may not do in the future, as I think this card can be used for a multitude of reasons – or even as a ‘just for you’ card.
I hope you can come and join in with our ‘tree’ theme – I look forward to seeing your creations. xx
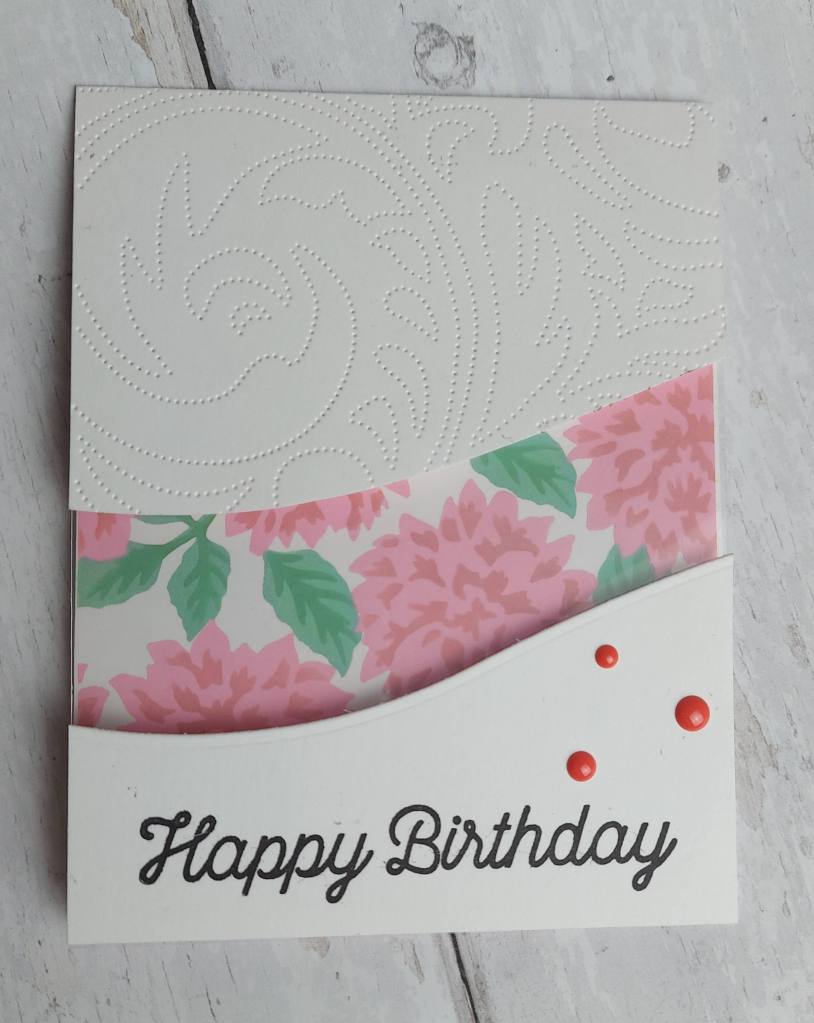
Hello there. Cardz 4 Galz has started a new challenge. This time the theme chosen by Helen is ‘New Year or New Stash‘. Here is my card:
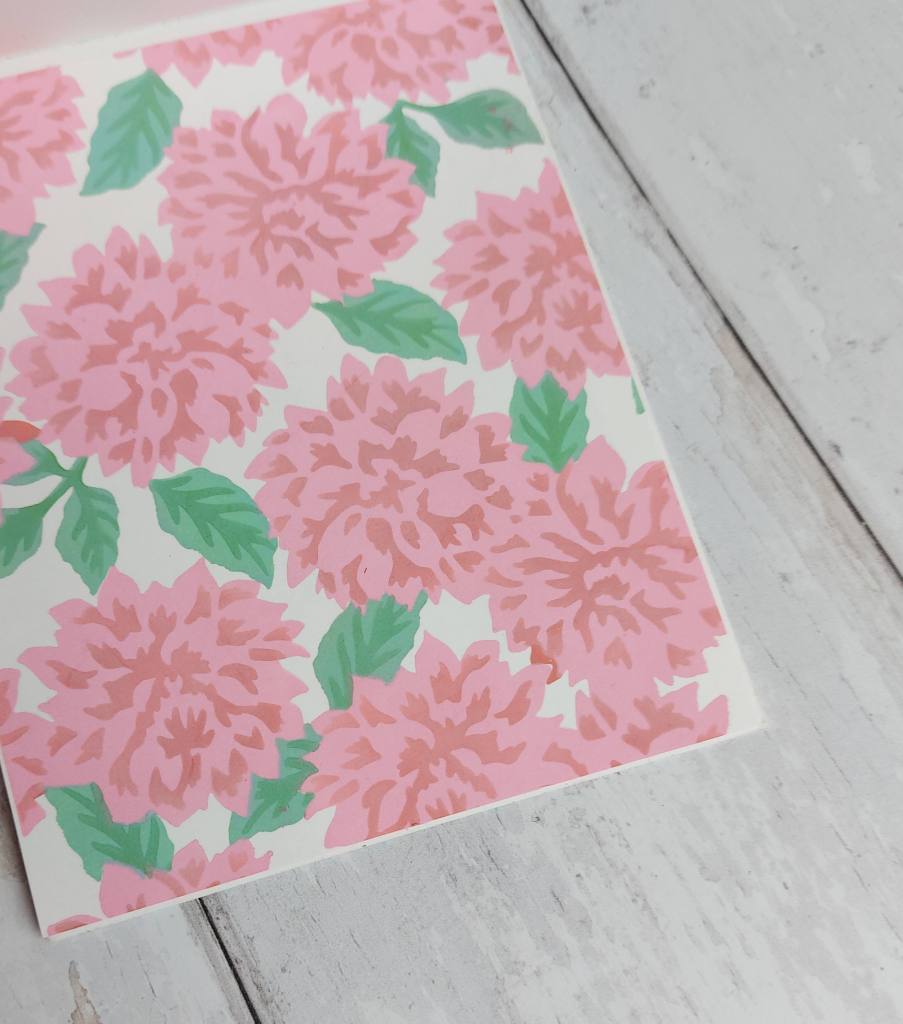
This card was created using a new stencil from Pinkfresh Studio – a layering stencil – which I’m finding I enjoy using………as long as I keep everything today and don’t get any ink smudges – which happens quite a lot…..
I also used the hint and tip from a few YouTube videos about using the Misti to line the stencil up and keep everything straight – worked very well for me. No longer did I have to tape each layer down – just used the Misti magnets and kept moving them around. I did notice that it worked best when the stamping mat was removed first – some more of the edge to keep the papers and stencils straight.
I used Distress Inks for the stenciling and then die cut that piece to fit the inside of an A2 card base:
I had a plan in mind – but it took me quite a while to figure it out….
The front panel was cut using a hillside border, and that top part embossed using an Altenew debossing panel. I then added some acetate at the back, to hopefully create a window.
The part that was cut from the front panel was cut to size – leaving the ‘window’ in the middle – stamped with an MFT sentiment, and attached to the bottom of the acetate.
The back of this front panel looked a little ragged – sticky showing through the acetate – so I managed to create two backing panels the same as the front to hide all the mess. Some red dots added for some more colour and interest on the front.
I hope you can come and join us – I look forward to seeing you in our gallery.
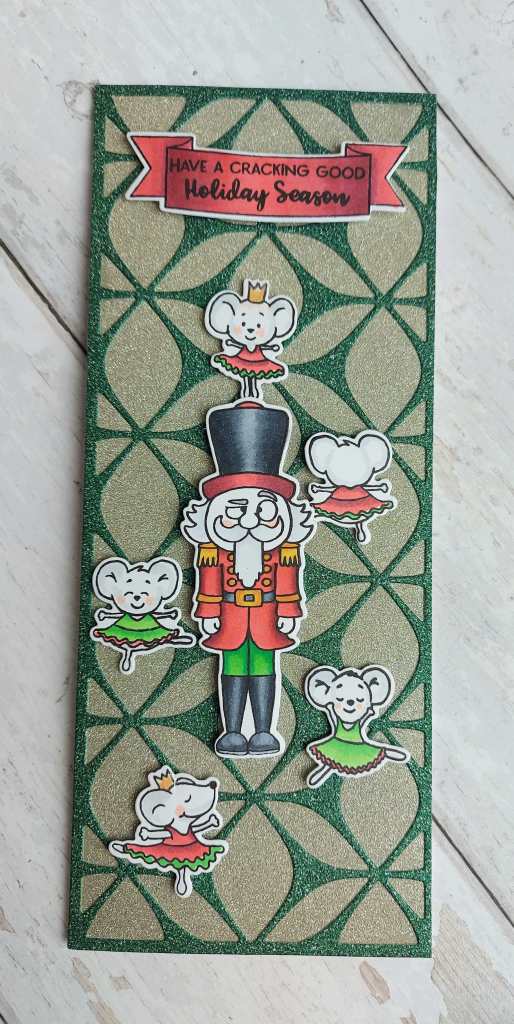
Hello. A little playtime in my craft room created this last minute Christmas card:
The background on this slimlime card is covered with a light green glitter card, then a darker green glitter card over the top using a Catherine Pooler slimline die.
The images from Gerda Steiner Designs were stamped with Gina K Amalgam ink, then coloured with Copics, and then die cut.
All arranged as you see, to create a look like the mice are dancing around the little soldier. I love that one of the mice has her back to us – fits in great with what I wanted to achieve.
Hello once again. A new challenge has started at The Alphabet Challenge. Dawn has chosen the theme of ‘silver’. Here is my card:
For this card, I new I wanted to use the Tim Holtz/Sizzix 3D embossing and cutting folder again. That was the first thing I did for this card – and that snowflake came out beautifully using some Simon Says Stamp holographic card stock.
I was hunting through my previously created backgrounds- I do like a background creating session, especially if it involves Distress inks or Distress Oxid3es – I can go a little crazy. I have also recently started to use the Distress Spray Stains. This green background was using one of the new Mica spray stains – though the shine doesn’t show in the photo (so difficult to capture this time round) and I thought the green background – looking quite distressed itself – a little white space – would be perfect for allowing the snowflake to stand out.
After I had put the card together, I realised that the concentrated green at the bottom actually looks like a row of trees – do you think so too?
I hope you can come and join us with your ‘silver’ creations – I look forward to seeing you in our gallery. xx
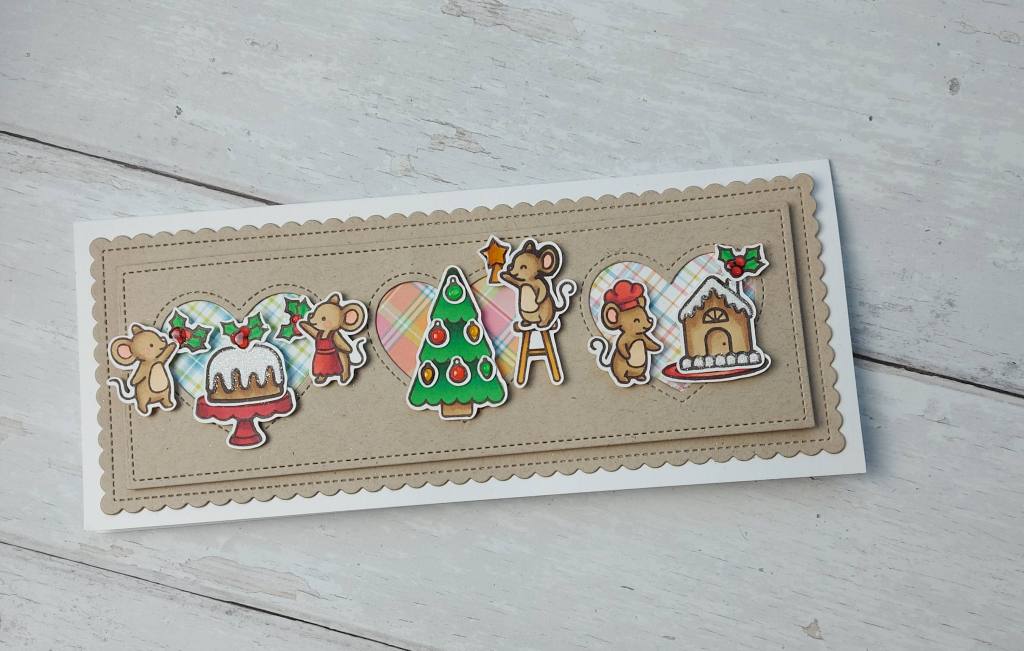
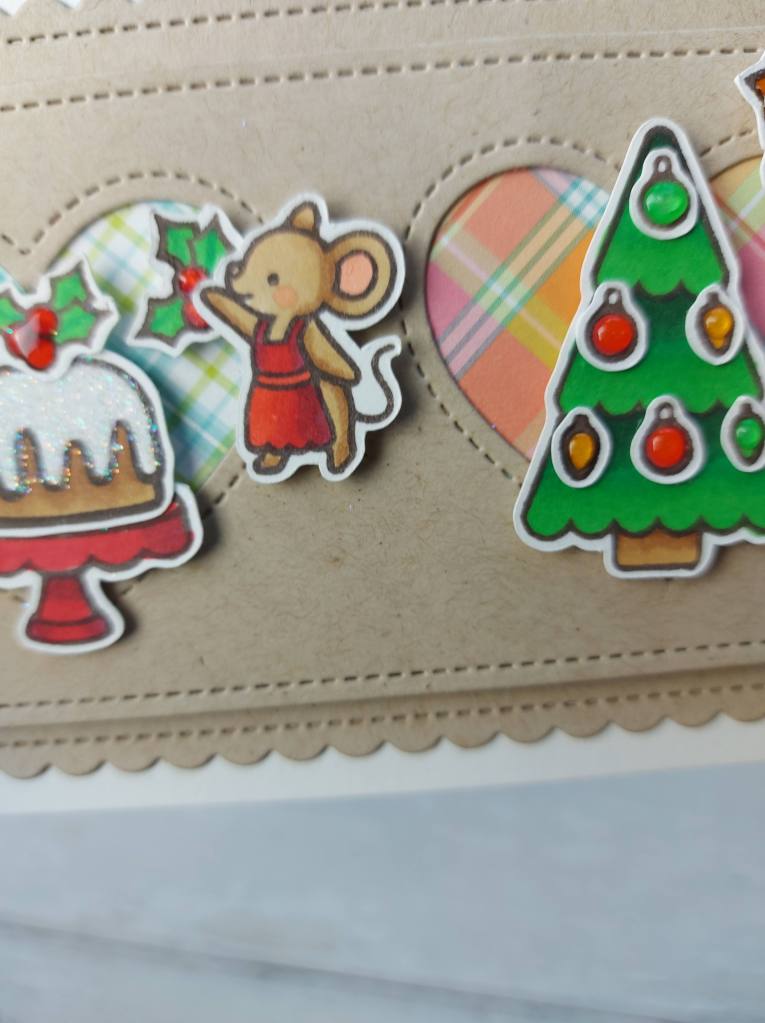
Hello there. Cardz 4 Galz has started another challenge. The theme chosen by Shell is for you to create a card with Christmas Animals. Here is my card:
I used mainly Lawn Fawn products for this slimline card. The base and three heart cut-outs are from one die set, and the hearts backed by Lawn Fawn patterned paper.
The images were stamped, coloured with Copics, then die cut, and arranged as you see. Some glossy accents added to the tree baubles and holly berries, and glitter added to the pudding and gingerbread house.
I really like how this turned out – putting all the images together to create three scenes, which actually work together to create one large scene too.
I hope you can come and join us in this challenge.
Hello there. I have a fun trio of Christmas Stockings for you on a card today:
These stocking dies are from the recent Concord & 9th Jolly Holly workshop – which I still haven’t completed. I was sunning myself in Mauritius during the actual ‘live’ event, and have caught up with the first session – but yet to do the second session………maybe this week….
For the background I used the Altenew ‘Cozy Flannel’ cover die – a very old and well loved die – and some white card stock, and then some muted green glitter card stock. I layered them together – just slightly off-setting them – to create a slight showing of the glitter.
For the stockings, I used some Clearly Besotted dotted paper, and for the cuffs, heel, and toe parts, I used some glitter card stock too.
I think this is such a fun and colourful card, and I may make more of these – so quick and easy to put together once the design is sorted out.
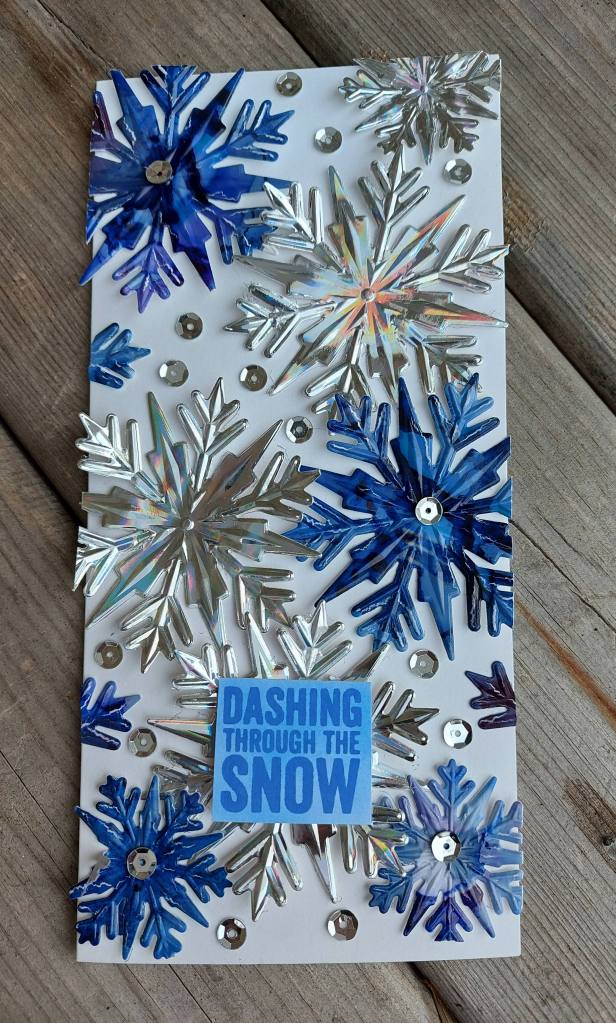
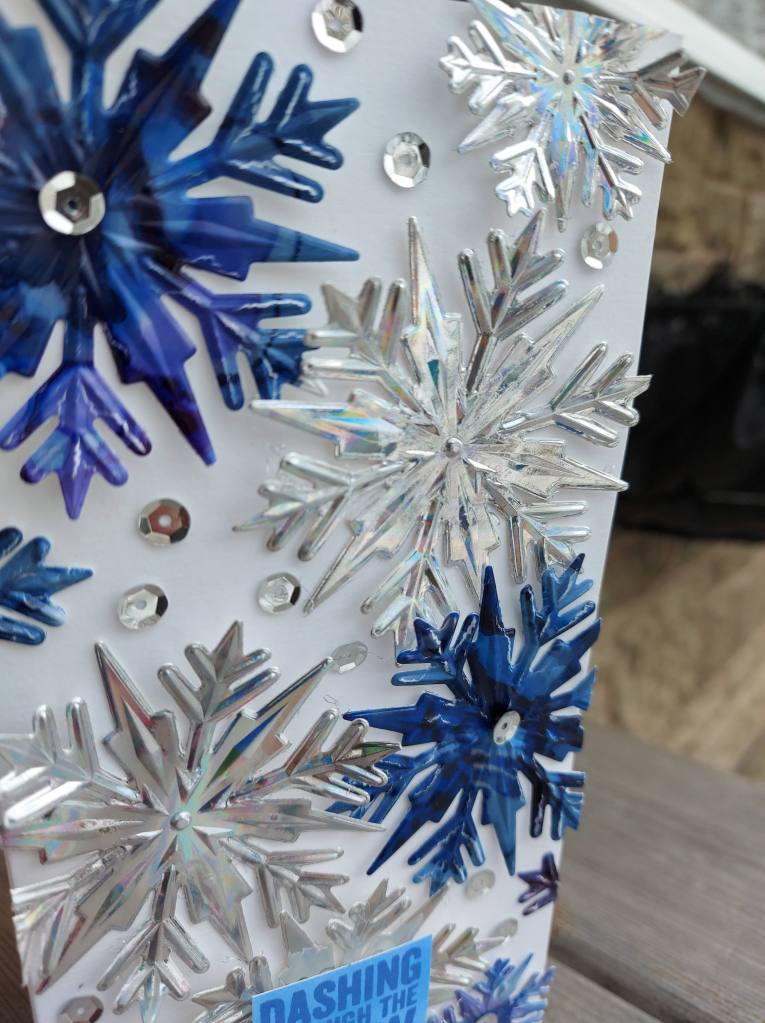
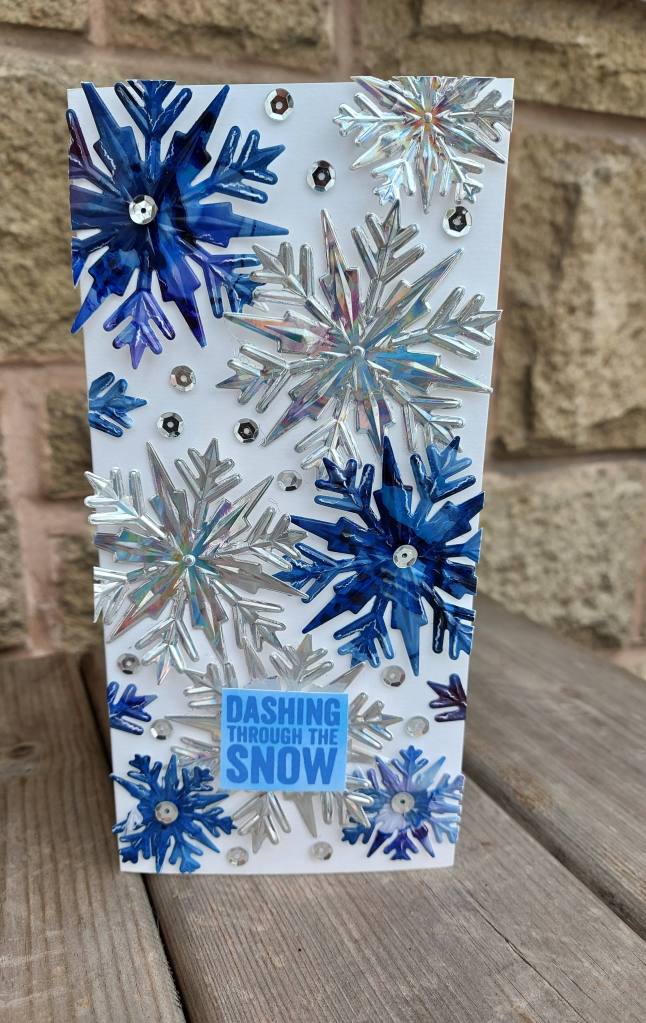
Hello once again. I have taken some time to play in my craft room, and have created the following card:
Do you think there are enough snowflakes and shine?
I used an alcohol ink background previously created, some Simon Says Stamp holographic silver card, and the Tim Holtz 3D embossing folder – which also die cuts the snowflakes at the same time – to create the two different sized snowflakes.
I used a slimline card base and placed the snowflakes where I felt they should go. Some were hanging off the edge, and when I had cut those overhanging pieces off, I then placed those little bits into some spaces around the edge. I didn’t glue the snowflakes down completely – just the centres of them – so there was some movement and dimension.
In the other spaces on the card I added some sequins for even more shine.
The sentiment is also from Tim Holtz, stamped with a Distress Oxide, then used a blending foam to spread the ink around the sentiment – something I saw how to do from one of Tim’s live YouTube videos. I was amazed that the sentiment itself didn’t blur, but he colour was able to be blended – love it.
Hello there. The Alphabet Challenge has started a new challenge. We have reached the letter ‘R’ and Debbie has chosen the theme of ‘RED’.
Here is my card:
I chose a mini slimline card, and used a background previously created using a Tim Holtz stencil and Deco Foil Duo Gel – running through my die-cut machine. These poinsettias are just gorgeous in the silver and this is one of the most successful duo foil backgrounds I made – there was some frustration initially – but this came out almost perfect.
The sentiment is from Simon Says Stamp – silver heat embossed onto white.
Quite simple but I feel very effective.
I hope you can come and join us with your ‘Red’ creations – I look forward to seeing your projects. xx
Hi there. Another challenge has started at Happy Little Stampers CAS Challenge. Kylie has chosen the theme – most appropriately – of ‘Christmas Characters’. Here is my card:
Even though this is a CAS make – it took quite a bit of planning. Why? Well – the placement of each stamp and which ink to use for which layer. I definitely took Tim Holtz advice on one of his lives about layering Distress Oxides and Distress inks when stamping. I knew I wanted to use the fabulous Santa from one of his stamp sets, but what to put around him? How to make it look whimsical and fun?
I used his swirly thing stamp, and Salvaged Patina Distress Ink, then I inked up Santa with Candied Apple Distress Oxide, before turning to the sentiment.
I chose to stamp this in black, but also heat embossed in clear to give a little shine, and to make it stand out.
I really need to play more with Tim’s stamp sets. I always tend to think they need to be used on a mixed media project with lots of techniques – but I really like the simplicity of this card.
I hope you can come and join us with your CAS Christmas Characters – I look forward to seeing you in our gallery. xx
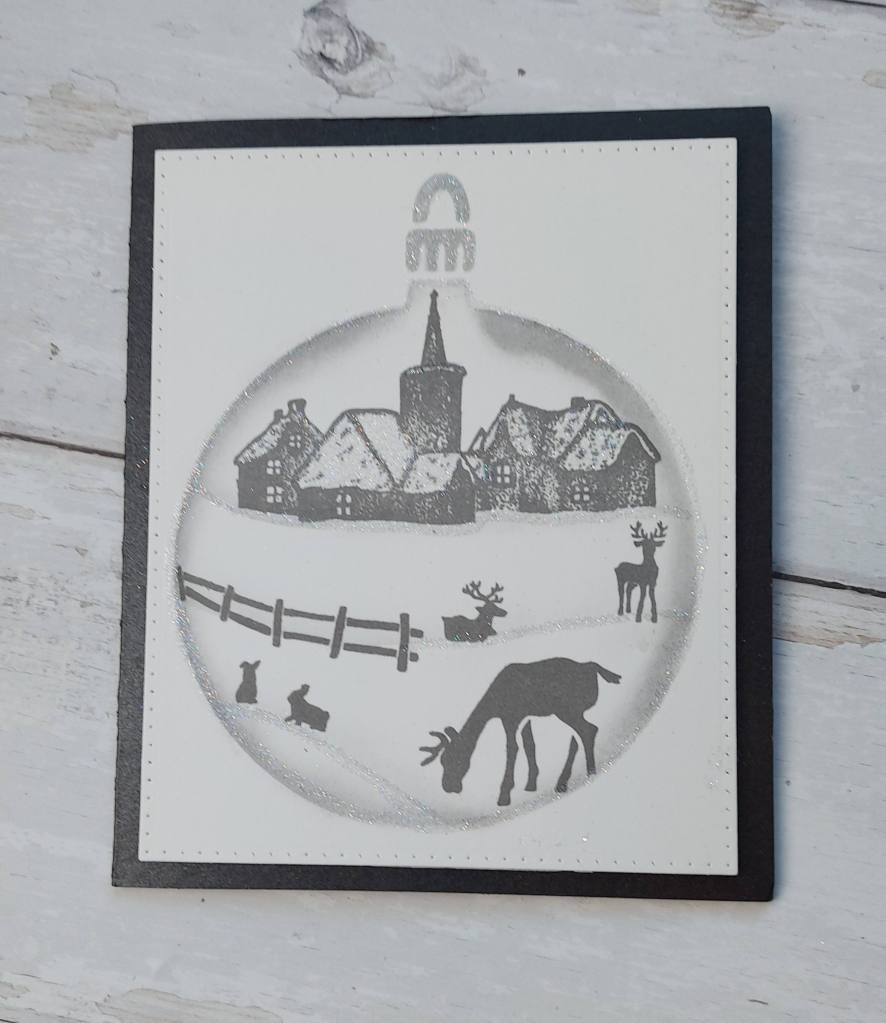
Cardz 4 Galz has started a new challenge, and the theme chosen by Caz is ‘It’s Snow Time’. Here is my card:
I went completely outside my comfort zone to have a go at this technique. I have been seeing it for years – tried it a couple of times – but this time I wanted to try and get it done correctly. I am pleased with the result – but it did take a lot of planning, and masking, and decisions!
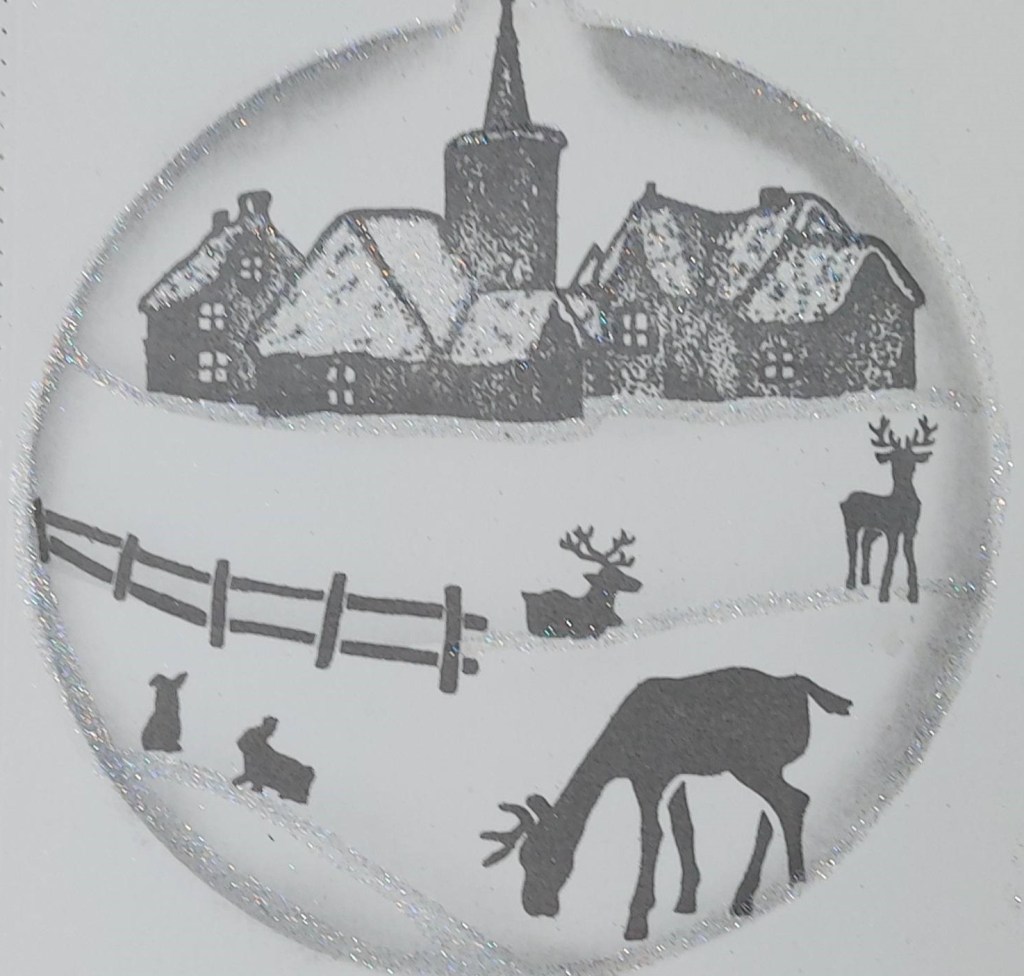
I began with a piece of Bristol Smooth card stock, then placed the Card-io Bauble stencil onto it. I stamped the little scene at the top with Distress Oxide ‘Weathered Wood‘, then placed the fence and animals where I thought they could sit.
I then tore some paper and ink blended the same Distress Ink to create some hills underneath the animals. I added some of the same DI around the edge of the bauble – then also decided to add some Lawn Fawn Prisma Glitter – well – why wouldn’t you?
Most of the cards like this are created using a black ink, but I wanted a more muted silhouette – and I think it works.
I hope you can come and join us for this challenge – I look forward to seeing your creations. xx