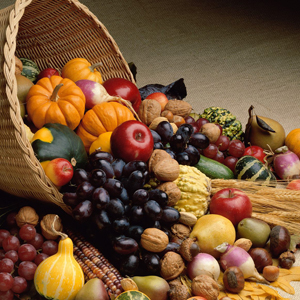
This card was firstly inspired by the current challenge at Inspiration Station. I was looking at the colours with the basket full of harvest goodies.
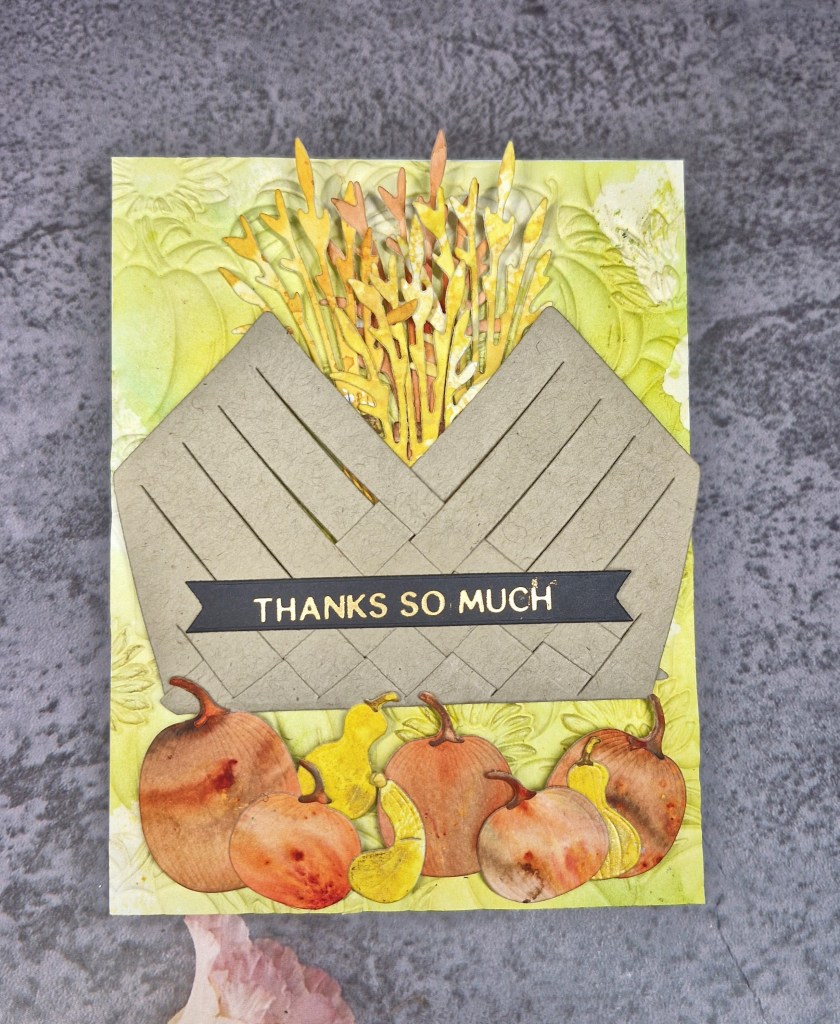
I took the opportunity to raid my stash of pre-prepared papers and card from ink smooshing and spraying and spritzing, using Brushos – generally from one of my play sessions.
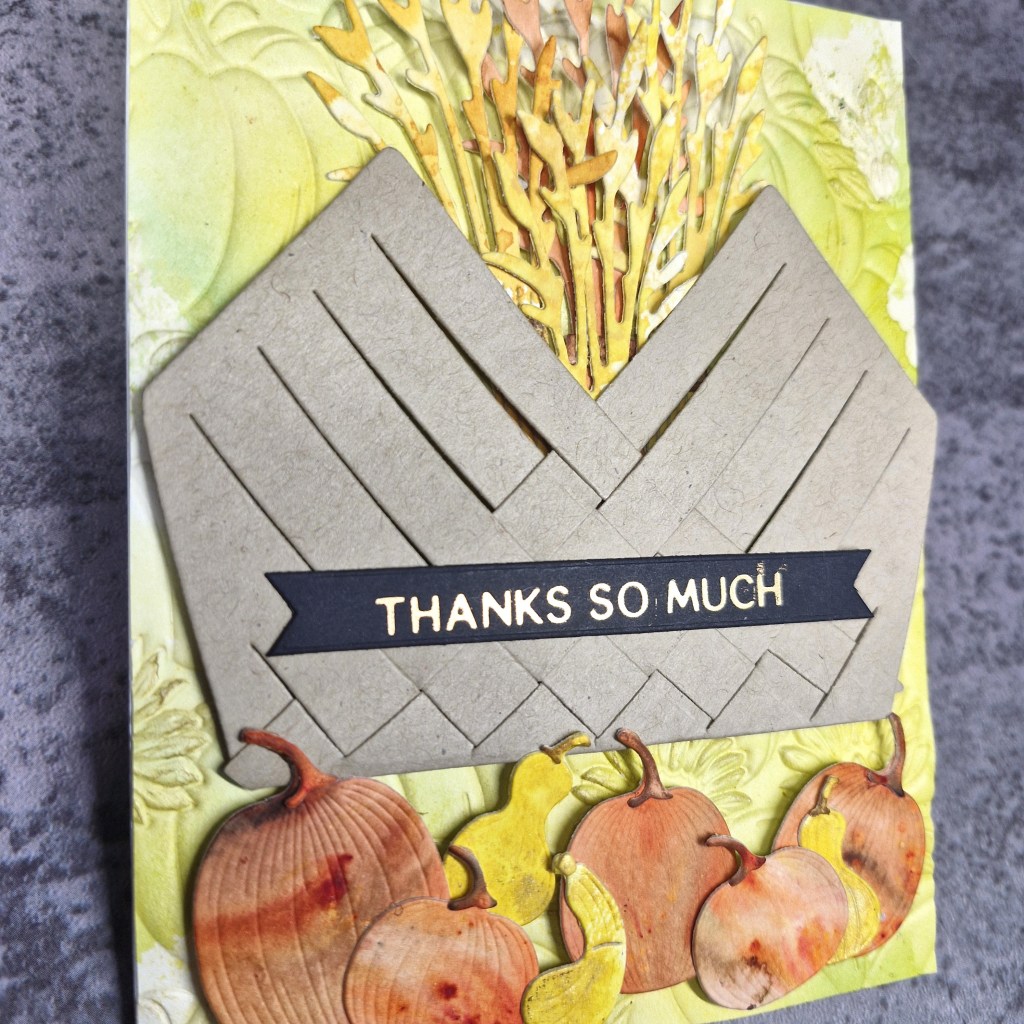
I found the orange piece and die cut some pumpkins using a die set from The Greetery. I also found a piece of yellow card from playing with some mica sprays – the smaller pumpkins were die cut from that. The sheaves of wheat were die cut from more mellow orange and yellow pieces.
The basket is also from The Greetery – ever used – and that was just from some plain light brown/Kraft card stock – letting the other elements shine.
The background panel was created using a piece of paper I had gel printed on – I was obviously playing with some light green or lime inks and paints, and that piece was cut down to an A2 size panel, then a Spellbinders pumpkin embossing folder used on it, after which I took some bright ink and lightly blended over the top – catching the details subtly in some areas.
Now all my elements were ready, I glued the background panel onto the card base, played around with the layout, then added some 3D foam pieces to the back of the basket, inserted the sheaves of wheat, then stuck down.
The pumpkins were added with a mixture of 3D foam and glue.
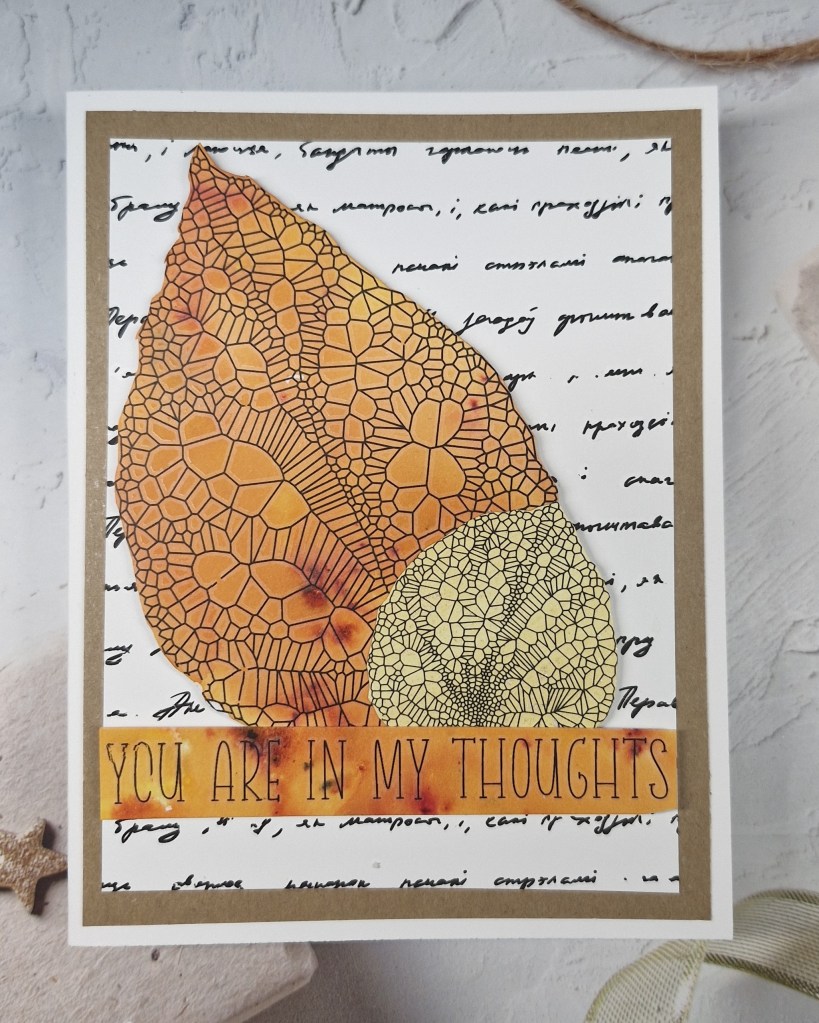
The sentiment is gold foiled – again from a previous crafting and foiling session – black strip to make it stand out amongst all that colour.
I had fun creating this card – so many mediums I have previously played with, creating a stash I forget to turn to – but I was also inspired by one of my Design Team buddies who had recently produced a card using stuff in her ‘bit box’ – and so reminded me I had a stash of papers and pieces of card from all my sessions playing with inks and paints and gel plates etc… I really must remember I have them….
I shall be entering the following challenges:
We Love 2 Create – anything goes mixed media
Inspiration Station – photo inspiration
Creative Artiste Mixed Media – anything goes mixed media
Tic Tac Toe – middle row – thanks sentiment – free – Kraft card stock
Ellibelle’s Corner – Garden Party – anything in or from the garden