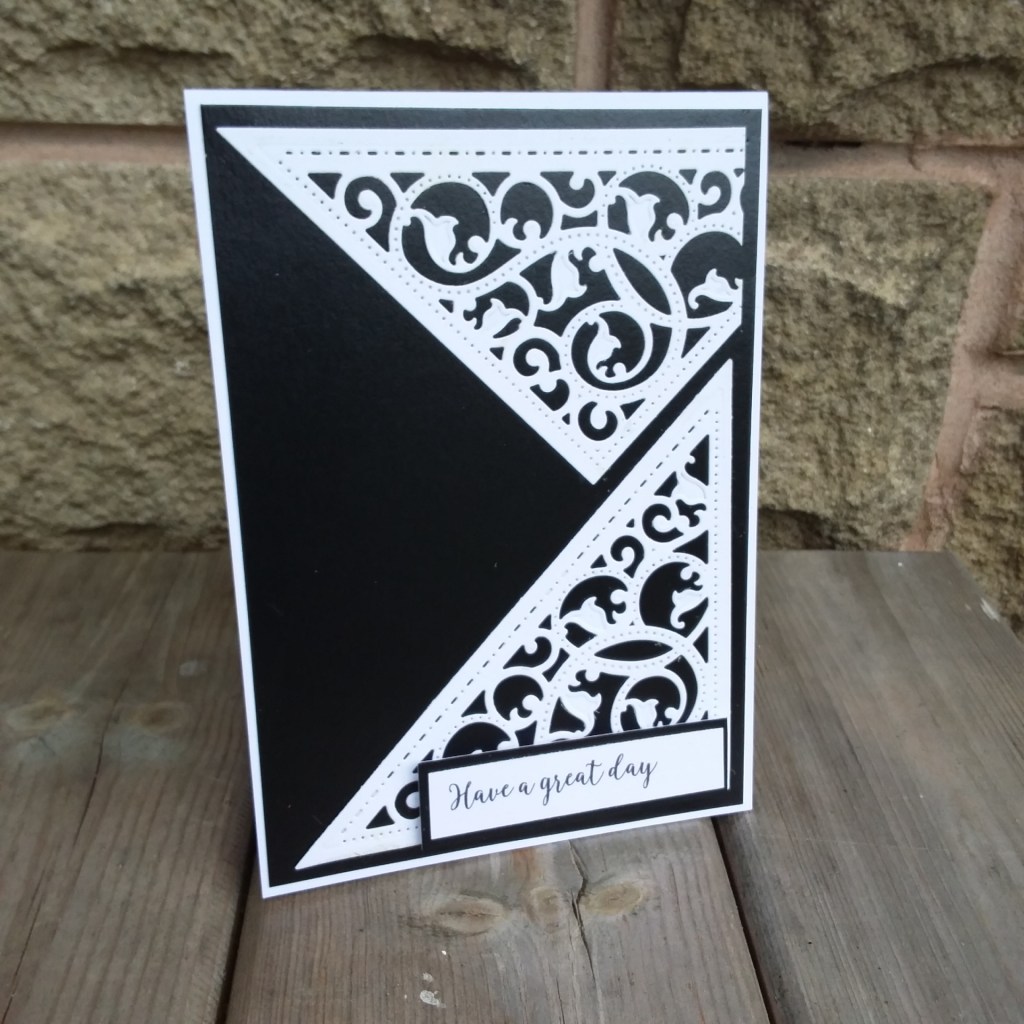
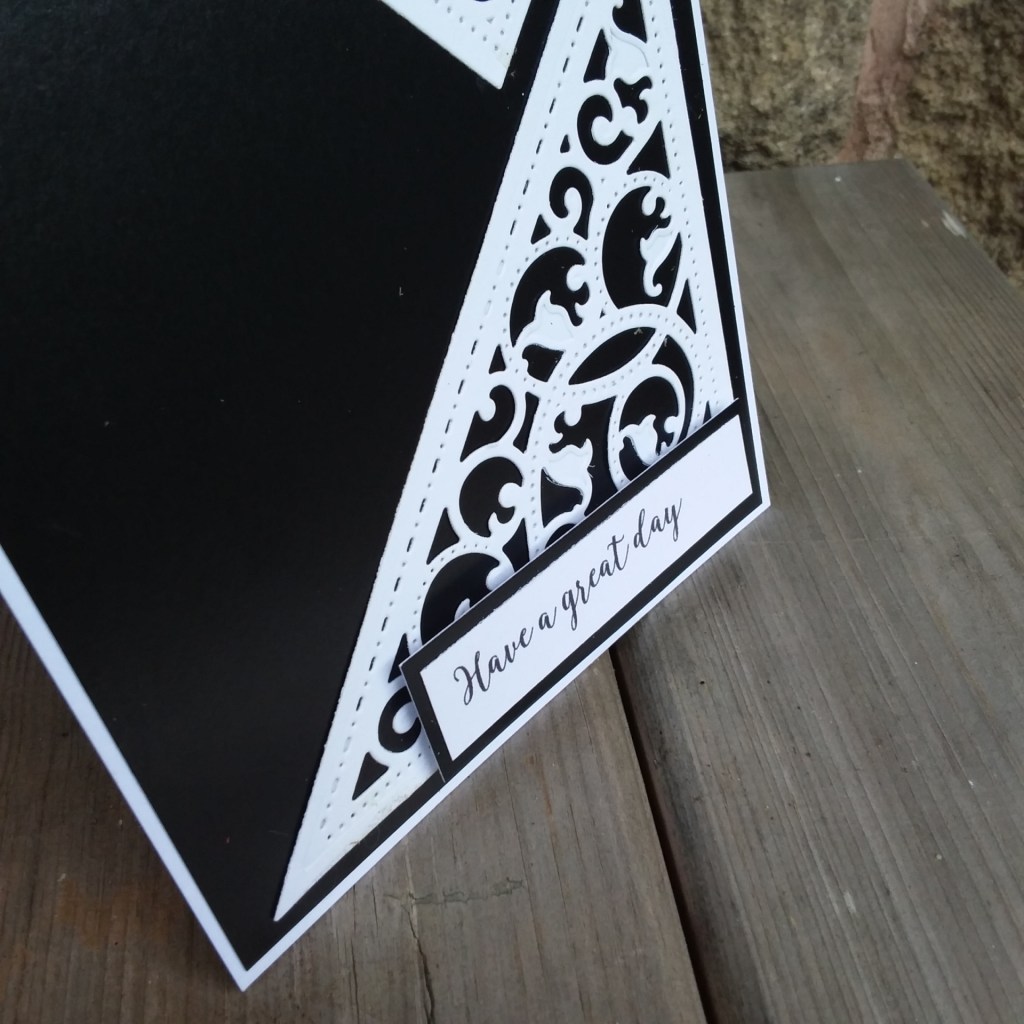
Hello everyone. I have a CAS die-cutting card today:
Even though it looks CAS – it took me a little while to get the triangle right. Funny how what seems like the simplest things take the most time, isn’t it?
On a white card base, I layered a piece of glossy black card – very, very difficult to get that to come through on the photos – but it is a matt kind of glossy – not too shiny………
The white triangles are die cut from an old, old, old Spellbinders set – it says 2013 on the back of the packet!
Getting the angles of these two triangles on the card was the hardest part – fiddling and moving, then cutting away part of the top triangle….
The sentiment is from a piece of card with lots of sentiments on from Craft Box UK.
I’m off to do some layering stamping for another challenge – if I can line ’em up properly, that is…………
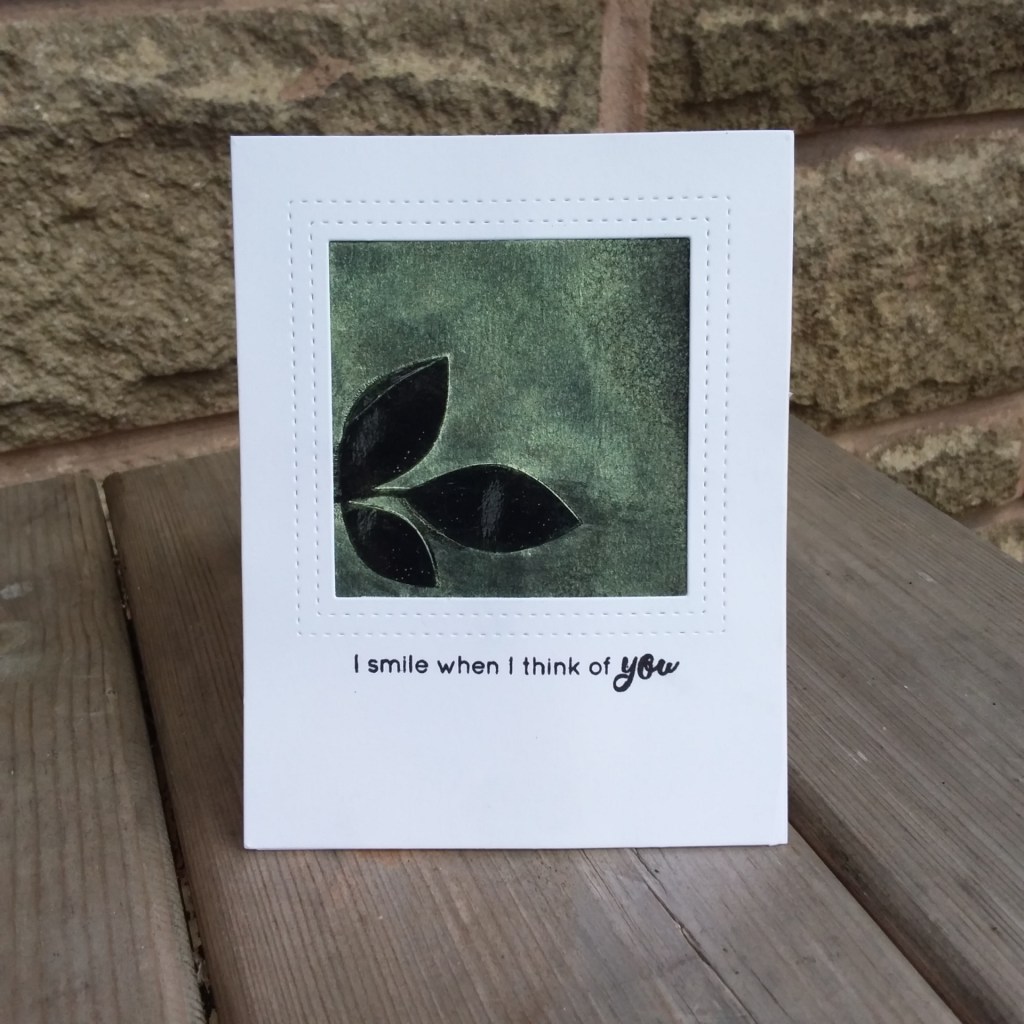
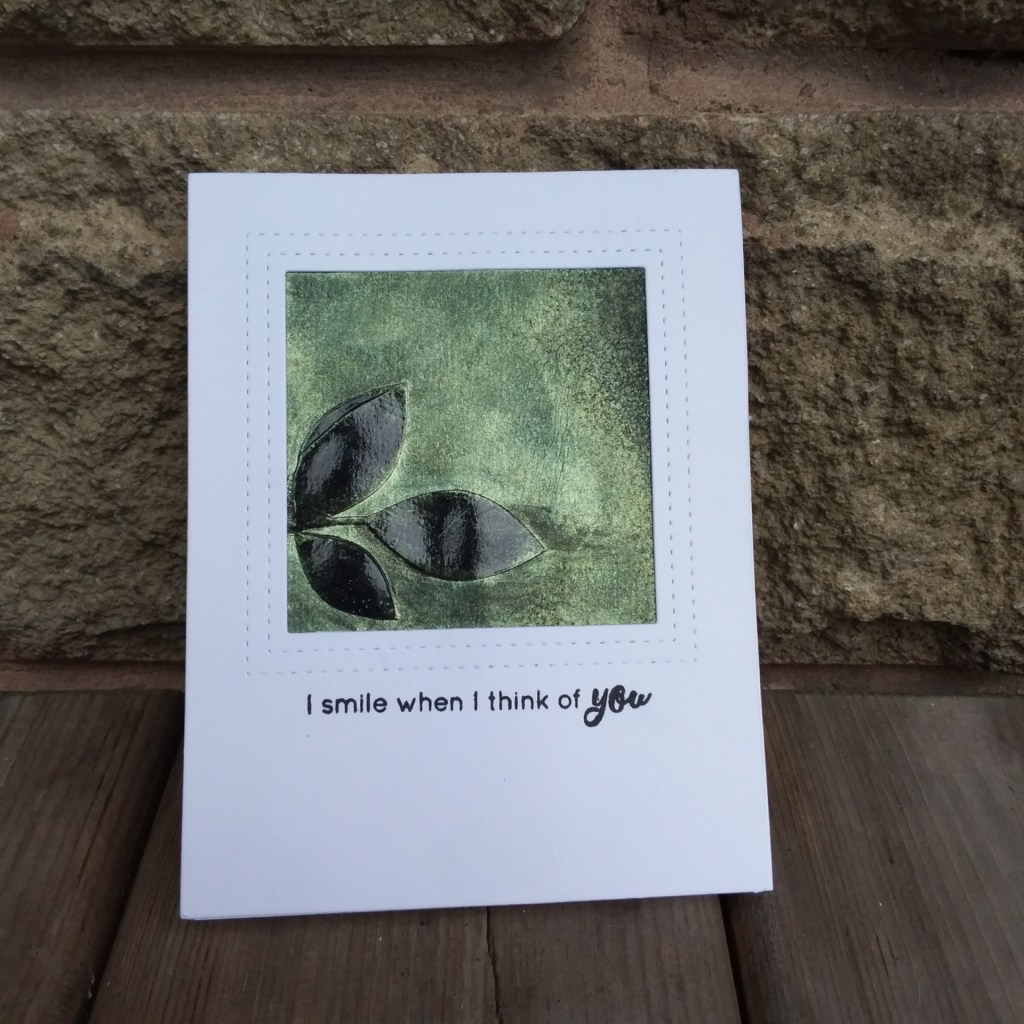
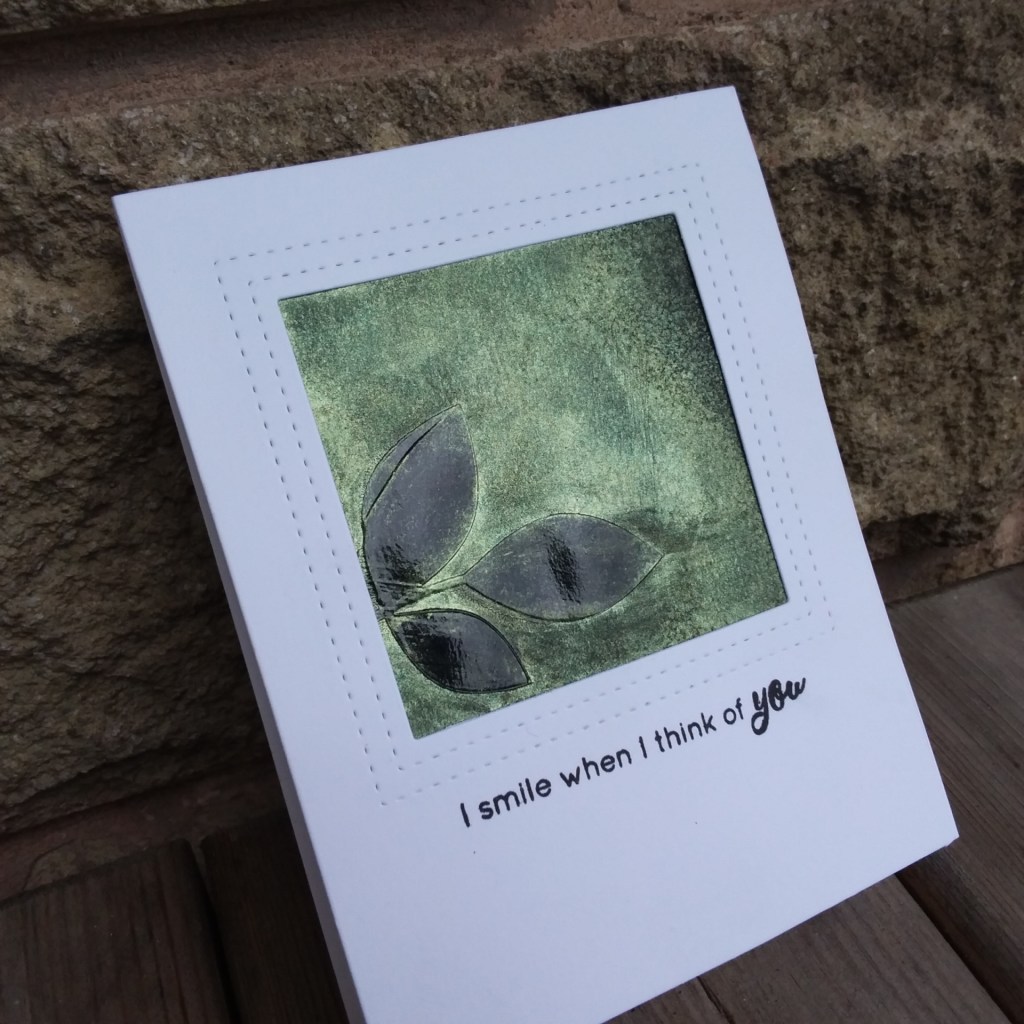
I tried to capture the shimmer and shine on the leaves, and the Lumi spray.
I took a black piece of card and stenciled some leaves using Indigo Blu ‘thick slap-it-on’ and let it dry.
I then sprayed – using short and sharp sprays, and then some longer finer mist spray – to try and get some variation in the drips and drops. The ‘slap-it-on’ resisted the spray – for the most part – leaving a black silhouette of the leaves.
Whilst this was drying, I used the Reverse Confetti cover panel to create the window, and taped the square black and green image underneath – adding the whole to a white card base.
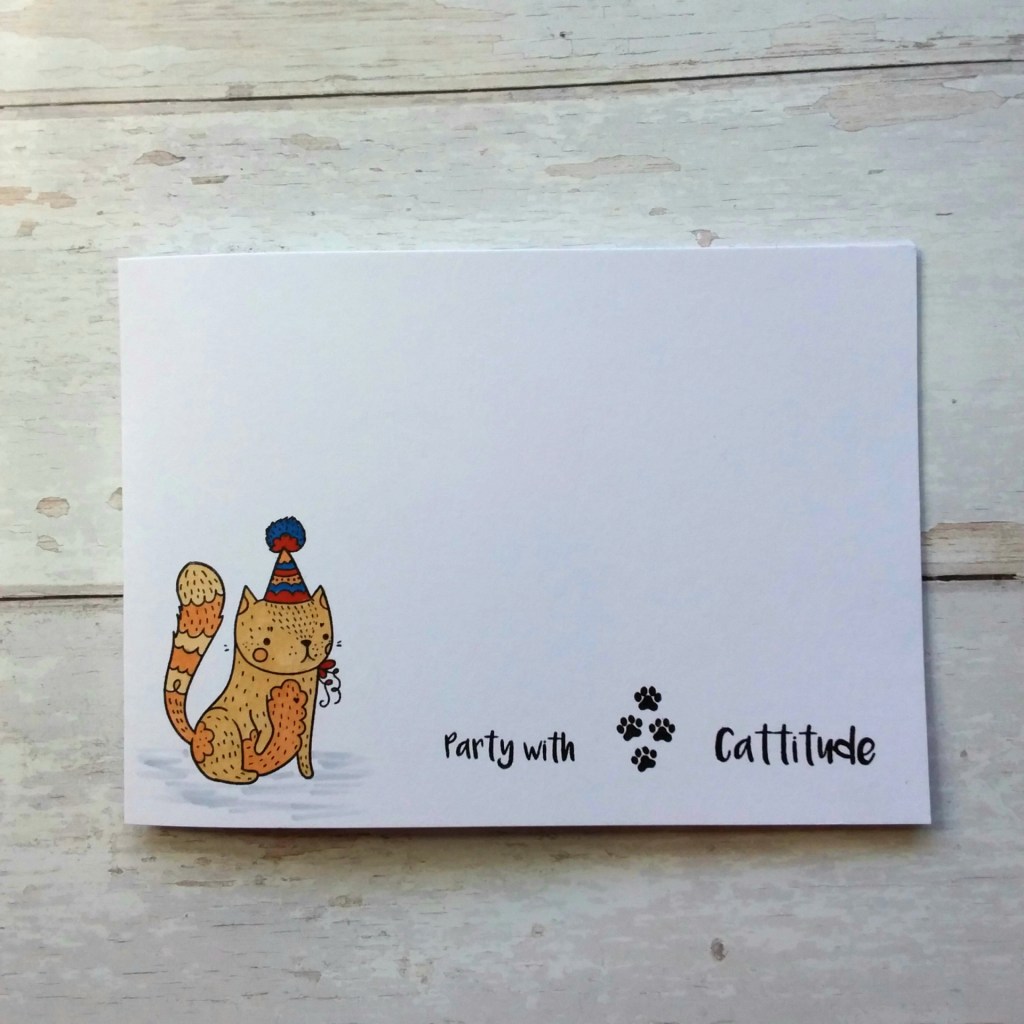
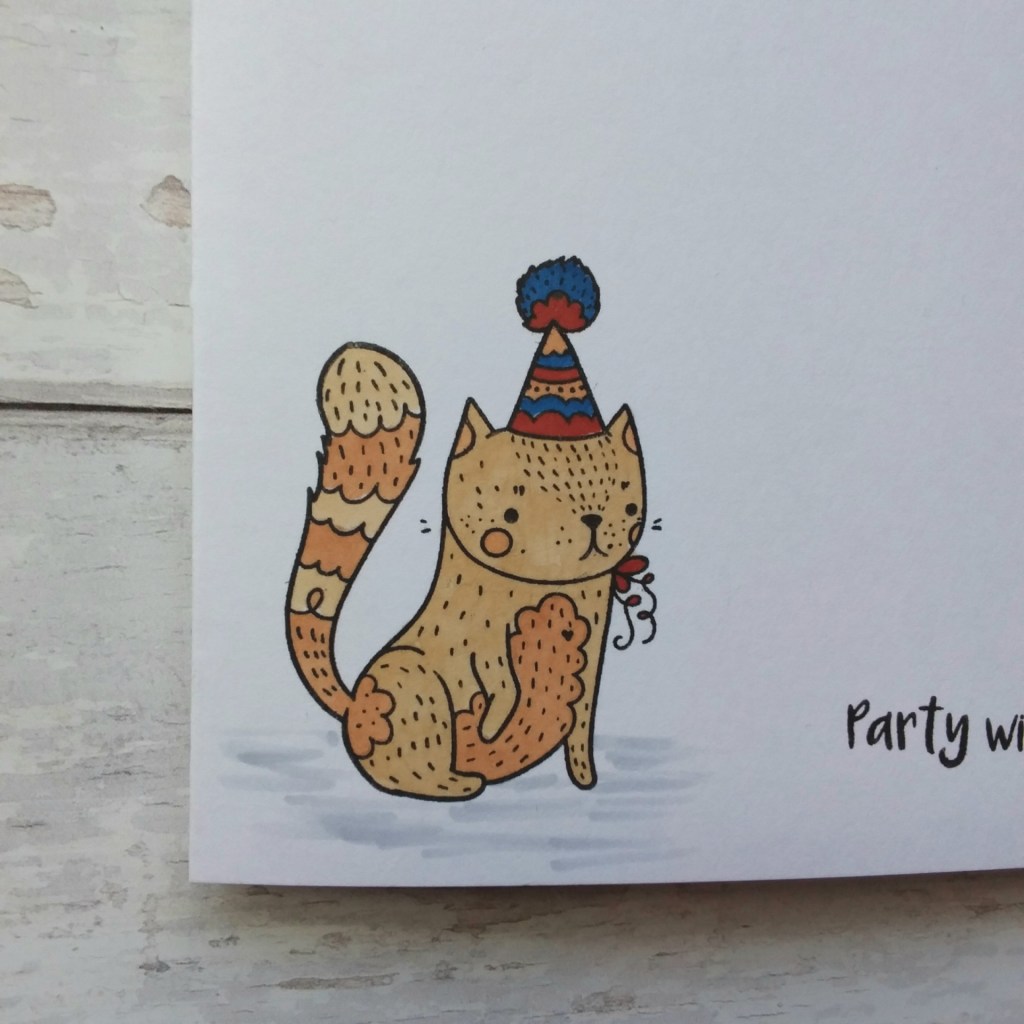
I have a CAS card to share today using a newly purchased stamp set from Funky Fossil Designs:
This also turned out to be a one-layer card…………
Once the image and sentiment was stamped with Gina K amalgam ink, I coloured with the three colours from the JUGS challenge. As it is one layer, I couldn’t do much shading – in fact none at all. I knew these Copics would bleed onto the back of the page – so I took it very gently, and not hanging around with the Copic too much.
Hello everyone. I hope you are keeping well. I have a CAS card to share today from a new stamp set from Tracy Hey/Alpaca Pals:
This is such a cute stamp set, and I would never have found this company if it wasn’t for seeing a card made by Jenny aka Ginger Ninja Crafts
I went to the web site, spent a little bit of money on several stamps – and as I ordered at about 12 midday – they arrived the following day! How about that for rapid service! There are so many cute images on so many different stamp sets – and the sentiments are truly fabulous – I hope you check them out.
Anyhoo – back to my card – I used Make-It Colour Blending Card cut to 7×5 inches, stamped the images as you see with Gina K Amalgam ink, then coloured with Copics.
The colour scheme is from the current challenge at Color Throwdown.
At the moment, I seem to be playing with my Copics quite a bit – I think I’m getting the hang of them – but in any event – I’m getting to like the little bit of colouring I’m doing. Maybe because I’m getting the results I want, maybe because I have more time to play, so I don’t feel ‘pressured’ to HAVE to colour……………..I never thought I’d say I like colouring…..!
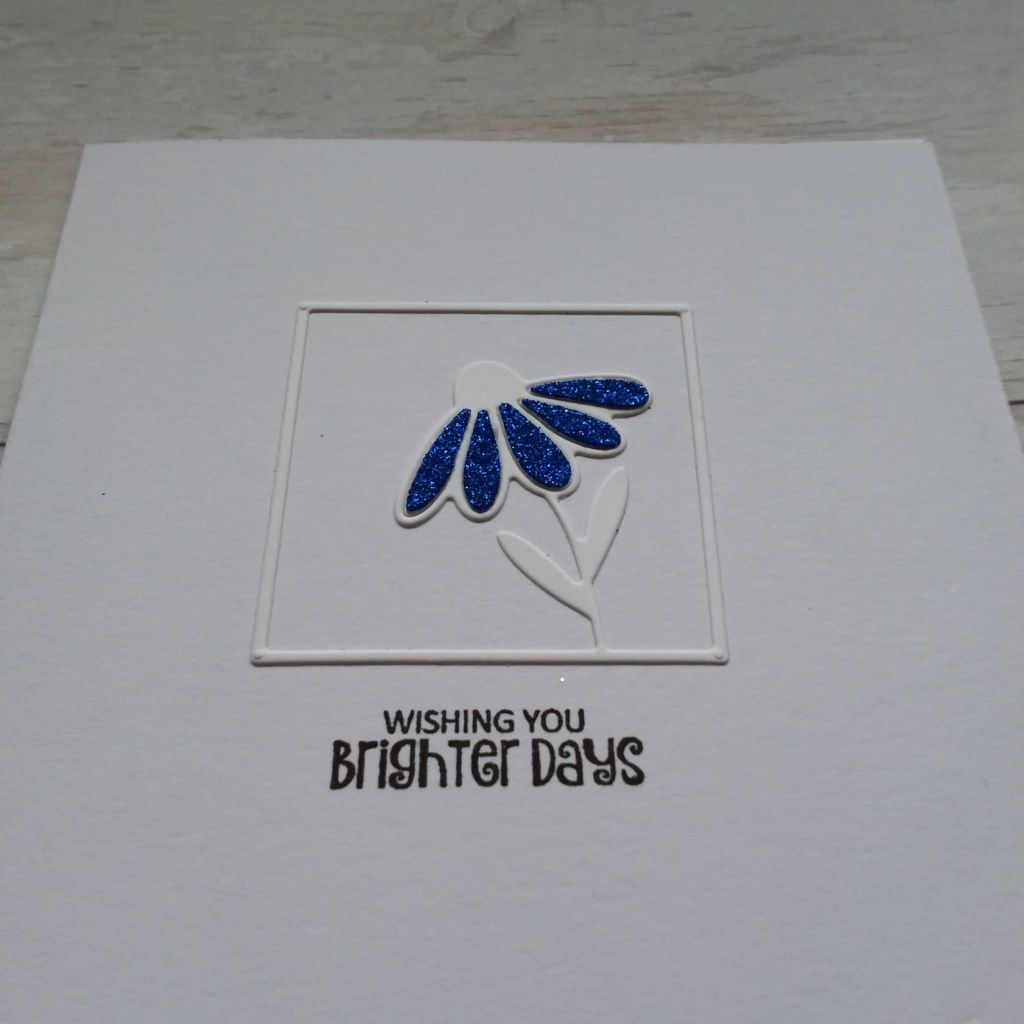
Hi everyone. I have created a CAS card today – an idea I had yesterday and going round in my mind. I changed my idea several times, and this card is the one I prefer. Isn’t it strange how such a CAS card can lead to several versions?
I have wanted to use this die set for ages – and have left it out on my desk since I bought it – which is probably a few months, actually! There are 6 small square dies in this set – and I’ll probably make some encouraging cards with the rest of the images.
I die cut the Pink Fresh Studio square from white card stock with double sided sticky tape on the back. This was placed in the centre of a square card whilst I toyed with a couple of ways to add the extremely glittery blue card into the petals.
I first inlaid them on one card, then I made another and this time I inserted the white petals in first, then added the blue petals on top – that way the blue petals stood a little proud of the outline.
It’s very difficult to show the glimmer here – but trust me – it’s very sparkly!
As I am currently making cards with encouraging sentiments – mainly anyway – I used this sentiment from a Clearly Besotted stamp set.
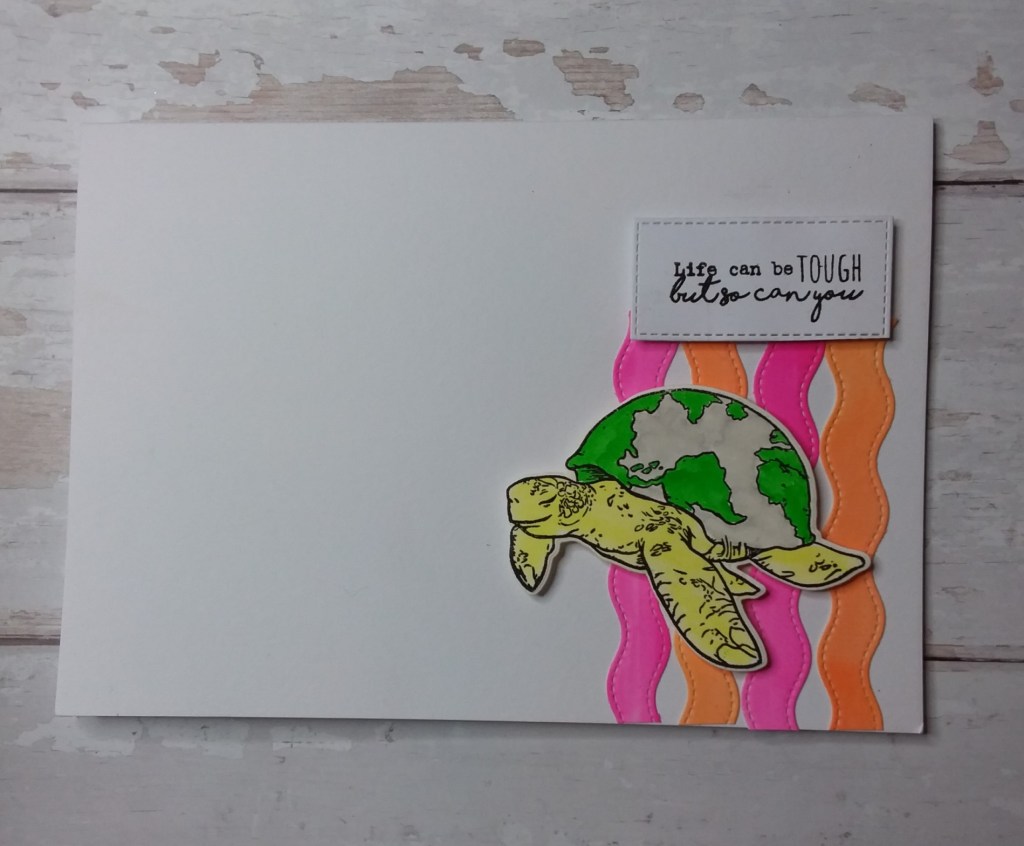
Hi there. I have made a card today just for the fun of it. I took inspiration from several challenges – but I wanted to create a fun and colourful card, with some inspiring words. Inspiring for me – and for everyone else.
I wanted to play around with colour, I wanted to play with some water-colouring, I wanted to just play. I didn’t want to particularly think about what I was creating. I knew I wanted to use this stamp set from Hero Arts, and I knew what sketch and colours I wanted to use – so I began.
I played, I water-coloured, I used colour, I used dies. No shading, no thinking about which way the light was coming from – just played………..and in the end I am pleased with what I created!
I stamped the turtle onto Arteza water-colour card in Altenew Obsidian ink, let it dry a little, then collected the four colours together I was using from the current challenge at Color Throwdown.
I did colour a turtle in pink – but didn’t like that, so here is what I did the second time around. I used a little water with each colour, to spread things around a little, and I’d forgotten how pigmented these zigs are……..
The stitched waves were pieces of card coloured again with zigs and die cut using a Lawn Fawn ‘stitched wavy borders’ die, and they remind me of some sea-weed drifting in the motion of the sea.
I have just receievd some Tracy Hey Designs stamp sets – and this sentiment was just sat there looking at me………………it’s almost as though I am saying this to myself – and saying this to others. I may have to use this sentiment again…….
So – a fairly basic yet colourful card, I enjoyed the process, and I’m already planning what to make tomorrow…..
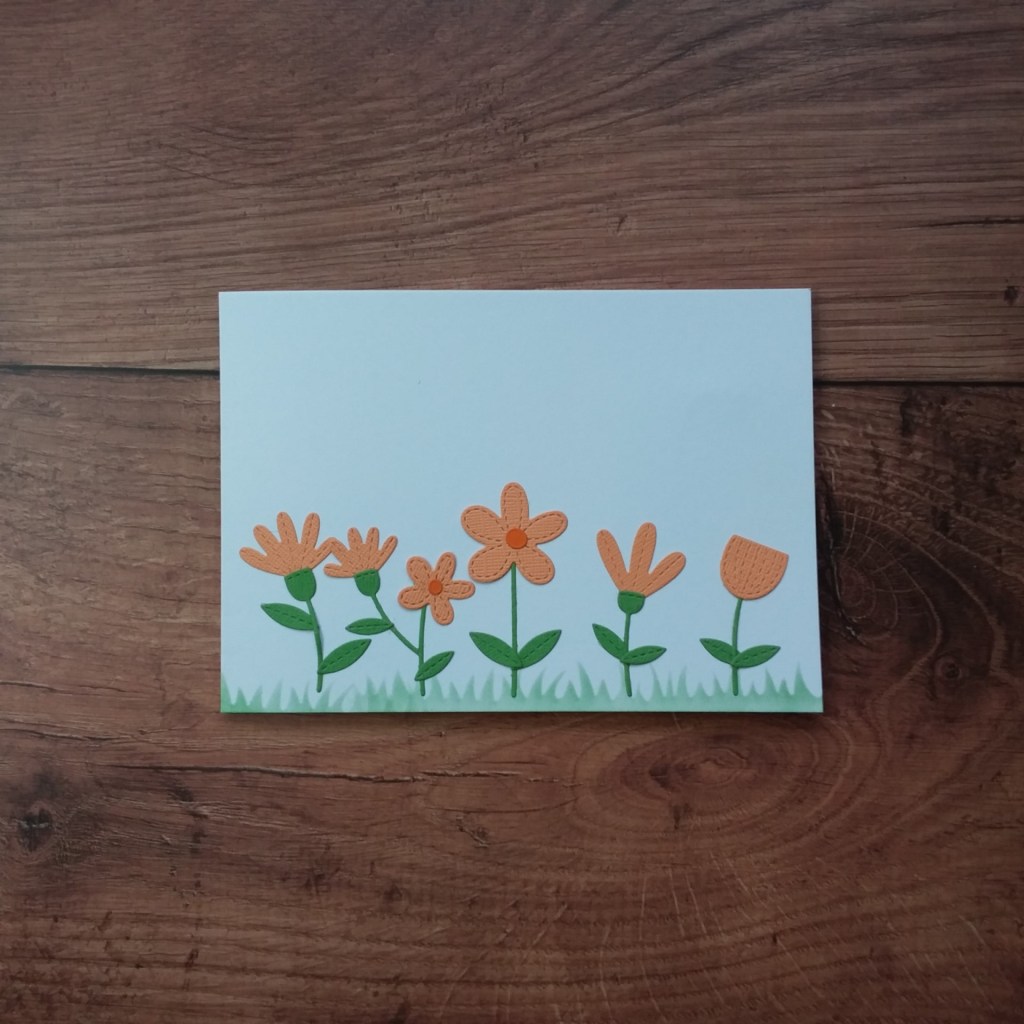
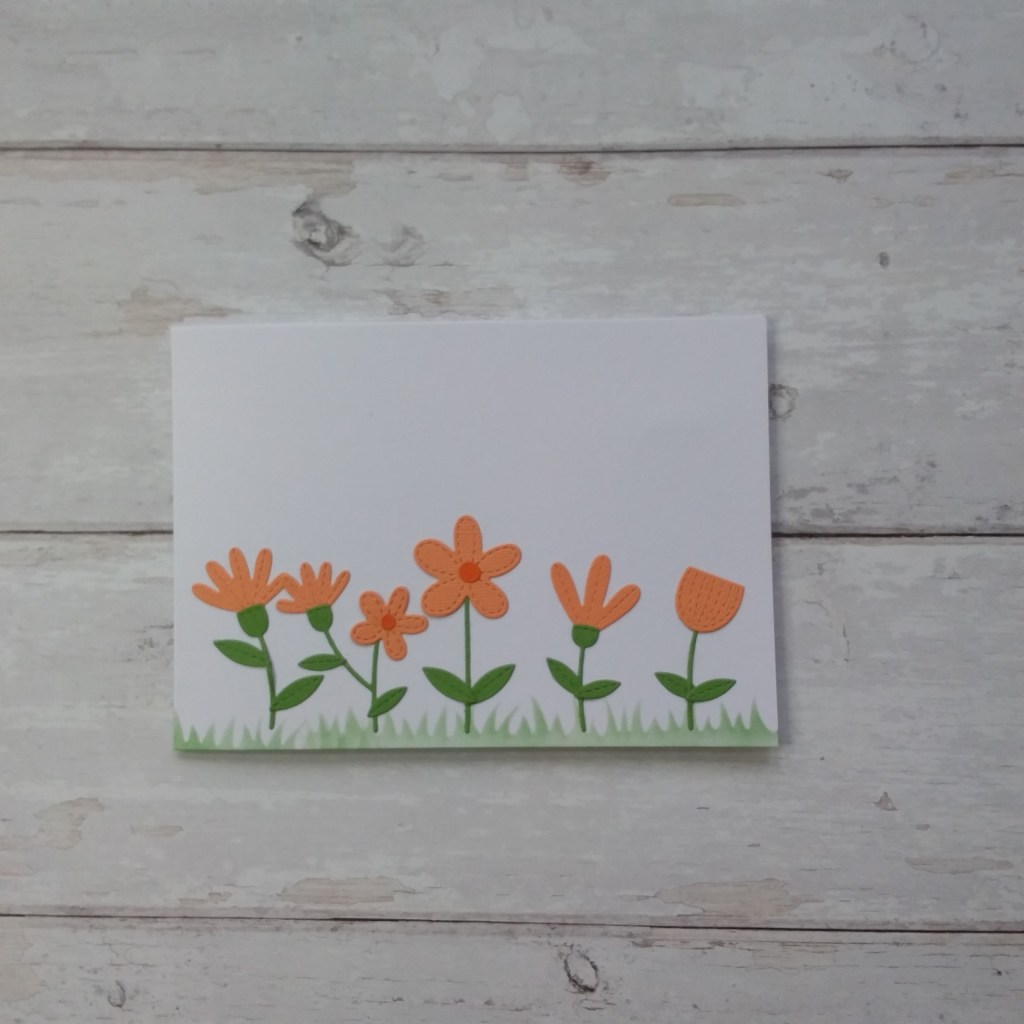
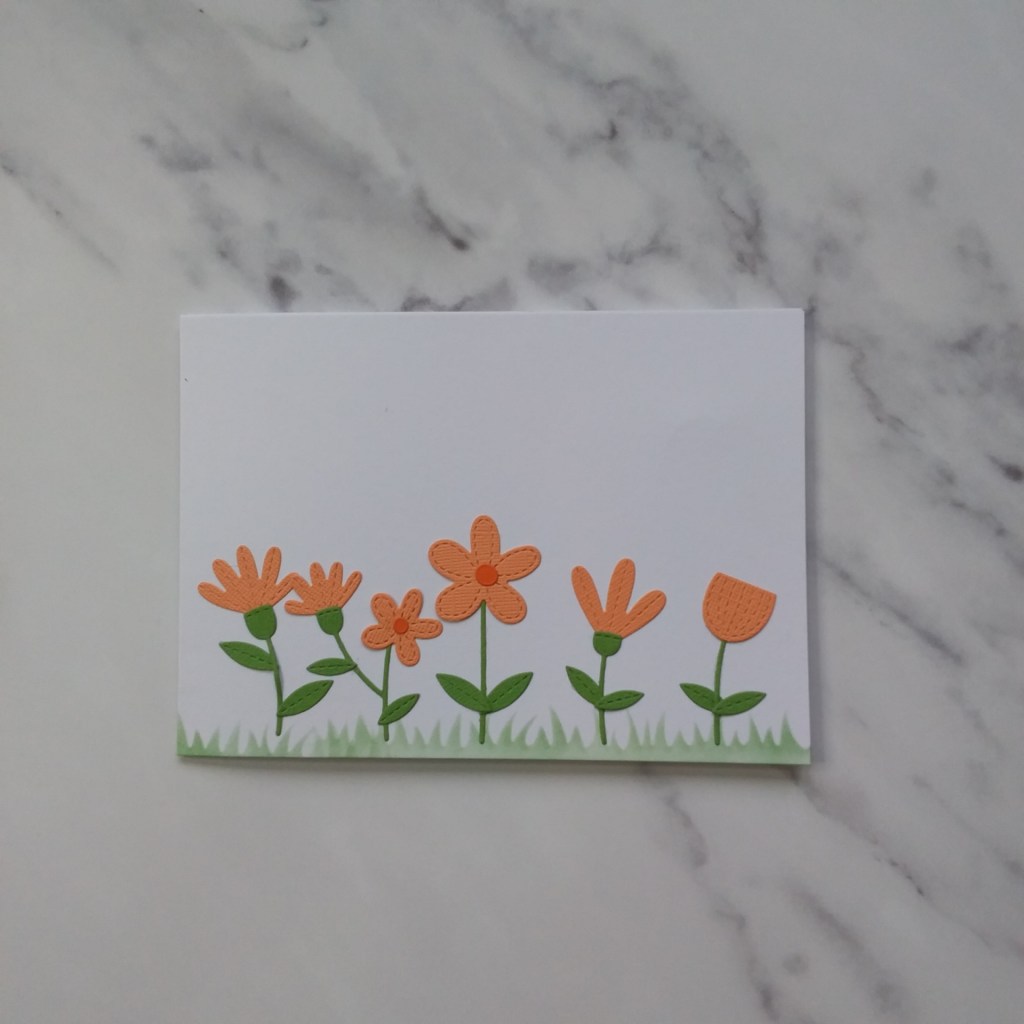
Hello. I have a card to share I made today, as I’m working the next couple of days, and may not have time to craft.
I used a newer die set from MFT called ‘Stitched Garden Dynamics‘, and just played with die-cutting and glue sticking.
I also used a stencil for the bottom edge, from Time For Tea Designs, to add some added interest that wasn’t dimensional. I did toy with the idea of die-cutting some grass, but in the end went for the stencil. I think it gives a more CAS look.
I have received three backdrops to enable me to take better pictures of my cards – though the lighting and additional elements are what I;m going to be working on from here – but these are the other two backdrops I received:
I like them all, and it took me a while to decide to use the dark wood, as my card is so bright and light. I will be working on adding some decorative elements to my photos too – watch this space!
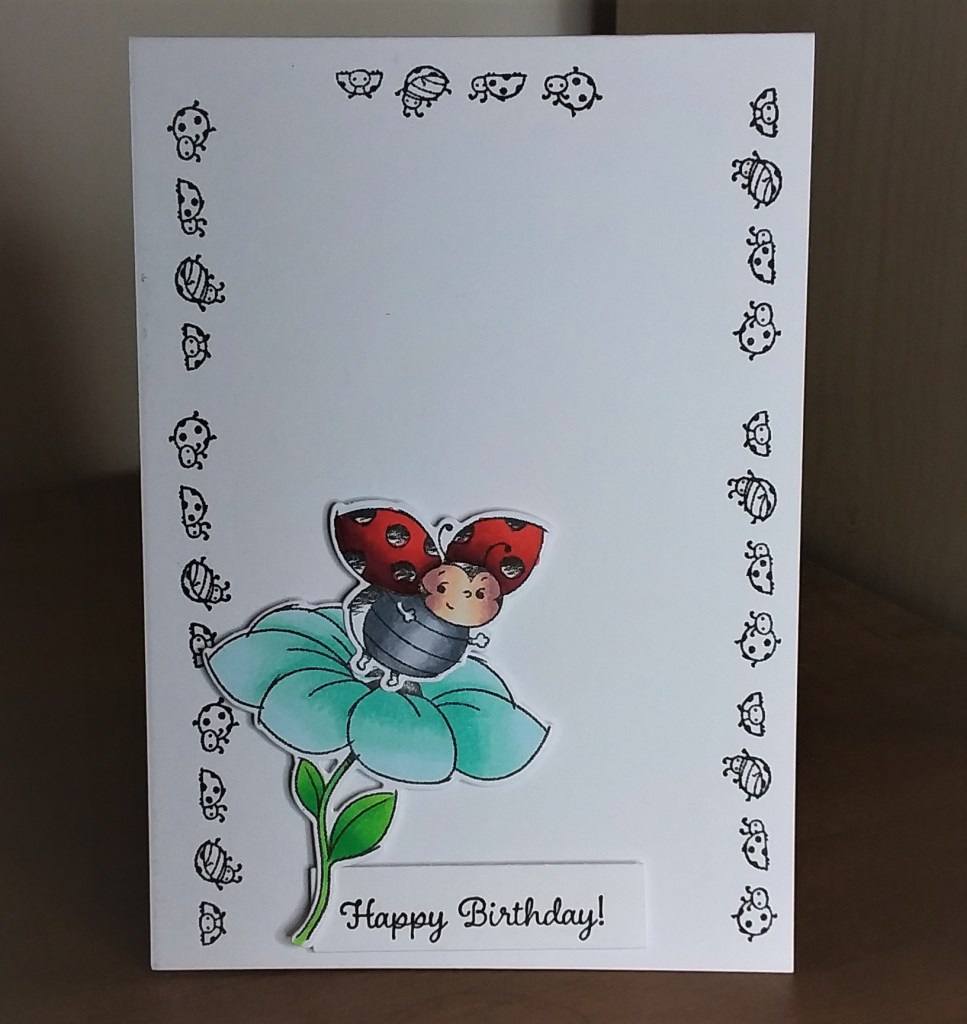
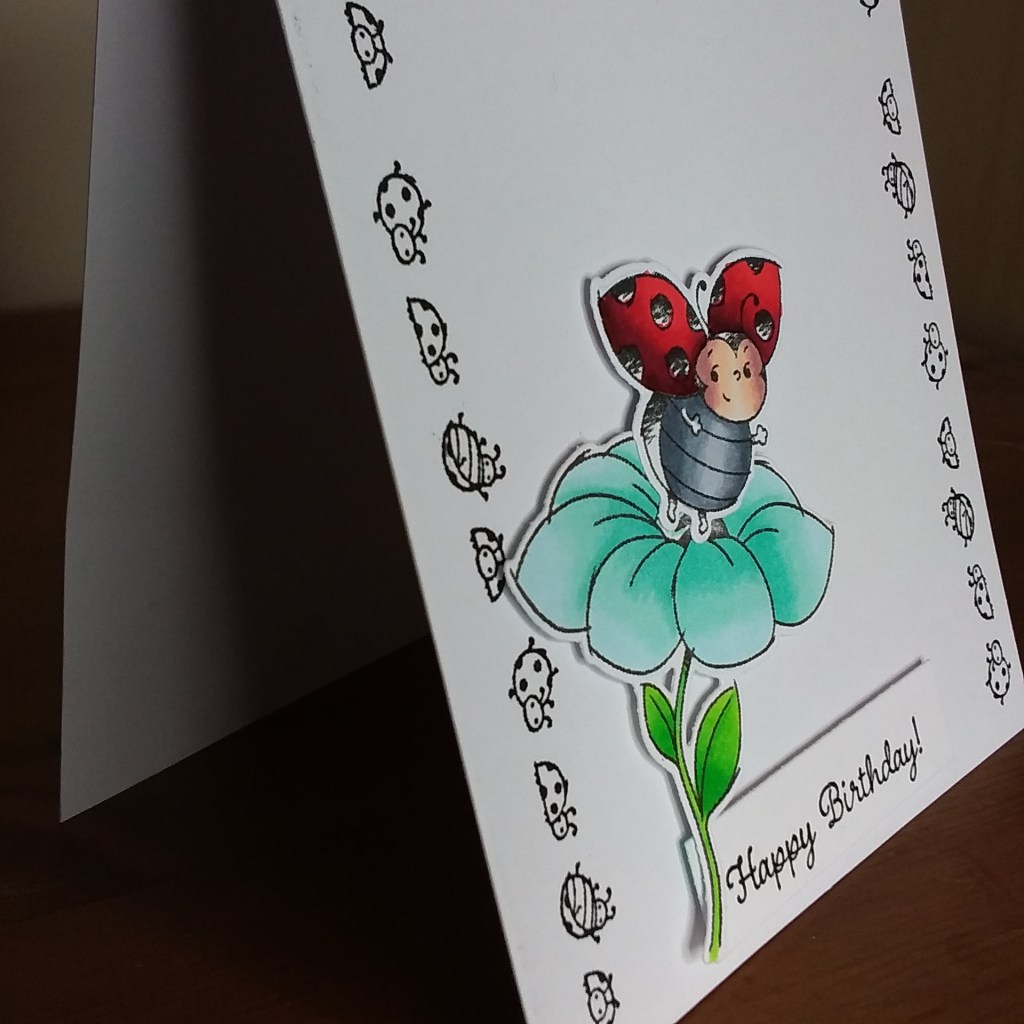
Hello there. I have been playing with a Stampin Up stamp and die set which I just I would have fun with:
I actually stamped all the ladybird images out at once, and played with my Copics. The little bugs around the outside are also a part of this set, as is the flower.
Once coloured and die cut with the matching dies, I used a sketch layout from a challenge listed below and that’s kinda it.
All done. Quick and clean and simple…………well – I stamped the little bugs the wrong way up at the bottom edge – so I had to have the sentiment on a strip to cover it! Maybe I shouldn’t have owned up to that one…………
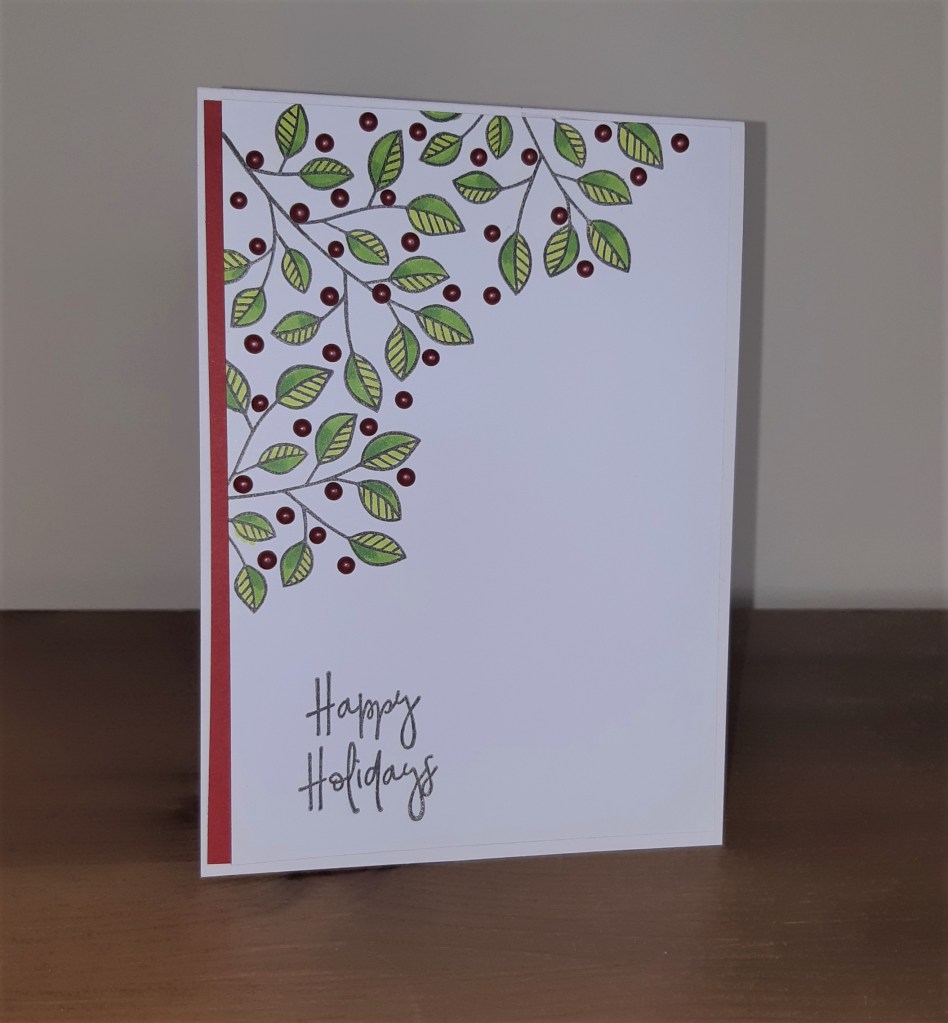
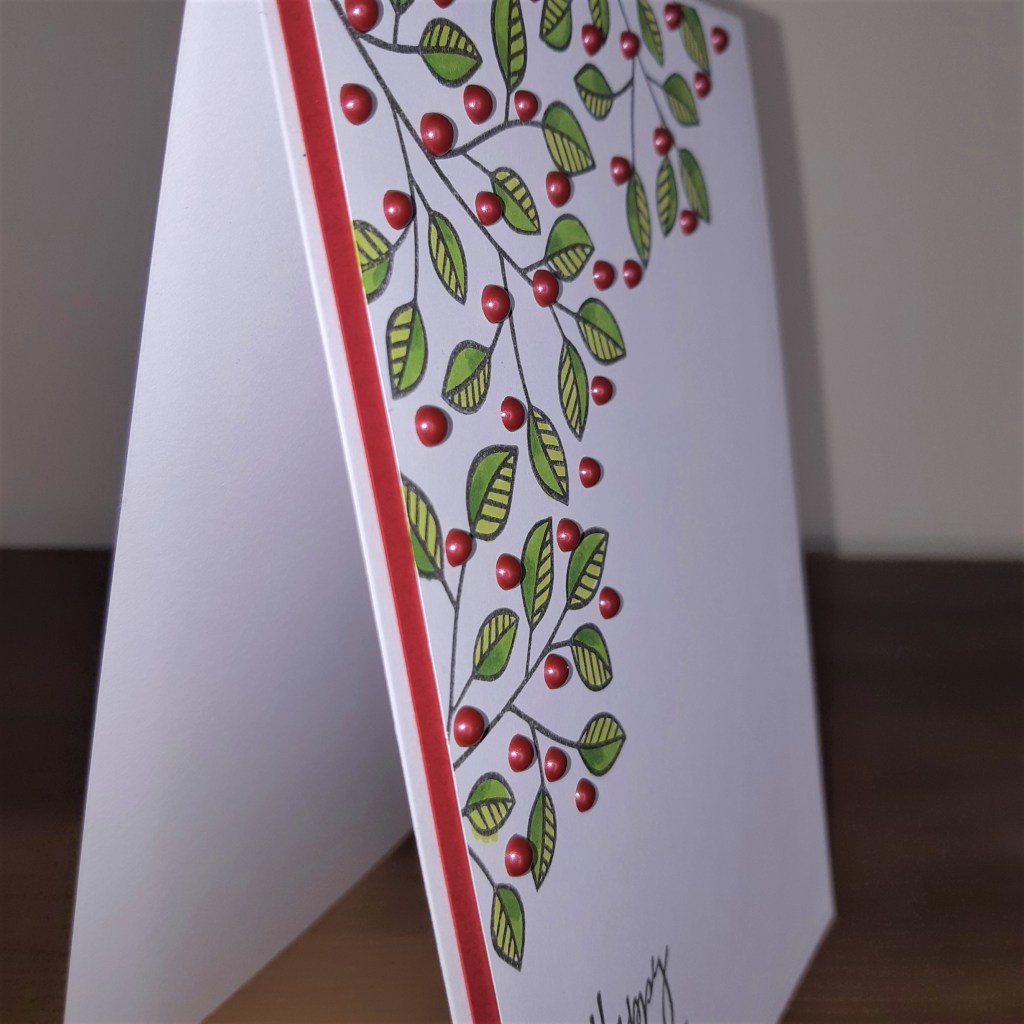
I didn’t have much time to prepare this card, so I am pleased it came together quite quickly.
I began by stamping the branch image from a freebie stamp set several times onto a piece of Make It Colour Blending Card, and coloured the small leaves with three green Copics. The sentiment is from the same stamp set.
I was going to add it to the card base as it was, but decided it looked a little too plain, so I added the red strip down the side, and then went ahead and added some Tonic Nuvo drops – and added more of them, then more of them. I really, really, really, need to know when to stop adding those……….but I do like the little bit of added dimension and colour they give.
I hope you can come and join us in our challenge, and I look forward to seeing your creations in our gallery. xx
Hello again. I have been crafting quite a bit this week – no work, and hubby has been away, but returning shortly. I shan’t get much done and posted for the next few days, as I’m also going to an Indigo Blu crafting retreat – 3 whole days! At Indigo Blu!
Hopefully I’ll get to try some new techniques. We’ve been asked to take a pasta machine and things to roll clay with – I’ve never worked with clay before, and I don’t have a pasta machine – hopefully someone will share………..!
So, this may be my last post for a few days. Here is the card:
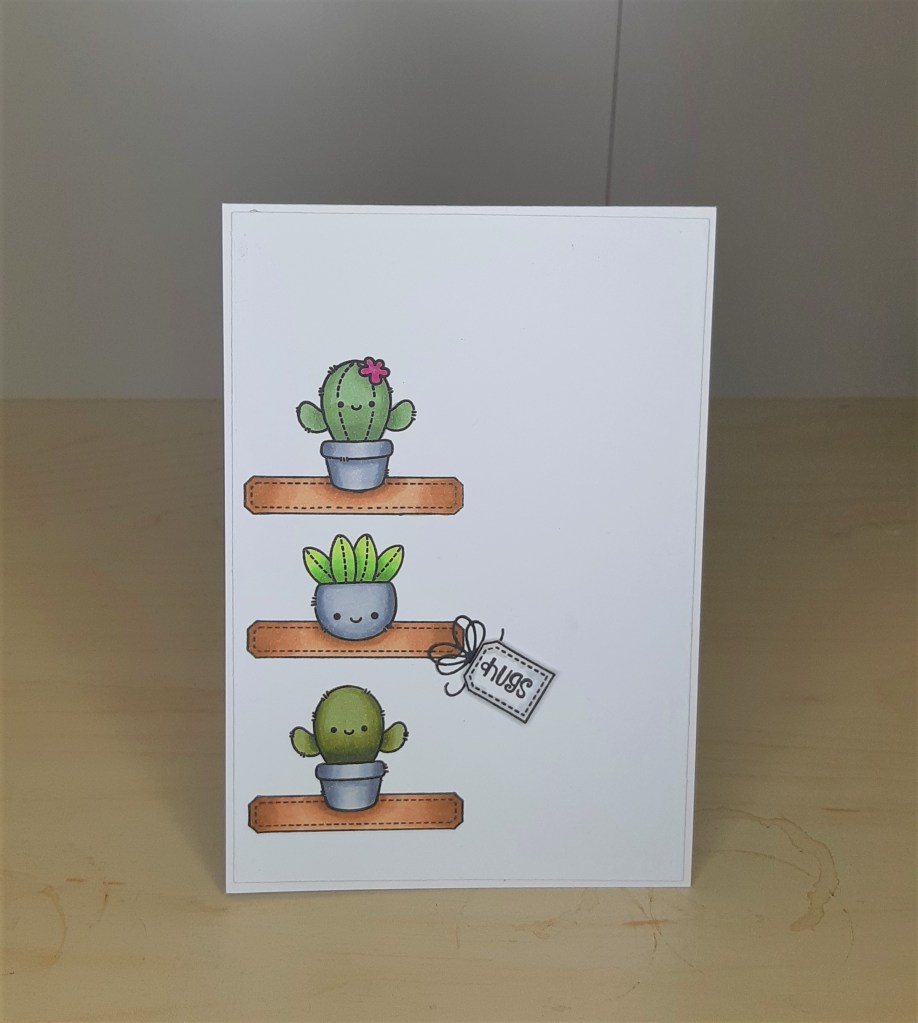
I used one of the new stamps from Clearly Besotted – ordered Sunday on their release day, and arrived yesterday.
I took a piece of Make-It colour blending card and planned my layout. The first things I stamped were the three cactus, using Gina K Amalgam ink, then stamped again onto masking paper, masked them off, and stamped the shelves. Well – I say shelves – but they are actually tag stamps from another Clearly Besotted stamp set……………and the top shelf didn’t stamp well, but I didn’t notice until I had removed the stamp – thank goodness for s steady hand and a black art-liner pen!
I then used a range of Copics to colour them – three shades of green for each cactus – changing the tones on each one – so a total of 9 shades of green.
The sentiment is from the cactus stamp set, stamped into a little tag, fussy-cut, and stuck down onto the little ribbon already stamped.
Quite a bit of planning went into this, even though I was following a sketch layout, and is a CAS card. I struggle sometimes with the layers – which to stamp first, which can be masked – but I think I’m getting the hang of it – front first, then work your way back…………..I think….!