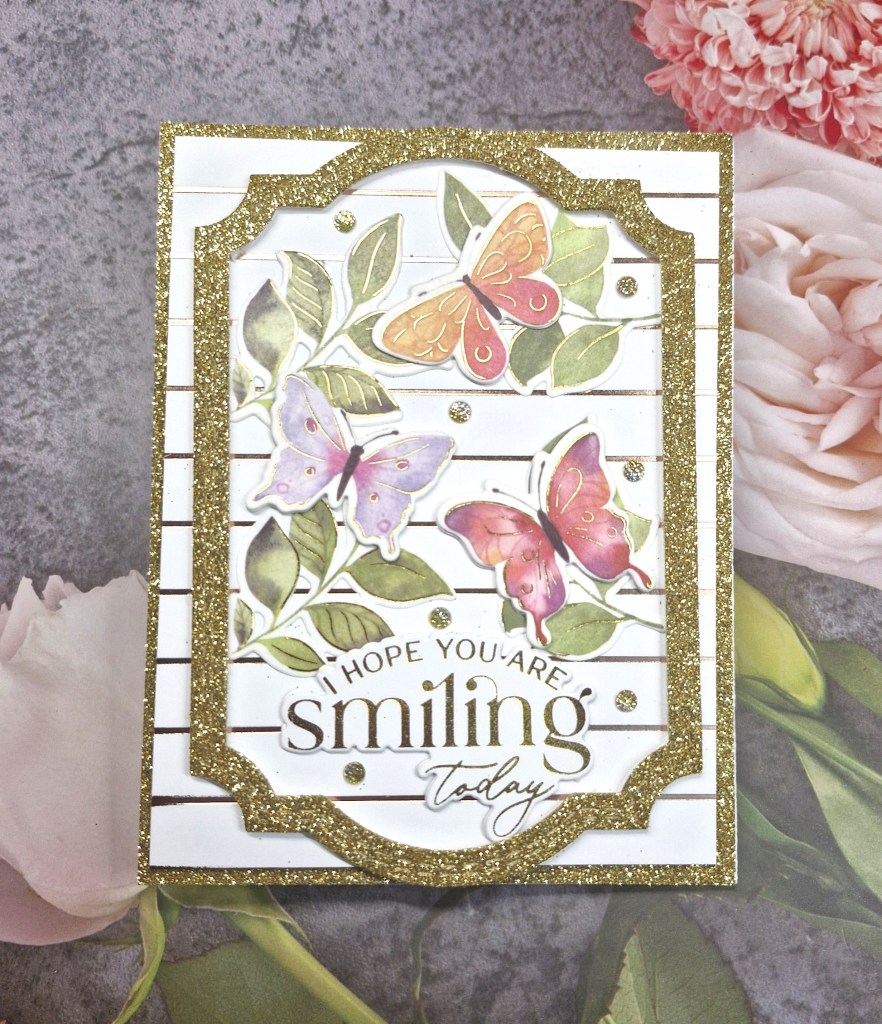
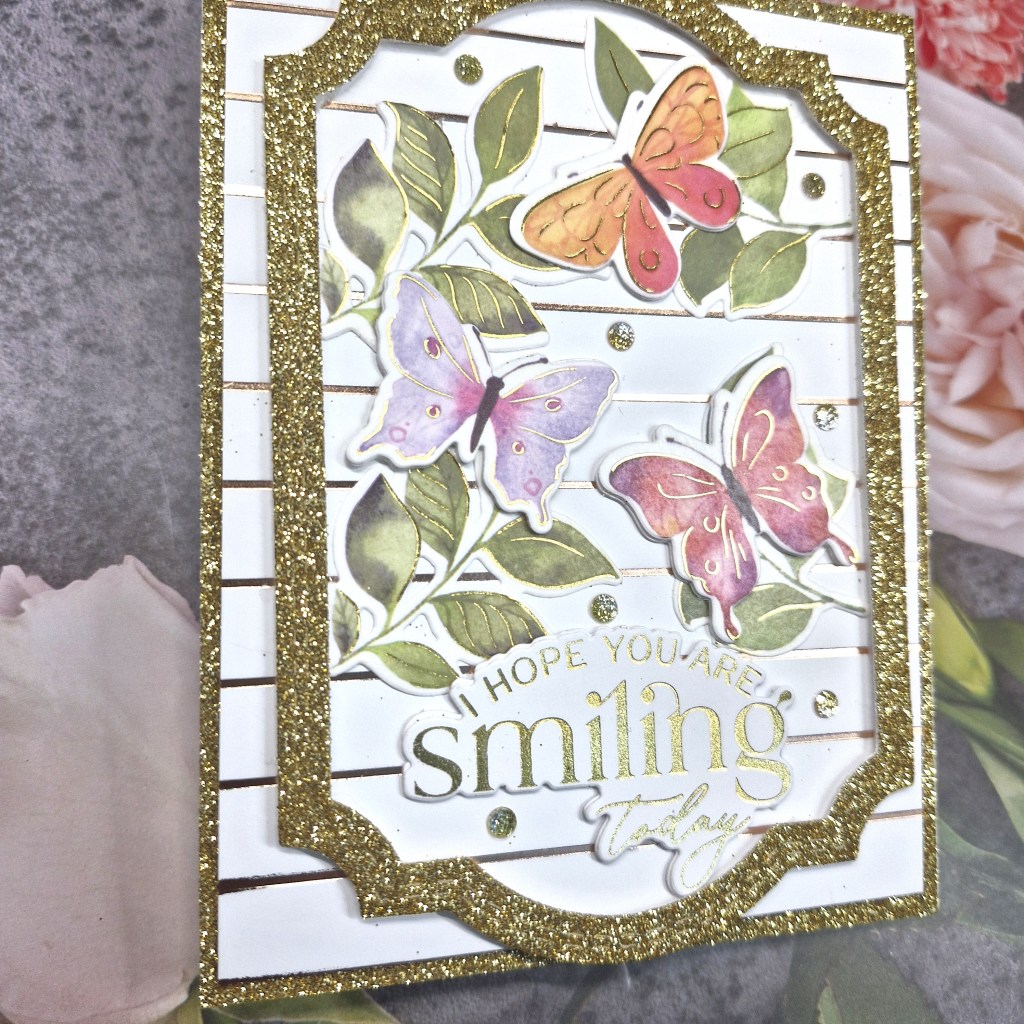
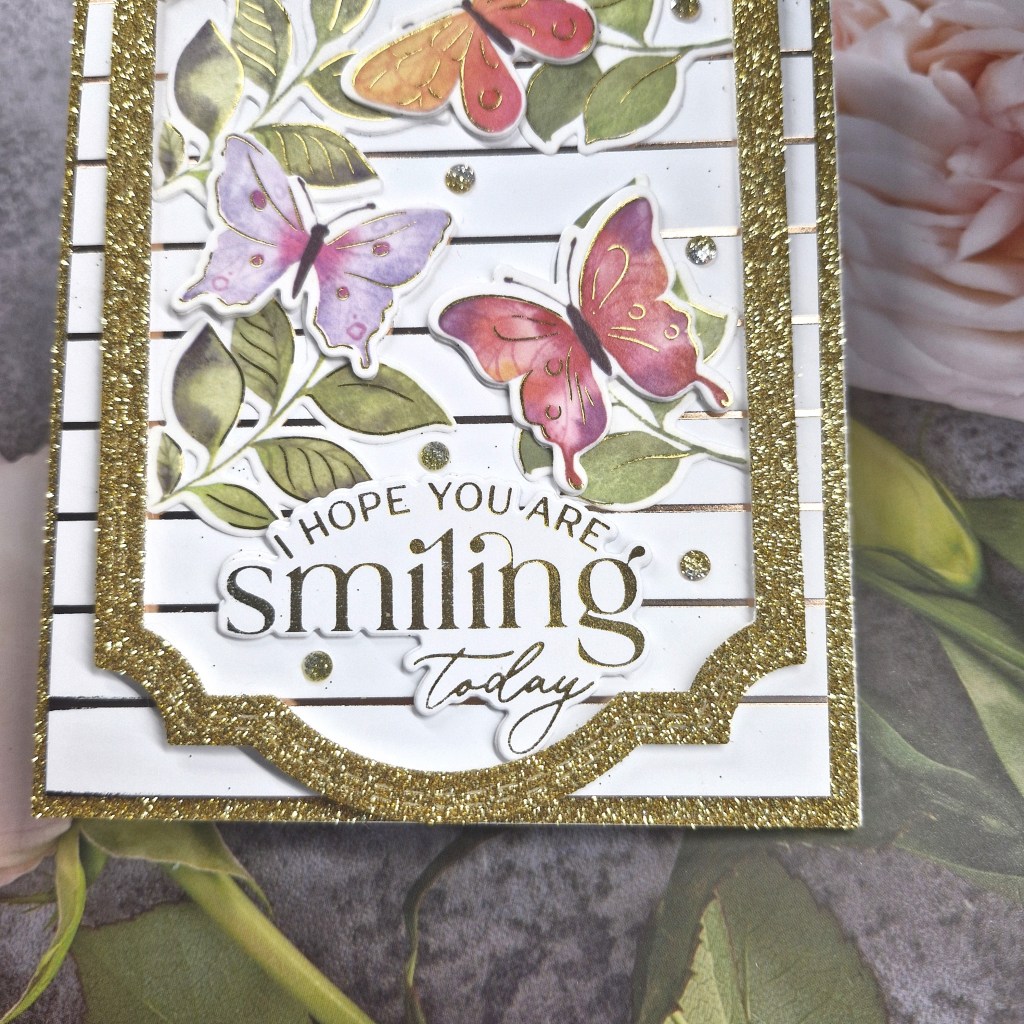
Hello there. Popping in to share a card for the new challenge at Cardz 4 Galz. Dawn has chosen the theme of ‘Stripes’. Here is my card:
My use of stripes is in the background foiled panel. I layered that onto a piece of gold glitter card stock. I added another frame from a Pinkfresh Studio die set, then created the images.
These images are from another Pinkfresh Studio suite – washi tape onto white card, then die cut with the matching dies.
The images were arranged as you see, and some ombre glitter gems added.
The sentiment is also gold foiled, and stacked with two or three die cuts instead of 3D foam.
There is a lot of gold going on in this card – I must have been in one of my blingy moods.
I hope you can come and join us with your take on our theme of ‘stripes’.
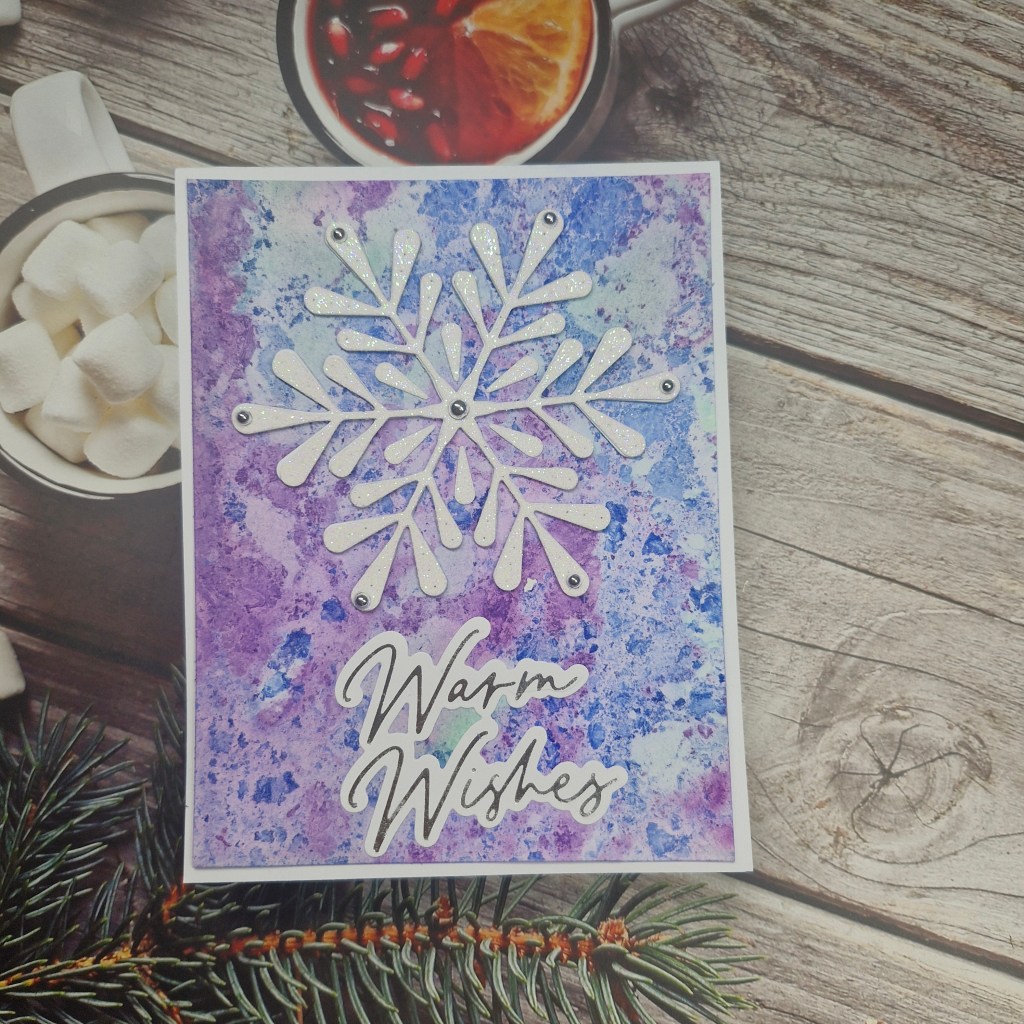
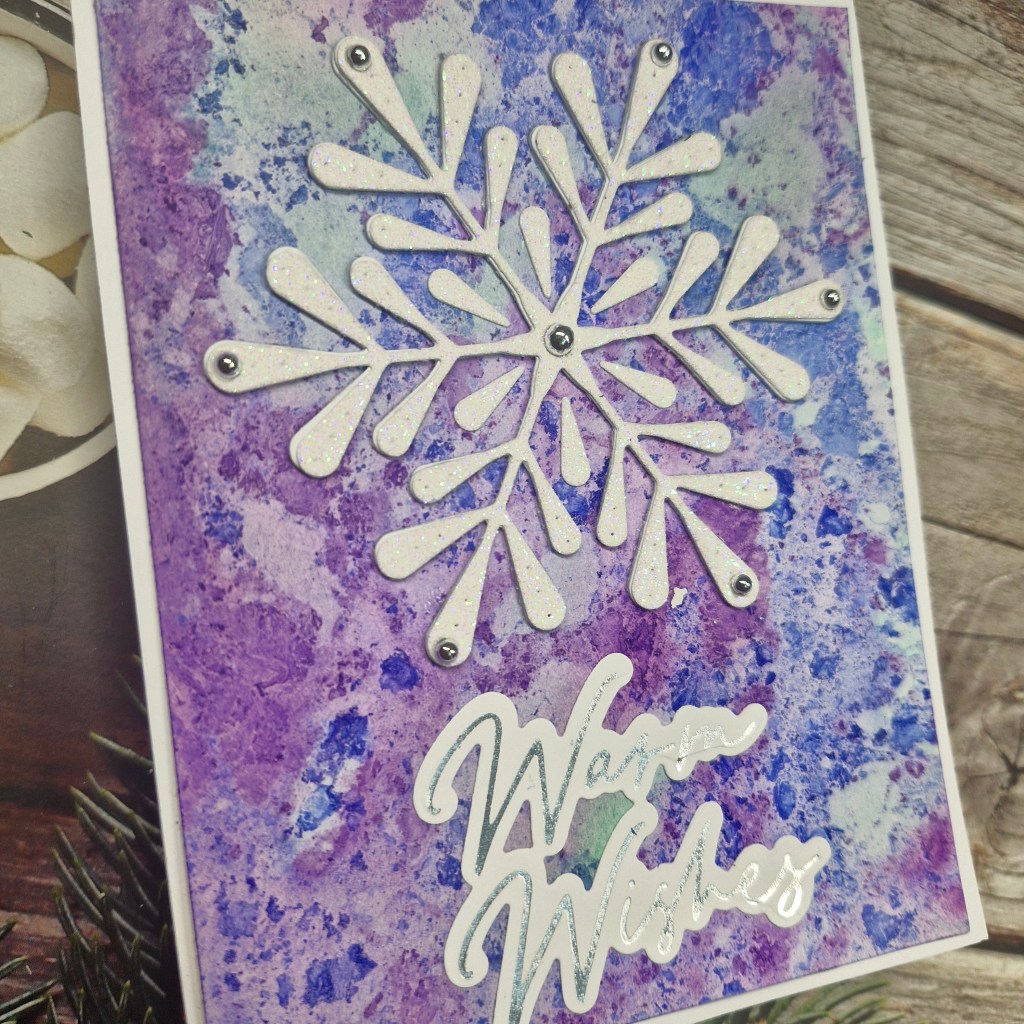
Hello everyone. The Holly & Ivy Christmas Challenge has started a new challenge. The theme is always ‘anything goes Christmas’ Here is my card:
The background panel is a previously created panel using alcohol inks and water – you have a shallow dish of water big enough to take your card panel, add alcohol inks, stir a little – then place the card on top for a few seconds, lift it up – et voila…..a fabulous card panel. You can use any card – normal 80lbs – so I hope you give it a go.
This was cut down to just smaller than an A2 card base, then adhered flat.
The snowflake is from a Simon Says Stamps die, cut out of white glitter card – and layered with another plain white piece for more stability.
I added the silver foiled sentiment – from Pinkfresh Studio – then added some silver pearls to parts of the snowflake.
I hope you can com and join us and prepare your stash for the end of the year. xx
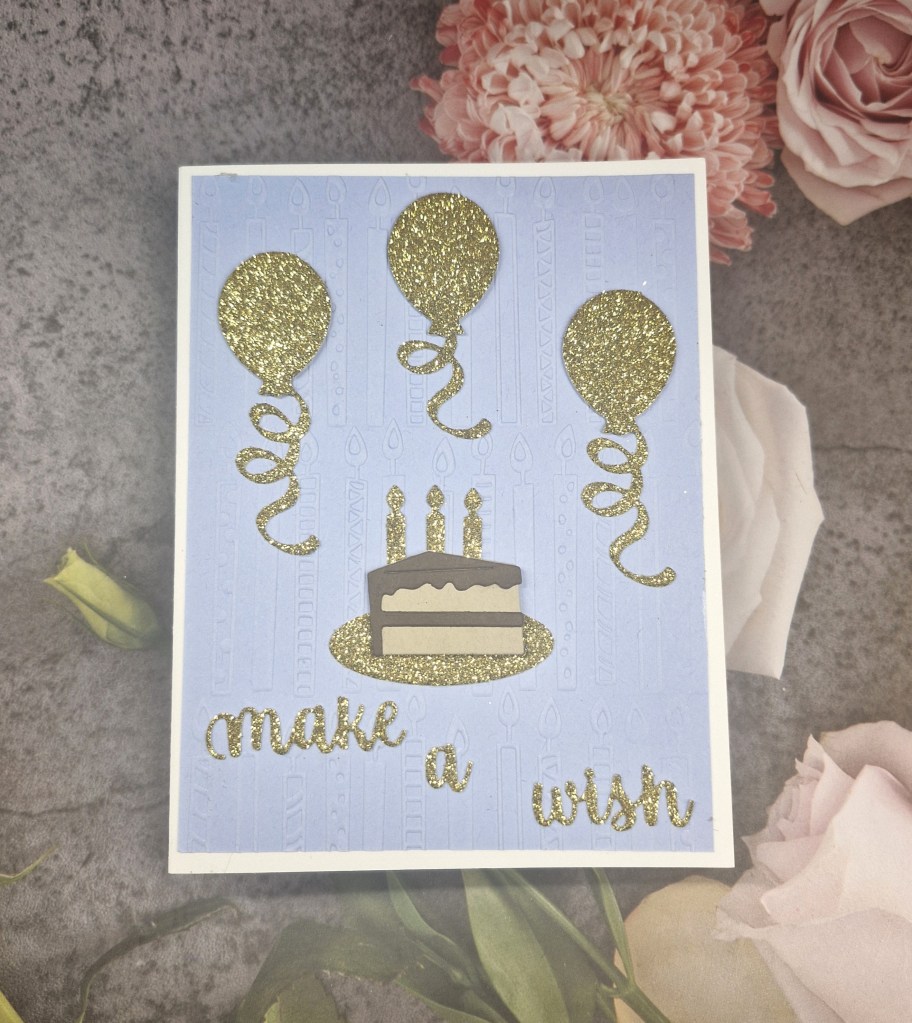
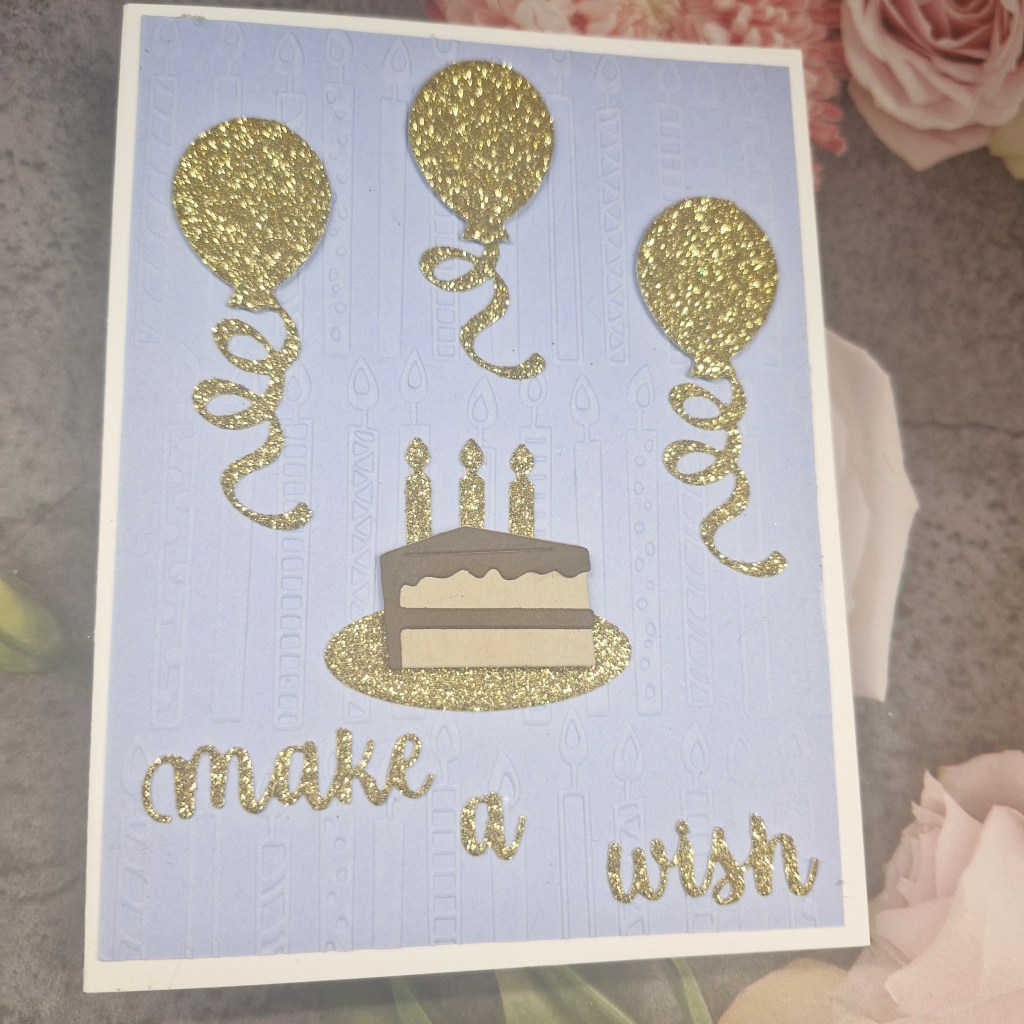
Hello again. It is my turn to host at The Alphabet Challenge. Having reached the letter ‘Y‘, I chose the theme of ‘Yummy‘. Anything food related and yummy and delicious – you get my drift. Here is my card:
I think I went quite clean here making the die cuts speak for themselves.
The blue background panel was created using a Spellbinders embossing folder and adhered flat to the card base – a small white edge all the way around.
The cake, balloons, and sentiment are from a die set received as a ‘goodie bag’ from an online Facebook sale from a UK shop. They have this sale once a month, and can last up to three hours – there are always bargains to me had – and the last bargain is a super-duper crafty bag. This die set was one of items in that bag, and are from Karen Burniston.
I felt these were small but mighty cute images, and as such I wanted them to stand out.
The cake was created – gotta be chocolate for me – using two shades of brown card stock from Concord & 9th.
All the other elements were die cut using Pinkfresh Studio gold glitter card stock. I may well have used this a lot recently – but it is very, very sparkly and it just has to be done…..
The cake was adhered to the platter, the candles layered behind. the balloon strings were adhered to the back of each balloon – the middle one cut down slightly to fit above the cake.
And the sentiment added at jaunty angles.
I hope you can come and join us with your ‘yummy’ creations – I look forward to seeing you in our gallery. xx
I shall be entering the following challenges:
Seize The Birthday – anything goes birthday – option anything that flies not taken -unless to let the balloon go in windy weather….! :)
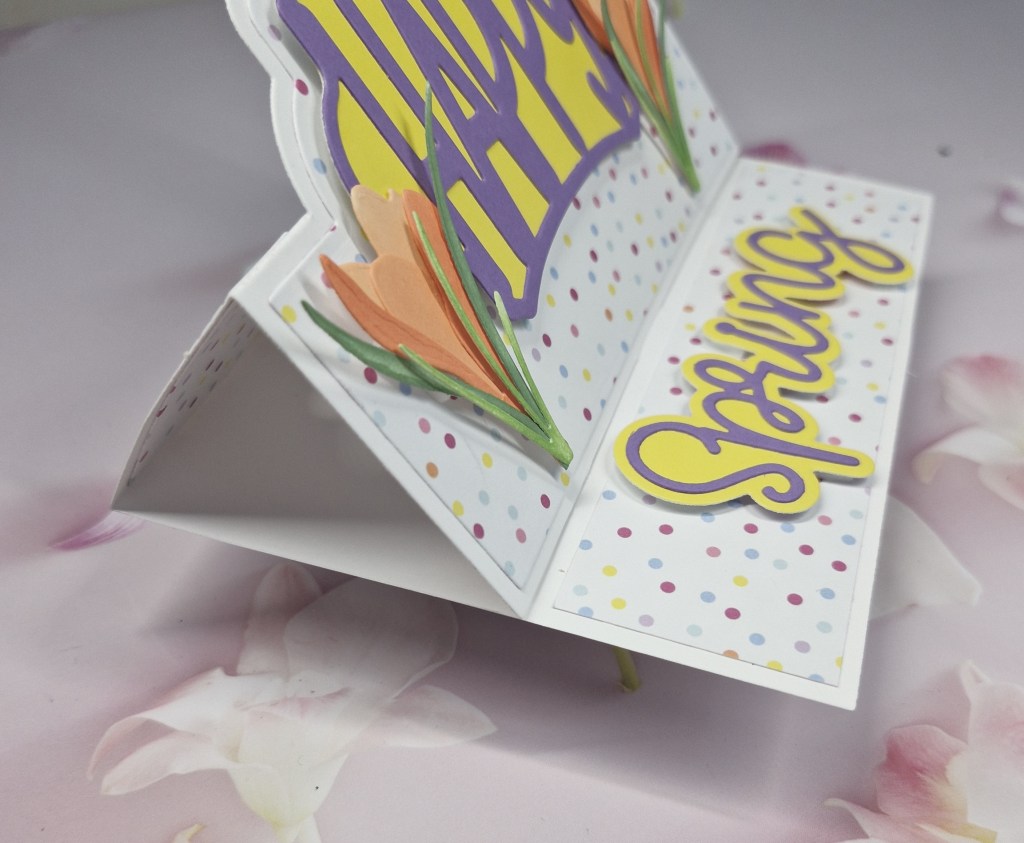
Hello everyone. I have a card to share for the new challenge at Cardz 4 Galz. Sue J is hosting this time round and she has chosen the theme of ‘Springtime’. Here is my card:
I chose to make use of products from a previous crafty event. The products are from ‘Stamps Of Life’ and the die set creates this stepper card, with added dies for the layers.
I started by creating the card base using the main die, then added layers of patterned paper for the background. Some bright and colourful dotty paper.
I added the two die cut words – also using dies from the same die set.
The two crocus flowers are from The Greetery layered as per instructions, and adding more green leaves for a fuller look.
I hope you can come and join us with your creations following our ‘Spring’ theme. xx
Hello once again. You may be pleased to know that the card I am sharing today does not contain washi tape – no washi tape – none, at all, anywhere…….
I decided to break out the Copics and create this mixed media CAS kinda card:
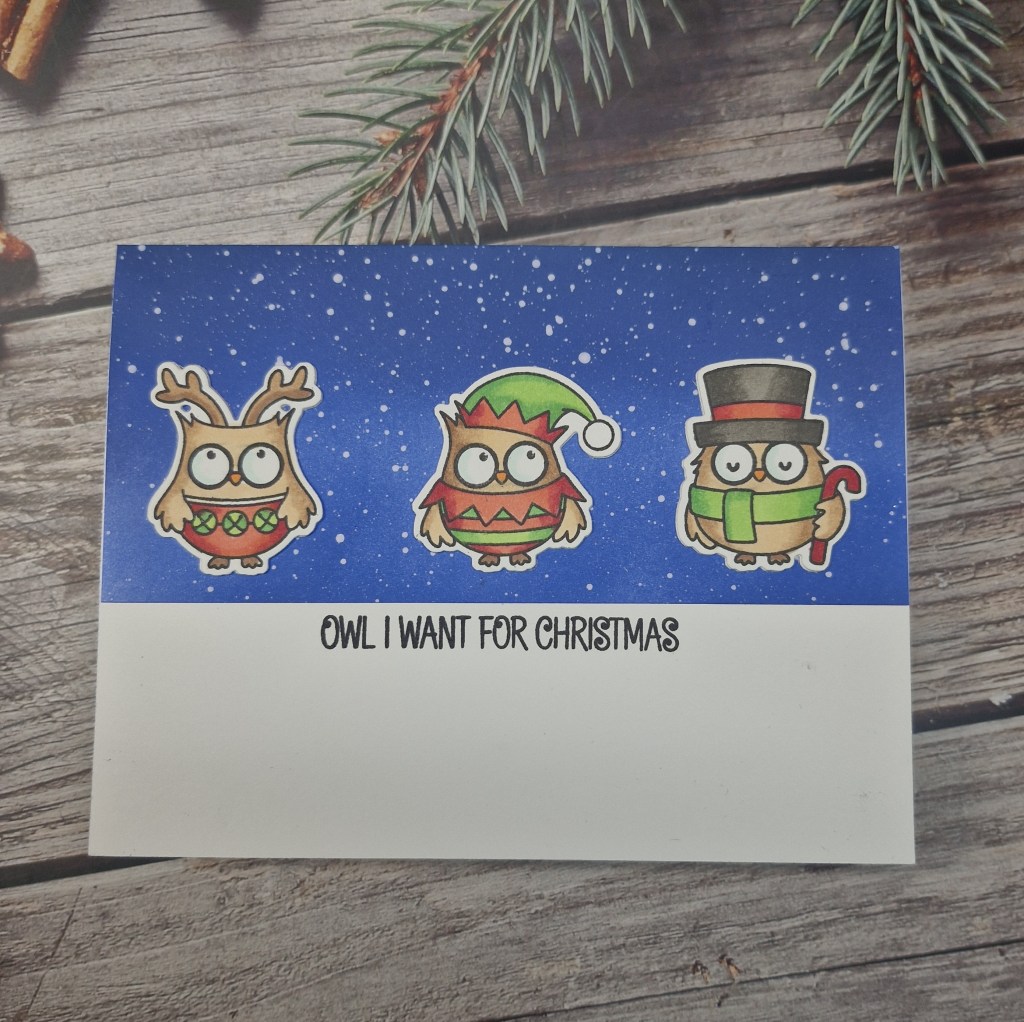
I was inspired by one if the challenges below to create a Christmas card featuring owls. I searched the Color My Life app – fabulous cataloguing system if you don’t have one – and this cute stamp and die set from Clearly Besotted popped up. Bingo. Perfect for what I wanted.
I started by stamping the images in Gina K Amalgam ink, and heat setting before colouring using my Copics. Once coloured, I used the matching dies to cut them out.
The background is a landscape card base, and onto that I adhered a blue strip for the night sky. This strip was created by ink blending two Distress Oxide blue tones, then I used Liquitex white acrylic paint to create the splatters.
This was put aside to dry whilst I stamped the image – also from the same stamp set – directly onto the card base, ensuring it would be just below the blue strip.
Before adhering the cute little owls, I did die cut another blank one to layer behind for a little more stability, and then glued directly down onto the blue piece.
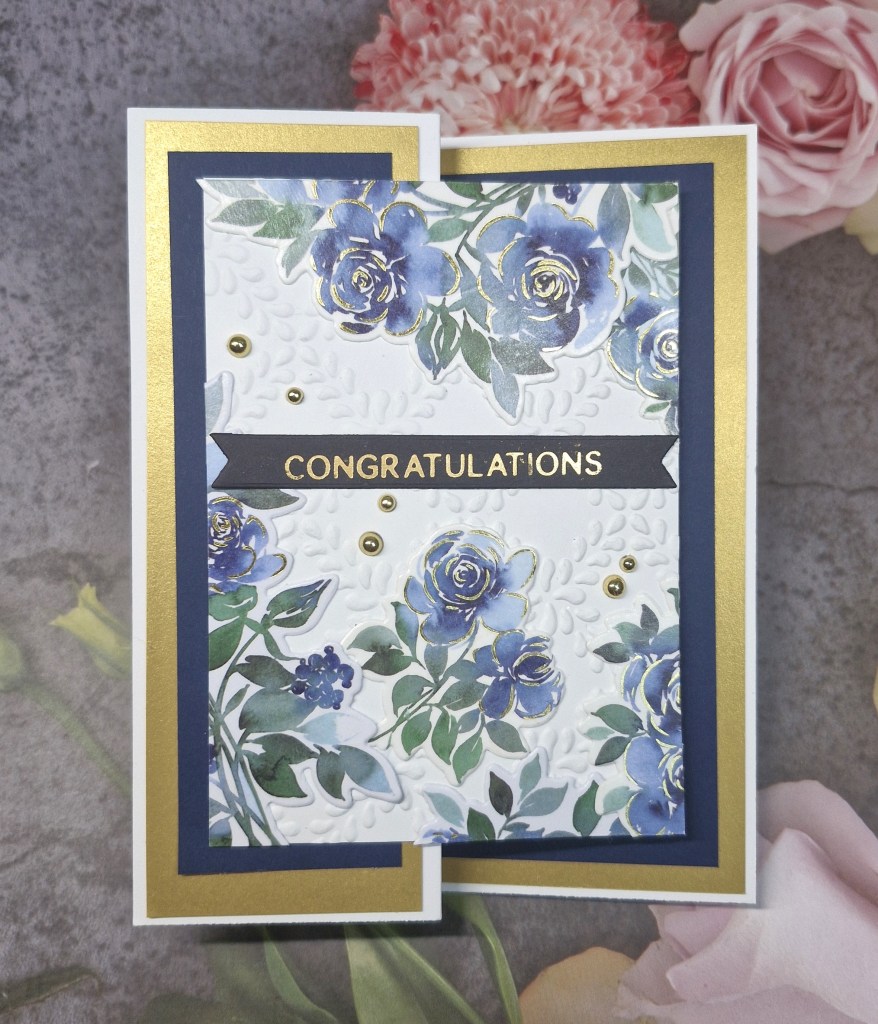
Hello everyone. You remember how I said yesterday that I wouldn’t be using any more Pinkfresh washi for a while…..? Well – I may have just told a little fib. I watched a Jennifer McGuire video and totally inspired to create – but this was using more Pinkfresh washi. I changed the washi to another product suite – Indigo Roses – and created this card:
There are also three other panels I am working on, but this card came together first.
I first attached the washi tape to white card stock, then used the matching dies.
I followed Jennifer’s examples of cutting down another white card to four rectangles. I used an old Spellbinders embossing folder on each of the four rectangles. This one has the date of 2012 on the back……!! It is an ‘M-Bossabilities’ reversible embossing folder called Garden Lattice – two designs for the price of one, and is A4 in size. It’s amazing what you find in your stash when looking for something else, isn’t it?
Taking guidance from the YouTube video, I taped the four rectangles together, attached the die cut washi images, cut the rectangles apart – then attached more images. The video explains it in far more detail and is very easy to follow.
Once the panel designs suited my eye, I created the folded card base, matted some gold, then found some blue card stock from Time 4 Tea Designs which matched the indigo roses.
The mats and layers were created and attached to the card base, then the floral panel adhered to the left front.
A previously created foiled sentiment was added, and some gold gems. I also finished the inside – very unusual for me – but I was in the zone.
It really is hard to put away products you are having fun with, and I have several rolls of washi from different product suites at Pinkfresh Studio. A few of them were from virtual events – there is a lot of washi on each roll…
Thank you for bearing with me for the past few days.
I shall be entering the following challenges:
CYHTP – embossing folder – option of lucky/St Patrick’s Day not taken
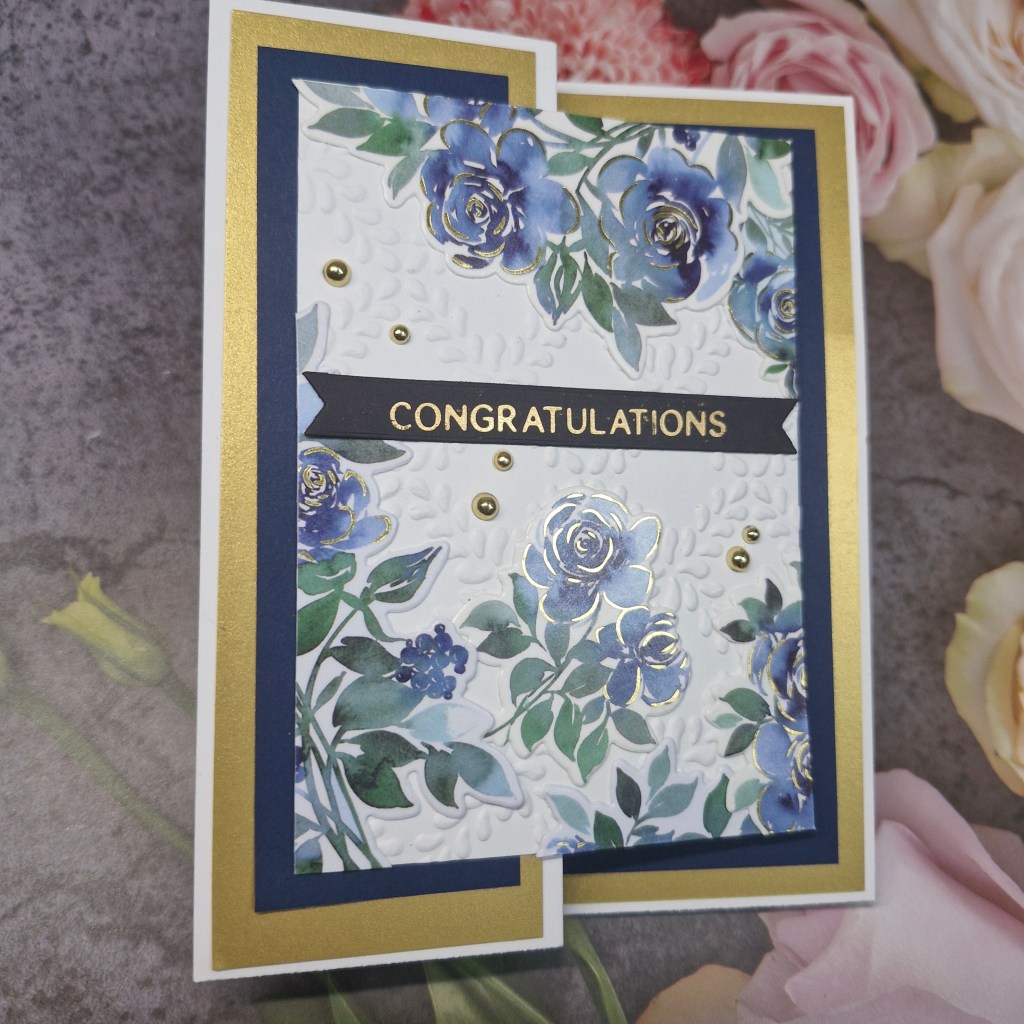
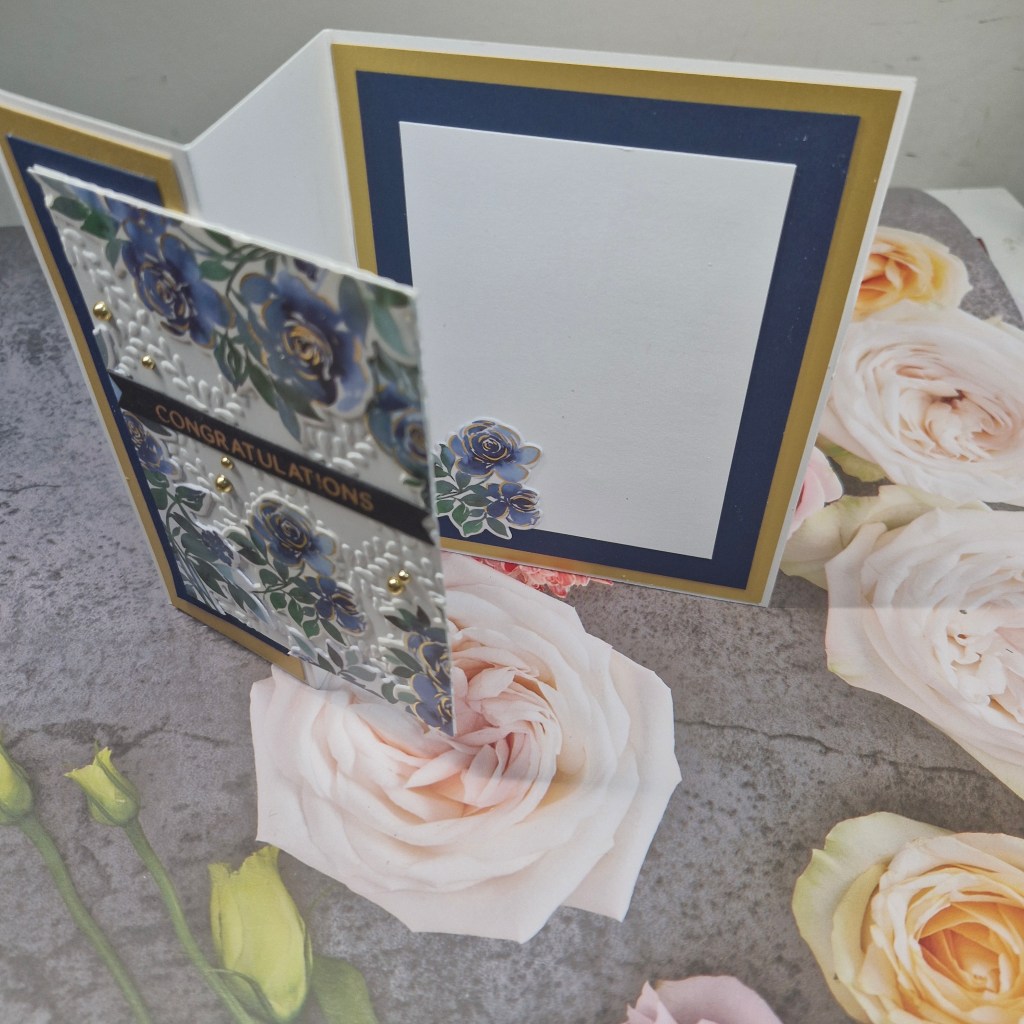
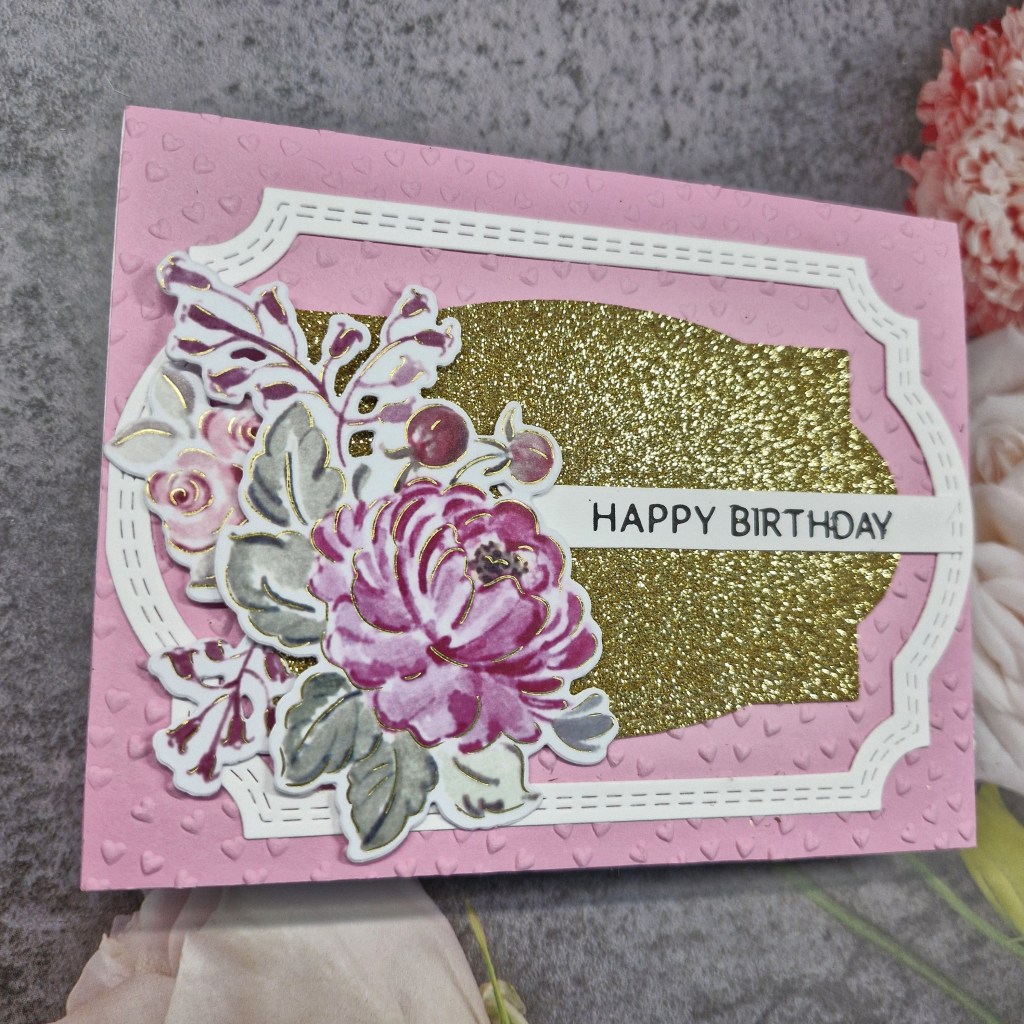
Hi there. I am sharing the final project – for now – using the remainder of the Pinkfresh Studio washi. I am sure I will be using their washi tape for future projects, but this is the last project for now:
The background panel was created using some Concord & 9th card stock, and a Spellbinders embossing folder. This adhered flat to the card base.
I used the frame die set from the event to create the white outer frame, and then die cut the smaller label with the same gorgeous gold glittery card stock I have used previously.
Once the middle gold and the outer white pieces were attached, I played around with the large and two smaller images until I was happy, and added a sentiment stripped foiled in black – previously created.
I shall be entering the following challenges:
CYHTP –embossing folder – option of lucky/St Patrick’s Day not taken
Hello, I am still working through some of the remainder of the Pinkfresh Studio washi tape received as part of a recent virtual event. I only die cut the entire images twice – and there are lots of florals to be used.
Here is my card for today:
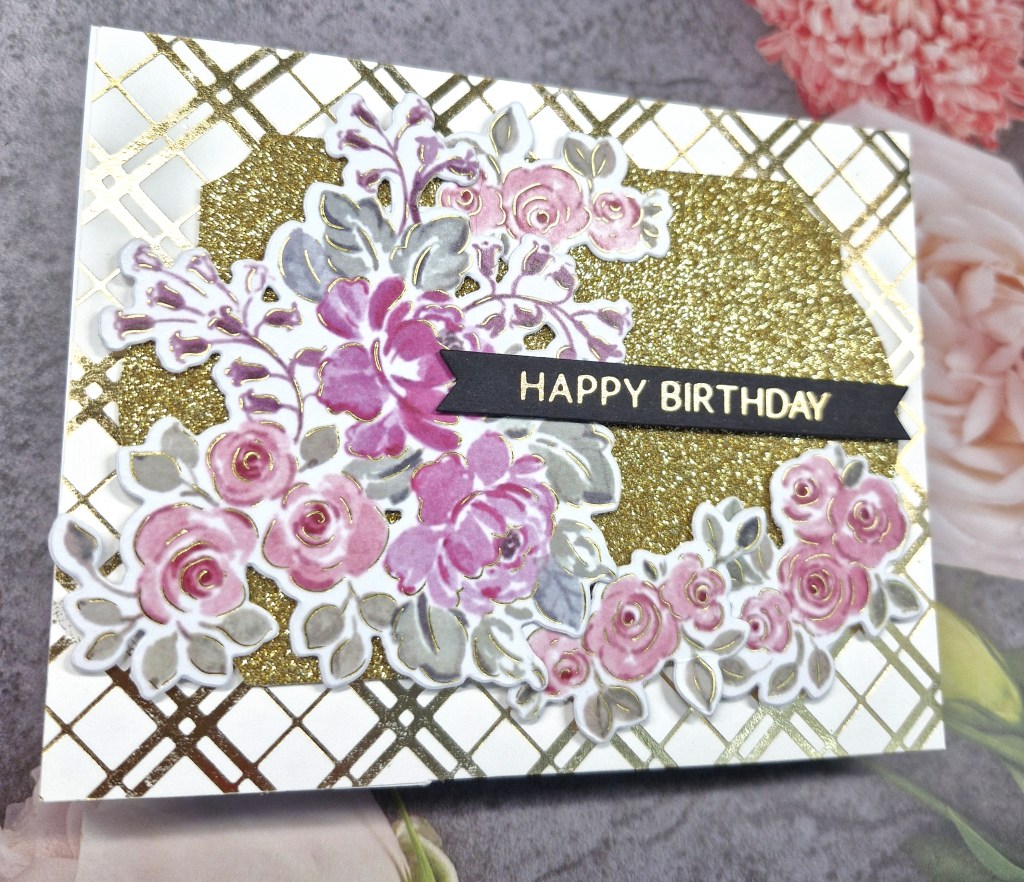
For the background on this card I used previously created foiled panel and a Honey Bee Stamps plaid foil plate.
I then created the glittery gold panel using a Pinkfresh Studio die set, and arranged the floral images around and about until I was happy with the design.
I added the foiled black strip sentiment as a stand-out piece – no other black on the card – but I liked how it stood out.
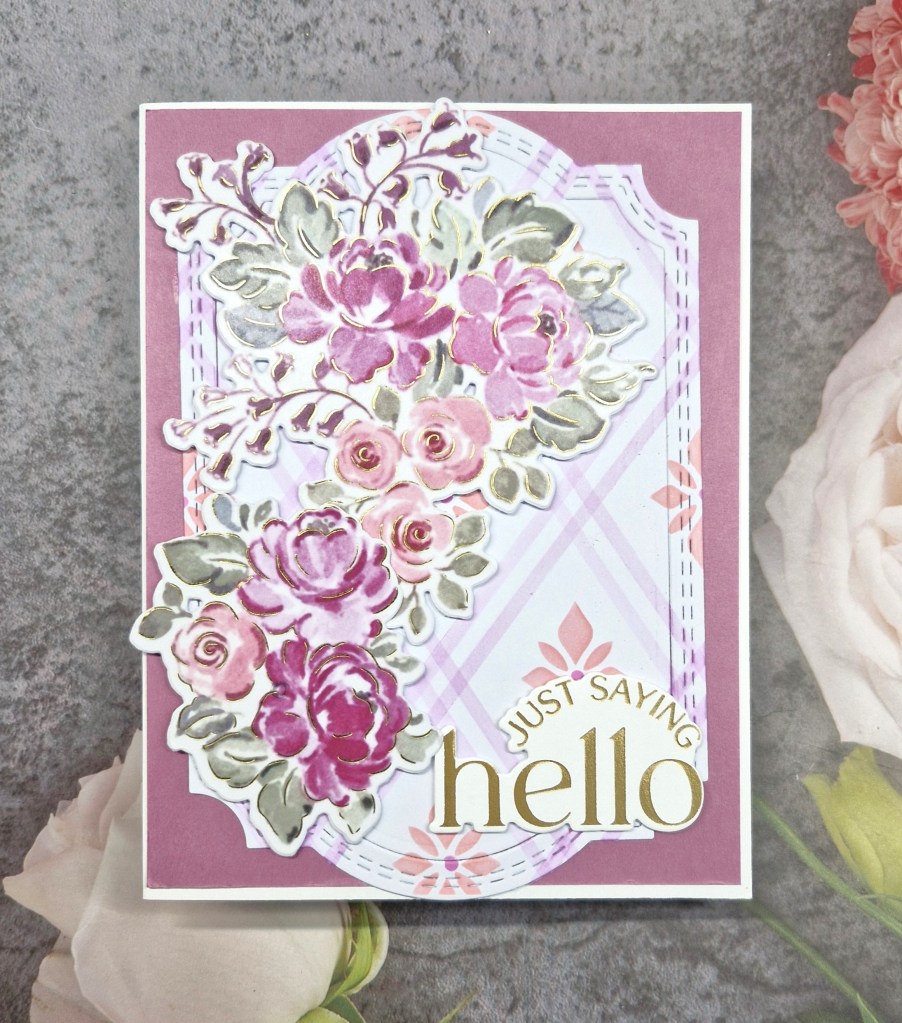
Hi there. I have another project to share using some of the pieces left over from a previous project:
I again used the stencil from Pinkfresh Studio and there recent virtual event, as well as the washi tape suite.
The washi was adhered to some white card, then the images die cut using the matching dies.
The background panel was created using the layering stencils received as part of this event, and die cut using a couple of frame dies. For this frame, I also inserted the middle back into the frame.
There was too much white visible around the frame and flowers, so I added a panel of Concord & 9th card stock, and glued everything down. The sentiment is a foiled sentiment previously created.
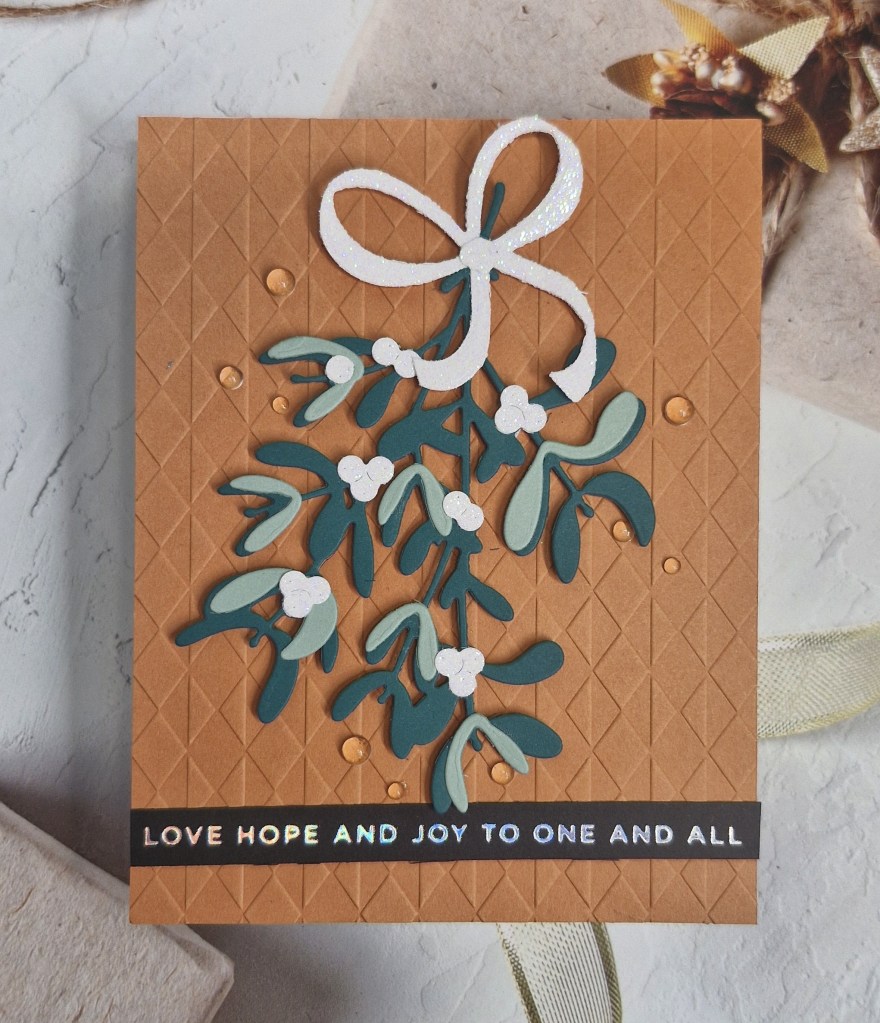
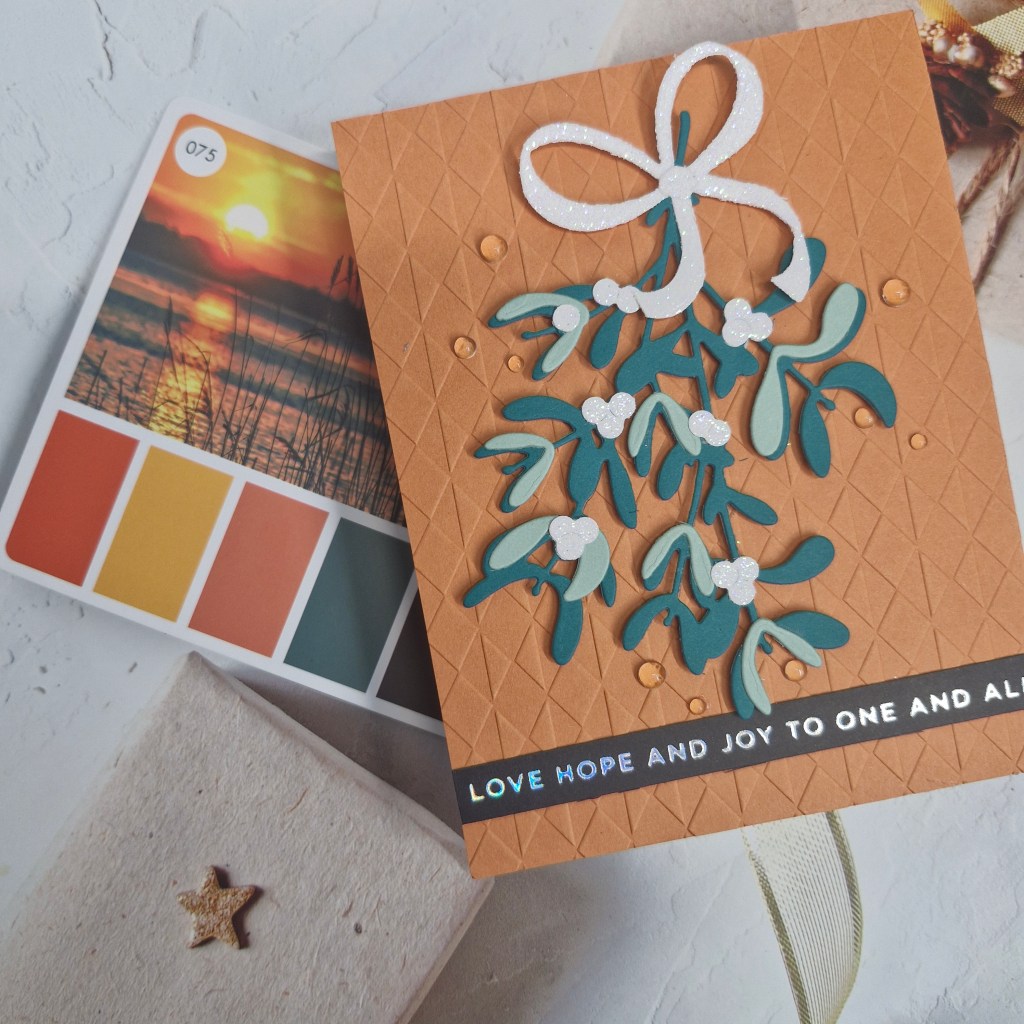
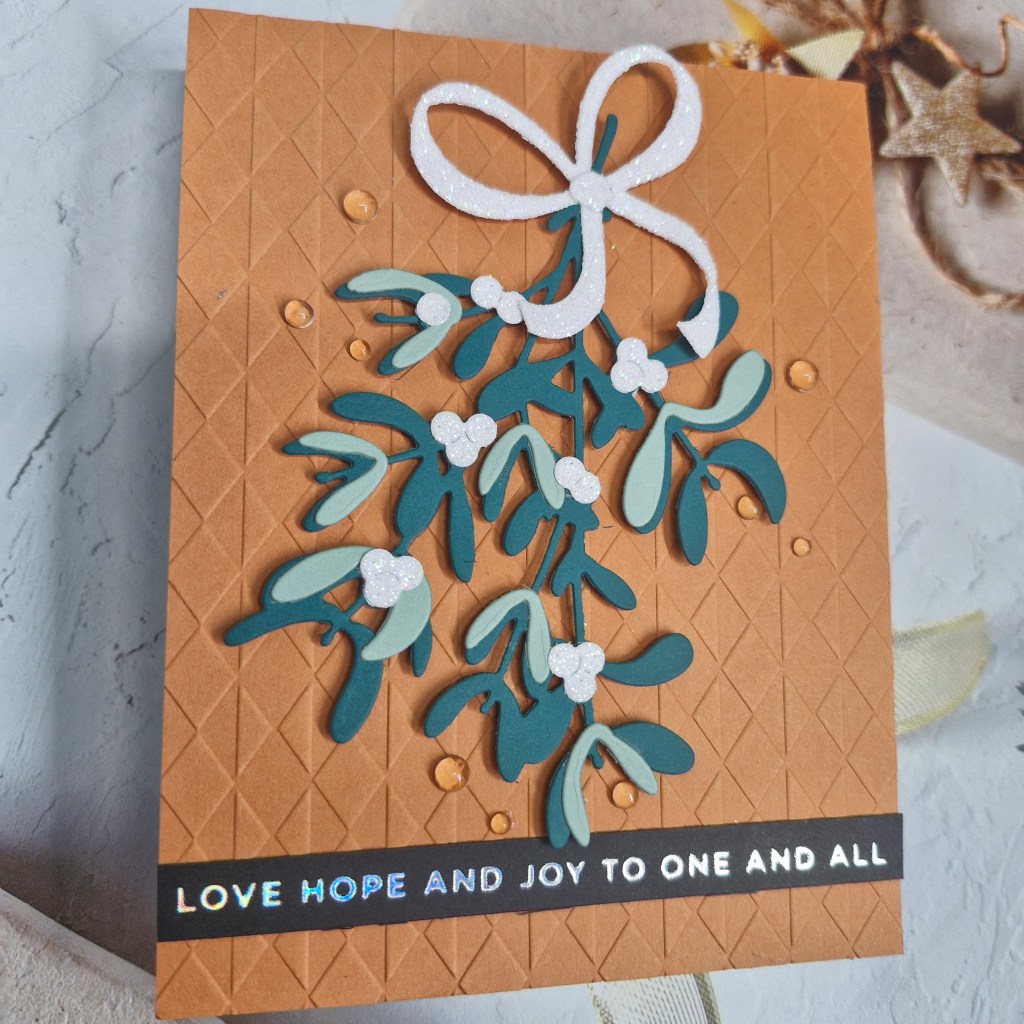
I thought I would have a go at using the Color Cubes by Sarah Renae Clark. My sister bought them for me a year or two ago – and I have never even opened the two boxes. Here is the photo with the card from the cube box I used:
I thought it was quite dramatic and so I went with it.
The background panel was created using a panel of Spiced Cider card stock from Concord & 9th and a Spellbinders embossing folder.
The mistletoe layering dies are from The Greetery, die cut using Concord & 9th card stock and some white glitter card from a UK company called Pink Frog Crafts. (This company is very local to me actually, and they have a fabulous range of glitter card – even non-shedding – and is quite handy when I am almost running out.
The bow is from another die set from The Greetery, also die cut out of white glitter card.
The final touches were the added foiled sentiment, and the clear gems.
I hope you can come and join us with your Christmas creations. xx
I shall be entering the following challenges:
Jingle Belles Rock – Christmas and Bling It! – (glitter card stock and gems)