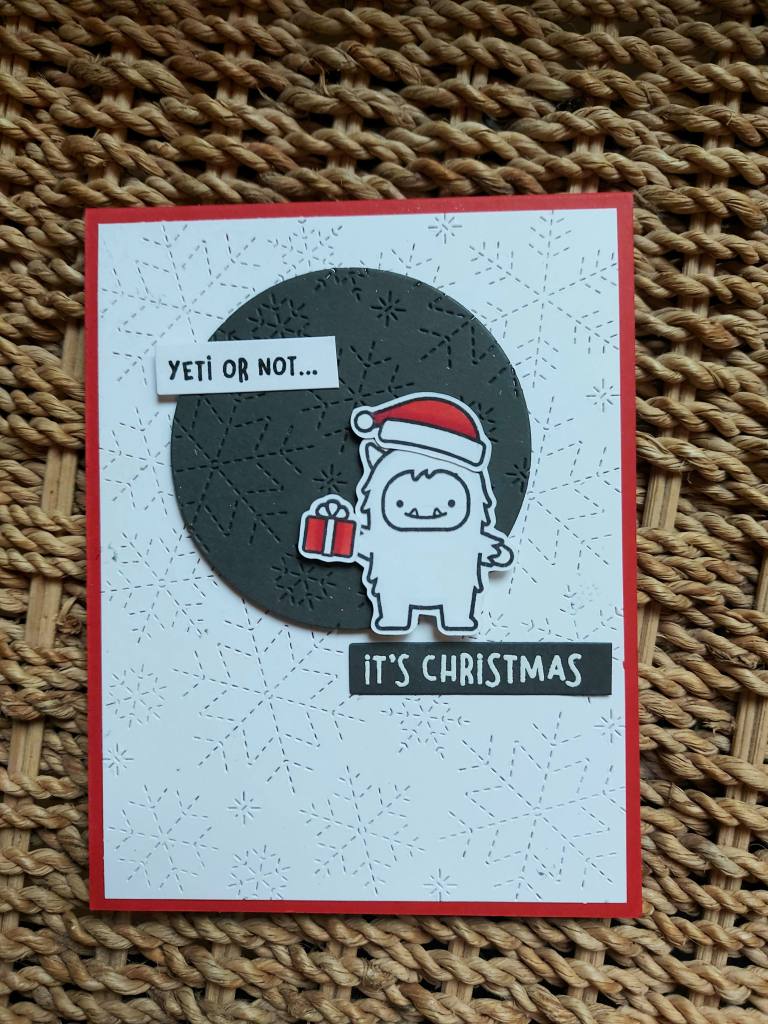
Hello once again. I created a card using an older stamp set and a new background panel from Lawn Fawn:
I chose a red card base using Heffy Doodle card stock, and then added the Lawn Fawn stitched snowflake backdrop – once I had cut it down slightly to leave a thin red edge.
The grey circle is die cut, then run through my machine with the same backdrop die, to add some stitched snowflakes as interest.
The yeti, hat and present were stamped, coloured with Copics, then die cut. The two sentiments were stamped and heat embossed – grey on white, and then white on grey.
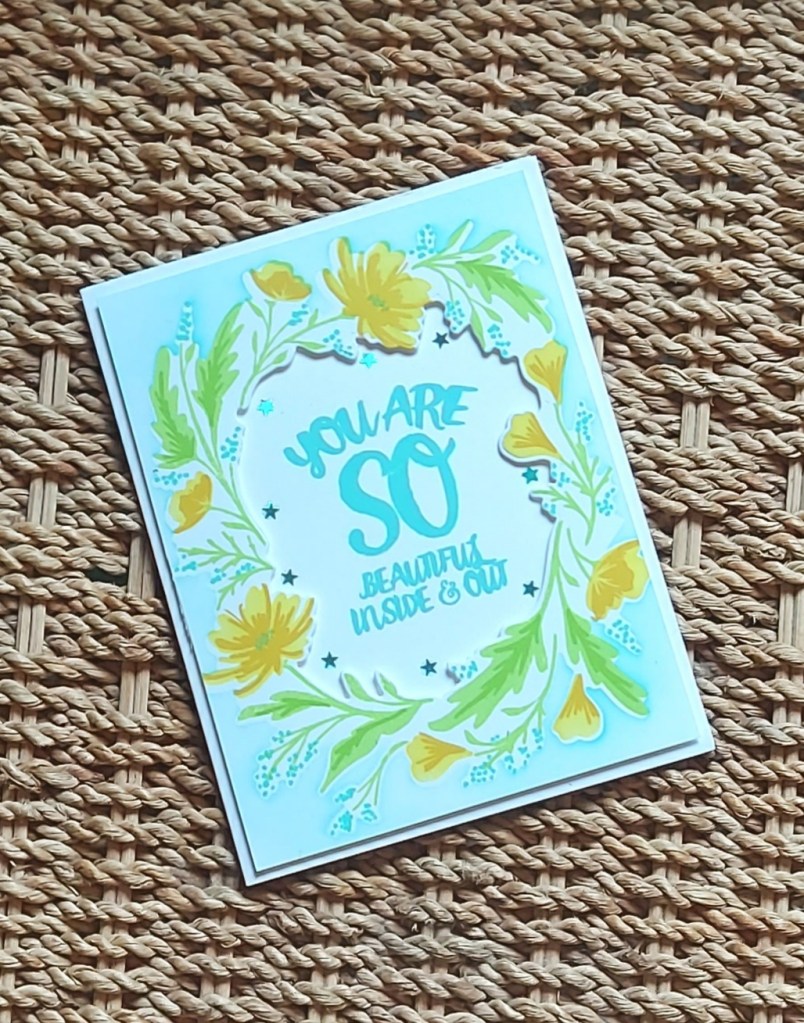
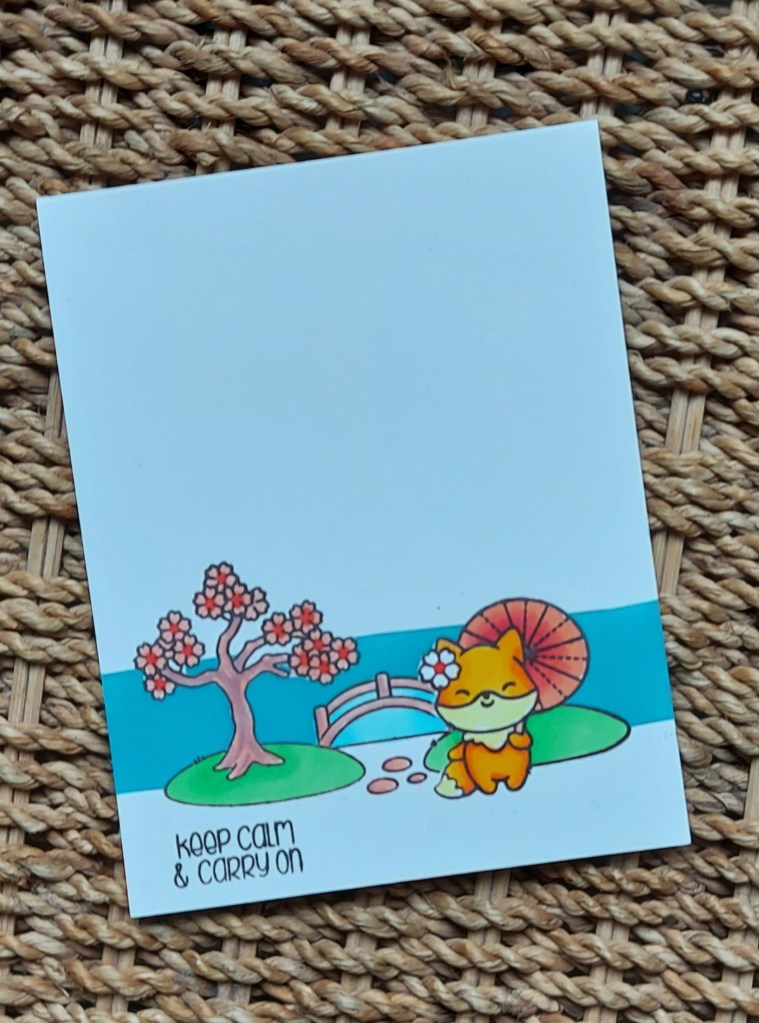
Hello. Following on from my craft time yesterday, I created a card for the current challenge at Just Us Girls:
I’s a colour challenge this time round, and I decided to use my new set from The Greetery. One of our online shops in the UK has started to stock The Greetery – I took the opportunity to purchase several sets. This was one of them.
I first used the base stencil to blend the first layer of the flowers in yellow, then used Altenew inks and rest of the stamps to create the full image.
I then used the matching die to cut out the middle of the image to create a window – this would make a great shaker card, something I’ll try in the future – and used the matching stencil to ink blend some Salvaged Patina Distress Ink around the outside.
The sentiment is from Altenew, and stamped with Salvaged Patina Distress Oxide – better than the Distress Inks when stamping – and then layered the floral panel onto a white card base with 3D foam.
I searched my stash for some turquoise embellishments, and found these tiny stars, which I added as you see.
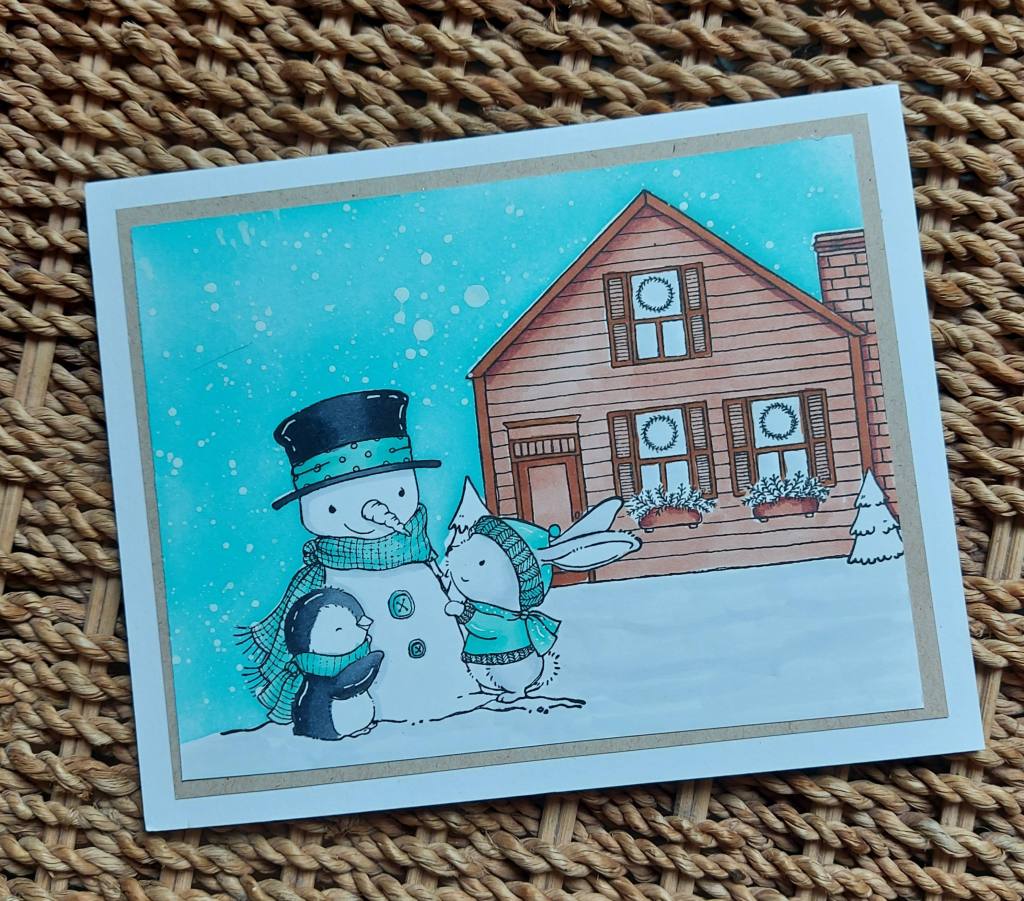
Hello, After a couple of days away. I have come home to finish this card:
I used a couple of Purple Onion Designs stamps. When I first saw that these stamps aren’t mounted – and being completely spoiled by mounted red rubber stamps – I hesitated getting some. However – I’m glad I did get them. All I did was add some low tack tape-runner to the back of the stamps so they stuck to my Misti – worked a treat.
I first stamped the snowman and critters, then fussy-cut a mask for them, then stamped the cabin. I also cut a mask for the cabin, and ink blended – Salvaged Patina Distress Ink – for the sky. Before removing the masks, I add some water splatters.
I chose Distress Ink on the Neenah 80lb card stock, as I didn’t want the full-on solid ink blending you get with Distress Oxides.
I coloured the images with Copics, adding a cool grey to the outline of the snowman, and created some snowy looking lines pn the rest of the white area.
I purposely didn’t colour the trees – I thought there was already enough turquoise, and I wanted to stick with the colours for the current Color Throwdown Challenge – which doesn’t include green!
I was going to cover them with some glitter……..but decided not to, because I would have had to add glitter virtually all over – and I wasn’t in a glitter mood! This way, I think the colouring and masking is effective enough…
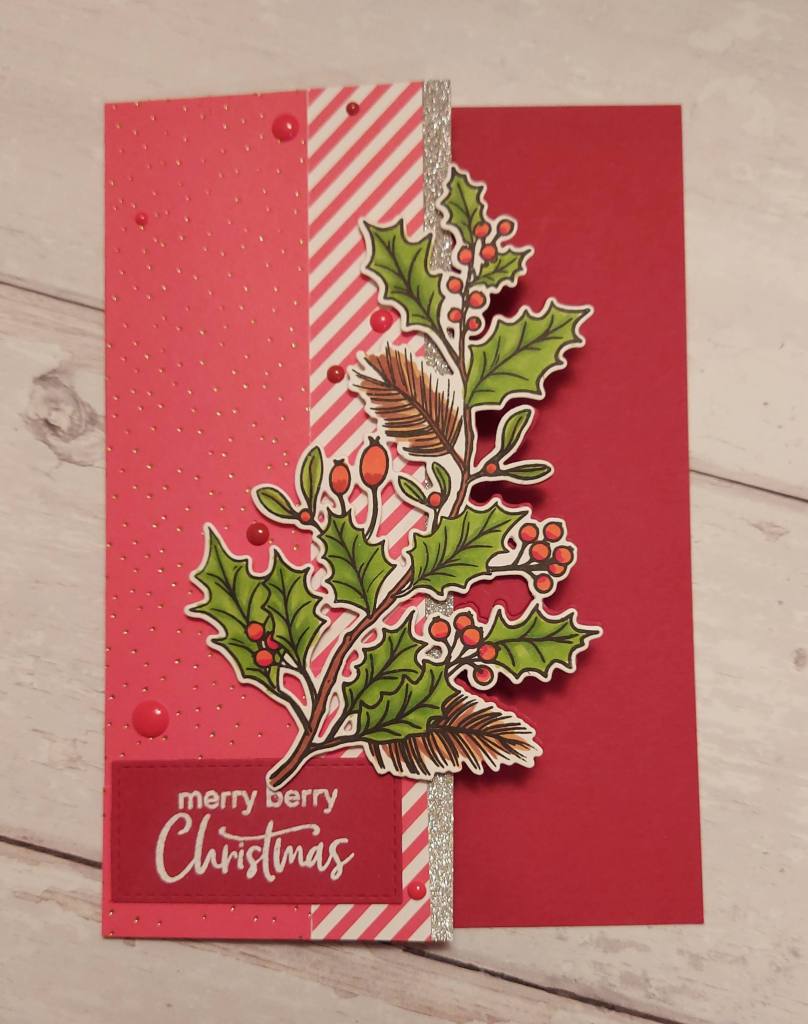
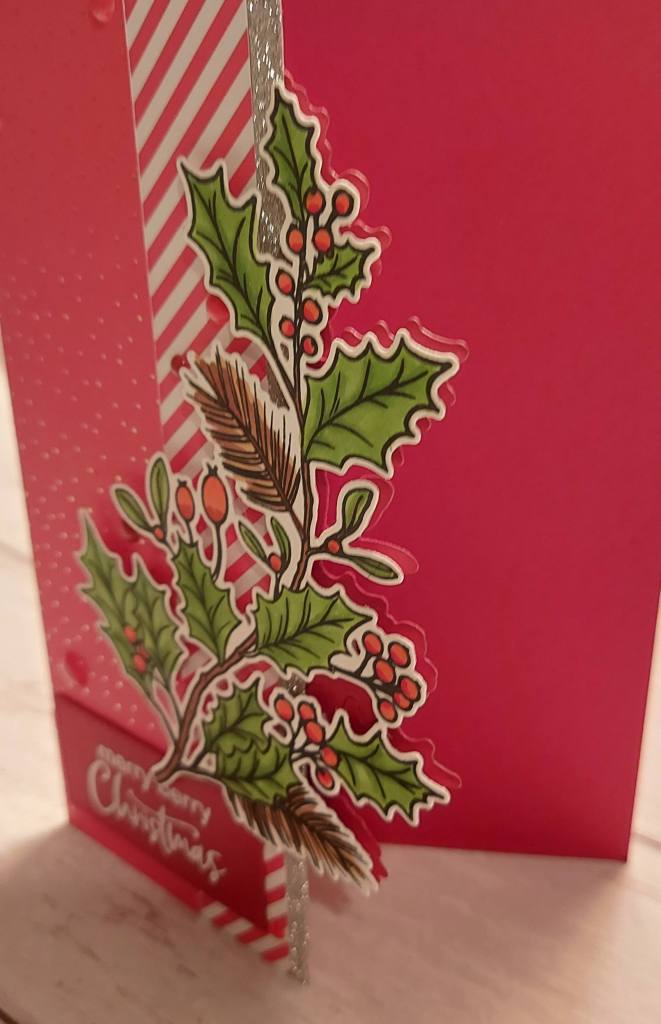
I thought I’d have a go at partial die-cutting with this gorgeous Hero Arts stamp and die set:
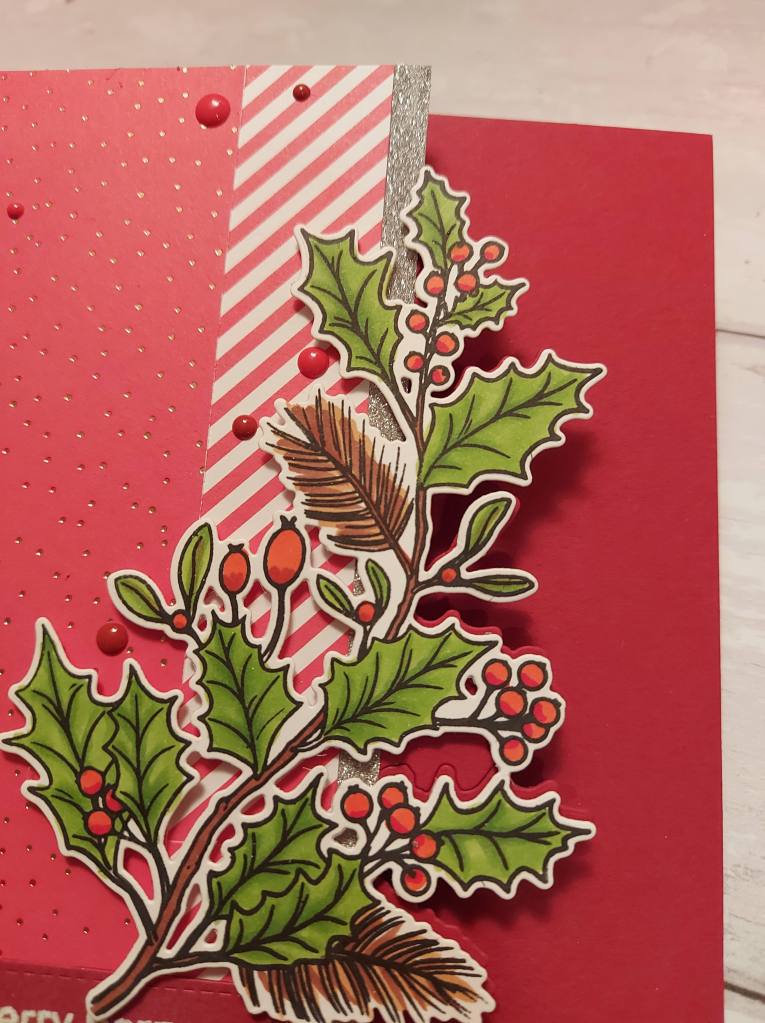
I stamped, coloured, the die cut the holly branch first. I then took a red card base, and partially die-cut the holly branch into the front, then used a craft knife to cut away thee top and bottom.
Before sticking the image down, I added a slim silver glitter strip, then some Lawn striped paper and dotty shiny paper.
My card base is 5 x 7 inches, so the 6 inch papers didn’t fit all the way, so I craftily joined them where you wouldn’t be able to see the join – under the sentiment and under the branch – soooo crafty…..!
The sentiment is white heat embossed onto the piece of red card stock I used for the base which I had cut off.
Hopefully you can come and join us in this challenge and get your Christmas card stash to grow by at least one more creation…… xx
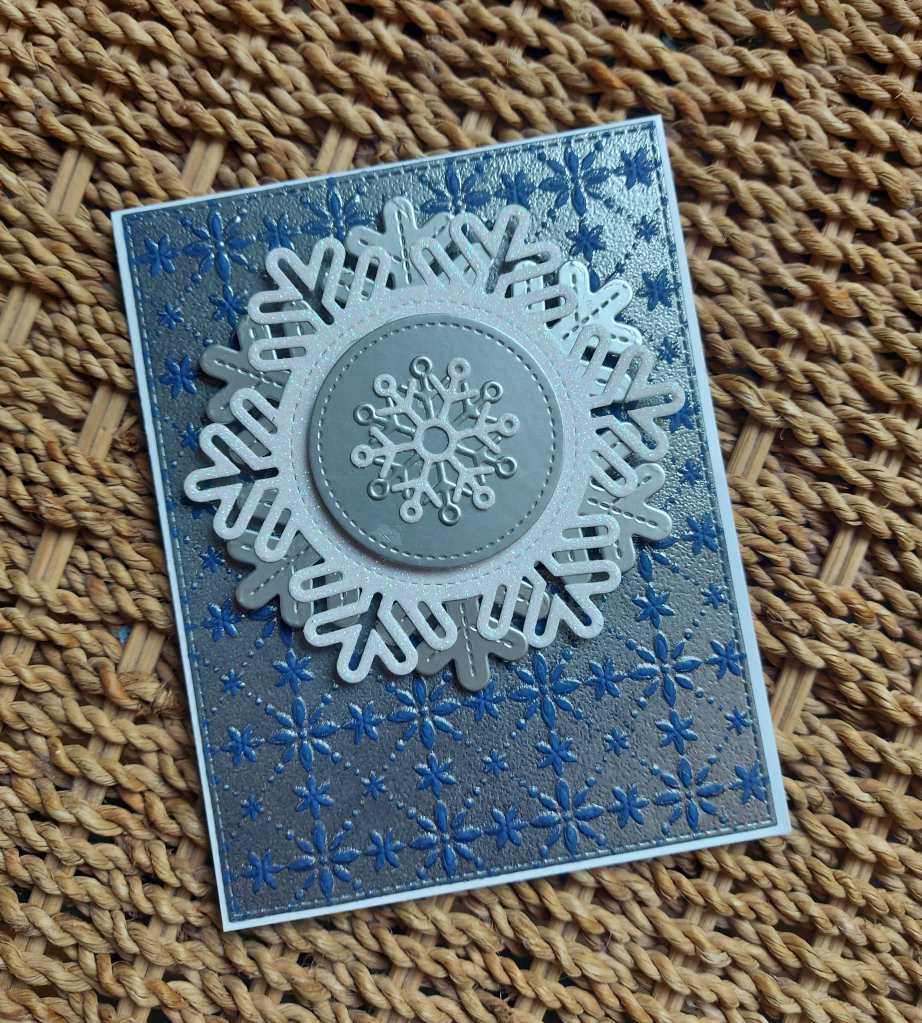
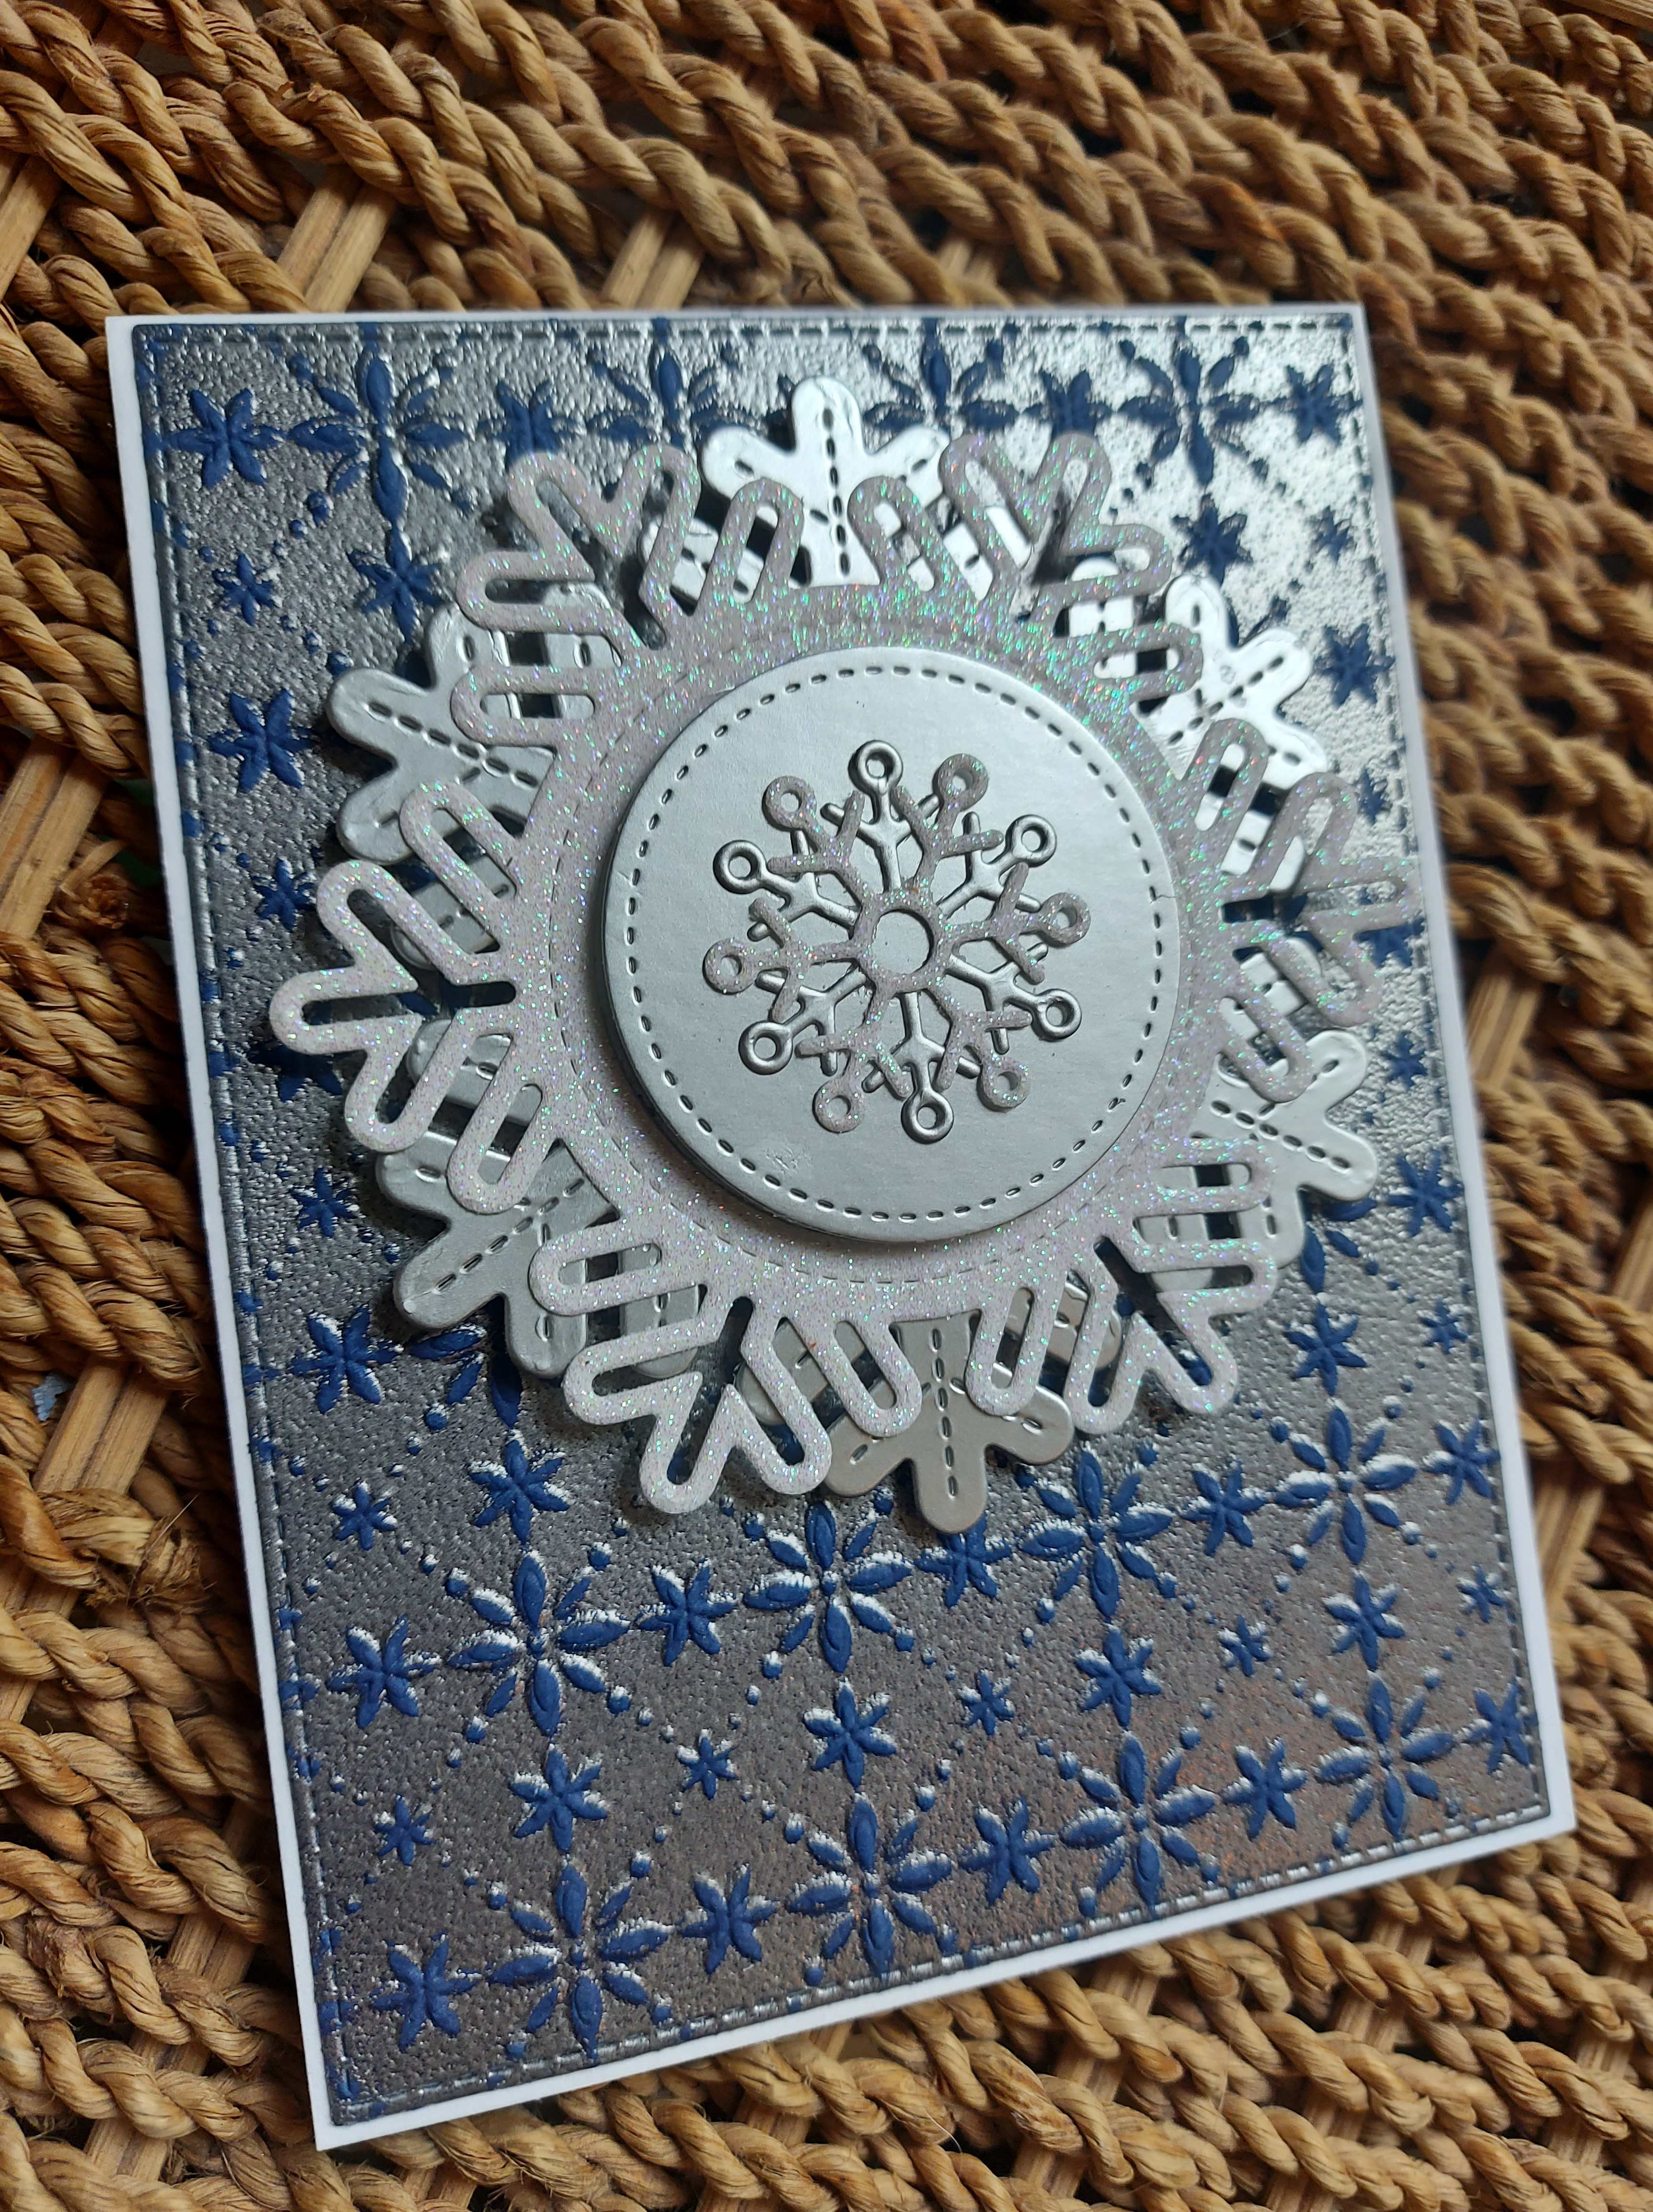
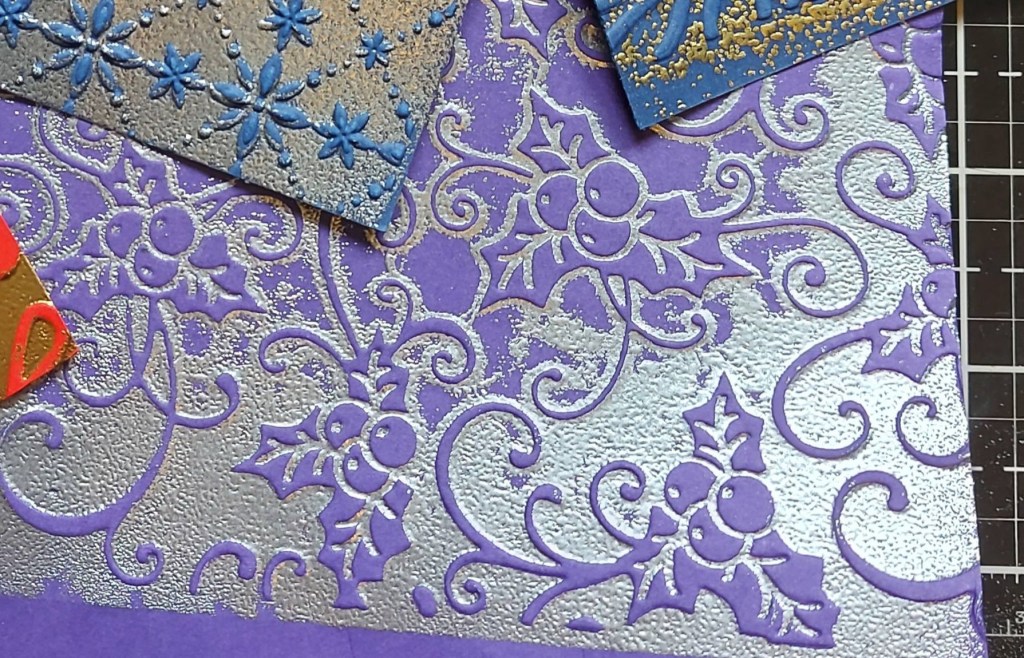
Hi once again. I was inspired by the current challenge at Just Us Girls to try a technique – heat embossing with embossing folders. I have tried this before – with very poor results – but this time their link to the Jennifer McGuire video helped me a lot:
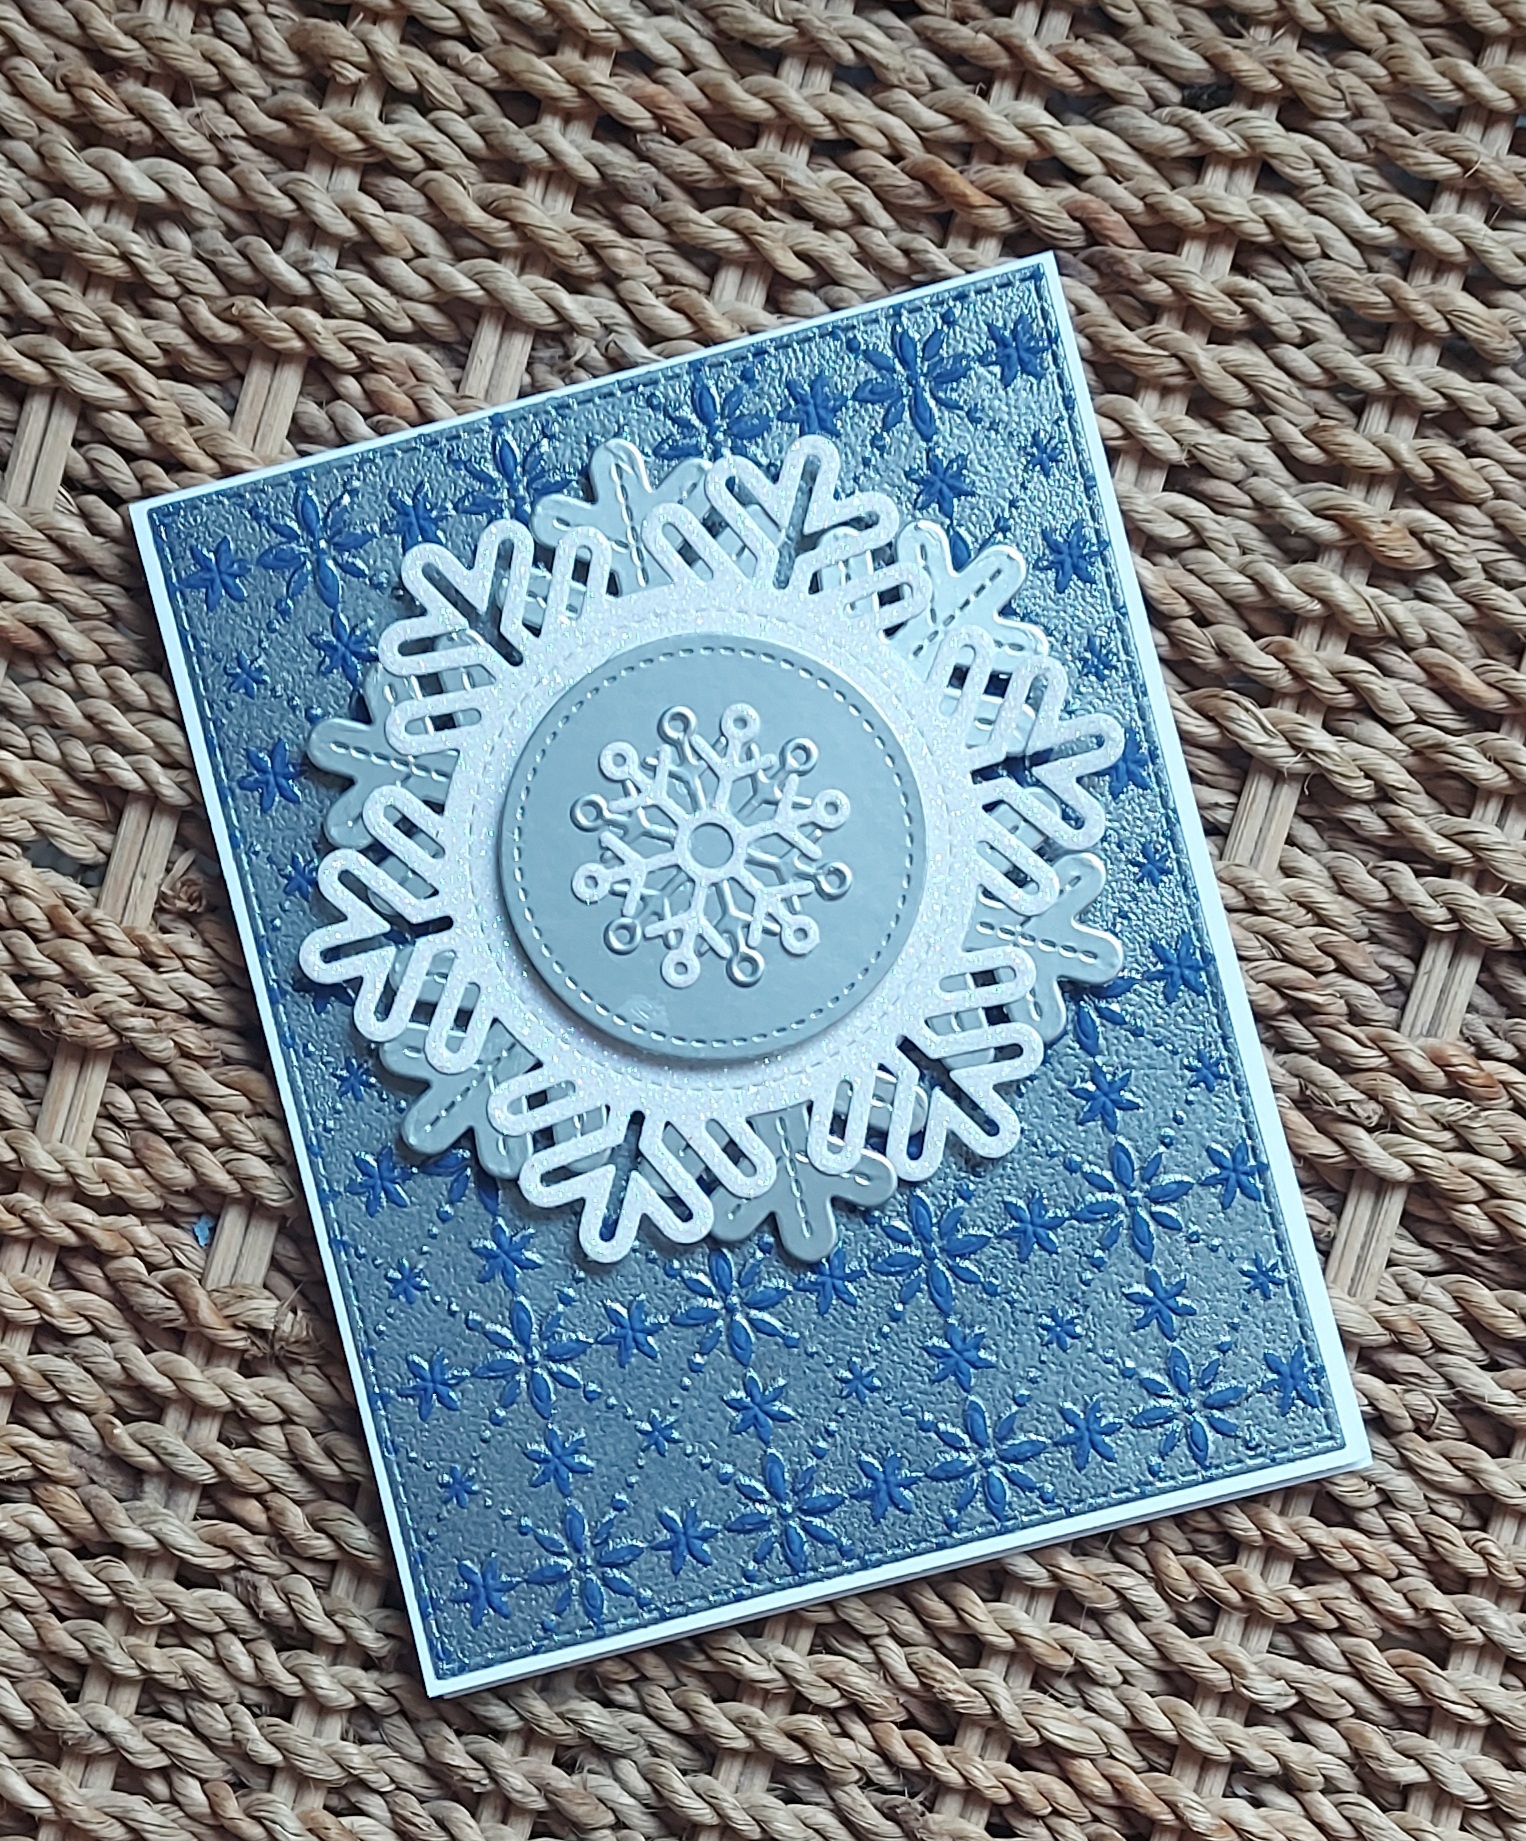
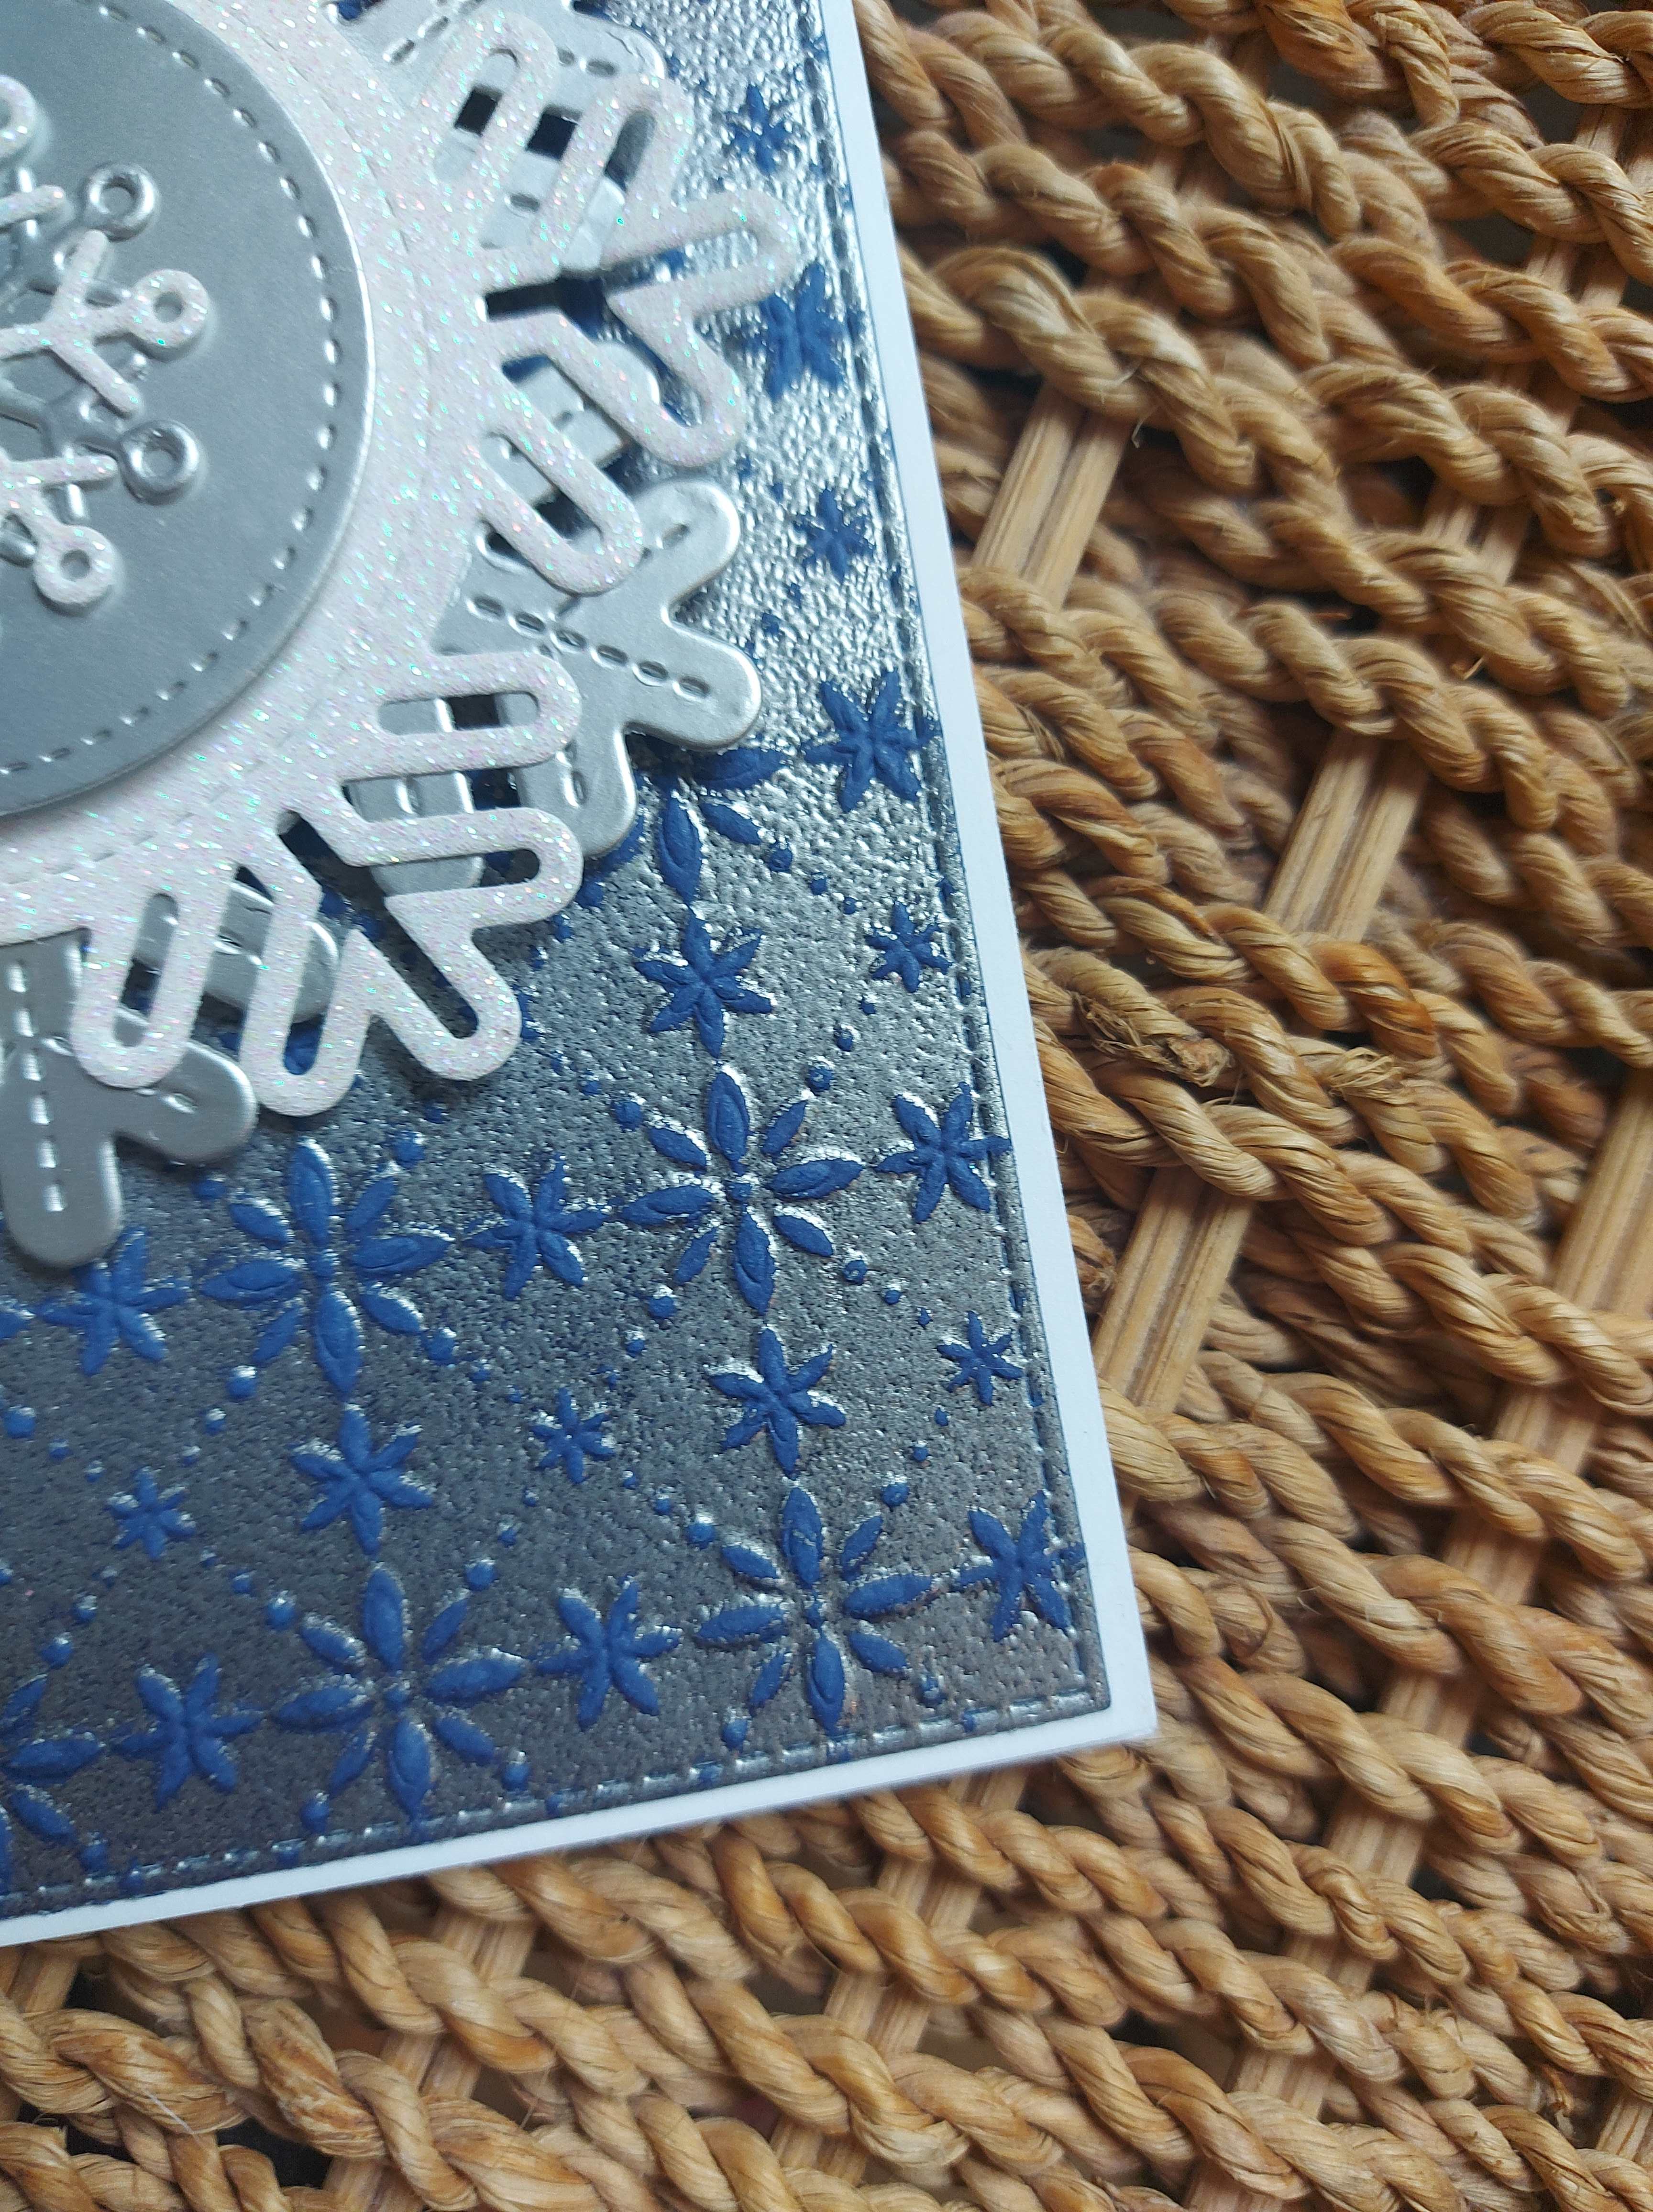
I played with numerous different colours of card stock, and different colours of embossing powder – but this the one which inspired me the most. A dark blue card with silver embossing powder.
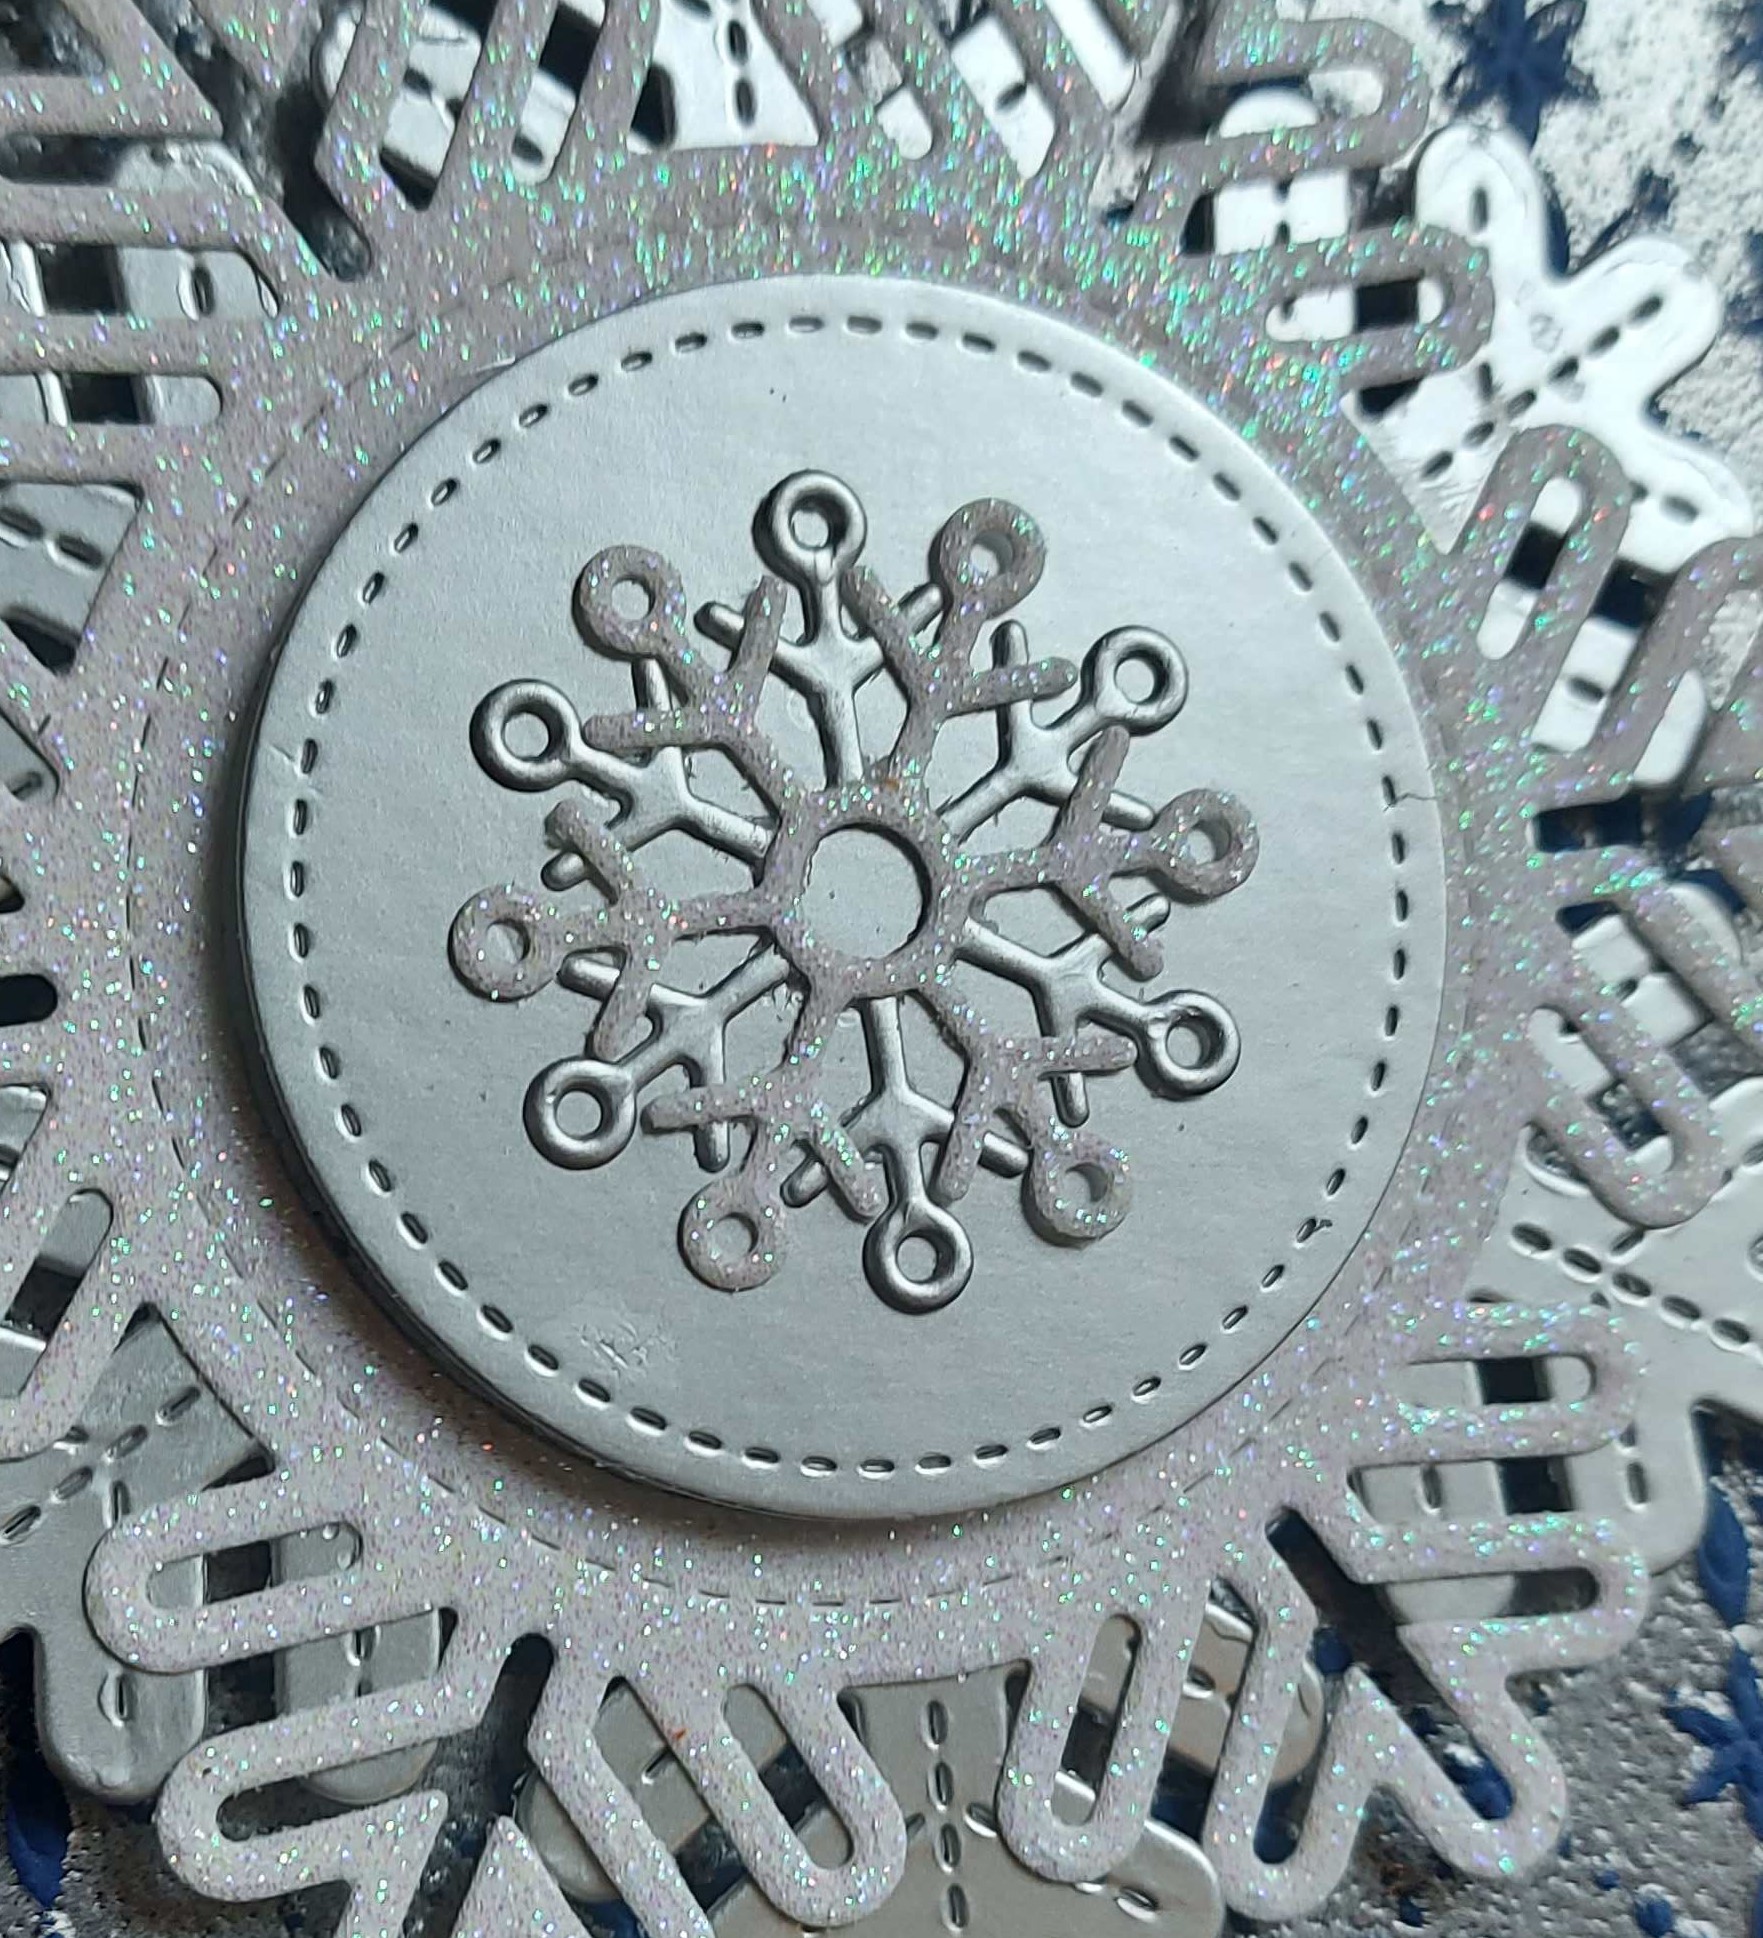
I used the Lawn Fawn snowflake dies to create a matt silver and glittery large snowflake and smaller snowflake, and layered them as you see.
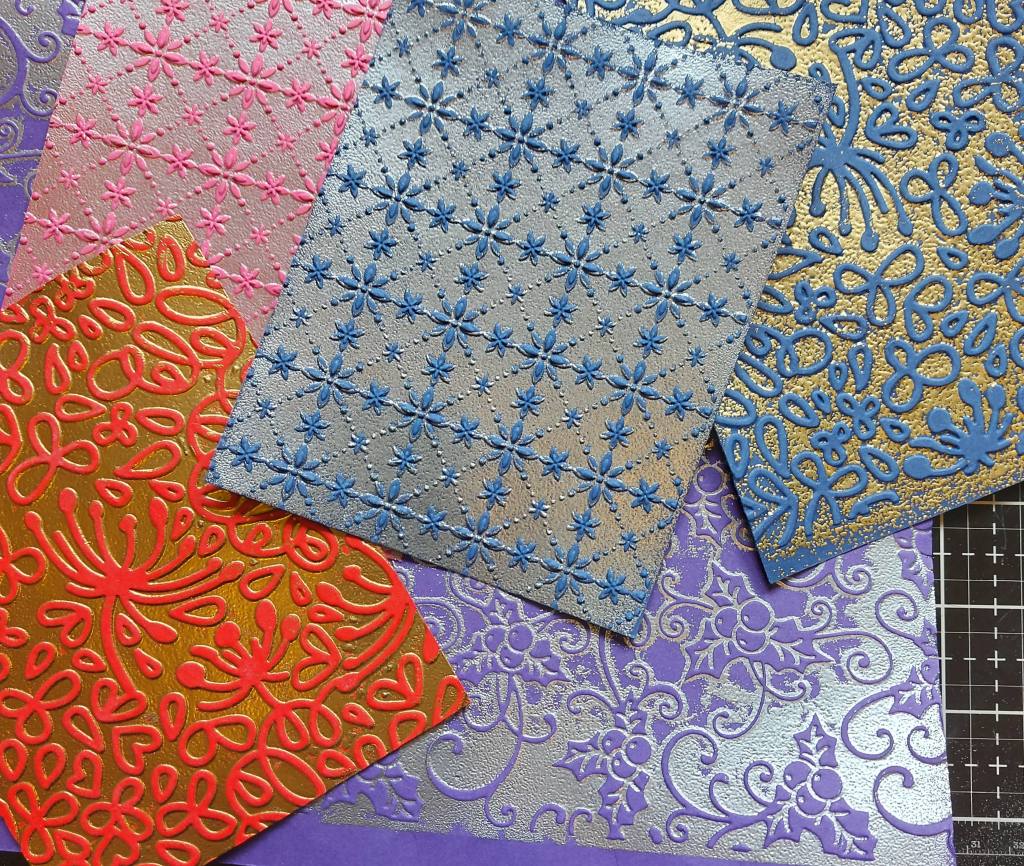
Here are some of my other ‘trials’:
The tip which helped me the most was using a brayer to add the embossing ink – that seemed to create a better overall coverage.
The other thing I noticed – the purple and silver piece is an A4 piece of card. I used an A4 folder, and my 12 inch Big Shot Pro – it seems I don’t get an even pressure across the whole piece – I will have to use a little shim in the future – but I actually like the effect of almost outlining the images instead of fully heat embossing the background.
On the blue floral piece, I used a thicker embossing powder, with larger embossing bits – not exactly a powder……maybe granules would be a better word? Anyhoo – I heated from the back, and created an uneven almost distressed and vintage look to that piece, which I’m liking too:
So – the outcome is that I enjoyed playing an experimenting, and also have some pieces which can be used as backgrounds, or even for die cutting in the future.
I shall be entering the card into the following challenges:
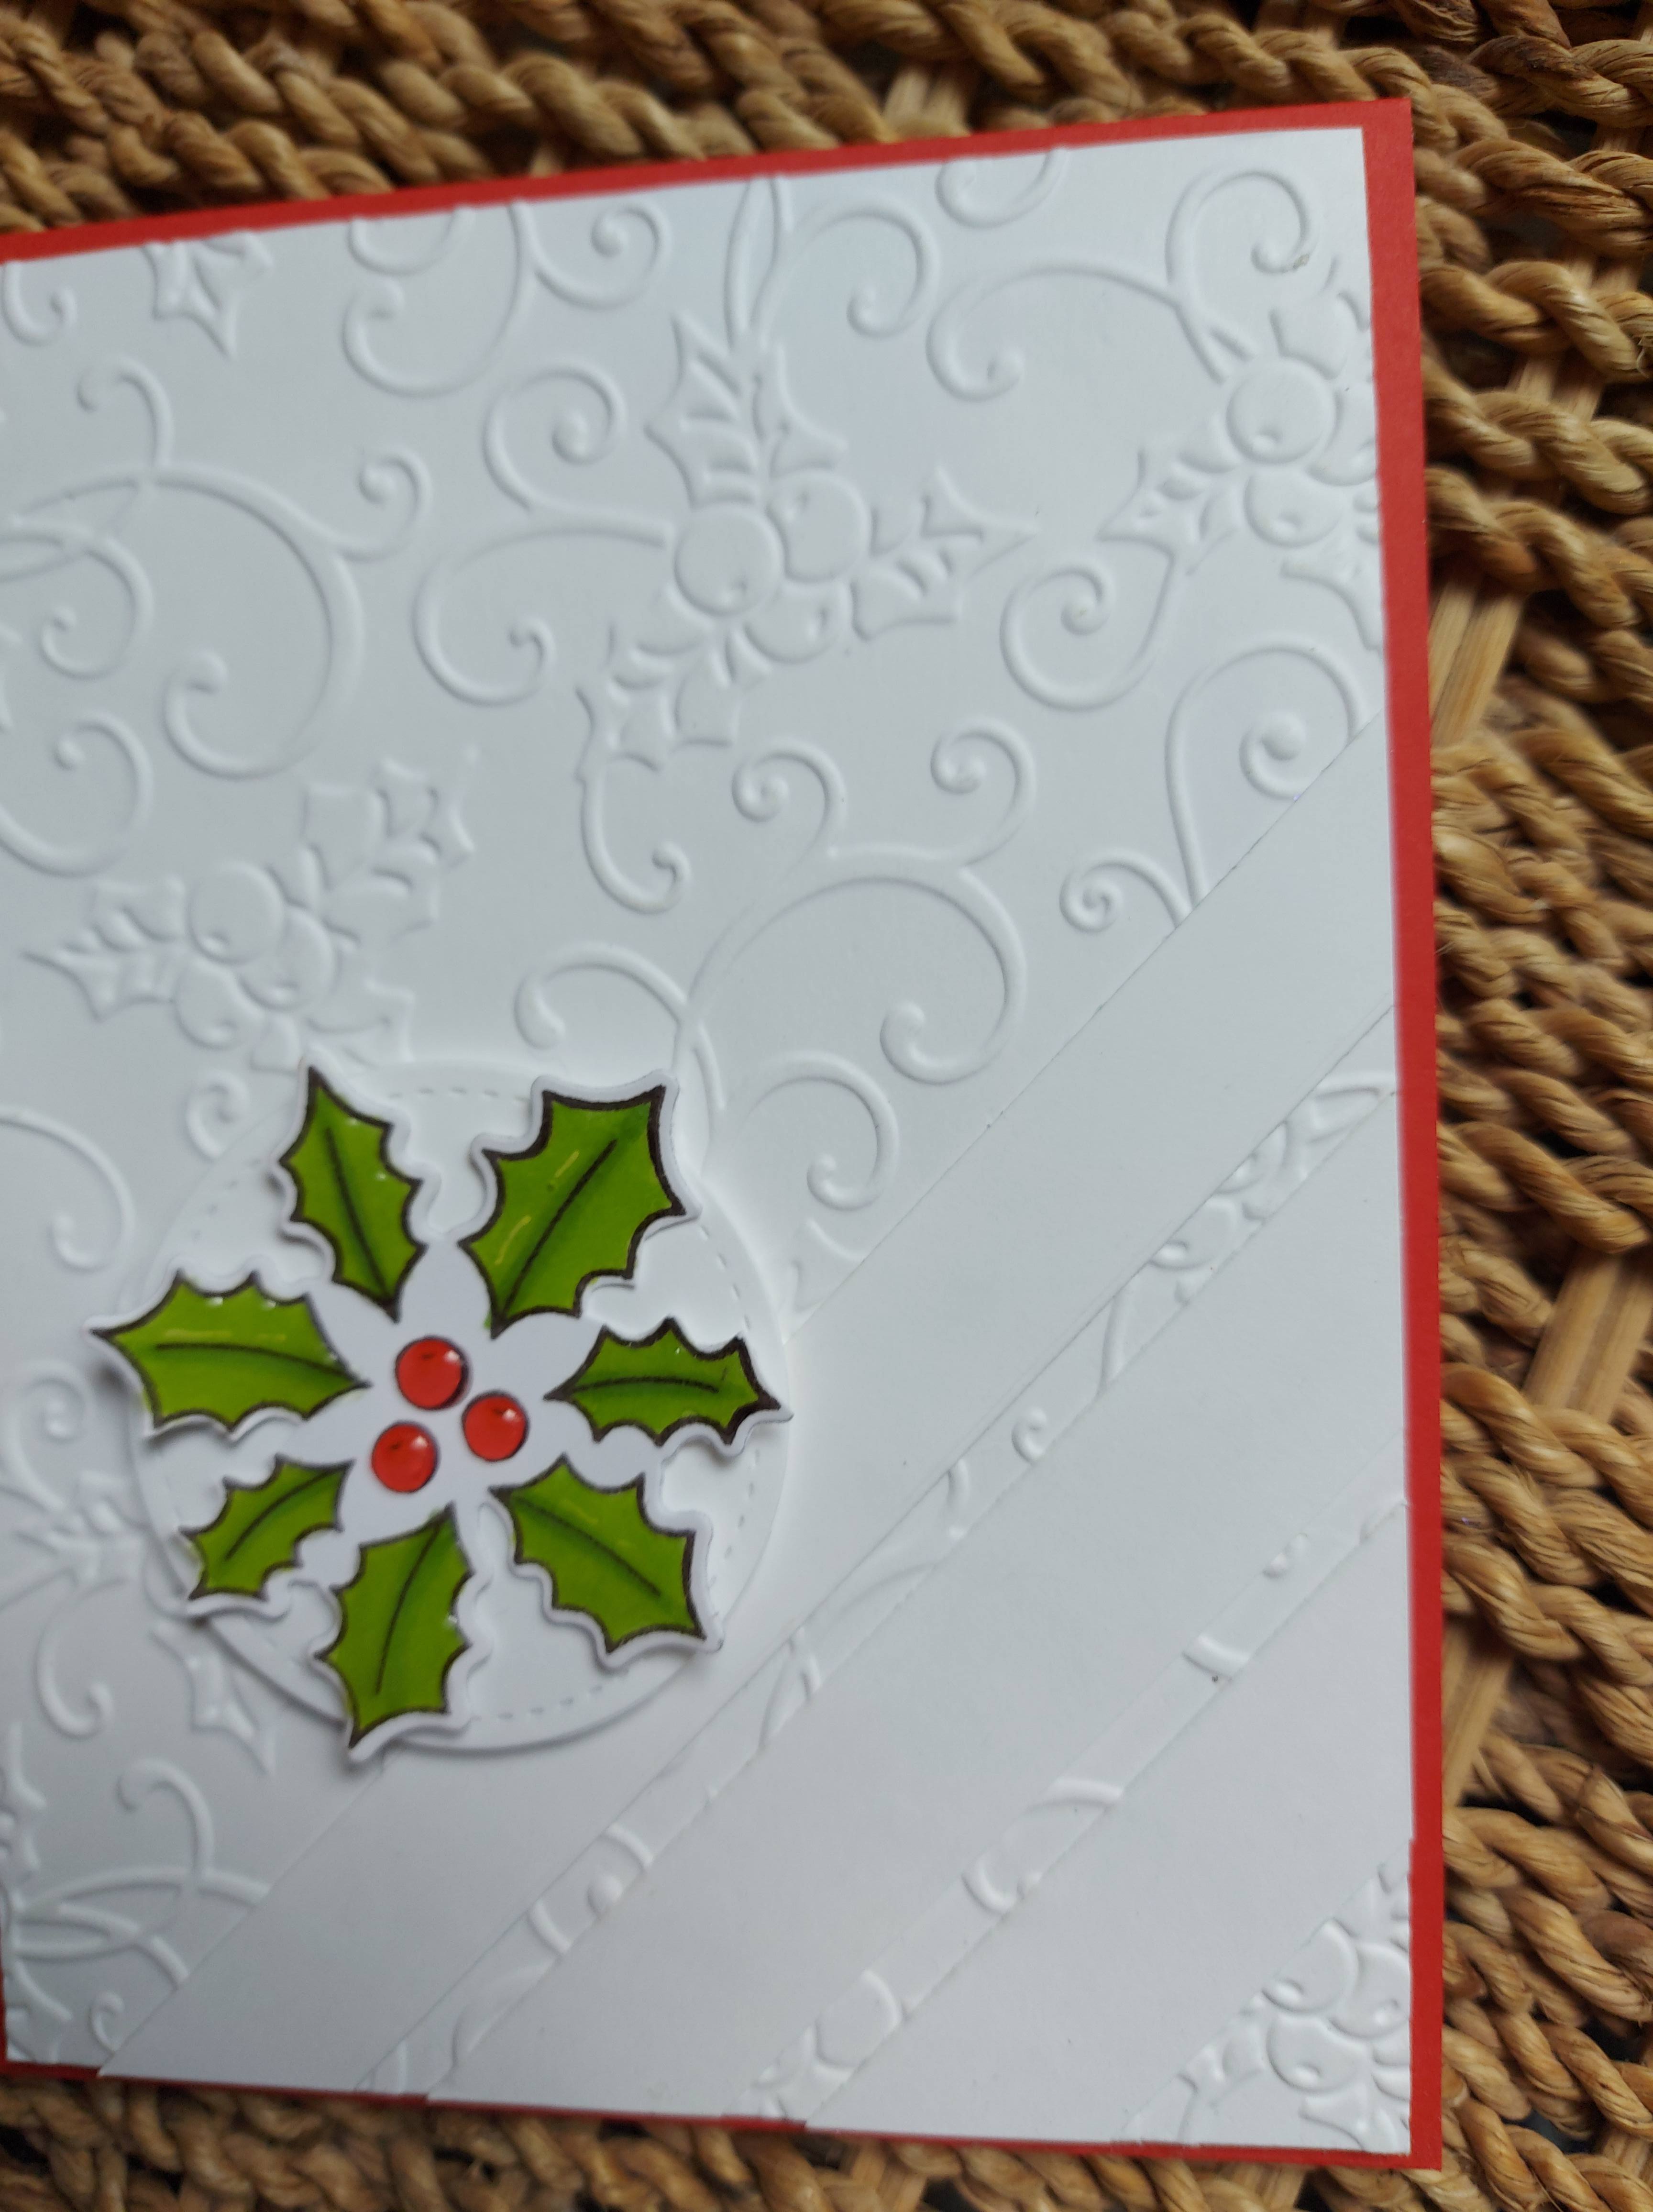
After another playtime in my craft room, I have a card to share:
I have no idea why the card doesn’t look white on that photo, and no idea how to correct it, but here are some other photos:
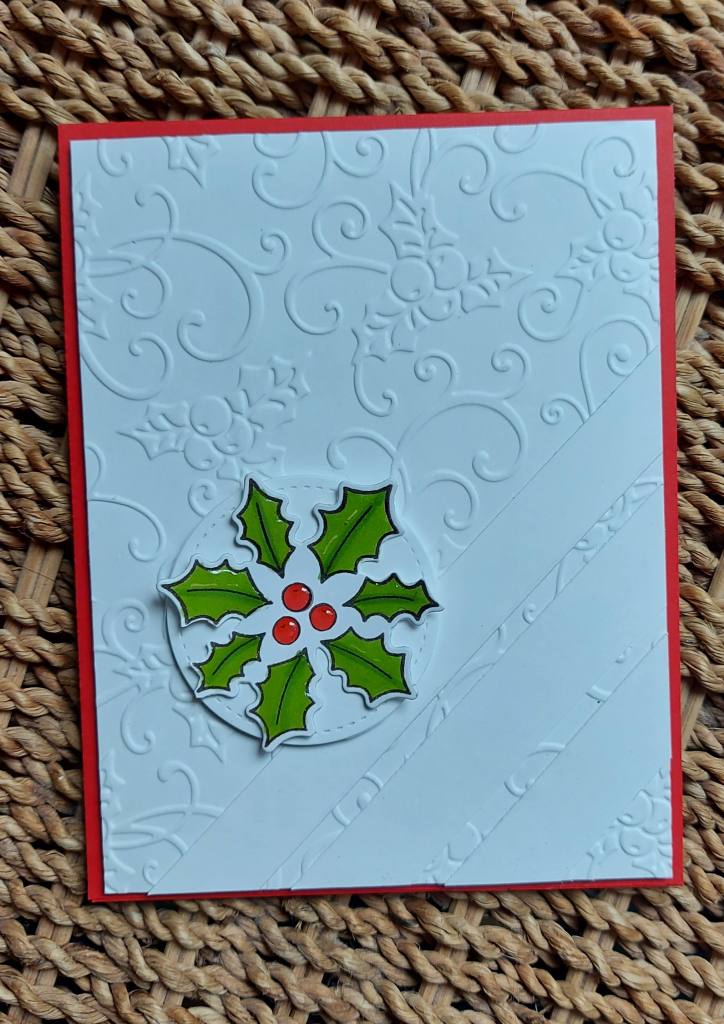
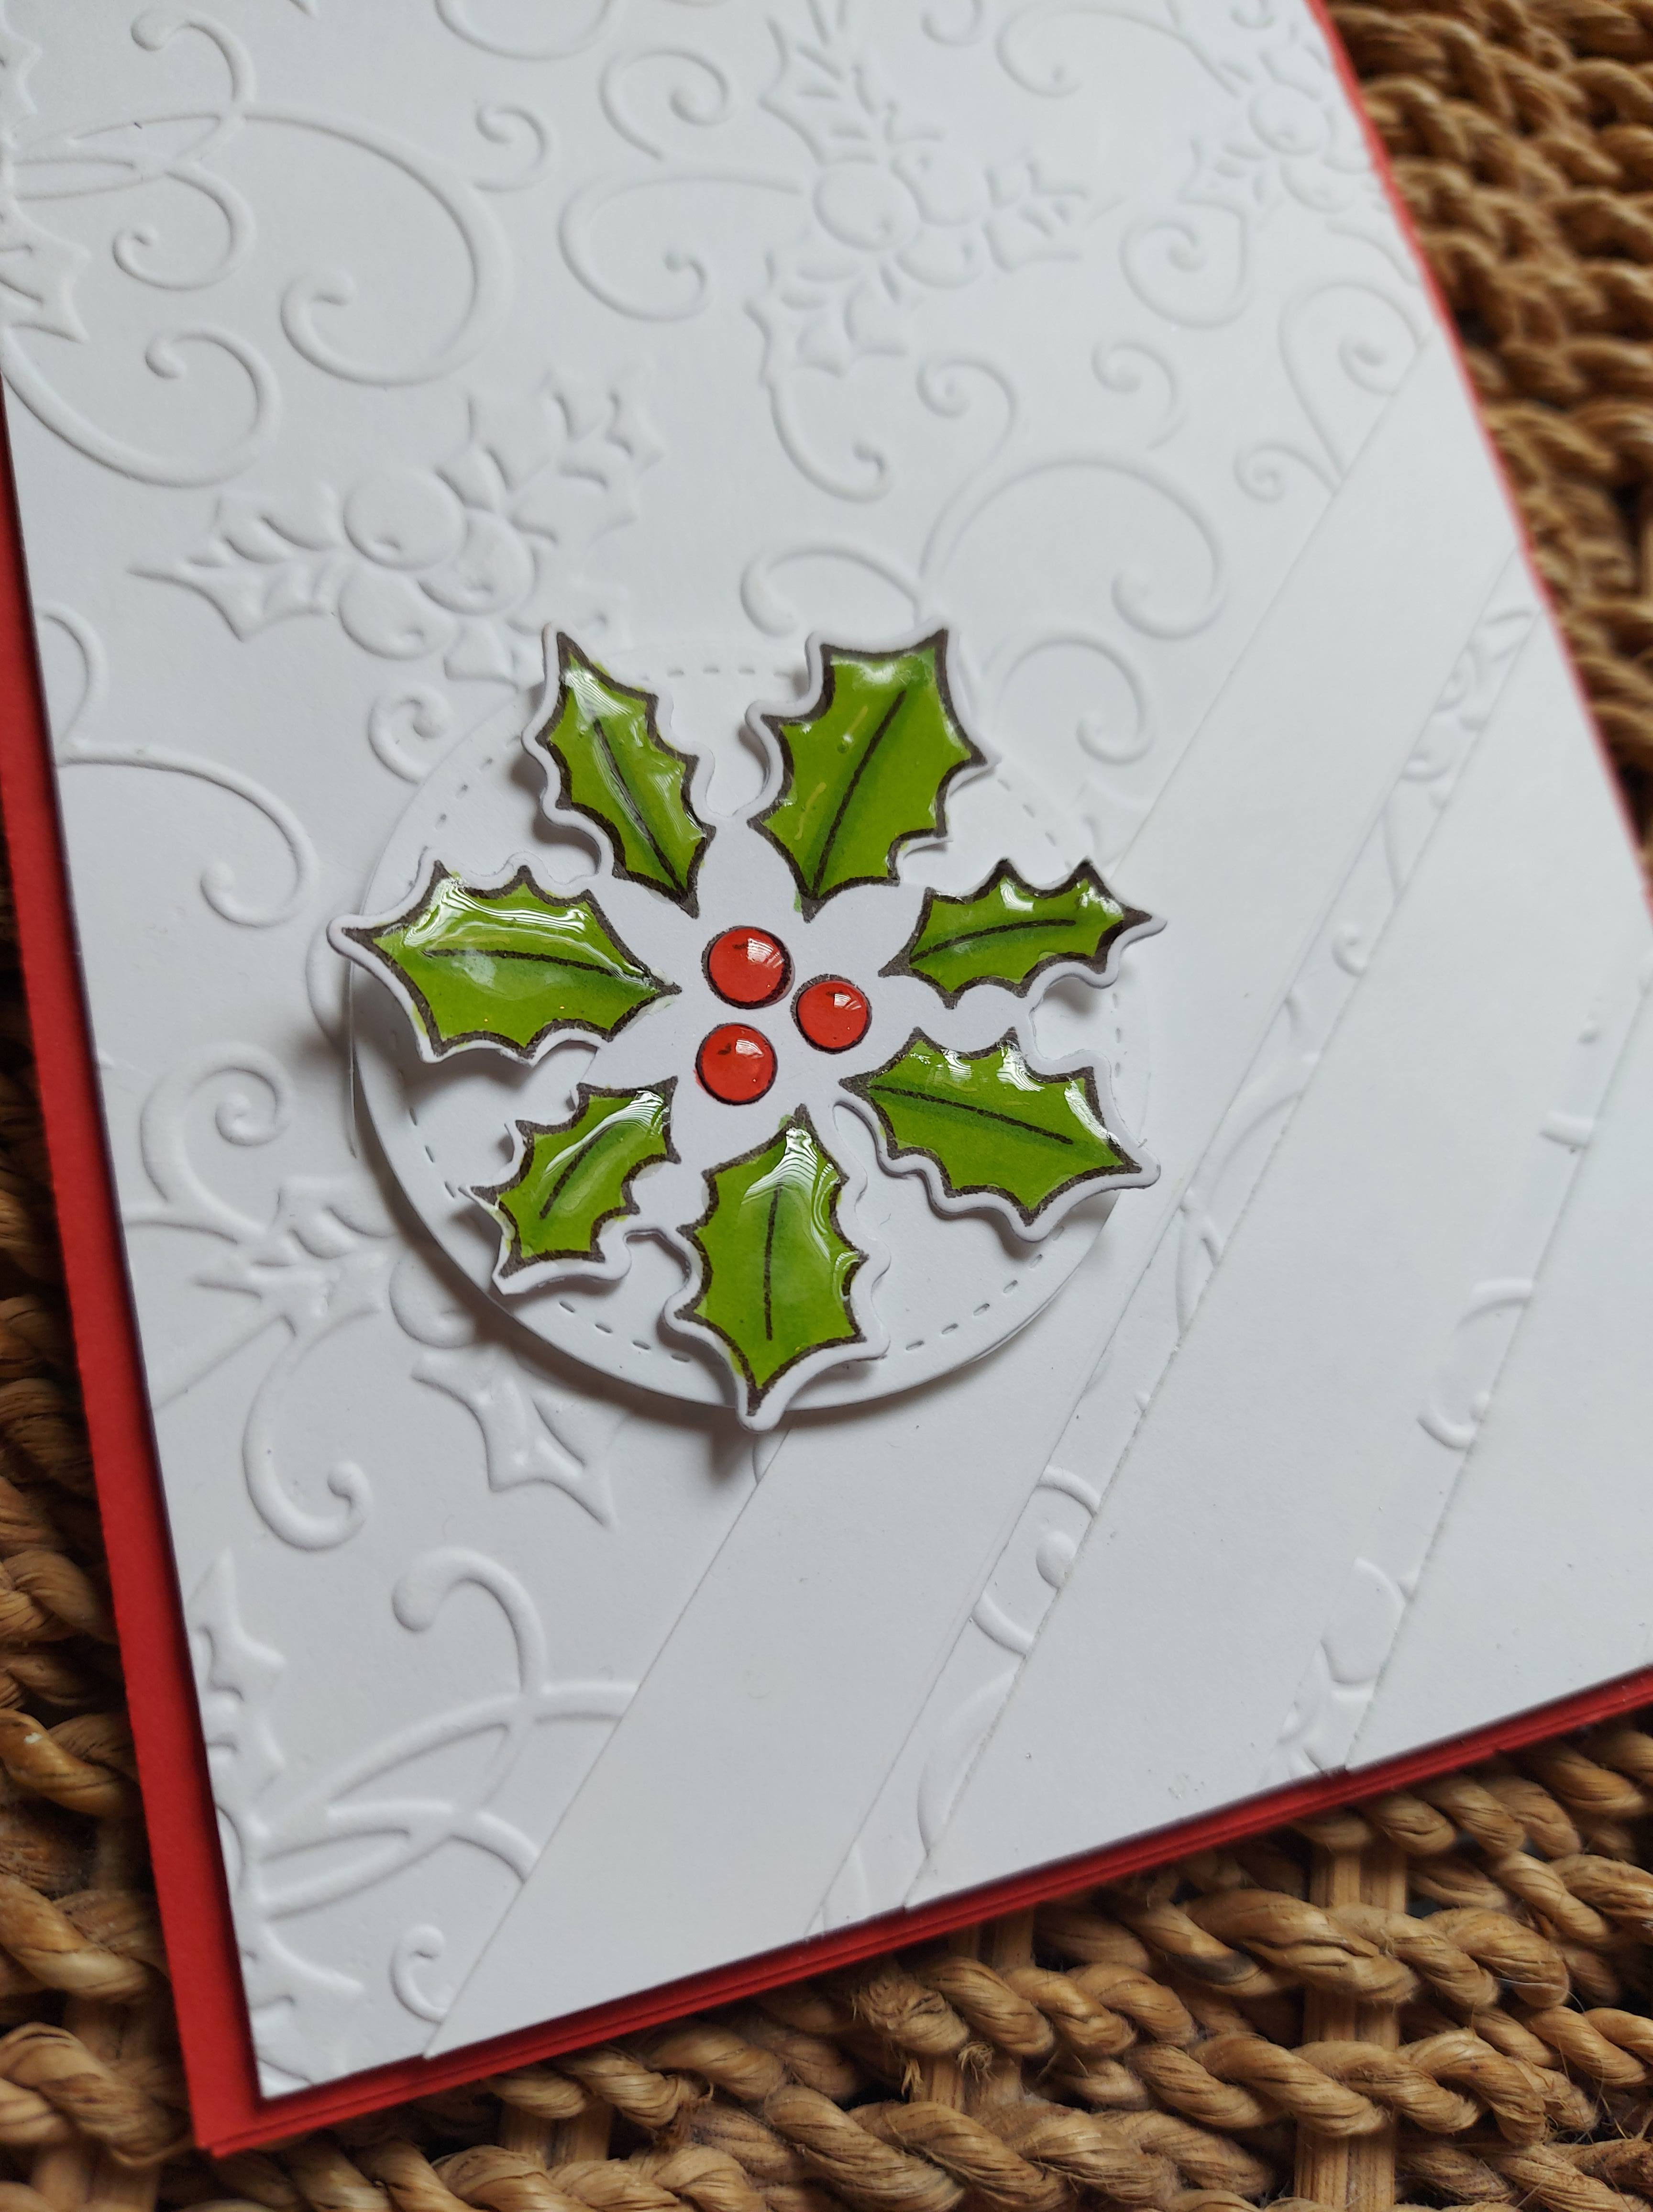
I actually went up to my craft room to get messy – ink smooshing etc – but then I changed my mind as this circular holly image was there drying from the previous day – so I decided to create a card using this first.
The image was stamped, coloured with Copics, die cut – then glossy accents added for some shine. This was then added to a small circle.
I used Heffy Doodle red card stock as the base, and added the white layer after dry embossing with a Sue Wilson embossing folder – one of my favourites and one of my oldest.
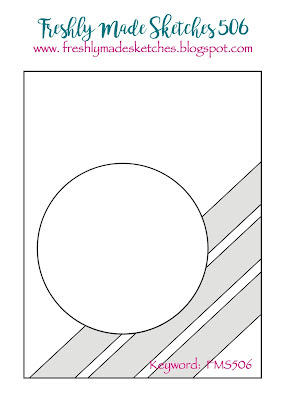
The layout of the card was to follow the current Freshly Made Sketches Challenge. I added plain white strips – something I wouldn’t have considered up until a few weeks ago……yep – another virtual craft session!
Sentiment-wise – I think I’ll put something on the inside, more of a verse sentiment, so the front stays clean.
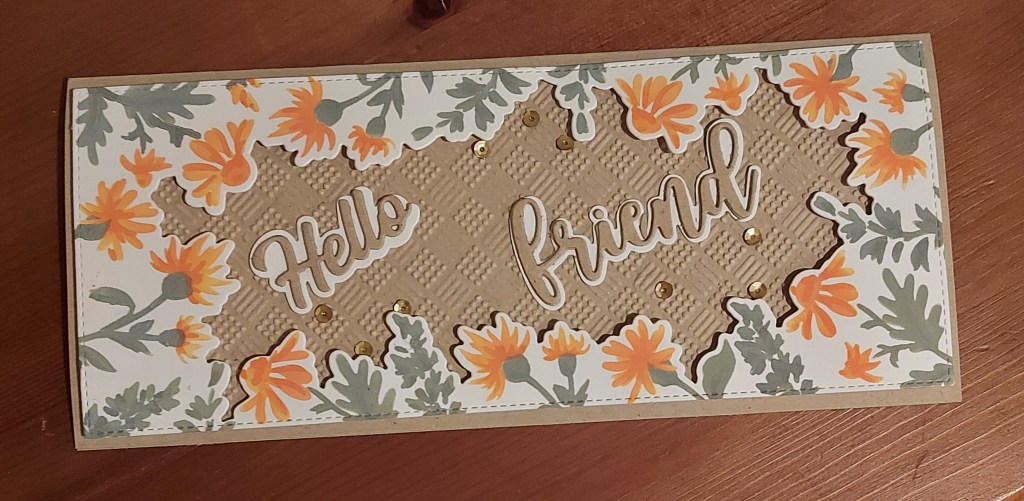
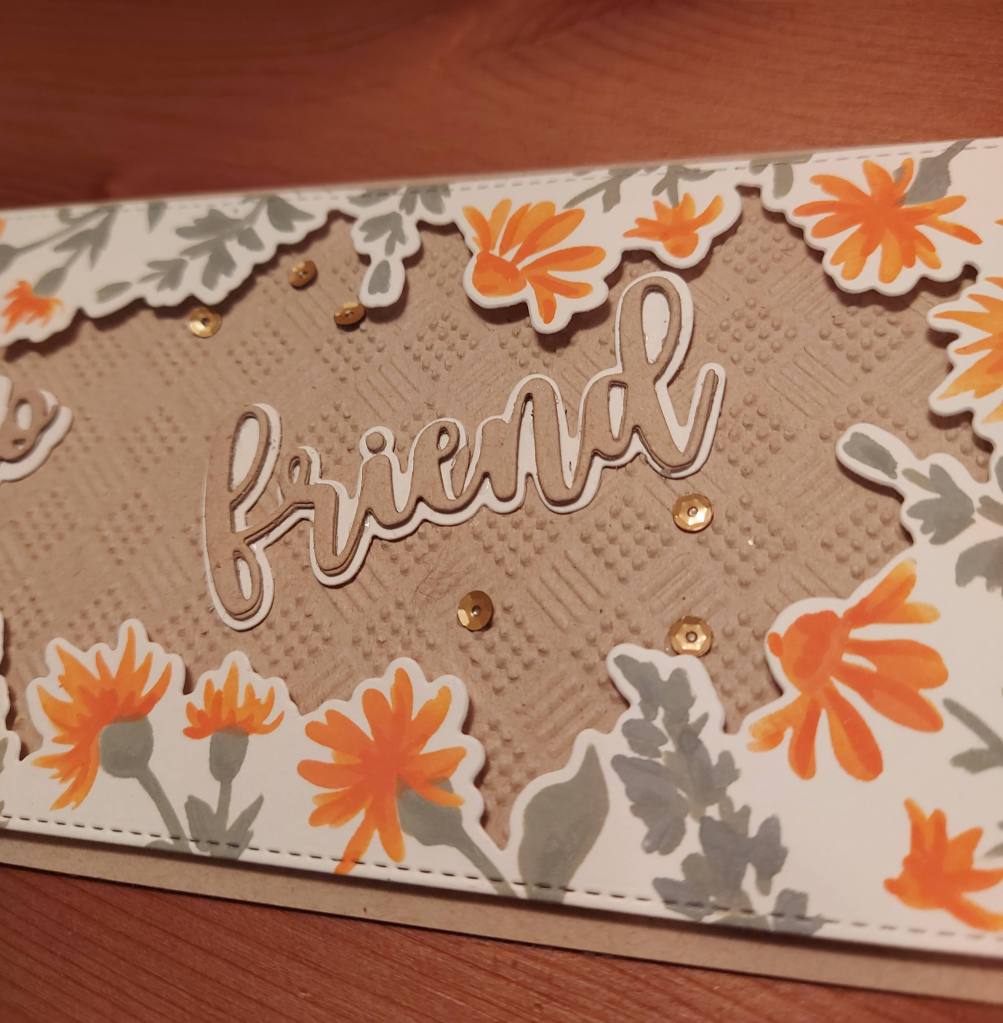
I’ve been playing with a layering stencil received as part of the Crop and Create kit a few weeks. I seem to be getting the hang of stencils – whether they are layering or not – and I’m enjoying creating variations using the same product.
The six layers to the flower stencil from Pink Fresh Studio were all still used for this card – but two shades of orange for the sunflowers, and the leaves and other floral images I used two – maybe three – shades of grey – all Distress Inks.
I didn’t mask anything off – just used a little – make that tiny – blending brush for each section. The stencil also comes with a die to cut the inner part out – which I obviously used – and die cut the whole slimline panel using a Mama Elephant slimline die I had.
The Kraft card base has a Kraft panel, embossed with a Sue Wilson pin-point embossing folder for some added interest, and the floral panel raised with 3D foam strips
The two words are also from the Crop and Create kit – one from Gina K and the other from The Stamp Market. This is the second version of the words – the first was by heat embossing with gold – but I didn’t like that, so went back to just layering three each of the words – Kraft – on top of the shadow layer.
But I did add some gold(ish) sequins – just because I could……..!
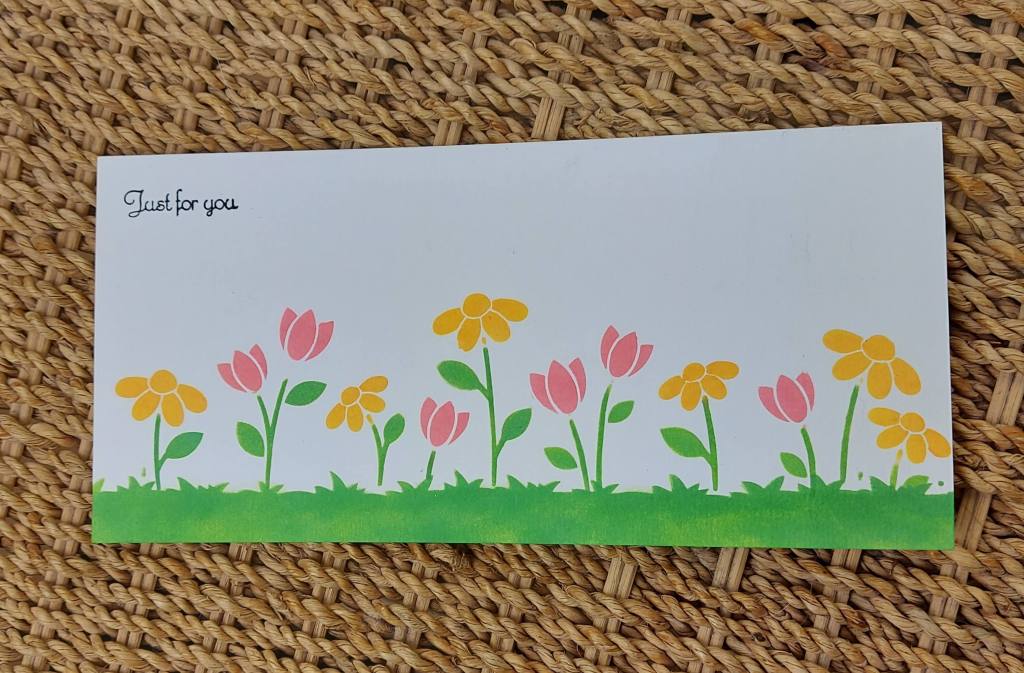
At The Alphabet Challenge we have reached the letter ‘N’, and Veronika has chosen the theme of ‘No Layers’. None. Zilch, Zip. Nada………
Here is my card:
I have taken a liking to stencils, particularly layering stencils. I struggle with them – I usually get some black ink on the layers somewhere – whether or not I’ve used black ink. Goodness knows where it comes from. And usually one of the colours I use ends up in the wrong place – handy for sequin placement – but this time I couldn’t use one due to being one layer.
I recently attended another virtual crafting weekend, and one of those classes was using a layering stencil, but also masking parts of that stencil to use different colours…..so I thought I’d try with this one from Simon Says Stamp.
I also decided I like to use Distress inks for smaller openings, and Distress Oxides for larger areas.
This particular stencil involved quite a bit of masking to get the different colours on the leaves and petals -those small sticky note arrow thingies work well for that – and small blender brushes too.
Hopefully you can join us in our new challenge – no layers. I look forward to seeing your creations. xx
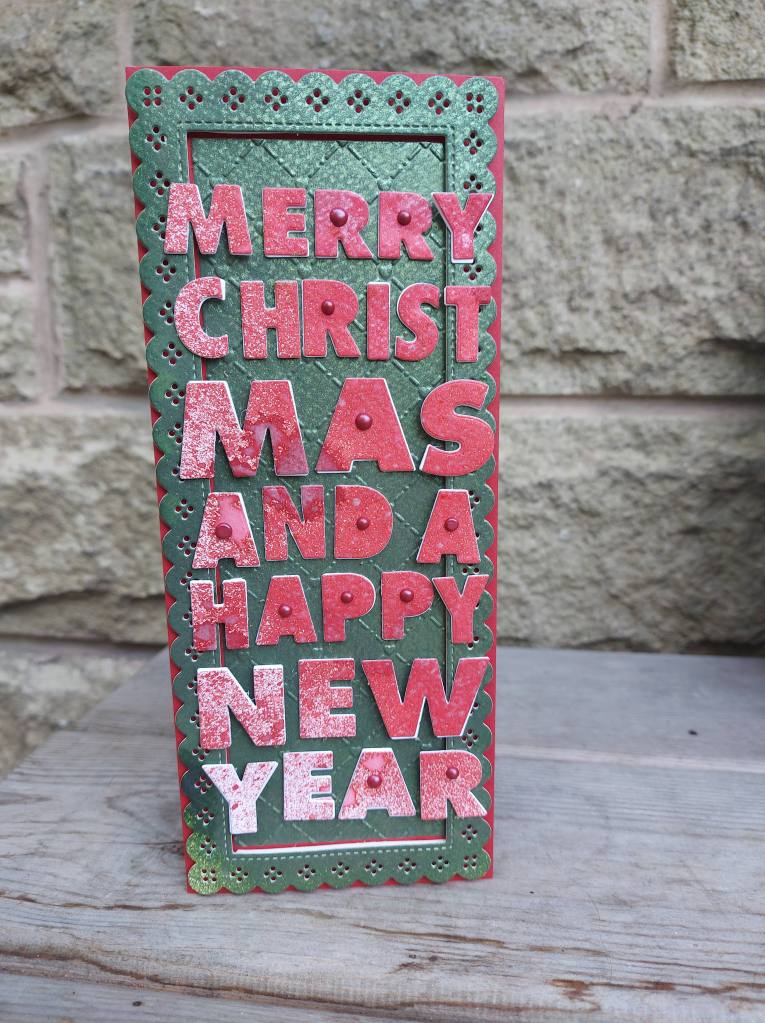
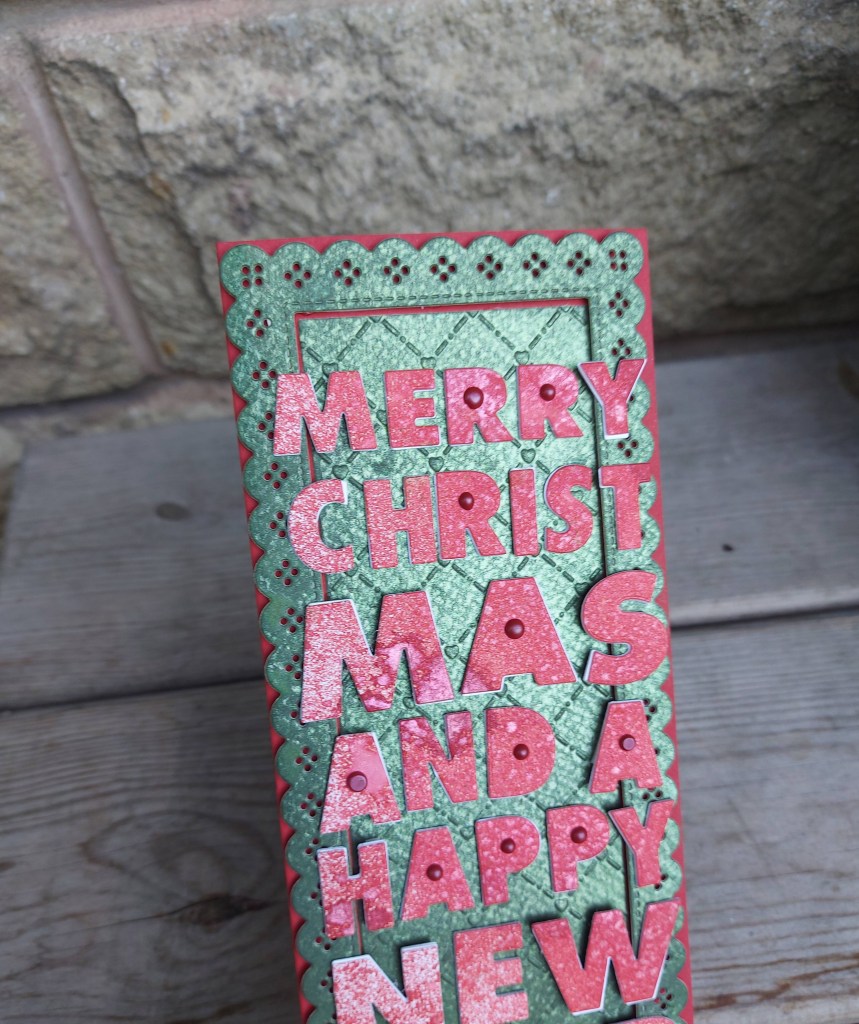
Hello once again. ABC Christmas Challenge has started a new challenge using the letters ‘U’ and ‘V’. The host is Julie, and the themes using these letters are ‘Under the tree‘ and ‘Vocabulary‘ (use words). Here is my card:
Having bought this cover die for attending the recent Hero Arts Stamp-along, and having used the outside areas for the shaker card we made, I used the letters which were die cut to create this card.
I sprayed them with a Tim Holtz Mica Spray, and whilst I was being messy, I also sprayed a separate piece of card with the green mica spray too.
Once those letters had dried, I stacked them three times with white card stock. and when the green layer was dry I used a slimline die from Mama Elephant to create the scalloped frame.
The letters were added as you see. The scallop frame is raised using 3D foam strips, so I added the letters to get the same height all round, as they didn’t quite fit into the frame – but I wanted it to work so I just got on with it, and some part of the letters on the edge were glued directly onto the frame.
I’m loving playing with these mica sprays – loving it. They are so shiny and vibrant – you will definitely see more makes using these.
I hope you can come and join us with your Christmas makes following our two themes.