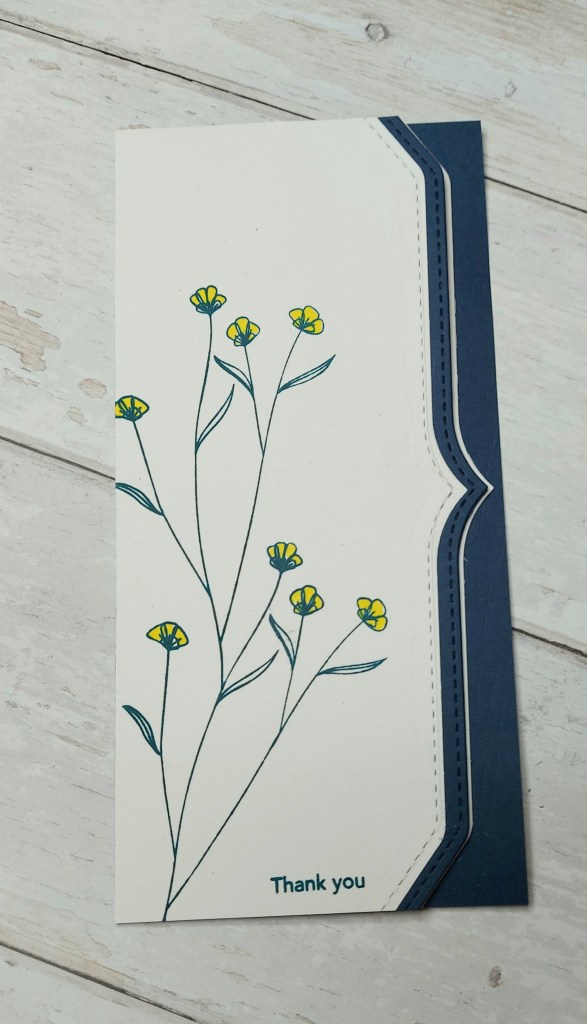
Hello once again. I spent a little time in my craft room yesterday and created this CAS card for a couple of challenges:
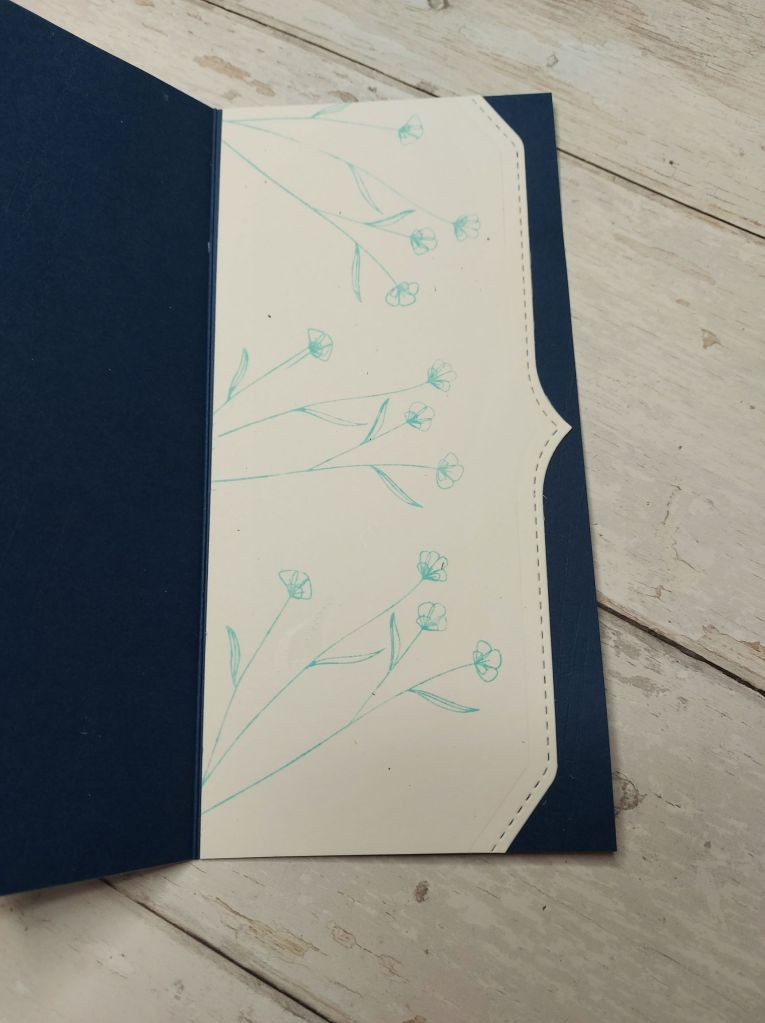
I even decorated the inside for a change:
The base card is a slimline navy blue, and the white pieces of card are Neenah Classic Crest.
The top front panel was stamped using Altenew ‘Charming Doodles‘ in Concord & 9th Navy blue ink, then the flowers coloured with a yellow Copic. This panel was then die cut using a Pinkfresh Studio slim edger die, as was the top layer of the card base.
As this merged into the back of the card base, I cut another white panel with the same edger and lined them all up, stamping the inside layer in a lighter blue so it could be written on when needed.
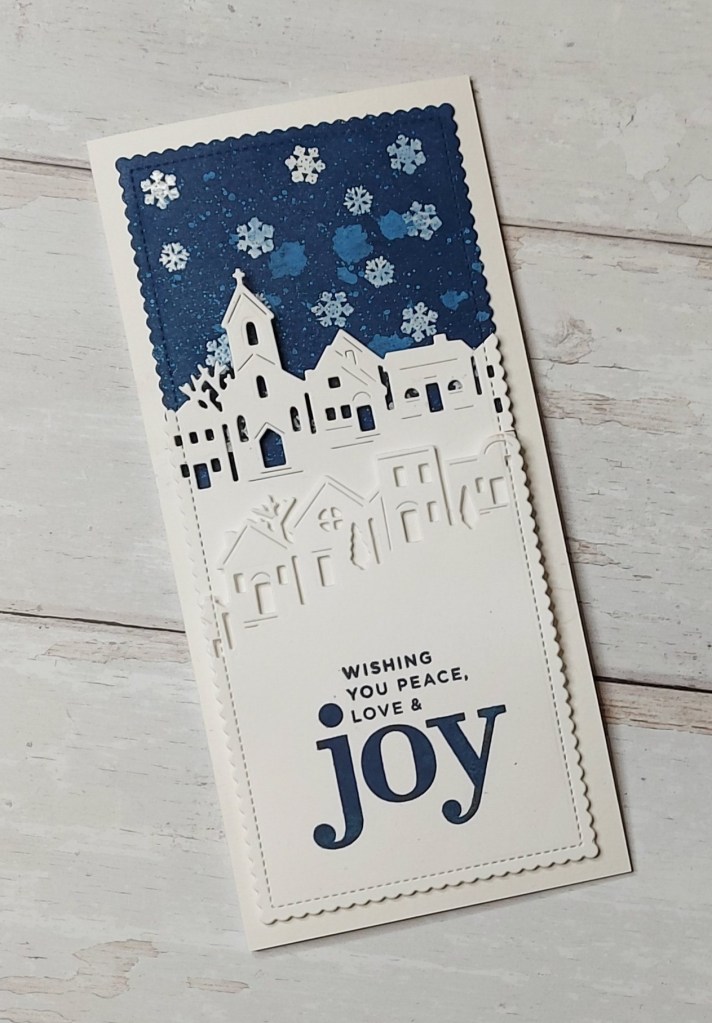
Hi – another challenge has started at The Holly and Ivy Christmas Challenge. The theme is – as always – anything goes as long as it’s Christmas. here is my card:
I first die-cut the back panel and stamped and white heat embossed some snowflakes. I then ink blended over the top, to create an emboss resist, and then splattered with water – some drops of water were bigger than others – but I think that’s the way to cookie crumbles……
I then die cut two of the layers from the Hero Arts tri-fold village die set – leaving a lot of white space at the bottom as I knew I wanted to stamp a large sentiment – the CZ Designs sentiment from the ‘Good Cheer’ stamp set.
These two village layers were die cut with the same slimline die from Lawn Fawn – and the scallops matched when attached to each other.
I hope you can come and join us in our ‘anything goes Christmas’ challenge – I look forward to seeing what you create. xx
Hello there. I have a couple of cards to share to day – one of which has the above encouraging sentiment, and one for a birthday:
On the first card:
I chose the stamp and use all the layers from Altenew ‘Remember This‘ stamp set. Once the flower was stamped, I masked it off and stamped the stem and a couple of the buds from the same stamp set. The sentiment is from a couple of stamp sets – ‘you are precious‘ is from the Altenew set, and ‘always remember’ is from the Stampin Up stamp set. A one layer card including some masking – very CAS.
The second card:
This took a little planning and a lot of masking. The flowers were stamped first – the outline, then I only used the middle of the three layers – quite effective I feel.
Each flower was masked – using the same mask just moving it around – and I stamped some of the leaves from the same stamp set around and about to fill some gaps, and only using the lightest shade of ink from the set of four – again from Altenew:
I tried a couple of different ways for the sentiment using the same stamp and die set from Lawn Fawn. the first one I tried was by stamping the words in black on white card-stock, but I felt the words didn’t stand out enough – it wasn’t bold enough – so I just die cut the two words out of black card and layered three together.
I like the boldness of the sentiment against the very feminine background.
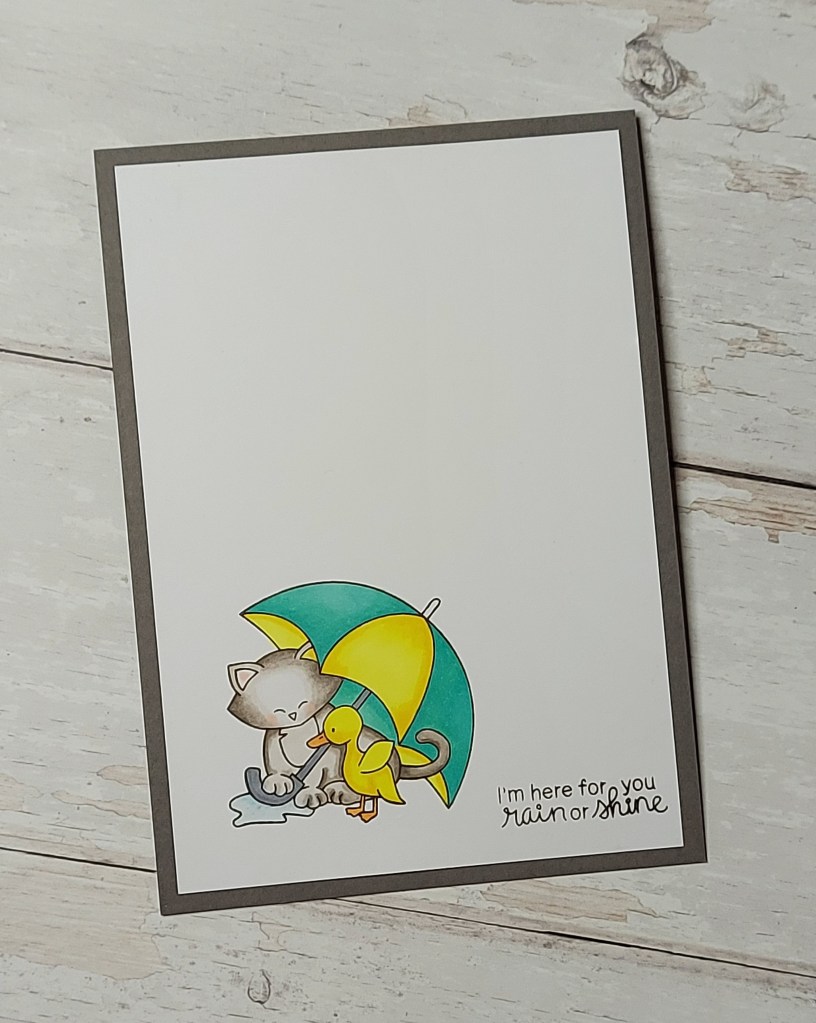
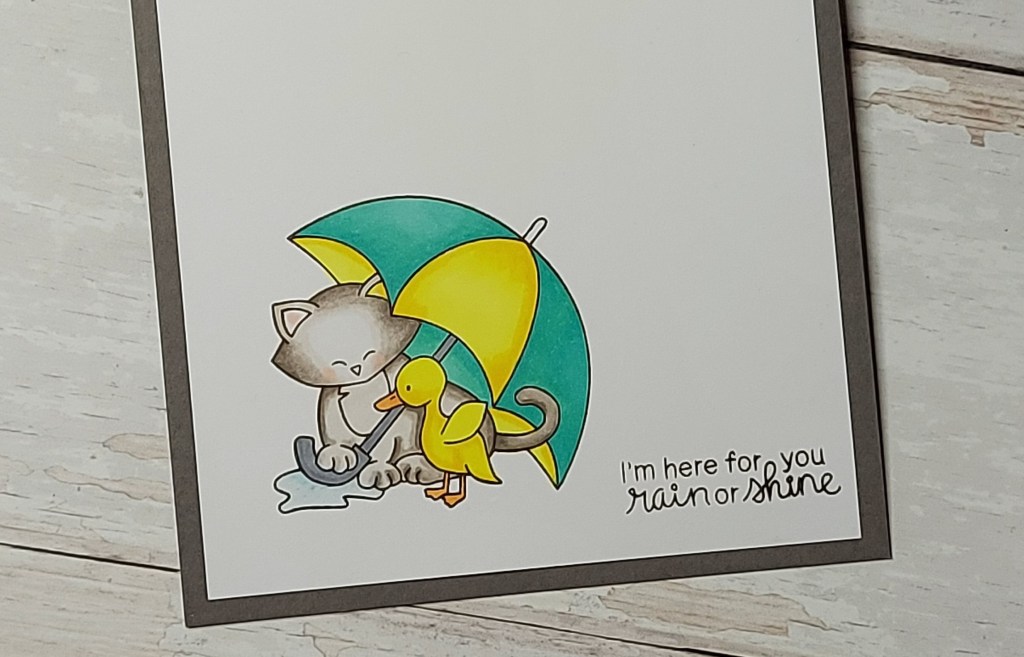
Hello. A new challenge has begun at The Alphabet Challenge. With the letter being ‘U’ – we want to see your creations with an ‘Umbrella’. Here is my card:
I recently ‘found’ this stamp set when moving stuff around and trying to organise things – again! I stamped the image in Gina K amalgam ink, then coloured with Copics, then stuck this down on a Grey card base.
I hope you can come and join us with your ‘umbrella’ themed creations – I look forward to seeing your creations. xx
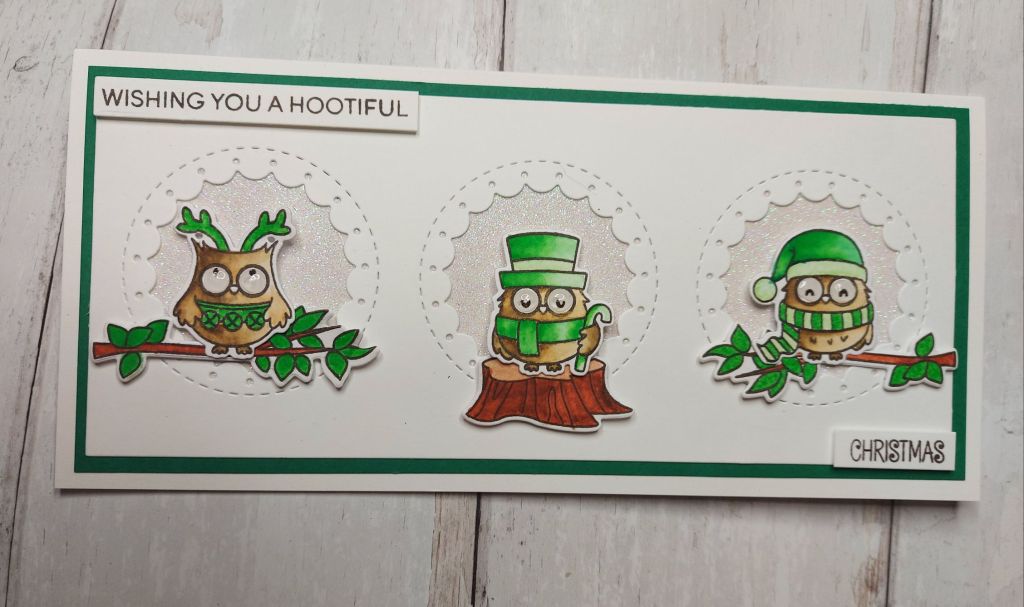
A Christmas card featuring owls in their Christmas outfits:
This time I coloured all the images with Zig Clean Colour Brush pens – which I haven’t had out in absolutely ages – so I thought I’d give them a go.
The images from Clearly Besotted were stamped in Gina K amalgam ink – a brown colour this time – and then coloured with my Zigs – a couple of browns and a couple of greens.
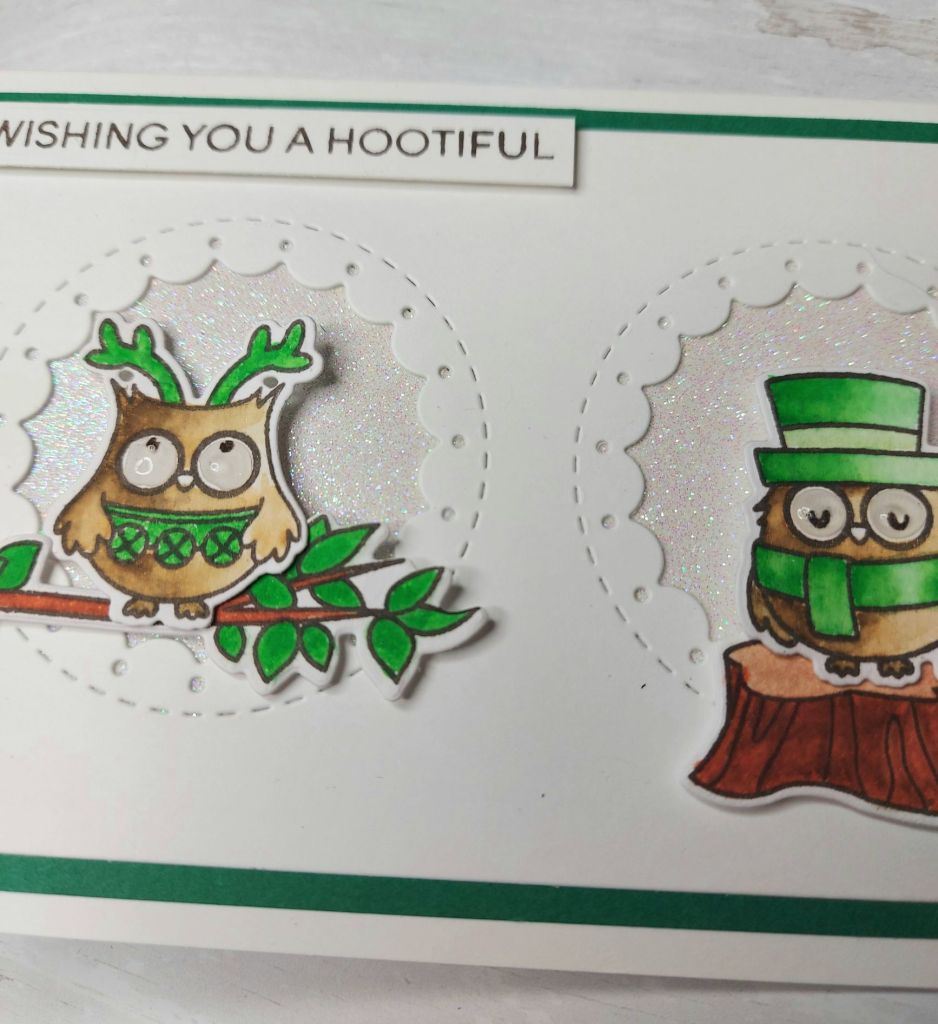
I have no idea what water-colour card I used – but it started to ‘pill’ a little when I tried to blend, so I didn’t really do much blending, and just went very gentle – I must remember not to use this stash again!
Once coloured and die-cut with the matching dies, I added some glossy accents to the eyes, and left them to dry whilst putting together the rest of the card.
A slimline card using Pinkfresh Studio scalloped windows, and adding some white glitter card behind each window. When I added my owls for placement, I decided they looked a little lost, so I used Heffy Doodle ‘Hootiful’ stamp and die set for the tree stump and branch.
The sentiments are from two different sets – selective stamping with some masking of part of the whole sentiments, to create what I wanted.
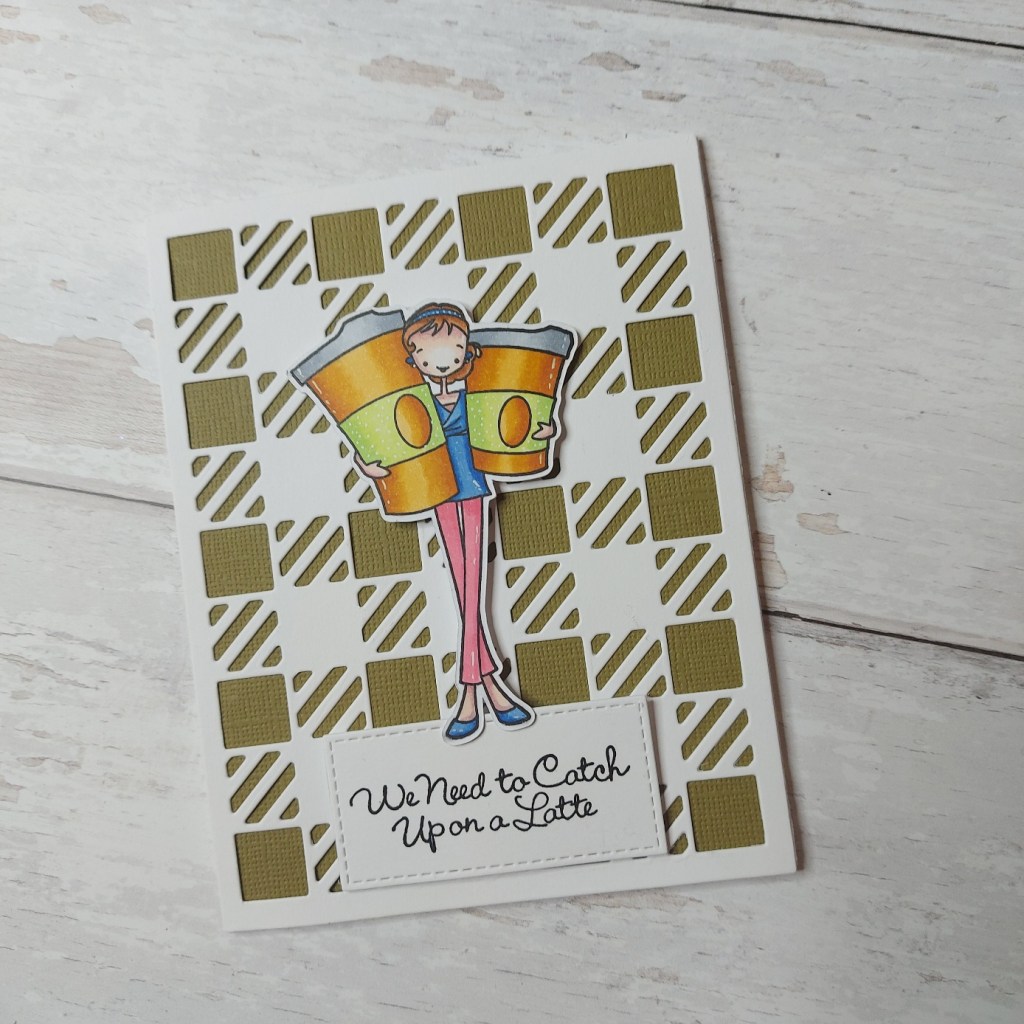
Hi there. The new challenge just beginning at Cardz 4 Galz has the theme of ‘Cocktails, Wine, or Coffee’.
Here is my card:
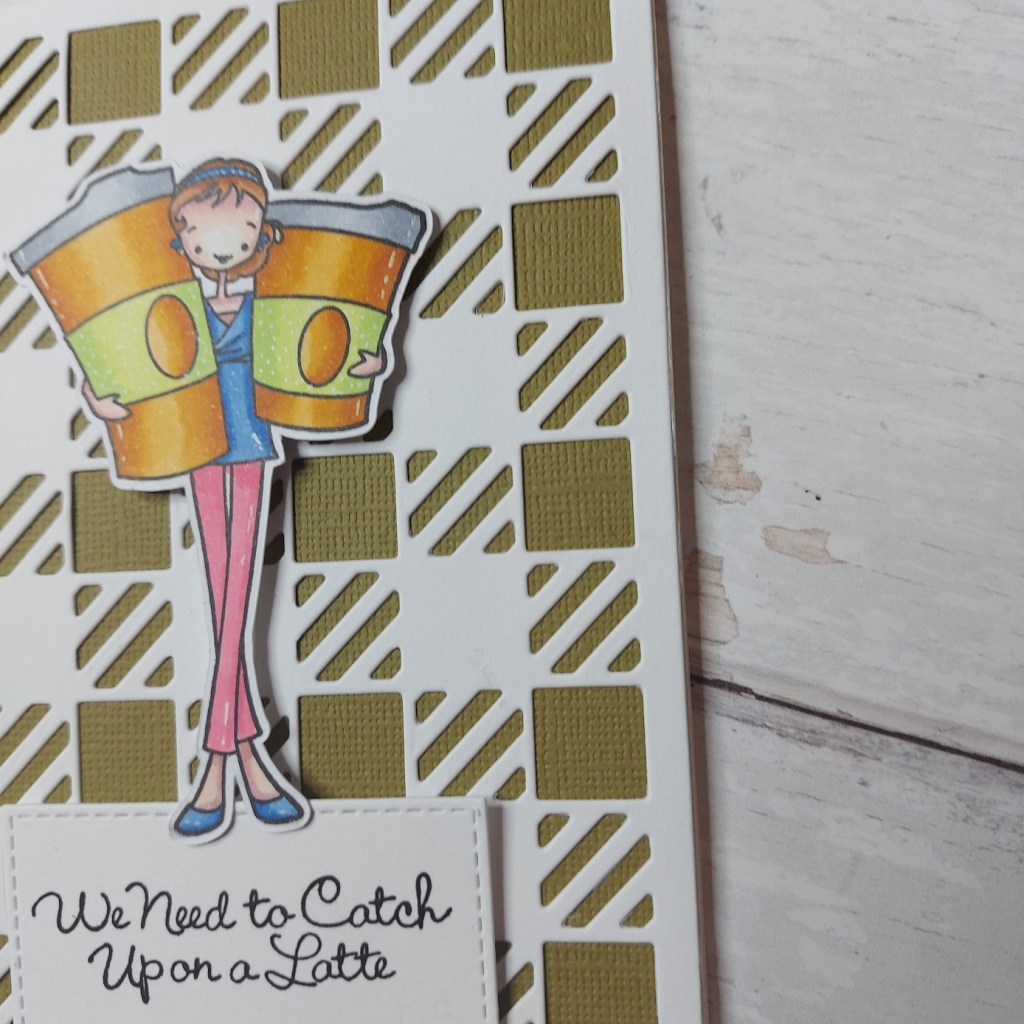
This image from MFT is one that was part of a grab-bag from Seven Hills Crafts. I usually wouldn’t have bought an image like this, but in the current situation of not being able to meet anyone – I thought it most appropriate.
Once I had stamped the image, and then coloured with Copics, I used my Scan-n-cut to cut it out – braveness ensued after I had coloured it – then added some white gel pen for highlights.
Turning my thoughts to the background, I used Altenew ‘Cozy Flannel Cover Die‘ and a base colour using some textured olive green card-stock – I think from a Tim Holtz paper pad I’ve had for yonks!
The sentiment is from the same stamp set – loving the font of this…..
I hope you can come and join us for this challenge, it would be fabulous to see your creations which match our theme. Please bear in mind our theme…………….there have been quite a few recent entries which don’t fit the bill…………..
Hello there. A quick post to share a card using the colours for the current Color Throwdown challenge:
Using the Concord & 9th ‘Wildflower Fields‘ stamp set, and Concord & 9th inks, I stamped directly onto the card base – two shades of pink for the flowers, green stems, and blue sentiment, which is from the same stamp set.
One more encouraging card in a very simple design but I think looks quite effective – I have a few people in mind to receive this – I may have to make more of them.
I hope you are all keeping well and managing to have a little crafty play. I did a Jenn Shurkus Facebook class on Saturday – UK time was 3pm – 10 pm – I think it wore me out.
I have still to complete the cards as there were some products I didn’t have, but a couple of them have arrived since – even though I did go through my stash to see what would work…..and I will be finishing them off over the next couple of days.
I will post them at some point so you can see what we made – 5 cards in total – three during the class, and two bonus cards – all very sweet and completely different ideas to what I would usually make.
I am looking forward to doing more of these classes – maybe I will see you online during one of them. xx
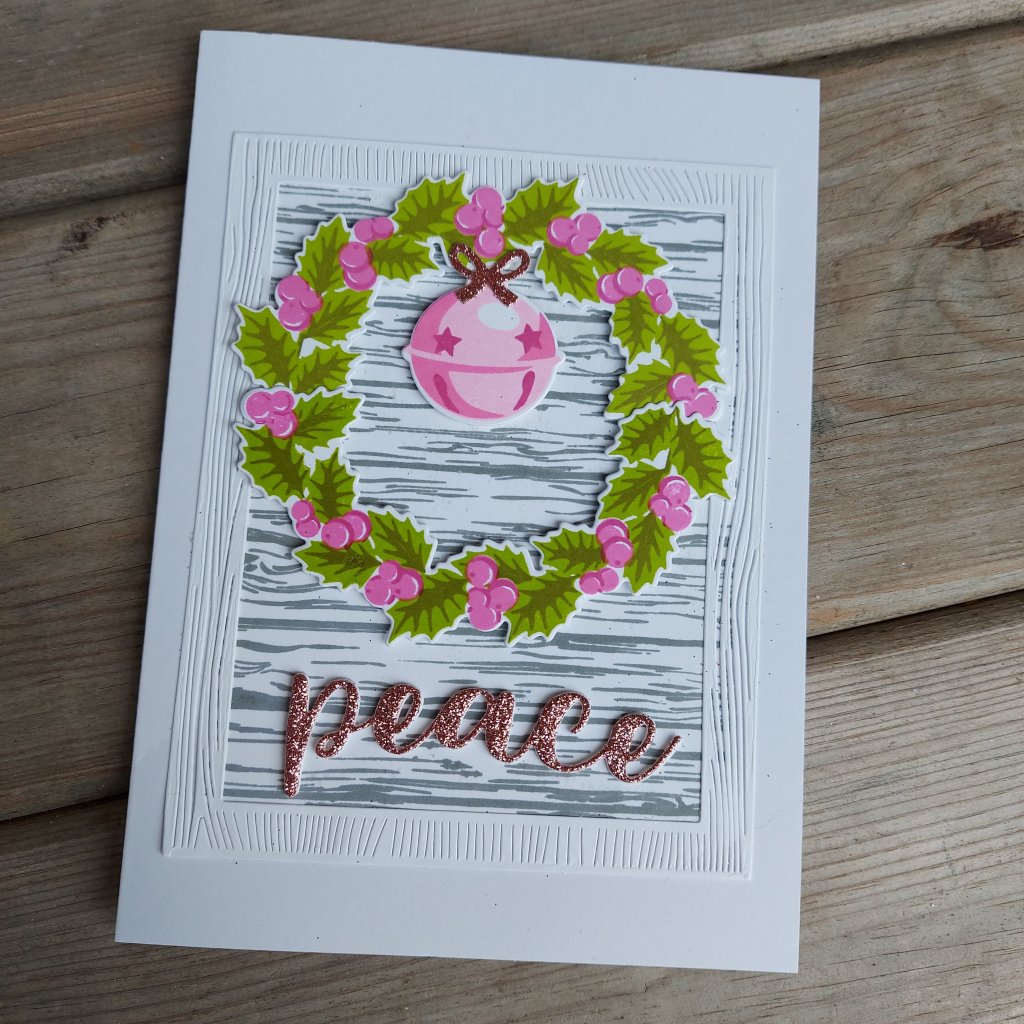
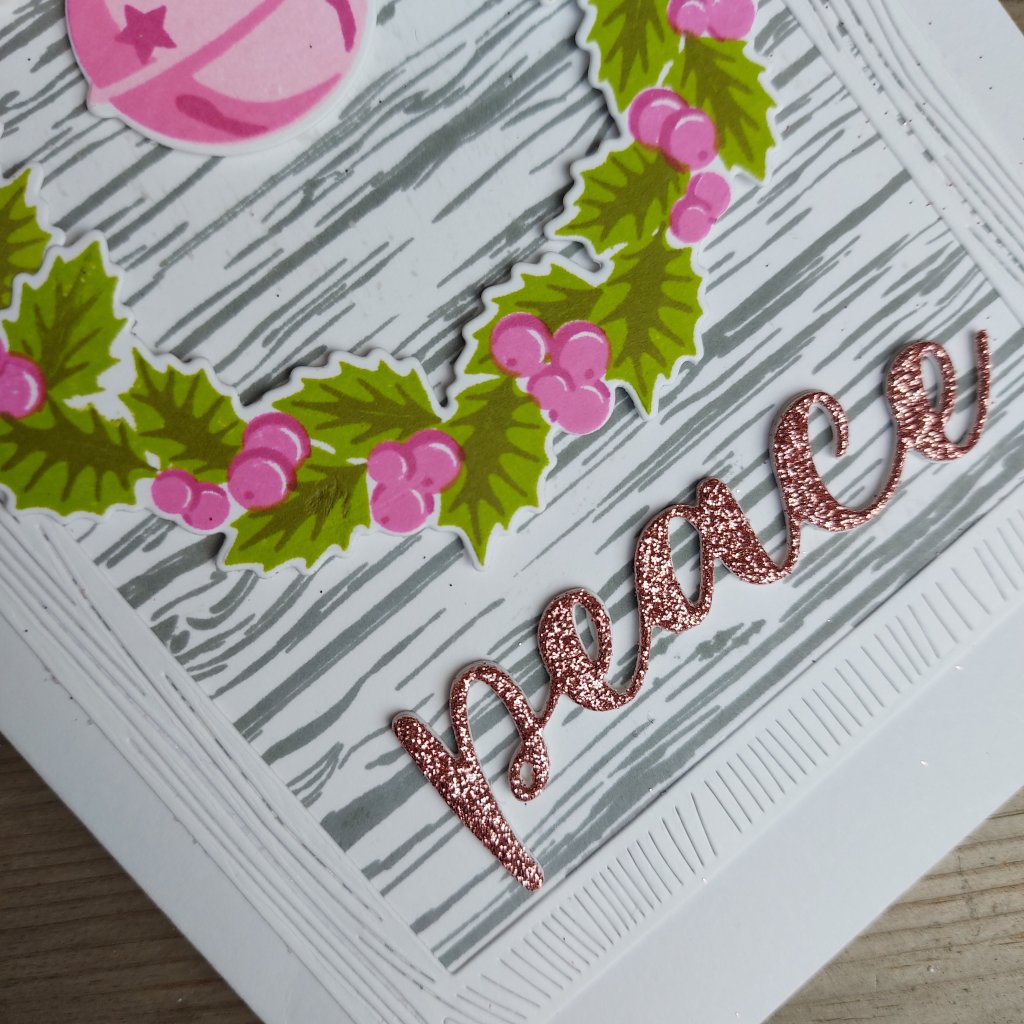
Hello. Here is my card for the new challenge at ABC Christmas Challenge, starting from the beginning of the alphabet again, and we want to see your Christmas creations ‘A’ for Advent and/or ‘B’ for Bells. Helen is the host this time:
Using Altenew ‘Bells and Bows’ to create the hanging bell, and ‘Peaceful Wreath‘, on the background of the ‘Pallet Background’ stamp. The word ‘peace’ die cut several times and the last layer being some pink glimmer card from Stampin Up, with ‘Infinity Wood Frame‘ dies from Hero Arts.
Once I had the dimensions right, this card came together quite quickly.
I hope you can come and join us and make an early start on your Christmas crafting – I look forward to seeing you in our gallery. xx
Hello once again. I seem to have hit a crafting mojo over-load……and I’m loving playing in my craft room.
Today I have a card to share inspired by a couple of challenges:
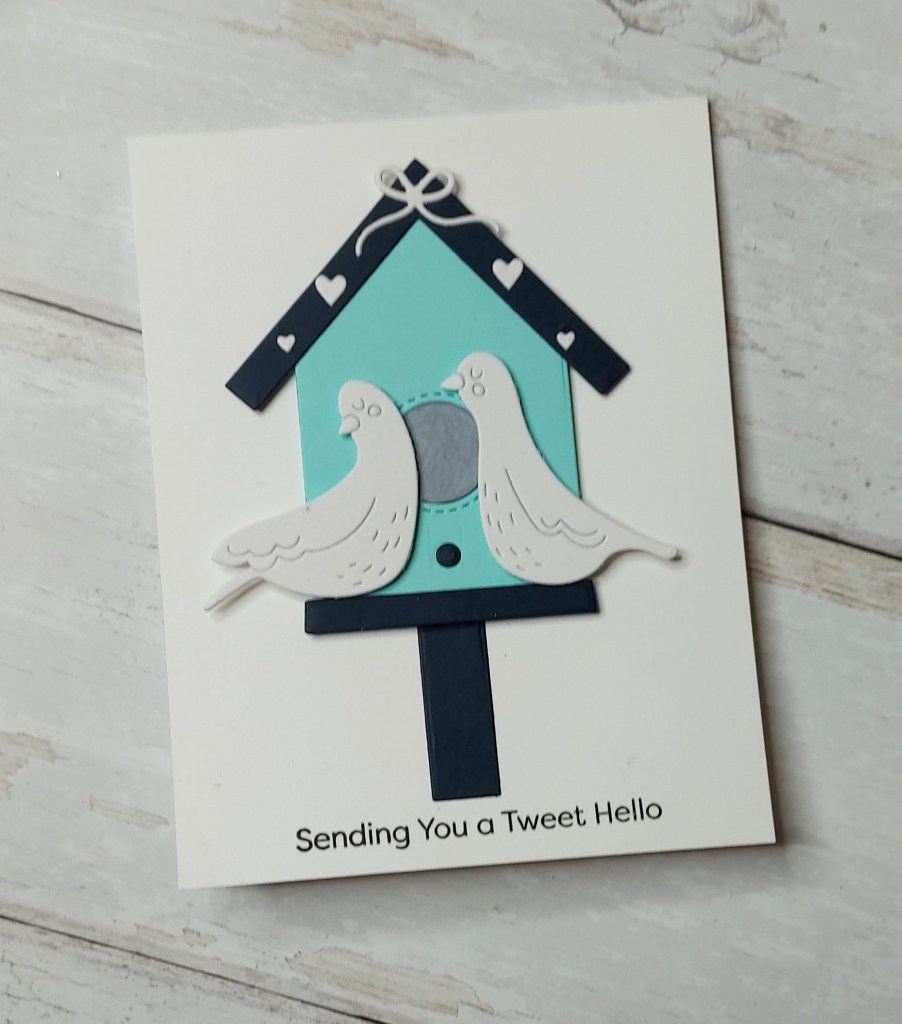
Using the MFT ‘Birdhouse‘ die set to cut – well – the birdhouse – and colouring the central inner circle of the opening with a C3 Copic marker, and put together as you see.
I then die-cut the ‘Turtle Doves‘ from Simon says Stamp out of white card-stock, planning to colour the beaks – but I like them pure white. I didn’t realise the beaks and feet came separate when die-cut – but I left the legs off making the doves look like they are sitting on their front porch……
The dies and bow from the Turtle Doves die set were added as you see, and the sentiment is from MFT ‘A Tweet Hello‘ stamp set.
I feel there will be more encouraging cards, and cards with similar sentiments coming in the near future, to try and help make someone’s day a little more pleasant.
Hello everyone. I am very pleased to let you all know I am now on the Design Team for the Happy Little Stampers CAS Challenge! Who would have thought I would be on a CAS DT, never mind for Happy Little Stampers – I am more than stoked…….
My first CAS Challenge as part of the Design Team has the theme of ‘Short and/or Tall’
……….here is my card:
I used the Heffy Doodle ‘Lil Lighthouse‘ stamp and matching die set, also stamping a few of the little rocks from Lawn Fawn ‘Christmas Fishes‘ so it looks like the lighthouse is on an island in the middle of nowhere.
All images coloured with Copics, and using the sentiment from the same lighthouse stamp set, outlining the sentiment strip with one of the colours of yellow I used on the door of the lighthouse – just so it stands out a little more.
The ‘rays’ of the lighthouse is from the matching die set, and I just coloured a piece of card and stuck it beneath the holes.
I hope you can come and join us – there is a lot of varied inspiration from the DT – be sure to keep your projects CAS using the challenge theme. I hope to see you there. xx