3 cards

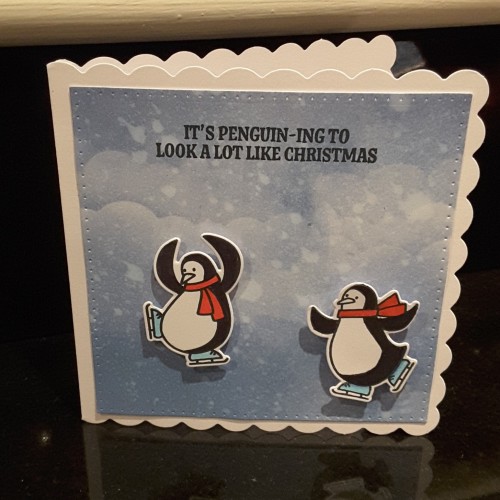
Hello there everyone. I have had a lot of opportunity to craft in the past 24 hours, and I have three cards to share with you today. I could post some tomorrow – but I have my bestie coming round for take-away, drink, and movie – so I am sure I have made the right choice in not posting tomorrow!!

This first card is inspired by the current CASology challenge

Week 294 - Start[1]

20180408_141246
It took me a little while to think of things. I was thinking cars, jobs, baby, weddings, then I remembered the most recent Catherine Pooler Stamp of Approval, and a paper aeroplane in there……..
I took some water-colour card and used 2 colours of Distress Oxides to blend together at the bottom, using a piece of paper to maintain a fairly straight and clean edge, then spritzed with water. My idea of the water was for it to look like clouds…..
The sentiment, dots and plane are from the same collection, and stamped in Versafine black onyx.
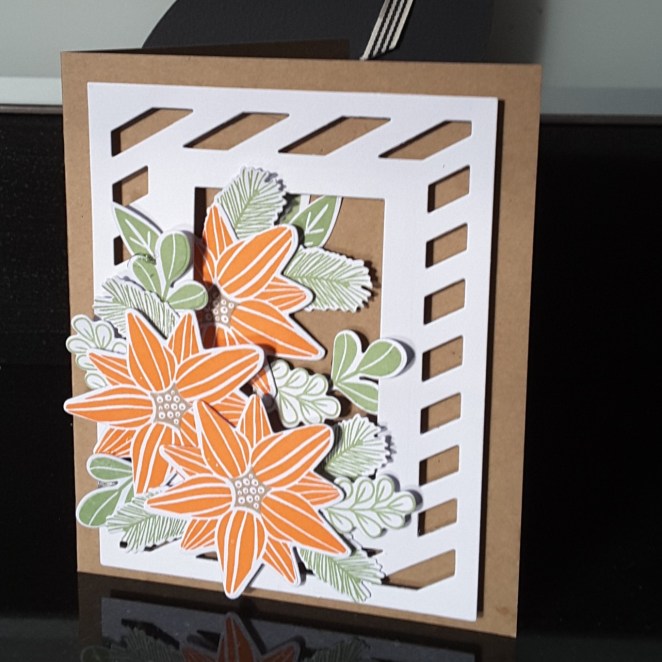
This second card was inspired by Time Out Challenges and 4 Crafty Chicks (flowers):
20180408_141152
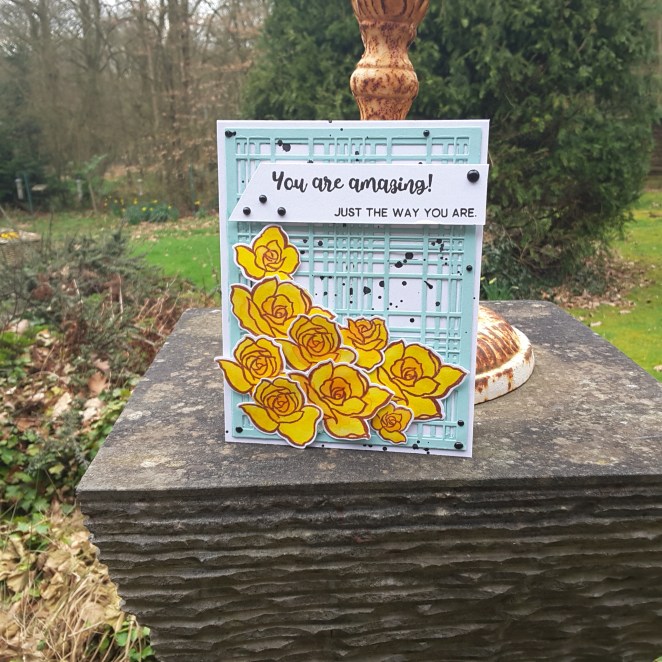
I took the colours of the flowers and vase stand. The Altenew layered plaid cover plate A and B were cut out and stuck together, and after putting onto a base card, I used some black splatters – I felt the urge for a little mess!
The yellow flowers are from Altenew ‘Amazing You‘, and I stamped the outline in a darker yellow from one of their ink sets, embossed with clear embossing powder, then water-coloured with a Zig yellow and an orange.
After die-cutting them I arranged in a huddle, using 3D glue gel – helps me to position – and added the sentiment from the same stamp set.
I then decided to add some Tonic Nuvo black drops extra to the splatters – I thought the white background card was a little plain!
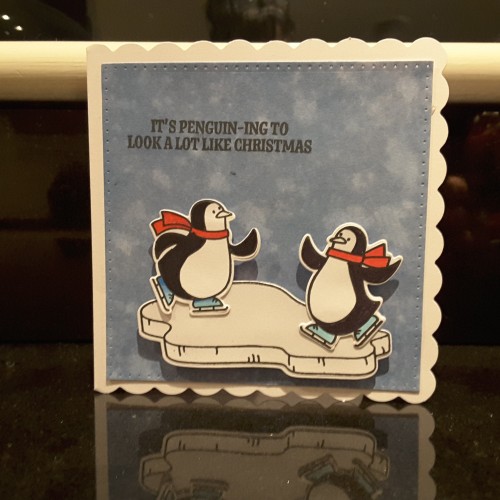
This third card is inspired by the current challenge at The Library Challenge, and Just Us Girls:
20180408_141313
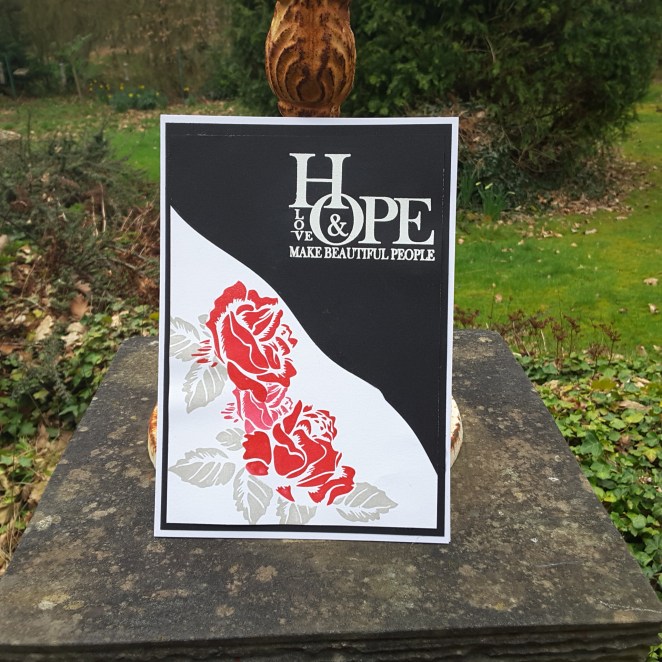
I took the cover of the book and used the black, white, and red – some grey leaves for artistic license – and stamped some flowers from a Stamps By Me set I have had for a while.
I used Catherine Pooler ‘Rockin Red‘ (I must get the ink re-fill next time I order anything) and embossed with clear embossing powder. Some masking – which doesn’t scare me now, even when I don’t have the matching dies – and then thought about how to make a curvy black side.
I turned to my Avery Elle ‘Snow Caps’ dies and used one of the curves twice.
The sentiment is also from Stamps By Me, and I was looking for a bold sentiment to join the Just Us Girls challenge, and heat embossed in white – like the title of the book.
Thank you for your perseverance, and I hope to be back with you soon. 🙂

Orange Poinsettias

20171112_141838

Hello there. Welcome. I had some good news the past couple of days – I was a winner in the Uniko challenge for October, and also a chosen winner for Happy Little Stampers October CAS challenge – one layer card. Yay! Talk about being inspired. It certainly got my creative juices flowing this weekend.

I have also been having a look through the Inkspirational challenge cards where I am still Guest designer – another few days to go still – and there are amazing creations on there. I am still going through and visiting people and looking at their cards and their process…….

Onto the card for today……I had so much fun putting this card together, and I am definitely going to make more of this style and theme. I just wanted to share with you straight away.

I took inspiration from several challenges, but the colours were from Color Throwdown, and the theme/topic was from The Card Concept. I knew I wanted to do a card with poinsettias on it, and decided to go with an orange poinsettia. I know there are some out there, as I did a Google search, but have never actually seen on in real life.

The base card is Kraft card, and I die cut Avery Elle ‘Diagonal Stripes’ leaving out the centre rectangle, but inserting a smaller rectangle from another die set. I wanted the Kraft card to show through the die cut so it looked almost like a trellis against wood.

I used Stampin Up adhesive strips around the edge of the die cut, and added some to the centre rectangular piece – but I didn’t take the sticky off the inner rectangle. Why not? Well, I knew I wanted to place the flowers and leaves in, under and around the white die cut, so having that inner rectangle stuck down wouldn’t work. Lateral thinking, huh?

I then stamped the poinsettia with Catherine Pooler orange ink, and the leaves with Altenew green ink. The centre of the poinsettia is where the brown comes into the card. The stamps themselves are also from Catherine Pooler. I die cut them, and then started to play with the positioning. Once I had it sorted – kinda – I then used 3D glue gel to put the flowers down first, then the leaves, as this glue gel gives me time to move things around until I am happy.

I think you can see the dimension on the die cuts from one of the photos. Sticking down the leaves half in and half on the white die cut, underneath the flowers, generally creating a positive cornucopia of foliage. 🙂

I didn’t add a sentiment, for several reasons. Firstly – I couldn’t find one which would suit or match the card, secondly I couldn’t find anywhere to put one where it wouldn’t look out of place, and thirdly – I didn’t want one!

I shall be entering the following challenges:

Color ThrowdownBrown, Orange, Green, Kraft

The Card ConceptPhoto inspirationPoinsettia and leaves

Crafty Hazelnuts Christmas Challengeanything goes (option reindeer)

Allsorts Challenge blogAutumn colours

Crafty Friends ChallengeChristmas


Playing with backgrounds

20171009_19282420171009_19141520171009_191355

Hi there. I’ve been playing with my Avery Elle ‘Brring On the Joy’ stamp and die set. I saw this on a YouTube channel, and thought how cute they looked. If you know me at all, I struggle with cute. I never know how to colour the little animals, how to arrange them – but I thought with penguins it would be simple…..a little bit of black, a little bit of white, some colour for the scarves and shoes….and there we have it.

Now, my main struggle was the background. I wanted to play with my Distress Oxides, and took the ‘Faded Jeans’ – the only oxide I have that is blue – and set to playing.

I first used normal card – too much blending, and the card started to break down. Without water, too. So – water-colour card. Actually, this is a little thinner than card, but thicker than paper.

I did one background by smooshing the ink pad onto my craft mat, added water, and then lay the water-colour card down. This was too random for me, and not enough coverage, so I took my blending tool and made it more even. That was pretty decent.

The I just took the ink pad, ran it over the water-colour card, wet it down, evened it out…a more solid background. Kinda liked that too.

The next one, I ink blended the traditional way, and even used a cloud stencil I had handy for some detail in the background…..You can tell which one that is. I just kept playing, and trying different techniques, and the only one I didn’t really like, and couldn’t do anything with – was when I didn’t use water-colour card or paper……. quite obvious, really! Oh – and I finished off with some water splattering……..got to really – rude not to!

I think I’ll be making some similar cards, as I like the sentiments, they are cute……and I liked playing with the oxide.

I shall be entering one of these cards into the following challenges:

Simon Says Stamp Wednesday challenge – Christmas

The Merry Christmas Challenge – anything goes Christmas

The Holly and Ivy Christmas Challenge – anything goes Christmas

Christmas with the Cuties – Christmas animals


CAS Christmas Reindeer

20171004_202319

20171004_202306

Hi there. I have finally found time to play with my Mama Elephant ‘Little Reindeer Agenda’. Finally! I bought this set and the Santa set a few weeks ago from Seven Hills Crafts, and just haven’t been in the mood to play with them. Today, that changed. No idea why, but it means I have a couple of cards to share with you.

I stamped eight of the little reindeer in black Versafine, and coloured them with my Zigs. I added some shading to the reindeer, even though they are very small, but used a flesh colour, and a light tan colour – just a little dimension. I used the matching dies to cut them out and then tried to decide the lay-out.

That problem was solved by the current challenge from AAA Cards. The sketch they have – I thought – was ideal for a lay-out using all my reindeer. I then decided not to put them straight, but the put them a little ‘wonky’, which could mean movement, but it actually means you don’t have to line things up perfectly. 🙂

One sentiment is from the Little Santa Agenda set, and the other sentiment is from Avery Elle ‘Brring on the Joy’ – a set with penguins I may use very soon – now I’m feeling I need to make some more Christmas cards.

20171004_202416

I covered the reindeer with my glitter pen, and added some Nuvo Drops to noses – they are all Rudolph (artistic license), and another three drops for some added colour. Can you see the little ‘personal’ touch on the second card? The larger drop wasn’t quite dried when I stood the card up to photograph it, and it started to droop just as I took the photo……slightly less than round now…….


I will be entering the following challenges:

AAA Cardssketch

Christmas at Sweet Stampin’ anything Christmas

Crimbo CrackersReindeer

Addicted to Stamps and Moremake your mark

Winter Wonderland Challengeanything goes Christmas

2 Crafty Critter Craziesanything goes with a creature/critter

Crafty Hazelnuts Christmas Challengeanything goes Christmas 


Colour challenge

I was beginning to panic yesterday, as I saw one of the challenges I wanted to enter was closing – and I hadn’t even started my card! The challenge is from ‘Just US Girls’ and has the theme of using three colours – pink, purple, and grey. I had an idea in my head, and just didn’t get round to doing it. Until yesterday.

I was using a grey ‘Narwhal’ card from Lawn Fawn, which I had bought from Sevens Hills Crafts, and thought that would be a good base for my card. I was going to use the unicorns from the Avery Elle stamp and matching die set ‘Pegasus Duo’, and I wanted to make a shaker card. I haven’t had much luck with shaker cards, but I still keep persevering, and having a go. I look at quite a few videos on YouTube – and usually still get it wrong!

This time, I stamped the unicorns, embossed the outline in black, coloured them in with my Zig pens, die cut them, and then planned to have them on the outside of the shaker shape, with clouds and stars from the same set – then I changed my mind. As always!

I cut a heart-shaped aperture in white card with my Sue Wilson fillable die ‘Fluttering Hearts’, added a piece of acetate then added two layers of white foam, raising the white card enough to add sequins and glass beads. This is where I usually go wrong – I forget the acetate. This time, I kept concentration enough to remember. Yay!

Once I layered them together, I searched my sequin and bead stash for colours of sequins with the purple and pink theme. I found a few, but they were mixed with other sequins. How much time did it take me to get enough out of the pile that I wanted? You don’t really want to know….honest.

I placed them in the aperture behind the acetate – then how do you add the base card so it is square, and the beads don’t fall out whilst doing it? I guessed! I tried adding the base grey card with no glue and felt how close to the edge it was, added the glue, then went for it. It worked….!

This is where I decided not to use the unicorns and to stamp the three little stars around the aperture instead. I can hear you now – what if it goes wrong? What if the stars don’t stamp correctly, what if I make a mess of it? I know, I know. But I did it anyway.

You could probably hear my squeal of delight across the whole of Chesterfield.

I wanted a sentiment, and I wanted it in purple, as I had just realised that the purple I was going to add was on my unicorns – and I wasn’t using them. I used my purple Zig on the sentiment stamp, and stamped it a couple of times with my Misti, on a spare piece of card, as I wasn’t brave enough to stamp it directly onto the card. (I can hear you all again, breathing a sigh of relief) I also wanted to have a grey layer underneath the white sentiment strip.

The white sentiment and grey layer were cut out using my Sue Wilson ‘Frames and Tags’ die set, as they layer together quite nicely, and have a stitched inner part. I did consider making the banner slightly raised and wavy, but kept it flat to the card, feeling that the shaker element added enough interest.

I am very, very pleased with the way this shaker card turned out. There are a few tweeks I want to make to future attempts, but all-in-all I had fun. Isn’t that the name of the game? I’m having LOADSA fun playing with it.