Hello and welcome. My second post of the day as the June Happy Little Stampers ‘anything goes birthday‘ has started.
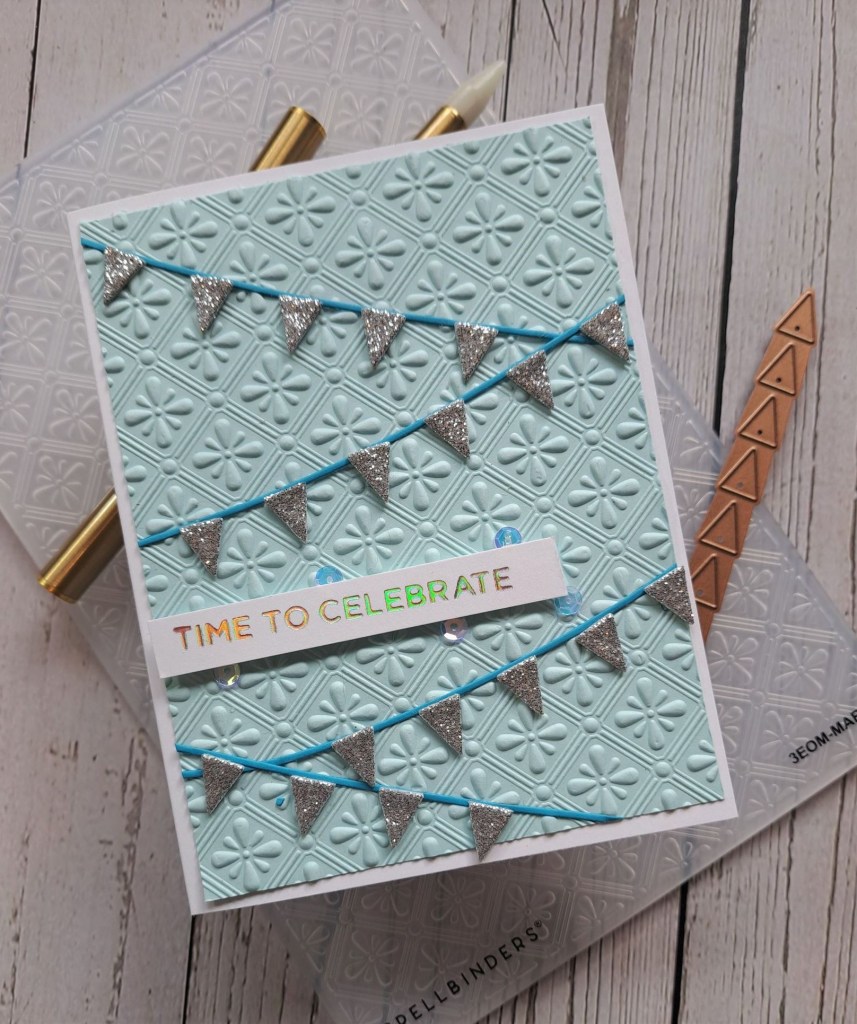
Here is my card:
I dry embossed a light blue panel and cut it down slightly to create the border from the card base.
The banner was die cut with blue card, and the triangle from the Spellbinders silver glitter foam – this is o very easy to die cut.
Once I decided on where I wanted each string and each triangle, I glued them down – and I even measured between each little triangle to make them even – did someone say OCD…….?
The sentiment was attached with 3D foam.
I hope you can come and join us with your birthday makes. xx
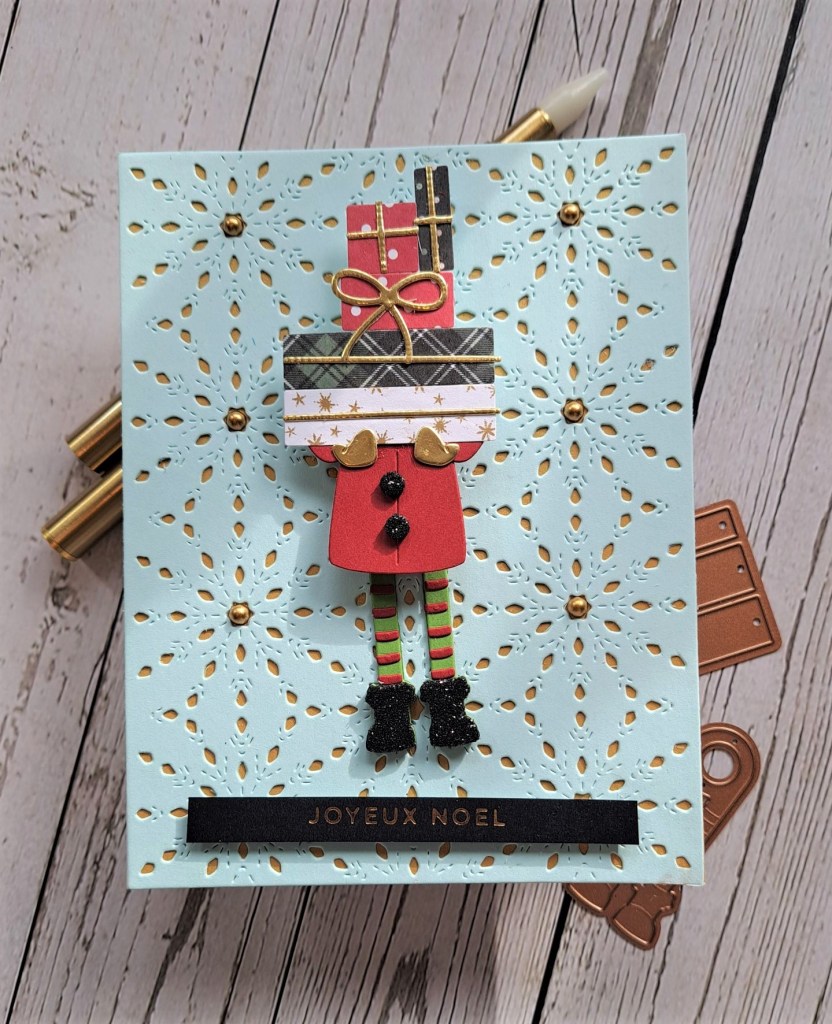
Hello once again. The new challenge at The Holly and Ivy Christmas Challenge has started. Kate has taken over the helm for this challenge. Here is my card:
The background was created by die cutting a Pinkfresh Studio cover plate and adhering that to a brushed gold panel.
Now onto the main image – lots and lots of die cutting, piecing those itty bitty pieces together – and watching YouTube to figure out how to make her dance:
It’s actually quite an easy and simple idea to be able to create the ‘dancing’ and movement – ingenious if you ask me,
The dies are from Spellbinders, and cut using a mixture of patterned paper, black glitter foam, and gold.
I added the foiled sentiment, and also added some small gold gems to the centre of each snowflake.
I hope you can come and join us with your Christmas creations – anything goes Christmas. I look forward to seeing you in our gallery. xx
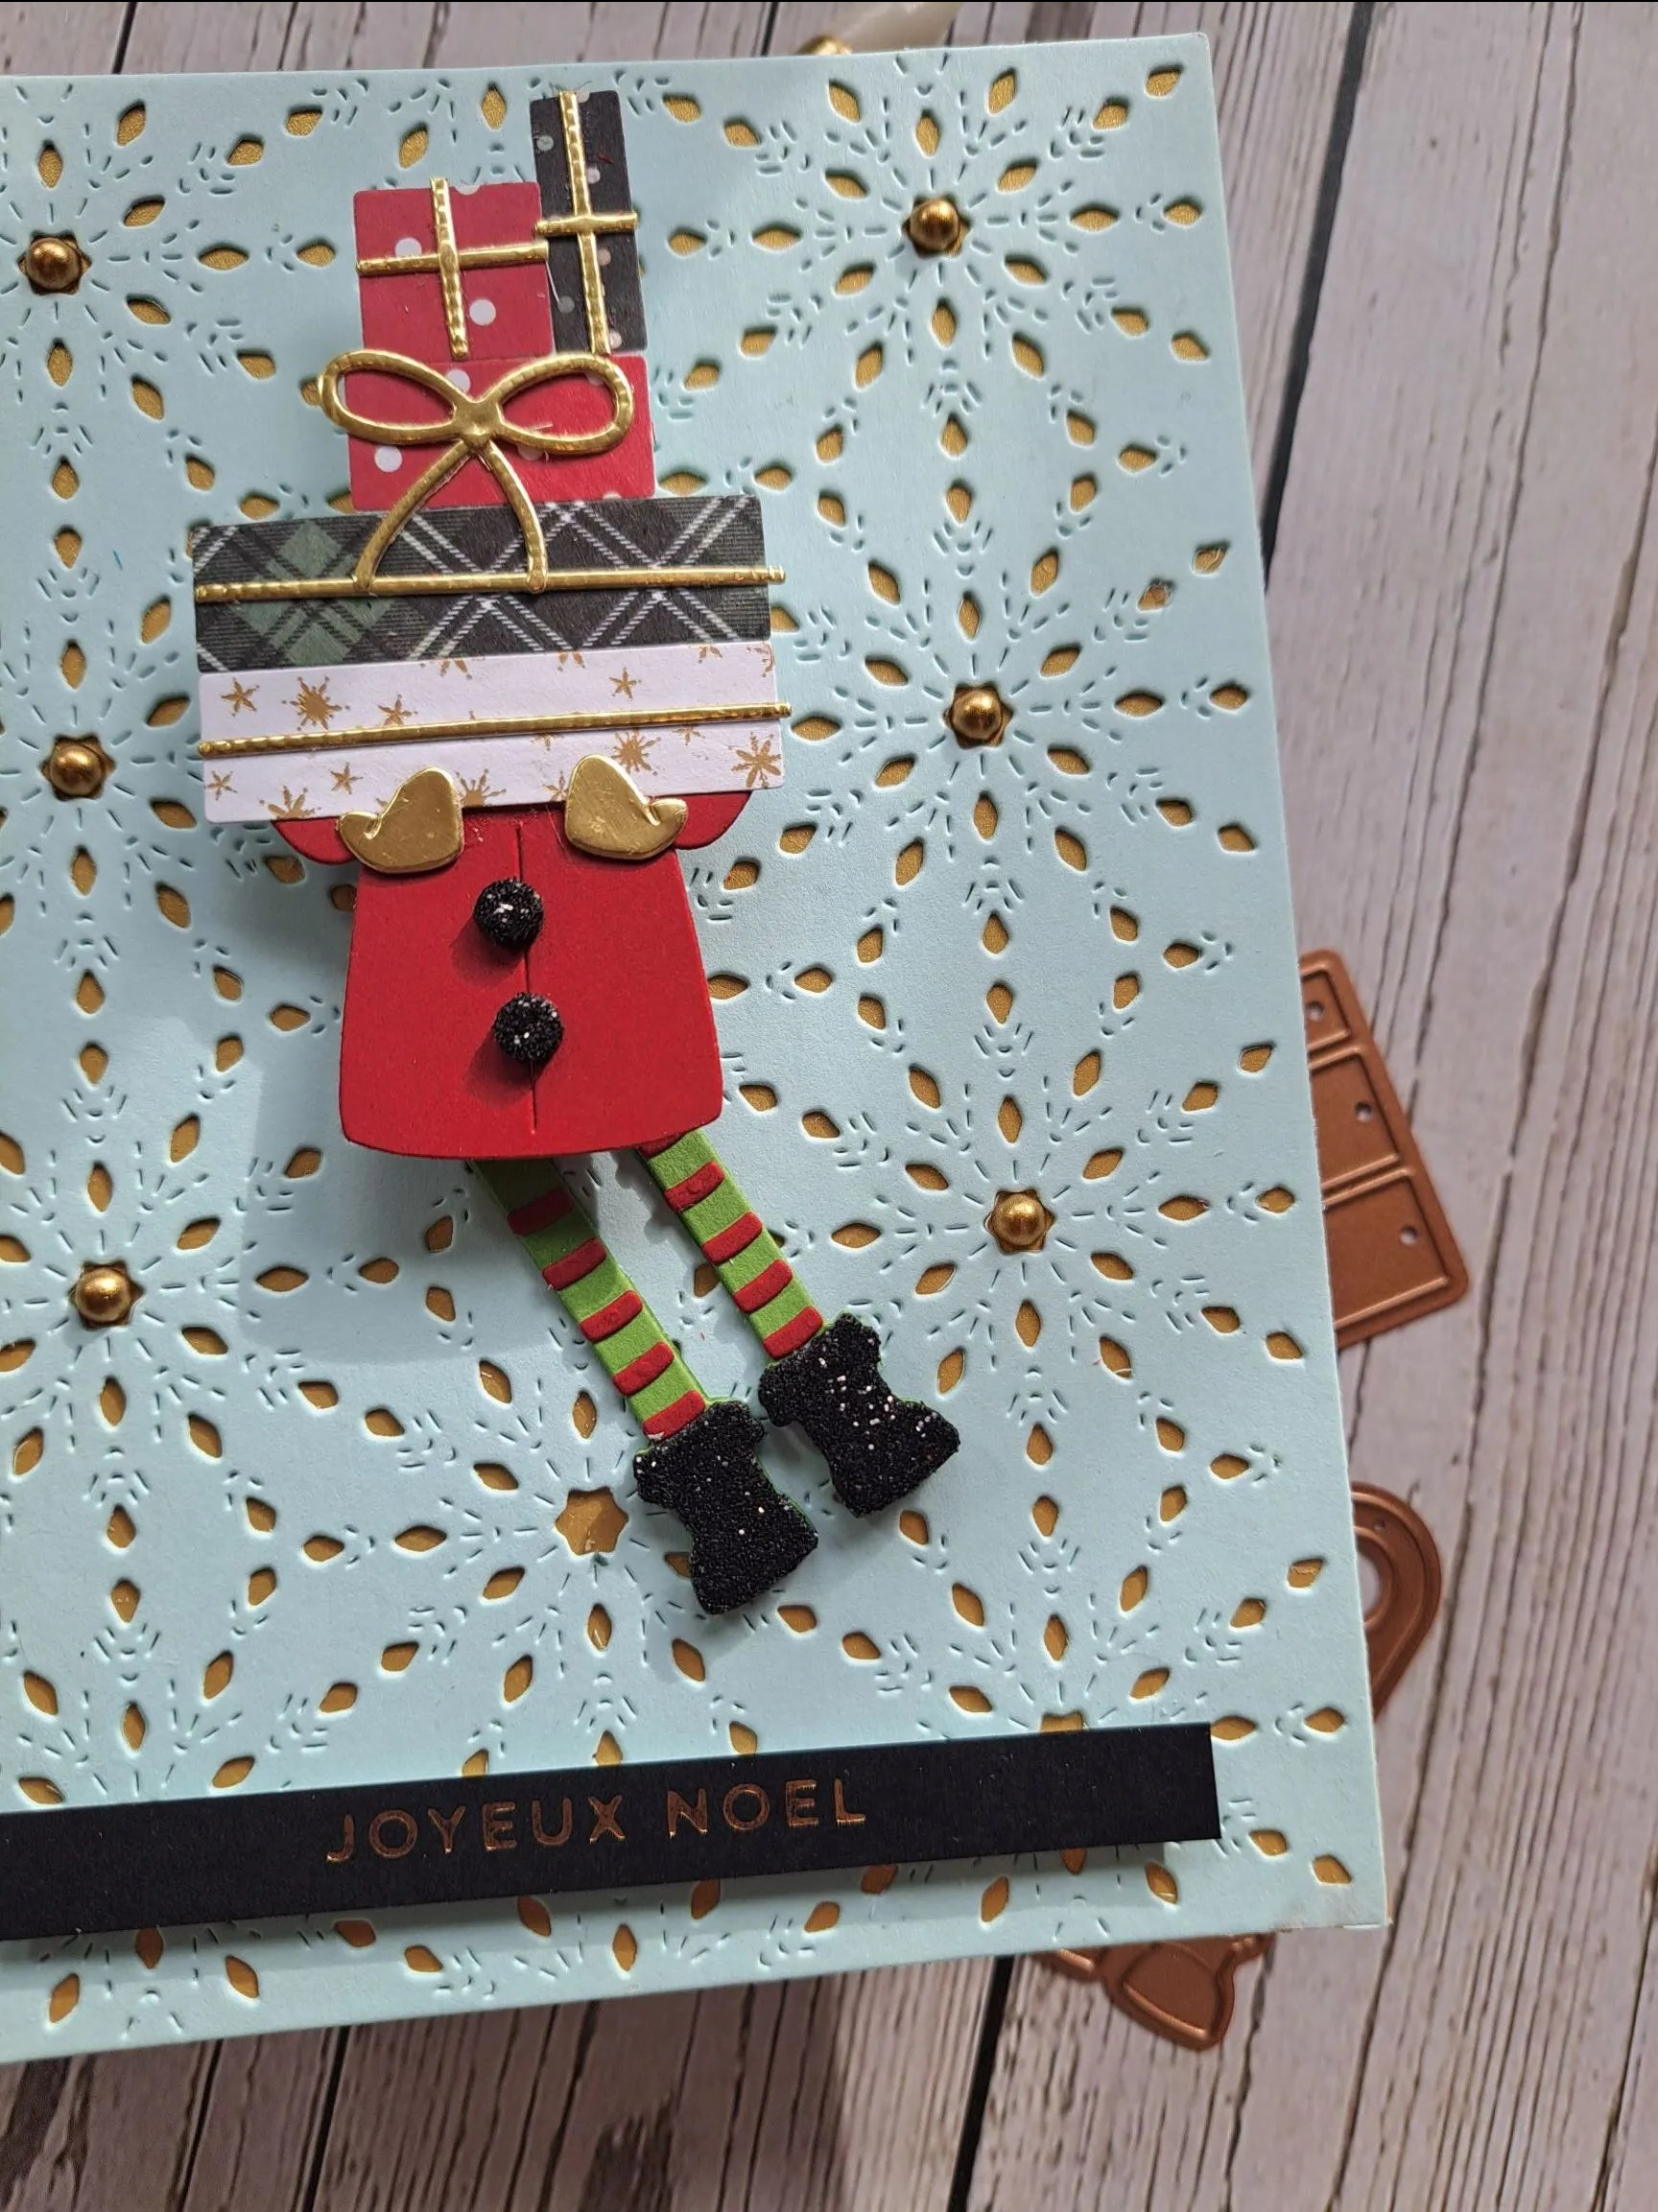
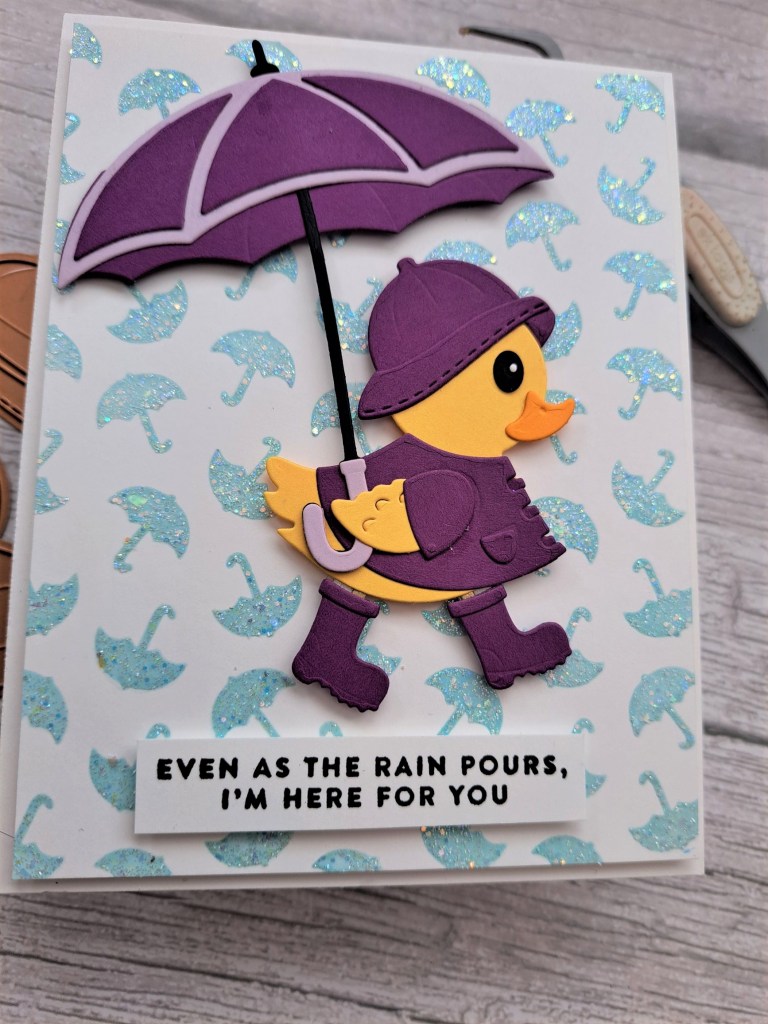
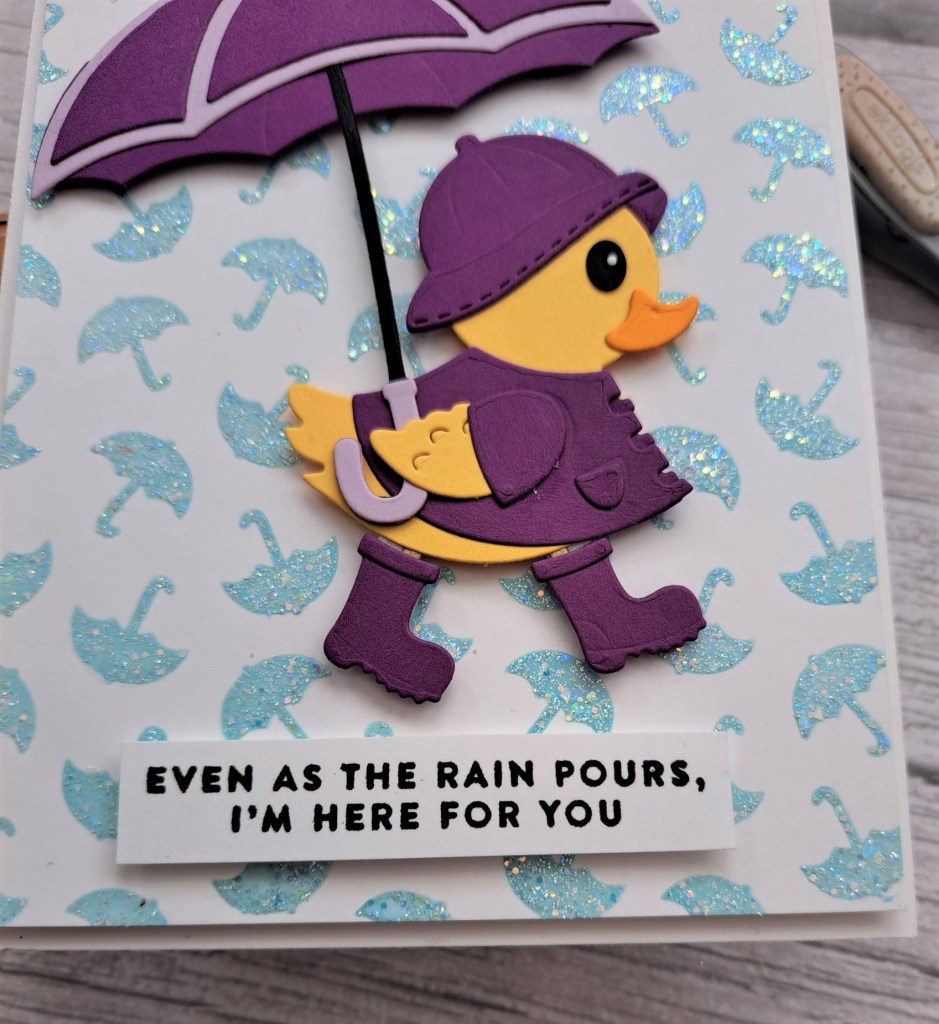
Hello. I spent some time in my craft room yesterday and created this card:
I wanted to use this cute little duck from Spellbinders, so I die cut all the elements from some new colours from Concord & 9th.
The background was created using a stencil from Clearly Besotted, ink blending the umbrellas with Salvaged Patina Distress Ink, then stencilling some Ranger glitter paste on top of the umbrellas. Putting that aside to dry, I searched through the Color My Life app for a suitable sentiment, and this came up from Simon Says Stamp on one of their butterfly sets.
I stamped that in Versafine black onyx, and arranged everything onto the card base.
I felt the card needed something else, so I also die cut the umbrella from another Spellbinders set, and added that – thank goodness I didn’t glue the wing down completely on the duck – I was able to slot it in behind.
I feel that this little duck may be making some further appearances on my blog posts…..
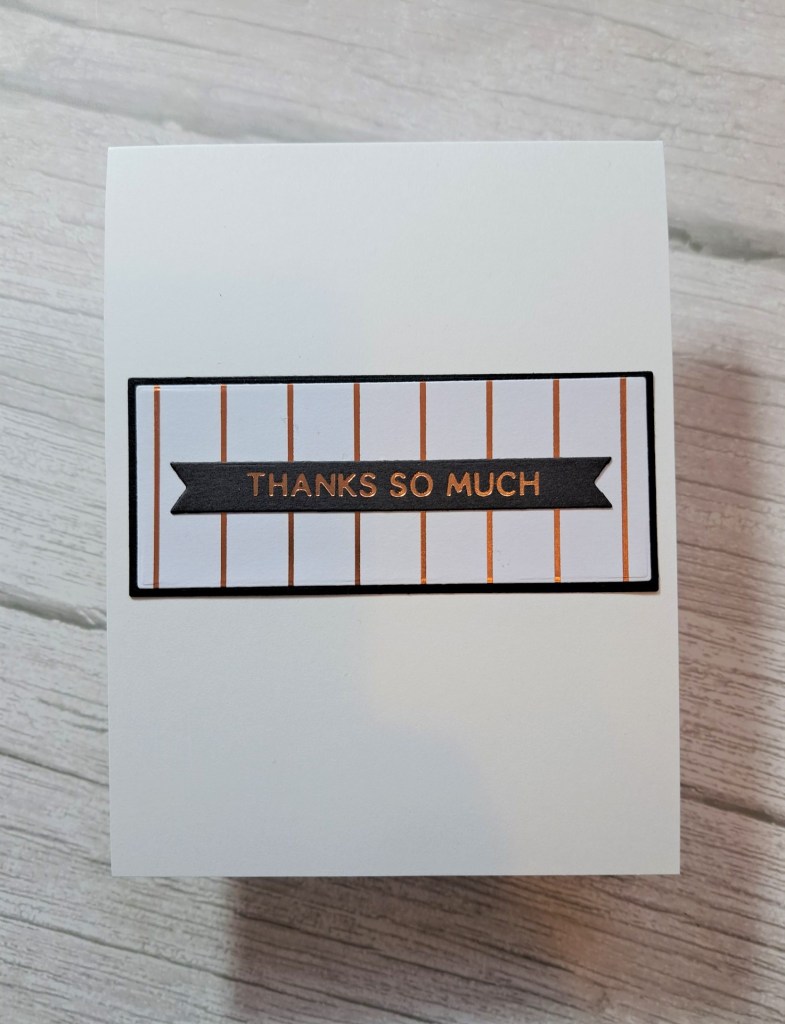
Hello. I have a change in pace for the card today – completely different to the card posted yesterday:
During the Spellbinders Glimmer class last weekend, I foiled a card panel with these vertical gold stripes.
I die cut the panel to create this broad strip using Gina K Designs Master Layouts, and added the black layer behind.
The sentiment is also from that glimmering session, as part of that class included the new release and these sentiment strips. Foil 9 sentiments in one go, and then the die cuts them out in one go – with the fish-tail ends too……
The hardest decision about this card was where to place the panel – near the top, near the bottom…..I went with central – and had to restrain myself from adding more embellishments and an embossed back panel.
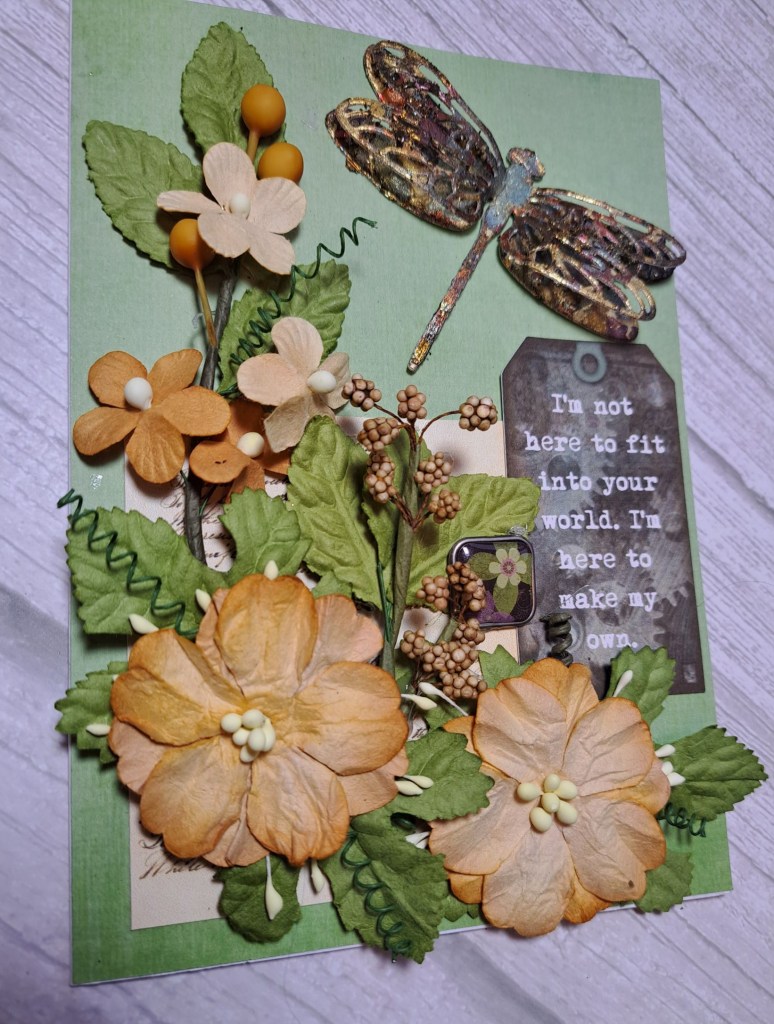
Hello there. The Alphabet Challenge has reached the letter ‘D‘, and Caz has chosen the theme of ‘Dragonflies‘. Here is my creation:
So – it’s a little different to my usual creations, isn’t it? I challenged myself to use some of my crafty stash – things which have been sitting there for absolutely ages……and items which do not come easily to me to use.
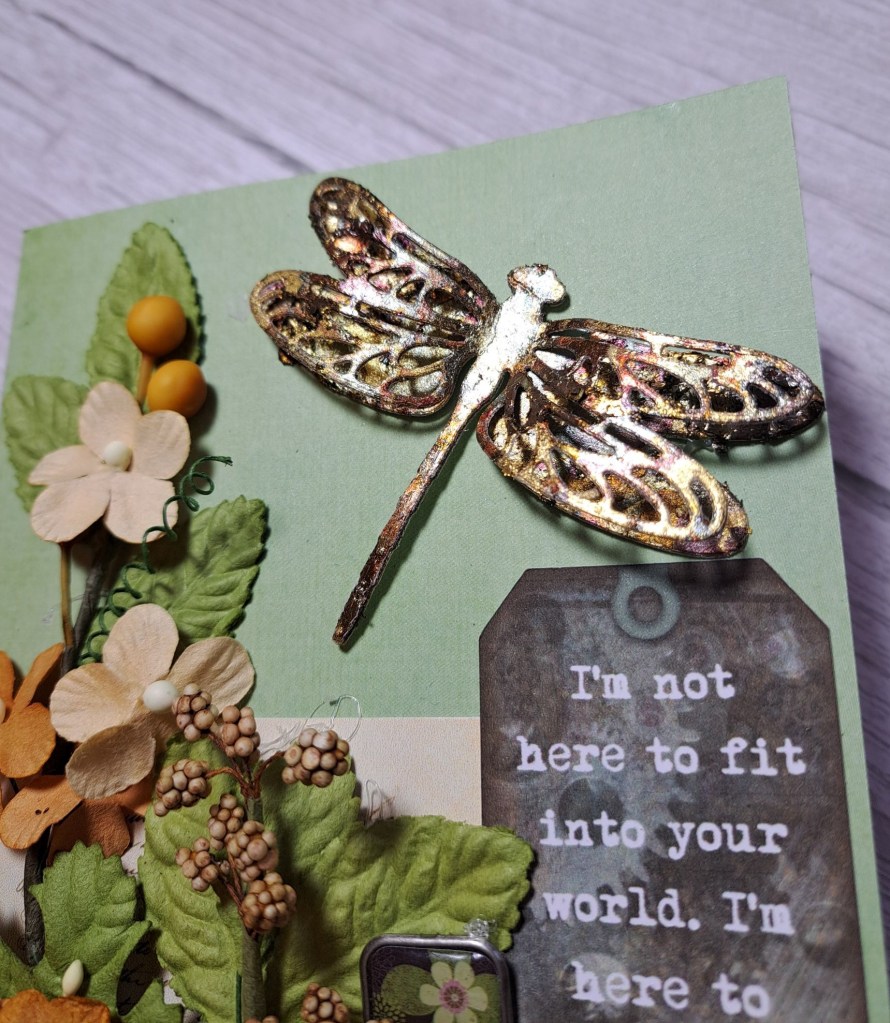
The star of the show is that dragonfly, a die set from Stampin’ Up, but taken up a notch using double sided sticky sheets and glitter flakes. I first adhered the sticky sheet to a piece of card, rubbed in the glitter flakes, then die cut. I added the solid layer behind, and only stuck down the main body of the dragonfly – not the wings and tail end.
Once I had him made, I decided to use some of my 49 and Market ‘stuff’.
I attached a green base layer to my 5 x 7 inch card base, then added some tickets and the main sentiment, then went to town adding the flowers and leaves with collage medium. I even found a shiny button thingy and added that too. These items are from Craft Box UK, and 49 and Market I think.
So very much outside of my normal creations, but I challenged myself, I am happy with the outcome.
I hope you can come and join us with your dragonfly creations. xx
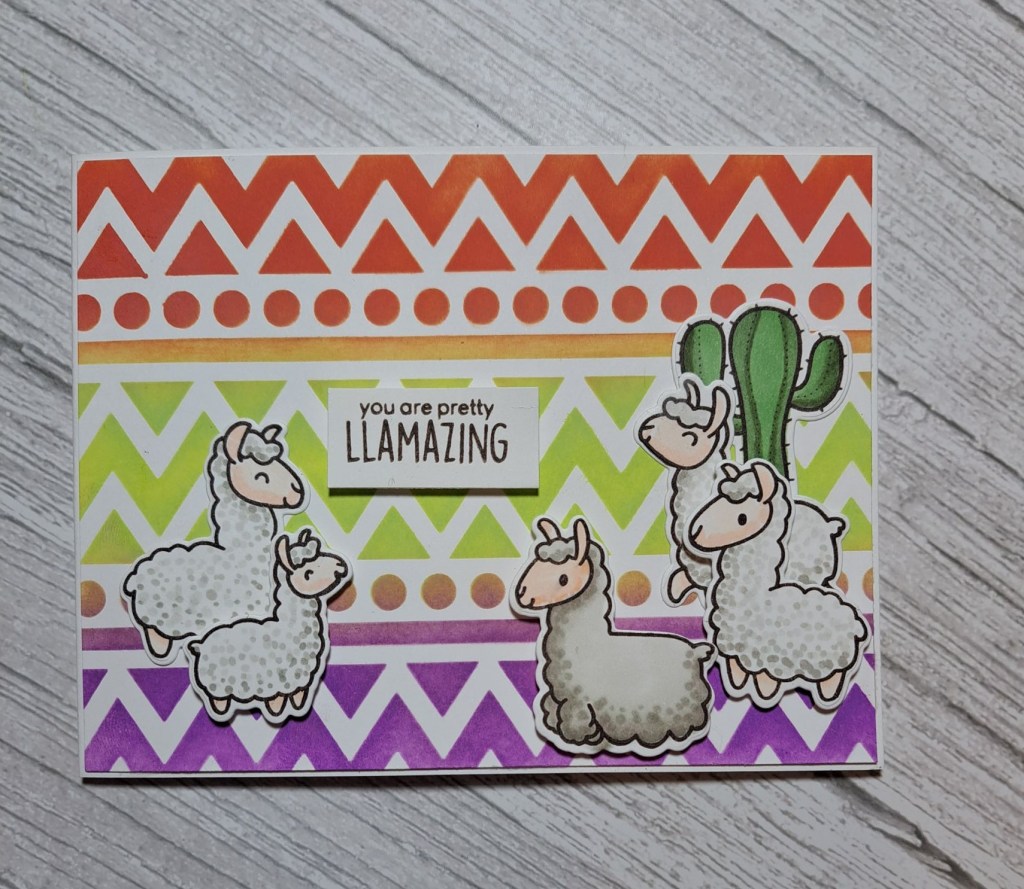
The new challenge theme at Cardz 4 Galz has been chosen by Johanna – backgrounds. Here is my card:
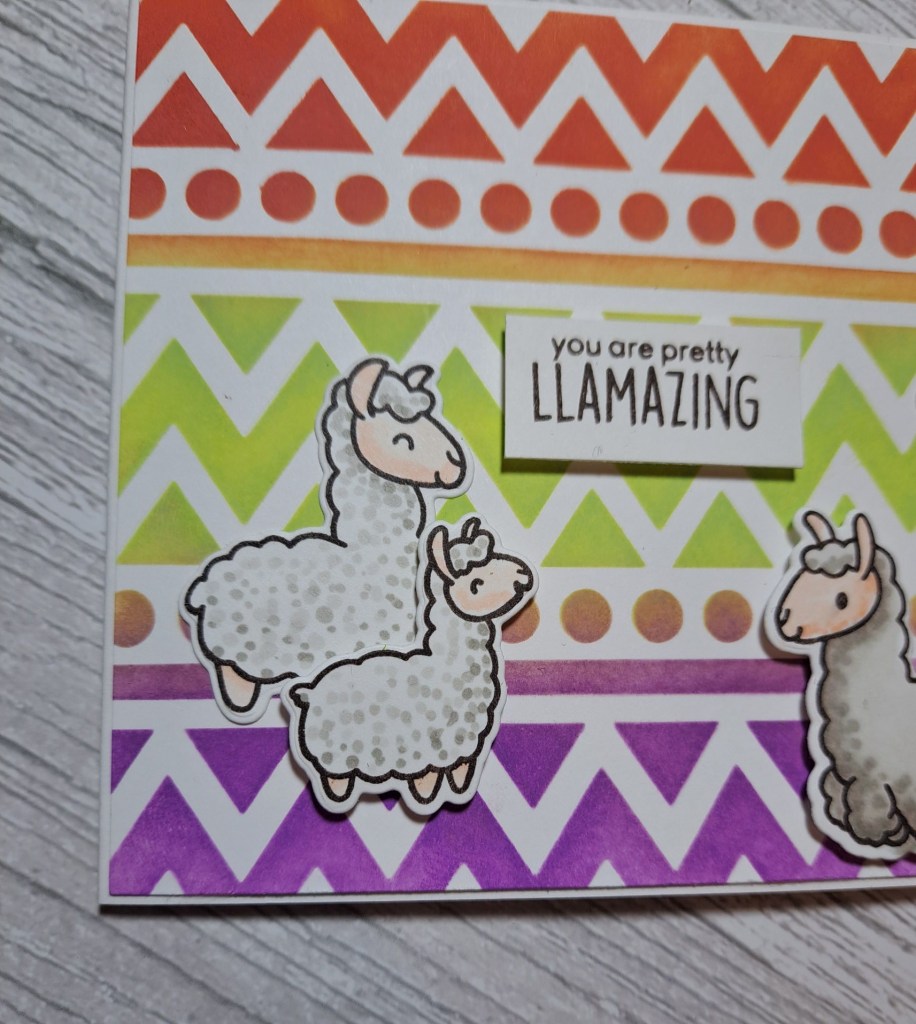
My background was created using a stencil from Time For Tea Designs, and ink blending with Distress Oxides. I used three colours, but the overlap between each colour created two more, so I achieved almost a rainbow effect.
The images are from Heffy Doodle – stamped, coloured with Copics, then die cut with the matching dies.
I tried a different way of colouring – dotting instead of the usual solid colouring – and I think this creates dimension in their coats. I may well be doing this technique again as I like the effect.
I wasn’t going to use all of the llamas, but I just couldn’t resist.
I hope you can come and join us with your background themed cards. xx
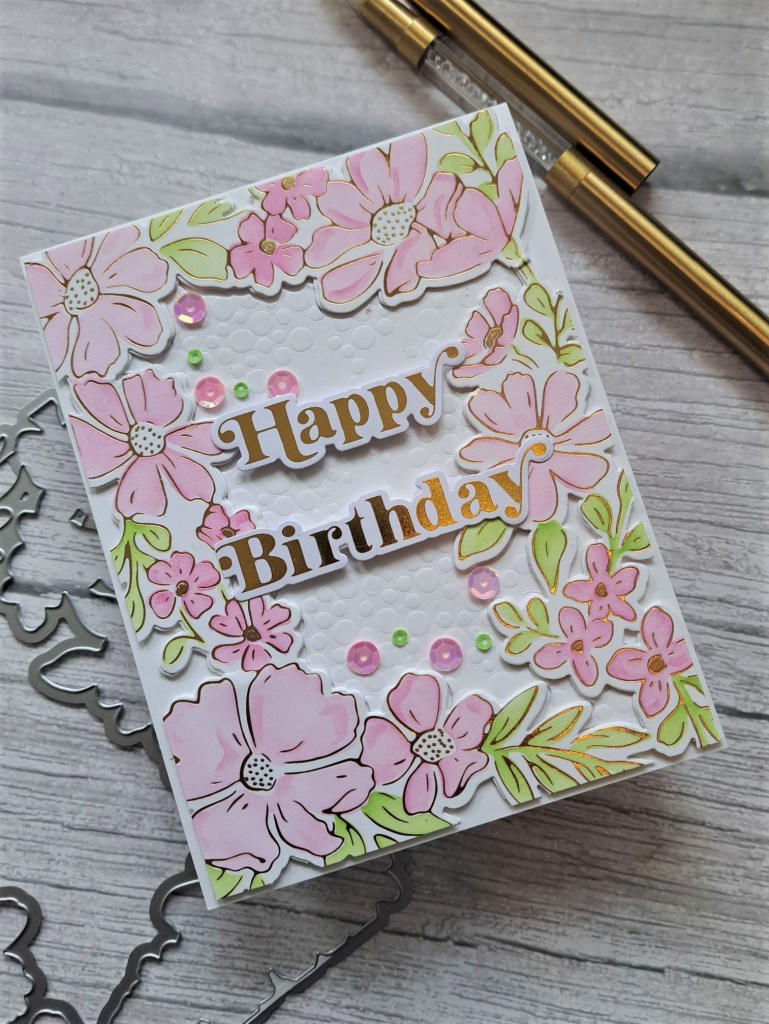
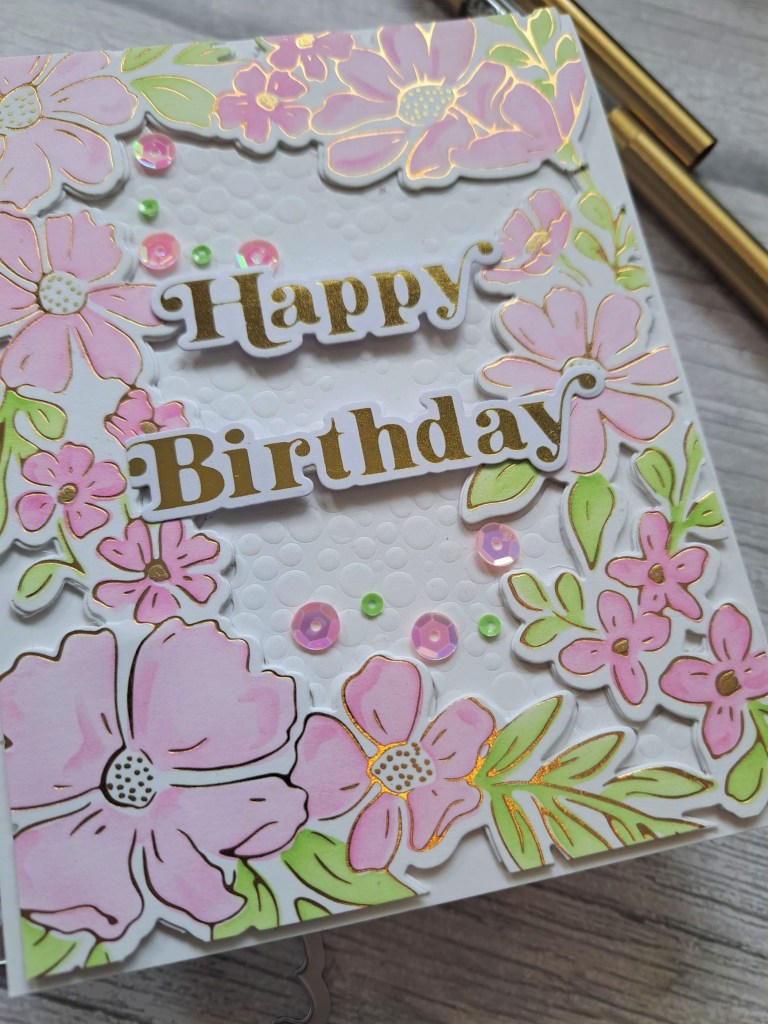
Hello. I attended the online Spellbinders Glimmer class this past weekend, and played with foiling – with just about every plate and sentiment set I had. I was glimmering for absolutely hours. Once I got the hang of it – I just kept foiling. Here is a card created with a foil plate from Pinkfresh Studio:
I had foiled the plate onto a white panel, then I used the matching stencils in Pinkfresh pink and lime green inks. I just stencilled harder with the same pink to create some variation, and added extra lime green to the base of some of the leaves.
I didn’t blend the centre of the flowers, but added some gold dots with a metallic gold paint marker from Spectrum Noir. I had bought them to use when I was doing the wax seals and highlighting the image – yet another kit I haven’t really played with yet……!
Once the blended panel was dry, I die cut the border with the matching die set, and added two more die cut layers in plain white for stability.
I thought the centre of the border was a little plain, so I dry embossed a stencil and inserted that embossed ‘off cut’ to create more interest in the centre.
The sentiment is also from my foiling sessions, added with some 3D foam strips, and I searched my stash for some pink and lime green sequins, and added them as you see.
I’m afraid I have become addicted to foiling – you are definitely going to see more of that in my future posts…..beware!
I shall be entering the following challenges:
Crafty Catz – anything goes, option of lace, ribbon or twine not taken
Allsorts – anything goes option add embellishments – taken
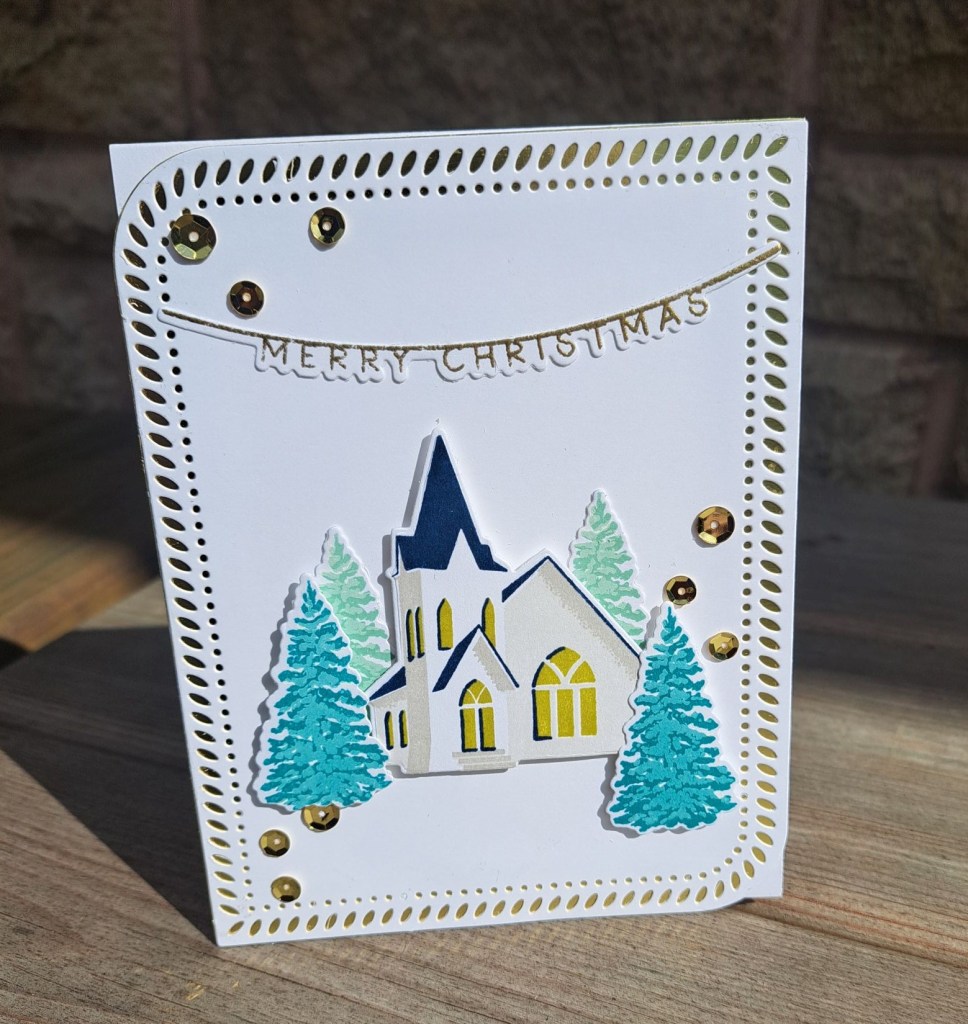
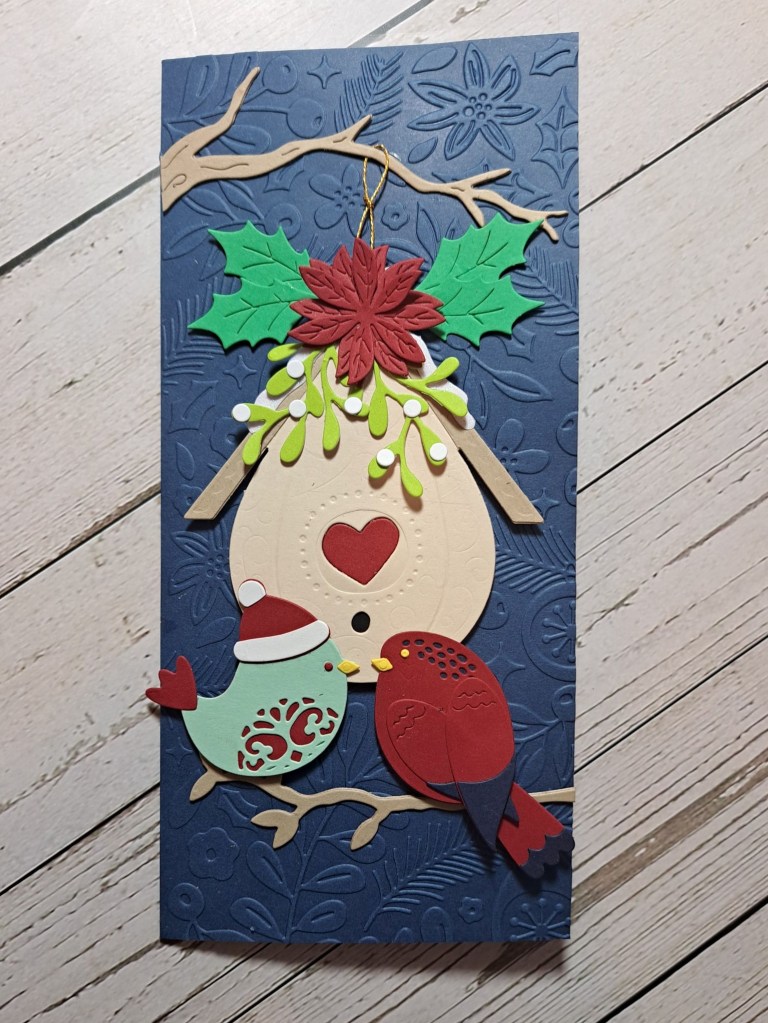
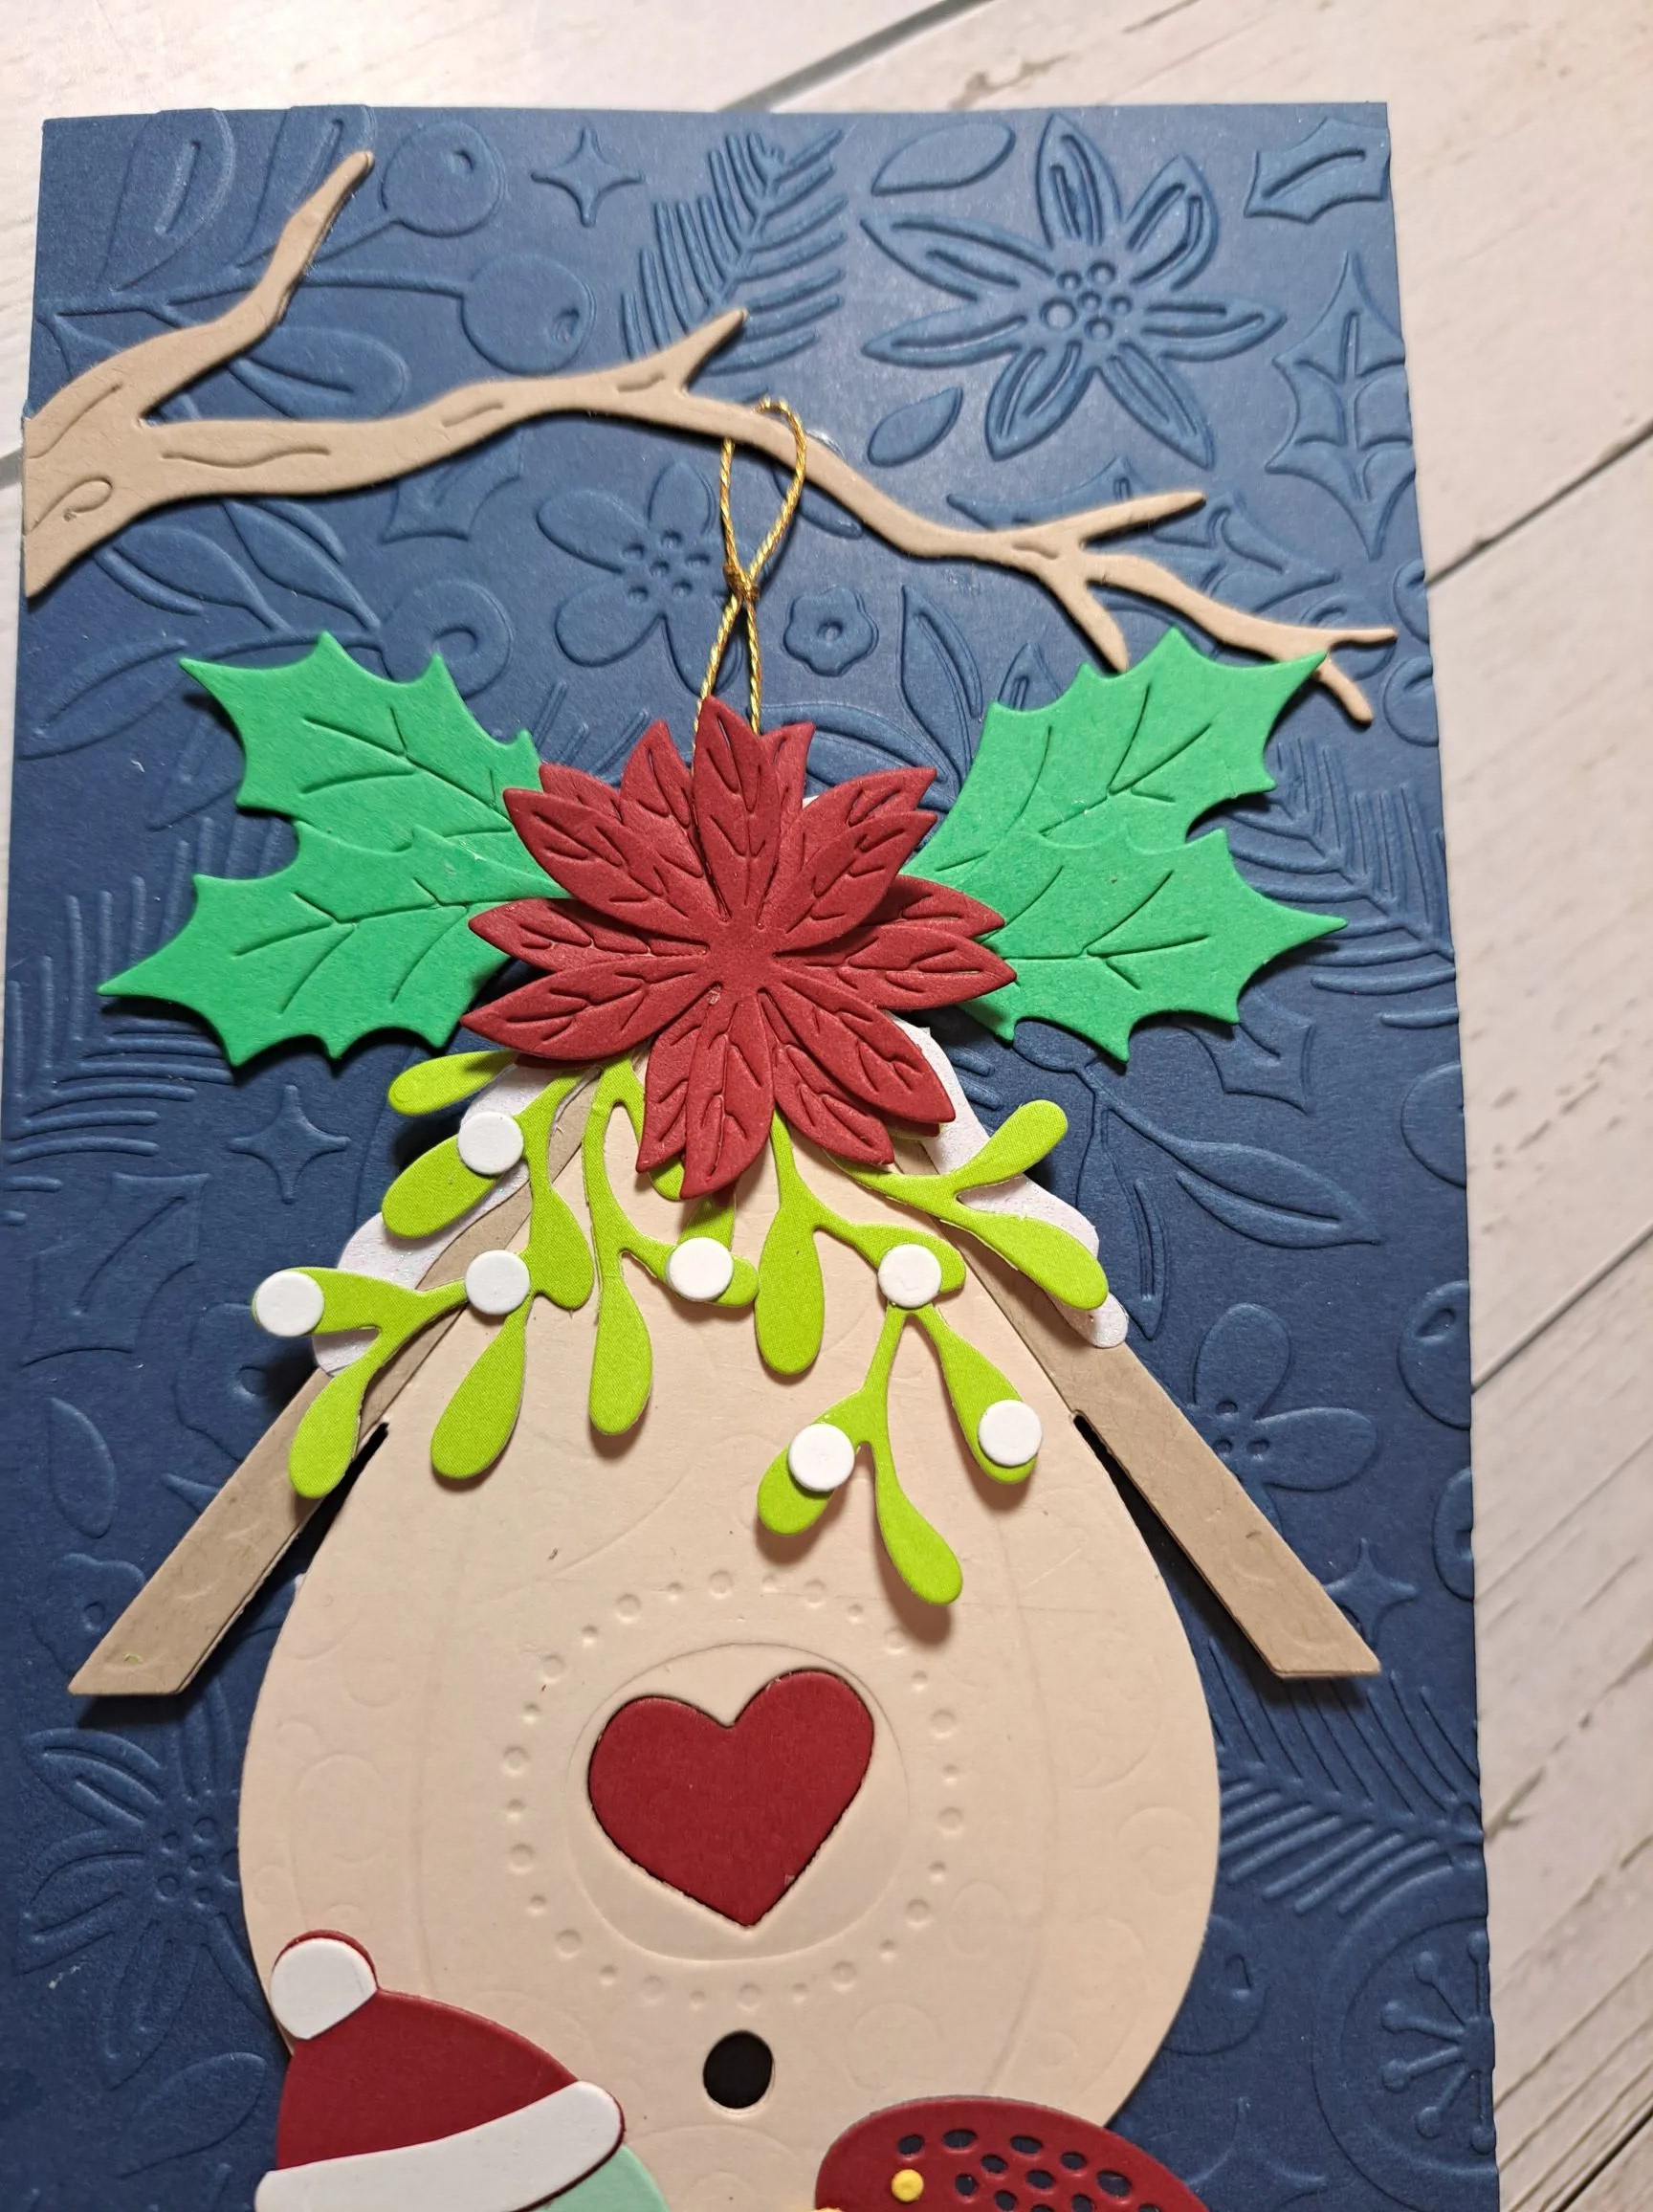
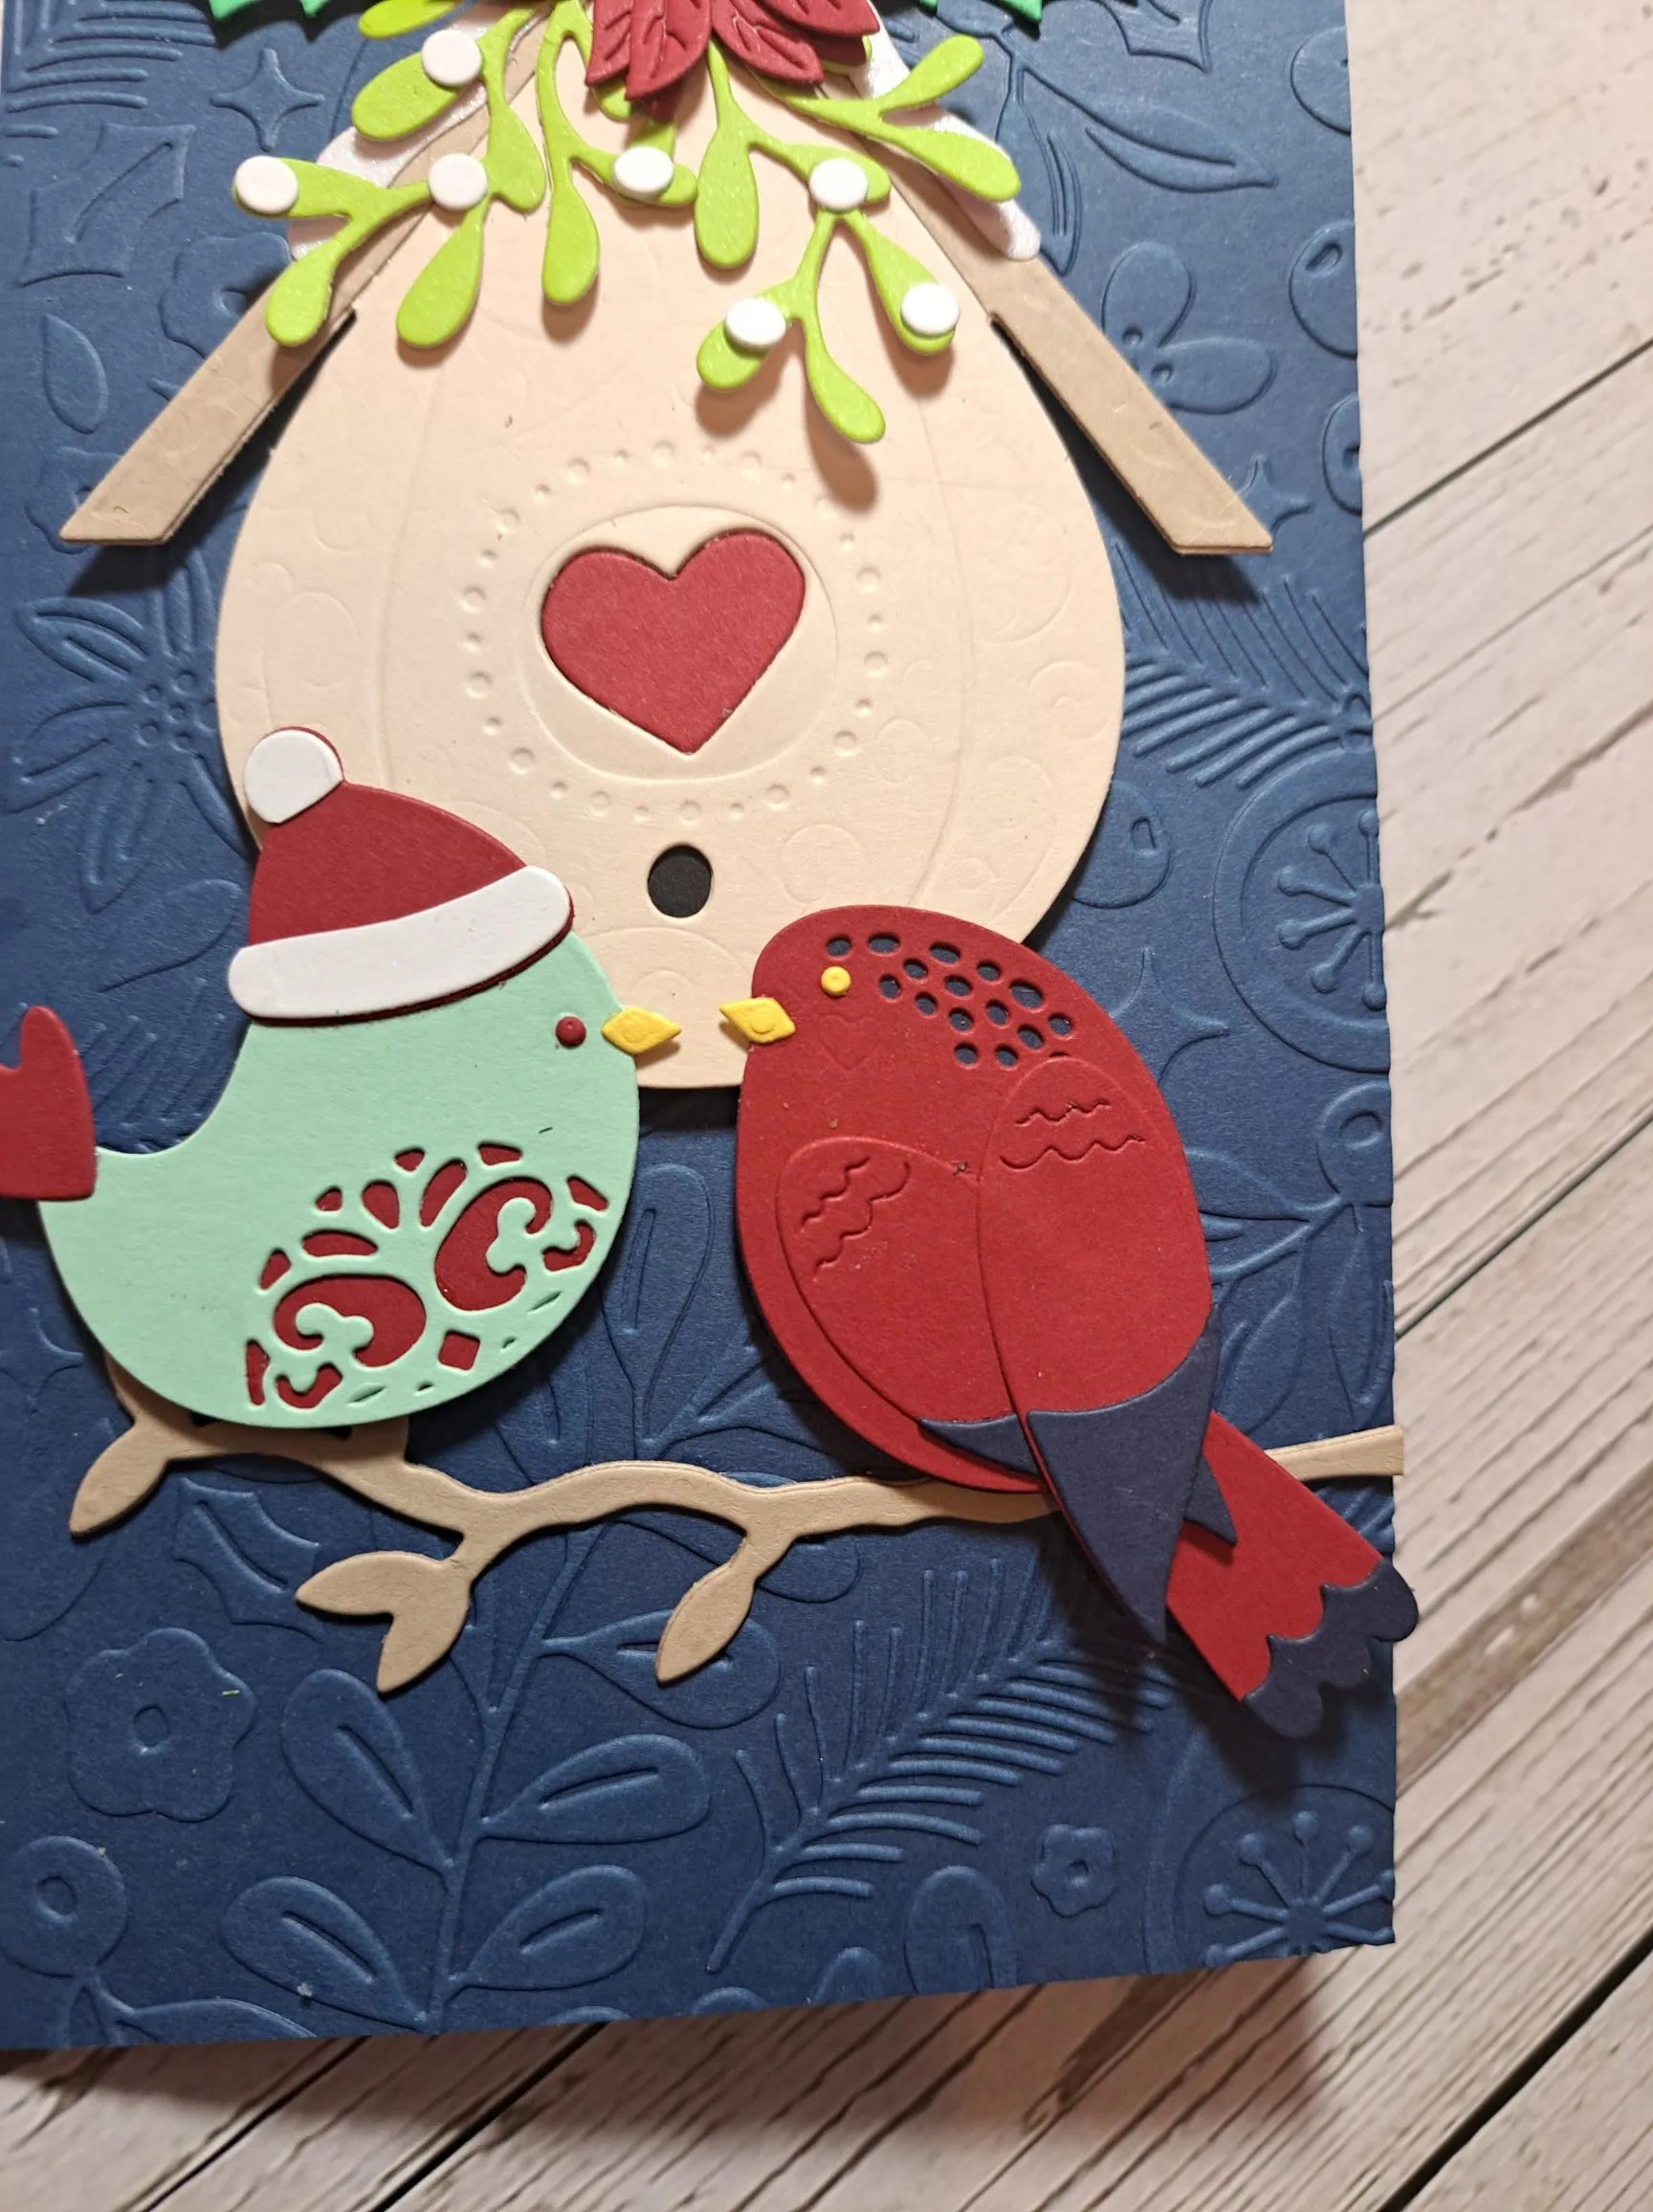
Hello there. ABC Christmas Challenge has reached the letters ‘J‘ and ‘K‘, and we want to see your Christmas/Festive creations with ‘J’ for Jingle Bells, and/or ‘K’ for Kisses (under the mistletoe)’. Here is my card:
I have some slimline card bases in this gorgeous dark blue and never think to use them – so I grabbed one, and embossed the front half with a Spellbinders embossing folder.
The birds, bird house, and all the floral elements were die cut and assembled, and the hardest part was deciding on where each of the elements were to go. Thank goodness I went for slimline so I could get everything on there.
I’m looking forward to seeing your Christmas/Festive makes following our themes. xx
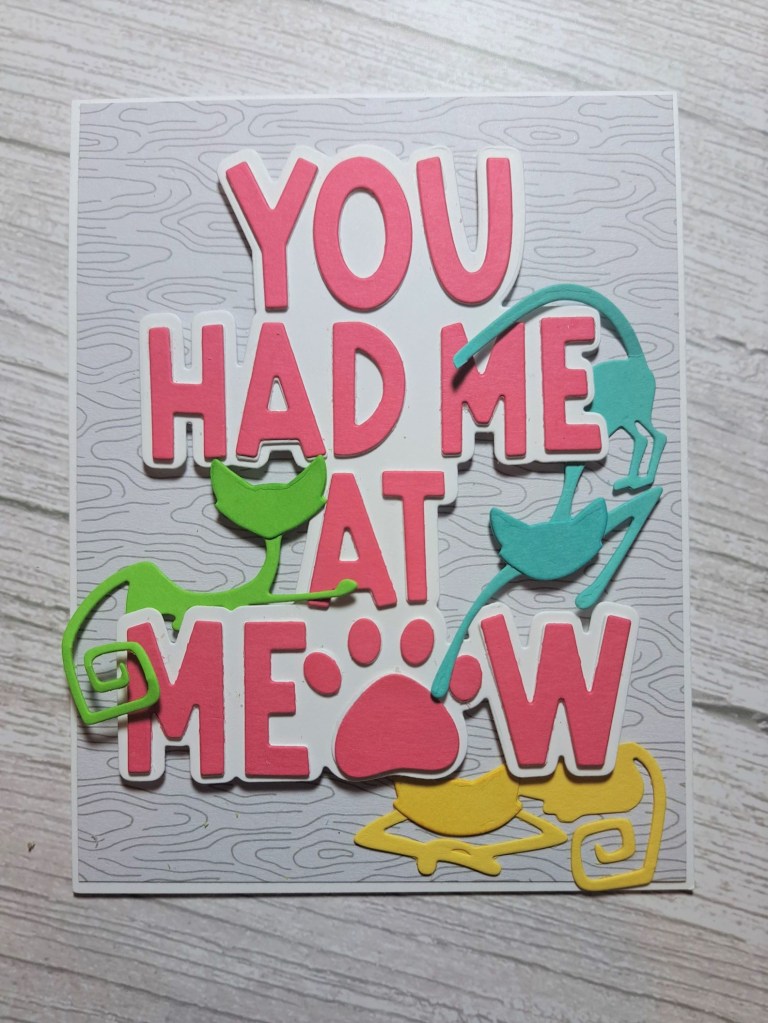
Hello once again. The Alphabet Challenge has reached the letter ‘C’, and Helen has chosen the theme of ‘CATS’. I am currently ‘owned’ by four cats, but rarely seem to make cards with cats……. Here is my card:
The background panel is patterned paper – a subtle one as I wanted everything else on there to be bright and cheerful.
The main sentiment is from Time For Tea Designs, die cut in the bright pink with the white shadow layer, and attached with 3D foam.
The cats are from a Tim Holtz die set, the die set aptly called ‘Mischievous’, and I chose the three cats which I would be able to intertwine around the sentiment – again in bright and cheerful colours.
The hardest part about creating this card was choosing the colours. I wanted bright, cheerful and fun colours, which I think I achieved.
I hope you can come and join us with your cats themed creations. xx