Hello everyone. I little lax in posting this past week or so – good weather here in the UK so I made the most of it.
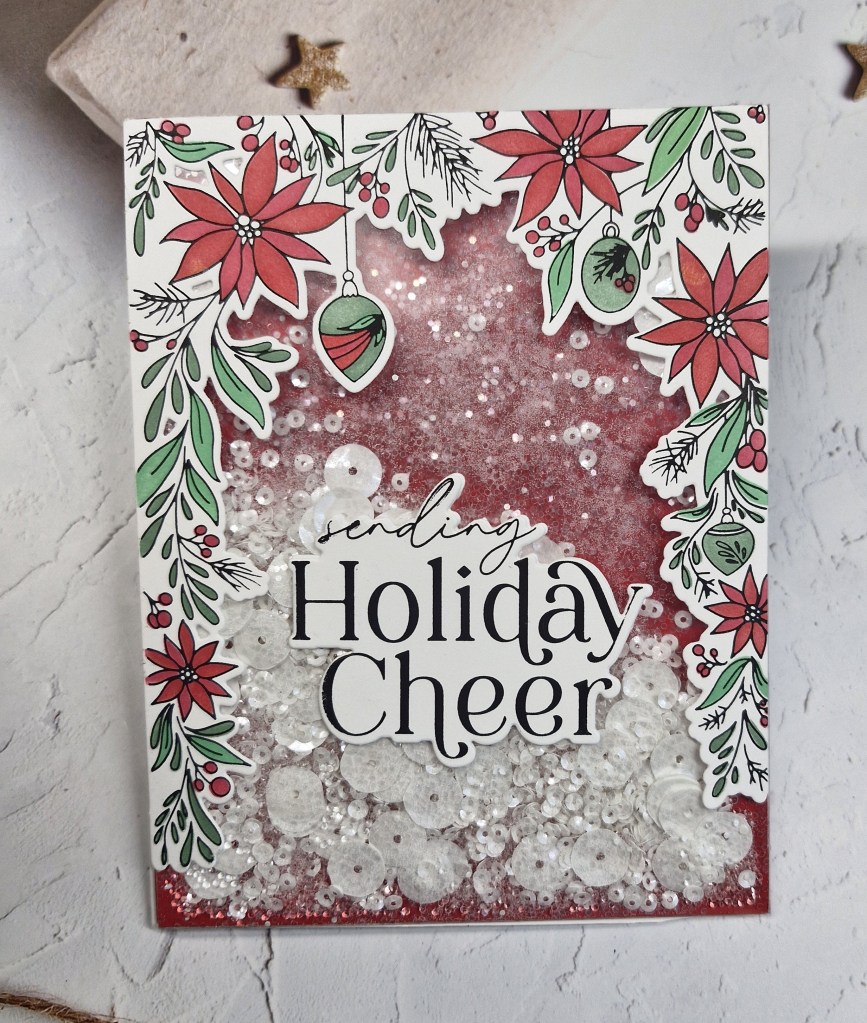
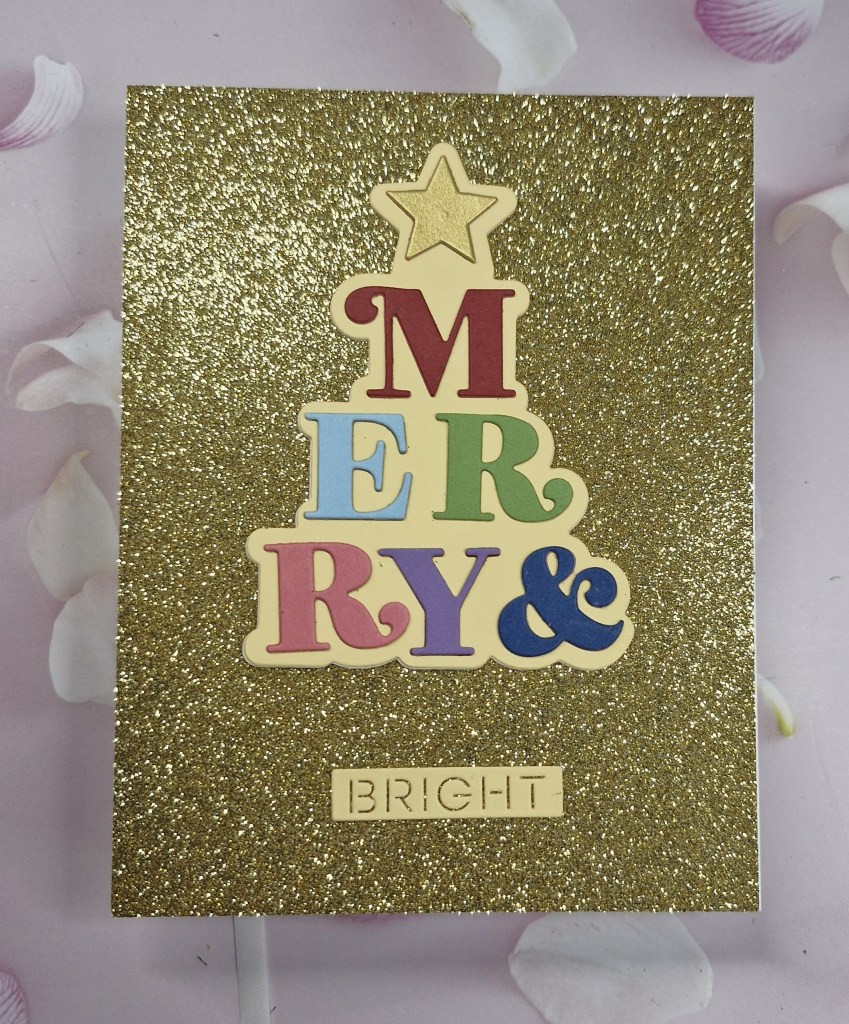
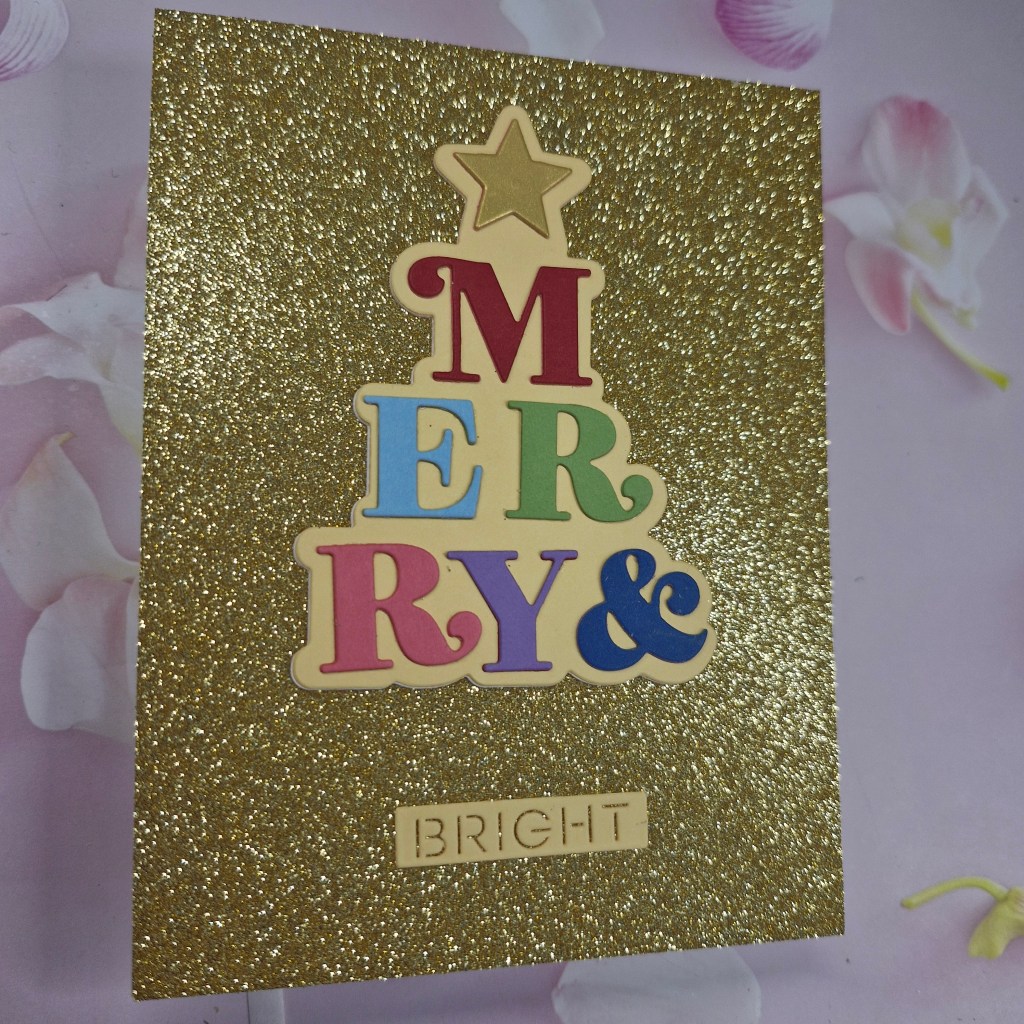
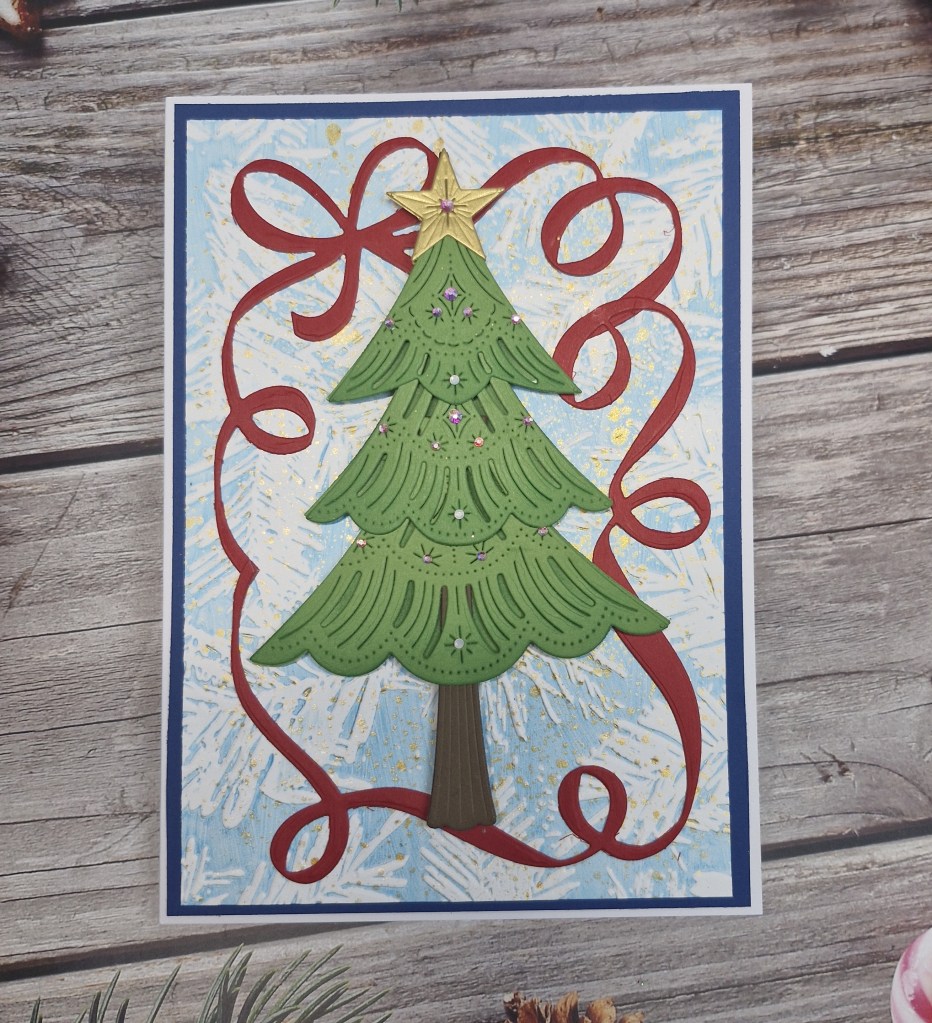
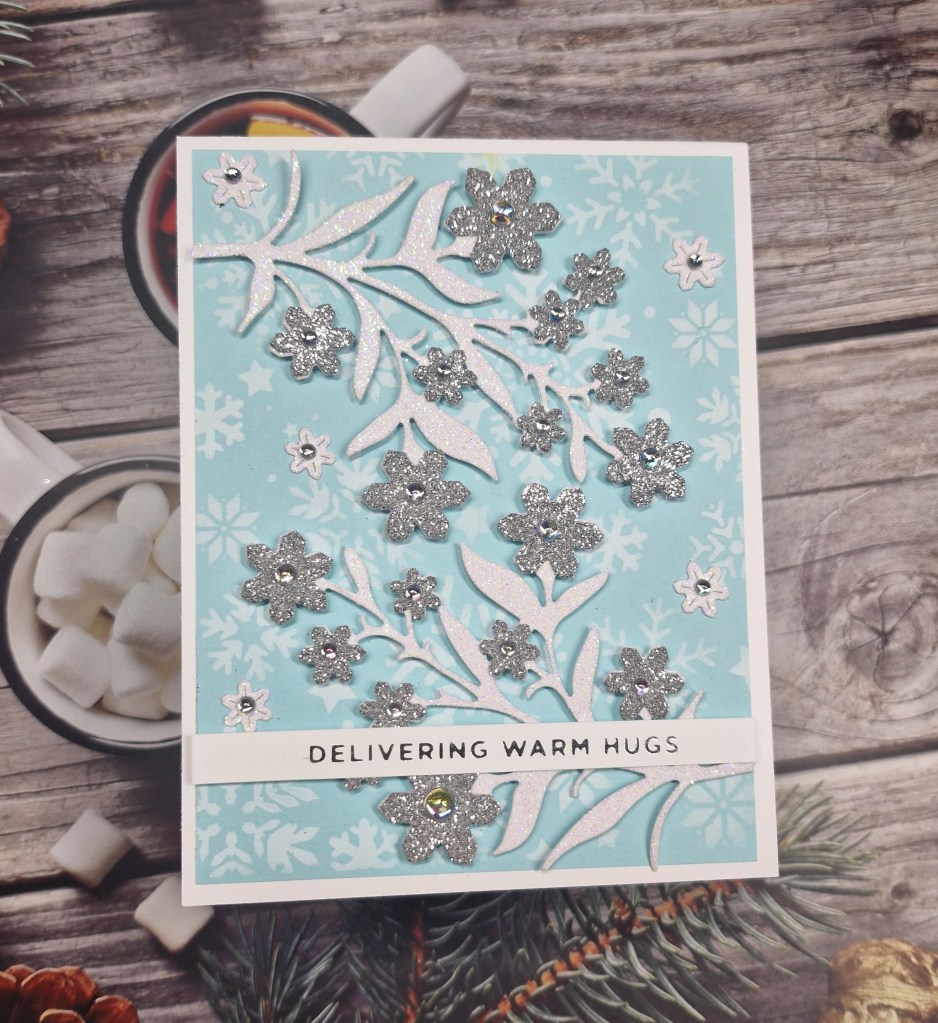
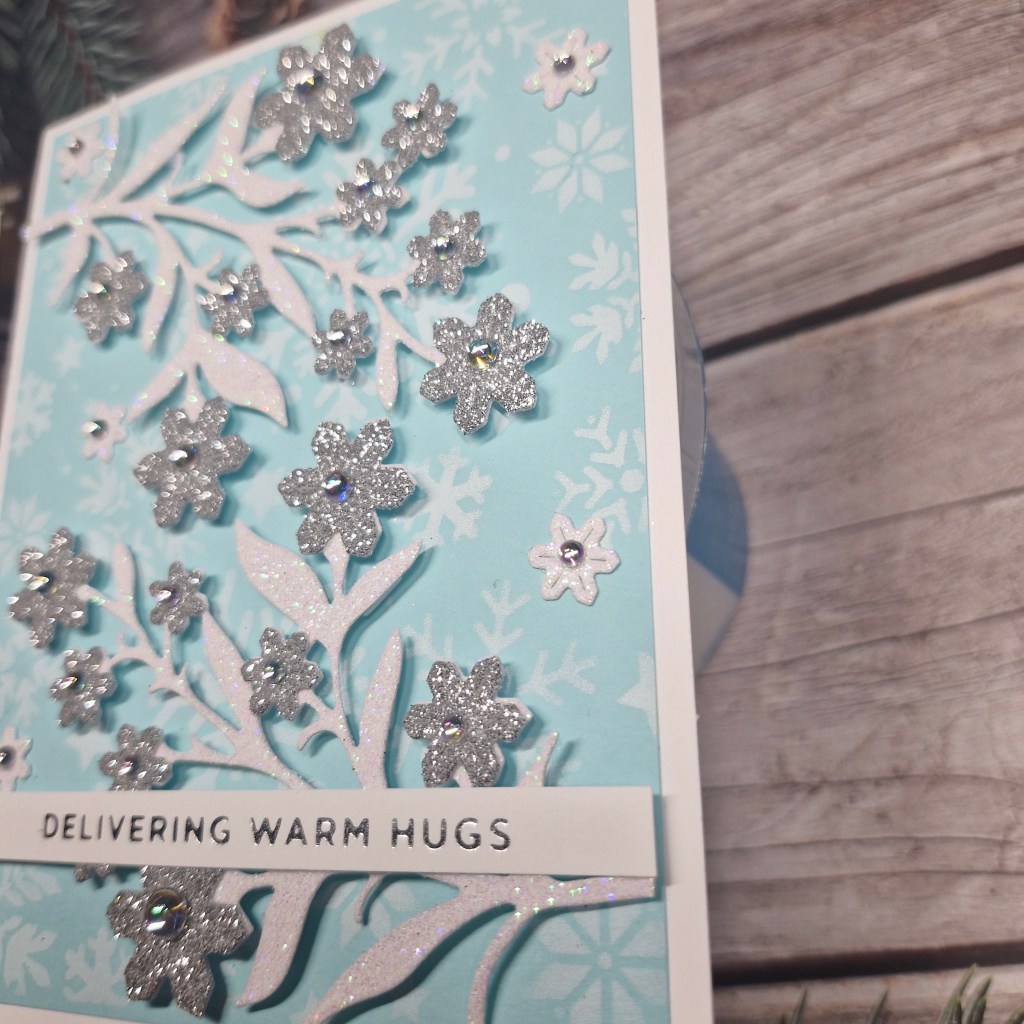
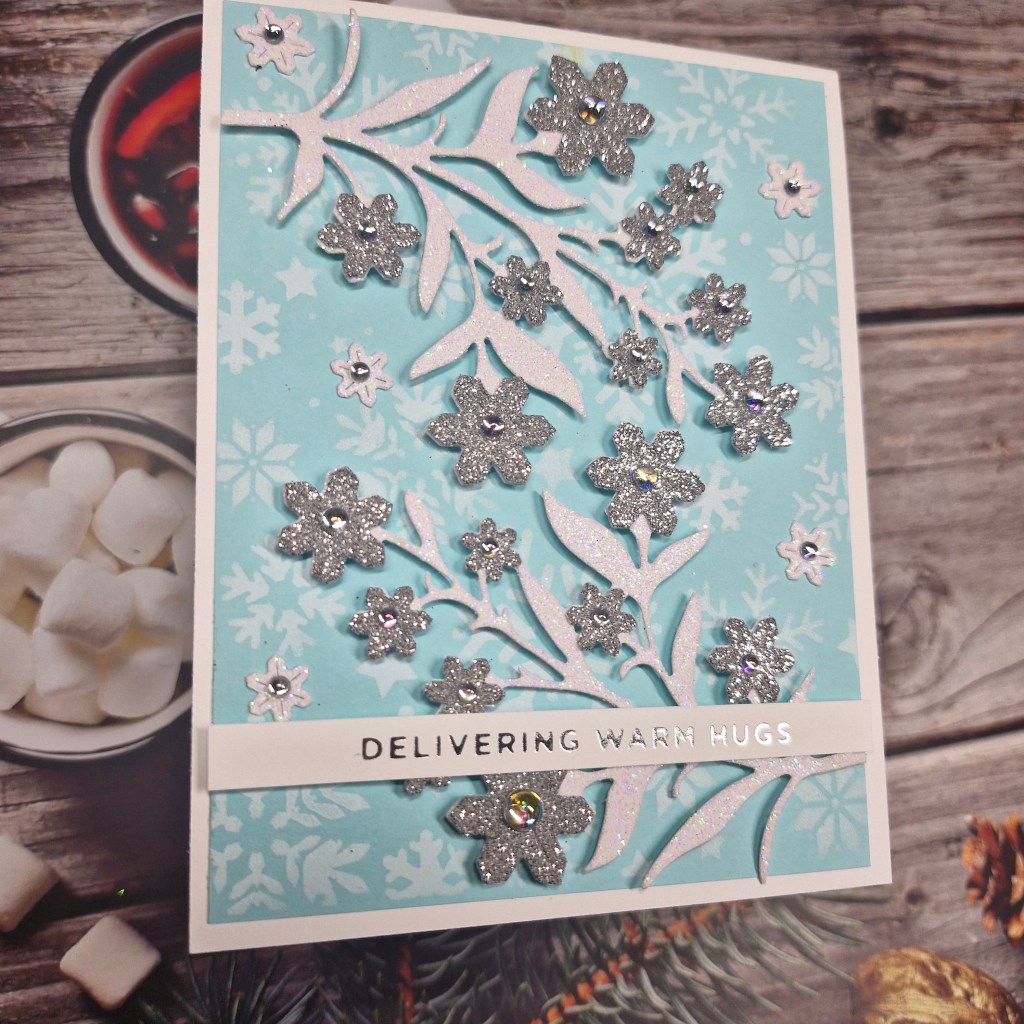
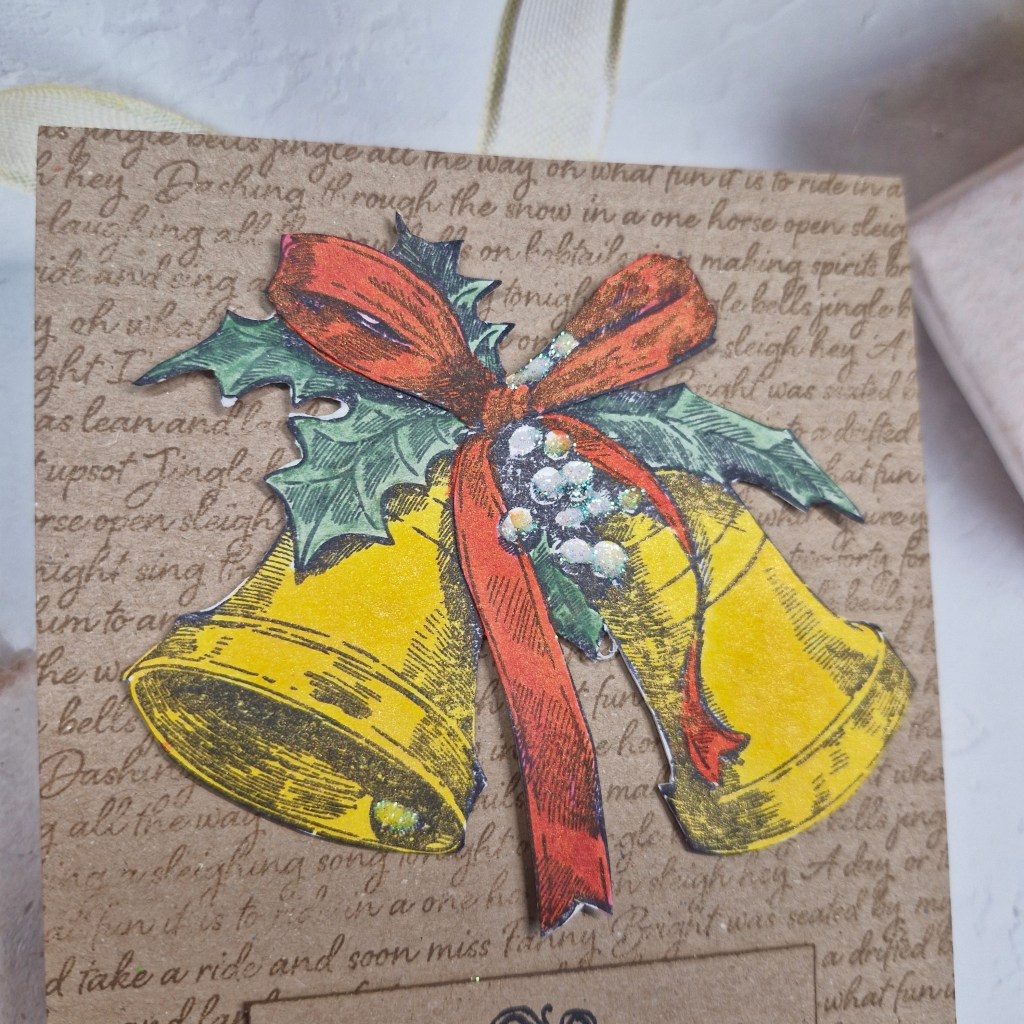
The new challenge at ABC Christmas Challenge has started. Having reached the letters ‘J’ and ‘K’, we want to see your Christmas/festive creations featuring ‘Jingle (bells)’ and/or ‘Kraft’. Here is my card covering both of the themes:
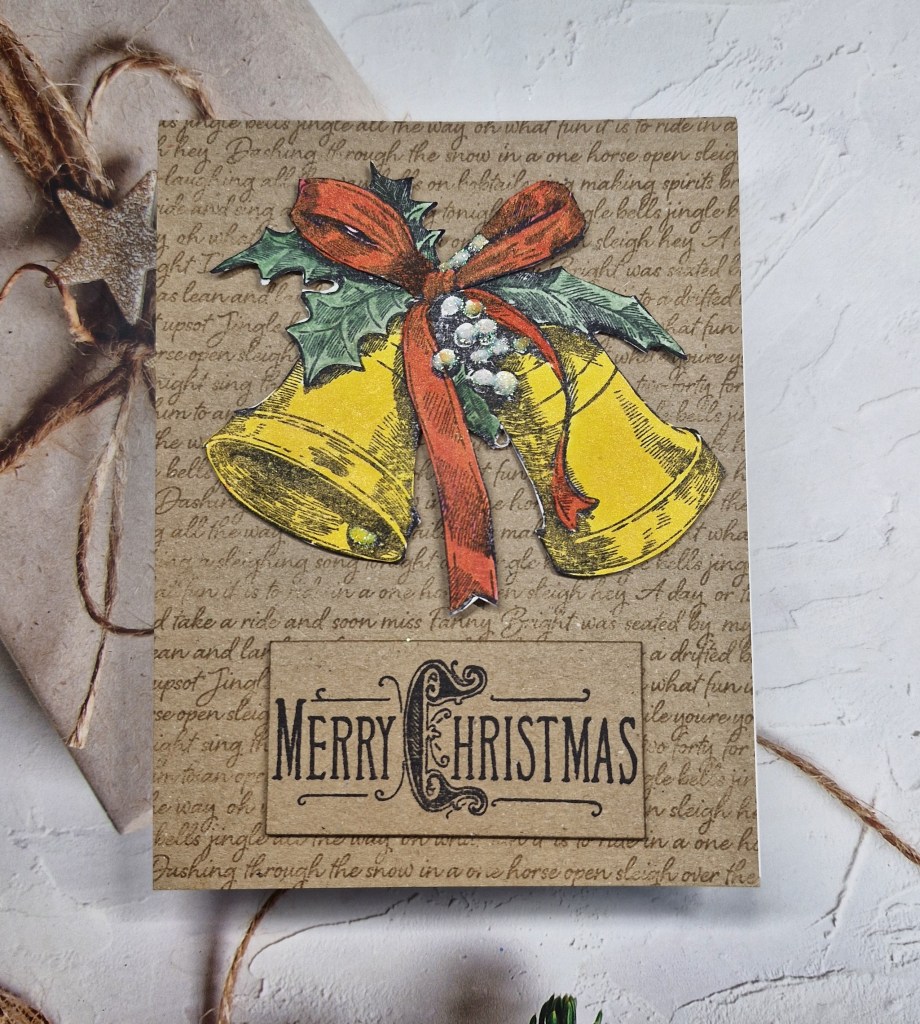
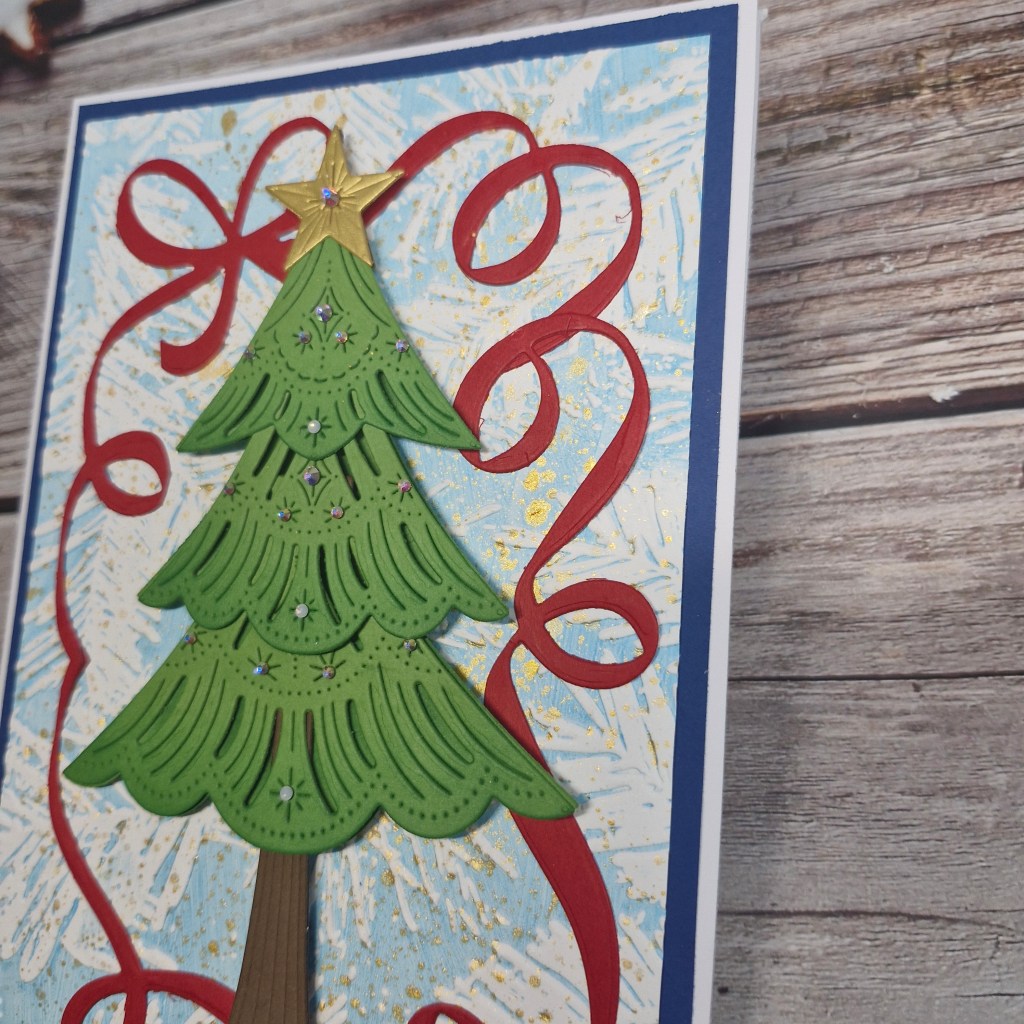
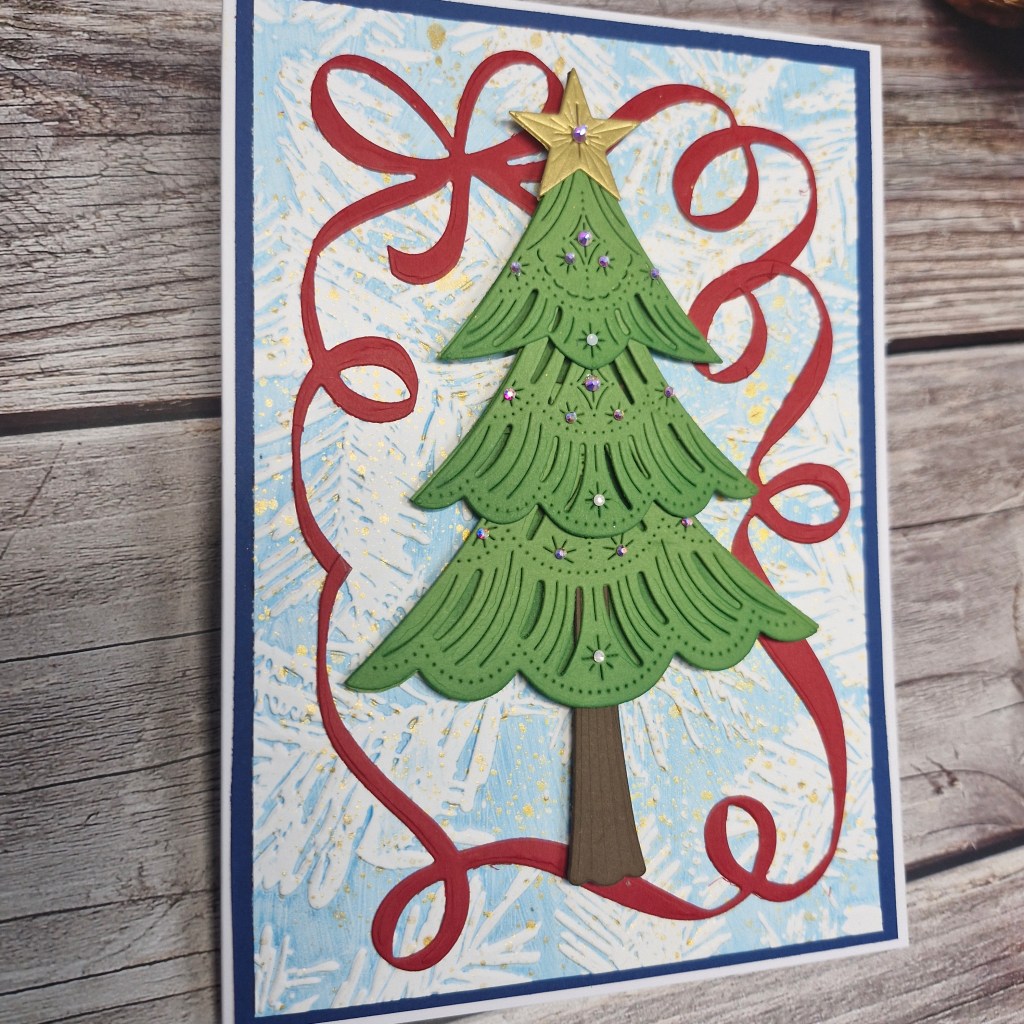
I started by stamping the Tim Holtz bells onto some water–colour card several times with Archival black ink, as I wanted to layer some of the elements.
I then used mica sprays and Distress water-colour pencils to colour in the images. Once they were dry completely, I fussy-cut one whole image, then cut parts of the ribbon from other images and layered them on top.
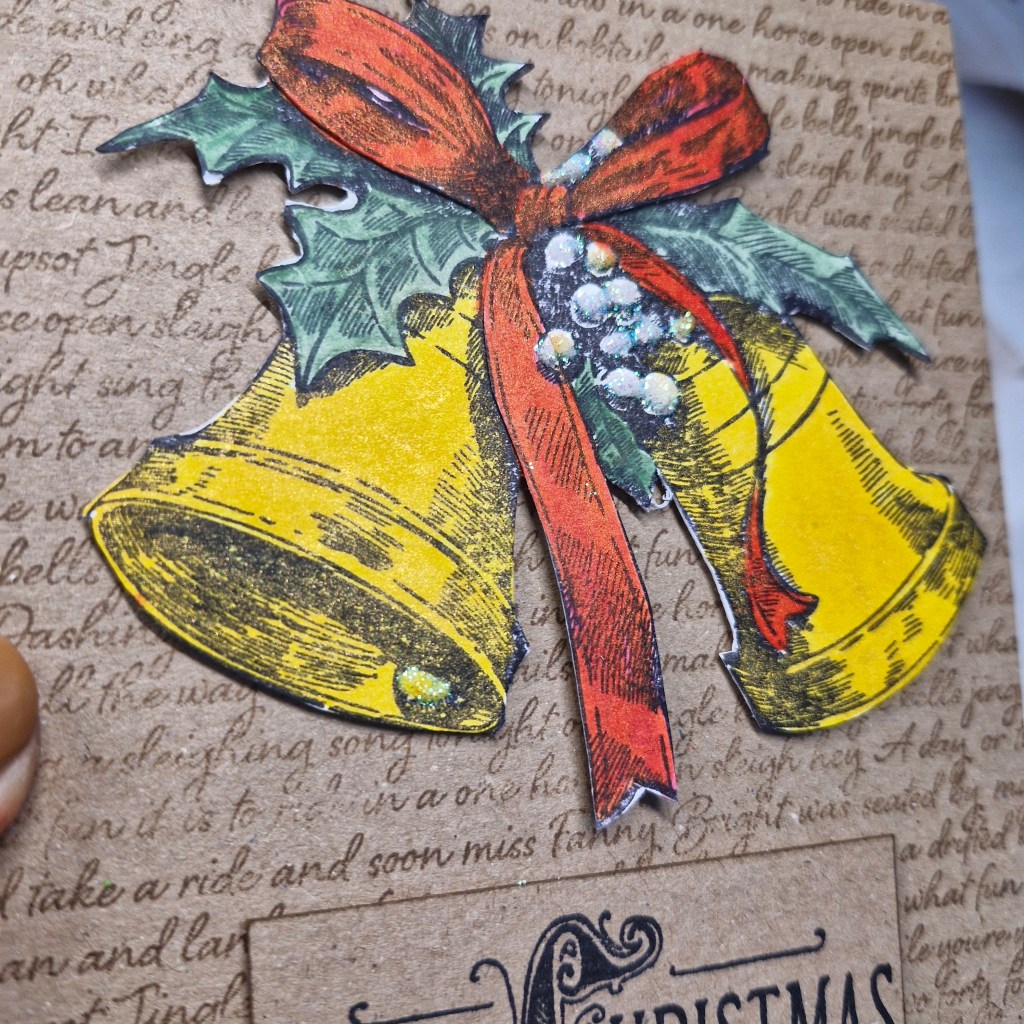
The background panel was created using Kraft card stock, and stamping a Hero Arts rubber background stamp in a brown ink for a tone-on-tone look. This panel was adhered to the card base, then the bells attached with 3D foam pieces.
The sentiment was stamped, a rectangle die to cut it out, then a ran the brown ink pad along each edge to make it stand out more.
It’s very difficult to photograph the mica – but those bells really do shine.
As a finishing touch, I added glue to the berries then glitter.
I hope you can come and join us with your Christmas/festive creations following one or both of our themes. xx
Addicted To Stamps & More – Christmas
My Time To Craft Christmas – Christmas and use glitter
We Love 2 Create – anything goes mixed media
Creative Artiste – anything goes mixed media
Merry Little Christmas Challenge – anything goes Christmas