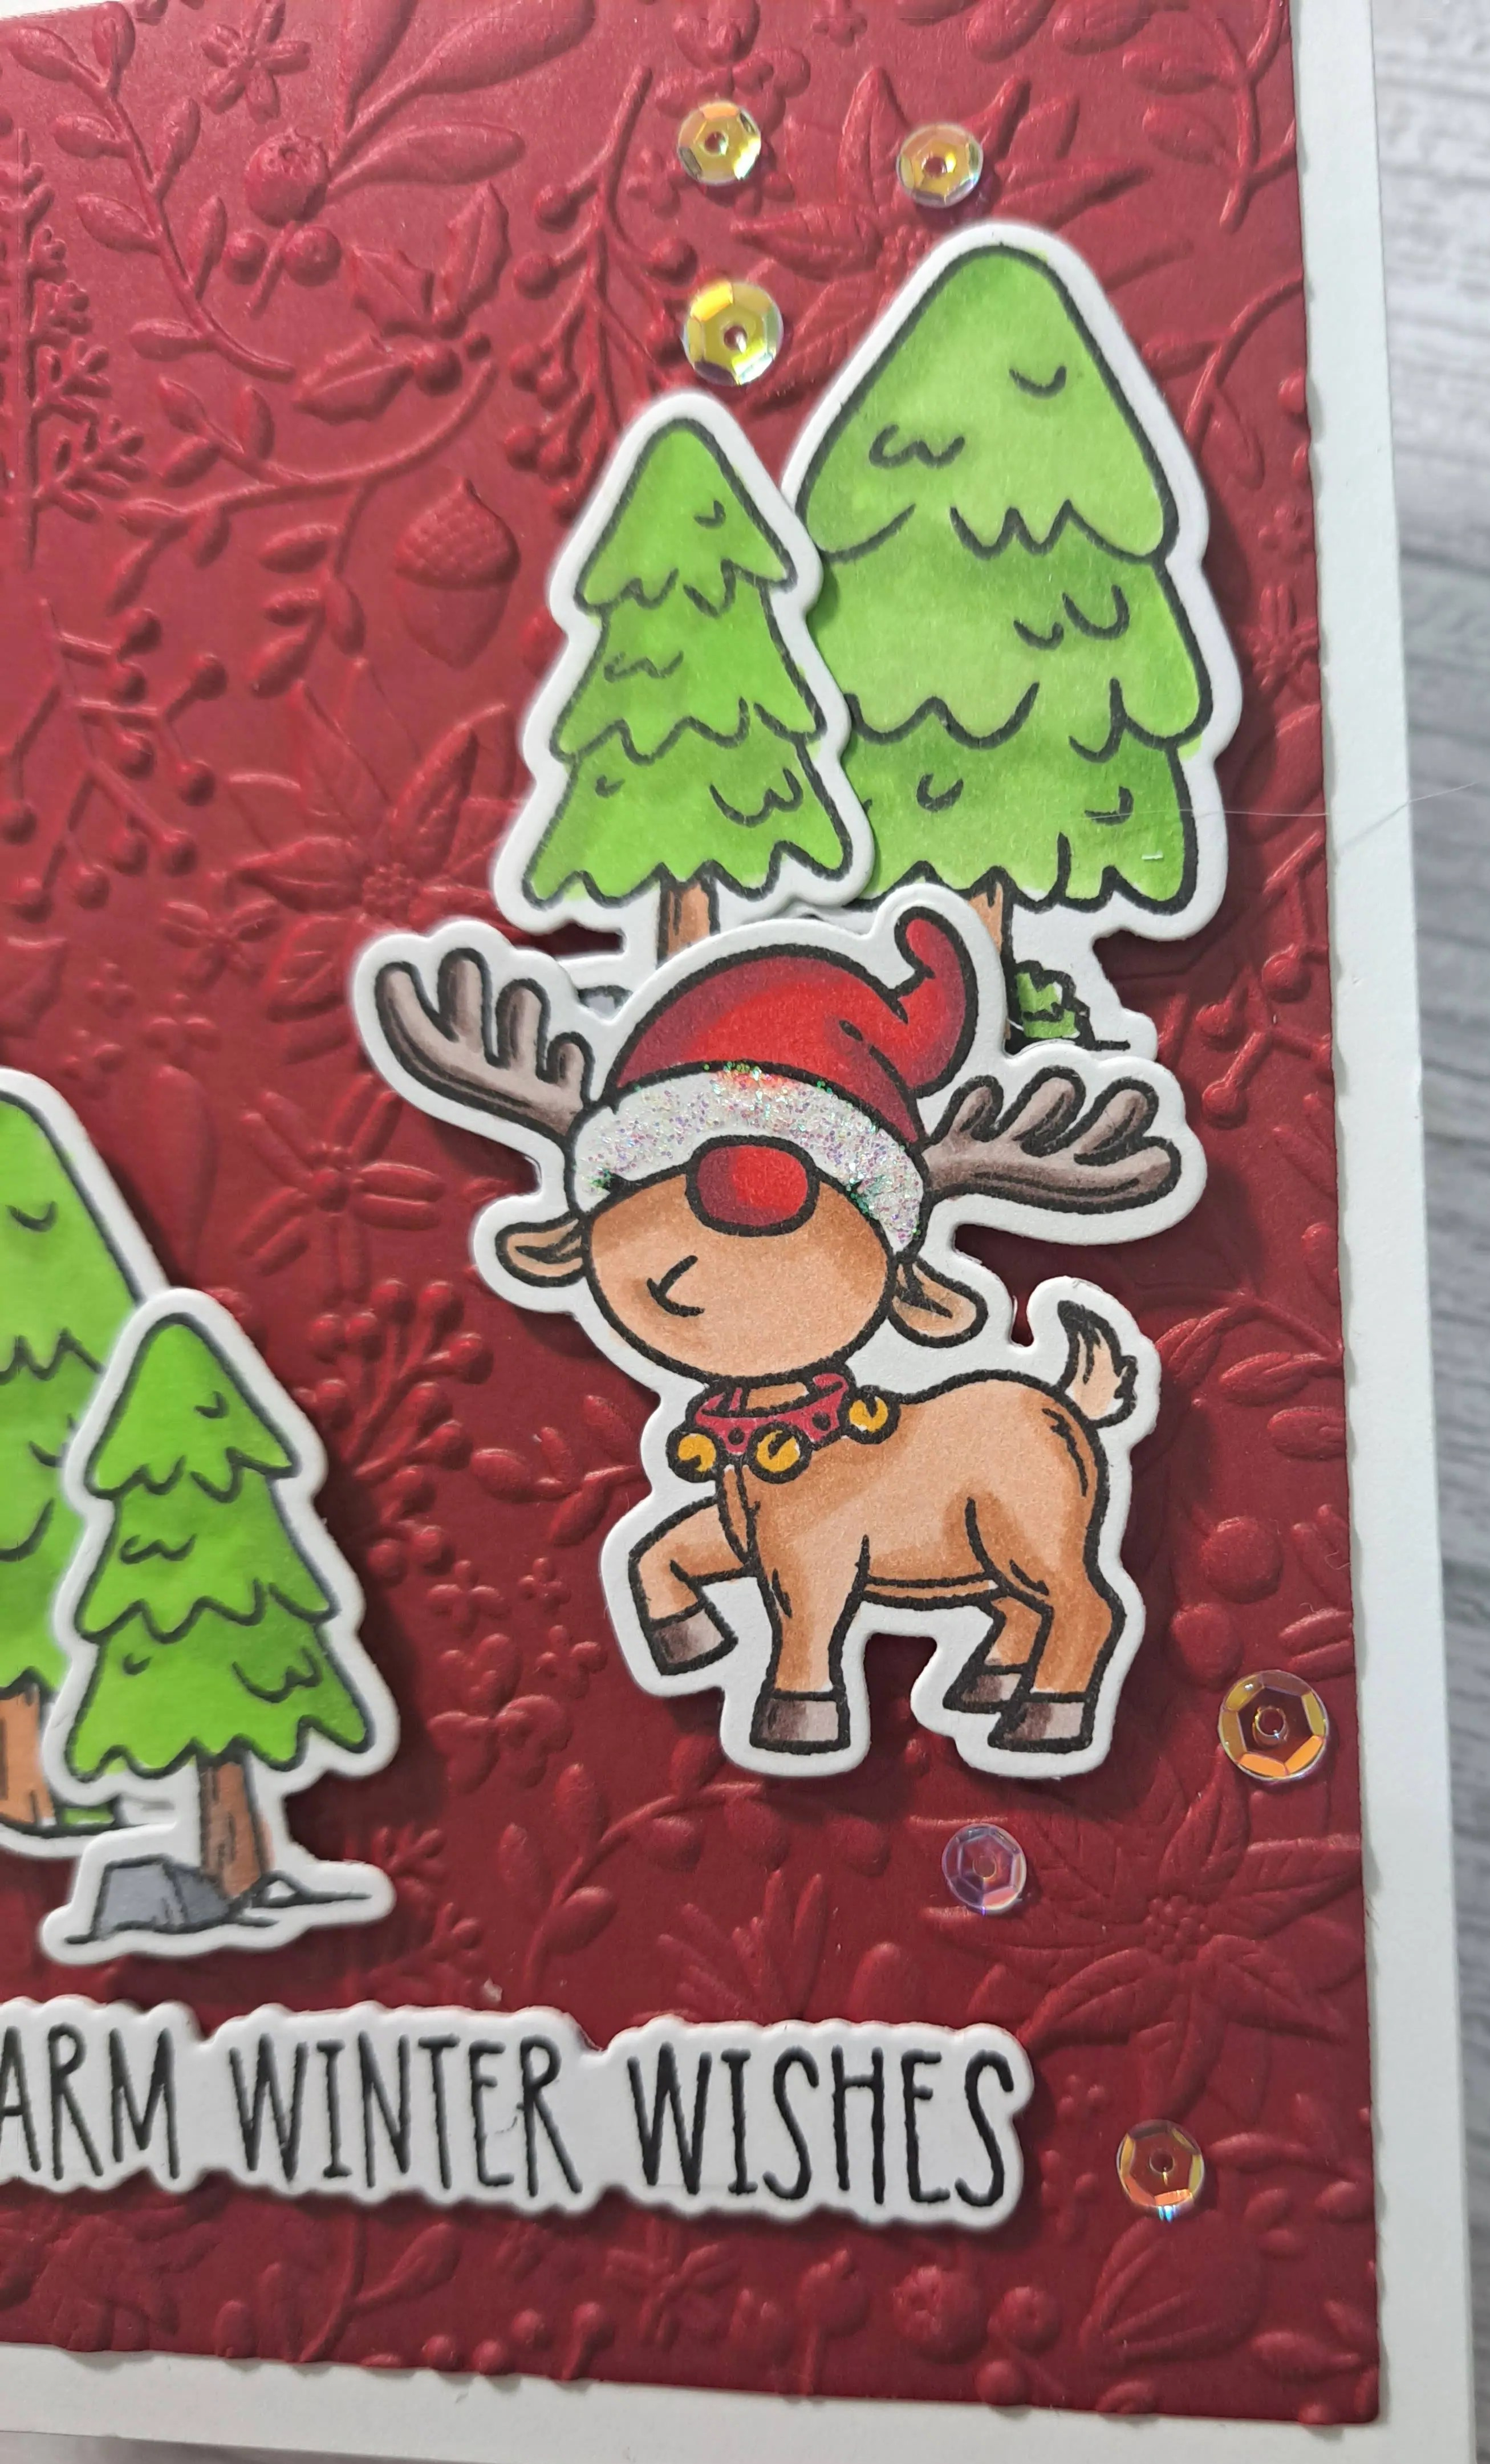
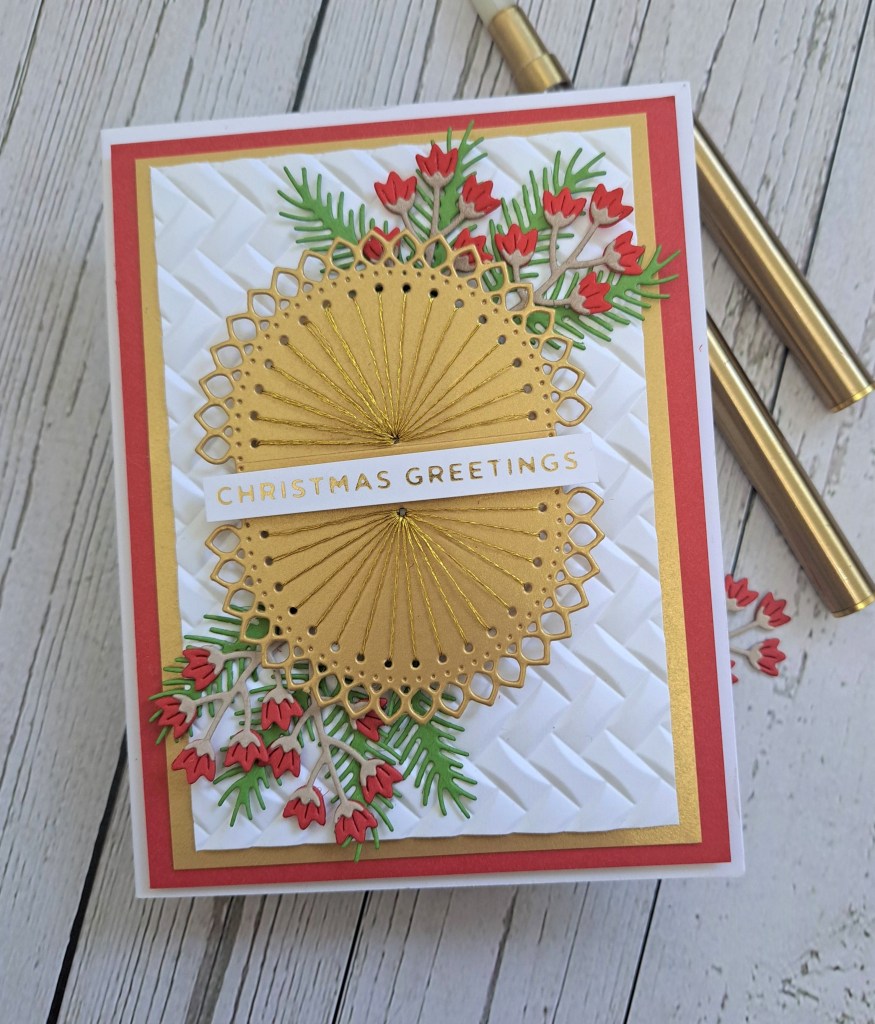
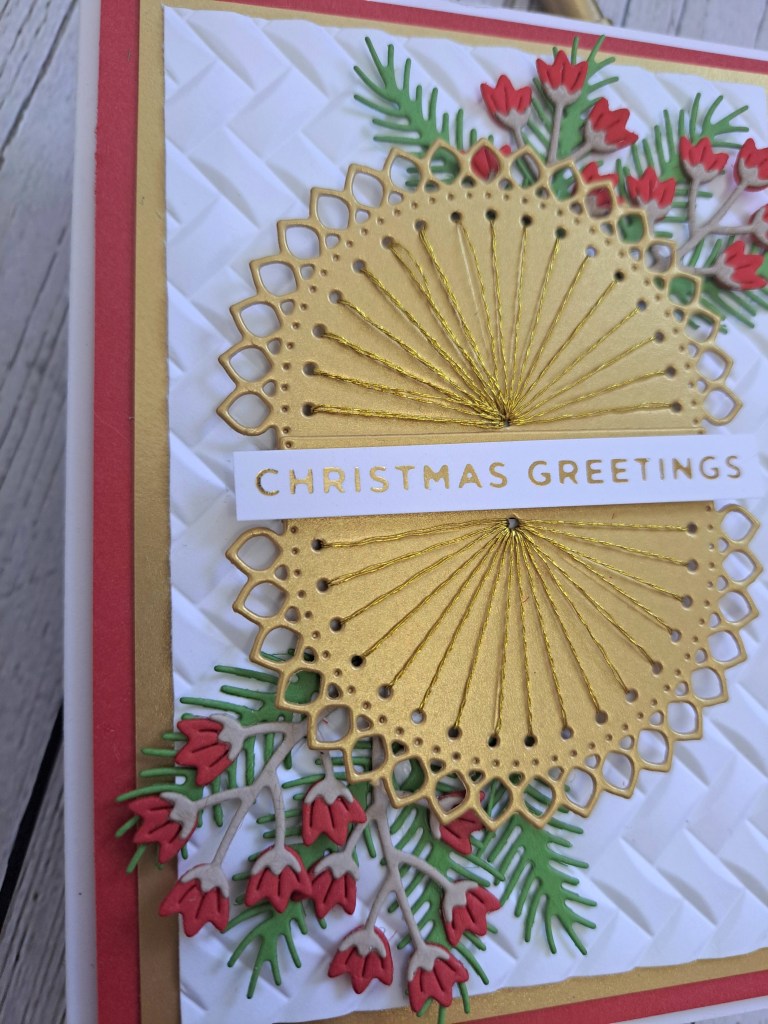
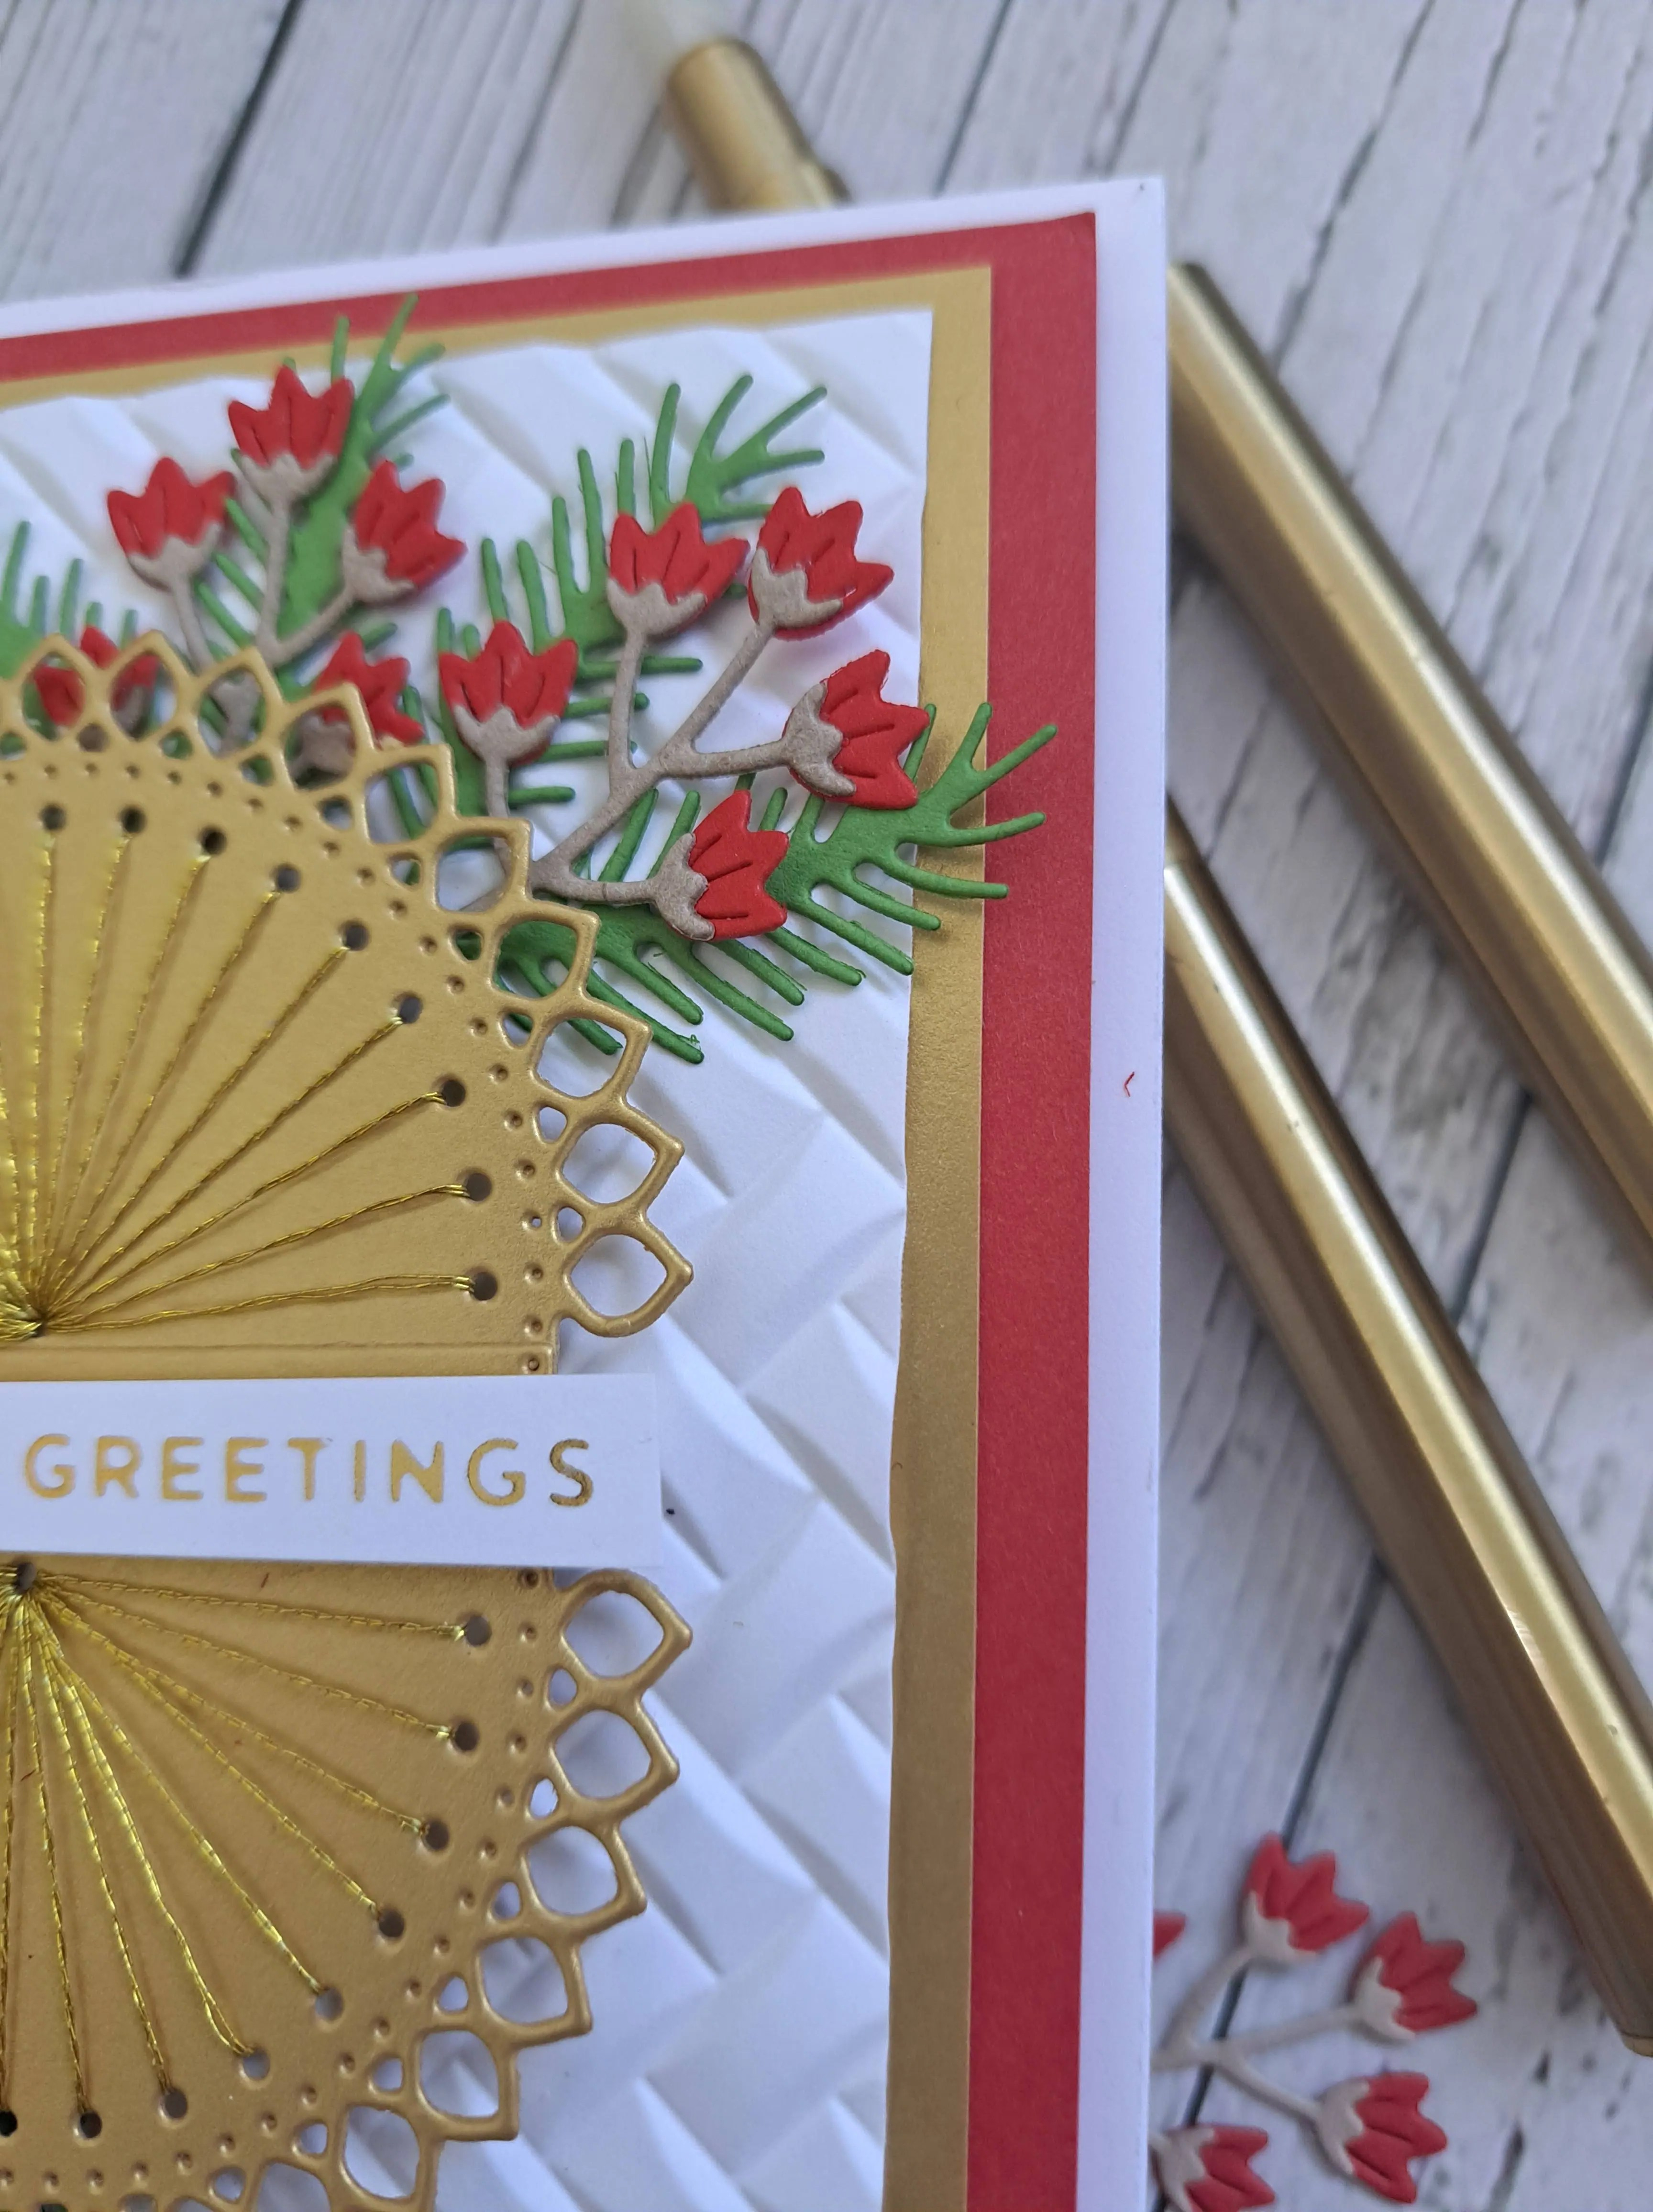
Happy New Year to you all. The ABC Christmas Challenge has started with their Christmas themed challenges. The first is A – anything goes Christmas, B – Berries. Here is my card:

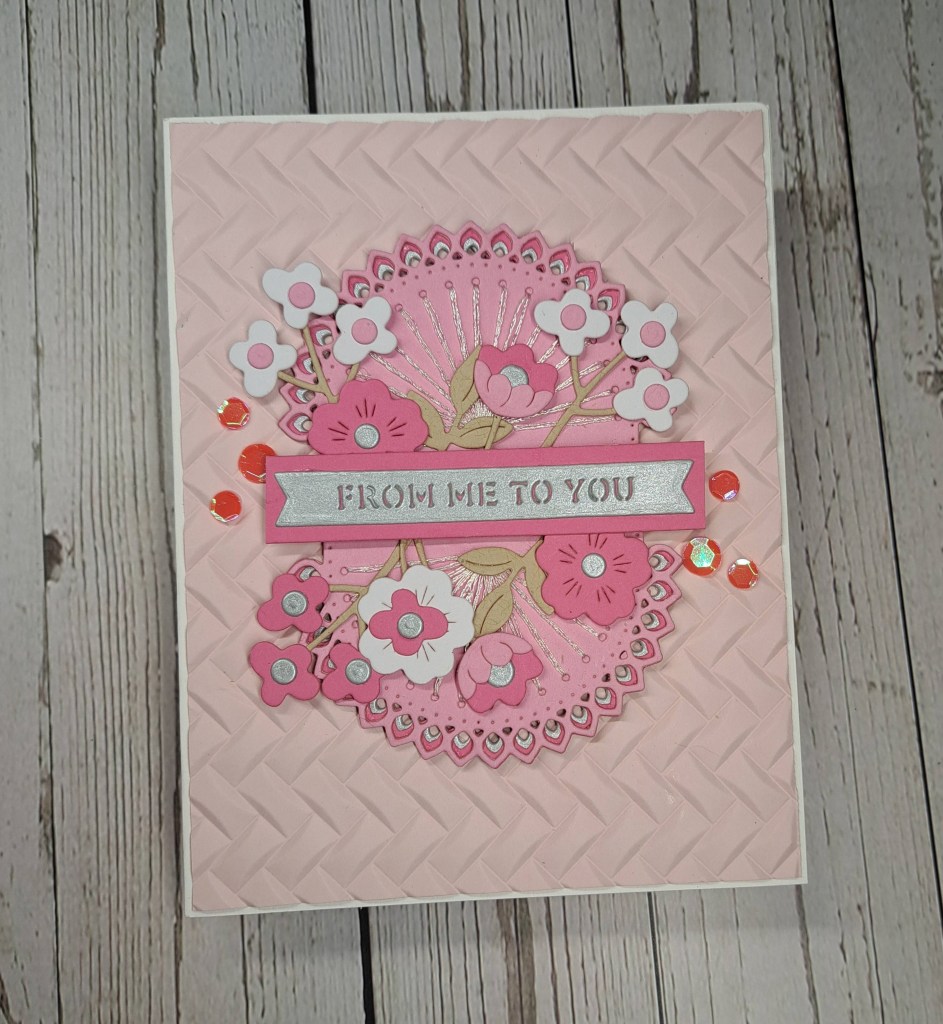
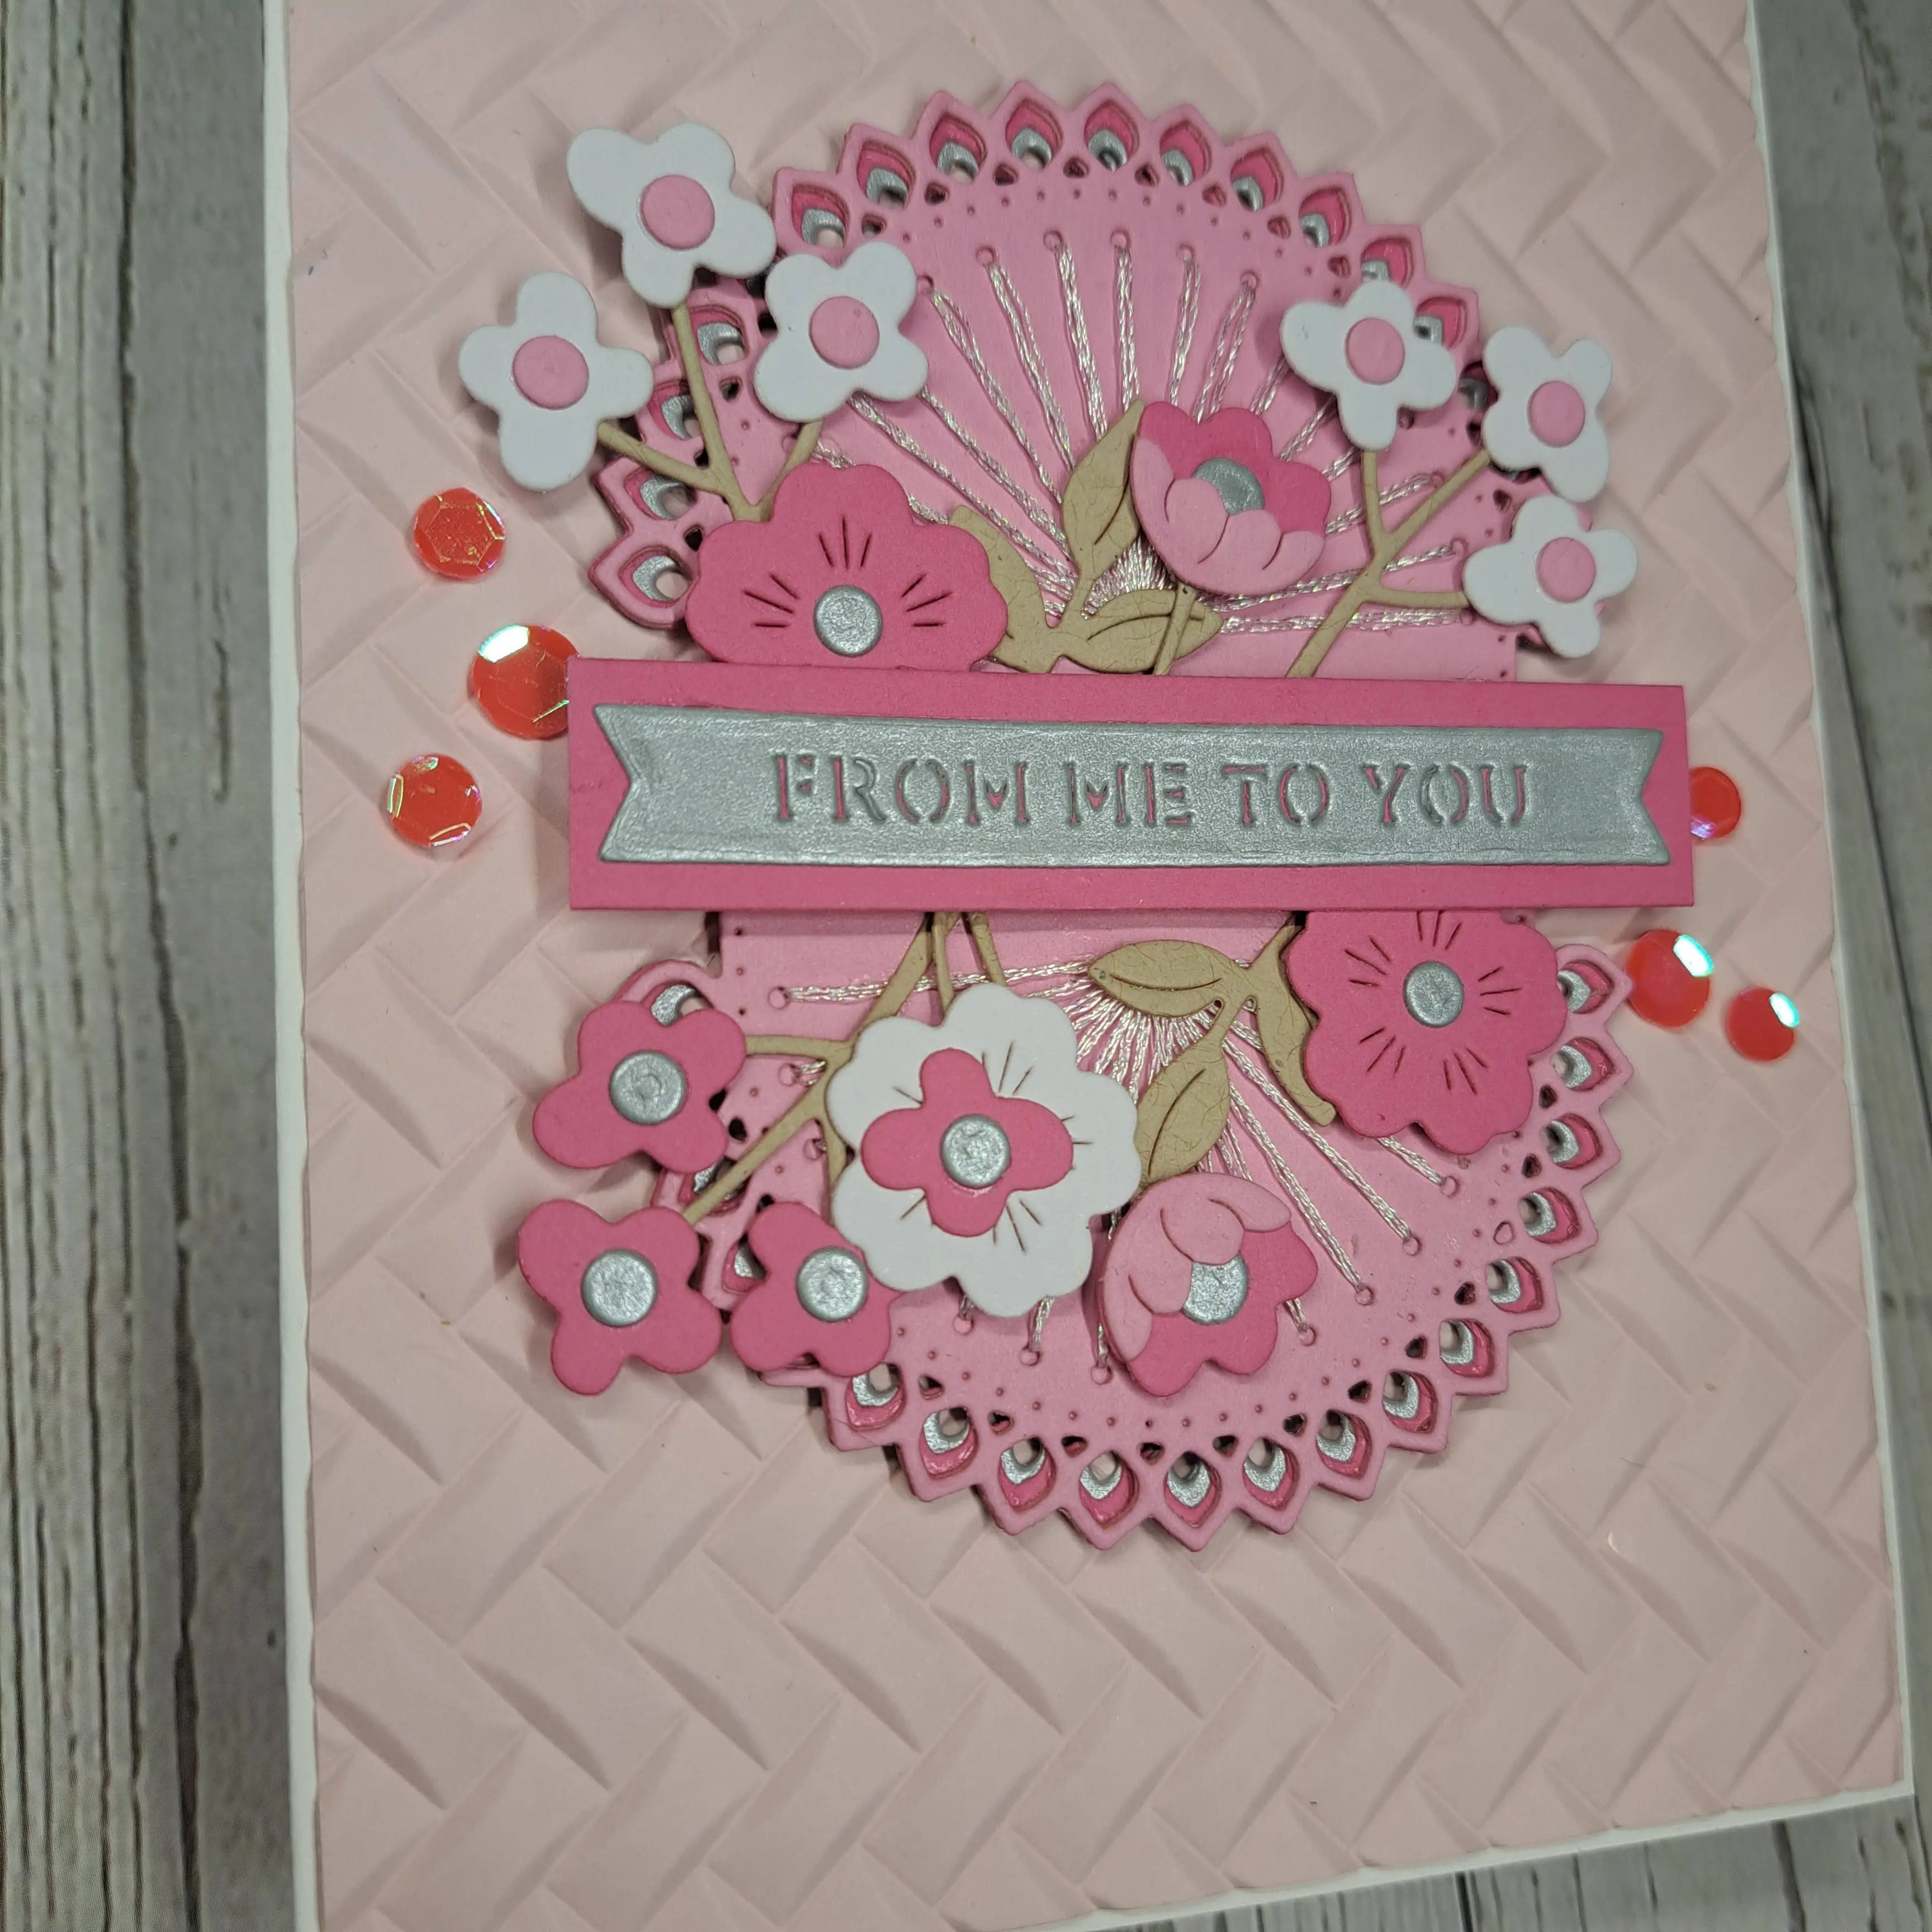
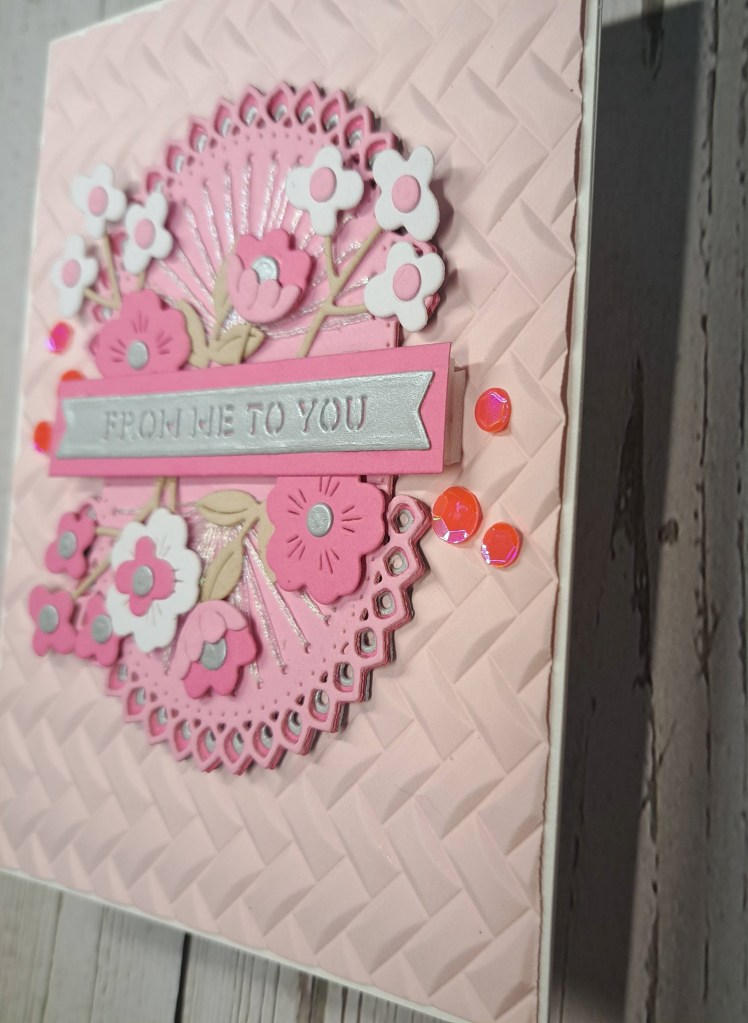
So – pink………I know – but I love the way this looks…… I am not a pink girl in general, but I just thought I’d try this out.
The pink background is dry embossed using a Spellbinders embossing folder, then splattered with white and silver acrylic shimmer paint. Whilst this was drying, I die cut a previously created panel of green mica spray with the Hero Arts holly dies.
The holly was layered onto the pink background using glue for the bottom sprig, and 3D foam for the uppermost sprig.
For the berries, I chose some red sequins.
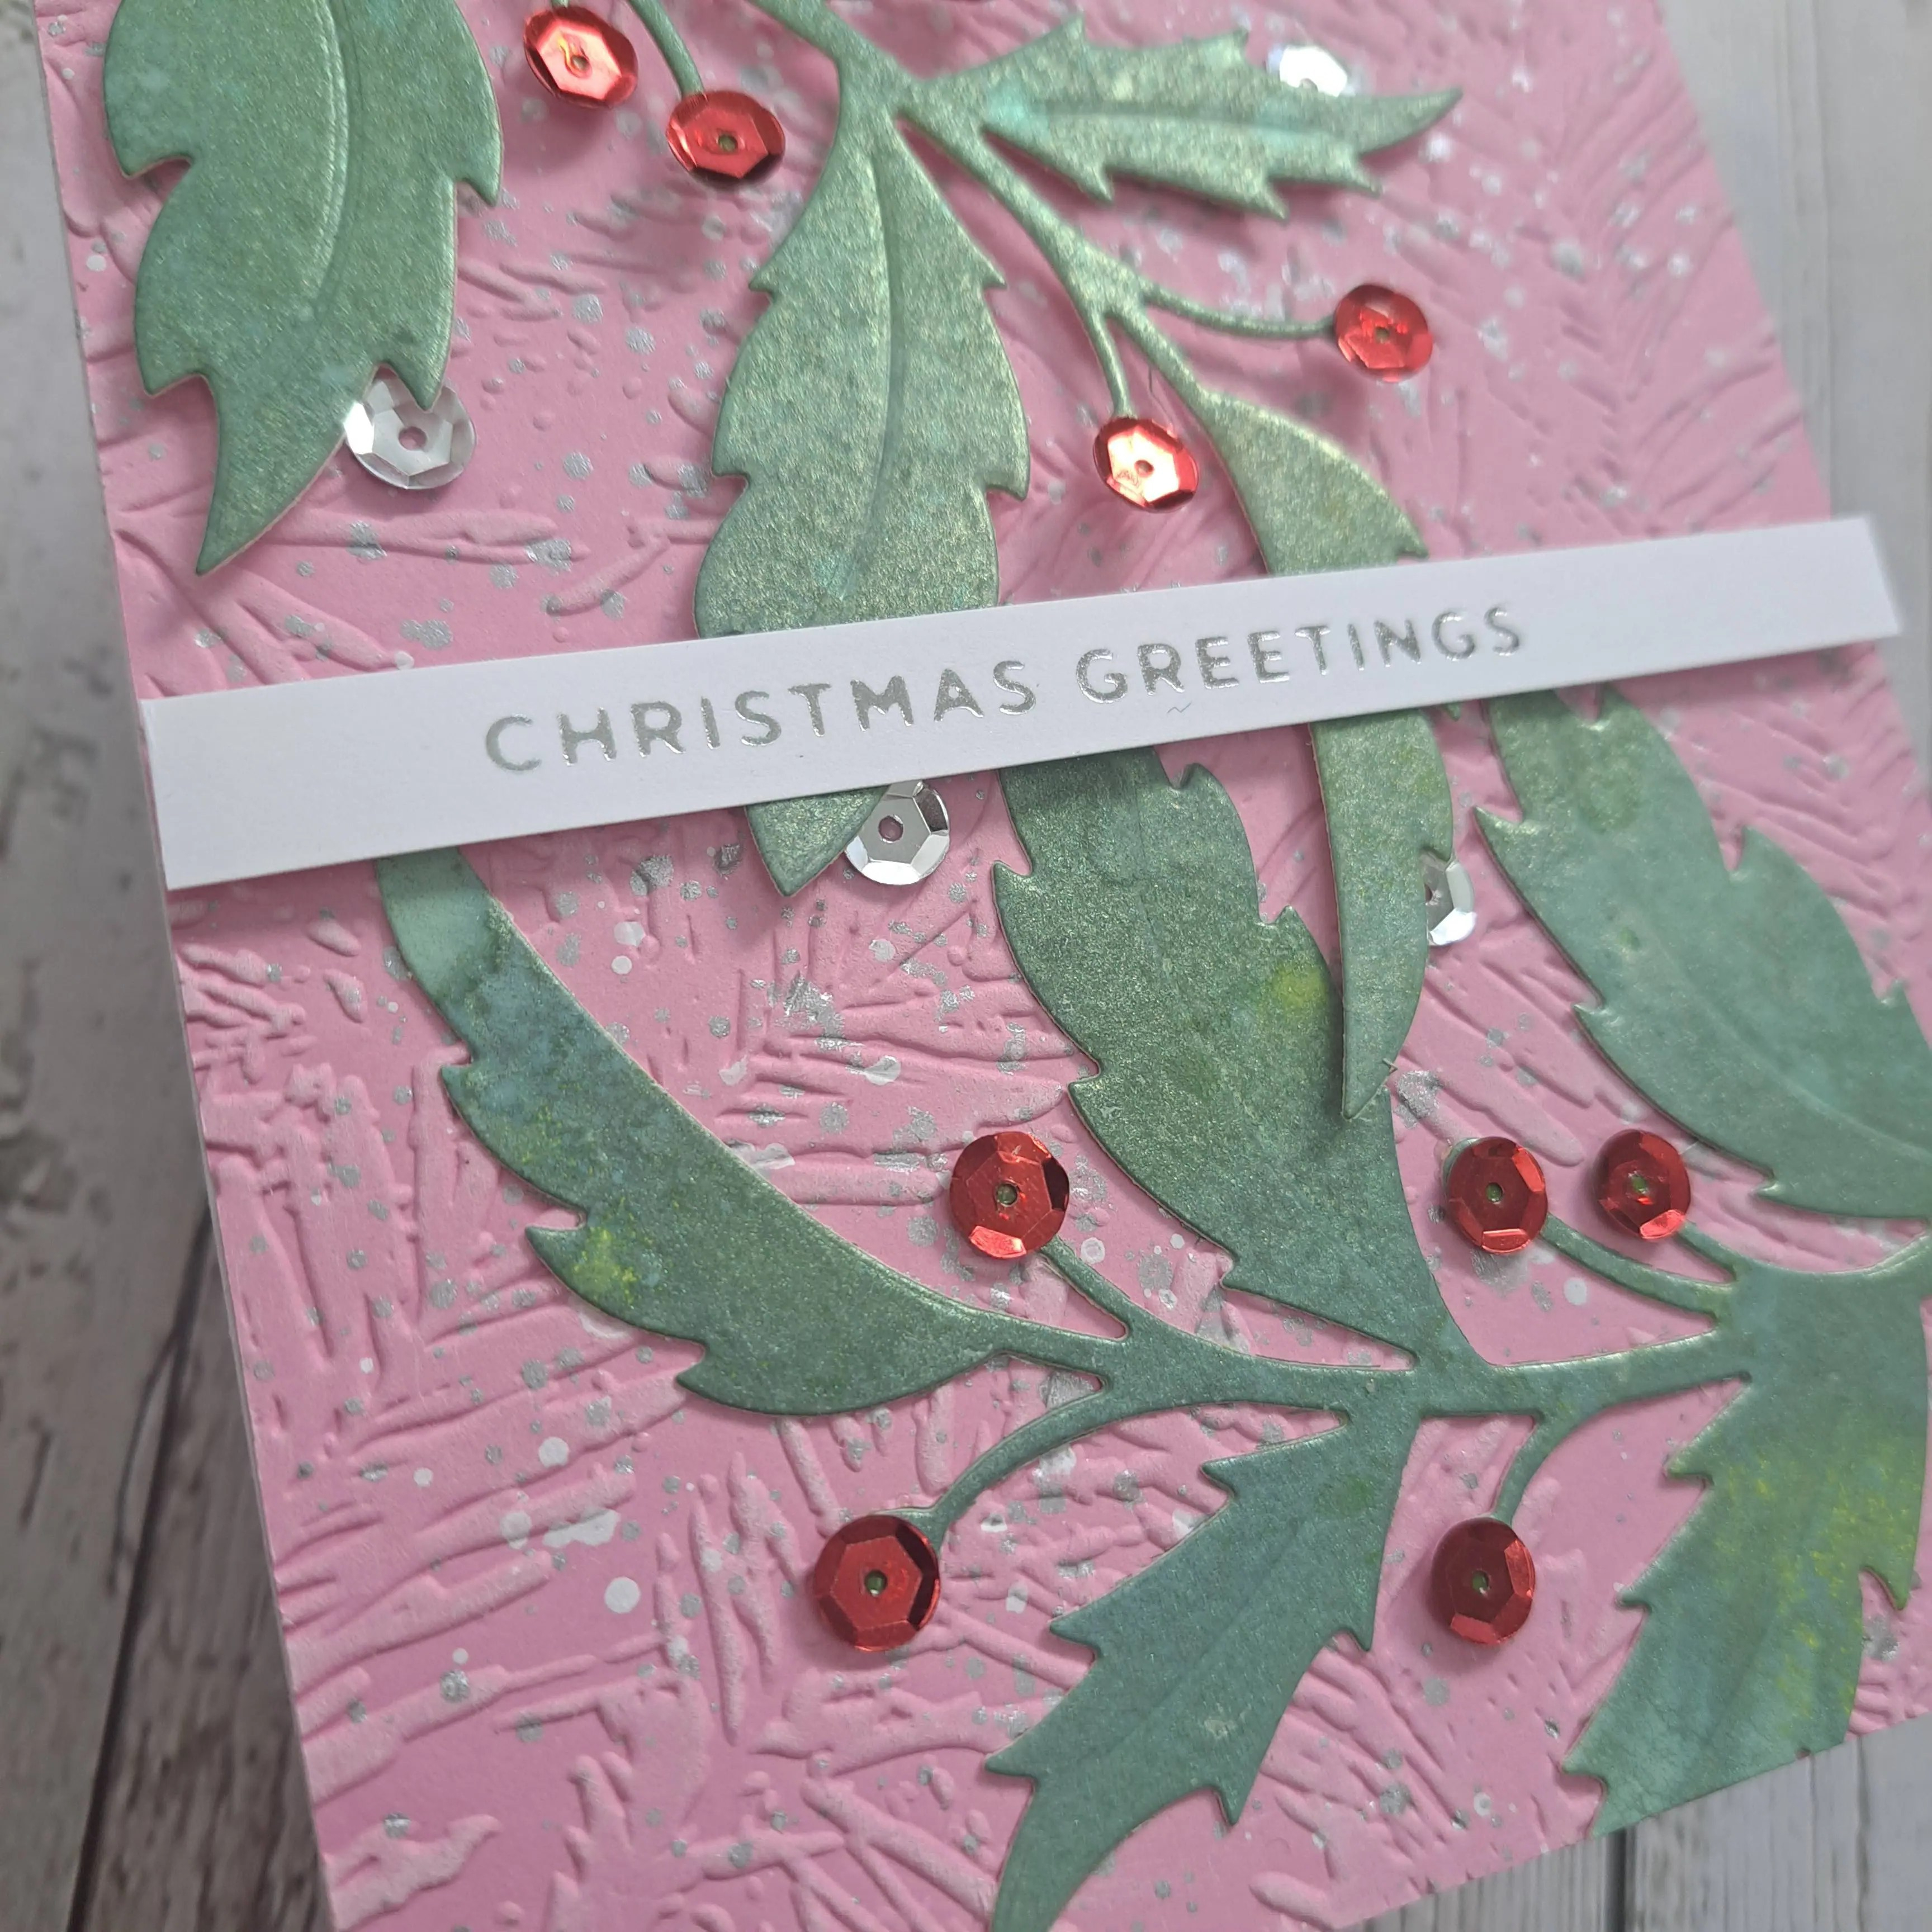
So many shimmer and shine elements, and then I added a foiled greeting strip too…
I hope you can come and join us with your Christmas/festive creations following out themes. xx
I shall be entering the following challenges:
Creative Inspiration – anything goes
Crafts Galore – anything goes
Daisy Chain – no designer paper
Ellibelle’s Corner – anything goes
The Crafty Addicts – anything goes
Love To Craft – anything goes
Merry Little Christmas Challenge – anything goes Christmas
Mix It Up Challenge – anything goes – option of mixed media taken – acrylic paint, foiling, mica sprays