Hello once again everyone. The Alphabet Challenge has started a new challenge. Billie A is hosting, and she has chosen the theme of:
T is for Thank You
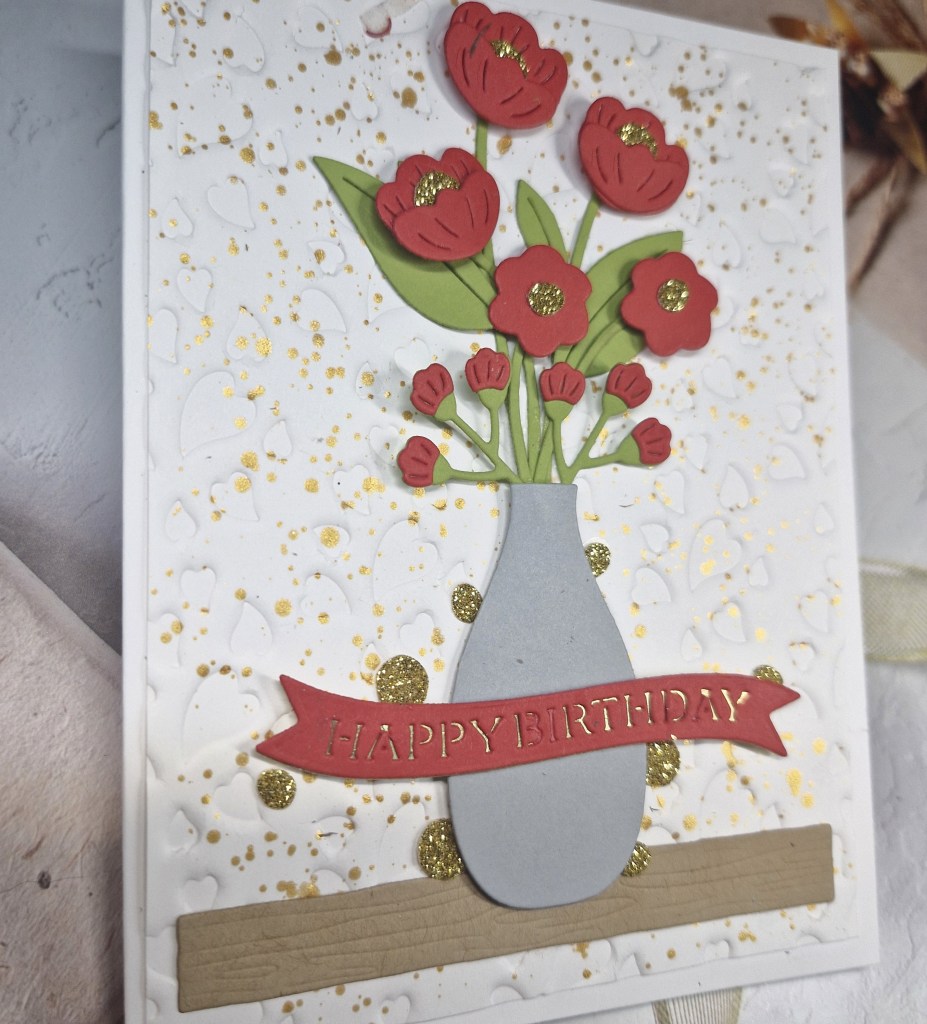
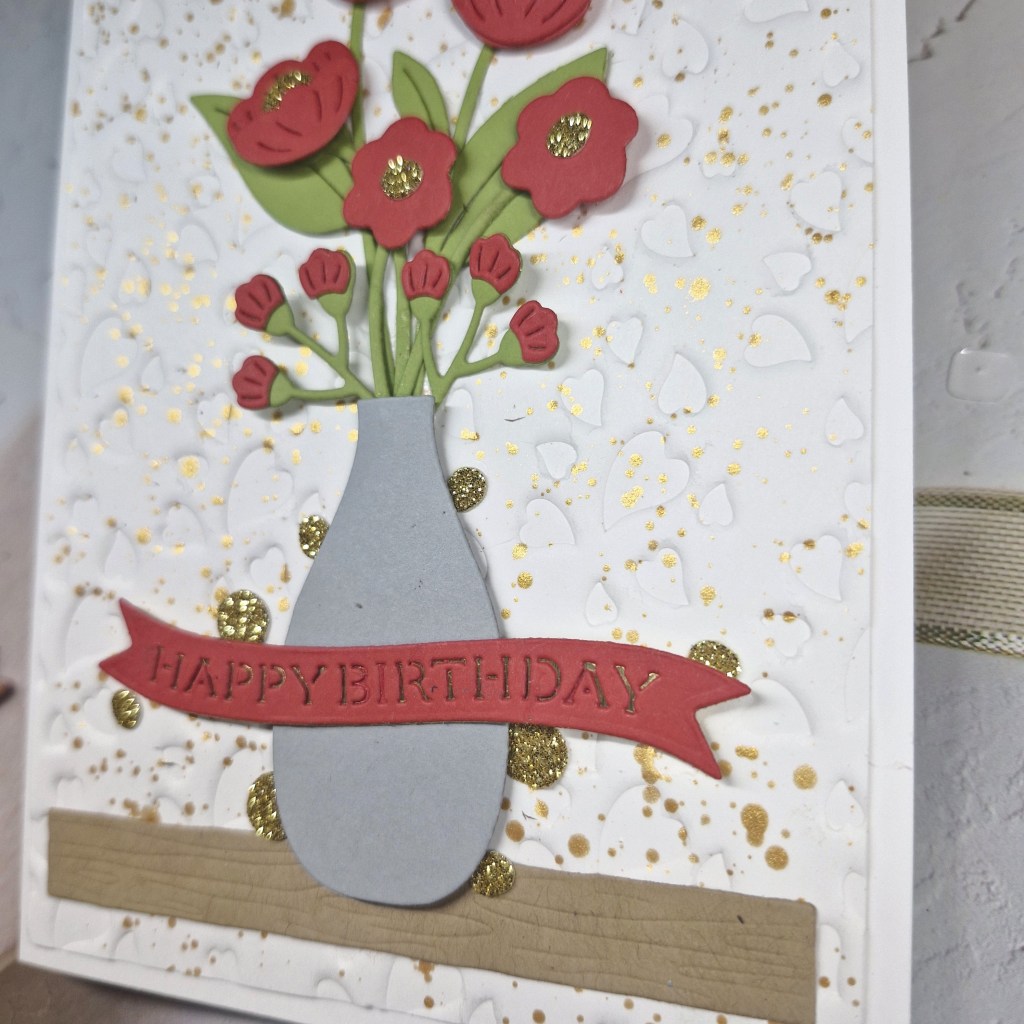
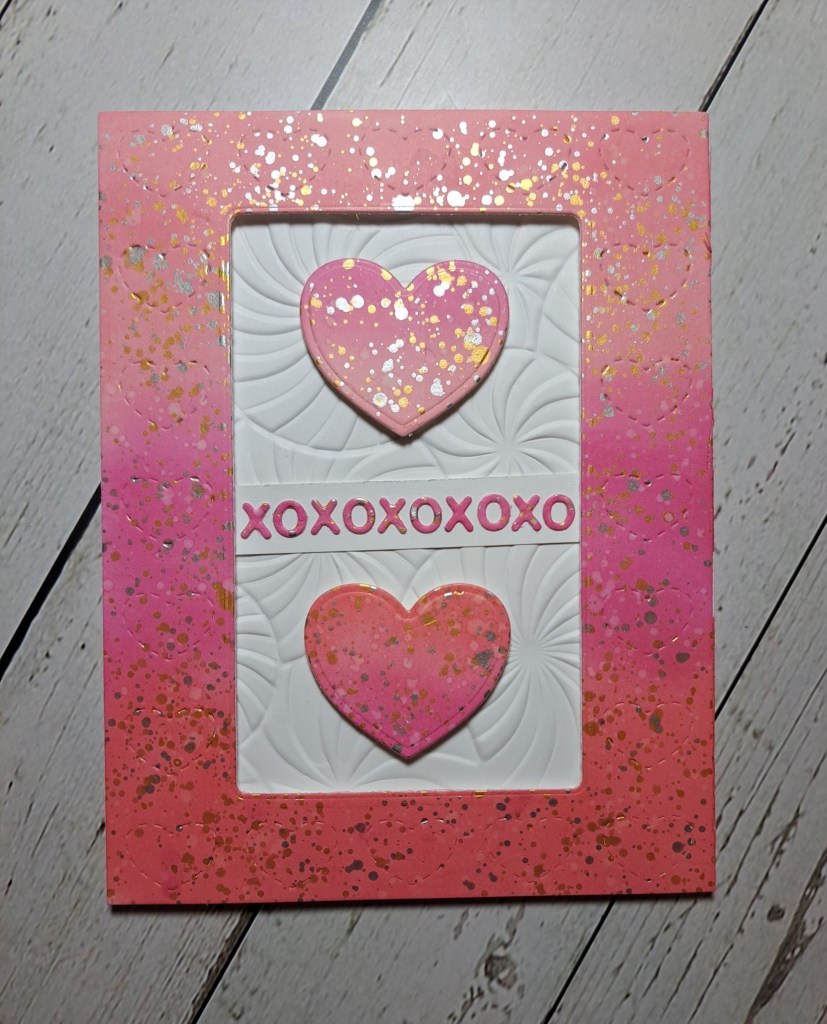
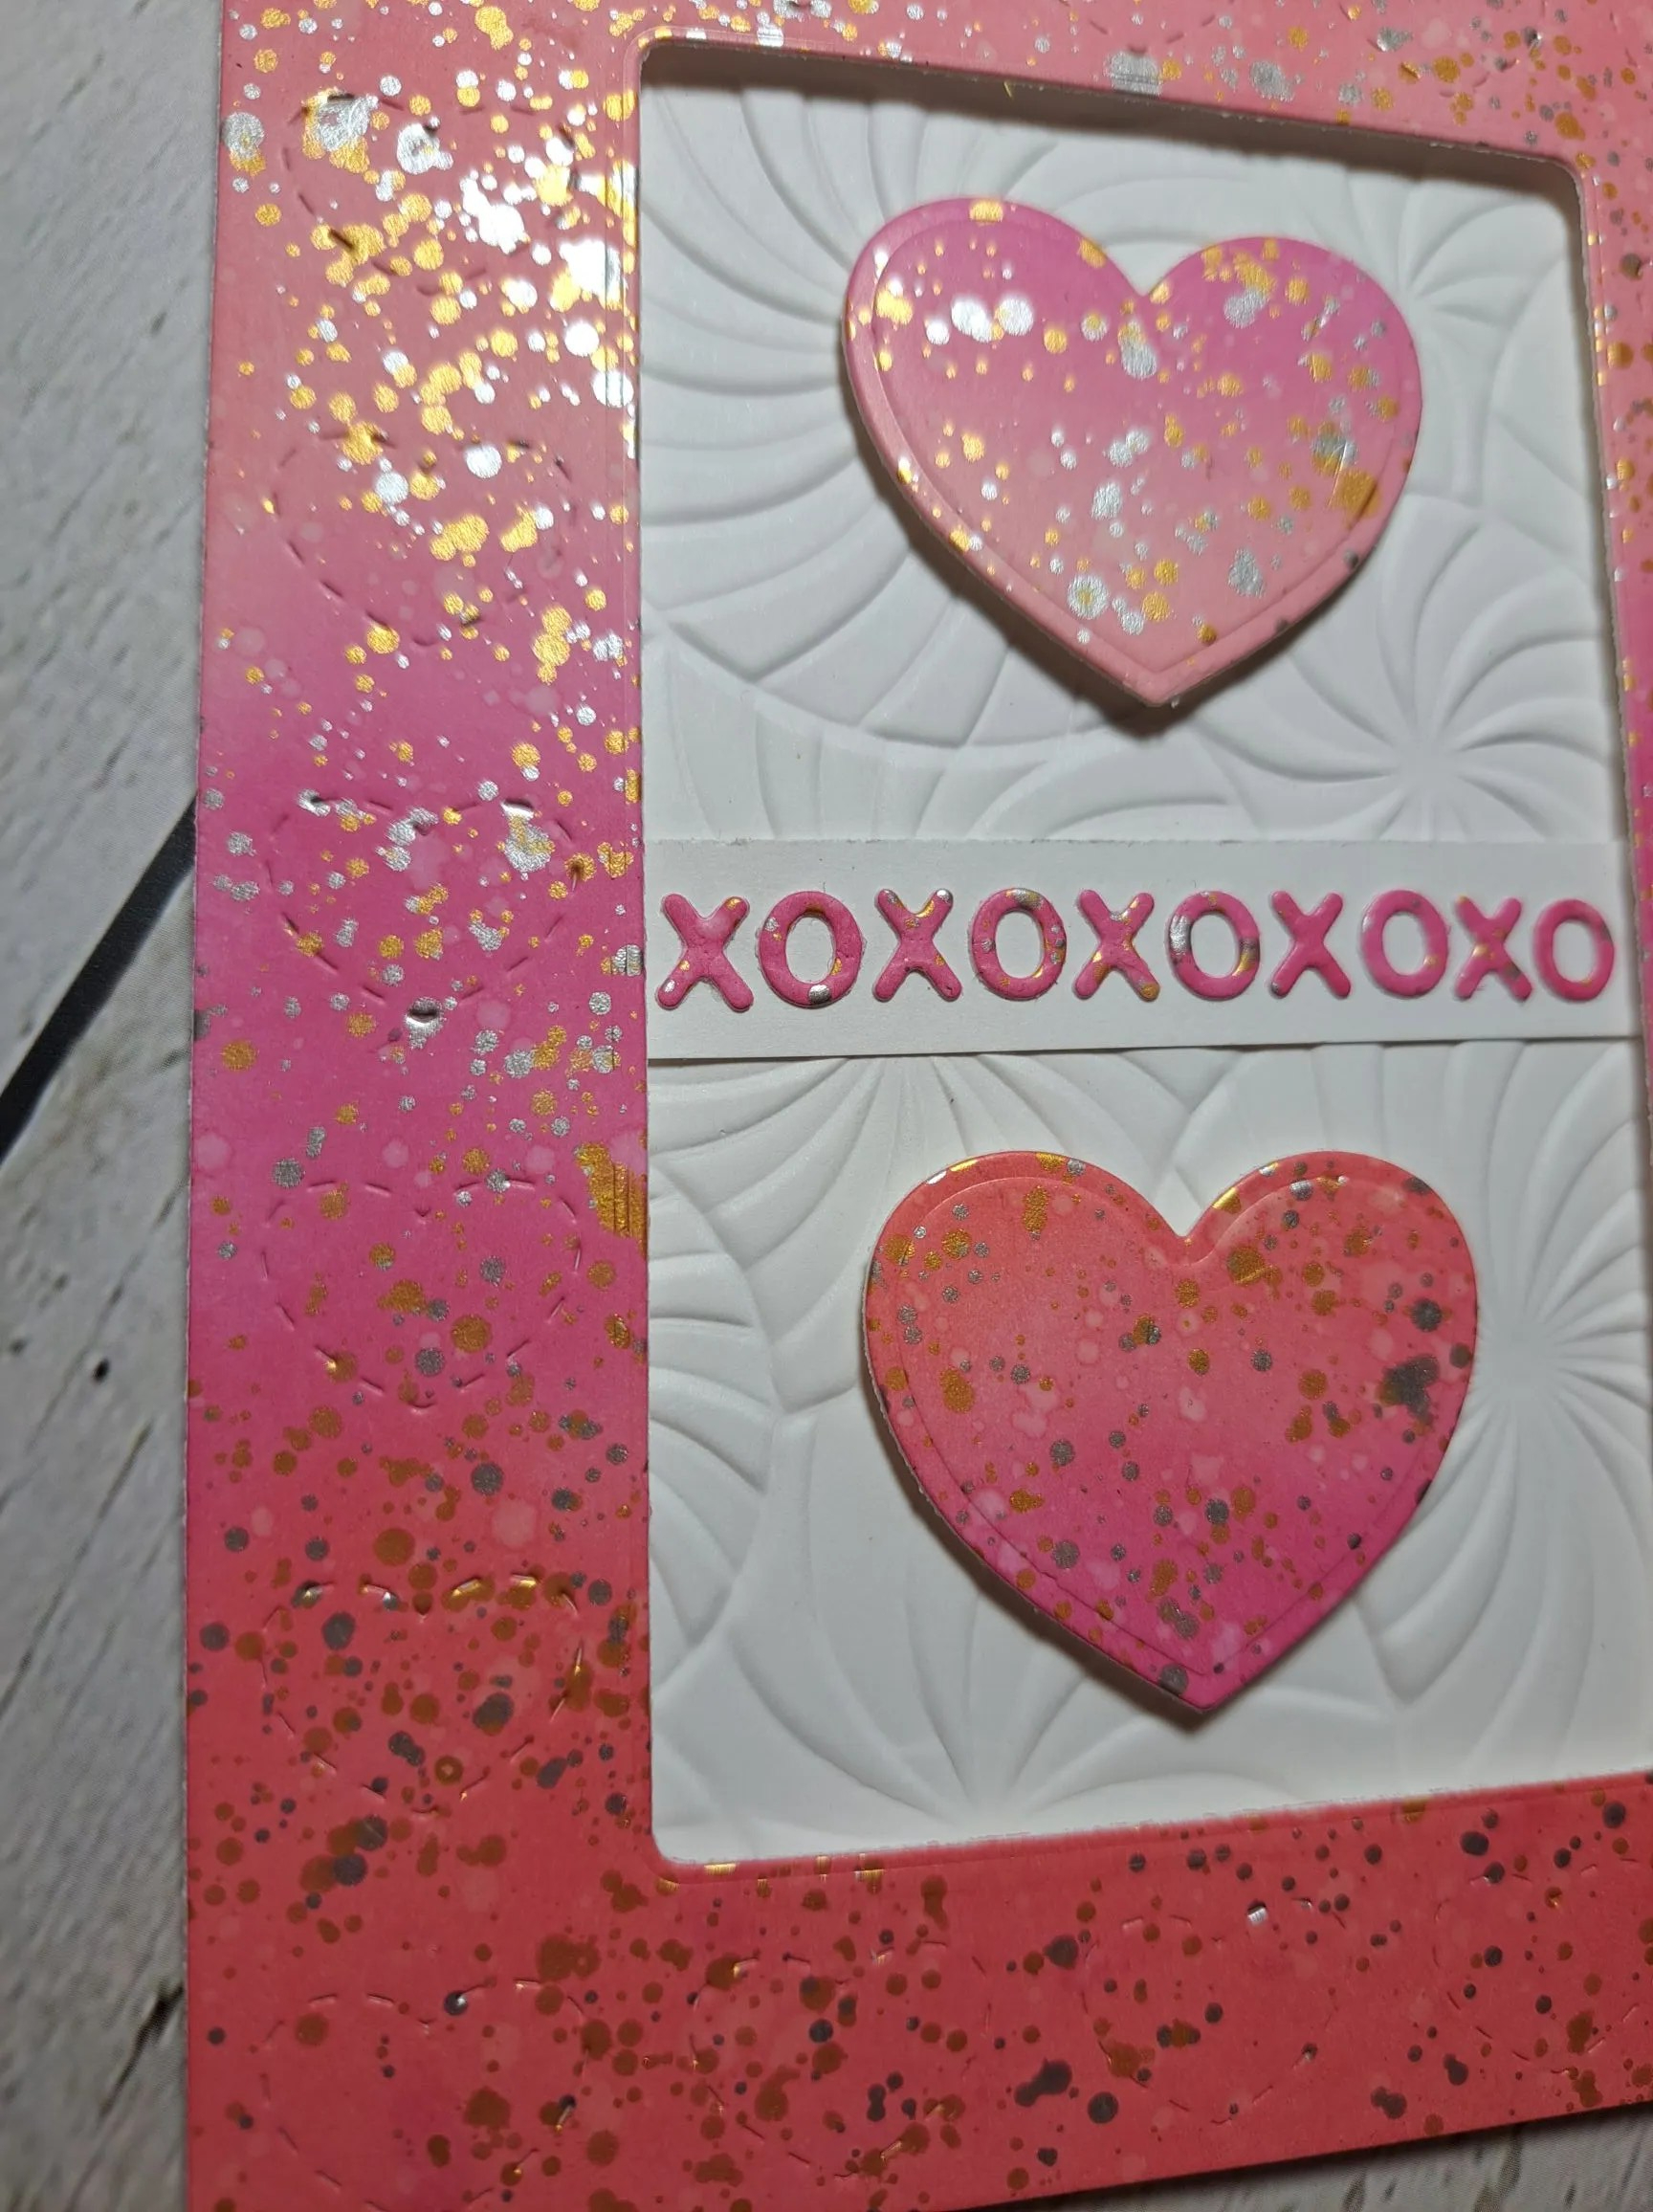
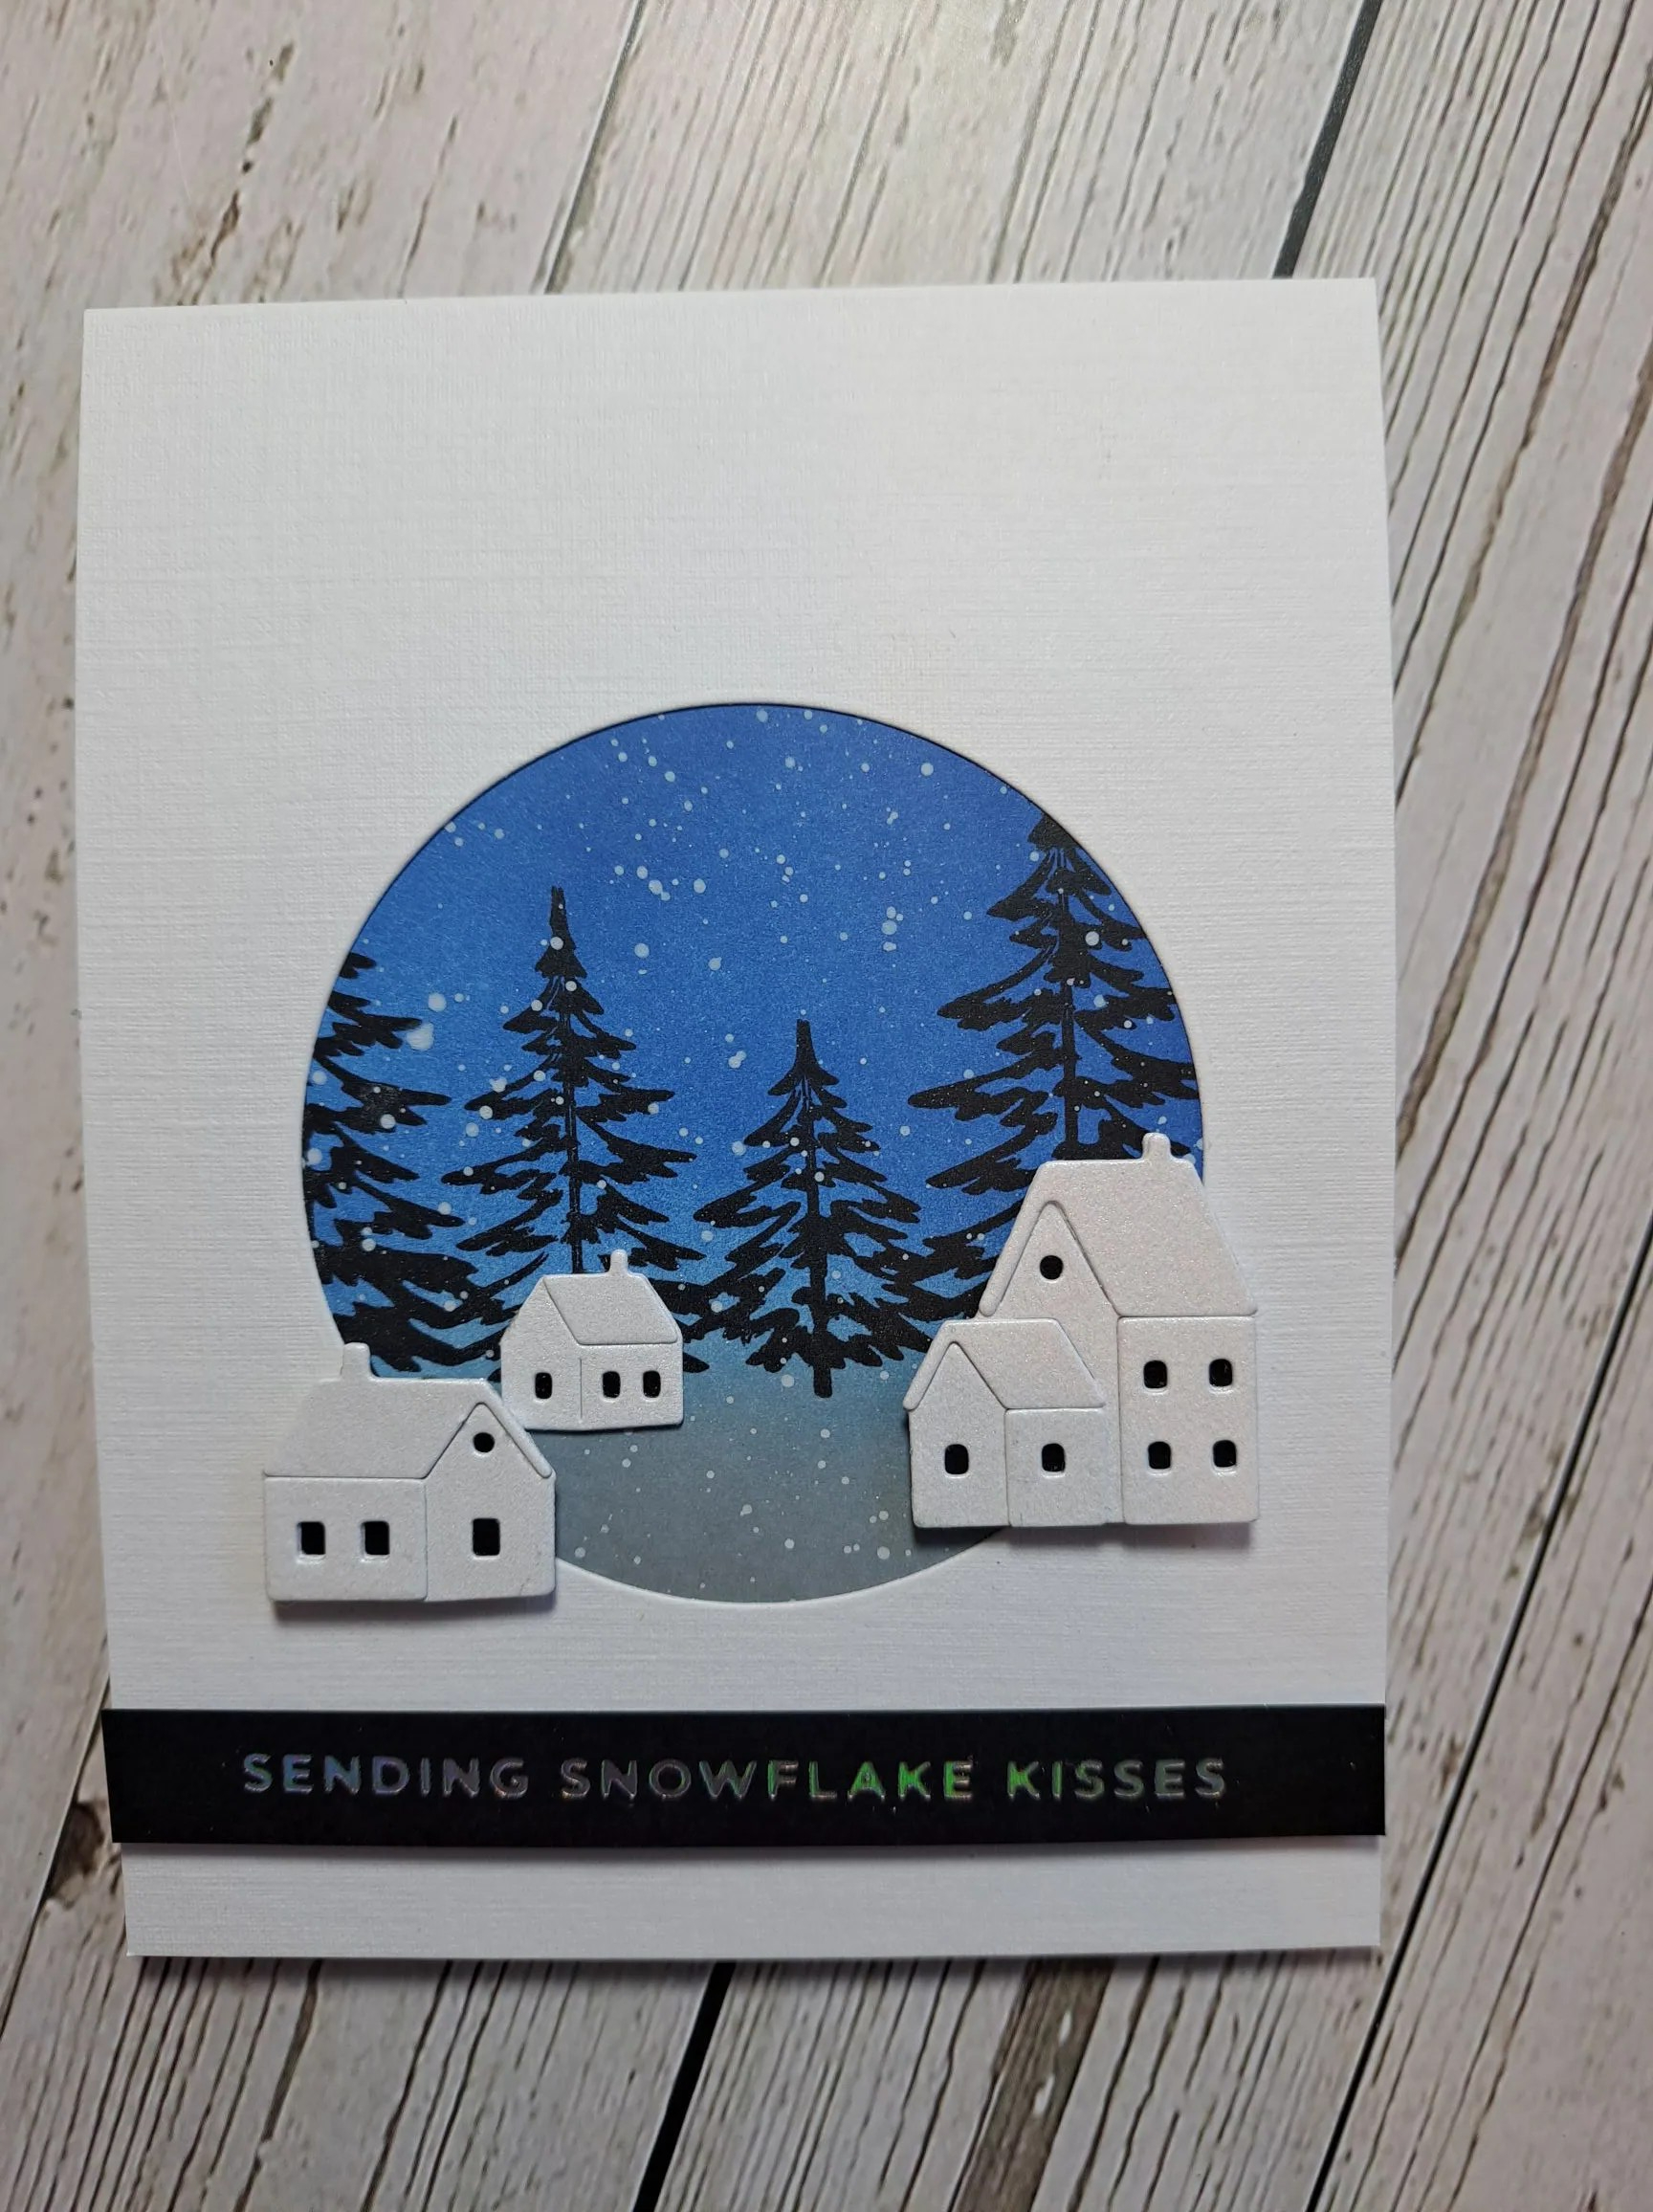
Here is my card:
The background roses are from a Waffle Flower Crafts stencil. A layering stencil. I used the stencil three times on an A2 card panel to create the three roses, just by rotating the stencil each time, and masking off the leaves where necessary.
I then used the stencil to add a few leaves, and found a little stamp with dots on to add more details in the open spaces.
I used my gold shimmery acrylic paint to add splatters. Once dry, I used a foil plate from Crafty Meraki which had a lot of hearts, and dry embossed using the silicone mat and my die cutting machine. You can see the subtle background hearts:
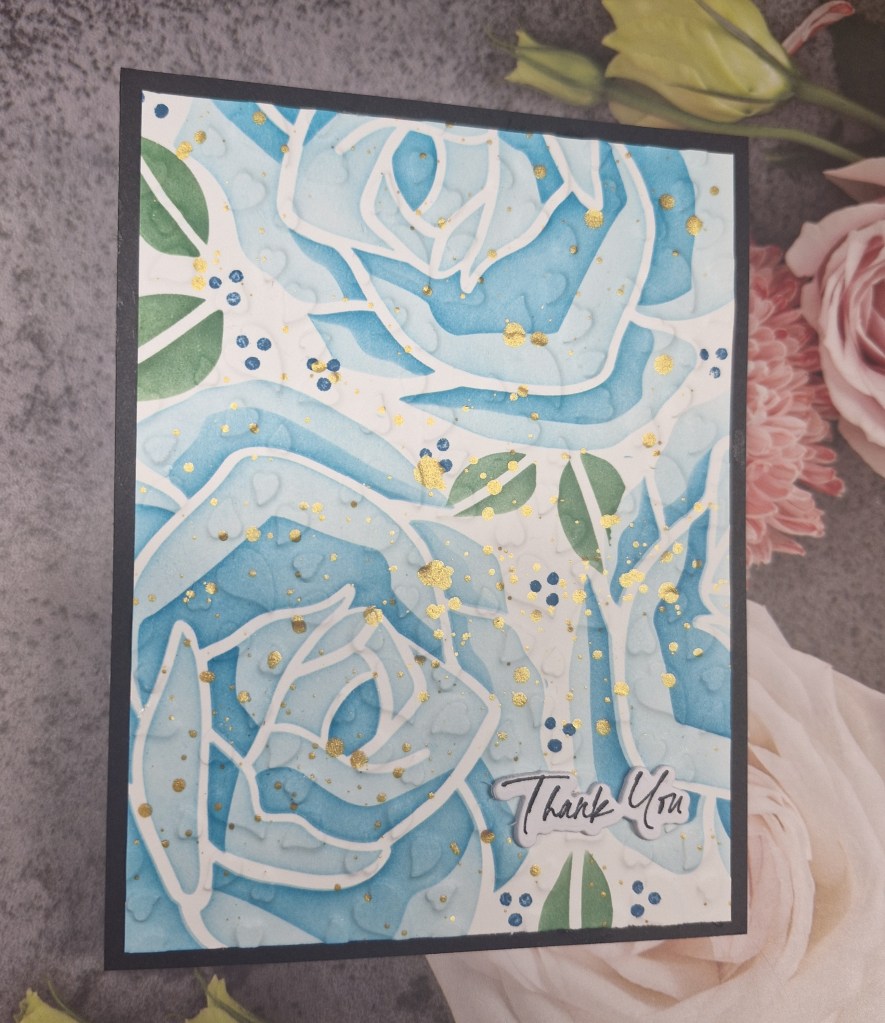
This panel was cut down and added to a dark green A2 panel leaving a small border around the edge, then the stamped and die cut sentiment was added.
I may have to use these background foil plates more often for an embossed look – if I can remember what sandwiches to use each time…
I hope you can come and join us for this challenge. I look forward to seeing you in our gallery. xx
I shall be entering the following challenges:
Lil Patch Of Crafty Friends – anything goes
A Perfect Time To Craft – anything goes
MAWTT – Thank You
2 Sisters on the Blog – anything goes
Crafts Galore – anything goes
Give A Crafter A Cookie – anything goes
Stencil Fun – stencils – option of hello/winter not taken