I just need coffee….

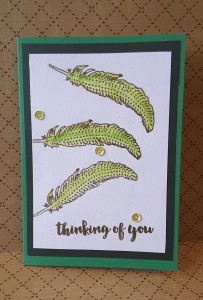
I have gone completely different today. (you never can tell what I’m going to do) Clean and simple, mixed media, many layers, much stamping – I would not like to be predictable.

For this card, I have kept it very clean and simple, just using a sentiment – to reflect how I feel about coffee! – and a couple of images from Altenew stamp sets ‘Coffee Love’ and ‘Coffee Talk’. I like the variety of stamps you get in these sets, and are ideal for quick cards. I have previously used the stamp with the coffee beans for adding detail to the background, but this time left it as is.

I started by stamping my images onto Crafters Companion water-colour card, using my Misti, as the card is textured. I embossed with black detail embossing powder, and used my Zigs (again!) to water-colour the images. I blended the colours out, and on the coffee pots I even used two different tones of colours. I feel I’m getting there with colouring, still keep trying. I personally feel the Zigs are the best water-colouring pens for me, on this particular card stock, and as I have the 48 pen set, there are plenty of colour choices.

I cut the images out with the matching die set, on my Grand Calibur, which meant I could cut the lot of them out in one go. (Making several cards for the charity) I played with the layout a little on my white card base. I had a choice of sentiments I could have used, but went with this one. I drink quite a bit of water, and quite a bit of coffee, but the sentiment I used is for when water just won’t do……I am sure many of us have those moments.

I raised them with some dimensionals from Stampin Up. And…………..did you notice? No smudges! At all! Nowhere to be seen! So no sequins needed! Yay!

I am entering this card into the following challenges:

Crazy 4 Challenges – theme of incorporating tea or coffee

Cuttlebug Mania – theme ‘A Nice Cuppa….’

Aud Sentiments Challenge – use a sentiment


Fantasy Fairies


I have been playing with my Brusho’s again……I seem to create quite a mess – on the card and off of it! I was inspired by three challenges today – Cards In Envy, Fab N Funky Challenges, and Stamp with Sarah Kay. The first two challenges were to create fantasy cards, and the third challenge was for a water-colour background.

I started to get my Crafters Companion water-colour card – I had used the last of it! Now what do I do? How can I do a water-colour background without water-colour card? It won’t flow as well. I was in crisis mode! Luckily, their Chesterfield store is a mere 10 minutes drive away…………on with the make-up, did my hair, got in my car – and was back home within the hour. Of course, one has to look around the shop whilst there, doesn’t one? Guess what I found? These lovely, adorable fairies from Lavinia Stamps…..ideal for what I wanted to create. They are quite solid, but adorable. Out with the old idea, in with the new!

So – water-colour card cut square to fit my 7 inch square white card base. I used my Misti to stamp my two images facing each other, one higher, in Ranger Perfect medium. Misti because with the textured card I usually need to stamp twice. Added white embossing powder and heat set it. Then to the background. I thought the white embossing would resist the colours, so I just went on in there.

I wet down the card – both sides – taped it down, and sprinkled my chosen Brusho colours onto it. Turquoise at the top, Crimson in the middle, Lime Green at the bottom. A sort of sky and sunset and grass thingy going on here. Until they ran together! Blinking tape didn’t keep it flat! I mopped up extra colours, tried to stop the red running into the green, then the blue ran down – muddy colour in the middle! Wet it down again, kitchen towel to mop-up some colour, added one colour at a time, dried it, added the others. Don’t you just love kitchen towel??!!

I then used black Versafine to stamp some floral elements from Stampin Up ‘Flowering Fields’ stamp set. An older stamp set, but I like the little images – very versatile. I think it looks like the fairies are playing in a fantasy sunset field, dancing on the flowers – well – that was the look I was going for, anyway.

Attached the watercolour card to black, then added to base card. Of course, I added some glitter, and I think I’ve managed to catch this in the photo – Spectrum Noir clear sparkle pen. Pushed a little extra out and just flicked it onto the card.

I think I’m getting the hang of Brusho’s – I mean, you actually can’t plan very much where they are going to spread to. There may be a knack to them – but I’m enjoying exploring their capabilities…….


Smile in the rain


I have been having a play with a stamp set from Newton’s Nook, and the matching die set ‘Newton’s Rainy Day’. I have this for a few weeks now, and because I really, really struggle with cute animals and colouring, I have been holding-off playing with it. Today has been the day I have girded my loins and just got on with it.

I am not a colourist, I dabble – much like many of us, I am sure – and sometimes make mistakes, sometimes it works out right, but tend to (mostly) have fun playing.

This is my idea of playing. I stamped the main image four times – twice on Crafters Companion water-colour card, and twice on IndigoBlu stamping card. I coloured them all with my Zigs, and added Spectrum Noir sparkle to all of the umbrellas and water puddles at the end.

I found I didn’t know what colours to use except definitely wanted a yellow duck, and definitely wanted a blue puddle – the rest were experiments in colour. The cards with the purple cat and the red umbrella, and the brown cat and grey umbrella were in the IndigoBlu stamping card. I found that the zigs didn’t colour that well on this card, and left pen marks. The colour sank into the card very quickly, and I went over the imaged two of three times to try and even things out.

For the water-colour cards I wet down the area of card first, then went in with the colours, using my water-brush to spread the colour around a little, for a more uneven and water-coloured effect. I like the look of the texture of the water-colour card, so didn’t add too much depth.

The ‘Smile’ sentiment is from Altenew, which comes with a stamp and die set, but I only used the die. To get a full yellow effect, I wet down a piece of water-colour card, then ran my Stampin Up ‘Daffodil Delight’ ink pad across it. I used my water-brush to even the colour a little – but not too much – dry the card, then die cut the word out. The little sentiment is from the same Newton’s Nook ‘Rainy Day’ stamp set. I thought the two worked together quite well.

As I am trying for more clean and simple cards, I left them at that. No embellishments, no added sequins – just as they were.

I will be entering a card for the following challenges:

Addicted to Clean and Simple

Crazy for Challenges

Make My Monday Challenge

Addicted to stamps

Crafty Catz weekly challenge

Colour Crazy Challenge

Crafty Friends Challenge

I thought I’d give you an update about my late, late, late Christmas presents for my friend, and one week late on the birthday card and presents – all received very gratefully and graciously! Thank goodness.


Brusho and butterflies


I’ve had a little play with my Brusho’s! I don’t know if this is what you are supposed to do with them, and I don’t know if this is the effect one hopes to achieve – but I like it! Such a little burst of colour. Like magic when added to water.

The inspiration for playing with my Brusho’s came from the Addicted to Stamps and More site. There is an inspiration photo which immediately brought to mind the small set of Brusho’s that I have. I haven’t really experimented with them, but thought I would give it a go.

I tried three techniques, and actually like them all, for different reasons. The first thing I did was to cut some of my Crafters Companion water-colour A4 card into 4 pieces. That way I could experiment with four different methods at the same time, rather than try one, and complete the card, then another etc. I like to look at the different outcomes all at once, then decide what I want to do with them.

First technique: wet the water-colour card front and back, then drop my Turquoise Brusho onto it very gently, slowly, miniscule fleck by miniscule fleck – it still burst all over my card! Then my card started to buckle, then the colour was running to the edges…..so I took my piercing tool – which I use to poke out the bits from intricate dies – and pushed the middle down, to keep it as flat as possible. I wanted the colour in the centre of the card, not the edges. This is the piece of card I used to cut my Tim Holtz Butterfly Duo out of, and embossed those same two butterflies with the matching embossing folder. I then added those butterflies to a piece of white card, and drew the antennae on with a black gel pen. I will think about adding a sentiment, but actually quite like them as they are.

Second technique: I dropped flecks of Turquoise Brusho onto dry water-colour card, then sprayed water onto it. Only a few drops of water at a time, again very sparingly, so I could try to determine where the colour and water was going to go. It didn’t quite work out that way, as the burst of colour really is very dramatic, but I liked the effect anyway. I kept some of the areas drier than others, as I like the effect of the Brusho grains when they are not completely saturated by water. I then used the same Tim Holtz Butterfly Duo die and embossing folder but with white card, and adhered the butterflies plainly and simply onto the spattered blue card.

The third technique was to stamp and emboss a butterfly and floral element from an IndigoBlu stamp set called ‘Nature 1’. This is a lovely stamp set, which has clouds, and grass, edge of a tree, and a gorgeous sentiment. The butterfly from this is quite solid – what I wanted – so I stamped the butterfly and the flower/thistle/weed (don’t know what it is!) with my Ranger Perfect Medium, embossed it with detail white embossing powder from Cosmic Shimmer, then wet the card and dropped my turquoise Brusho onto it. This time, I wanted a more ‘washed’ effect behind the butterfly and flower, and saturated the grains very well, let them run all over the embossed images, just so the image would be highlighted by the background colour, as the embossing resisted the colour of the Brusho, as expected. (Was that a really long sentence? Did I waffle on a bit?)

I then added some Tonic Crystal Drops in Midnight Blue to three of the edges, stamped a sentiment from the Altenew stamp set ‘Birch Land’ and adhered that with foam pads.

I have four other colours of Brusho’s and I feel I may be making similar cards with similar effects in the very near future. However, I may also have to do an internet and YouTube search for hints and tips when using these – but still going to have fun experimenting with them.

I shall also be entering one of these cards into the following challenges:

Just add ink

Crafty Friends Challenge Blog


Quirky Owls

Having had a long week at work, like many of us I am sure, I turned my head to card making this evening. I was looking through Paper Playful challenge site and two challenges took my fancy. The first was from Double D challenges, with the theme of things that fly, and the second was from Simon Says Stamp Monday challenge, with the theme of things with wings.

I had bought a quirky stamp set from ‘Hampton Art – Laugh Out Loud’ stamps either last year or maybe even the year before, but haven’t had a chance to add the sentiments to a card. The sentiments on the stamp sets are quite different, and I am sure they couldn’t be used on everyday cards, and certainly not on the cards I make for charity.

I decided I would use one of the sentiments along with one of the images from this stamp set from Stamp Addicts ‘Owl Be Yours’. I went with the three owls which seem to be saying ‘speak no evil, see no evil, hear no evil’ as it reminded me of when my two close friends and I go away together. We would have so much fun, and I am sure at points during the days away, one of us would be covering our eyes, one of us would be pretending not to see, and one of us would be pretending not to hear. Aaaahhhh – the memories!

I started by stamping the three owls with Ranger Perfect Medium, and embossing in detail black from Cosmic Shimmer. I new I was going to colour, but was not sure whether to water-colour or just normal colouring. I stamped images several times so I could play……

The colourful owls I spent some time with my Zig markers, not using any water, just blending two tones of the colours together. I wanted vibrant – and I think I got vibrant. I didn’t know what I was going to do with the colourful images, but they are ready for something in the future.

My entry into the two challenges was quite simple. I stamped and embossed in black, and gave a water-colour wash as the background using my Aquatints. I did make a mistake – again – and coloured the background in a yellowish colour, then went below the owls with green – so far so good, then I went above the owls with blue. So – what do you get when you mix blue and yellow? Yep – green! I therefore had a totally green background. So – wet the background down, removed most of the colour from the top half, then added a washed-down blue. Sorted.

I didn’t want the owls the same colour as the background, but didn’t want to colour them, so I used good old kitchen towel, wet it, and removed the colour from the owls, and slightly around the outside of them. A sort of bleach effect – but not totally removing the colour. It almost gives the impression of a halo, I think.

Final touch was adding the sentiment from the Laugh Out Loud set, stamping in black Versafine, and layering on the bottom of the card.

A good bit of playing to conclude the weekday…….

Tulips

I suddenly realised today how close we are to the end of March – hasn’t time flown? It only seems yesterday that we were celebrating the New Year, and we are now celebrating the appearance (probably) of Spring. I love the flowers which are now starting to appear – the daffodils in full bloom, then we have the Bluebells to look forward to. We have loads of bluebells covering the gardens around here, and a carpet of blue is definitely something worth seeing.

For this card, I have used inspiration from the Altenew challenge for March with the gorgeous inspiration photo full of colour, the Simon Says Stamp Wednesday Challenge of ‘Anything Goes’, and Make My Monday Challenge with the theme of ‘white embossing’.

When I looked at the inspiration photo, I thought of my Tulip stamp and die set, but I didn’t quite know where I was going with it. I stamped approximately 16 full tulip heads in black Versafine, and embossed with clear embossing powder. I didn’t want a thick outer line, which is why I used the Versafine, but just something to outline the flowers and differentiate them from the background. I also stamped and embossed the stems, all of the variety in the stamp set, just in case I wanted them.

I wanted to water-colour again, so took my Derwent Inktense pencils and had a play. I did some flowers all in one colour, then added a darker colour, merging the colours together. I know that tulips are usually a single colour, but my  variety of tulips are a mixture of two, if not three colours! I used the three coloured pencils in the photo above – Tangerine, Sun Yellow, and Poppy Red. The pencils certainly do pack a whole load of ink and I really, really enjoyed playing with them.

I then cut out the whole bunch of flower heads with the matching die set. I must admit, it took a bit of manoeuvring to get the dies to sit just right around the flower heads – some cut off to one side, but I think I finally got the hang of it.

Once I had the flower heads and stems, I started with put them onto a 7 inch square card base. I started laying the flowers down, added the stems, removed the stems, re-arranged the flowers – this process took me approximately 20 minutes, until I was happy. I decided not to use the stems, and arranged the flowers into a shape which slightly resembles a heart. Can you see it? Is it just my imagination?

For the background, I wanted to add some interest, so used my Sue Wilson A4 embossing folder ‘Checkboard’. This is a dimensional embossing folder, called a ‘PinPoint’ embossing folder, and gives an impression of a trellis. I know that tulips don’t climb trellis’s – but artistic license is certainly used whilst making this card. I embossed white card, and added straight to the card base, re-arranging my flowers yet again, and sticking them down using foam pads.

Now for the sentiment. I didn’t have a whole row to place a long sentiment, so used two of the ones provided in the tulip stamp set, and cut them out with my Stampin Up ‘Bunch of Banners’ framelits, putting one on the top left, and the other part on the bottom right. That way I thought the eye would be drawn across the whole card.

Quite a simple card, but it took a lot of fiddling around – colouring, die cutting, arranging. All good fun.


Coloured Rose

It’s been a couple of days since my last post, with the previous week being very productive for me. My husband is back from his travels, so today is the first day since his return I have been able to go to my craft room and play – he has gone golfing.

I went to Crafting Live in Doncaster yesterday and came away with quite a lot of goodies. I went there with mum, and we had a good time, a few laughs – and bought lots of stuff! That show is amazing. I tend to go in the summer, with mum and sister, and we always find what we are looking for, the stall staff are very friendly and helpful, even though it does tend to be very, very busy. I think we were there for over four hours, and sometimes go back for the second day, too – but the weather is gorgeous, I have time to play, and time to go into the garden – so decided not to this time.

This rose stamp is a new buy from Honey Doo crafts called ‘Roses are red’ and comes with a matching die. I decided not to do one card, or two, but four in total. I used my Crafters Companion water-colour card, and stamped and embossed the outline twice in detail black, and twice from white. I knew I wanted to add the colours from the CAS colours and sketches challenge, and wanted to play with different techniques. The colours are named from Stampin Up, and I do have the exact colours, so I didn’t have to think about which colours matched.

After embossing the outlines in white, for one card I used my water-colour brush and took ink from the lid of the ink casing, and coloured the flower for a muted look, and on the other white embossed card I used my Stampin Up markers of the same colours for a slightly more vibrant look – but still drew the ink out with my water-colour brush, adding a blue wash around the flower, before die-cutting the image and sticking to a 6 inch square white card.

For the images embossed in black, I coloured the image using the markers and drew the colour out slightly with my water brush, and for the other I coloured the image with the pens without drawing the colour out, for a more vibrant look.

I love how versatile this stamp is, and how the different techniques can give a totally different look. My favourite is the more vibrant look, and of the cards the two embossed in black seem to stand out more.

I shall also be entering one of these cards into the Crafty Challenge Calendar and Addicted to Stamps and More


Green and gold

20170322_102139

Whilst I am at home today as my car is being serviced, once again I look for inspiration for making a card from a couple of challenges. The first challenge is from Daring Card Makers with the theme of green with gold, and the second is from the Colour Crazy Craft Challenge with the theme of anything goes.

I took the opportunity to use my stamp set from Altenew ‘Faithful Feather’ and also tried again for a clean and simple card. I have attached the photos of my crafting progress, which I haven’t done before, so thought I would give it a try. I was going to give this to my friend today, as she was nipping round for coffee, but unfortunately she is unable to make it. So – she will have to look and admire it on this blog before she receives it!

I stated with Crafters Companion water-colour card, as I didn’t know if I was going to water colour, or just stamp, and as the card has some texture, I used my Misti to ensure good coverage of the stamp outline. I stamped and embossed the feather outline using my Ranger Perfect Medium, and Detail Gold embossing powder from Cosmic Shimmer.

Once I had the outline embossed, I moved onto the inner part of the stamp, and again stamped and embossed this detail. I wanted the outline and detail to stand out which is why I embossed both layers. In this stamp set there are several other layers which can be used, and I may try them out soon – seeing as how the set is on my craft table currently – but wanted this card to be simpler.

I then moved onto the colouring. I knew I wanted green, but didn’t know which green to use. I have several different pens, distress inks, Zig brushes……then – again – my eyes fell upon a recent purchase I had made through Hochanda craft channel……my brand new Derwent Inktense Pencils. Ideal opportunity to see how they worked.

I have the 12 pencil set, which came as a bundle with some water-colour paper, water brush, and set of 5 line painters. The lady who demonstrated during the shows for this product was absolutely inspiring. She made it seem that anyone could achieve the results she had….we shall see!

I tried three of the pencils on some spare water-colour card and they all blended absolutely smoothly, which made me be brave to add straight to the stamped feathers. I used Apple Green, only the one colour, and drew straight down the middle of the feather, using my water brush to blend out from the centre each side. I purposefully didn’t blend the whole of the ink as I wanted a darker line down the middle of the feather.

During this process – I smudged. Blinking Heck!!!. Just beneath the middle feather…..but decided to carry on and think of some way to disguise the area. No-one will know. I won’t tell anyone. It never happened…..

I stamped and embossed the sentiment from the same stamp set, then tried to decided what colour card base to use. I decided on a darker green just beneath the water-colour card, and a ‘Topsy Turvy’ card from Create and Craft channel – darker green on the outside and lighter green on the inside which I have tried to show in the final photograph.

Now onto the mistake I didn’t make! I made the decision to add three sequins, in a colour which seemed to match the green, and also had a hint of gold in them. Bingo! Sorted!

Well – in hindsight I wouldn’t have added them, but there we are.


Green and copper

For todays cards, I had a little play with my water-colour paints and tried out different ways of using them with a stamped image. The inspiration for these cards came from the Chocolate Baroque challenge, and one of their stamps I have recently purchased.

The stamp is ‘Rose Script’ and I loved the simplicity of the design, incorporating its own background with the script behind the rose, and the sentiments that come with the stamp set are going to be used a lot in my crafting – I can tell!

The challenge was a colour swatch of the greens, and one metallic element – copper. I realised that the only copper item I possessed was an embossing powder from Cosmic Shimmer, so I that’s where I started. Do I emboss the stamp? Do I emboss the sentiment? How about an embossed edging to the card? As I was in a conundrum – I decided to do them all….in conjunction with some water colouring.

I know, I just started to play with water colouring – and loving it. It may not be technically correct, it may not be what is taught in class rooms around the world – but in my little personal universe (I call it the Loopylooverse) – I’m enjoying playing and creating.

The darkest coloured card I started by embossing the stamped image in copper, wet down the whole piece of card, and just swept my water-colour greens across the image. I liked how some of the colours pooled within some parts of the embossed image, especially on the leaves, and decided to let it dry as it was.

Another piece of water-colour card and I embossed the stamp in clear embossing powder, and again swept the colours across the image. The embossing resisted the water-colours, highlighting the stamp. I added sentiment in the copper embossing powder, and also edged the piece in the ‘Be Creative’ double-sided sticky tape (again) added embossing powder, heat setting it, which created another dimension on the card.

The third card was a little mistake – but I actually like it. I wet the card, swept my colours over it, dried it with my heat tool, then stamped over that with my Ranger perfect Medium. I couldn’t see the stamp, so I wet the card again, and took most of the colour away, and it left the stamped image with an outline in the three different greens.

As I had used quite a bit of colour with those three cards, I decided to do a fourth (I had cut my A4 water colour card into four pieces) quite plain and simple. I stamped the image and embossed in copper. I used a small amount of each of the three green colours to a different part of the image, but I wanted most of it clean. The darkest green is on the stem, then the next two greens are on three of the leaves. That’s it. I put it down and refused to add any further detail, as occasionally I don’t know when to stop!

I used Crafters Companion water colour card, Gansai Tambi water colours, Chocolate Baroque stamp set – ‘Rose Script’, Cosmic Shimmer copper embossing powder.


Some Beautiful You

This set of cards I’m not quite sure about………I don’t use a lot of patterned papers in my cards, usually only strips of pattern, and often find I am not happy with the results. I thought I would publish anyway, as I enjoyed making them – but I may make more without a lot of the pattern, sticking to my usual strips of colour/pattern and not layering the whole thing.

The stamp set is from Stampin Up ‘Beautiful You’, and there will be more cards coming up from this set. I find it very versatile, and easy to use, and have made quite a few which I will be giving to my charity to sell.

The lady was stamped onto water-colour card, and then used a technique new to me – reflection stamping. I got the idea – and the know-how – from Jan Brown, a Stampin Up demonstrator, who I follow on YouTube.

The three cards above have the three different outcomes of my first few tries. I really like how they turned out, from quite bold in the main picture, to quite muted in the last picture. The blurry one is because I moved when doing the reflection – but looks good in the water/puddle. Do you agree?

Basically, use a piece of acetate or packaging, stamp the image you want, then flip it and use that stamped image to stamp onto the card/paper. It could be reflected below, above, or either side. As I mentioned, the first image I moved slightly – that acetate is slippery! The second image I pressed down, and the third I really concentrated on keeping it still and pressing all over the inked image.

Once the ink was dry, I coloured with my watercolour brush, creating a puddle effect around the reflection, and added some sequins for some dimension.

I have a thought process of stamping reflection technique – two ladies, hand-in-hand -= another stamp from the same set – watch this space.

I’ll be entering this card into the challenge on Inkspirational. The word prompt is ‘connect’, and I thought that connecting the same stamp with the reflection stamping technique would be a quirky way of meeting the requirements.