Merry and Bright Lantern

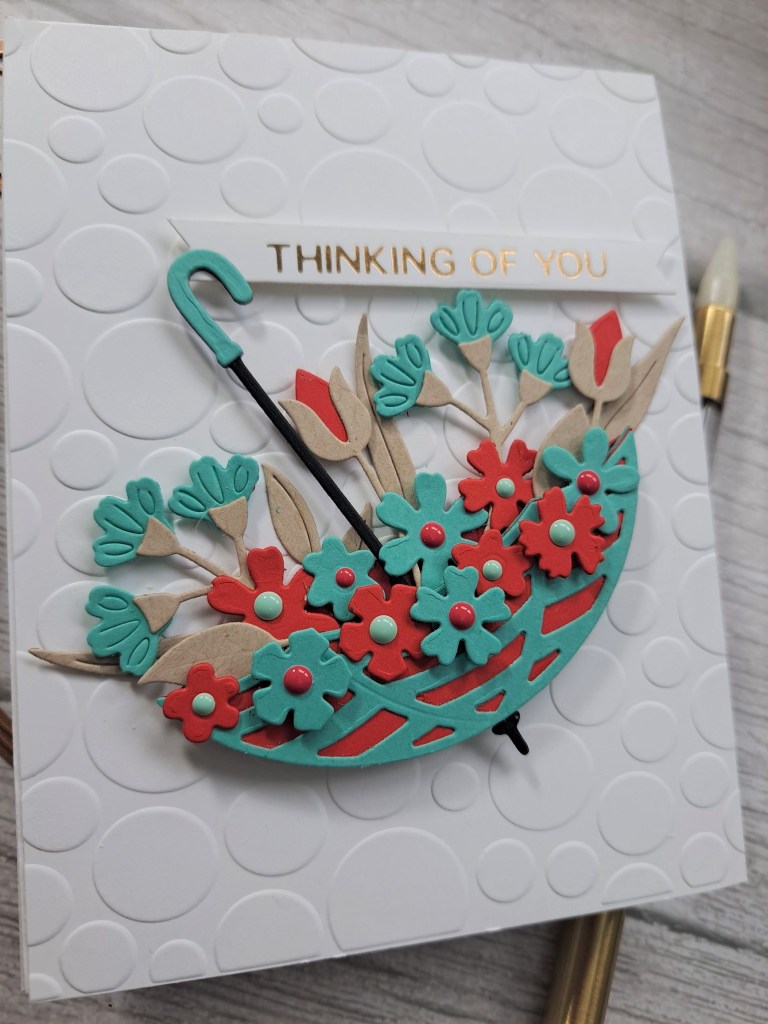
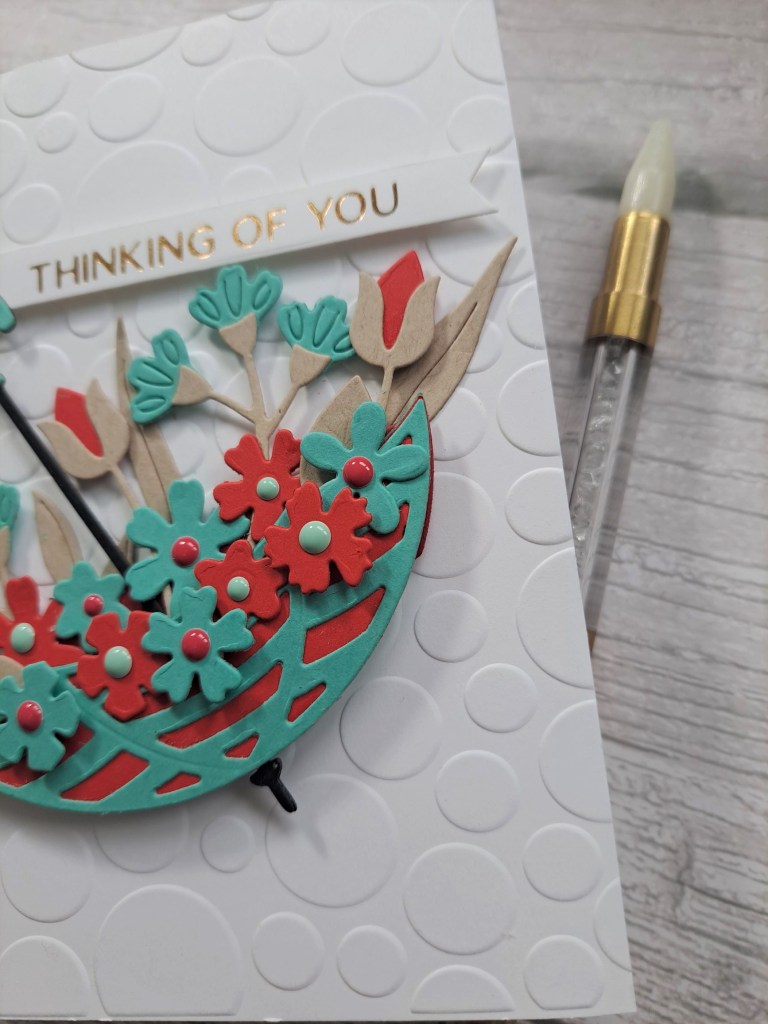
The Holly and Ivy Christmas Challenge has started their next challenge. Our theme is always ‘anything goes Christmas/festive’. Here is my card:

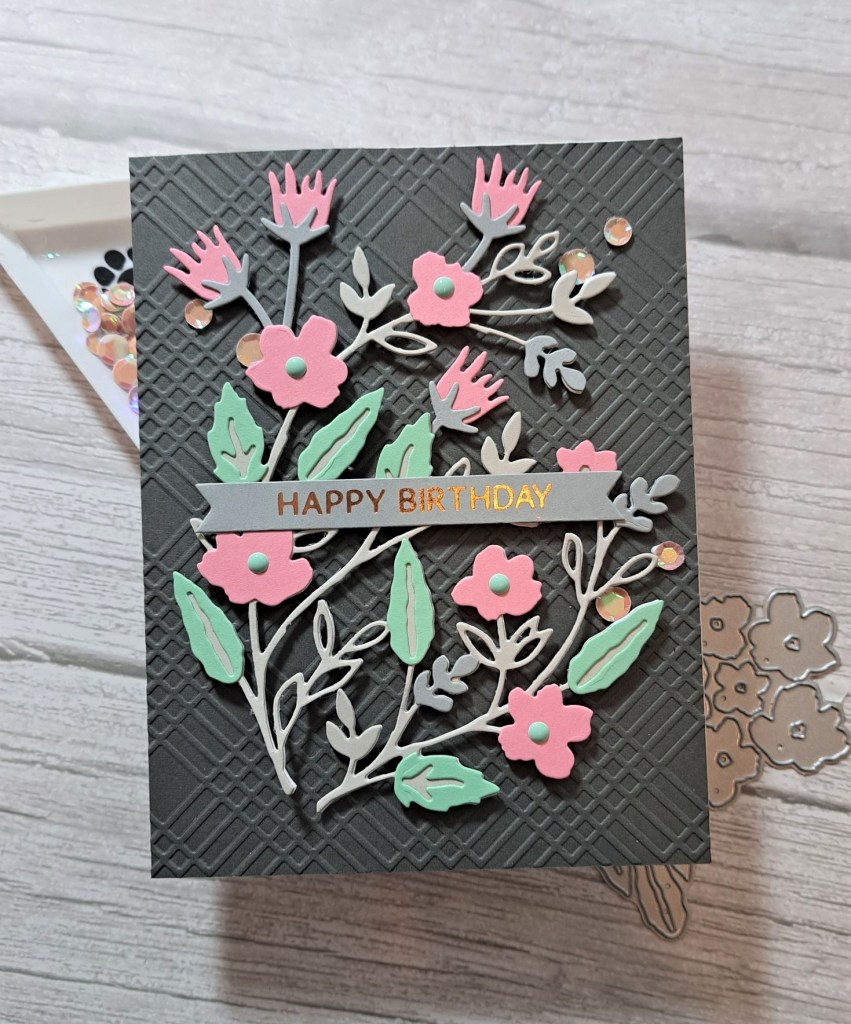
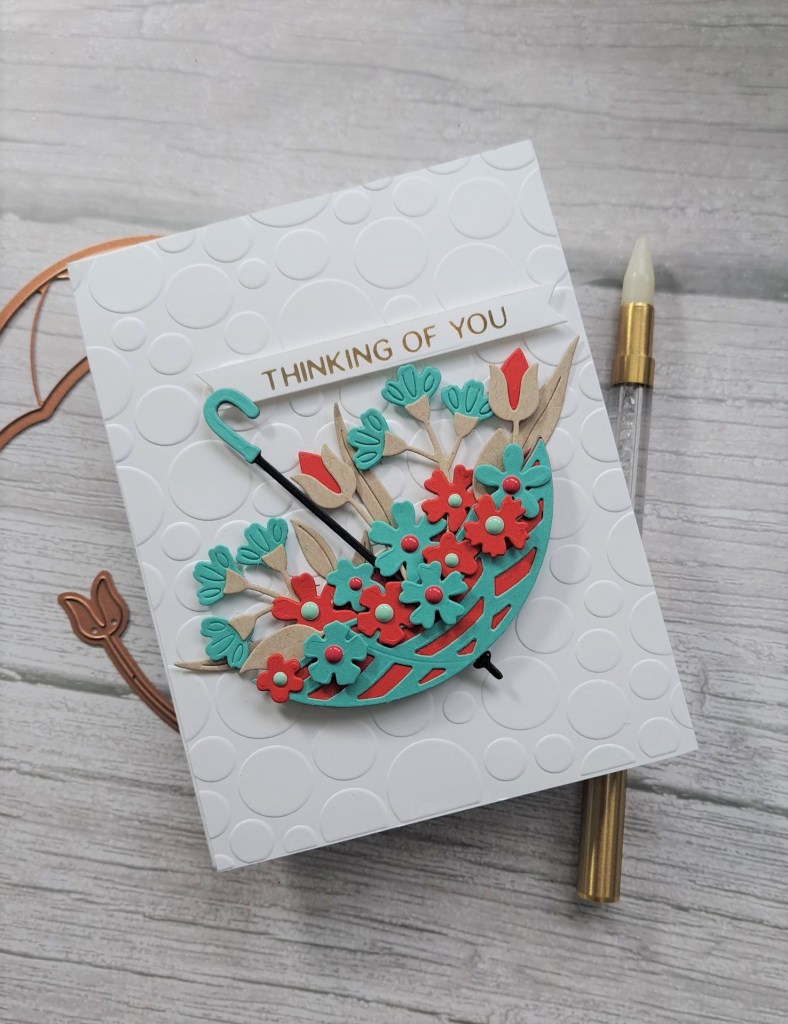
The background panel is dry embossed using a very old We R Memory Keepers embossing folder, I then layered that with a gold panel – gutting the centre by die cutting the gold label die, to which I also added a white dry embossed layer.

The images and florals are all from Spellbinders, another mega die-cutting session, then layered together. I first adhered the lantern, then played with placement of all the images until I was happy, and adhered them with a mixture of 3d Foam and wet glue.

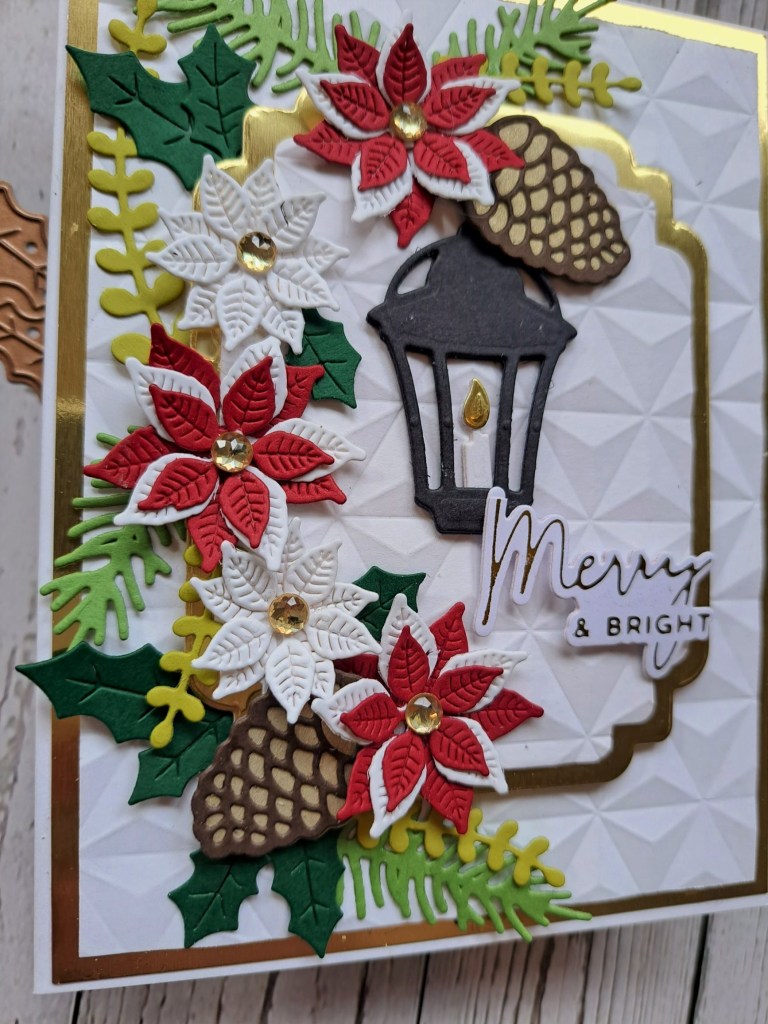
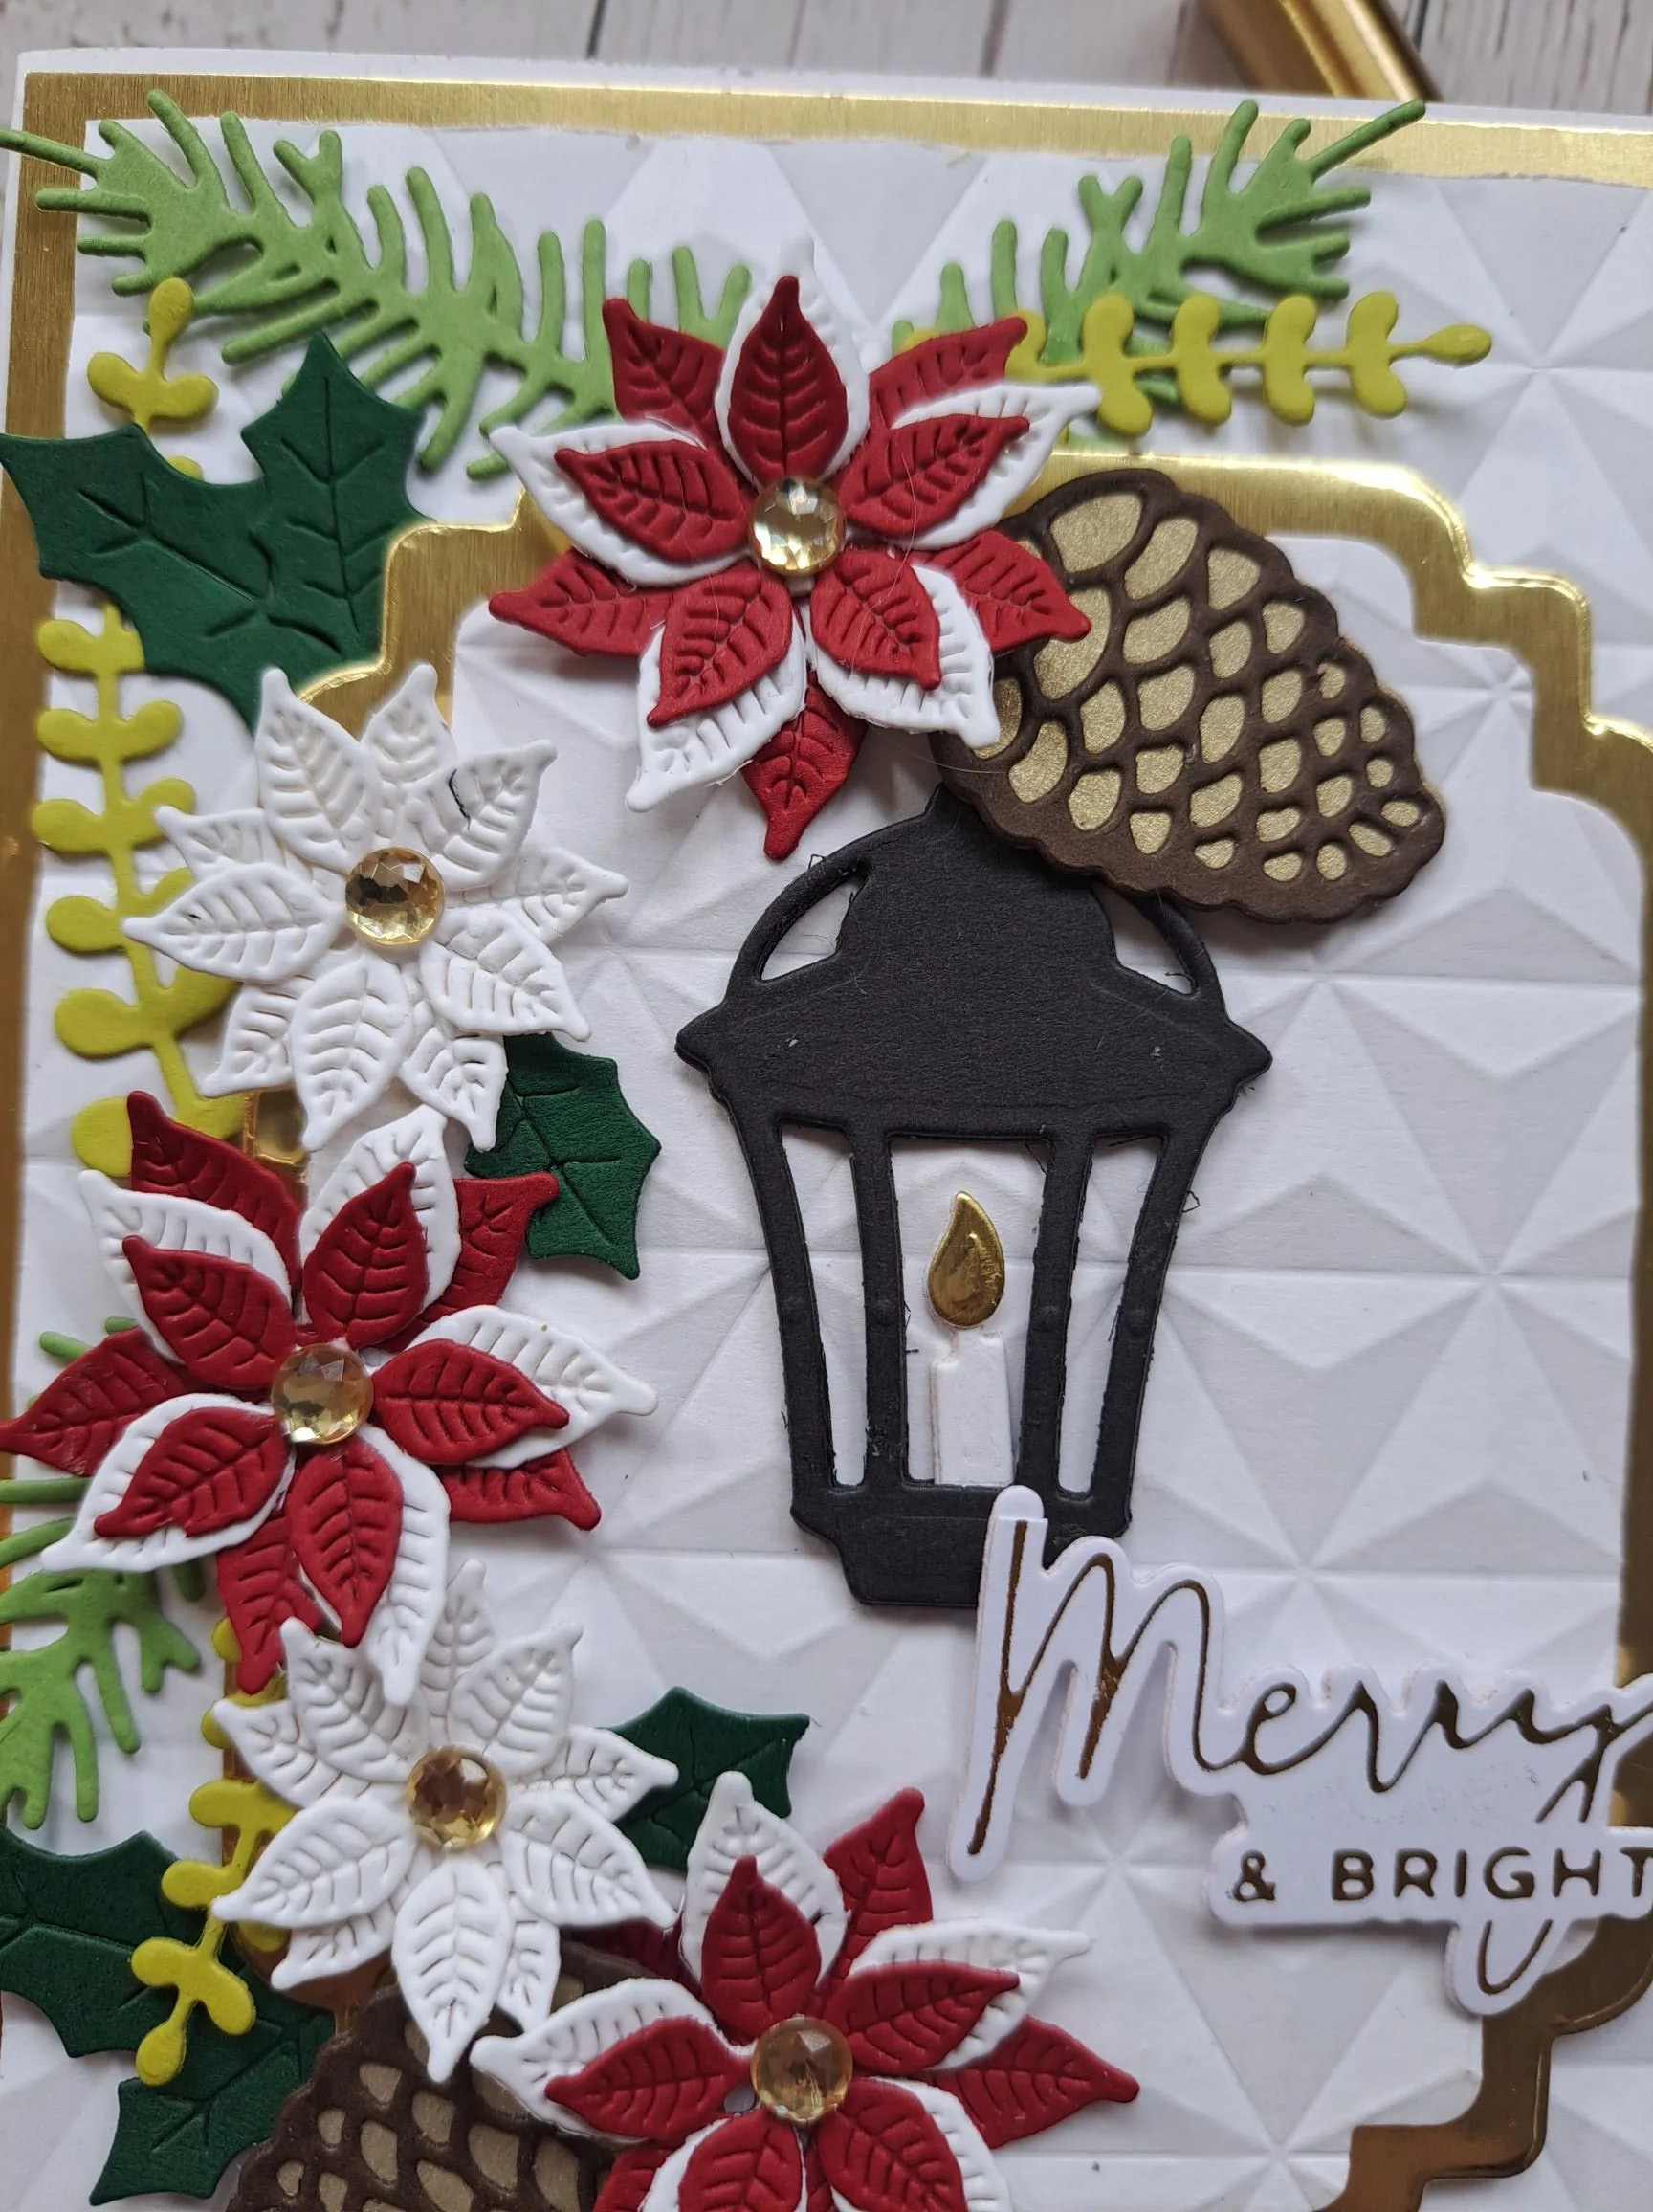
I then added some gold gems to the centre of the poinsettias, and a foiled sentiment.

I hope you can come and join us with your Christmas/festive creations. xx

I shall be entering the following challenges:

Merry Little Christmas Challengeanything goes Christmas

Inkspirationalseasonal

Peace On Earth anything goes Christmas

Creative Inspiration anything goes

Most Magical Time Of The Yearanything goes Christmas or Halloween

12 Months of ChristmasChristmas – option inspired by Christmas song not taken

Triple Bbirds and/or butterflies and/or blooms

Hello Friend Tag

Hello. A slightly different direction from my usual makes. This time I have turned my hand to a tag……

I used the products from the most recent ‘Let’s Stamp Together’ from Scrapbook and Cards Today. This time round it was Spellbinders. Even though I haven’t done the actual class yet, I have been playing with the products.

The tag was created from a stencil and glitter paste onto some light green card stock, then die cut using an MFT tag die. After running it through the die cutting machine, the glitter paste was more debossed than embossed, which I thought was a different look.

The flower stem was die cut from a light brown card stock, the flowers were die cut, then stitched. Before I adhered the flowers, I die cut some leaves which came with the set and stitched them, but they didn’t match the leaves on the stem, so I die cut the stem again, and just snipped the leaves off to add to the brown branch.

I then added the flowers, some faceted gold gems for the centre of the flowers, then added this to the tag.

Some green sequins for even more interest and dimension, and a previously foiled sentiment.

The ribbon was added after punching and adding the eyelet. I don’t have pink or light green ribbon, so I used this dark green ribbon. I have a stash of this ‘wrinkled’ ribbon, I forget where from now, and think that the tattered edges and wrinkles make for an interesting addition.

I shall be entering the following challenges:

Cut It Updie cuts and make a tag

Mix It Upanything goes option embossing

The Crafty Addictsanything goes

Ally’s Angelsanything goes

Hello Friend

A change in craftiness with this card – I wanted some messy crafting:

I started by creating the background panel. This is a Spellbinders stencil from a recent class, and I masked off the centre oval shape, then ink blended the two Distress Inks that you see. I added some brown around the edges for some darker contrast.

I then ink smooshed a couple of card panel – Distress Mixed Media Heavystock – with darker browns on one panel, and lighter browns on another. Once they were dry I used the Tim Holtz ‘Merry Moose‘ die, as I haven’t used him for quite a while. I wanted to enter a challenge where the theme was ‘deer’ – and then had to Google if a moose was a deer or something quite different – thankfully, a moose is part of the deer family – phew!

A simple white foiled sentiment to complete the card.

I shall be entering the following challenges:

FarmQuest deer

Just Us Girlshello

2 Crafty Critter Craziesanything goes with a critter

Crafty Animalsanything goes with an animal

Here Is A Place To Startanything goes

Color Throwdown Pink, Mint, Grey

Hello there. I was lucky enough to be the winner for a recent challenge at The Color Throwdown, and as such invited to be a guest for an upcoming challenge.

As you can see, the colours this time round are Pink, Mint, and Grey. Here is my card:

The flowers and foliage were created using a couple of die sets from Concord & 9th, along with some of their card stock, and some card stock from Heffy Doodle.

A light grey for the branched of the main spray, with a slightly darker grey for the smaller sprigs.

I stuck the layers together on the main spray, then popped in some other florals here and there.

I added some gems to the centre of the flowers.

When I came to adhere to the card base – I couldn’t make it work. The arrangement seemed lost against the white, despite trying a couple of embossing folders. I was going to ink smoosh onto a background panel, but tried this dark grey card stock from Lawn Fawn – and this worked much better.

I dry embossed that dark grey panel with a Spellbinders embossing folder, adhered the floral spray with 3D foam – some very, very tiny bits in parts – and added some sequins. I’m not quite sure what colour the sequins are, but they do give off the pink and grey vibe……

As for the sentiment – it’s a recently foiled strip created when taking part in the Spellbinders Glimmer class a few weeks ago – and on grey card too…..

What a great colour combination for this week – I hope I get you see you in their gallery. xx

I shall be entering the following challenges:

Allsortsuse dies

Beautiful Blossoms flowers

Creative Fingersanything goes

Craft Rocketuse dies

Daisy Chain no designer paper

Crafting Happiness anything goes

Umbrella Thoughts

Hello there. I have another Spellbinders card to share with you today:

I really do seem to be in a fiddly and finicky mood at the moment. I’m really enjoying all the die cutting and layering of the small dies from Spellbinders. I find it so satisfying when it all comes together.

The background was created using an embossing folder, and covers the whole card base.

I then did all the die-cutting, in red and aqua for a colour challenge, with a light brown for the leaves and sprigs.

I assembled the umbrella and adhered it to the card, then played with floral placement – lots of moving them around, playing with what colour to put where – until I came up with what you see,

I added some enamel dots into the centre of the flowers, then realised the umbrella handle was kinda flapping in the wind and needed some support. I decided to use the sentiment strip – previously foiled – the support the handle, and I quite like the sentiment off to one side.

I shall be entering the following challenges:

Allsorts use dies

Colour Huesred and aqua

Lil Patch of crafty Friendsanything goes

A Perfect Time To Craftanything goes

Daisy Chainno designer paper

Thanks Very Much

Hello. I was in a fiddly mood for crafting today, so decided to use lots of little layering die cuts from Spellbinders:

This tree die with the flowers and leaves, are from one set. I die cut the tree from a light brown card stock, then die cut the leaves and flowers from Concord & 9th card stock in three shades of pink, and two shades of green.

I did have to go onto YouTube for the placement of the flowers and leaves, but it came together quite quickly.

I added some white enamel dots to the centre of some of the flowers and added lots of little itty bitty pieces of 3D foam to parts of the tree for some dimension.

I felt something else was needed on the background, so I dry embossed an Altenew stencil which was still out on my craft table from a previous card, which I thought added extra interest to the background without taking away from the main image.

The sentiment is a previously foiled strip, and I decided to use gold foiling on a grey strip – black would be too harsh, and I thought a white strip would get lost……

I shall be entering the following challenges:

Simon Says Stamp Wednesday Challengeanything goes

Tic Tac Toe challenge middle rowpink, die cut, stencil

Lil Patch Of Crafty Friends anything goes

Crafts Galore anything goes

Triple B challengebirds and/or butterflies and/or blooms

Birthday Banners

Hello and welcome. My second post of the day as the June Happy Little Stampersanything goes birthday‘ has started.

Here is my card:

I dry embossed a light blue panel and cut it down slightly to create the border from the card base.

The banner was die cut with blue card, and the triangle from the Spellbinders silver glitter foam – this is o very easy to die cut.

Once I decided on where I wanted each string and each triangle, I glued them down – and I even measured between each little triangle to make them even – did someone say OCD…….?

The sentiment was attached with 3D foam.

I hope you can come and join us with your birthday makes. xx

I shall be entering the following challenges:

Simon Says Stamp Wednesday Challengeanything goes

CYHTPembossing folder – option bird/bird houses not taken

Ally’s Angels anything goes

Cupcake Inspirationsanything goes

The Alphabet Challenge – E is for Easel Card

Hello once again. The Alphabet Challenge has reached the letter ‘E’ ,and Meg has chosen the theme of ‘Easel card’. Here is my card:

My goodness – aren’t these difficult to take a photo of…..?

The base easel card was created suing a die set from Brutus Monroe. This came as part of a virtual/online class a few months ago, so I thought I’d give it a go.

The die cuts are from Spellbinders – the pierced die cuts – and adhered as you see, with the flowers being from a Taylored Expressions die set.

A foiled sentiment to complete the card.

I hope you can come and join us with your ‘easel cards’ – I look forward to seeing you in our gallery. xx

I shall be entering the following challenges:

Double D Challengeflowers

Cup Cake Inspirations anything goes

Use Your Stuff anything goes

Beautiful Blossomsflowers

Love To Craftanything goes

Slimline Shaker Birthday

Billie A has chosen the theme for the new challenge at Cardz 4 Galz – slimline birthday. Here is my card:

Onto a slimline card base, I adhered a previously created yellow Distress Ink smooshed panel.

The shaker panel was created using a Pinkfresh Studio slimline cover plate.

I adhered acetate along the back to cover all three circles, placed 3D foam strips virtually everywhere on the back creating three ‘wells’ for the sequins – I didn’t want all the sequins to go to one end of another and to stay behind each window – added another piece of acetate to enclose all the wells – then adhered to the yellow panel and card base.

I find this method of creating a shaker uses more acetate – but it makes it soooo much easier to add the sequins, and then add to the card base. I can’t tell you how many times I’ve stuck a shaker panel down wonky, or spilled all the sequins – this method stops that happening. Well, most of the time anyway.

The flowers are from Taylored Expressions – a little die kit from a past virtual event – and the sentiment was die cut from Spellbinders gold card stock.

I hope you can come and join us with your ‘slimline birthday’ creations. xx

I shall be entering the following challenges:

Lil Patch Of Crafty Friends anything goes

The Crafty Addicts anything goes

Seize The Birthdaybirthday and ‘make it pop’ – colours, shaker,

Ally’s Angels anything goes

Beautiful Blossomsflowers