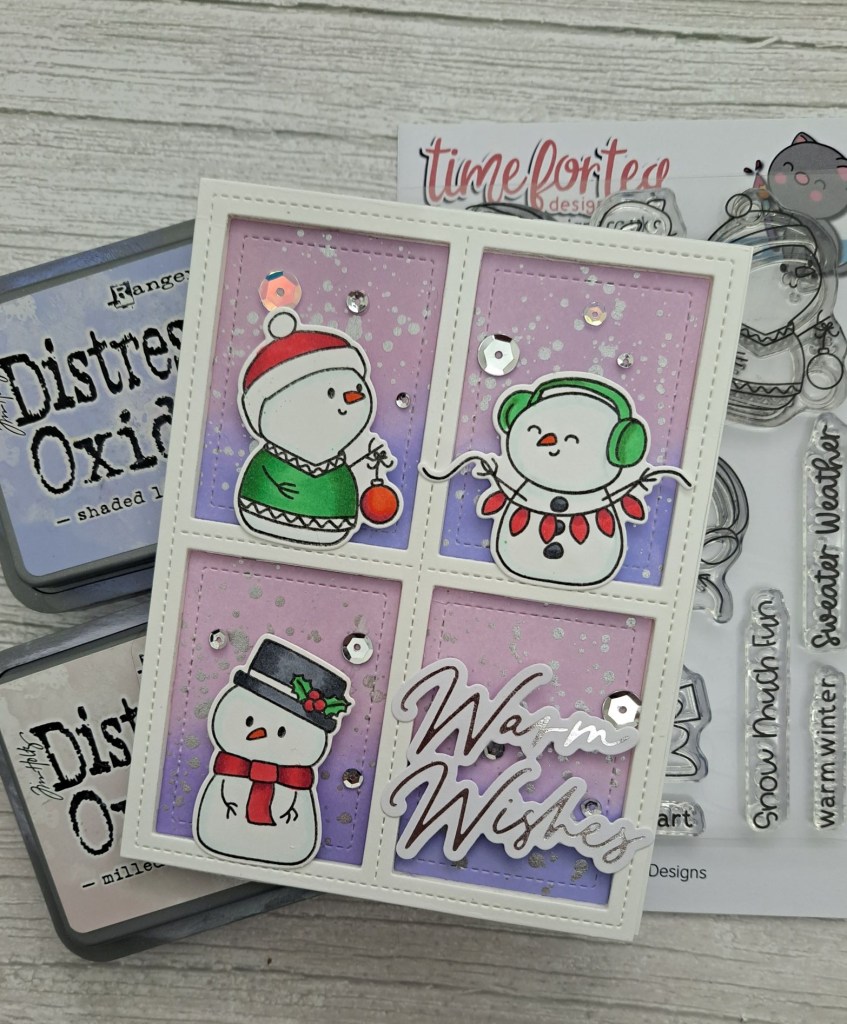
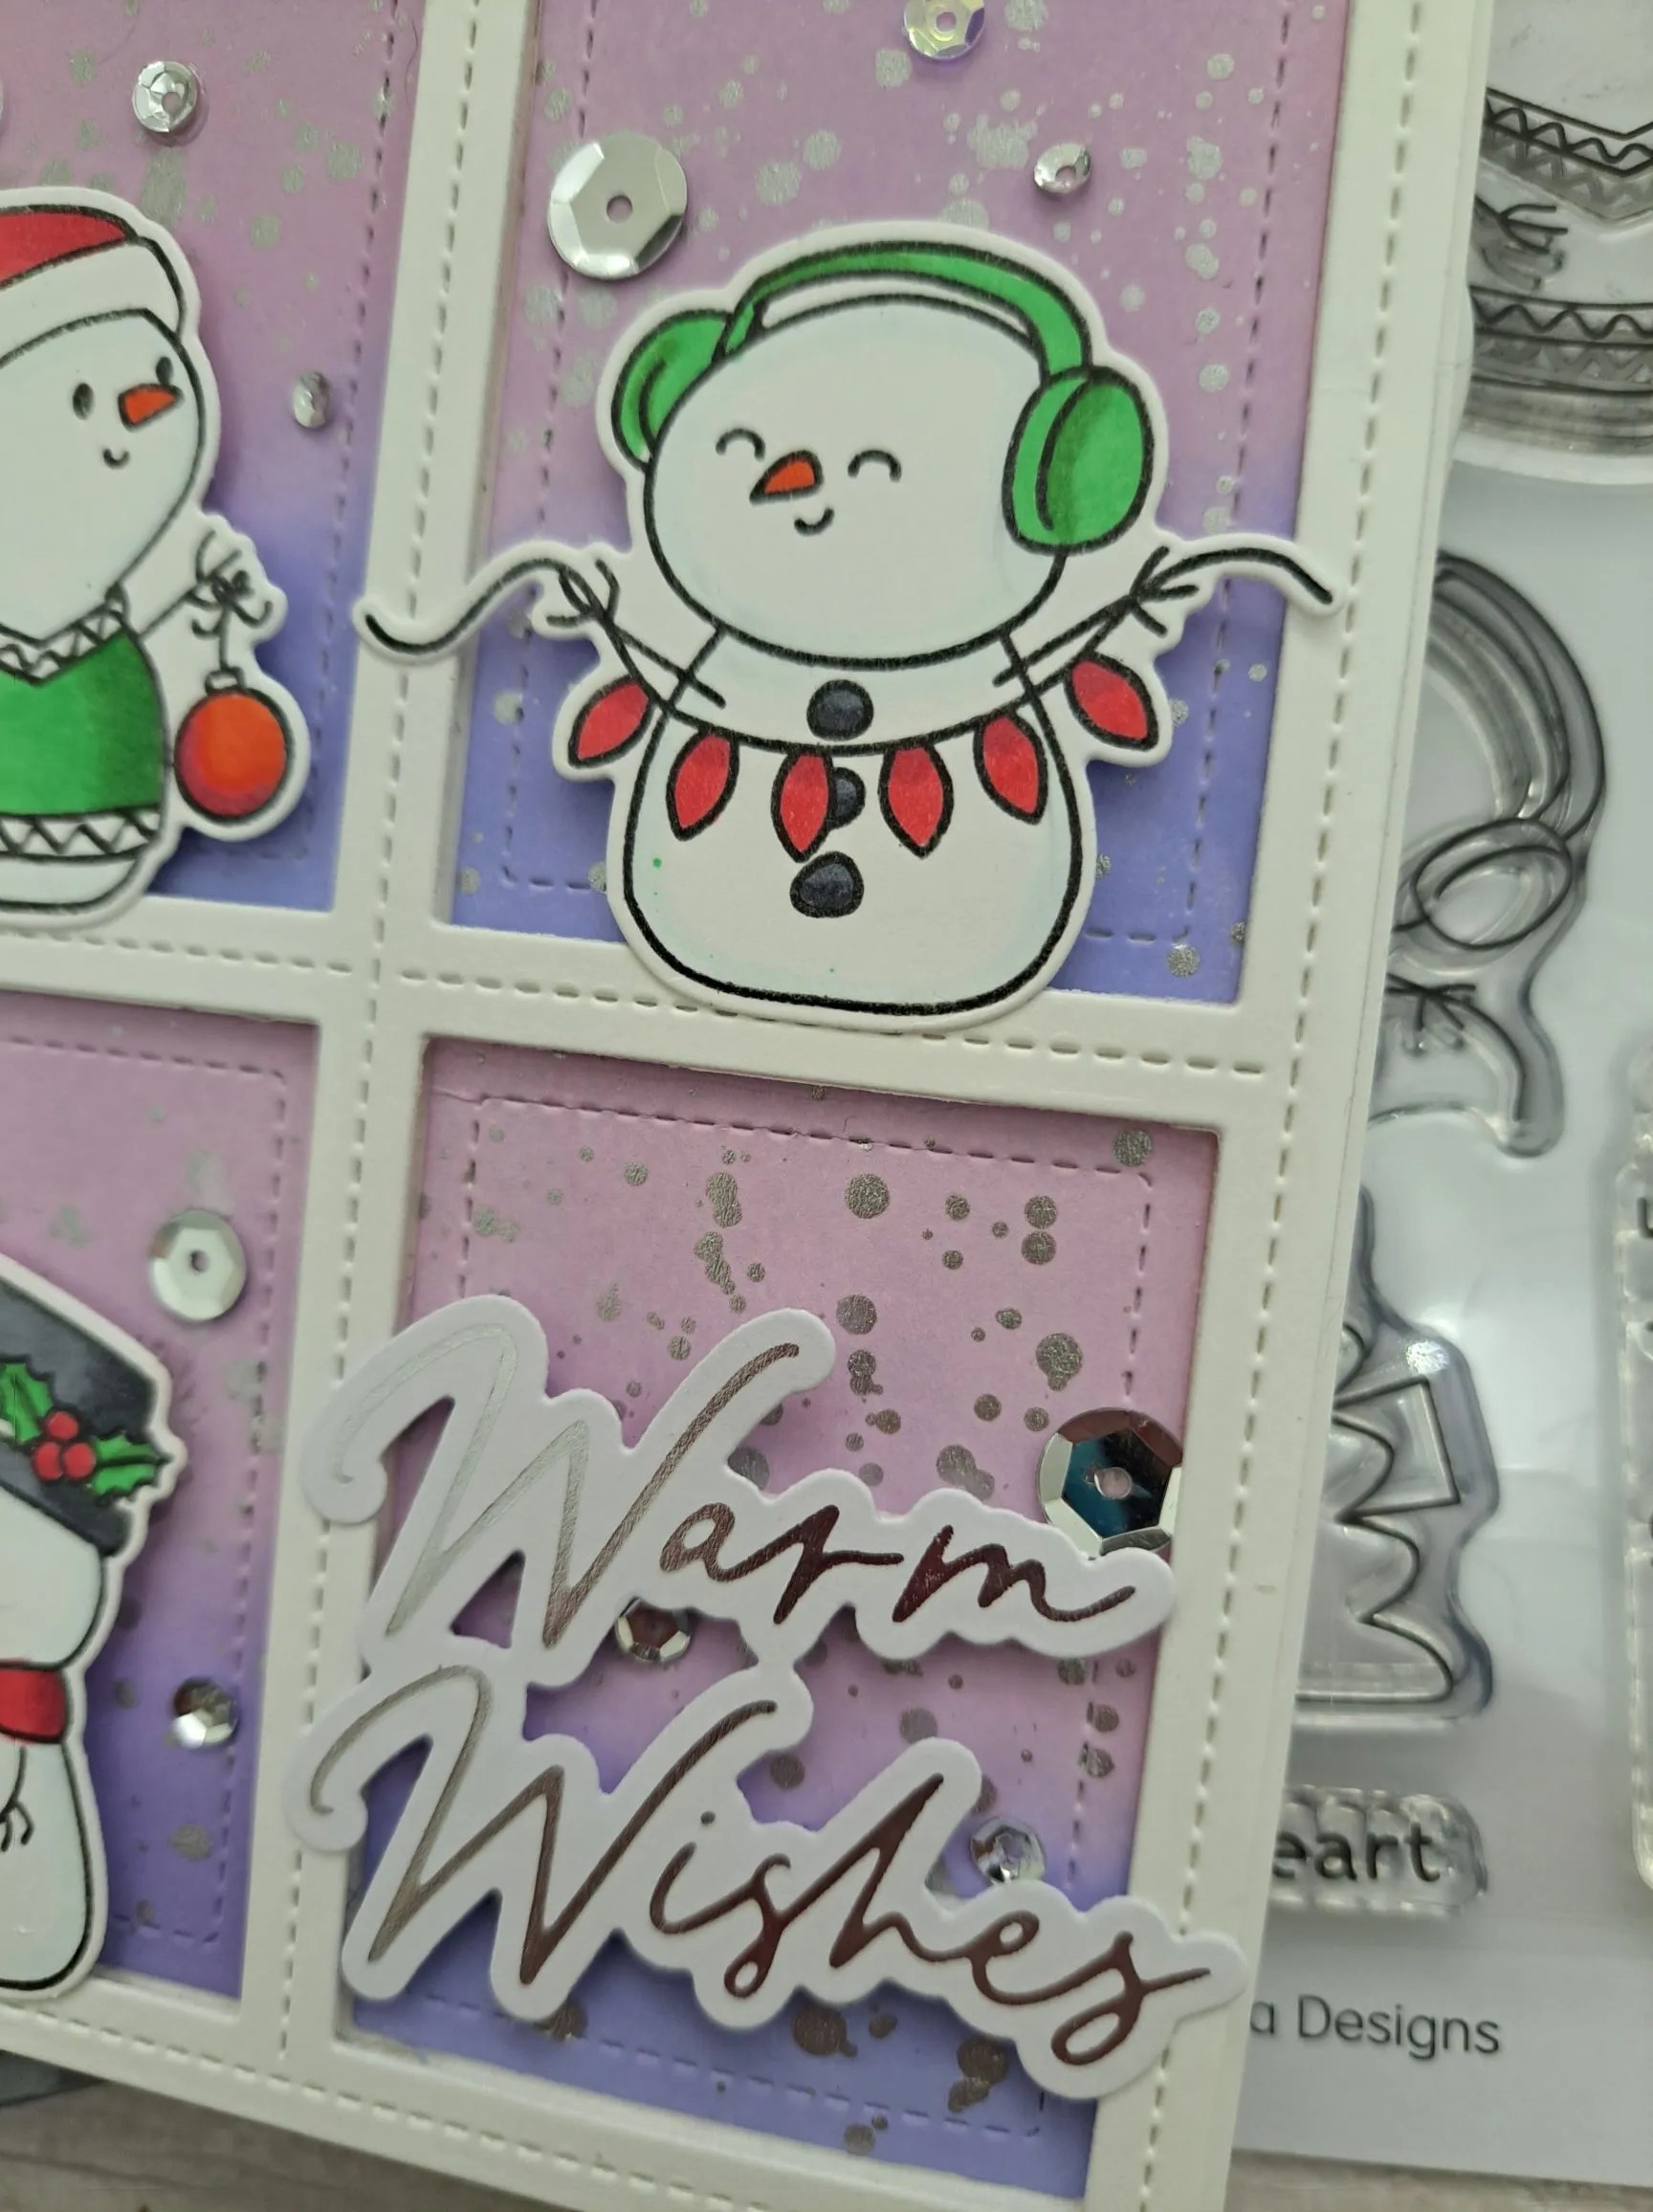
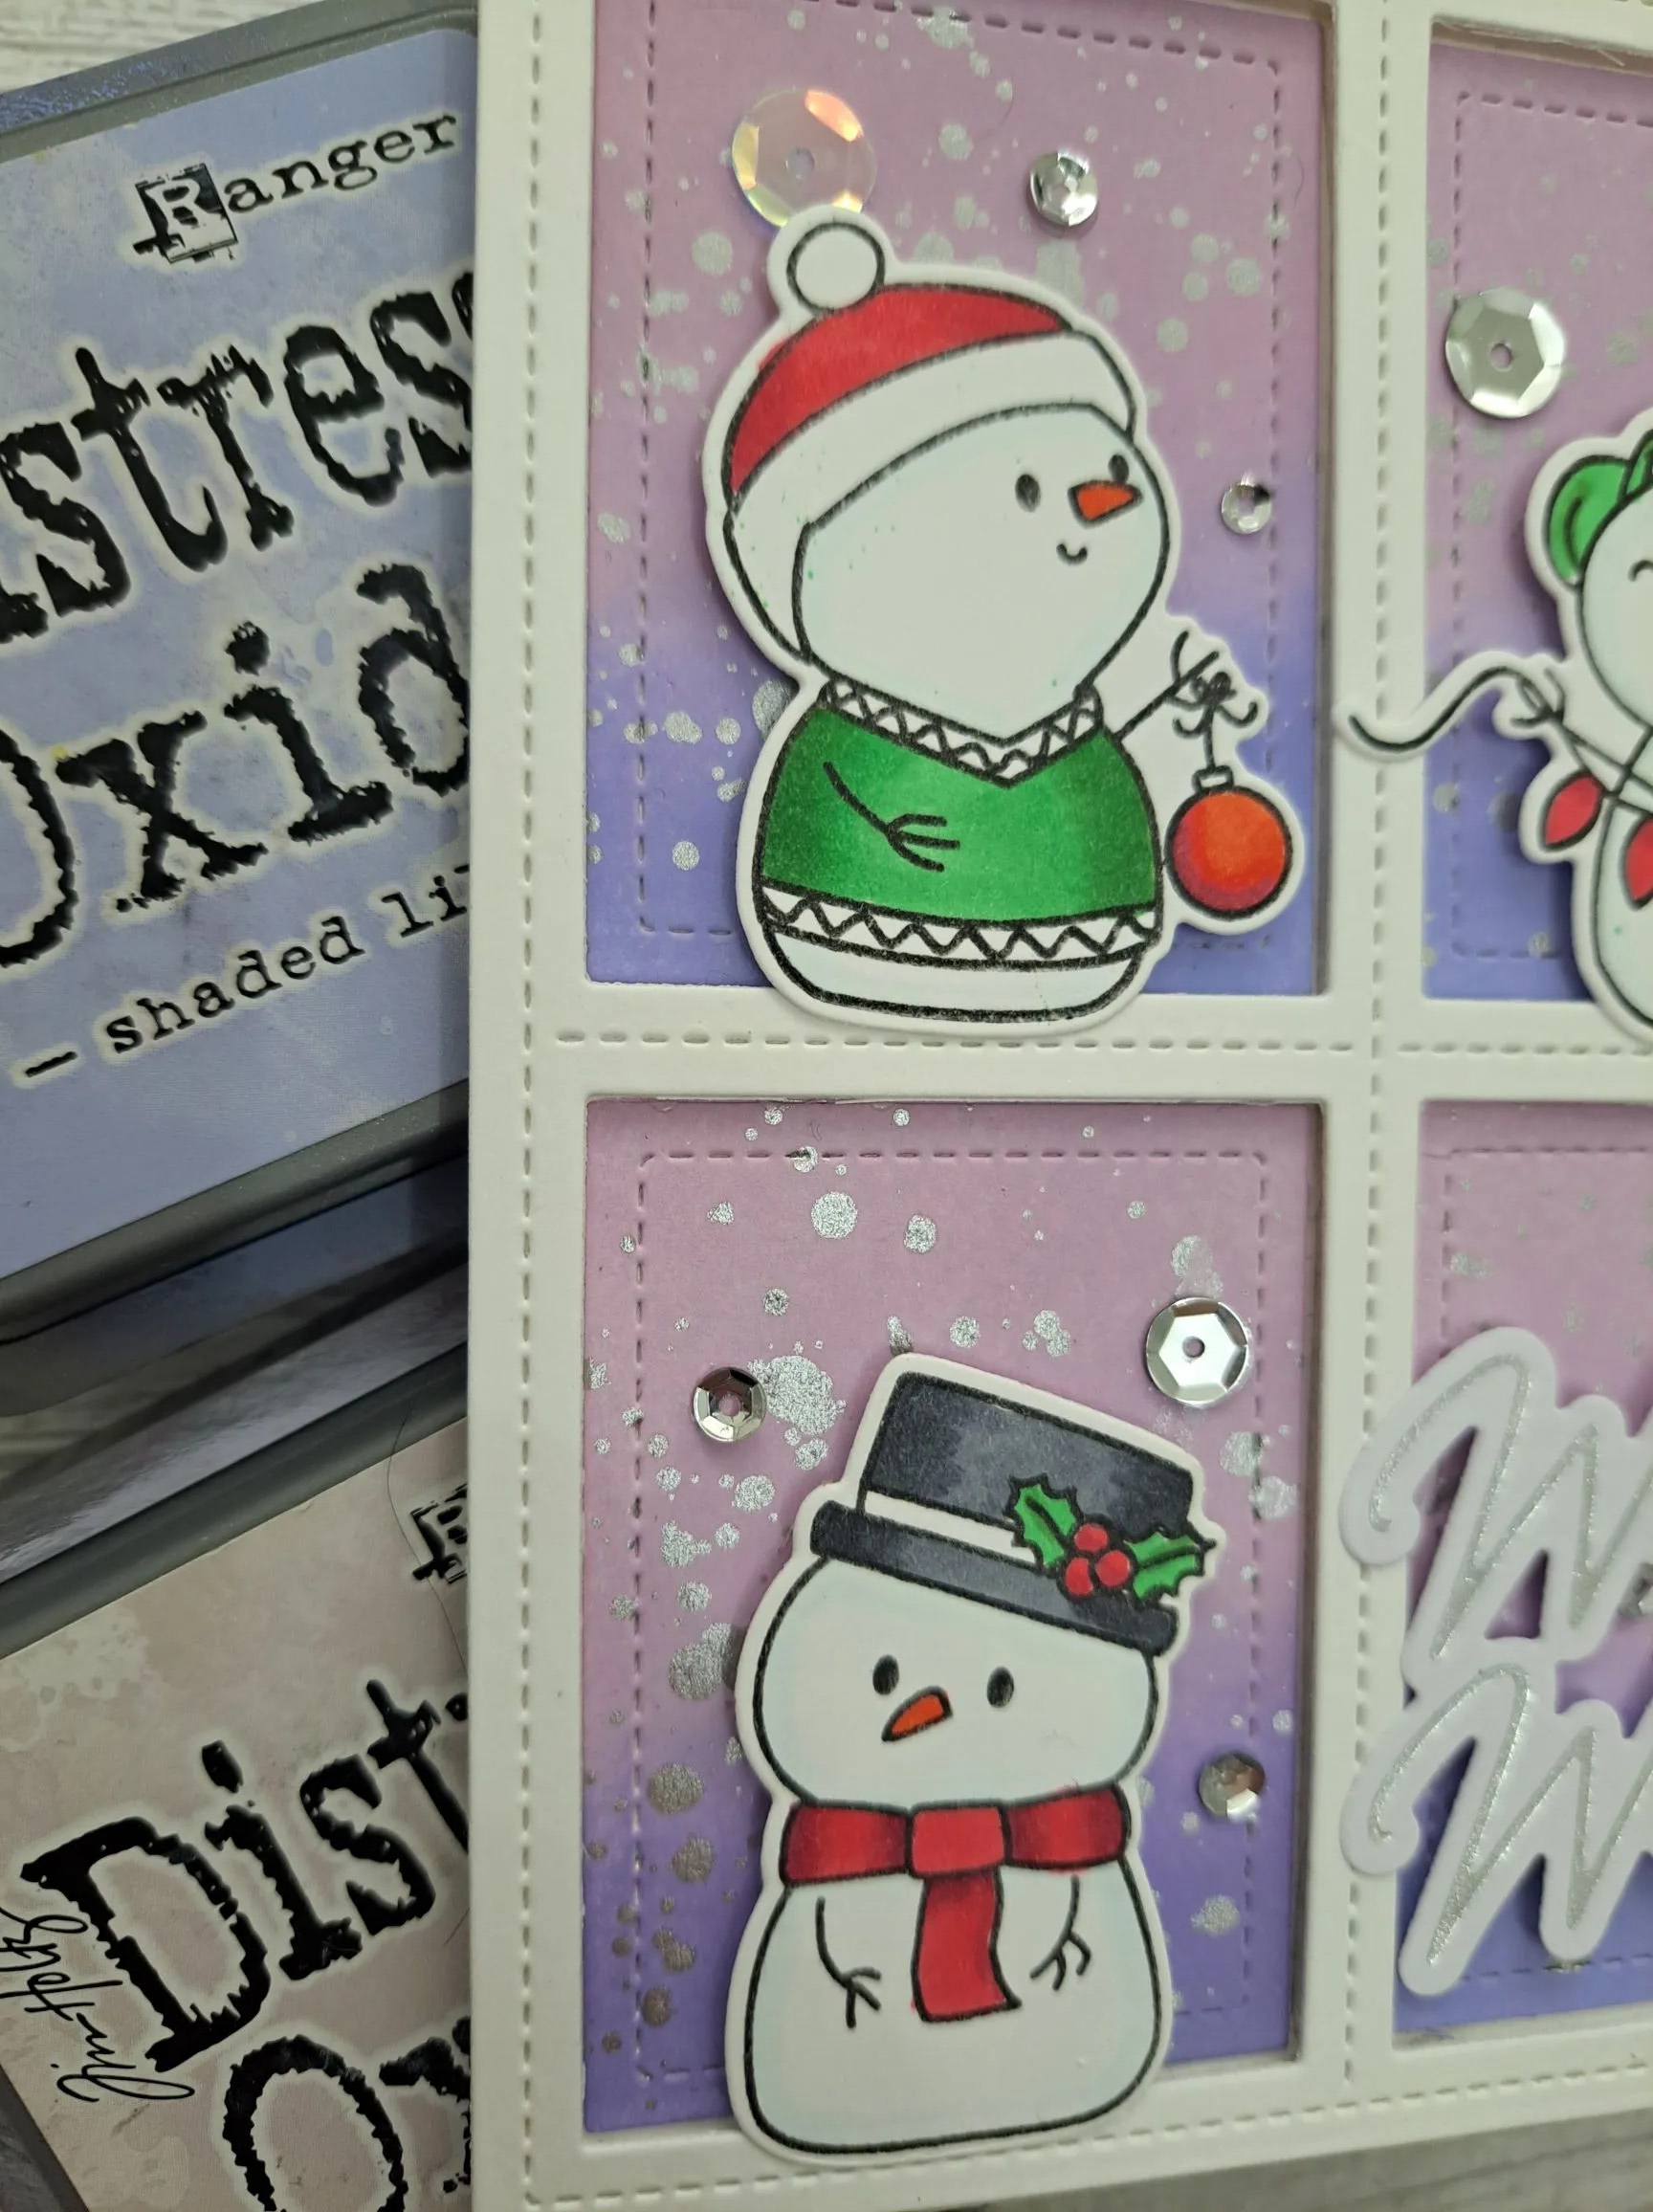
Hello. ABC Christmas Challenge has reached the letters ‘S’ and ‘T’. Fabiola is hosting, and the themes are ‘S for Snowmen’ and/or ‘T for Three of a kind’. I used both the themes on my card:
For the background, I die cut the Lawn Fawn ‘Four Square Backdrop’ and then each of the four insert panels I ink blended with Distress Oxides. I then splattered with water, and also splattered with some silver shimmer acrylic paint and set aside to dry.
I stamped the images from Time For tea Designs, coloured them with Copics, and die cut with the matching dies.
Onto a white card base I adhered the frame with 3D foam, added the ink blended panels and the images, found a foiled sentiment to add to the fourth opening, and adhered some sequins for even more shimmer and shine.
I hope you can come and join us with your Christmas creations following one or both of our themes. xx
Hello there. I have a fun card to share today for the new challenge at The Alphabet Challenge. Veronika has chosen the theme of ‘L for Literature – inspired by a book’. Here is my card:
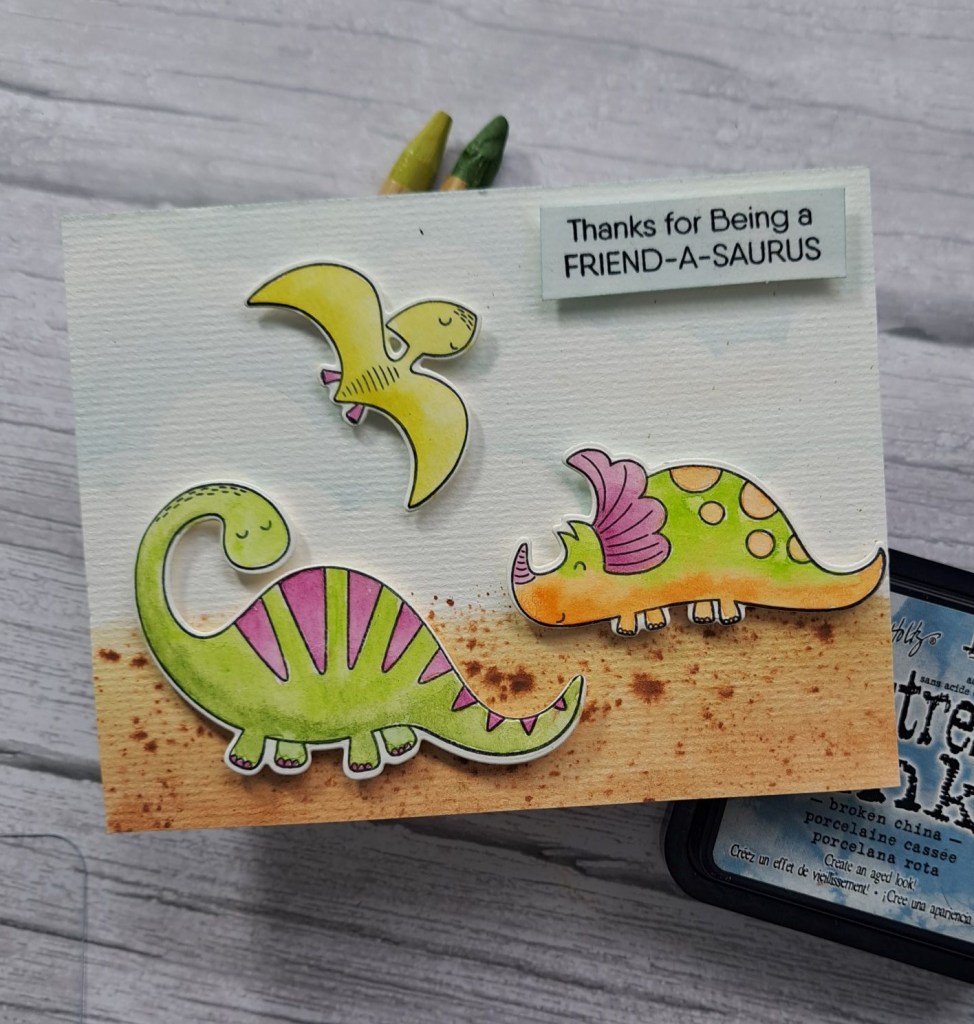
I certainly had some fun creating this card. The book I was inspired by is ‘The Lost World‘ by Arthur Conan Doyle.
I used an older MFT stamp set for the images, stamped onto water-colour card, then coloured using my Distress water colour pencils. Once dry, I die cut them with the matching die and set them to one side.
The background is also water colour card stock. For the top I used a cloud stencil and some light blue Distress Ink, and the bottom is Distress water colour pencils again, swashed then splattered.
The sentiment is also from the same stamp set.
I loved creating the different coloured dinosaurs – those Distress Pencils work a treat for me. I don’t colour straight onto the card stock, as I find there are pencil scores left behind and they don’t blend enough for me – maybe I’m too heavy-handed – but I like to wet the tip of the pencil, then use a brush the the wet tip to add colour to the images.
I hope you can come and join us with your creations inspired by a book. xx
The new challenge at Cardz 4 Galz has started, Caz has chosen the theme of ‘Leaves’. Here is my card:
This card was created using Gina K Designs Poly-Glaze stencil-mates foiling sheets. I followed the YouTube video, used a laminator and some green Decofoil I had from goodness knows when, then used the matching stencil to colour in the foiled leaves, with a yellow and a light orange to create some depth.
I have a couple of the poly glaze sheets for different stencils, and when I get my laminator out again, I’ll probably do batch foiling with different coloured Decofoil to them ready for future quick cards.
I also used Gina K Designs Master Layouts to die cut the black panel, then the leaf panel, adding a previously foiled sentiment and some goldy/orangey sequins.
I hope you can come and join us with your ‘leaves’ creations. xx
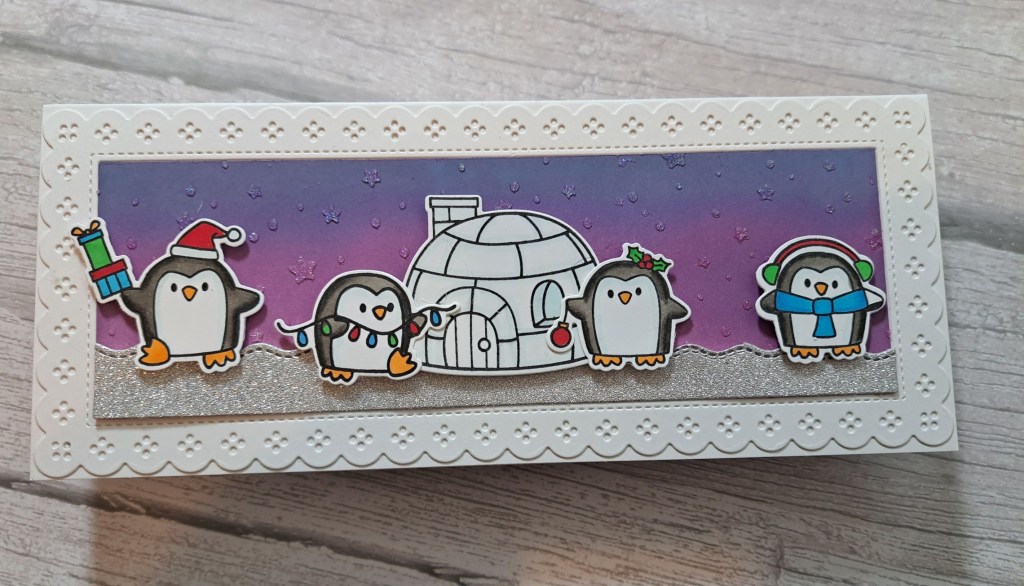
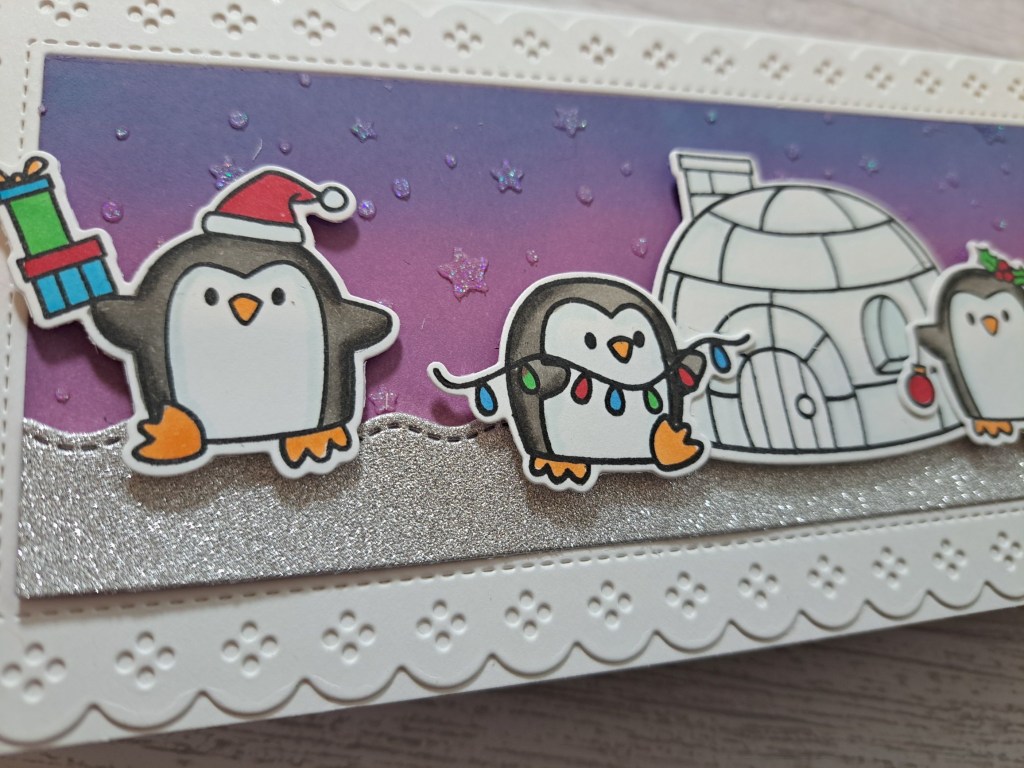
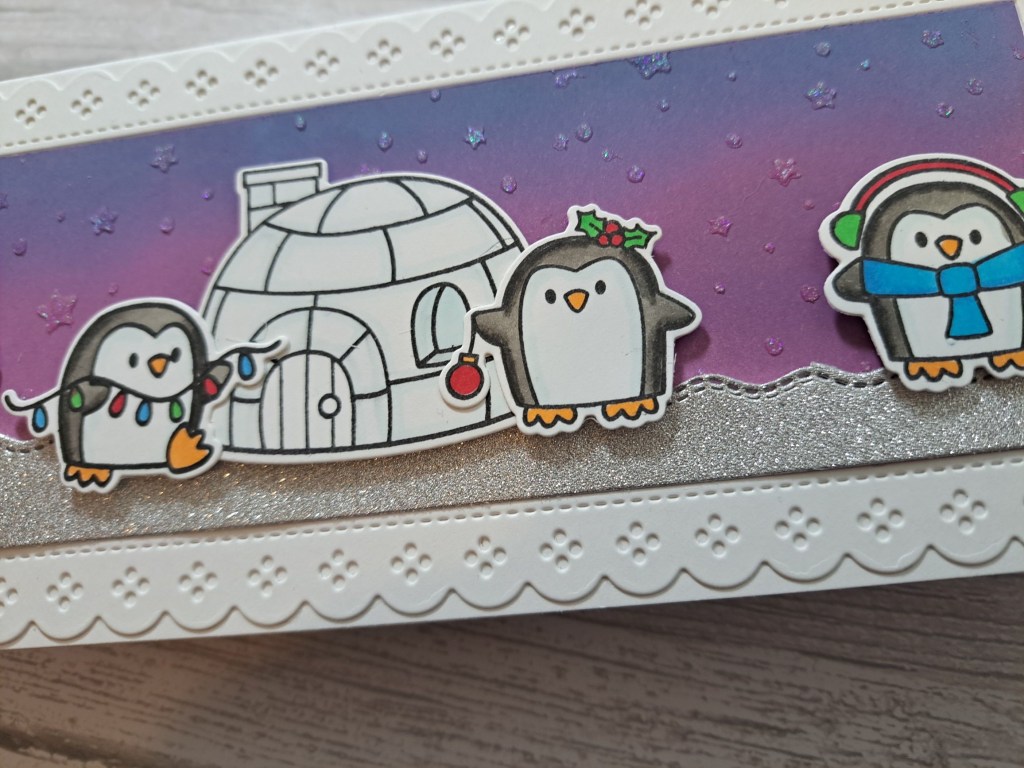
I used a slimline card base and die cut the Mama Elephant frame. The inner part was ink blended with Distress Oxides, and some glitter paste was added through a stencil and then out to one side to dry.
The penguin and igloo images from a Time 4 Tea Designs were stamped, coloured with Copics, then die cut with the matching dies.
I also created a silver glitter card strip using a stitched wavy die – and even though it wasn’t long enough for this card, I cut the strip first, then die cut twice to get the wavy stitching at the top.
The ink blended panel was now dry, so all the elements were added with either glue or 3D foam.
I hope you can come and join us with your Christmas/Festive creations. xx
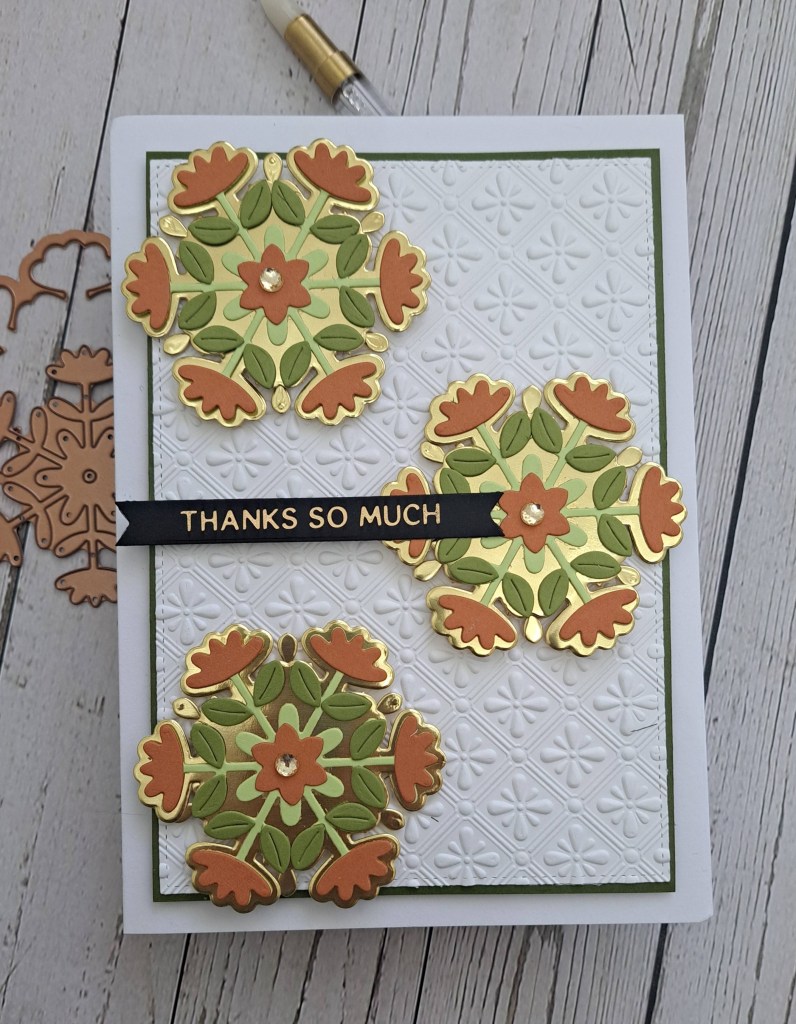
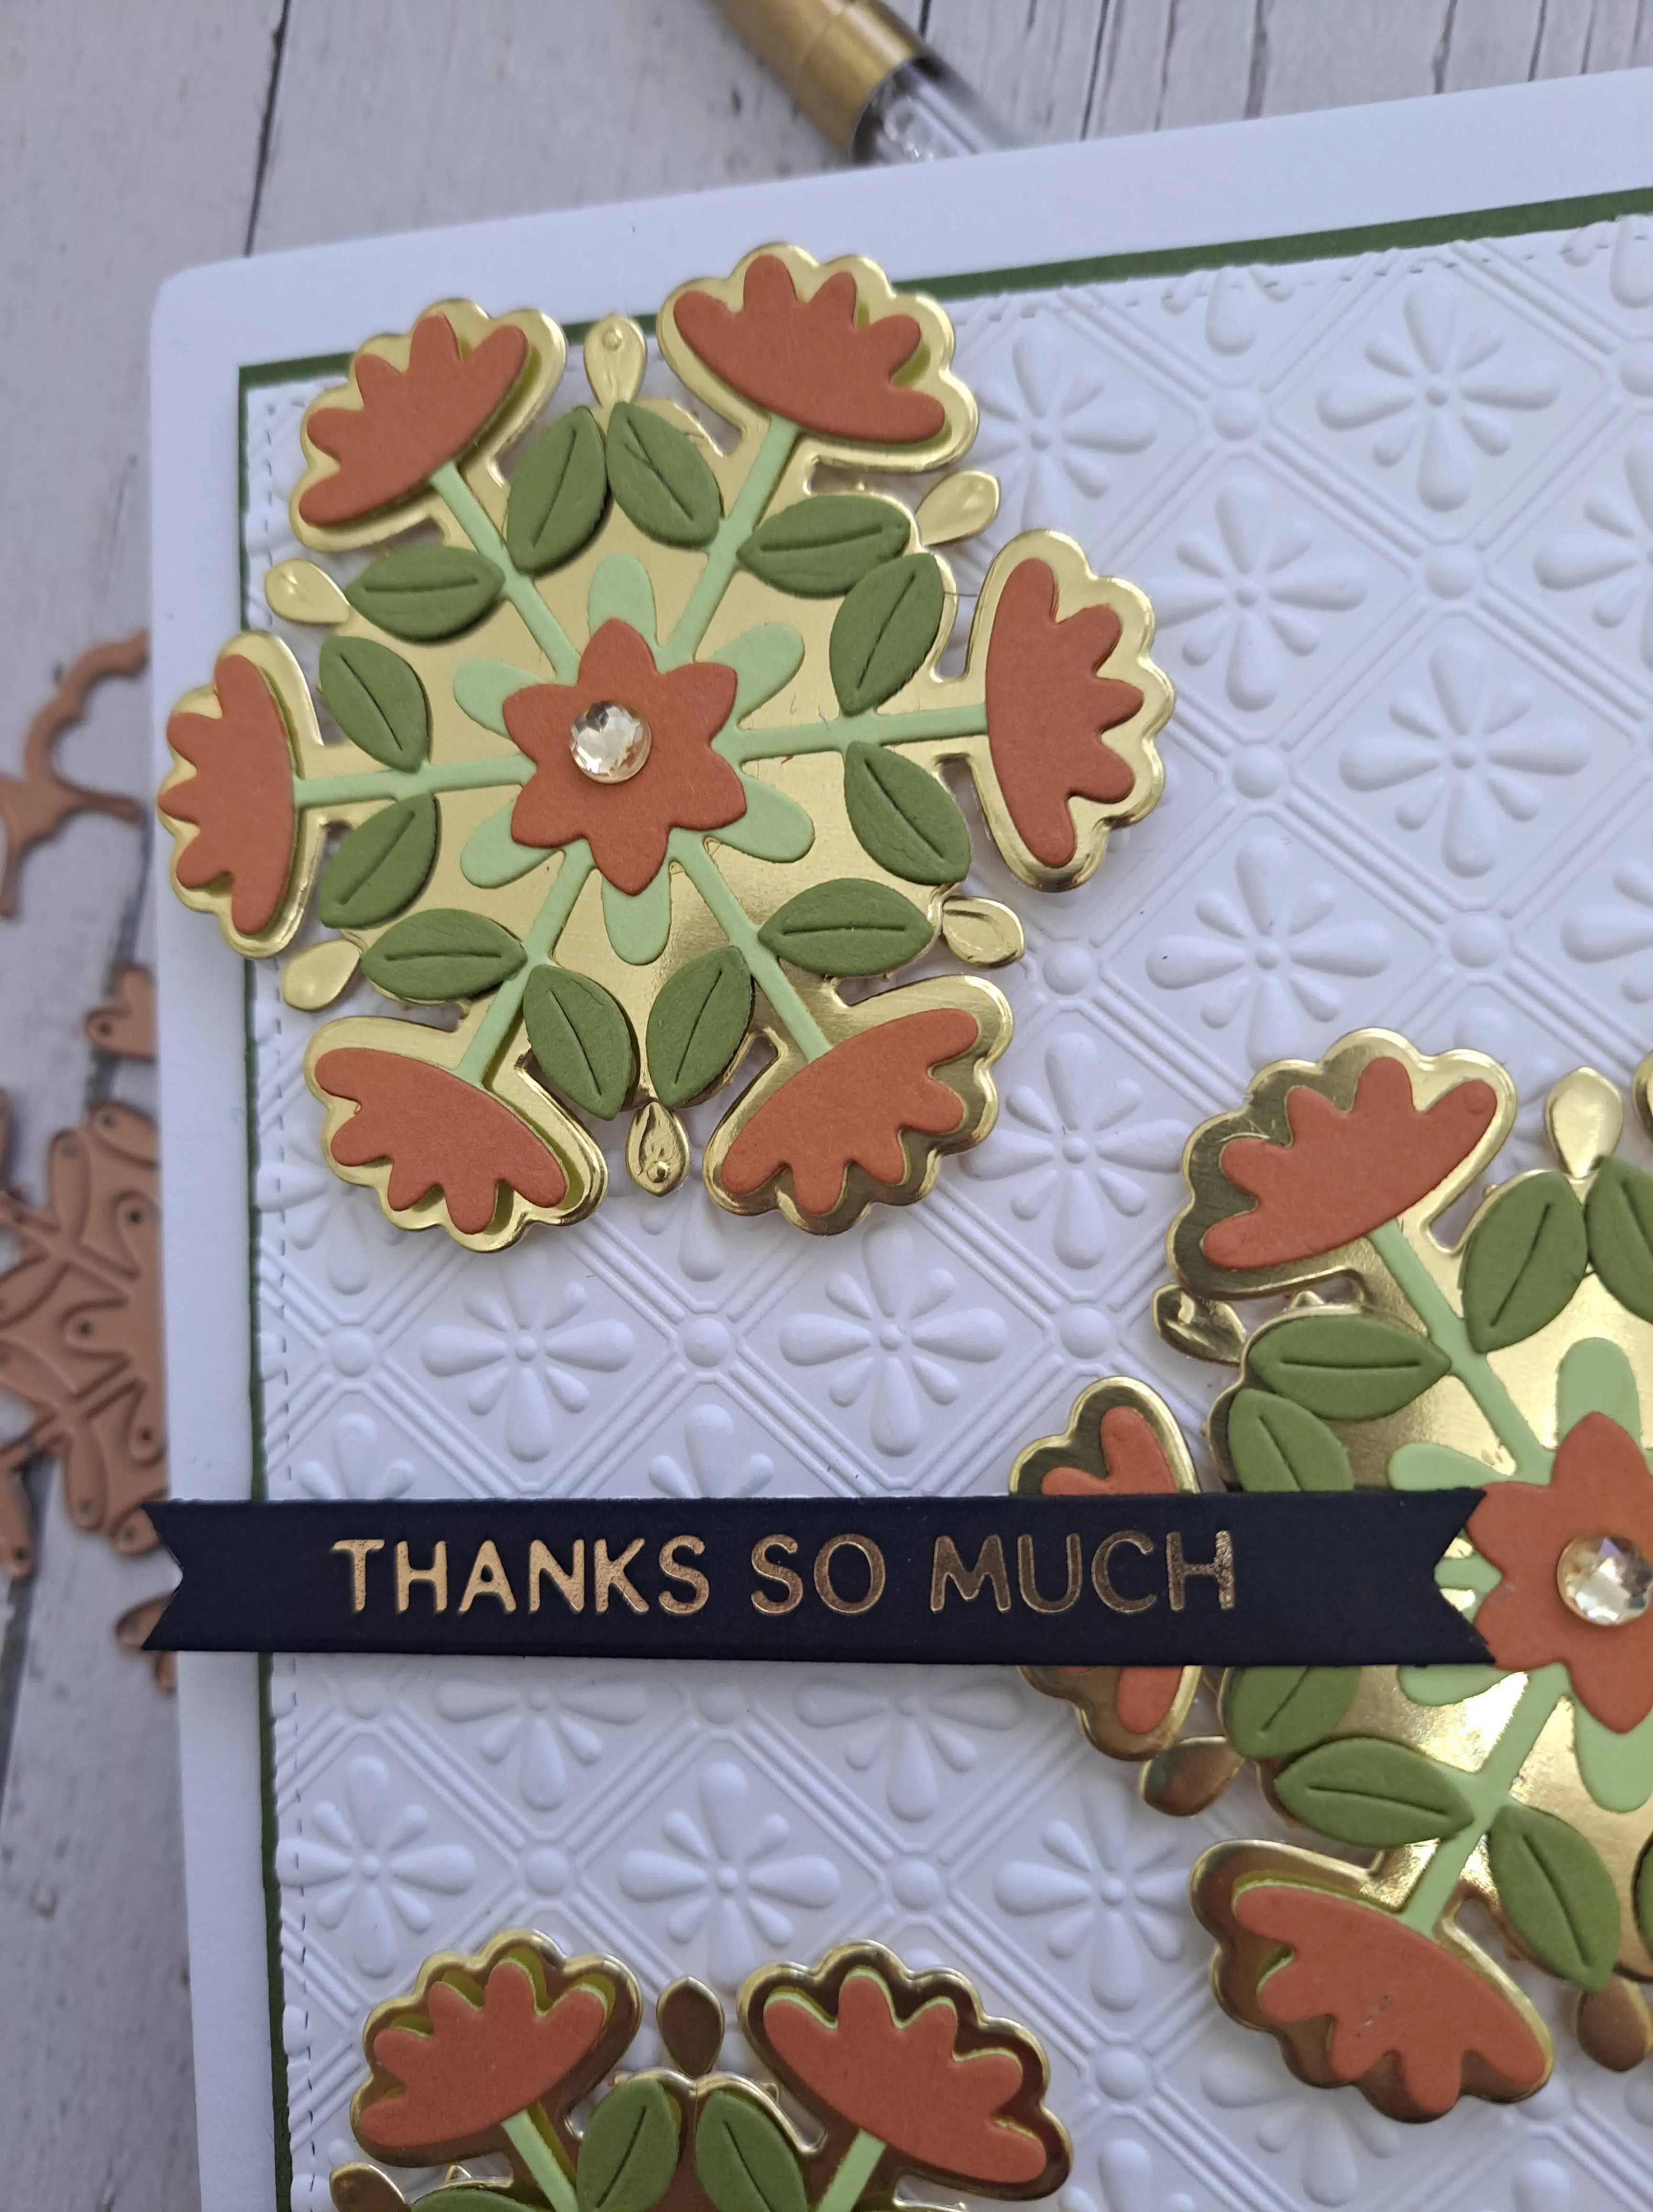
Hello I have a card to share using some Spellbinders products:
These floral dies were part of the products received when attending a virtual event with Bibi Cameron and Spellbinders. The layering florals are actually meant to be snowflakes – but I chose colours which are not necessarily meant for snowflakes and Christmas, to make a thank you card.
I die cut the outer layer with the shiny gold card stock, then used Concord & 9th green and cider for the florals – a lighter green for the stem, and a darker green for the leaves.
I also die cut another of the ‘snowflakes’ and layered behind the main one so you can see the itty bitty point showing in the gaps on the outside.
The background is a dry embossed panel using a Spellbinders embossing folder, matted with the darker green of the leaves – die cut using a Gina K designs Master Layouts die – so handy for those layers.
The sentiment strip is from a previous foiling session.
I’m so pleased with the versatility of this die set and how it turned out – not Christmas related at all. I like how the colours of the card stock and the gold go together, and the dry embossed panel adding some interest to the background.
I shall be entering the following challenges:
CYHTP – embossing folder – option of poppies not taken
Festive Friday Challenge – choose three items from the list (I chose four) – flowers, thank you, embossing folder, die cuts
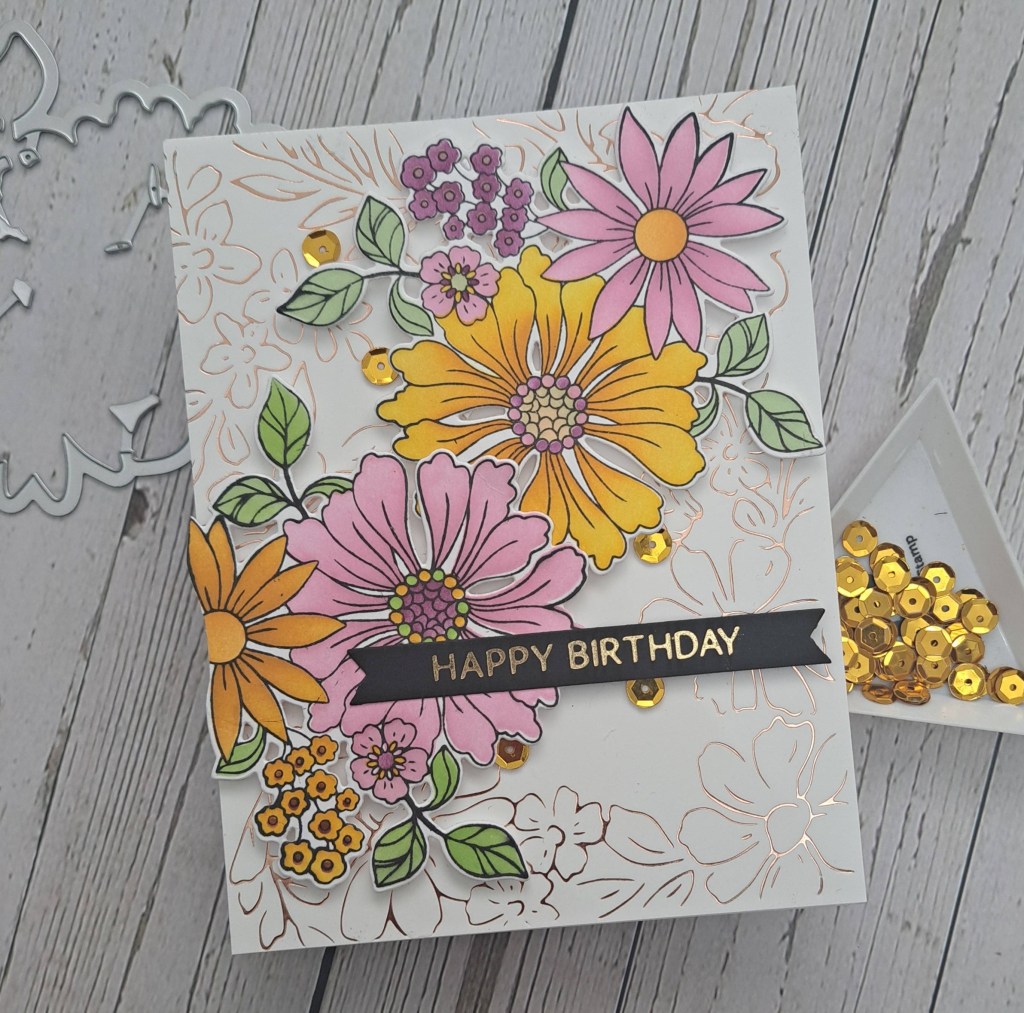
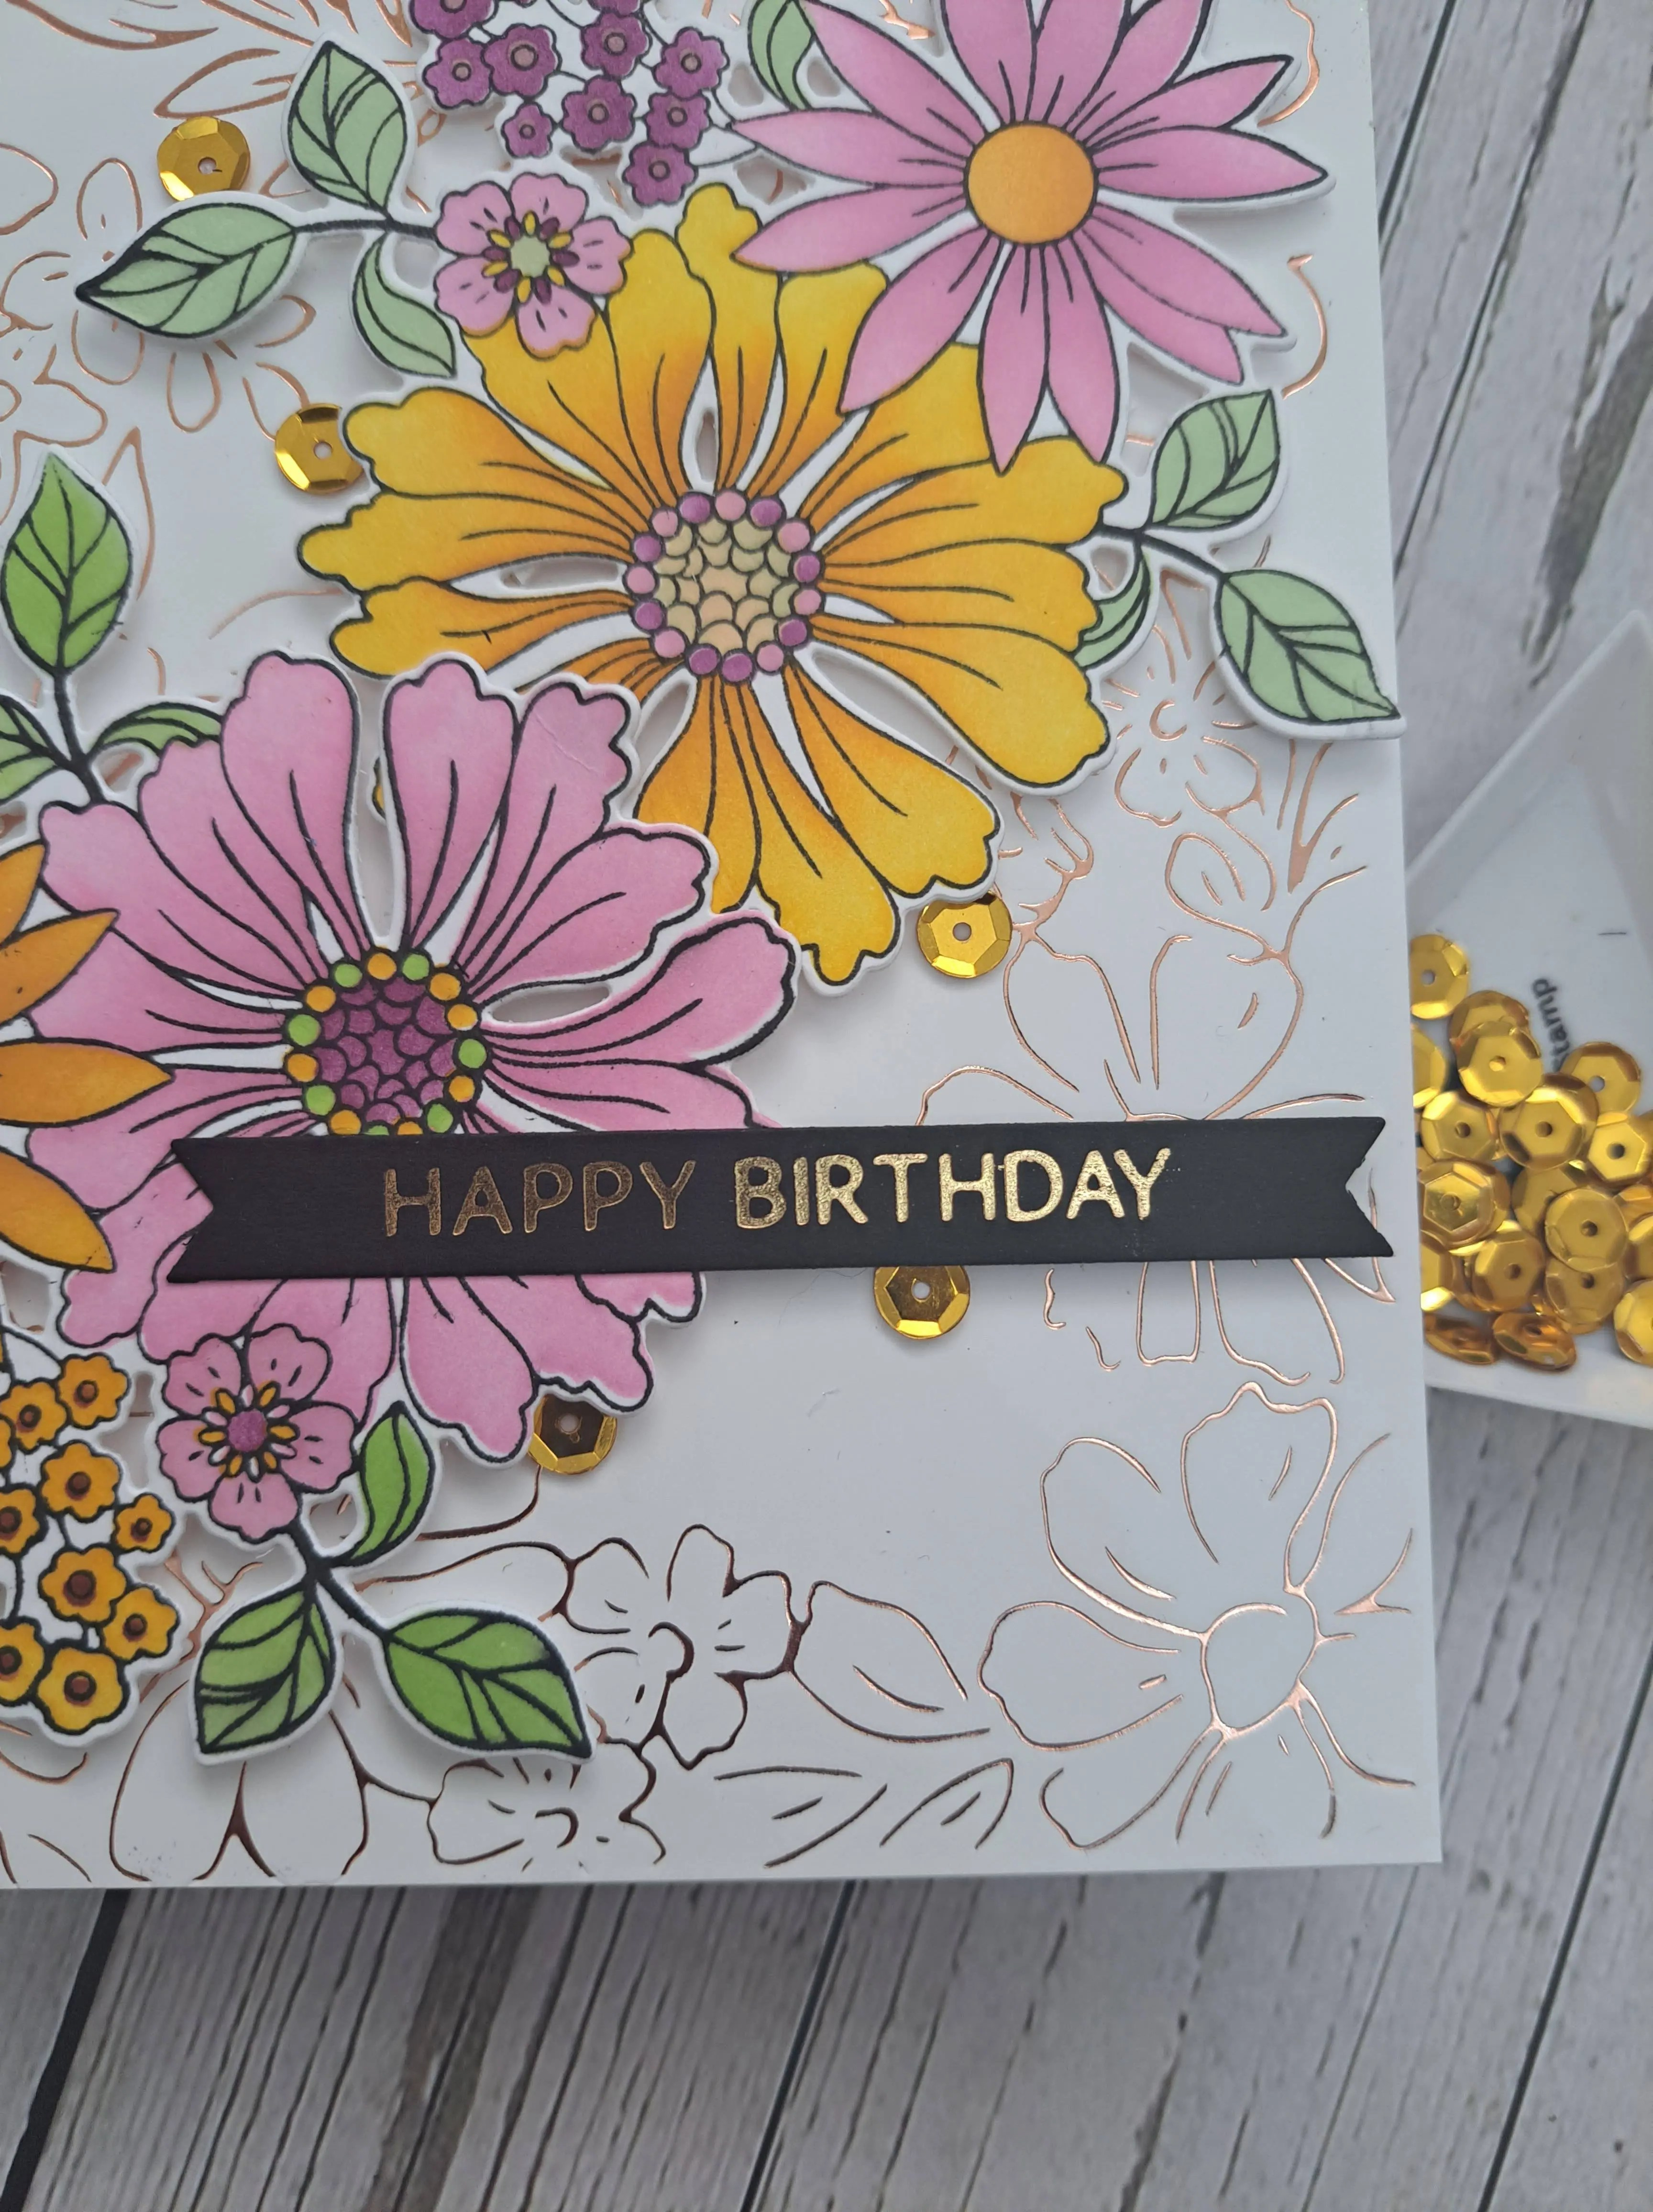
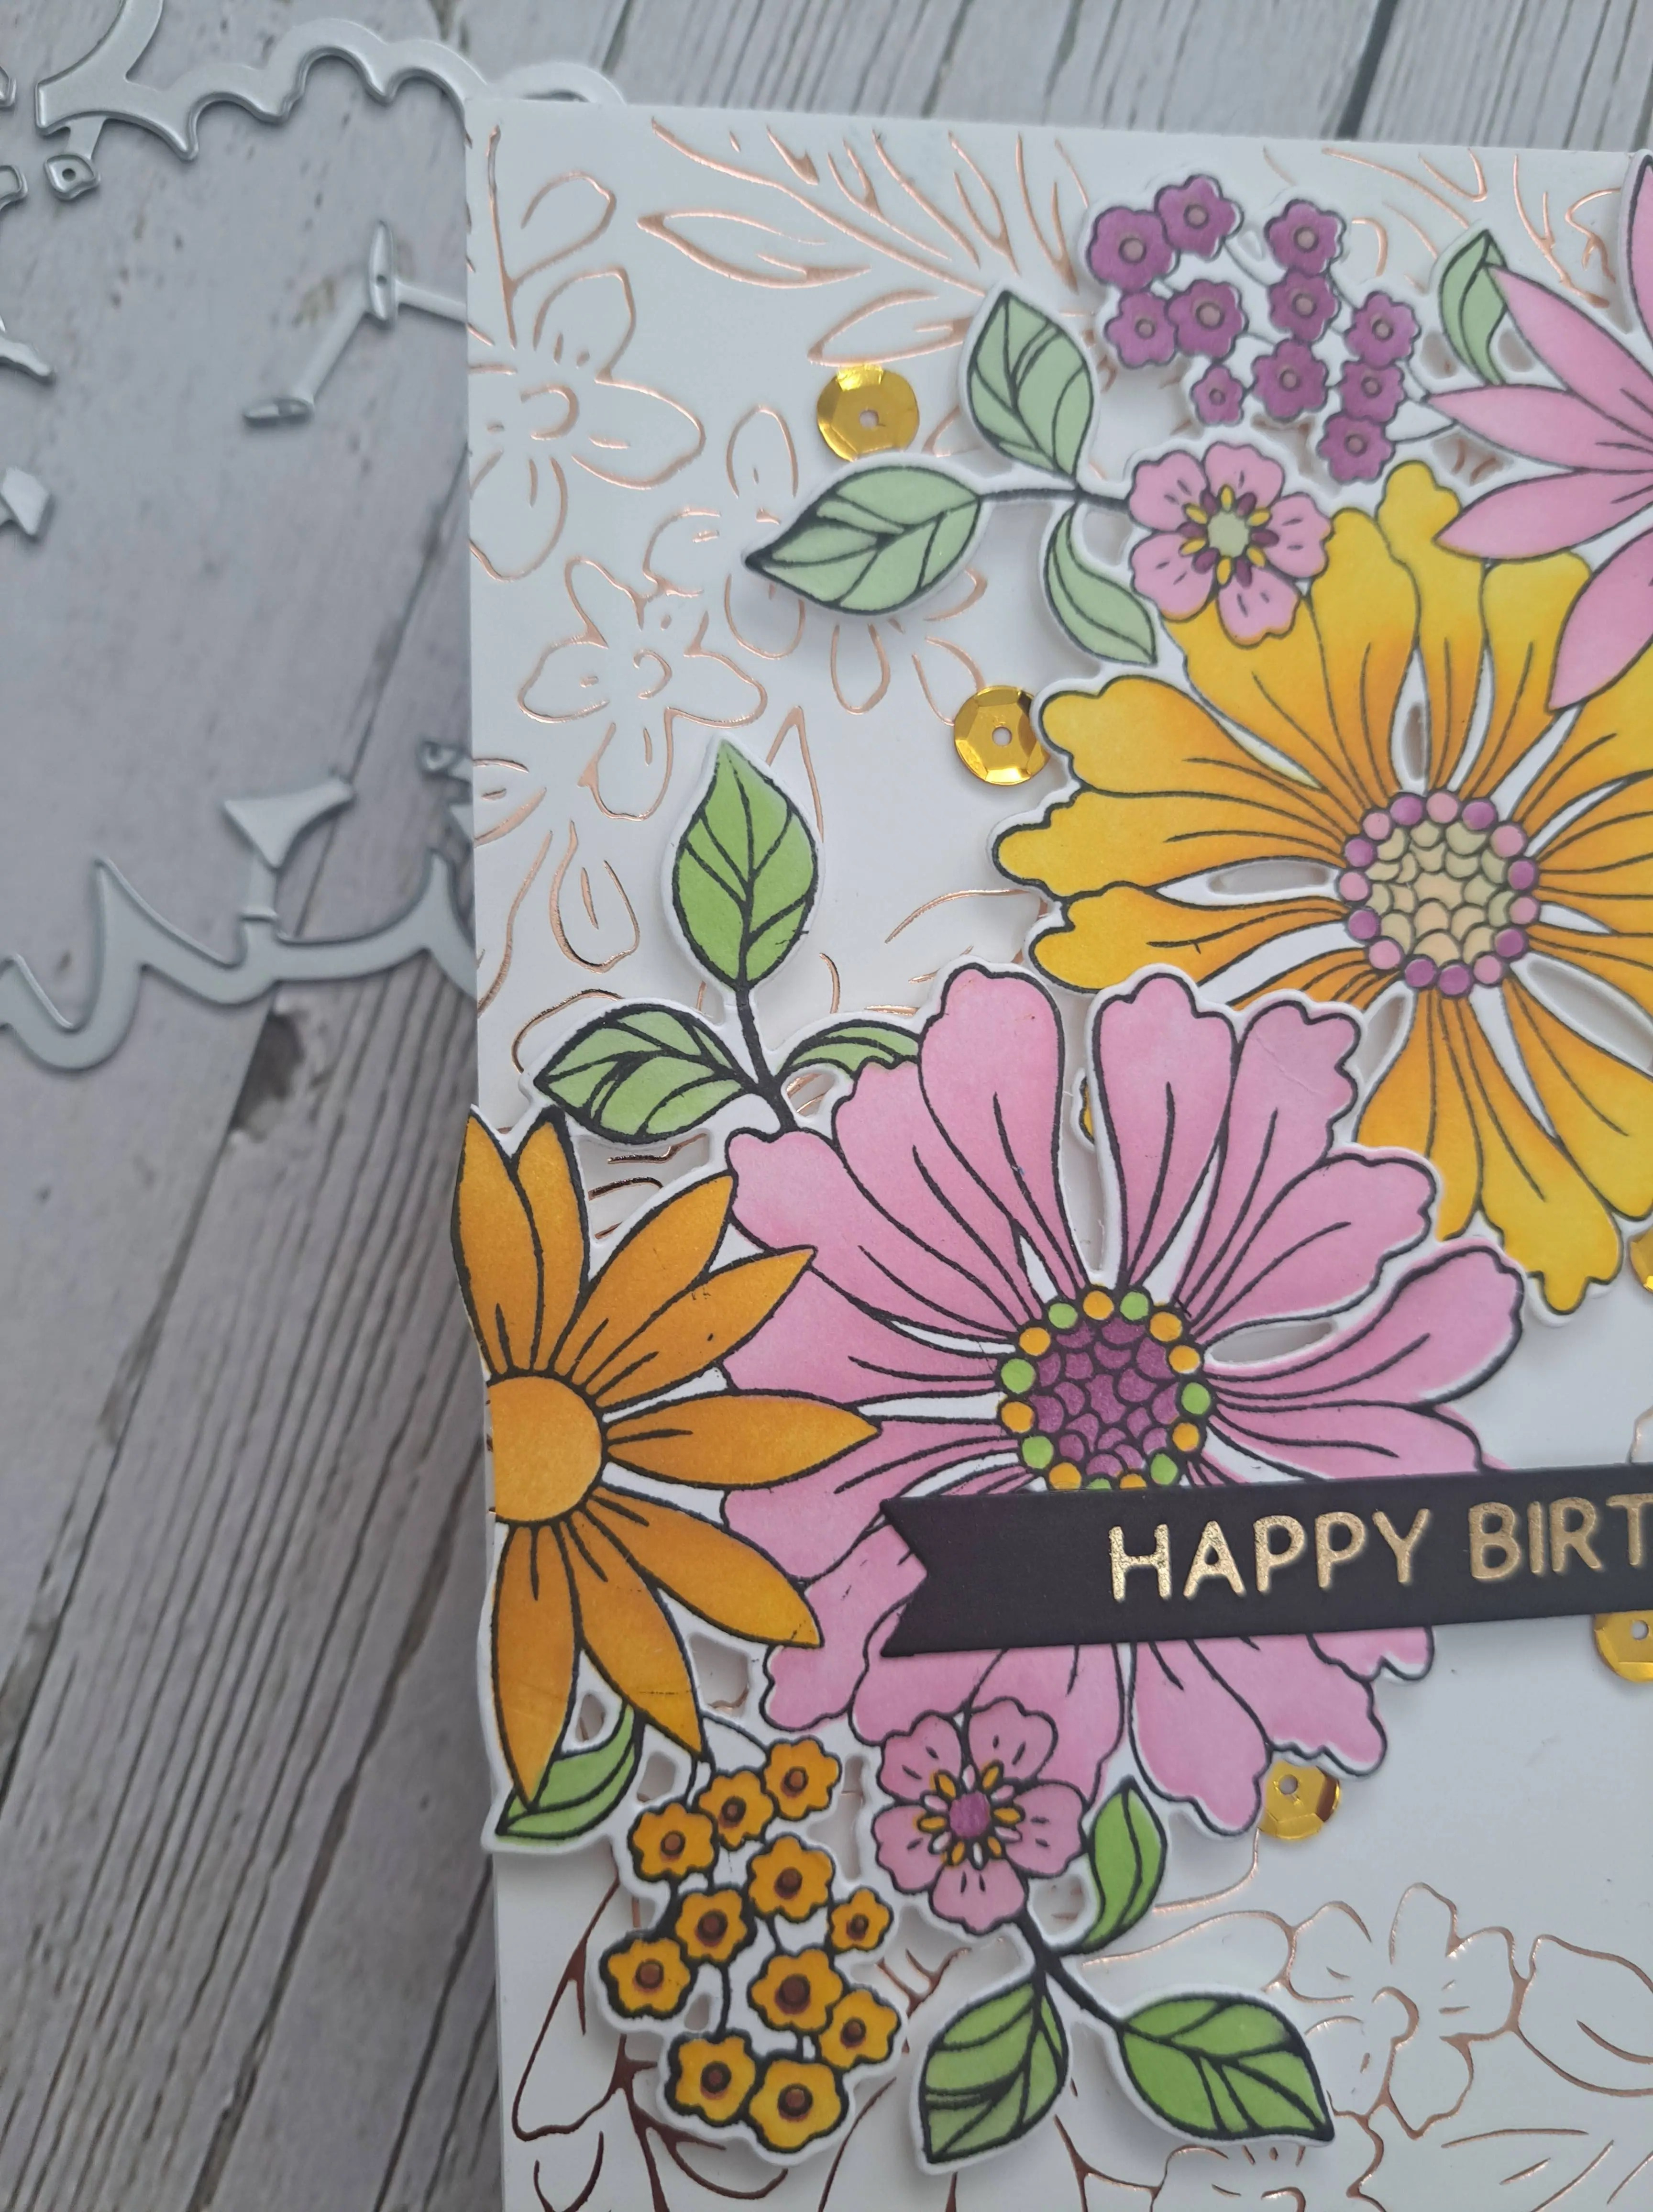
The theme for the challenge is ‘birthday‘. Here is my card:
The main floral images are from Pinkfresh Studio, stamped twice, then coloured using the matching layering stencils. I varied the colours on each layer of the stencils, not just sticking to one colour each layer, and used a liberal amount of masking/low tack tape to cover some areas up – I am quite a robust ink blender when it comes to stencils.
I gave a deeper pressure towards the centre of the flowers to try and give some dimension, then die cut with the matching die set.
The background is a hot foil plate – also from Pinkfresh Studio – and used as more of an interest in the background. Once this panel was adhered to the card base, I attached both of the floral images as you see with 3D foam, added a foiled sentiment strip, and some gold sequins dotted around.
I hope you can come and join us in the challenge this month with your birthday themed projects.
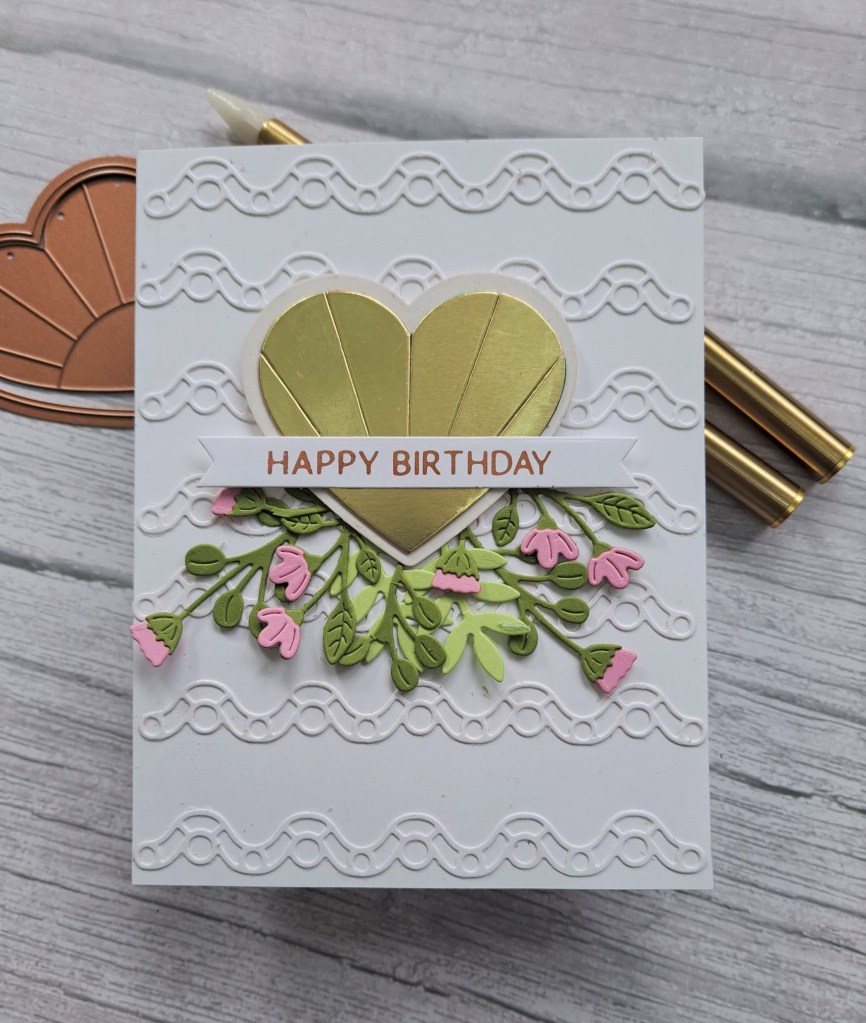
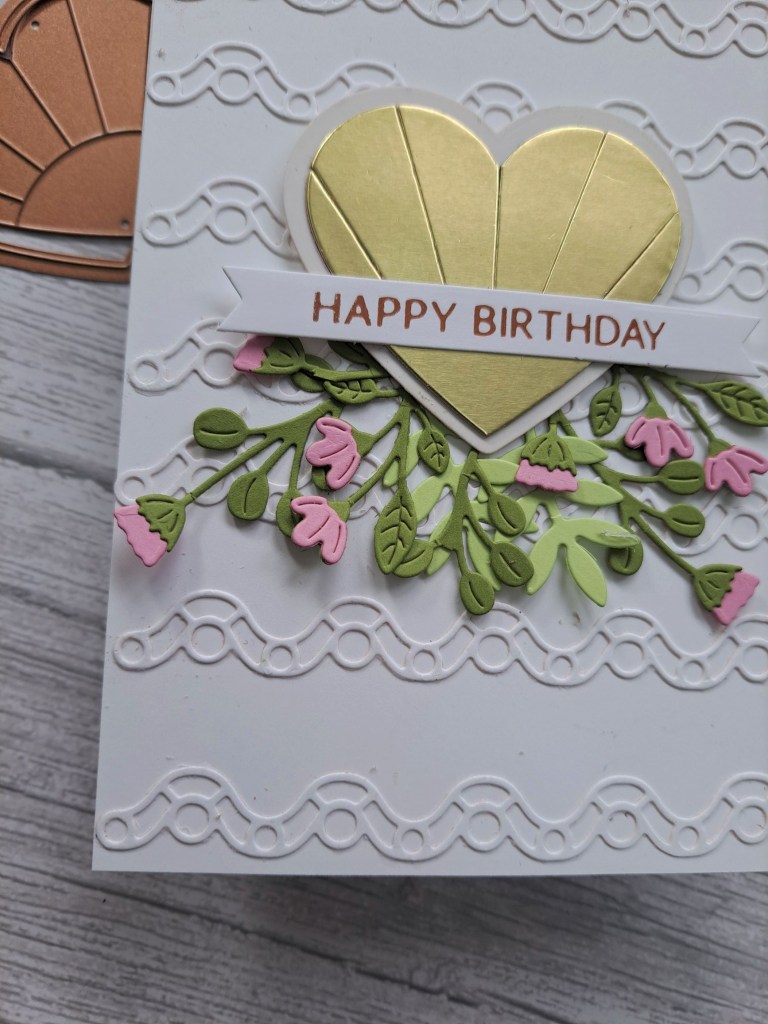
All the dies used for this card are from the Spellbinders Advent Calendar last year.
I started by creating the background, by die cutting the wavy strip seven times in white card stock and adhering them to the card base.
I then die cut the heart background piece in white, then the inner piece in gold card stock. The inner pieces can be used with coloured card stock to create a rainbow heart, which I may try in the future. The heart was attached with 3D foam – a piece in the middle of the back – as I knew I wanted to tuck some florals around it.
I die cut the flowers and leaves, layering them all together and then played with the placement around the hear until I was happy.
The sentiment is from a previous foiling session.
I you can come and join us with your birthday creations. xx
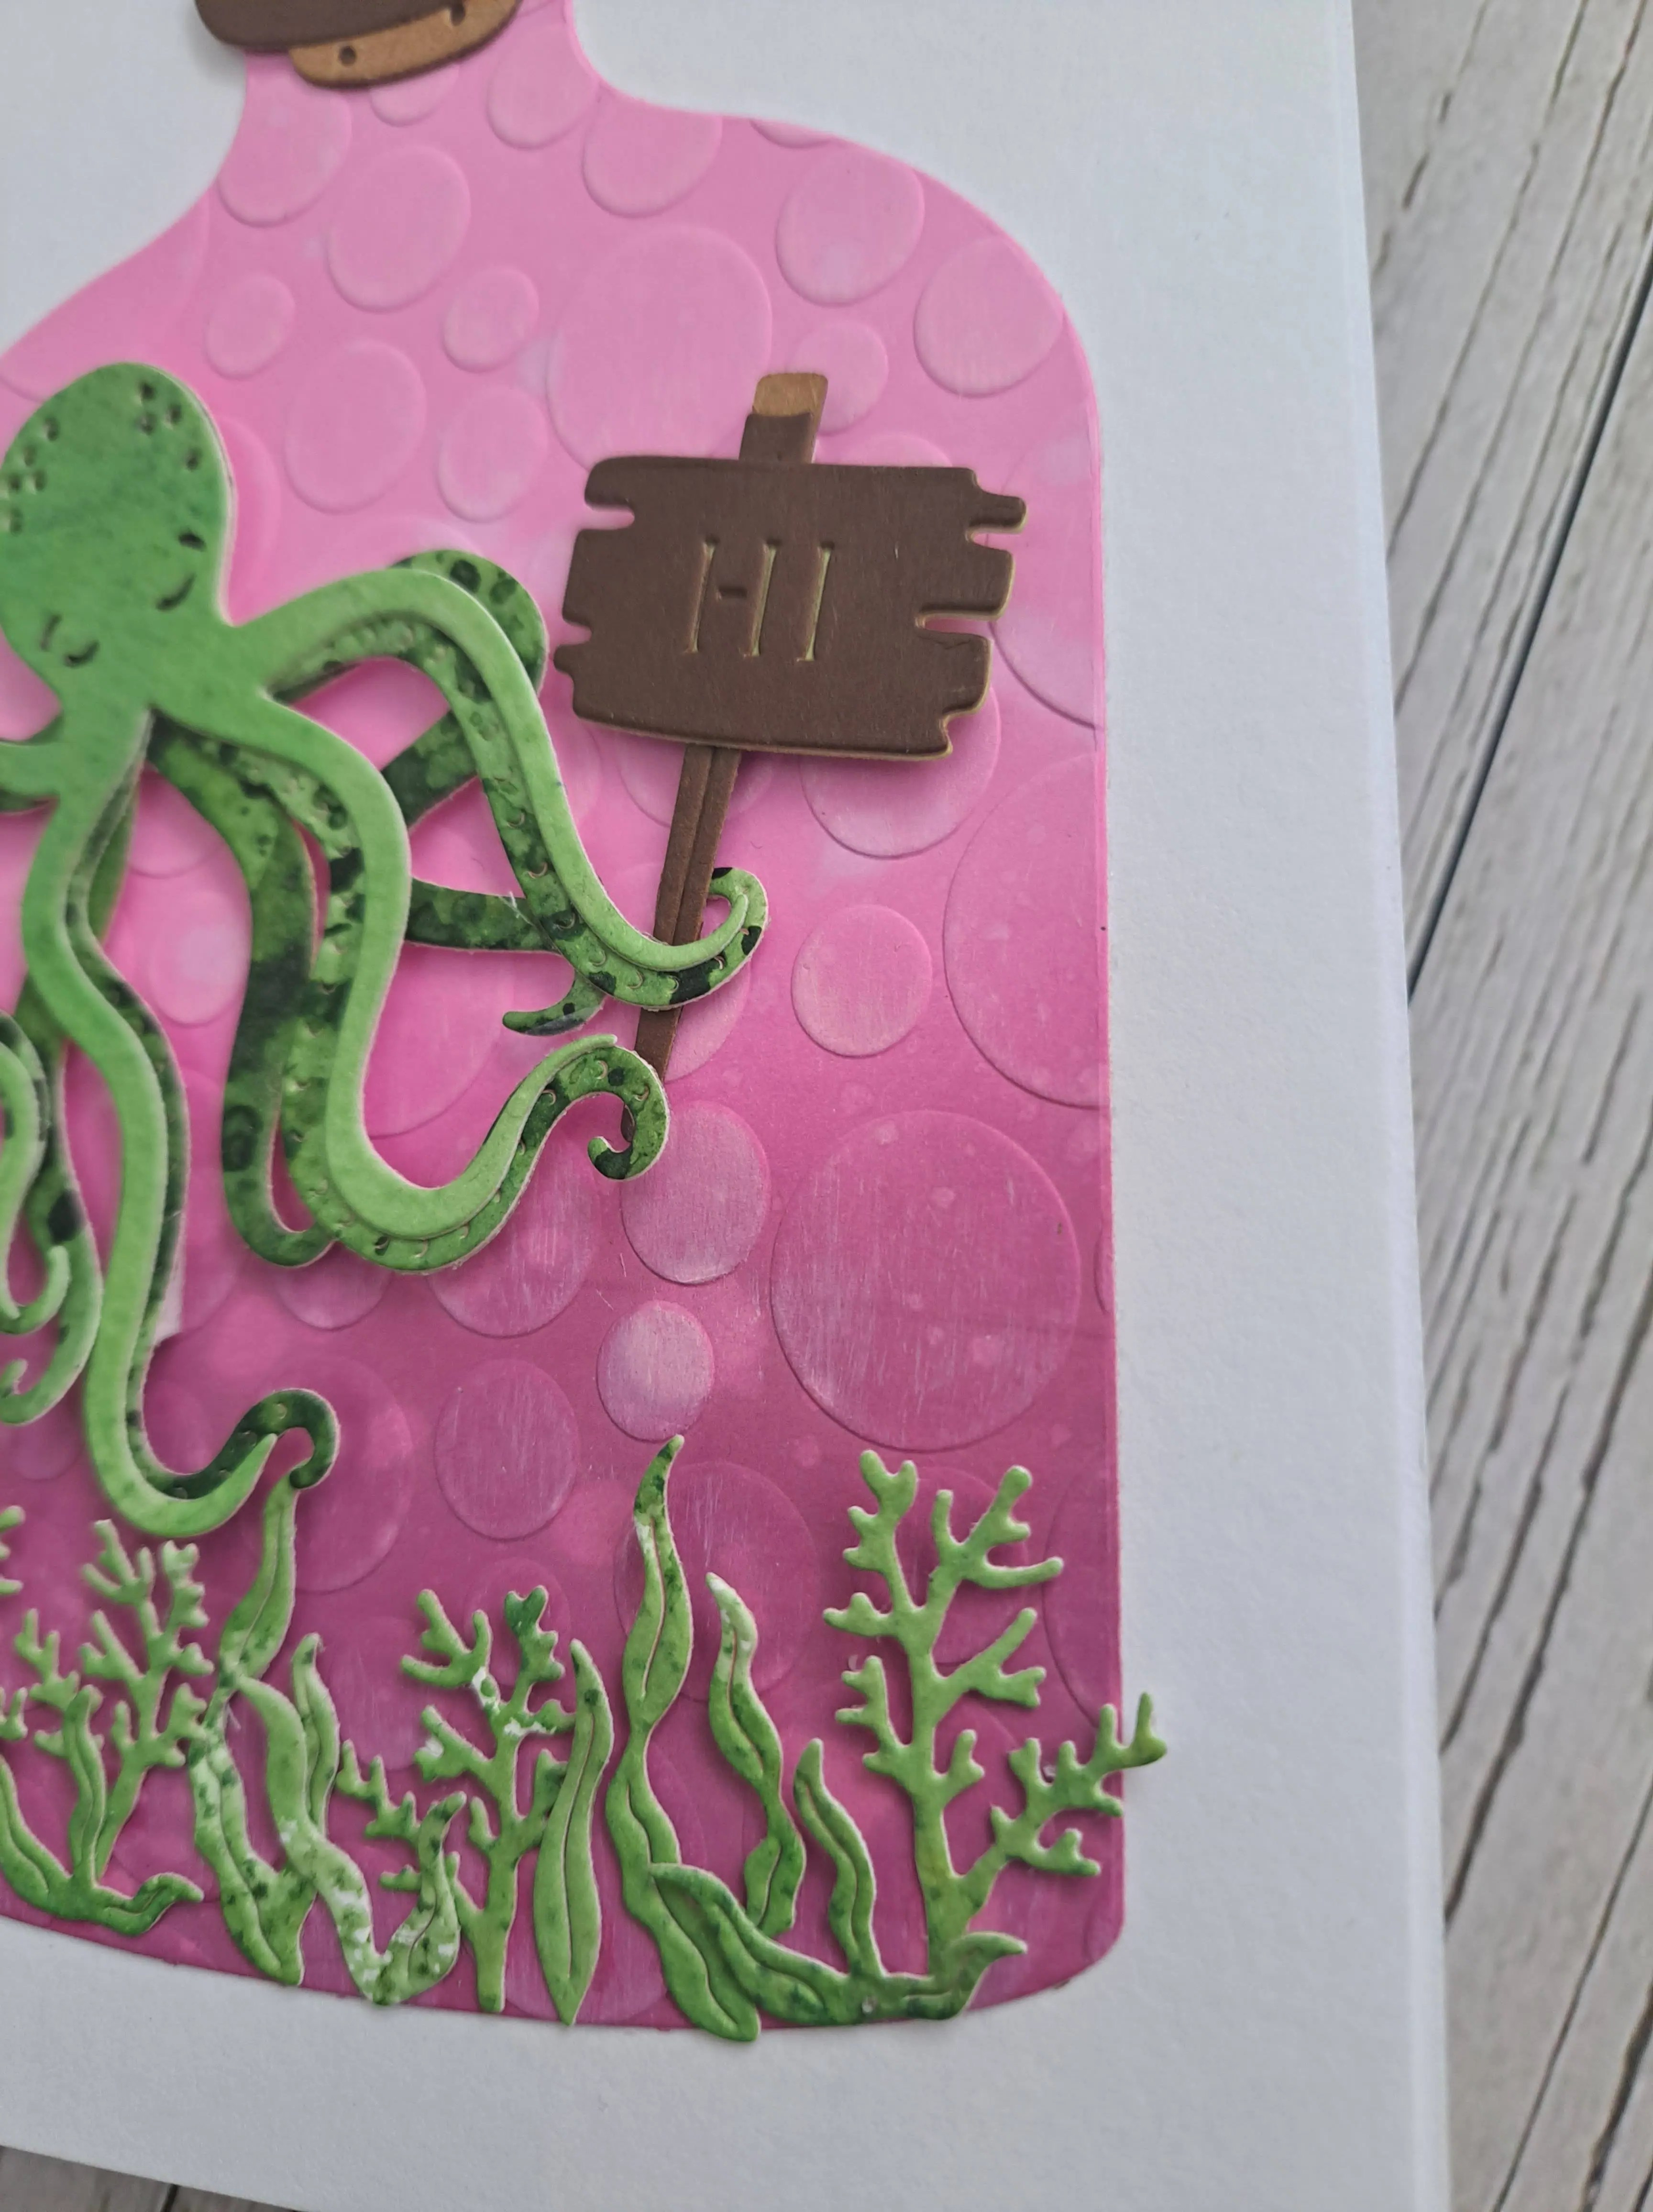
Hello, I hope you are doing well. I have a card to share using some products from the June release at Spellbinders which I haven’t got around to using yet:
I started by ink blending my background panel using the two inks you see in the main picture. I splattered them with water and set it off to one side to dry.
This piece of card is an older Distress Heavystock – some of the batch which doesn’t take water well, so I had to be very careful with the amount of water I added – but the effect came out as I wanted.
Once dry, I die cut the bottle, and then used a Spellbinders embossing folder to create the bubble effect. Onto that embossed bottle I then rubbed – very gently – some of the Hero Arts white pigment ink so it would pick up some of the edges of the bubbles.
I then used a previously created ink smooshing panel of green – a lighter green panel and a darker green panel – to die cut the octopus layers and the seaweed.
I put the layers together, added some black for the eyes and mouth, and stuck them down onto the bottle.
The cork was from some brown cardstock, as was the board and sentiment, slotted into one of the arms of the octopus.
This was fun card to create, and I can see I’ll be playing with this die set again.
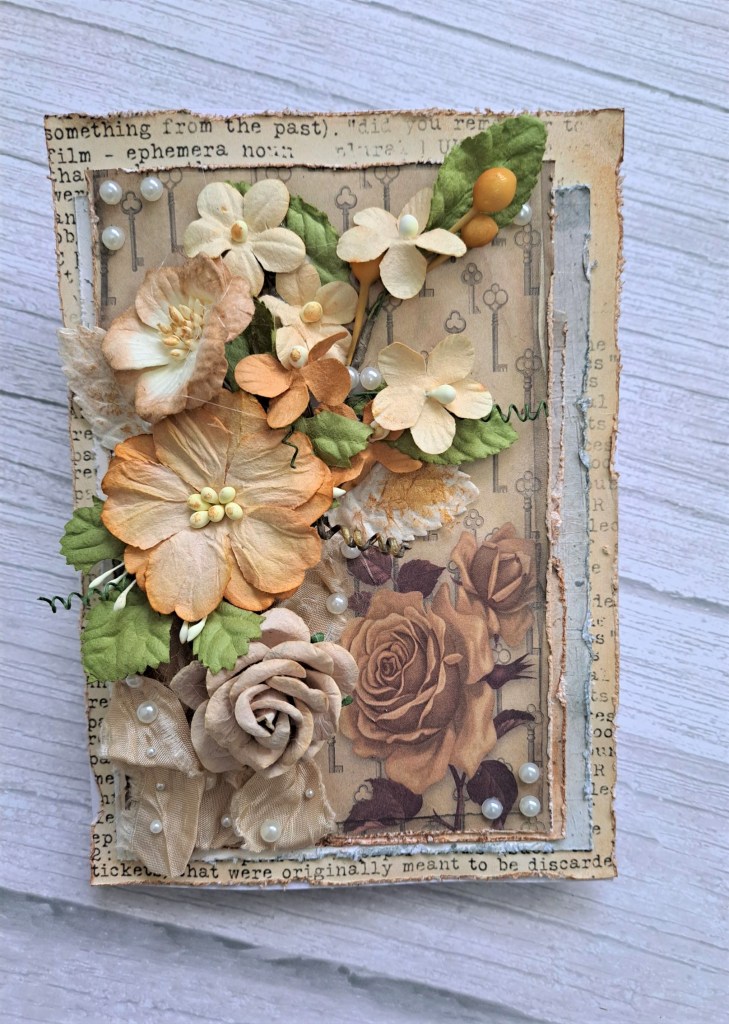
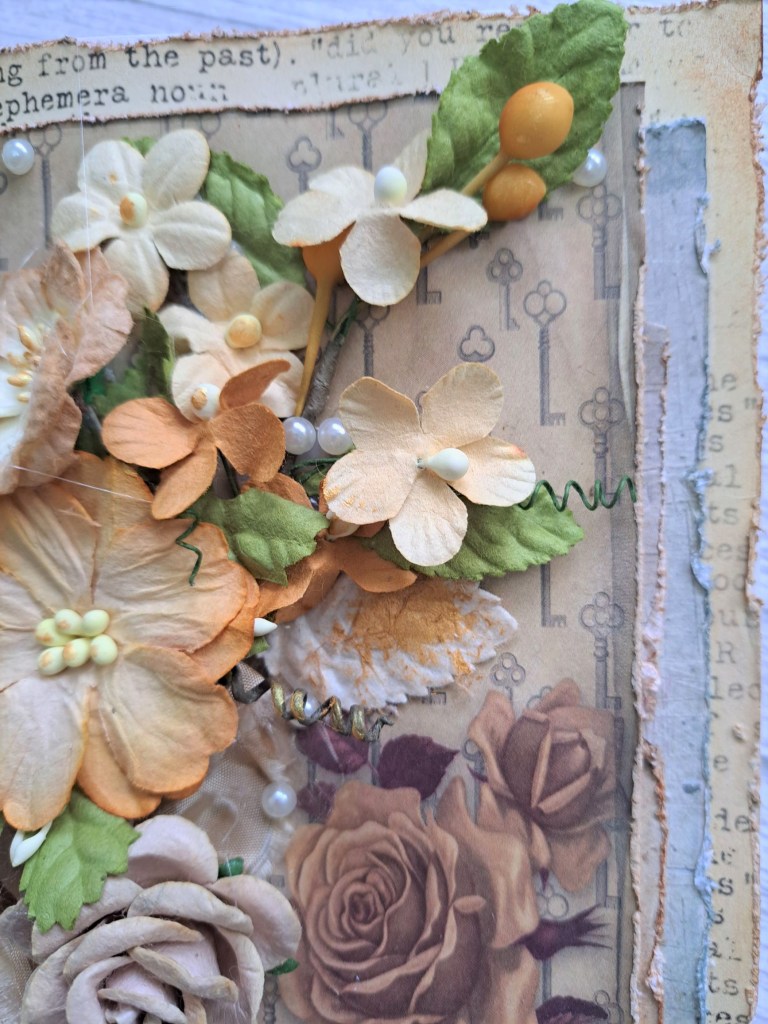
Hello there. I was lucky enough to be chosen as winner of a previous challenge at The Craft Challenge, and invited to be a Guest Design Team member for an upcoming challenge. The challenge theme is ‘Shabby Chic’ – here is my card:
So – I am hearing you ask ‘is this really Loopyloo? Has someone taken over her blog for a day?’ Well – this was certainly a challenge for me – but I’m giving it a go – and I really had fun with this card….
I asked for hints and tips from Jo and the CRAFT Team – and was advised to be posh in a tatty way, some torn paper. I also had a look through Pinterest – quite a bit of research to give me ideas – and then I played….!
I hunted out some patterned paper, some paper flowers, some pearls, my edge distress tool, and my ribbon.
My card base is 5×7 inches, and I added several pieces of patterned paper, various but muted colours, distressed the edges, inked those distressed edges just a little with some Distress Ink and glued them down. I offset them so you can see the layers, and so that the large rose on the top piece of paper could also be seen.
I found some shabby ribbon which I have ‘stored’ for the past 3 years, and used a muted brown colour as a base for the flowers. Using my hot glue gun I added the ribbon, the flowers – cutting and bending until I was happy with the outcome. I added some gold wax to some of the leaves which I thought were too bright
I found some pearls in varying sizes and attached them with wet glue – dotted them all around the flowers, and onto the ribbon.
I really had fun adding all the embellishments and details. It was a challenge for me – but I think I rose to the occasion…..
I hope you give it a go and join us at The Craft Challenge. xx
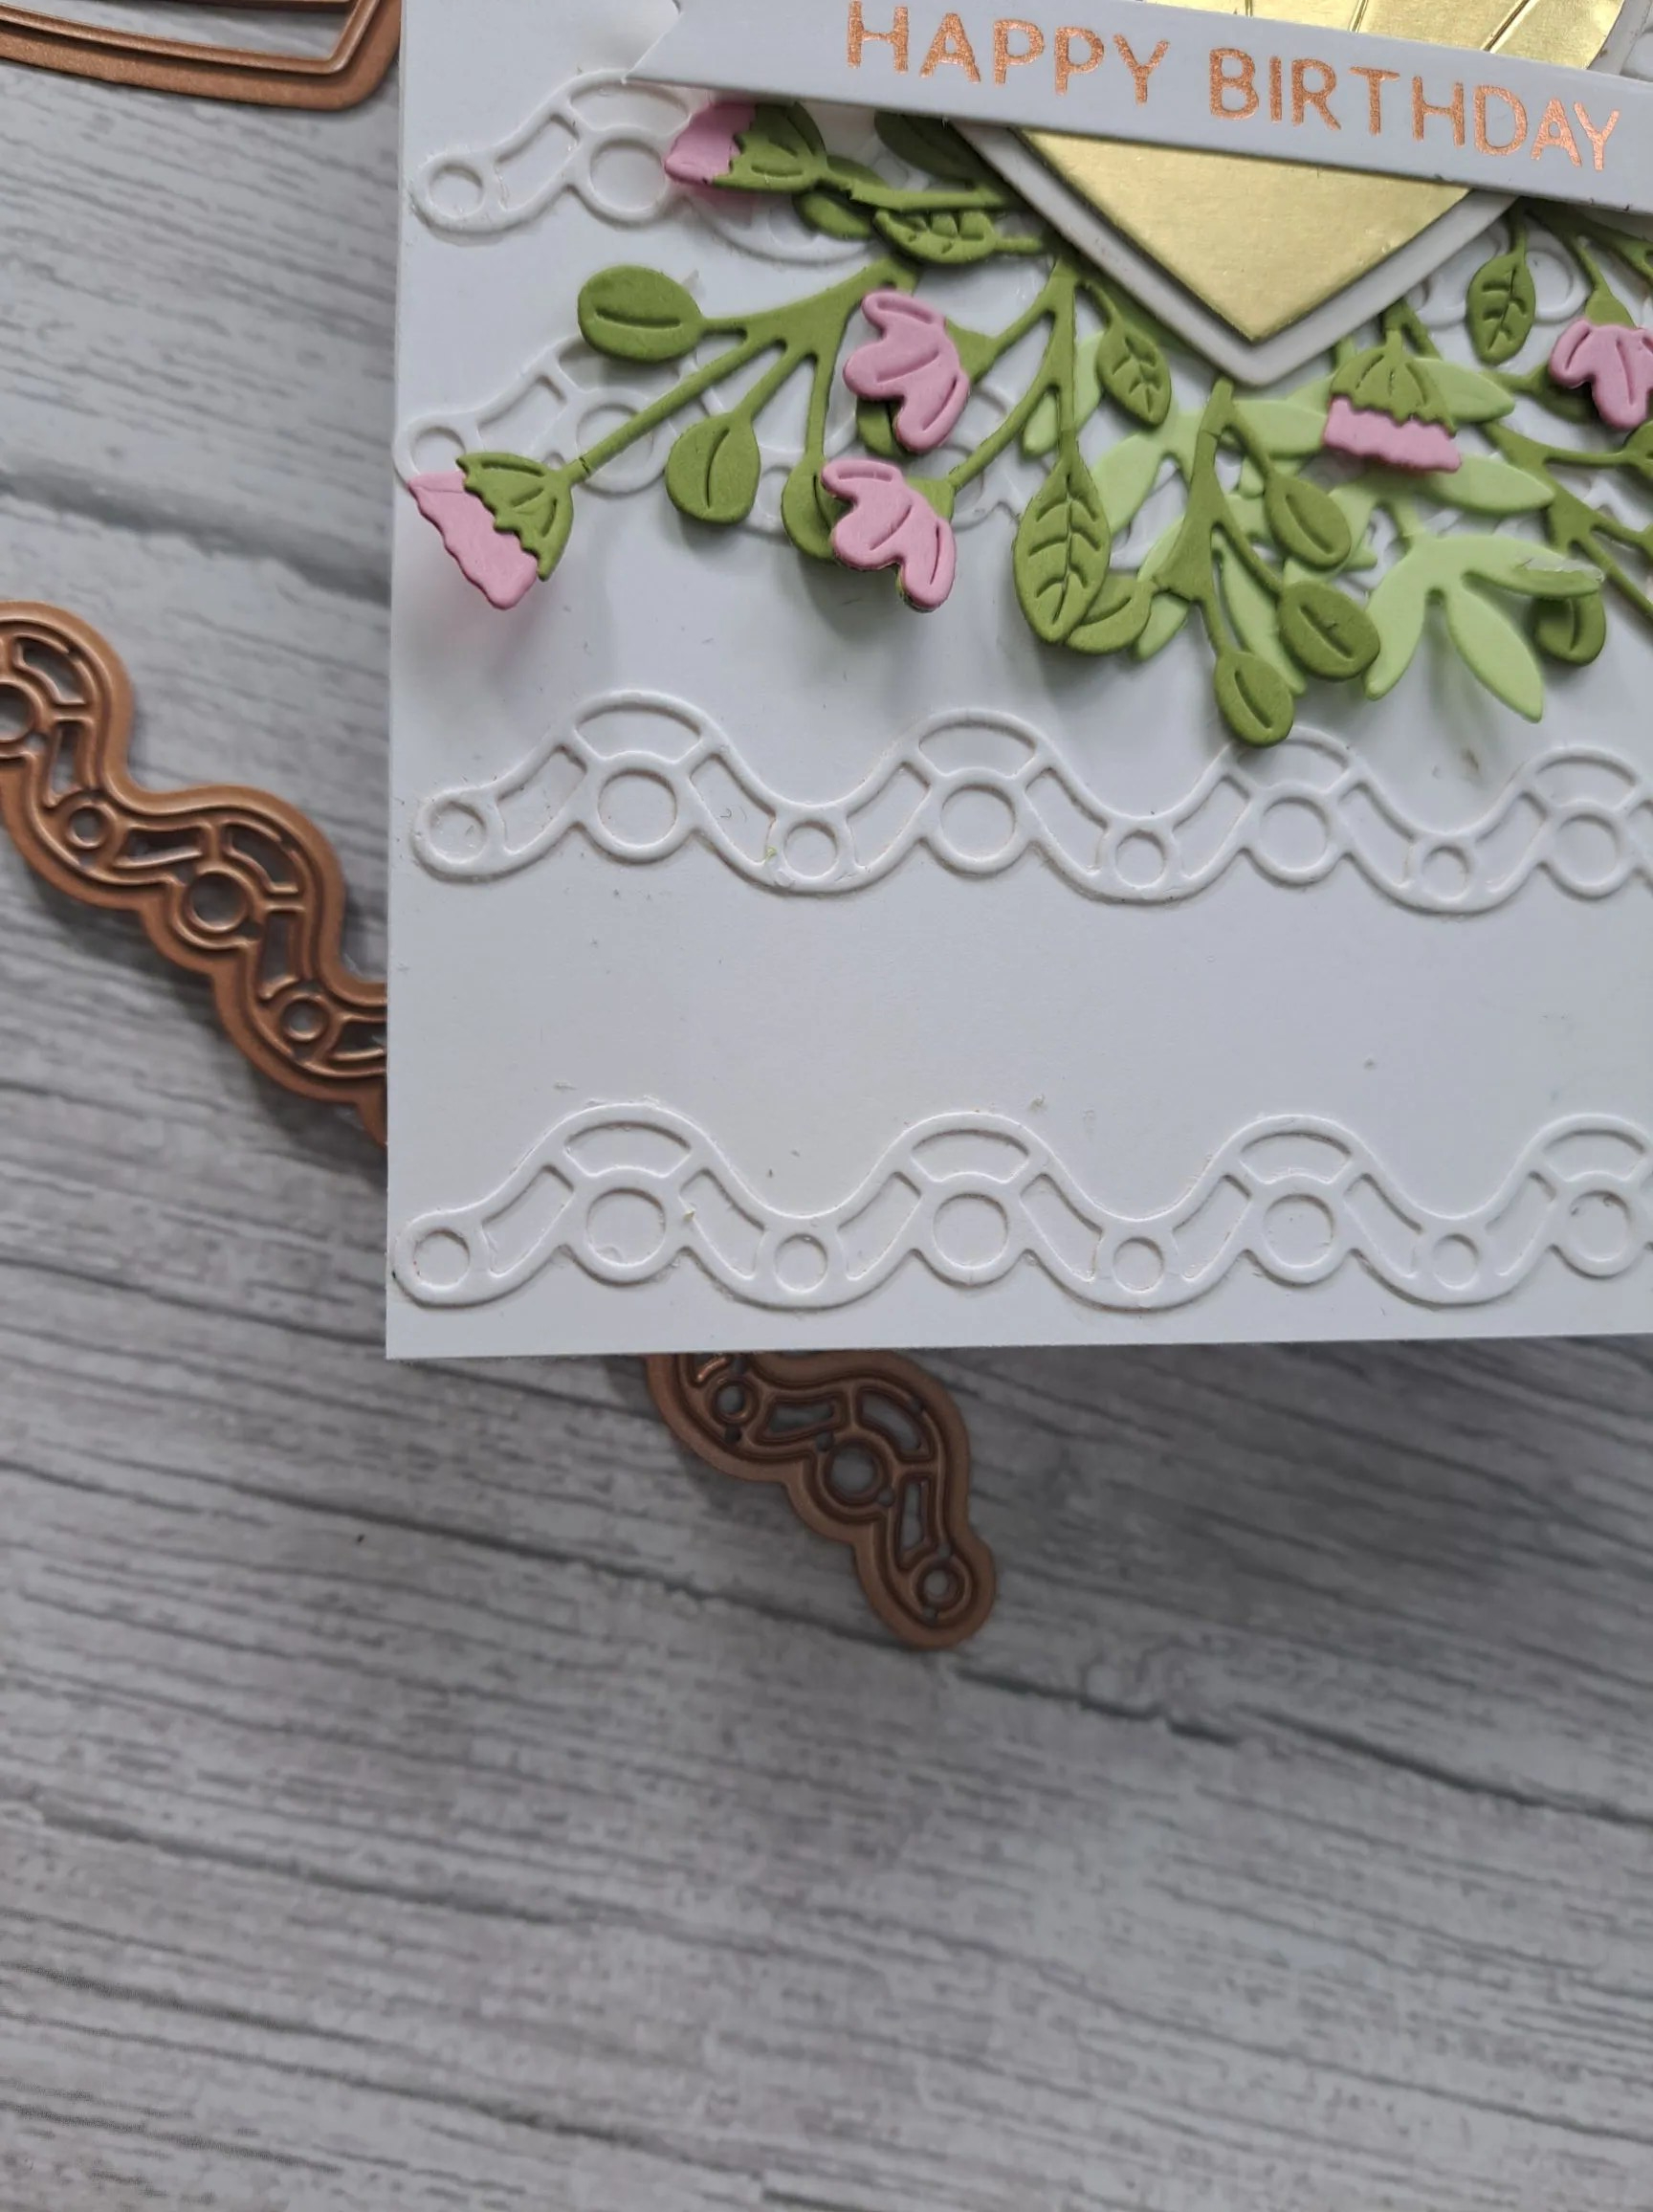
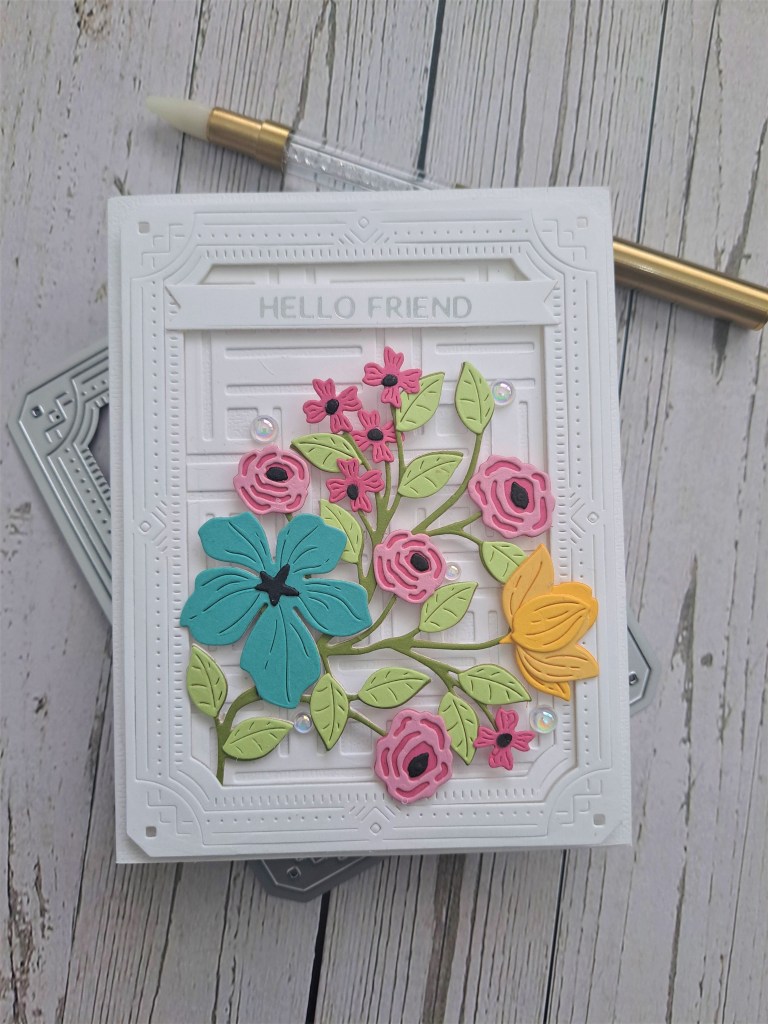
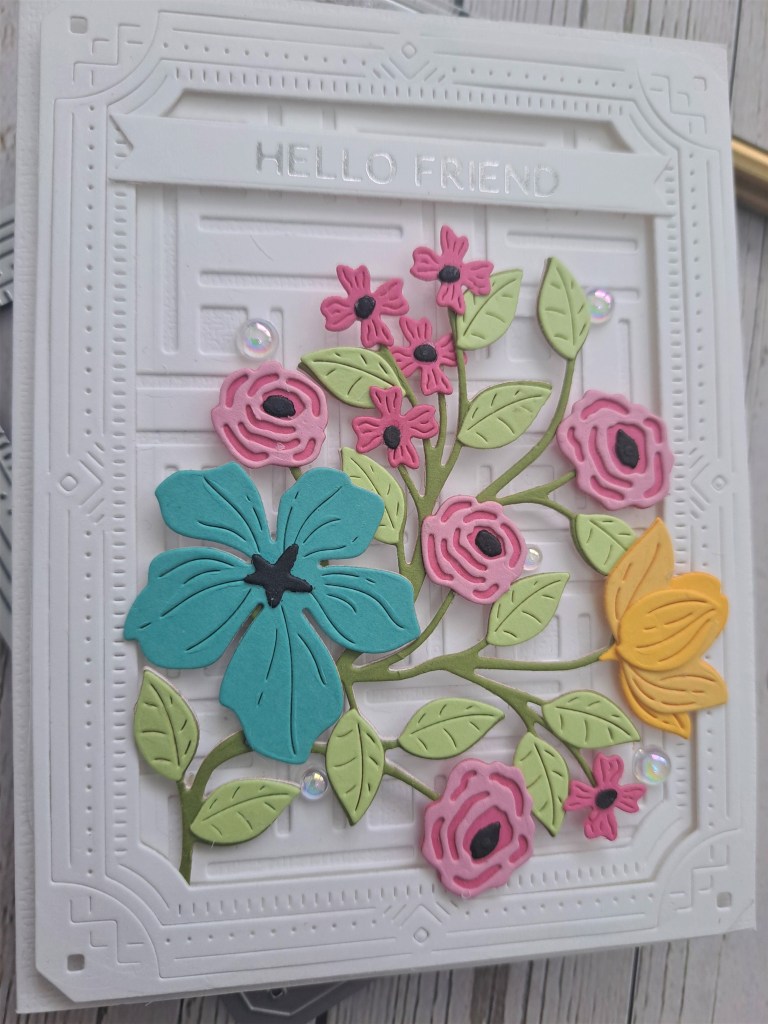
A Bank Holiday weekend here in the UK and some time for crafting. I created this card with some recent purchases.
I created the floral arrangement using Concord & 9th card stock ‘Four Petal Thank You’ die set from Spellbinders. Layering flowers and leaf die cuts seem to be my new joy………and a couple of years ago I wouldn’t have gone anywhere near any tiny, little fiddly pieces – now I quite enjoy them.
I die cut the favourite Pinkfresh Studio ‘Art Decoframe’, and die cut the middle out too. I used this middle piece of card with the new purchase from Catherine Pooler – the ‘woven‘ background panel. I wanted to insert this into the frame so instead of cutting the panel out wholly, I just used this inner piece.
The ‘woven’ panel was added as a ‘might as well’ when I was ordering recently, and I’m really glad I did. I think this die will be used a lot – it adds interest when used this way – white on white – and I am sure it will stunning in different colour schemes too – watch this space….!
A white card base, the deco frame adhered with 2D foam strips, the inner die-cut woven piece inserted, the florals added with 3D foam, a foiled sentiment strip and I thought I was done……but no…….I added some iridescent gems because they would pick up the colours near to them.