Excited Congrats…

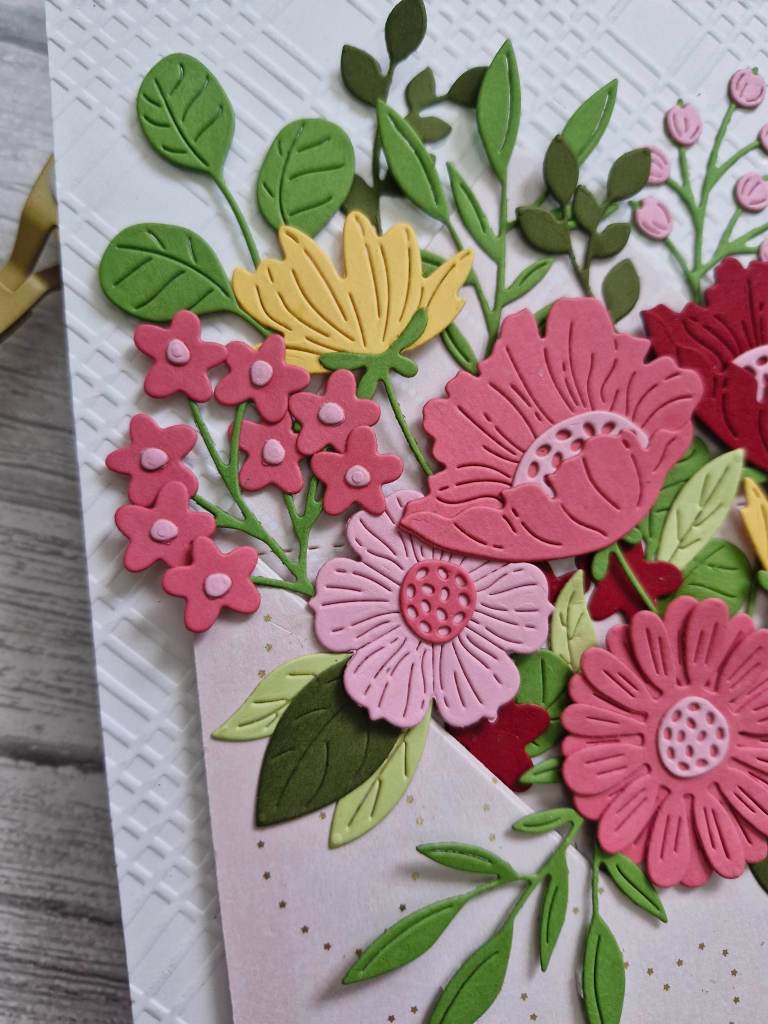
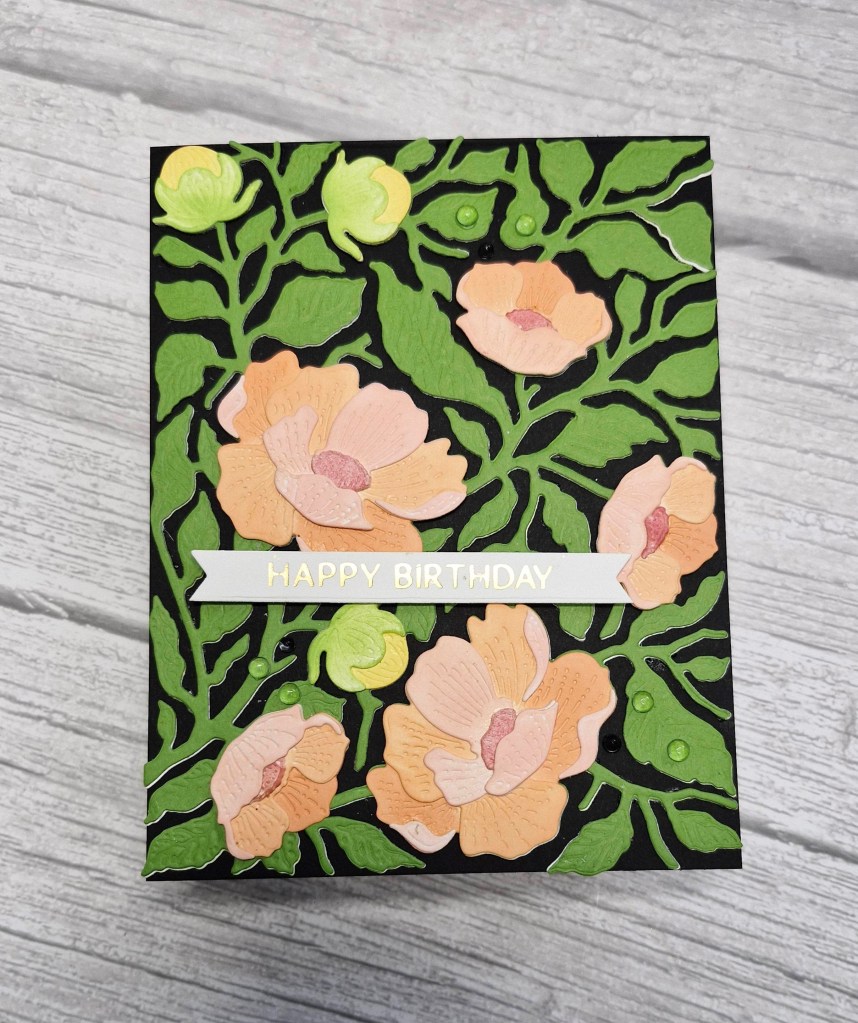
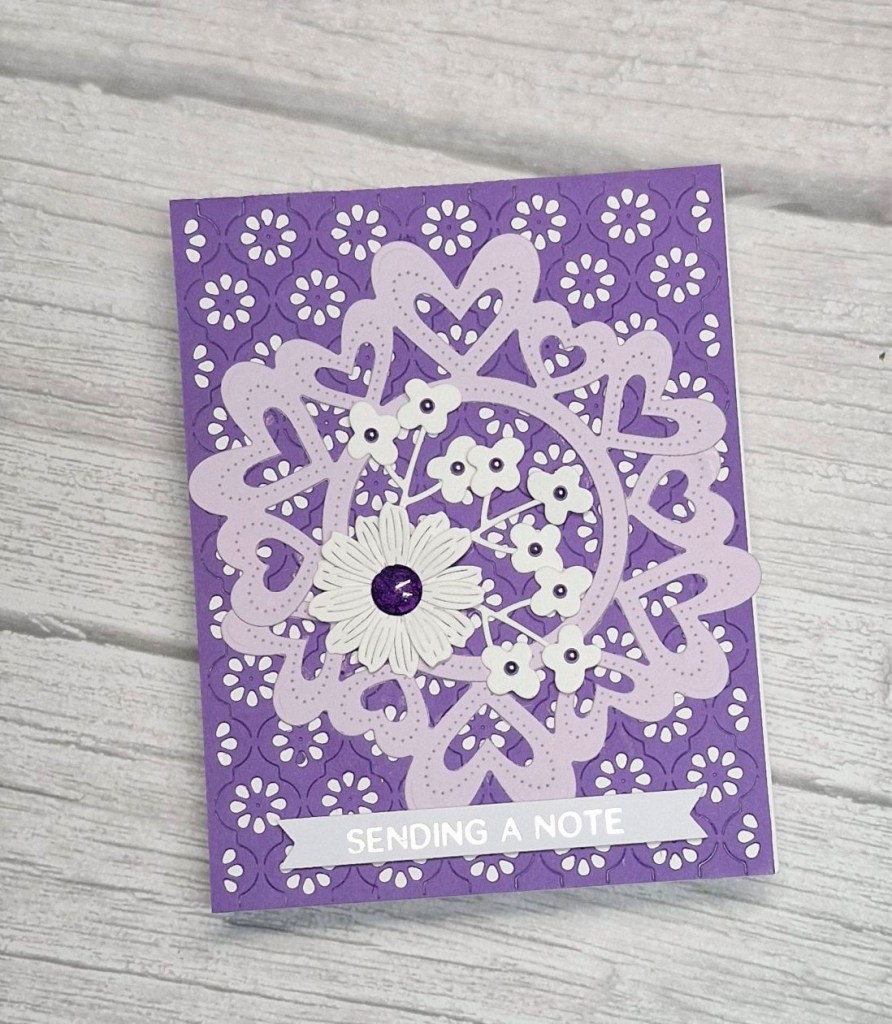
Hello again. I have a card to share using some of the products from the recent Pinkfresh Studio ‘Create and Connect Event’:

This floral arrangement is from the ‘Lantern Botanicals’ stamp set, now on general release, but was provided as part of our event kit.

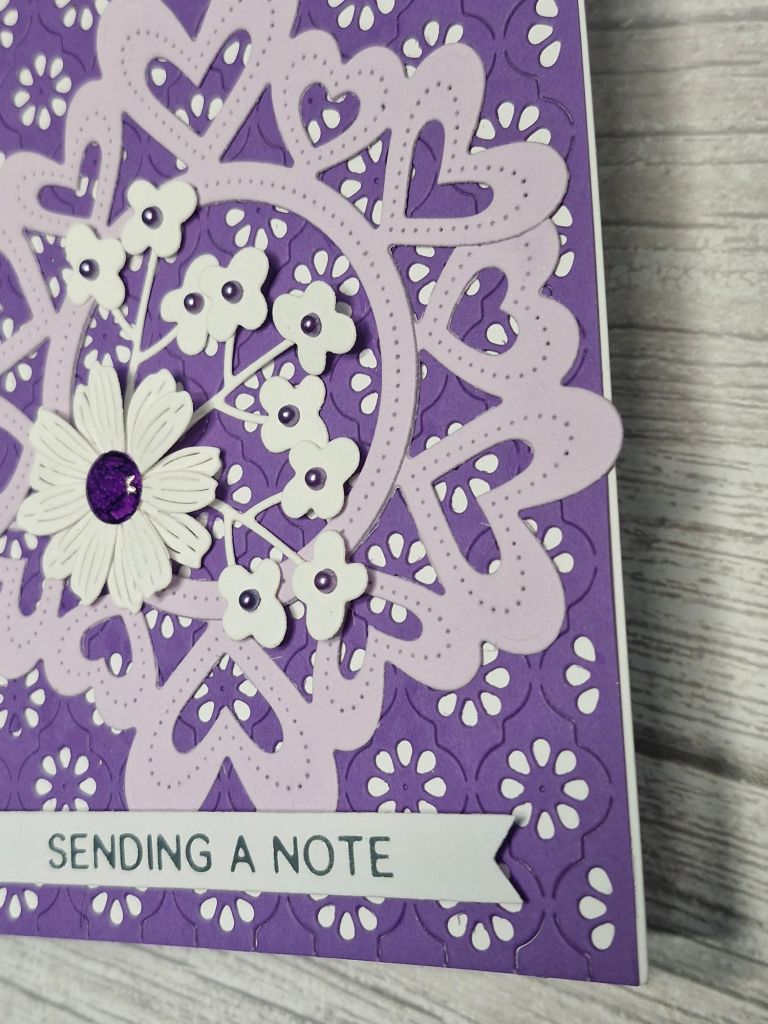
I stamped the floral images four times – minus the lantern at the top of the stamp – in a light ink, onto textured cream/linen card stock. The stamp was left in the Misti so I could stamp again with a darker brown ink after ink blending.

I then used the three layering stencils to colour the leaves and flowers, wondering if I had made an error using the textured card. I did stamp on the smooth side, but as you can see some of the texture came through with the ink blending. I think this gives and almost vintage feel to the images, so I carried on blending all four of them.

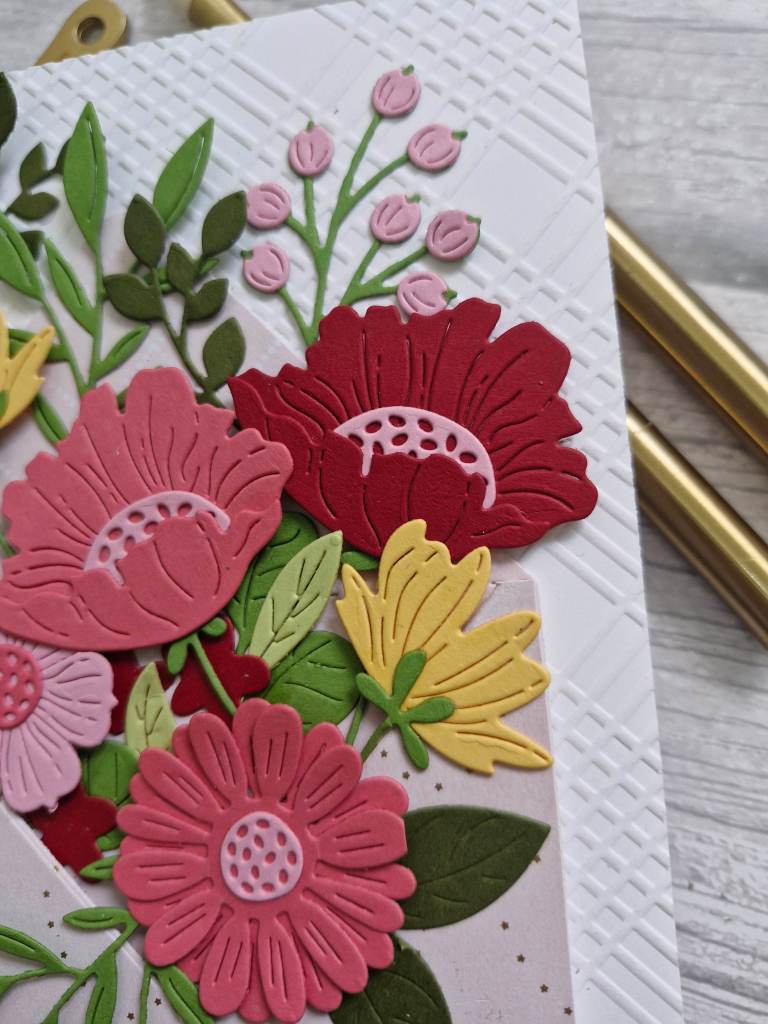
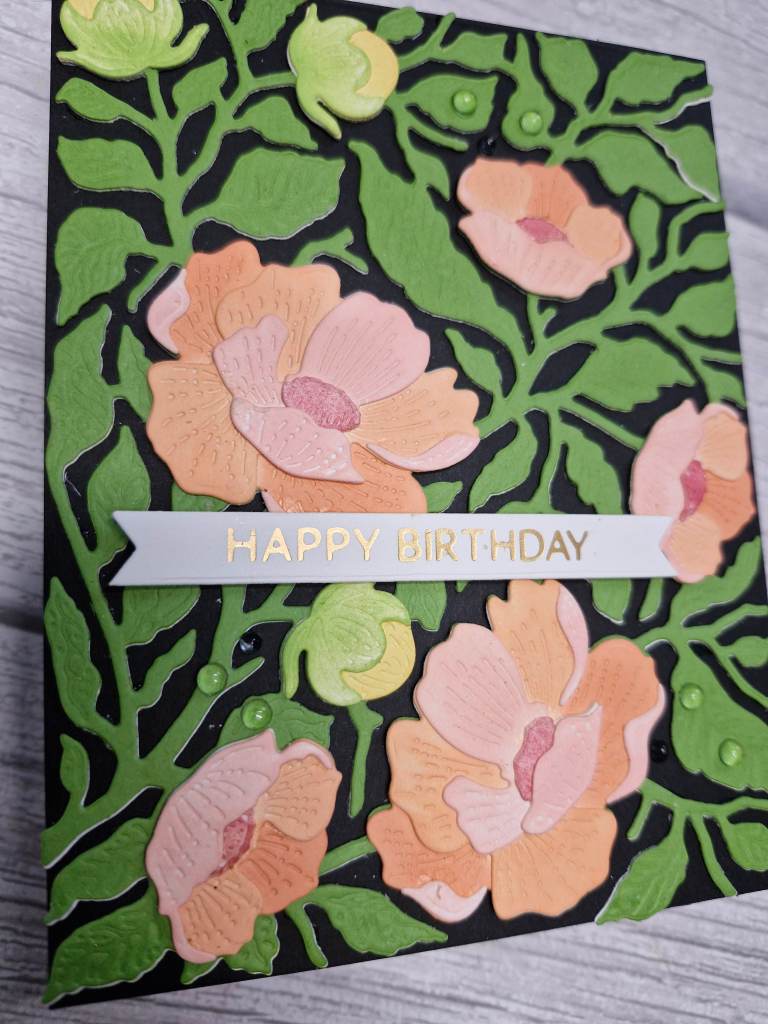
Once coloured, I then placed each piece back in the Misti, ensured it matched, then stamped again with a darker brown ink.

These were all then die cut, and extra layers cut and adhered together to create more stability and depth to them.

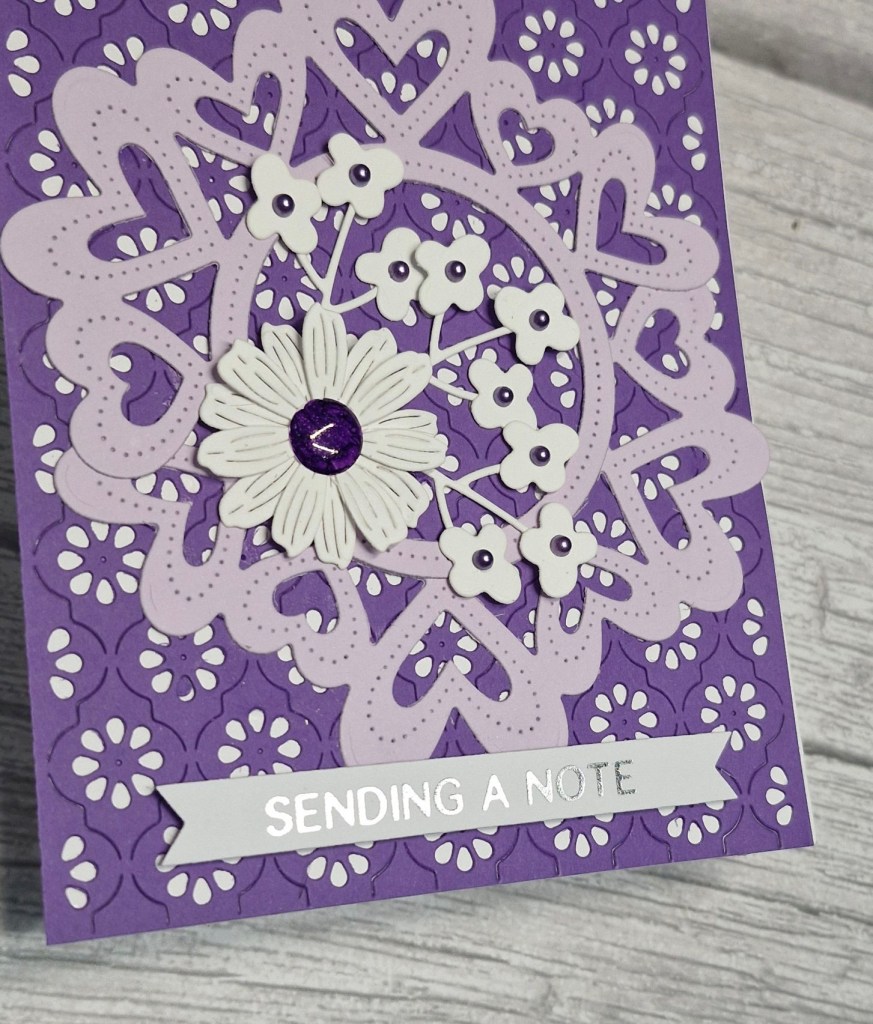
I used another A2 piece of the linen card, played with arranging the images, then glued them down – snipping the ones that hung over the edge, and adding little pieces if there were any large spaces.

The sentiment was stamped in the same dark brown ink, die cut, extra layers added, then attached to the card:

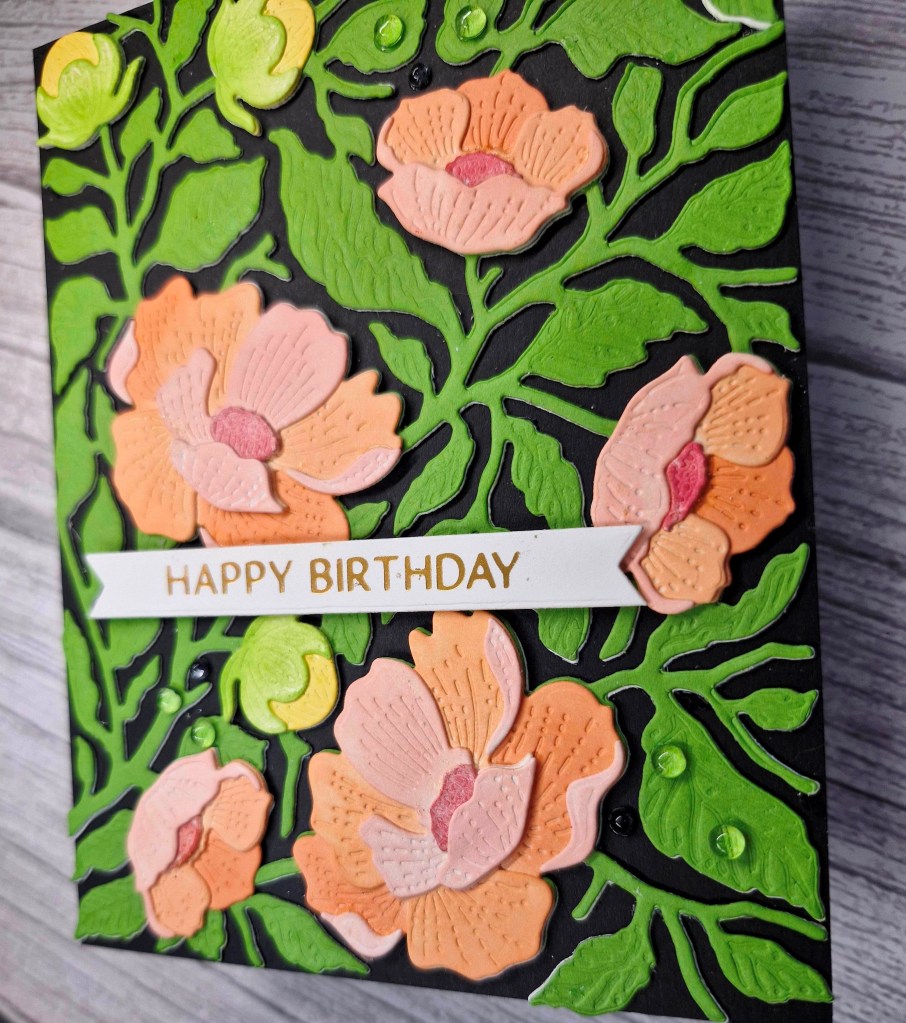
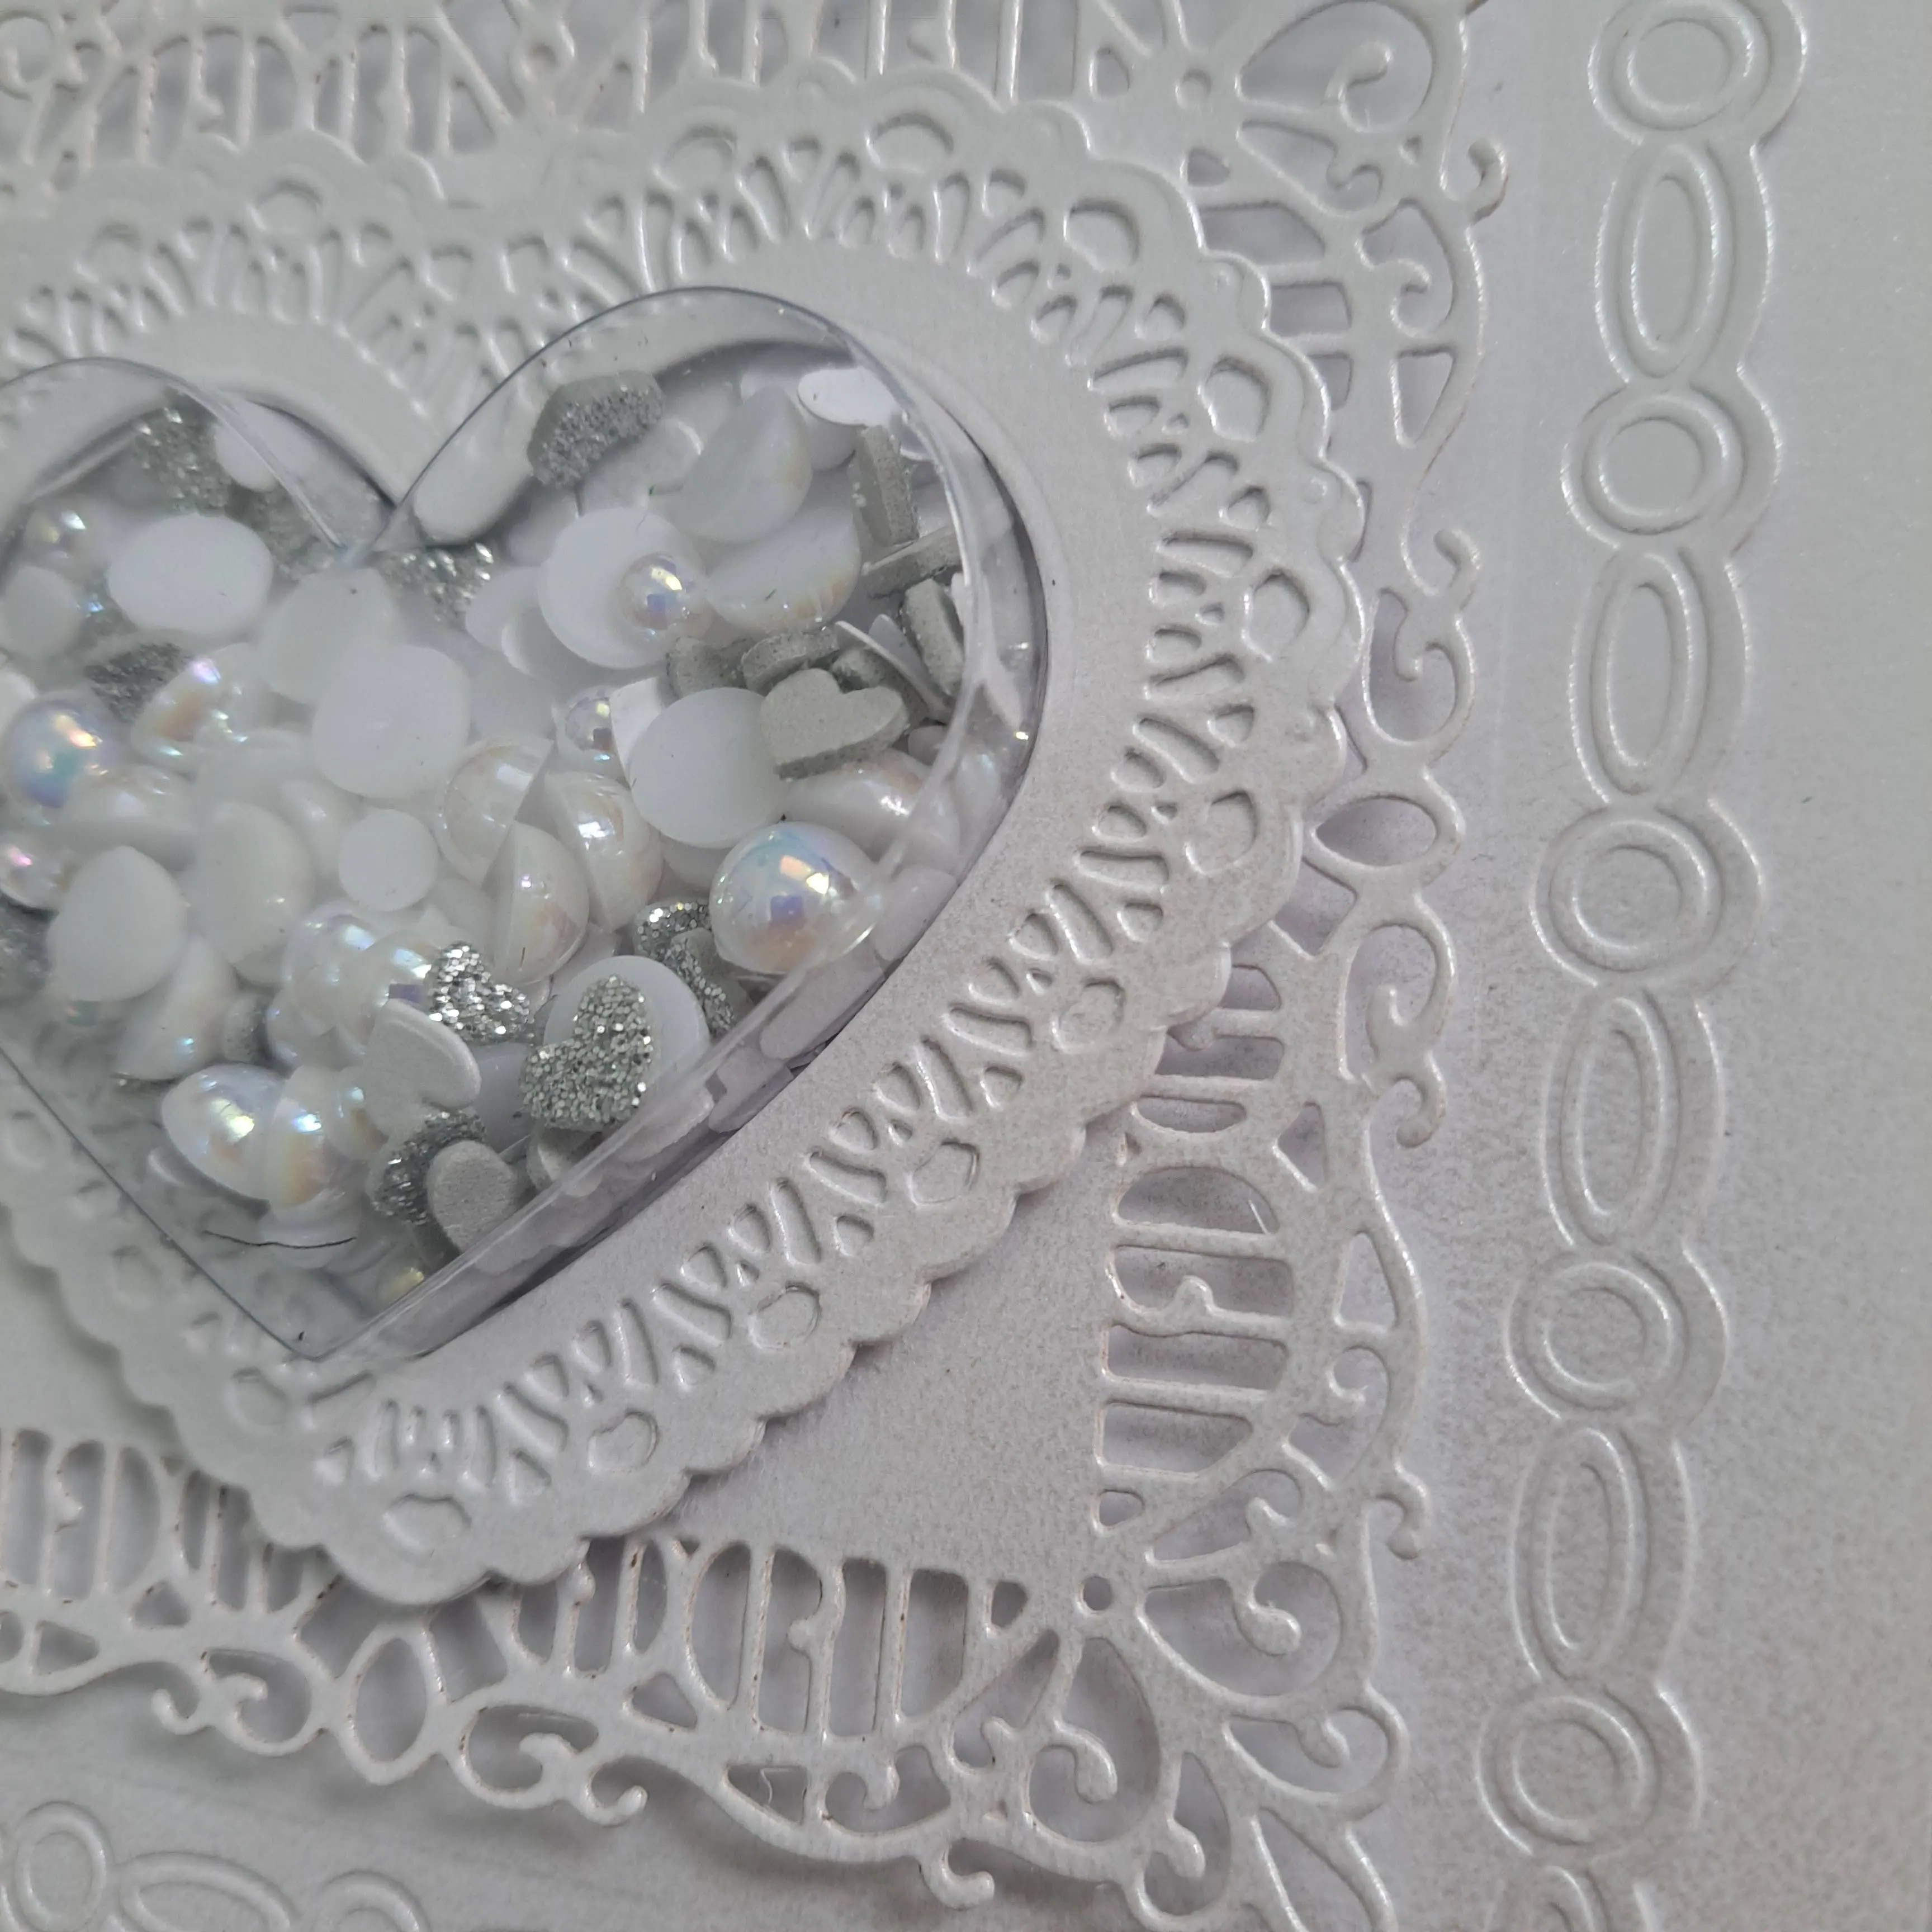
I added some iridescent gems in spaces. I like how these gems pick up the light, but also the colour of anything around them.

I shall be entering the following challenges:

Color Throwdownpeach, sage green, cream

Beautiful Blossomsflowers

Simon Says Stamp Wednesday Challengeadd a sentiment

Ellibelle’s Crafty Wednesdayanything goes

Die Cut Divas anything goes with die cuts

Here Is A Place To Start anything goes

Vintage Telephone

The Alphabet Challenge has reached the letter ‘Y‘, and Meg has chosen the theme of ‘Yesteryears/Vintage’. Here is my card:

I immediately thought of the old fashioned phones we used to have, and this die set from Time For Tea designs is one I have had for while and never used.

I die cut all the phone elements in several shades of teal, and layered them together. Once assembled, I used a 5 x 7 inch card base to allow for the large sentiment – also from Time For tea Designs.

I decided to use a patterned paper for the background, from Lawn Fawn I believe, and used grey tones to allow the colour of the telephone to be the centre of attention.

I saw a little reel on one of the social media sites which showed how the younger generation has no idea, no clue how to use these old rotary phones, many had never even seen them before……and how often just we pick up the phone to call someone and chat, rather than sending a message or texting…..? I think actually talking to someone on the phone is going to be a lost art form…

I hope you can come and join us with your projects which follow our theme. xx

I shall be entering the following challenges:

Ally’s Angels anything goes

Lil Patch Of Crafty Friendsanything goes

Creative Inspiration Challengeanything goes

Die Cut Divasanything goes with die cuts

Here Is A Place To Startanything goes – option of ‘hip to be square’ not taken

Delivering Warm Hugs

Hello there. The Holly and Ivy Christmas Challenge has started a new ‘anything goes Christmas‘ challenge. Here is my card:

I had fun creating this card with all those die cuts. I have to be in ‘the zone’ when I do this, but I enjoy the process.

The background panel is dry embossing using a Spellbinders embossing folder, and adhered flat to the card base.

The mug, marshmallows and candy canes are from Spellbinders, die cut and assembled with a mixture of glue and 3D foam.

the sentiment is heat foiled, and some silver sequins added for extra sparkle.

I hope you can come and join us with your Christmas creations. xx

I shall be entering the following challenges:

Simon Says Stamp Wednesday Challengeanything goes

CYHTP embossing folder – option of squares/circles not taken

Creative Fingers anything goes

Ally’s Angelsanything goes

Christmas Craft CreationsChristmas with stencils or embossing folder

Jingle Belles Christmas and mainly die cuts

Envelope of Flowers

I was inspired to create this card today:

I used the photo inspiration from the ‘Inspired By…..’ challenge as a starting point.

The background panel is dry embossed using a Spellbinders embossing folder, and cut to the size of the card – 5 x 7 inches this time.

The envelope die is also from Spellbinders, using a couple of sheets from their paper pads, and comes from a pack that creates a 3D envelope, but I cut off the sides and adhered the front to the base of the envelop with 3D foam to allow insertion of the elements.

The flowers are from a mixture of die sets from Spellbinders and Scrapbook and Cards Today, layered as necessary, and using Concord & 9th card stock.

I then played around with the floral arrangement until I had what I wanted, and adhered with glue and 3D foam. I was trying to achieve the overflowing envelope as per the picture, and also used the colours of the flowers to match too.

No added bling on this card, I think there is a lot going on already, and there is a touch of gold from the hearts on the front panel of the envelope.

I shall be entering the following challenges:

The Inspired By Challenge photo inspiration

Simon Says Stamp Wednesday Challenge anything goes

Ally’s Angelsanything goes

Beautiful Blossoms flowers – optional mood board

Die Cut Divas anything goes with die cuts

Birthday Roses

Hello. I created this card with some new products from Honey Bee Stamps:

I first die cut all the elements from the die set out of white, so I could see where everything went in this layering die set. I also went on Honey Bee Stamps web site where there is a layering guide.

The leafy background was then die cut again from Concord & 9th parsley card stock. I wanted a bright and vivid green. The details on the leaves weren’t as obvious as I wanted, so I ran it through again with the silicone mat to emboss those details a little more deeply.

For the two larger flowers I ink blended some peach colour tones from Pinkfresh Studio inks onto each layer – darker for the bottom, and getting lighter to the top.

The smaller buds I went with yellow flowers, and chose the make the top layer green for leaves, and a lighter green than the parsley card stock so it stood out more.

Once I had laid everything on tp of the leafy background piece, I glued the initial white piece behind it to give it more stability,

A white card base seemed to wash out the colours, and wasn’t quite dramatic enough, so I chose a black card base which I think works better.

All the elements were glued down, a foiled sentiment added, and some clear dew drops also added.

I shall be entering the following challenges:

Everybody Art Challengebirthday

Color Throwdownpeach, yellow, green

Simon Says Stamp Wednesday Challengebeautiful blooms

Craft Rocket Challengebirthday

The Crafty Addicts anything goes

Krafty Chicksoccasions

Beautiful Blossoms – floral

X for Xtra Love Hearts

Hello. Caz is hosting the new challenge at The Alphabet Challenge, and for the letter ‘X‘ she has chosen the theme of ‘Xtra Love Hearts‘. Here is my card:

I chose to go with a tone-on-tone look with purple. The background panel was die cut using the ‘Daisy Chain’ cover plate from Pinkfresh studio, and layered onto a white card base.

The Greetery ’round about hearts’ die was die cut twice, and layered to create the circle of hearts, and flowers added as you see. The centre of the flowers are all tiny little gems, but I didn’t have one big enough for the large flower, so I coloured a white one with one of my Copics.

The sentiment was from a previous hot foiling session, added with 3D foam.

I hope you can come and join us with your creations featuring ‘Xtra hearts’. xx

I shall be entering the following challenges:

A Perfect Time To Craft anything goes

Crafts Galoreanything goes

MAWTT love hearts

Crafty Calendaradd a heart

Avenue 613anything goes – option love letters

Aud Sentimentsuse dies and/or love/anniversary and a sentiment

Dragonfly Dreamshearts

Crafty Gals Corneradd a heart

Seascape

Hello again. Cardz 4 Galz has started a new challenge. Johanna has chosen the theme of ‘Sea Scape’ Here is my card:

The boat and dolphins are from a die set from Charlie and Paulchen. I started by die cutting the boat twice out of white card stock. On one of the boat die cuts, I coloured the mast and boat itself with a couple of brown Zigs, then the other white die cut I snipped the sails from and adhered onto the coloured die cut.

The dolphins I coloured with a grey Copic marker.

I then die cut a square out of a piece of Yupo paper I had used my alcohol inks on, and arranged the boat and dolphins as you see. I thought the wonky stitching on this die set would look like waves and add more interest.

I thought the blue alcohol inks looked like there was a swirly weather ahead and the dolphins were chasing the boat to warn it…….the way my mind works sometimes astounds me……

The white background panel was created using a Spellbinders embossing folder to continue to nautical theme.

I hope you can come and join us with your sea scape creations. xx

I shall be entering the following challenges:

We Love To Create anything goes mixed media (Zigs, Copics, alcohol inks)

Crafty Animalsanything goes with an animal

2 Crafty Critters Craziesanything goes with a critter

Creative Artiste Mixed Media anything goes mixed media (Zigs, Copics, alcohol inks)

A Perfect Time To Craft anything goes

Crafts Galoreanything goes

Avenue 613 Createanything goes option

Tipsy Baubles

Hello once again. The Holly and Ivy Christmas Challenge has started a new ‘anything goes Christmas‘ challenge. Here is my card:

I chose to go with a slimline card so I could arrange three of these large baubles from Spellbinders. I first die cut all the elements for the baubles in red, gold, and black, then assembled them before I thought of the background.

I did think of adding a panel to a white card base, but just to make things a teensy bit more difficult for me, I used a black card base. This was too plain, so I dry embossed the card front using a Spellbinders embossing folder. These embossing folders are large, they measure 3.5 x 8.5 inches, so virtually any card size could be used this way – you just have to make sure the edge of the embossing folder meets the fold of the card base just right….

I toyed with the idea of adding twine to the top of the baubles but I had no-where for the twine to adhere on the back as this was the actual card front. So I adhered with 3D foam and at a jaunty angle.

No sentiment for this card. I’ll attach a white panel on the inside when it comes time to send this, and add a verse or sentiment that way.

I hope you can come and join us with your Christmas creations. xx

I shall be entering the following challenges:

A perfect Time To Craft anything goes

Crafts Galoreanything goes

The Crafty Addictsanything goes

Ellibelle’s Corner anything goes

Ally’s Angelsanything goes

Christmas Craft CreationsChristmas with stencils or embossing folder

Birthday Sheep

Hello. A little crafty time to create this card:

As soon as I saw this sheep die from the Greetery I was hooked. I love the cute little sheep – there are two in the die set, one smaller than the other, but I just used the larger sheep for this card.

I started by die cutting the sheep out of white card stock, coloured the legs, tail, and ears with a light brown Copic, and started to glue the layers together. When I got to the face, I realised there are no features in there, so I searched the CML app to see what little face features I had. There are several from Lawn Fawn stamp sets, and I used one of the faces from their ‘All The Clouds’ stamp set – that way I didn’t make a mess when I tried to draw them!

The circle die cut is from Pinkfresh Studio. as is the ‘Daisy Chain‘ cover plate. I die cut the cover plate out of white a couple of times and layered together, then used some circle nesting dies to cut the cover plate panel, and a circle of red as backing.

The background Kraft was dry embossed using the cover plater die – it worked first time! I usually put the layers down wrong for embossing dies and end up with a mess, but this time it worked straight away.

All the elements glued onto the white card base, and a foiled sentiment added.

I shall be entering the following challenges:

Color Throwdown red, Kraft, white

Seize The Birthdaybirthday – option of splatters not taken

Crafty Animals anything goes with an animal

2 Crafty Critter Crazies anything goes with a critter

Craft Rocket birthday

W is for Weddings

Hello. The Alphabet Challenge has started a new challenge. We have reached the letter ‘W’ and Dawn has chosen the theme of ‘Weddings‘. Here is my card:

I wanted to go with a white-on-white card, and it has turned out to be another shaker card, using some older Sue Wilson/Creative Expressions dies. I found this heart shaker cup and made the card and layers around that/

A white square card base, with a couple of layers die cut using a shimmery white card stock.

I used a couple of heart shaped dies – they were brought out at the same time as the heart shaped cups – to create the back and the surround for the heart – filling it with white, glittery and pearl gems and heart shaped die cuts.

The glittery hearts were die cut from Spellbinders silver glitter foam, and I already had the gems in my stash.

I hope you can come and join us with your ‘wedding’ themedprojects. xx

I shall be entering the following challenges:

Shopping Our Stashwinter landscapes or white on white

Love To Craft anything goes

Ellibelle’s Corner I Spy hearts and/or roses

Try It On Tuesdayhearts and/or flowers

Creative Inspiration Challenge anything goes

A Perfect Time To Craftanything goes

MAWTT love hearts

Crafty Calendar add a heart