Pooh Birthday

Hello everyone. I had a little play in my craft room today to create this fairly simple card:
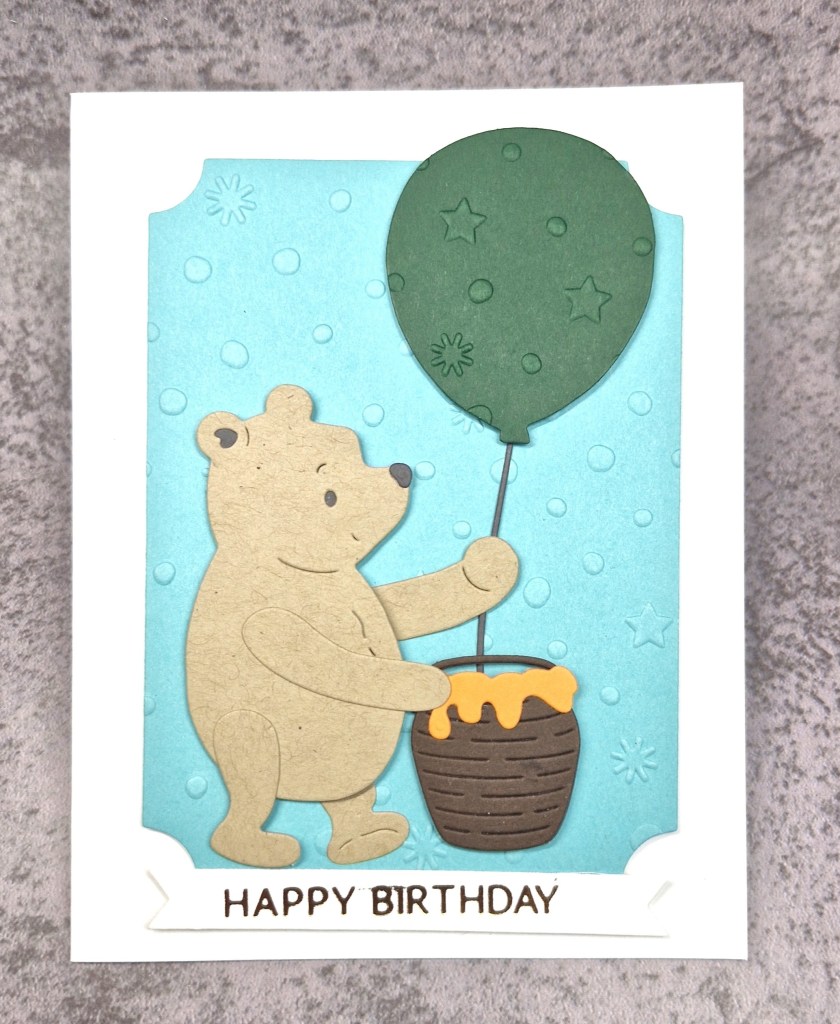
I used some new dies to me from Spellbinders which included Pooh bear and some of his friends. These were bought as part of a Facebook live sale from one of our UK companies – Sir Stampalot. They do this sale once a month, and I generally pick up a few crafty bargains.

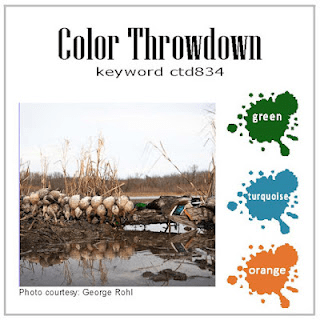
I started by die cutting Pooh himself, then the honey jar and the balloon. I chose colours from the current Color Throwdown challenge – which I haven’t entered in quite a while. The balloon and honey jar were then cut

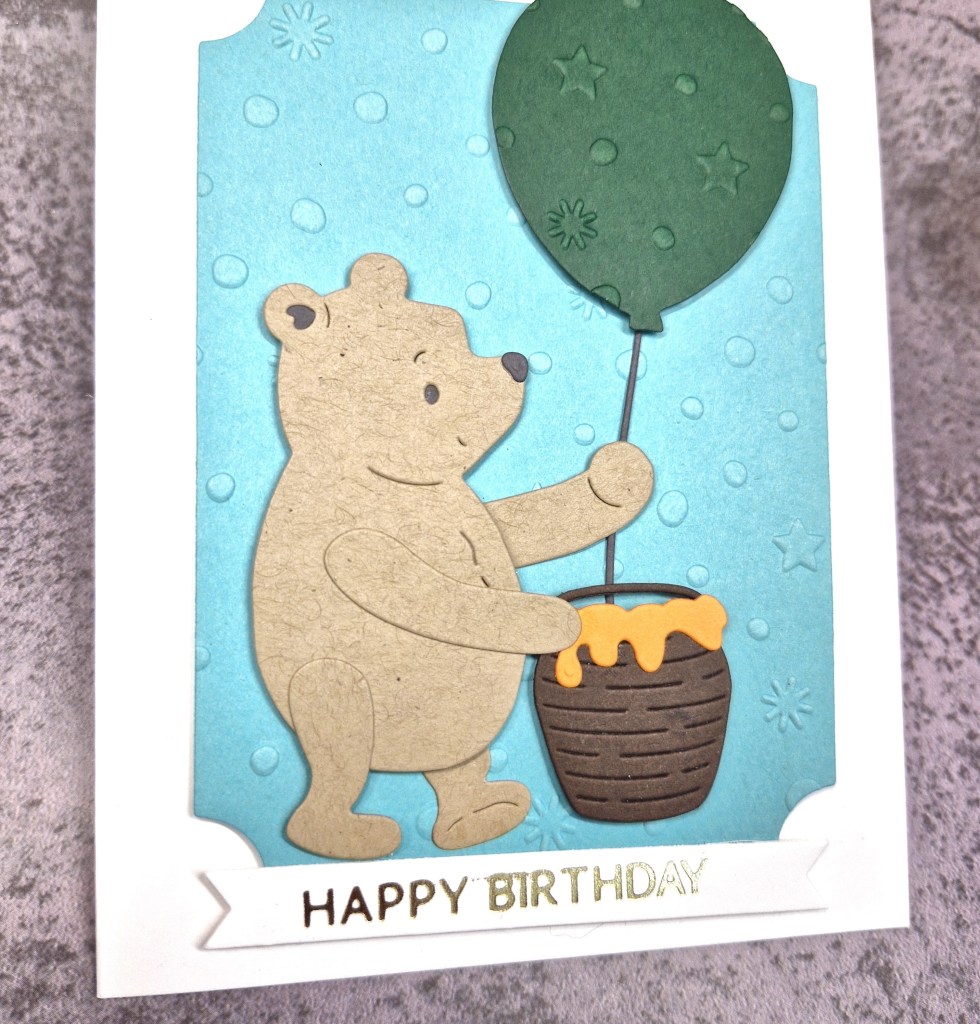
Once the bear was die cut, I used another die for the turquoise back panel. I thought the panel and the balloon looked a little plain, so I used an embossing folder to add some details. I can’t remember who this is from, and it isn’t in my CML app.

The panel was adhered with 3D foam tape, then I added the bear, ensuring all the other elements fit in. The gold foiled sentiment was then added last.
I shall be entering the following challenges:

Color Throwdown – green, turquoise, orange

Addicted To Stamps & More – any occasion

Daisy Chain – birthday

Crafty Animals – anything goes with an animal

MAWTT – birthday
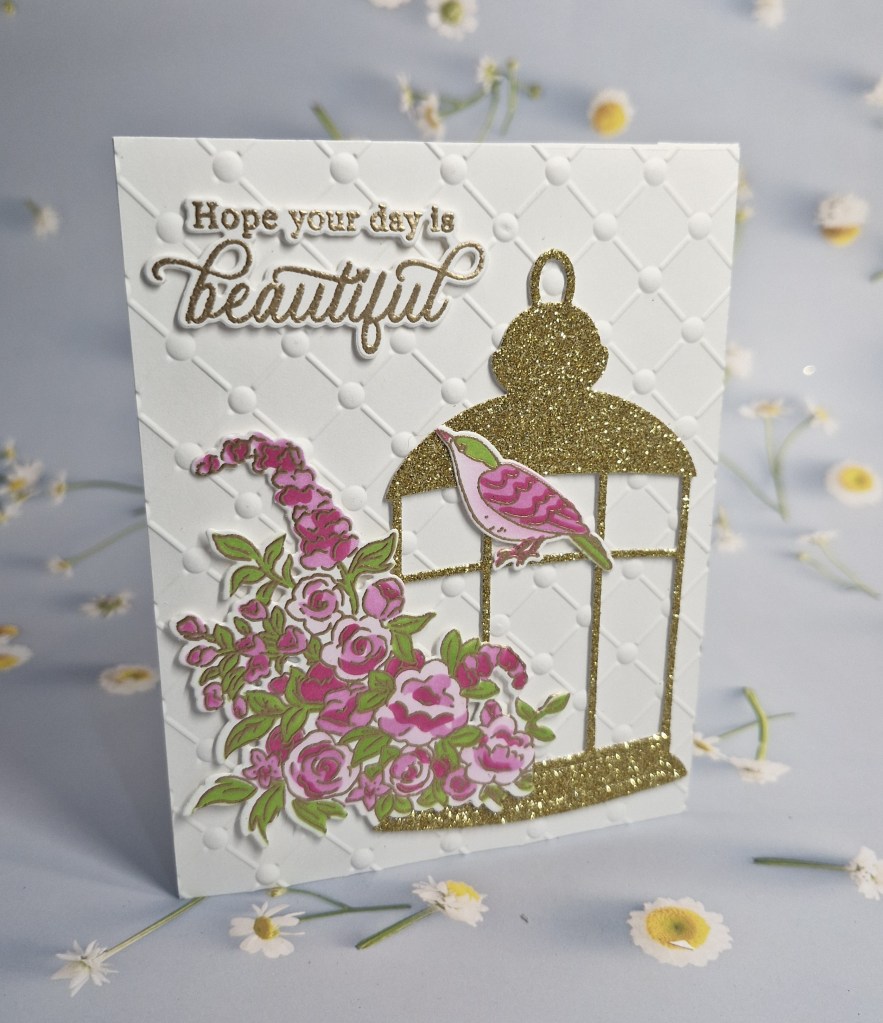
Hope Your Day Is Beautiful

Another challenge has started at The Alphabet Challenge. Deborah is hosting and has chosen the theme of

‘Embossing – heat or dry’

Here is my card:

For this card I chose another Pinkfresh Studio product suite called ‘Best Thing‘.

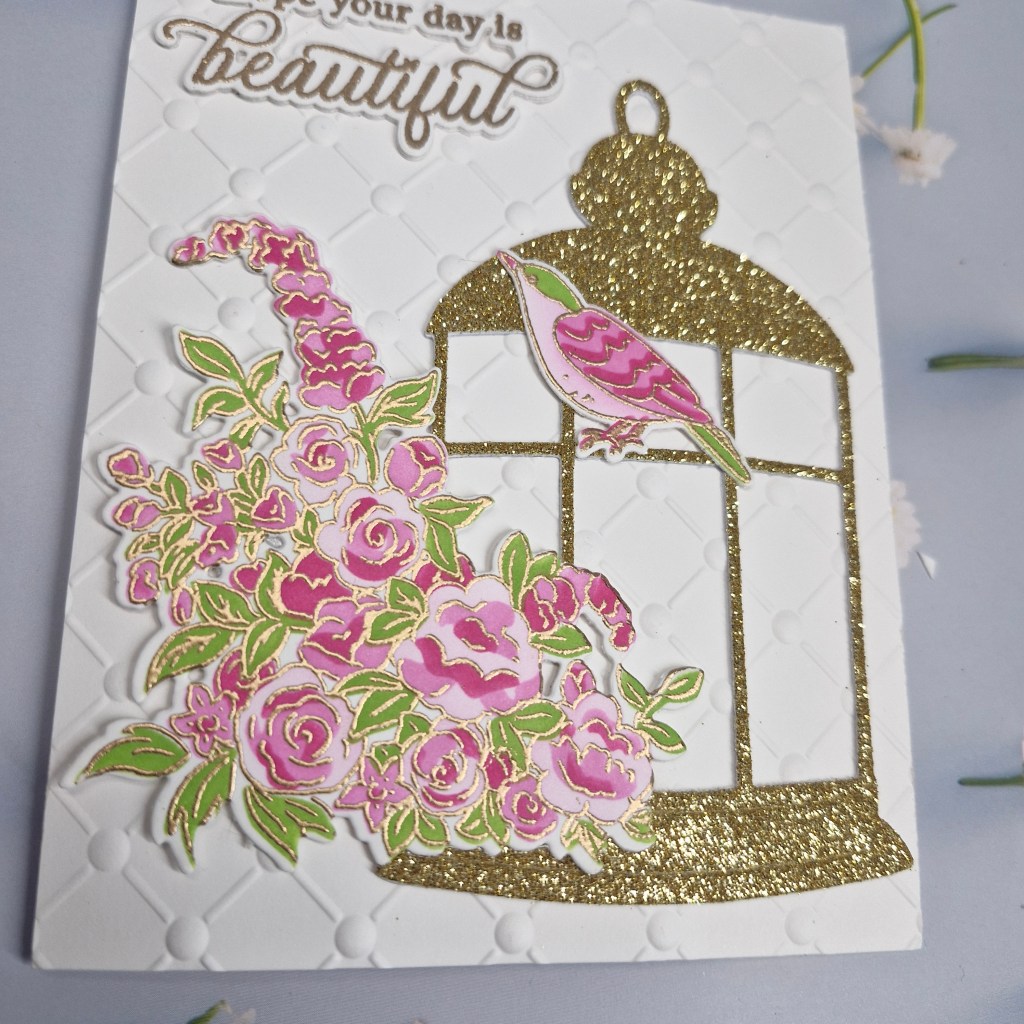
I first stamped and gold heat embossed all the images, coloured them with the matching layering stencils, then die cut them all out.

To put the card together, I added a panel which had been embossed using a Spellbinders embossing folder.

The birdcage was die cut from gold glitter card stock and adhered flat, then the floral images and bird attached and arranged as you see.

The sentiment is also gold heat embossed, and die cut and layered a couple of times.

I hope you can come and join us with your embossed creations – heat or dry. xx

I shall be entering the following challenges:

Love To Craft – anything goes

The Flower Challenge – flowers and add heat or dry embossing (both added)

Crafty Animals – anything goes with an animal

Crafts Galore – anything goes

Stencil Fun – stencils – option of summer fun not taken

Craft Rocket – no designer paper

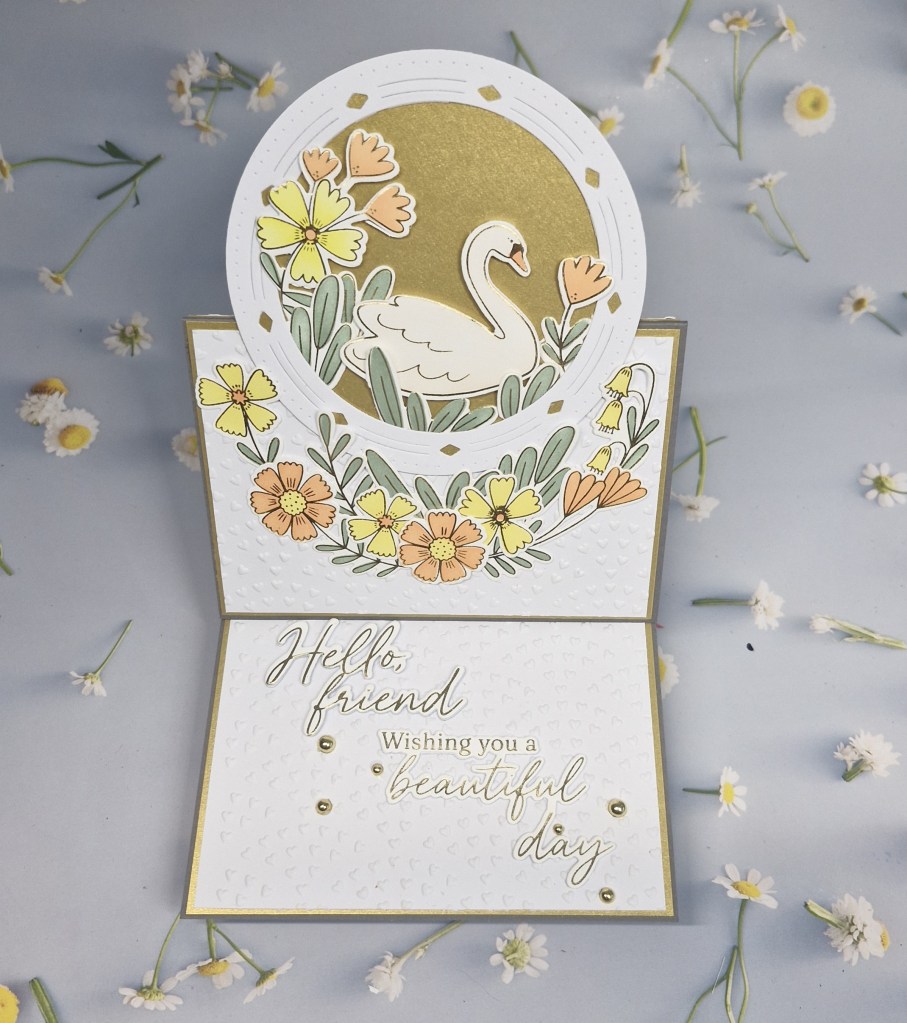
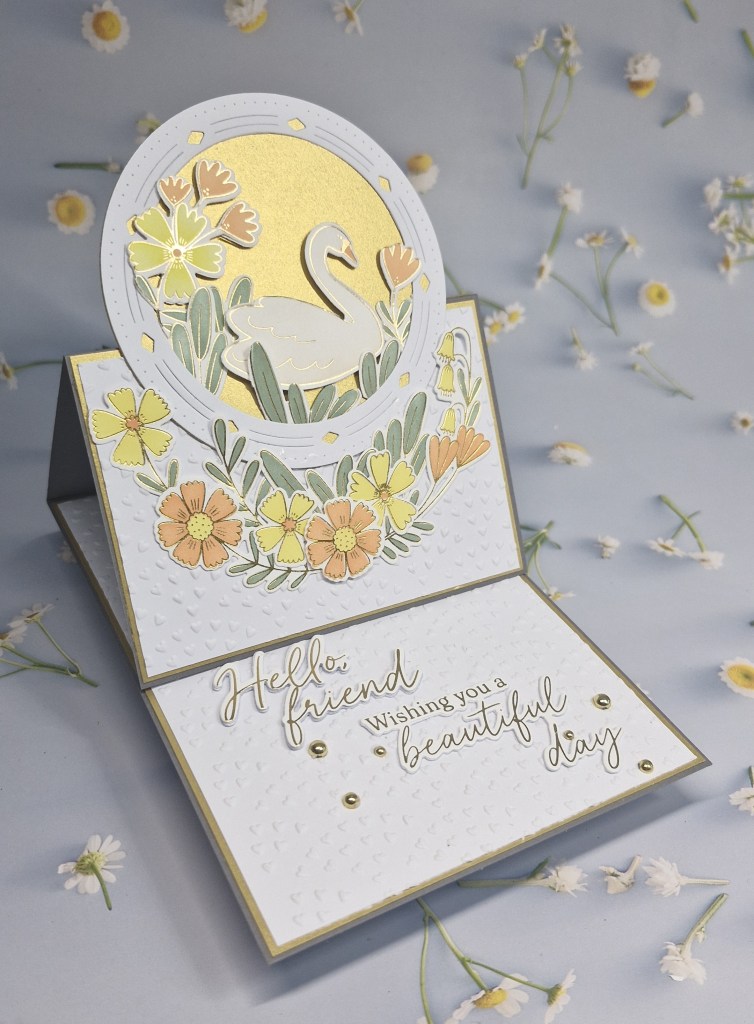
Swan Easel

Hello once again. It is time for the next challenge at Cardz 4 Galz. Debbie is hosting, and has chosen the theme of:

‘Easel card’

Here is my card:

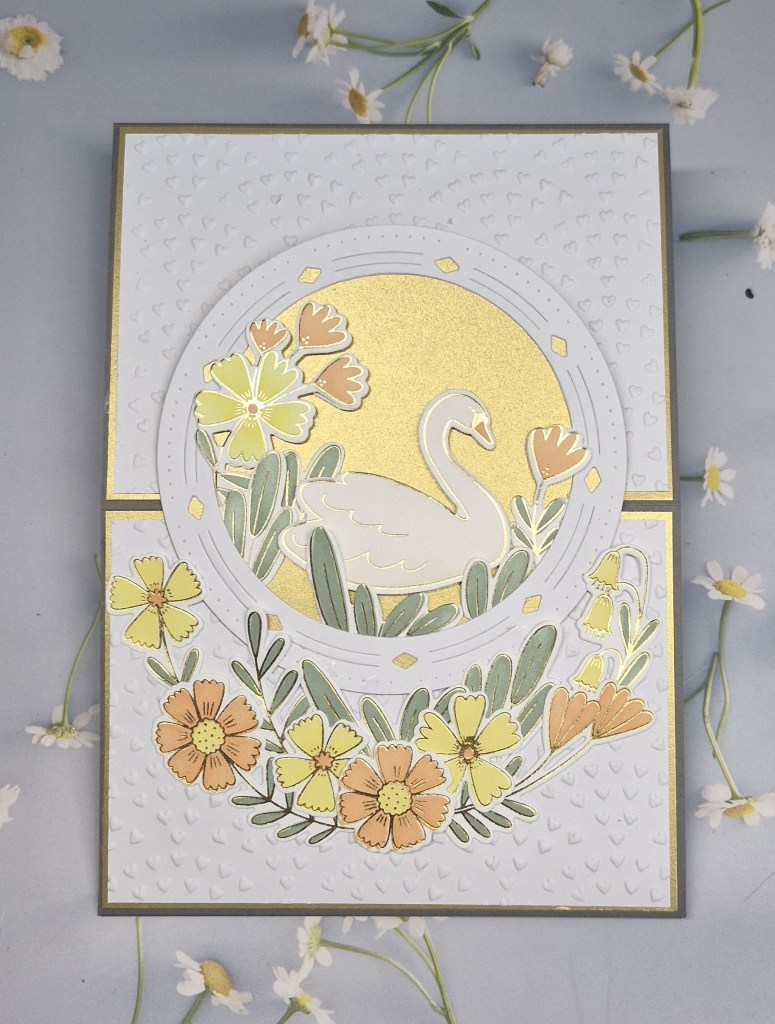
For the base of the easel card I used a 5×7 top-folding card. I knew I wanted a larger card to ensure I managed to get everything on there.

The front of the card was scored, then I cut a slightly smaller piece of brushed gold card stock for edge of the visible sides – three in total – and before attaching to the card base I die cut the circle from the larger piece for behind the swan.

These three pieces of gold were attached, three pieces of white card stock cut down to layer on top, and each of those three pieces were placed into an embossing folder from Spellbinders to add some interest, then glued down.

The next step was to hot foil the swan and floral images. This is from a Pinkfresh Studio set received from their ‘Create & Connect’ event in February of this year. Once hot foiled, all the images were ink blended using the matching layering stencils, then die cut with the matching dies.

The circle frame is also from Pinkfresh Studio, the gold circle previously cut added to the back, the swan and some florals added, then attached to the easel card.

The rest of the images added below the circle to form a swag.

The next step was the sentiment, which I used as the ‘stopper’ to allow the easel to stand open, and this was two hot foiled sentiments, die cut at least several times for depth, and glued down. Gold gems added for further interest.

I hope you can come and join us with your easel card creations. xx

I shall be entering the following challenges:

Lil Patch Of Crafty Friends – anything goes

Mix It Up – anything goes – option of paper piecing not taken

Love To Craft – anything goes

Tic Tac Toe – top right to bottom left diagonal – die cuts – free – ink blending

The Flower Challenge – flowers and add embossing – heat or dry (embossing folder)

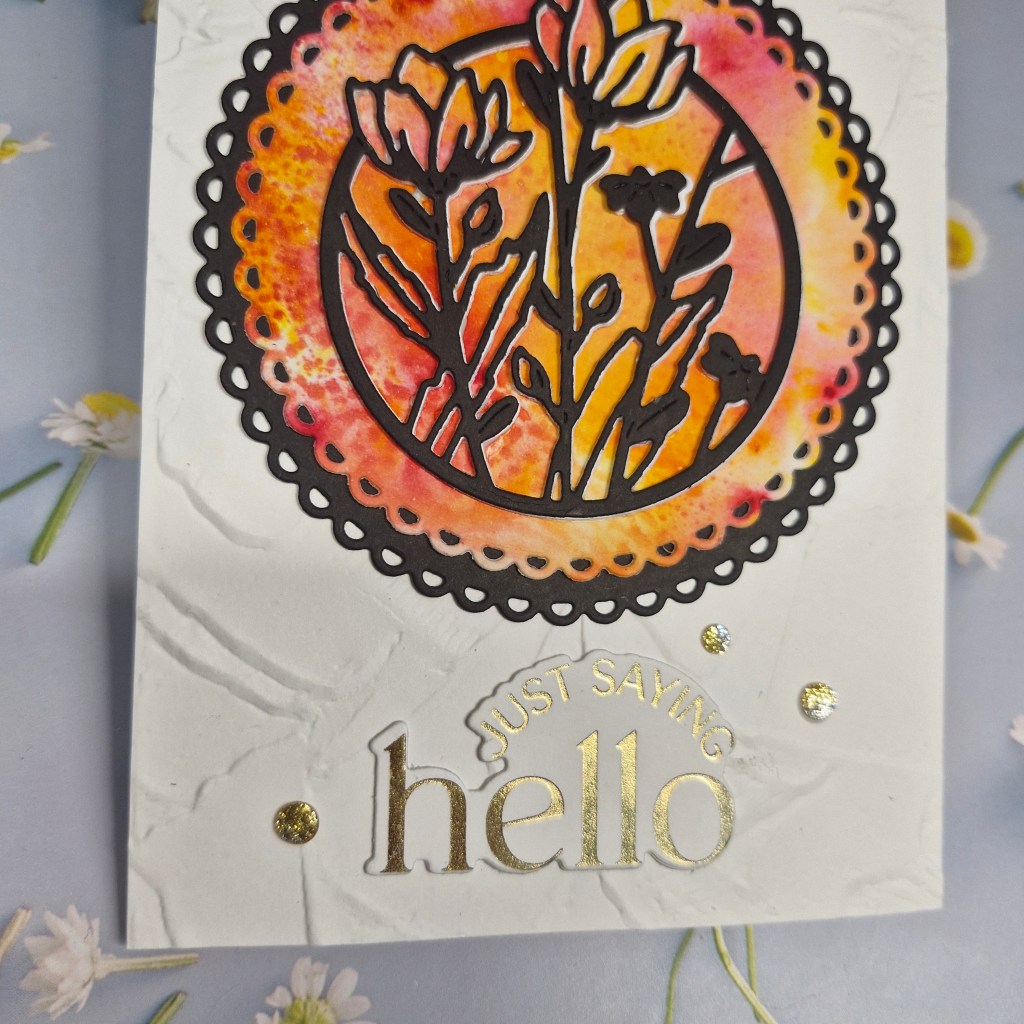
Just Saying Hello

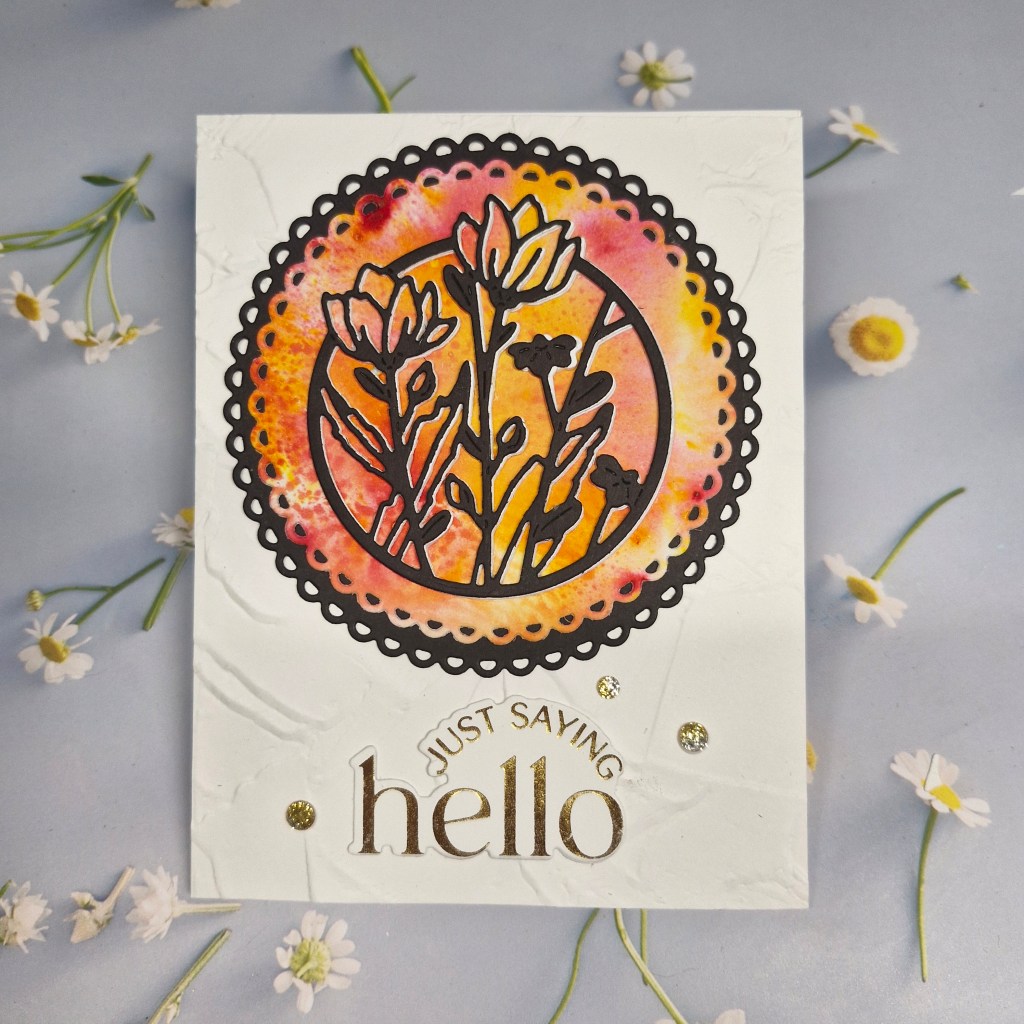
Hi there. A new challenge has started at The Alphabet Challenge. We have reached the letter ‘C’, and Tee has chosen the theme of ‘Circle’. Here is my card:

The background panel is a cream piece of card, and dry embossed using an old Stampin’ Up embossing folder. This was layered flat onto a card base.

To create the colourful piece, I used Brushos and water-colour card – some sprinkling, some sprayed water – and a very colourful panel was created. Out of this panel I die cut a scalloped circle from a Gummiapan die set.

The main floral image is also from Gummiapan, and die cut from black card stock so it would stand out against the colourful circle, and layered again with a white die cut of the same image to give a little off-set look. This was adhered flat to the bright scalloped circle.

I then die cut a further scalloped circle from the same nesting circle dies, and adhered flat to the embossed panel.

The sentiment was hot foiled and die cut using the matching dies, adhered to the panel, and some ombre glitter gems from Pinkfresh Studio added.

I hope you can come and join us with your projects which feature a circle/circles. xx

I shall be entering the following challenges:

Craft Rocket – flowers

Ellibelle’s Crafty Wednesday – anything goes

Crafts Galore – anything goes

Mix It Up – anything goes – option of paper piecing not taken

Love To Craft – anything goes

Things With Wings

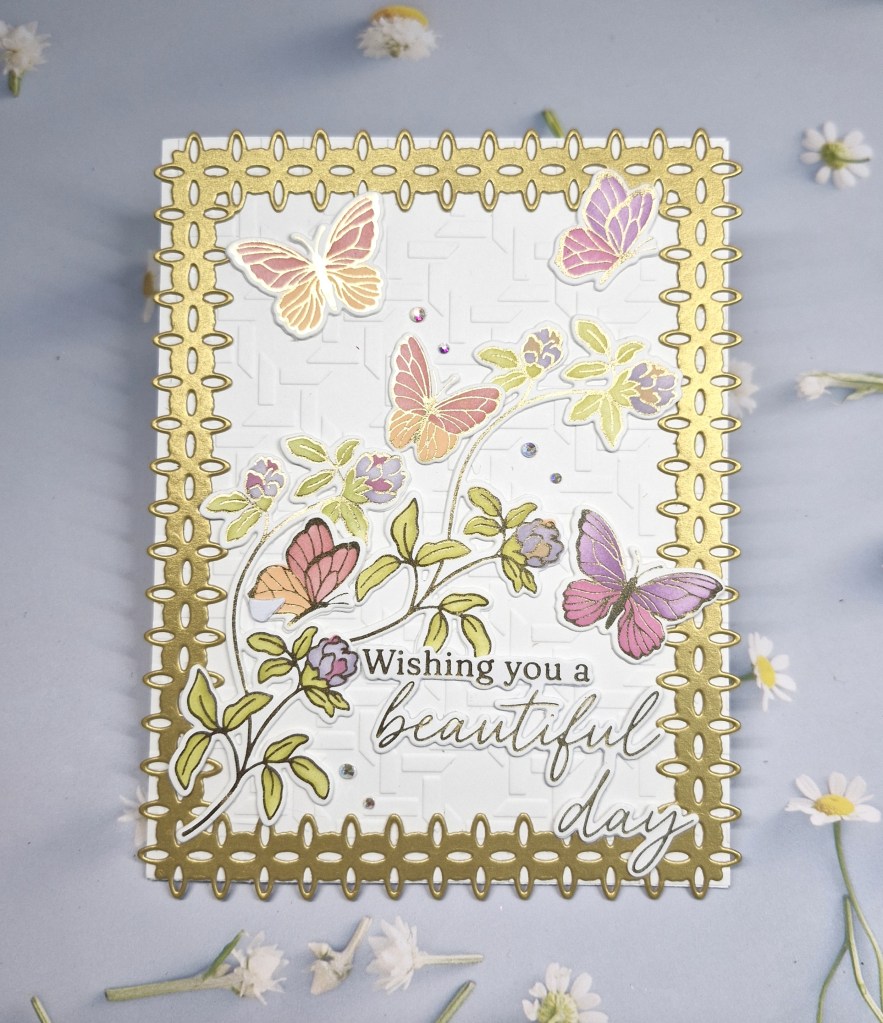
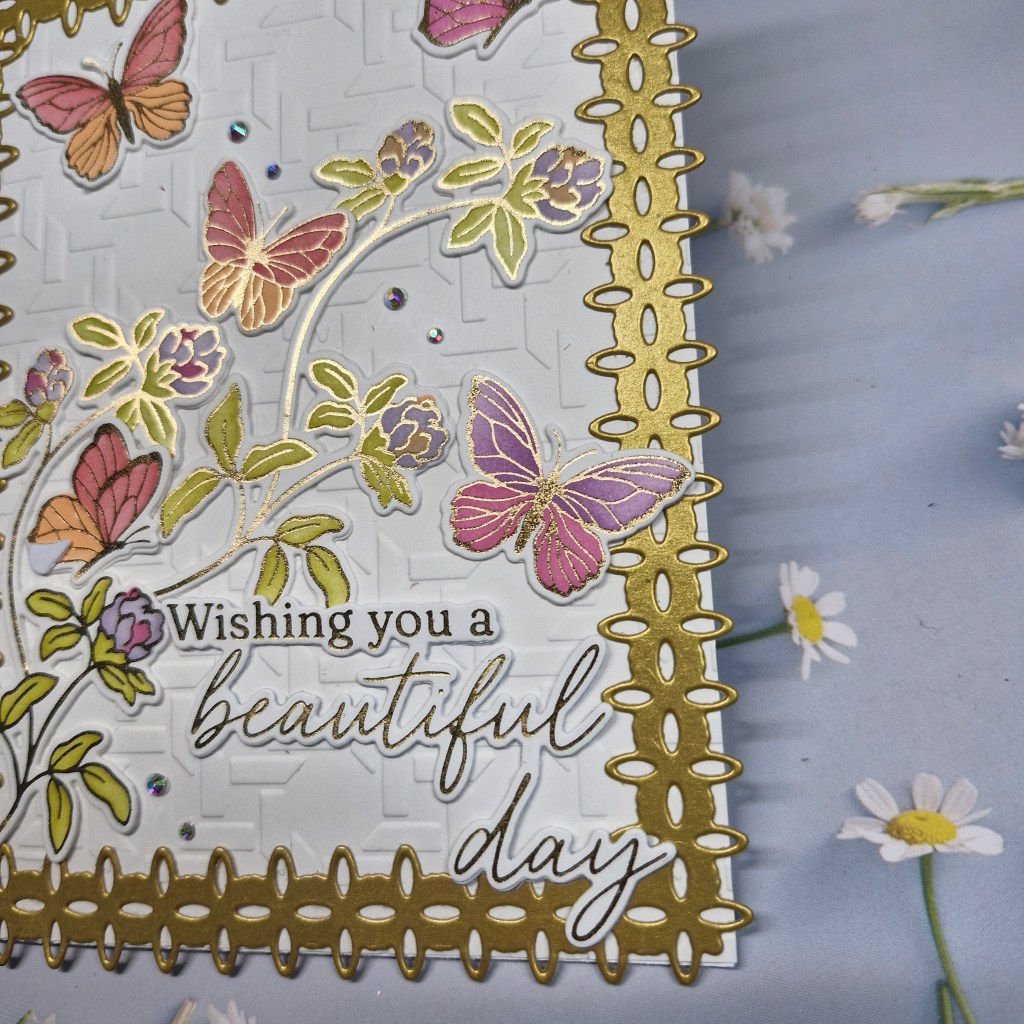
Hello once again. It is my turn to host the new challenge at Cardz 4 Galz, and I have chosen the theme of ‘Things with wings‘. Here is my card:

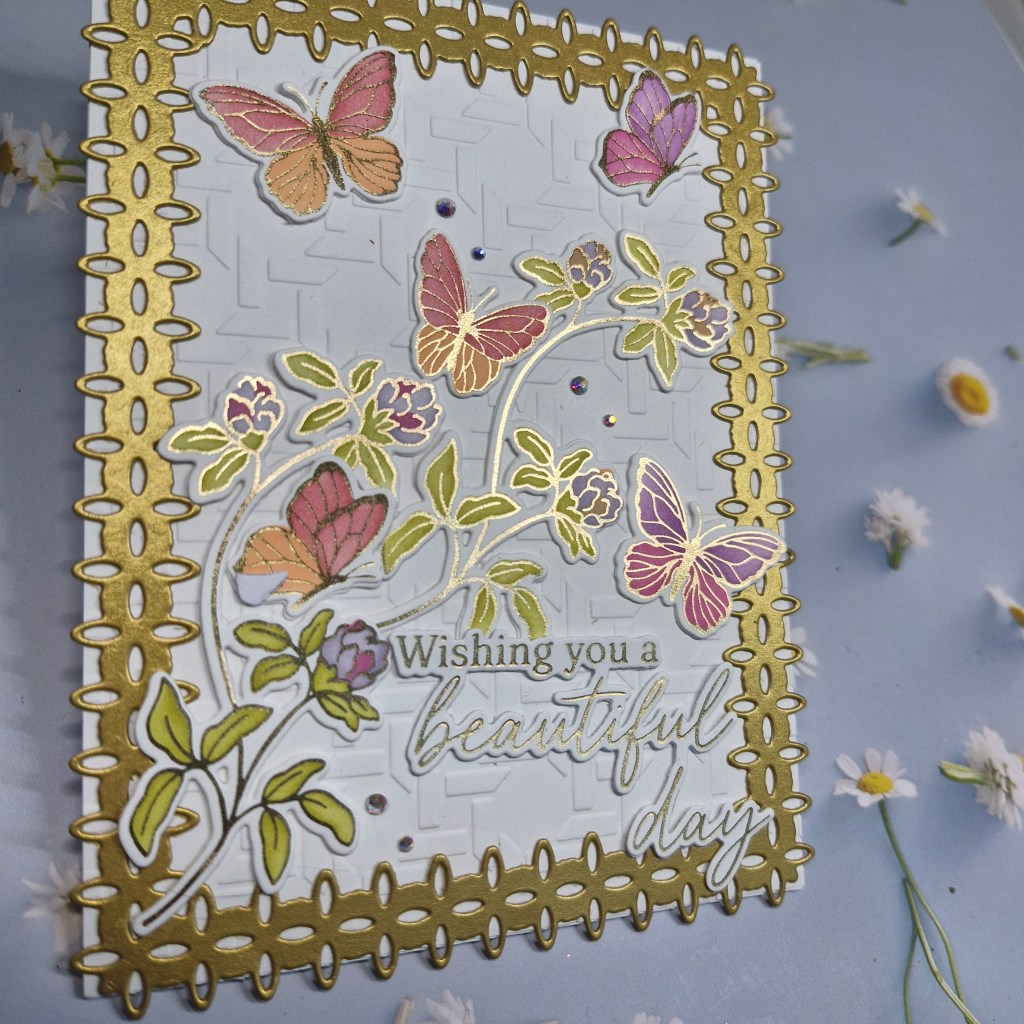
I used a Pinkfresh Studio suite called ‘Fluttering Butterflies’. I first hot foiled the butterflies and flowers, then used the matching layering stencils to colour them in. Once coloured, the matching die set cut them all out, and I could then decide what I wanted on the background.

The background panel was cut and dry embossed using a Spellbinders embossing folder, then attached to the card base.

The gold panel was die cut using a Pinkfresh Studio die set, then also adhered flat to the embossed panel.

I then played around with all the images until I was happy, and adhered them with glue, adding the foiled sentiment, and some Spellbinders gems as the final touches.

I hope you can come and join our ‘things with wings’ challenge. I look forward to seeing you in our gallery. xx

I shall be entering the following challenges:

Craft Rocket – flowers

Crafty Animals – anything goes with an animal

Ellibelle’s Crafty Wednesday – anything goes

Mix It Up – anything goes – option of paper-piecing not taken

Love To Craft – anything goes

Floral Birthday Frame

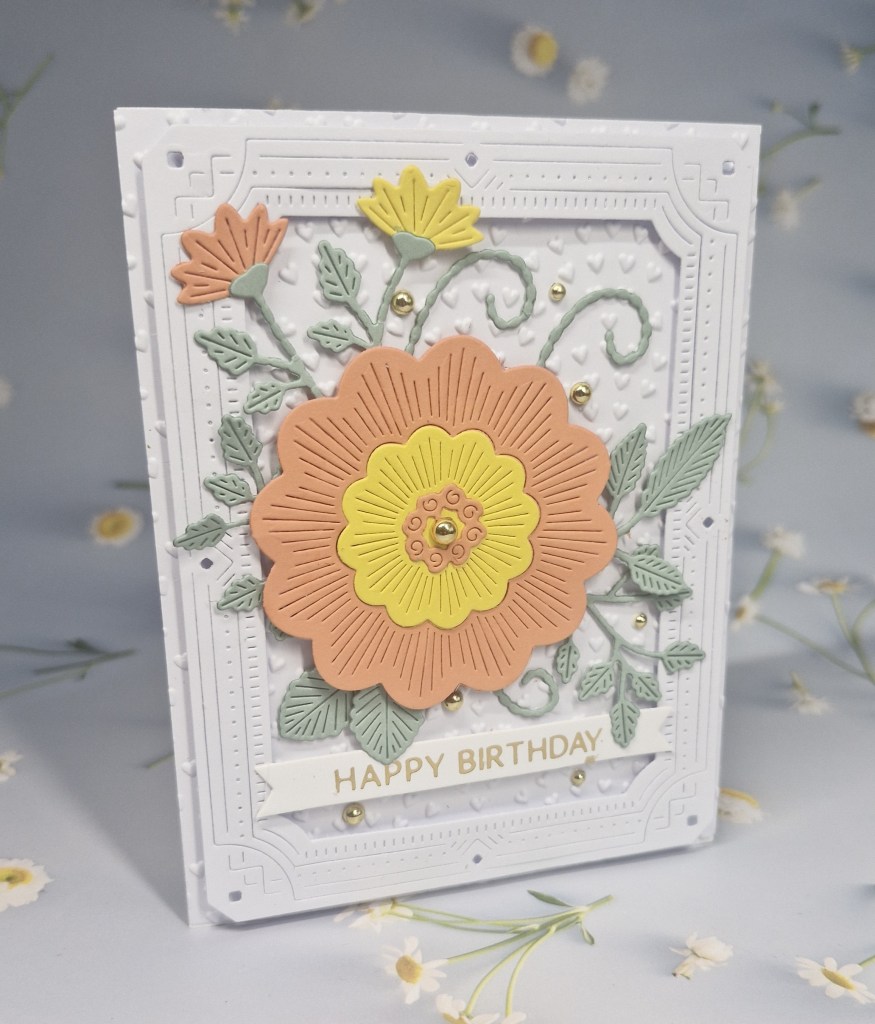
Hello again. I had time to play in my craft room using some flower dies from The Greetery I haven’t used as yet:

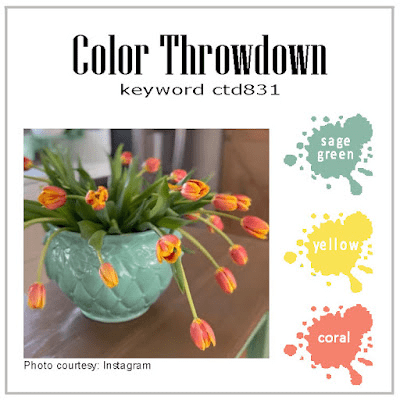
I used the current colour scheme from The Color Throwdown and a mixture of Spellbinders and Concord & 9th card stock.

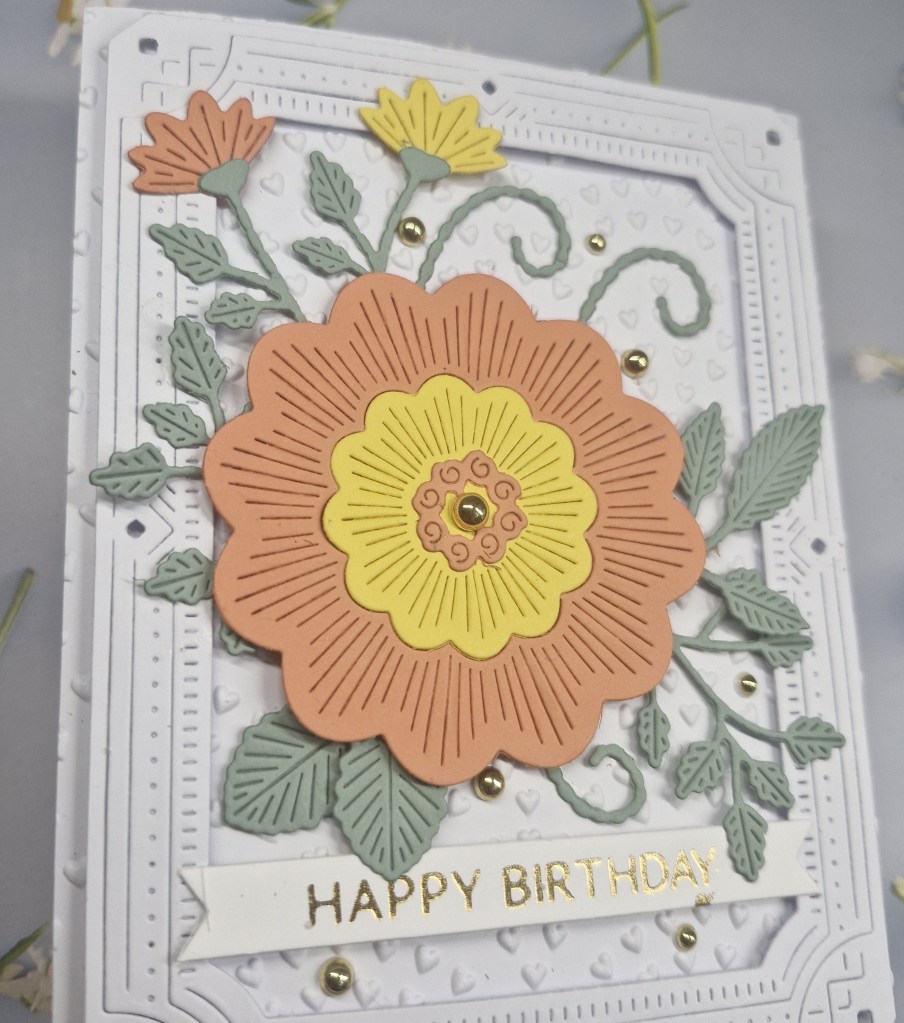
I die cut all the elements in the ‘Embroidered Blooms‘ die set and set about arranging them. I didn’t use half of what I die cut, so I am sure they will be used on a future project.

As I arranged them, I decided to add a panel at the back embossed using a Spellbinders embossing folder, and die cut a white frame using Pinkfresh Studio ‘art Deco Frame’. The fame was added using 3D foam squares in various places – I didn’t use foam strips as I didn’t really know if I wanted any of the foliage tucked underneath the frame as yet.

Once the frame was attached. I added the foiled sentiment strip at the bottom, then added the large flower with a few 3D foam pieces, and then arranged elements around and about.

The final step was – you might have guessed it already – adding some gold gems.

I shall be entering the following challenges:

Color Throwdown – sage green, yellow, coral

Die Cut Divas – die cuts and flowers

Aud Sentiments – sentiment with embossing wet or dry and/or flowers

Crafty Catz Weekly Challenge – anything goes with option of feminine birthday

Beautiful Blossoms – anything goes flowers/florals

Just Saying Hello

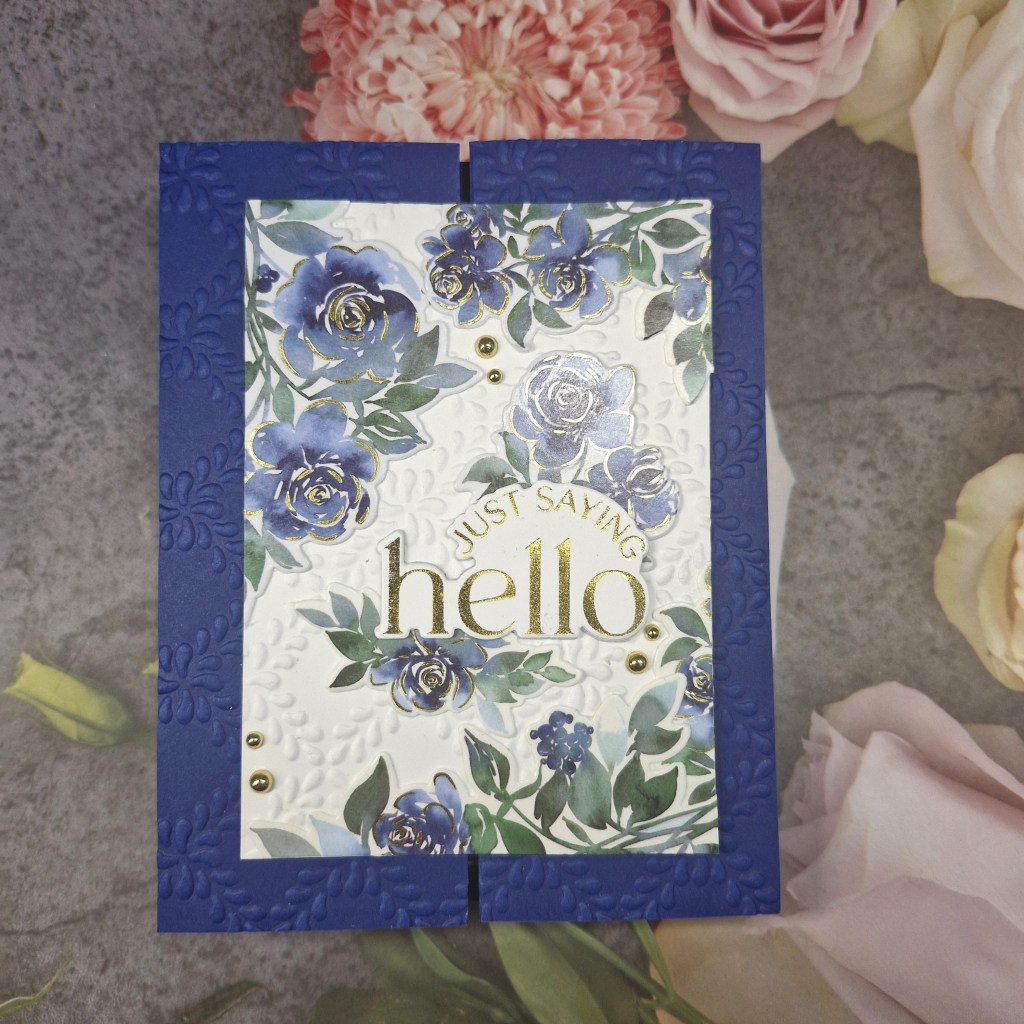
Hello once again. The Alphabet Challenge has started a run through the alphabet again. For this challenge, hosted by Helen, we want you to choose your own letter from the alphabet, and create a card from your own choice of theme for that letter….

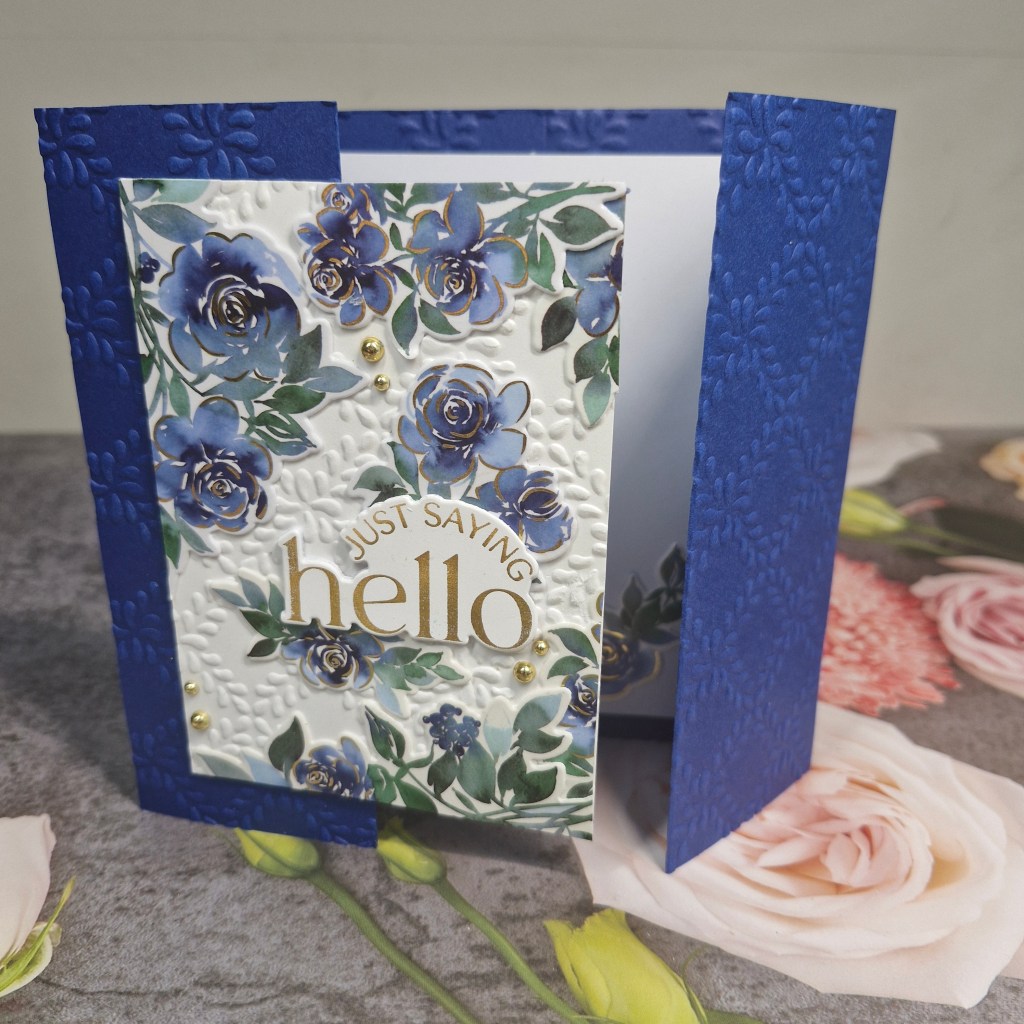
I chose ‘F’ is for Flowers’, and created this card:

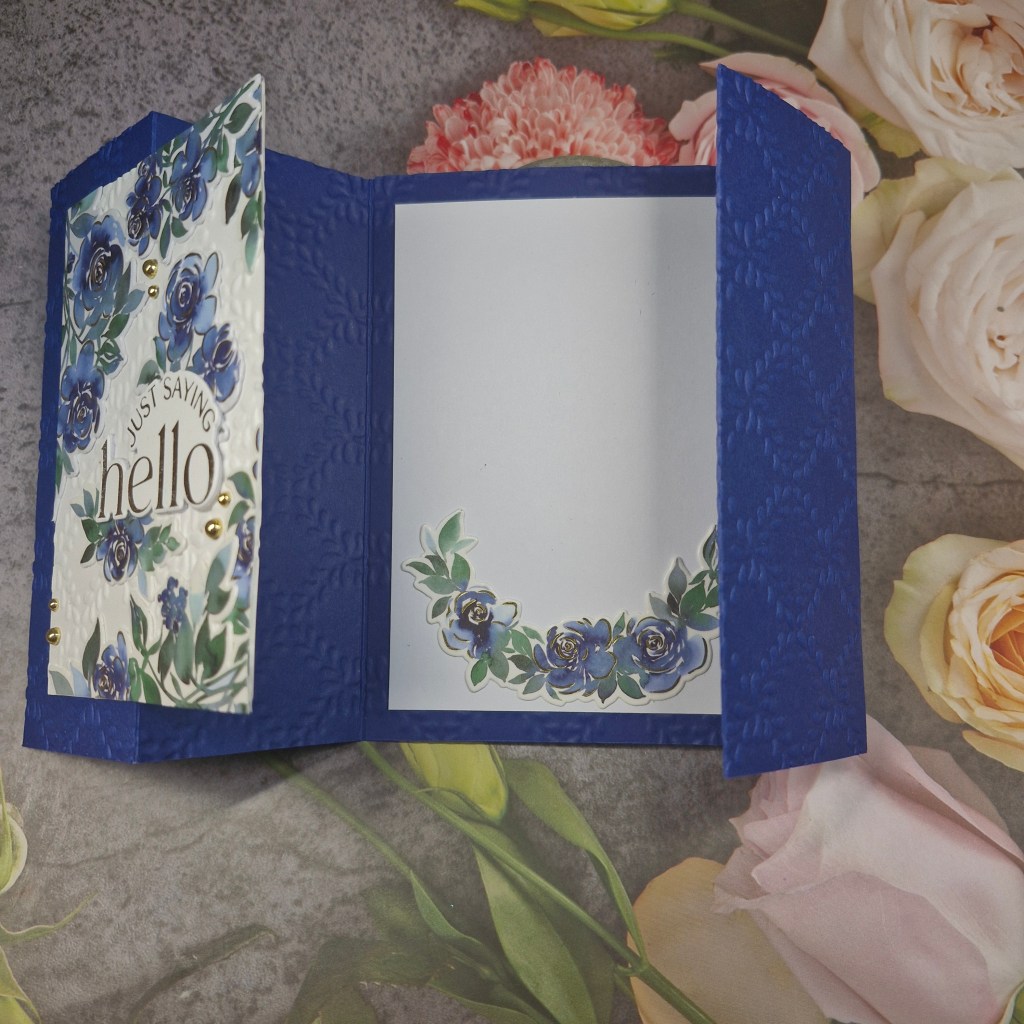
This is actually a gate-fold card, so I created the blue card base first, then ran that through the machine with an embossing folder. This created an all-over pattern for the whole of the card base.

The front panel was created using the same embossing folder, onto which I adhered some Pinkfresh florals from one of their washi tape suites – attached to a white piece of card, then die cut.

Once the images were laid out onto the white panel, with images over-hanging the edge, I cut the over-hangs off. The foiled sentiment was added, as were some gold gems.

I placed another white panel on the inside of the card, also decorated with some of the washi florals.

I hope you can come and join us this time round – choose your own letter and your own theme following that letter – the world is your oyster. xx

I shall be entering the following challenges:

Addicted To Stamps & More – die cuts and/or stencils

CYHTP – embossing folder – option of rainbow or rainbow colours not taken

Crafts Galore – anything goes

Die Cut Divas – die cuts and flowers

Creative Creases – anything goes with a fun fold

Beautiful Blossoms – anything goes flowers/florals

Y is for Yummy

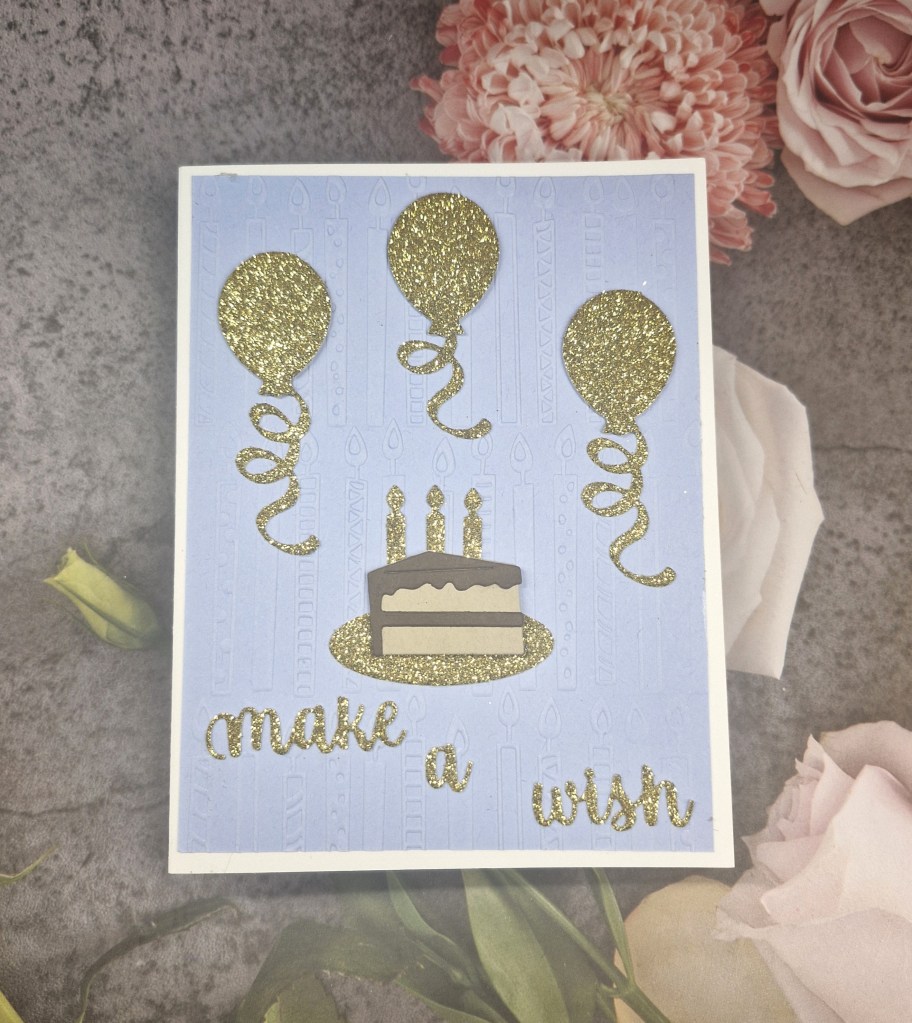
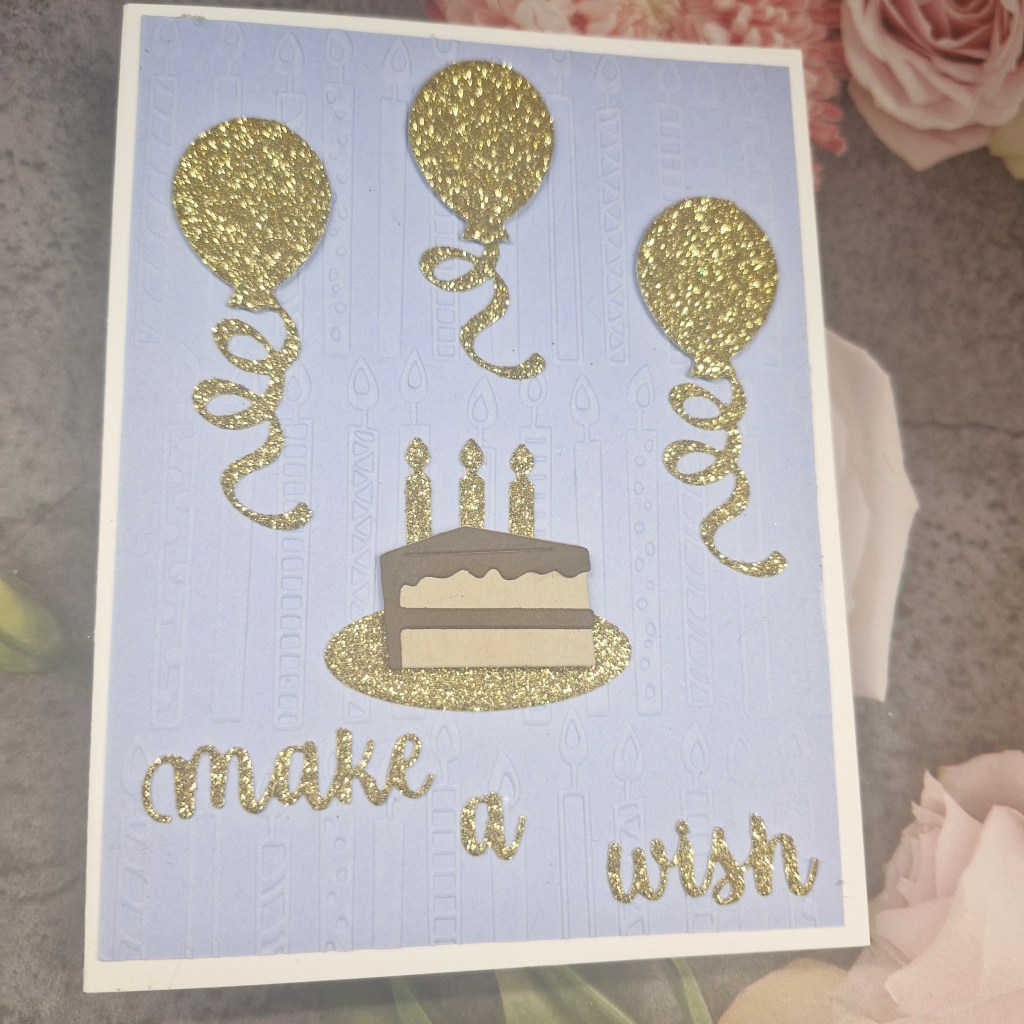
Hello again. It is my turn to host at The Alphabet Challenge. Having reached the letter ‘Y‘, I chose the theme of ‘Yummy‘. Anything food related and yummy and delicious – you get my drift. Here is my card:

I think I went quite clean here making the die cuts speak for themselves.

The blue background panel was created using a Spellbinders embossing folder and adhered flat to the card base – a small white edge all the way around.

The cake, balloons, and sentiment are from a die set received as a ‘goodie bag’ from an online Facebook sale from a UK shop. They have this sale once a month, and can last up to three hours – there are always bargains to me had – and the last bargain is a super-duper crafty bag. This die set was one of items in that bag, and are from Karen Burniston.

I felt these were small but mighty cute images, and as such I wanted them to stand out.

The cake was created – gotta be chocolate for me – using two shades of brown card stock from Concord & 9th.

All the other elements were die cut using Pinkfresh Studio gold glitter card stock. I may well have used this a lot recently – but it is very, very sparkly and it just has to be done…..

The cake was adhered to the platter, the candles layered behind. the balloon strings were adhered to the back of each balloon – the middle one cut down slightly to fit above the cake.

And the sentiment added at jaunty angles.

I hope you can come and join us with your ‘yummy’ creations – I look forward to seeing you in our gallery. xx

I shall be entering the following challenges:

Seize The Birthday – anything goes birthday – option anything that flies not taken -unless to let the balloon go in windy weather….! :)

Addicted To Stamps & More – birthday
Floral Congratulations

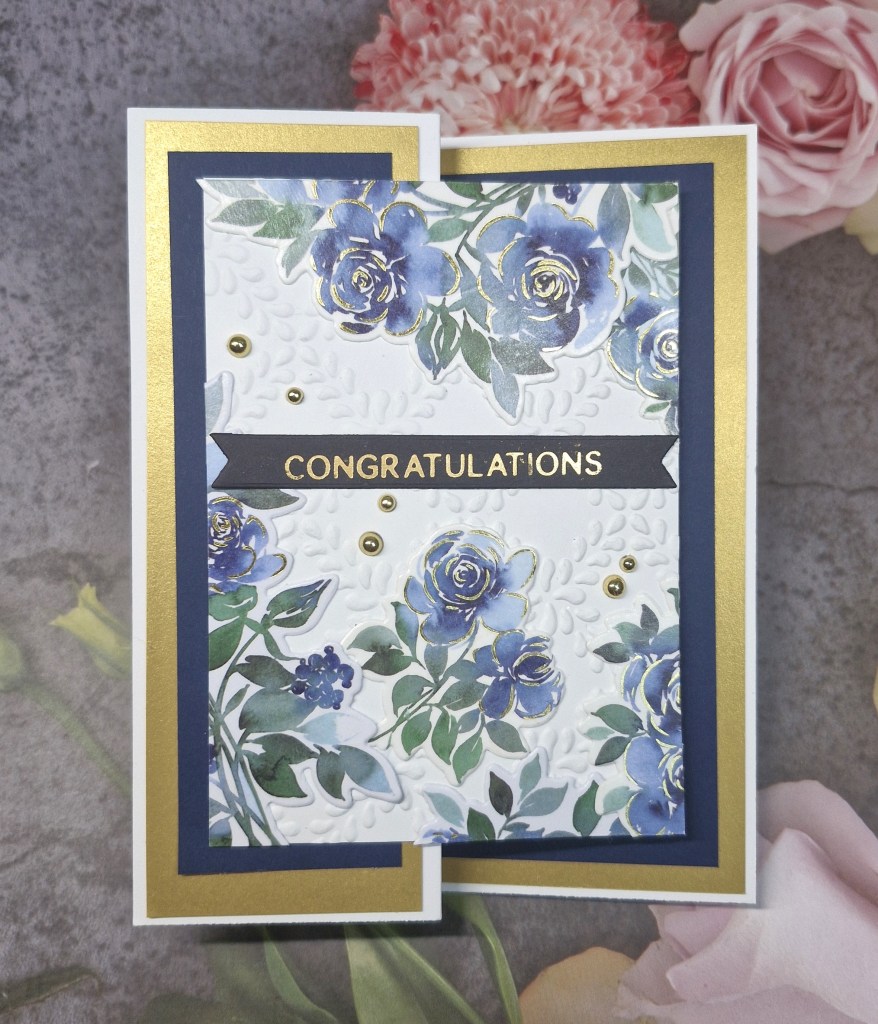
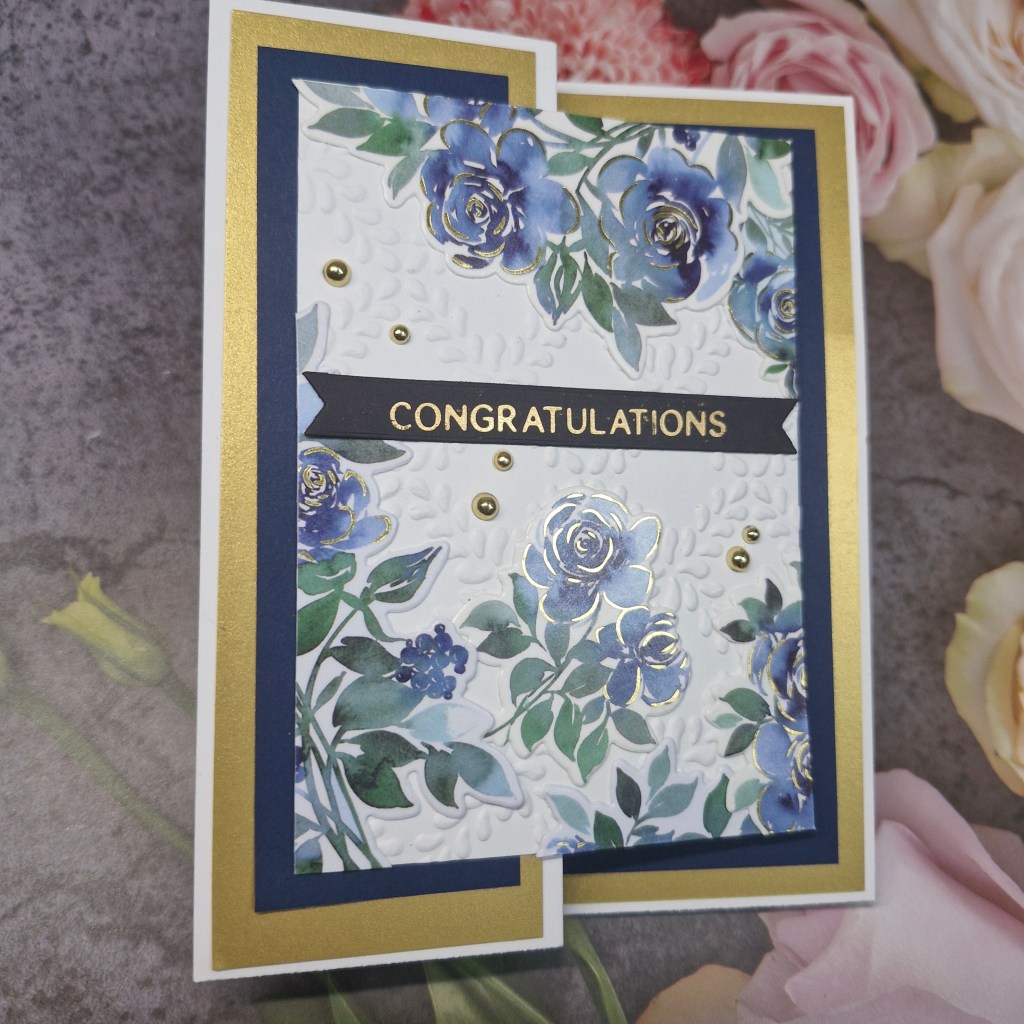
Hello everyone. You remember how I said yesterday that I wouldn’t be using any more Pinkfresh washi for a while…..? Well – I may have just told a little fib. I watched a Jennifer McGuire video and totally inspired to create – but this was using more Pinkfresh washi. I changed the washi to another product suite – Indigo Roses – and created this card:

There are also three other panels I am working on, but this card came together first.

I first attached the washi tape to white card stock, then used the matching dies.

I followed Jennifer’s examples of cutting down another white card to four rectangles. I used an old Spellbinders embossing folder on each of the four rectangles. This one has the date of 2012 on the back……!! It is an ‘M-Bossabilities’ reversible embossing folder called Garden Lattice – two designs for the price of one, and is A4 in size. It’s amazing what you find in your stash when looking for something else, isn’t it?

Taking guidance from the YouTube video, I taped the four rectangles together, attached the die cut washi images, cut the rectangles apart – then attached more images. The video explains it in far more detail and is very easy to follow.

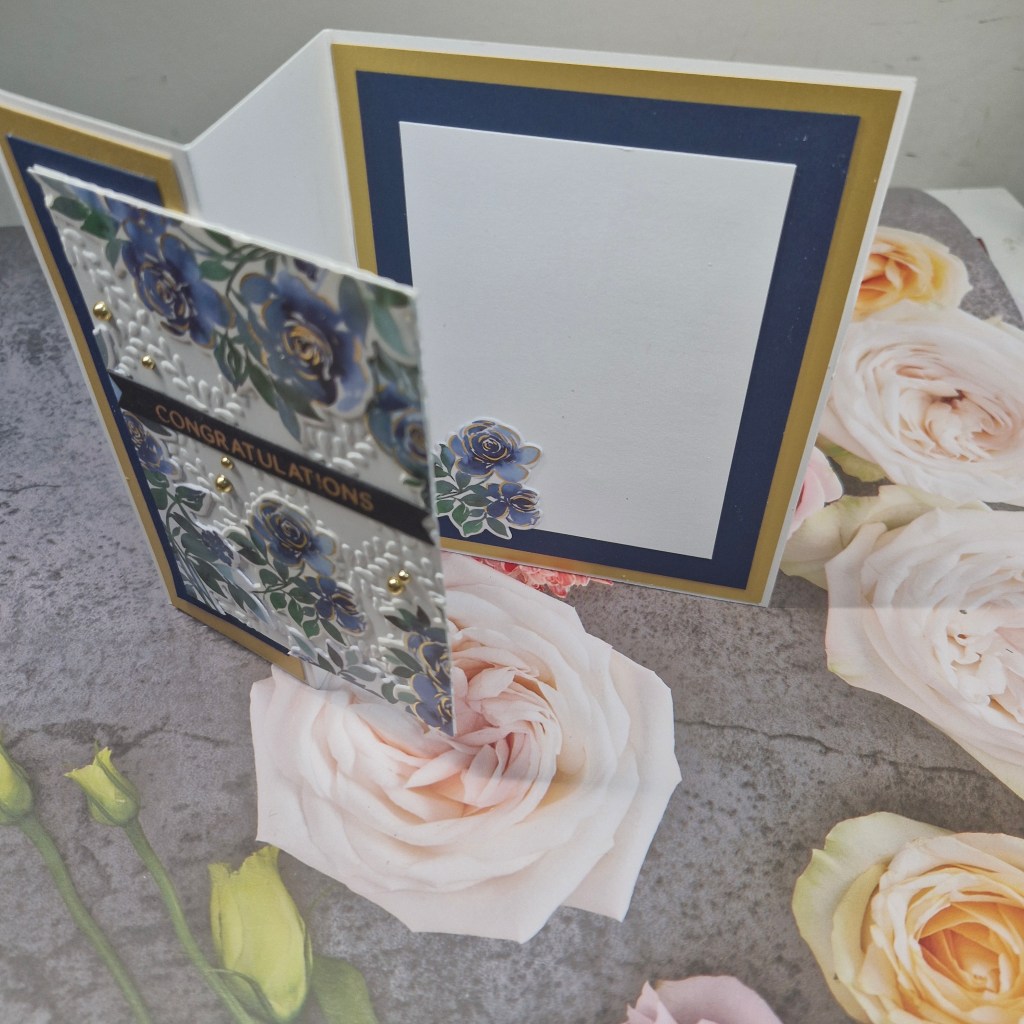
Once the panel designs suited my eye, I created the folded card base, matted some gold, then found some blue card stock from Time 4 Tea Designs which matched the indigo roses.

The mats and layers were created and attached to the card base, then the floral panel adhered to the left front.

A previously created foiled sentiment was added, and some gold gems. I also finished the inside – very unusual for me – but I was in the zone.

It really is hard to put away products you are having fun with, and I have several rolls of washi from different product suites at Pinkfresh Studio. A few of them were from virtual events – there is a lot of washi on each roll…

Thank you for bearing with me for the past few days.

I shall be entering the following challenges:

CYHTP – embossing folder – option of lucky/St Patrick’s Day not taken

Make My Monday – use a die/punch

Crafty Calendar – more than one fold

Creative Creases – anything goes with a fun fold

Lil Patch Of Crafty Friends – anything goes

Beautiful Blossoms – florals/flowers

Mix It Up – anything goes – option of layers taken

Pink Birthday

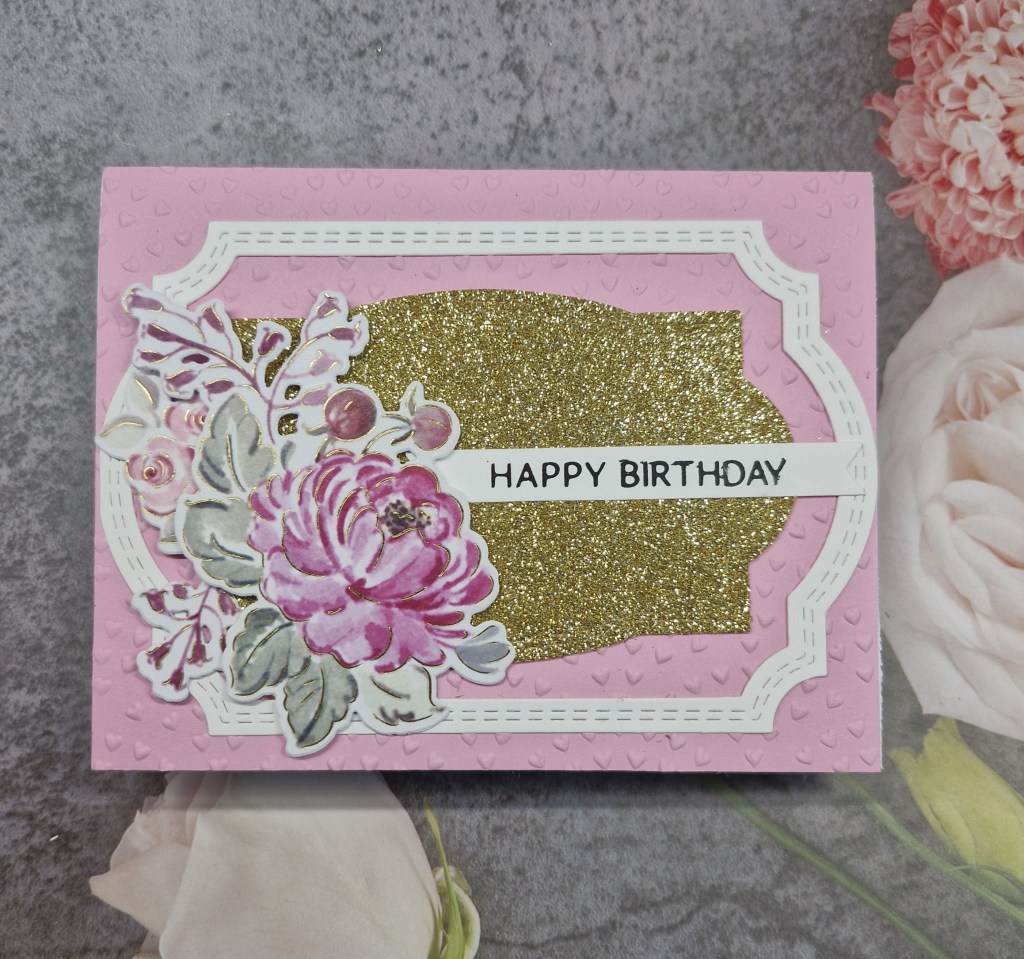
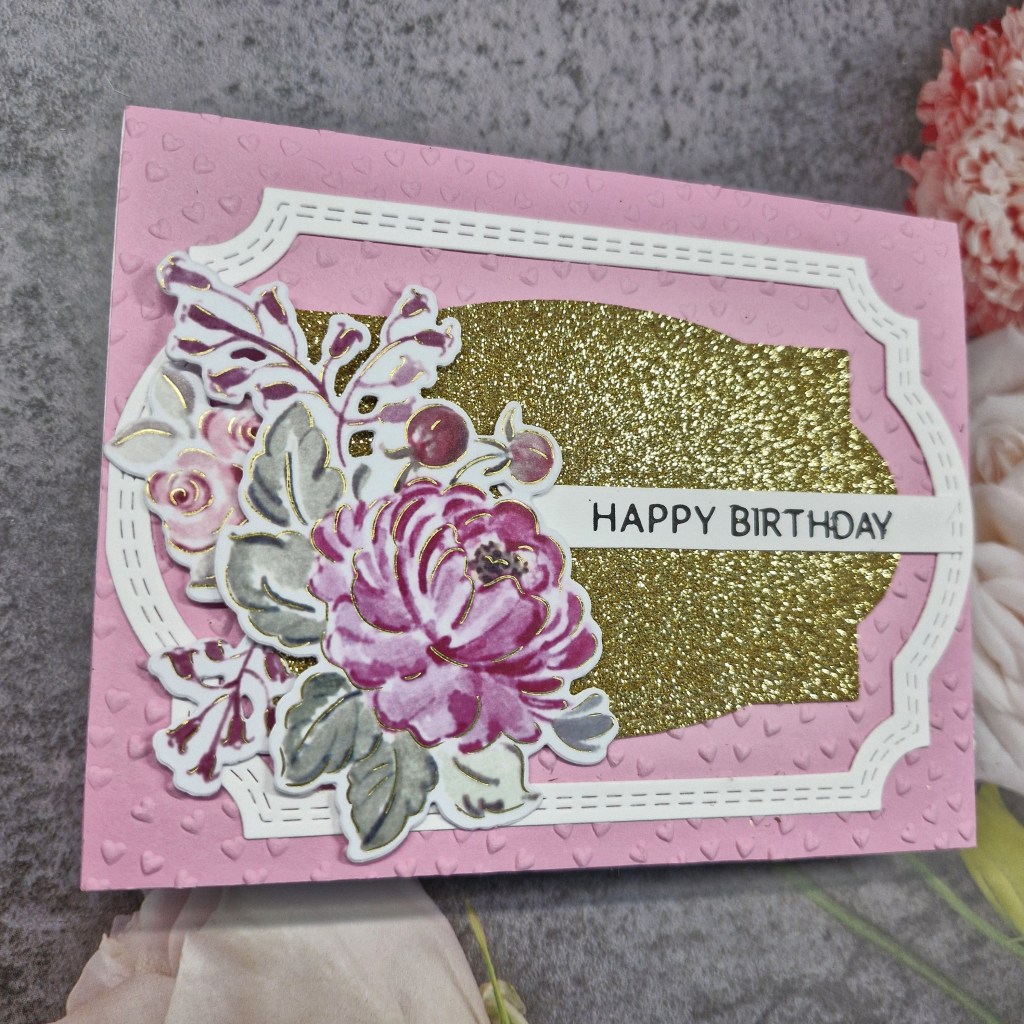
Hi there. I am sharing the final project – for now – using the remainder of the Pinkfresh Studio washi. I am sure I will be using their washi tape for future projects, but this is the last project for now:

The background panel was created using some Concord & 9th card stock, and a Spellbinders embossing folder. This adhered flat to the card base.

I used the frame die set from the event to create the white outer frame, and then die cut the smaller label with the same gorgeous gold glittery card stock I have used previously.

Once the middle gold and the outer white pieces were attached, I played around with the large and two smaller images until I was happy, and added a sentiment stripped foiled in black – previously created.

I shall be entering the following challenges:

CYHTP – embossing folder – option of lucky/St Patrick’s Day not taken

Creative Fingers – anything goes

Seize The Birthday – anything goes birthday – option of anything that flies not taken
Triple B – Birds and/or Butterflies and/or Blooms