Hello Friend Tag

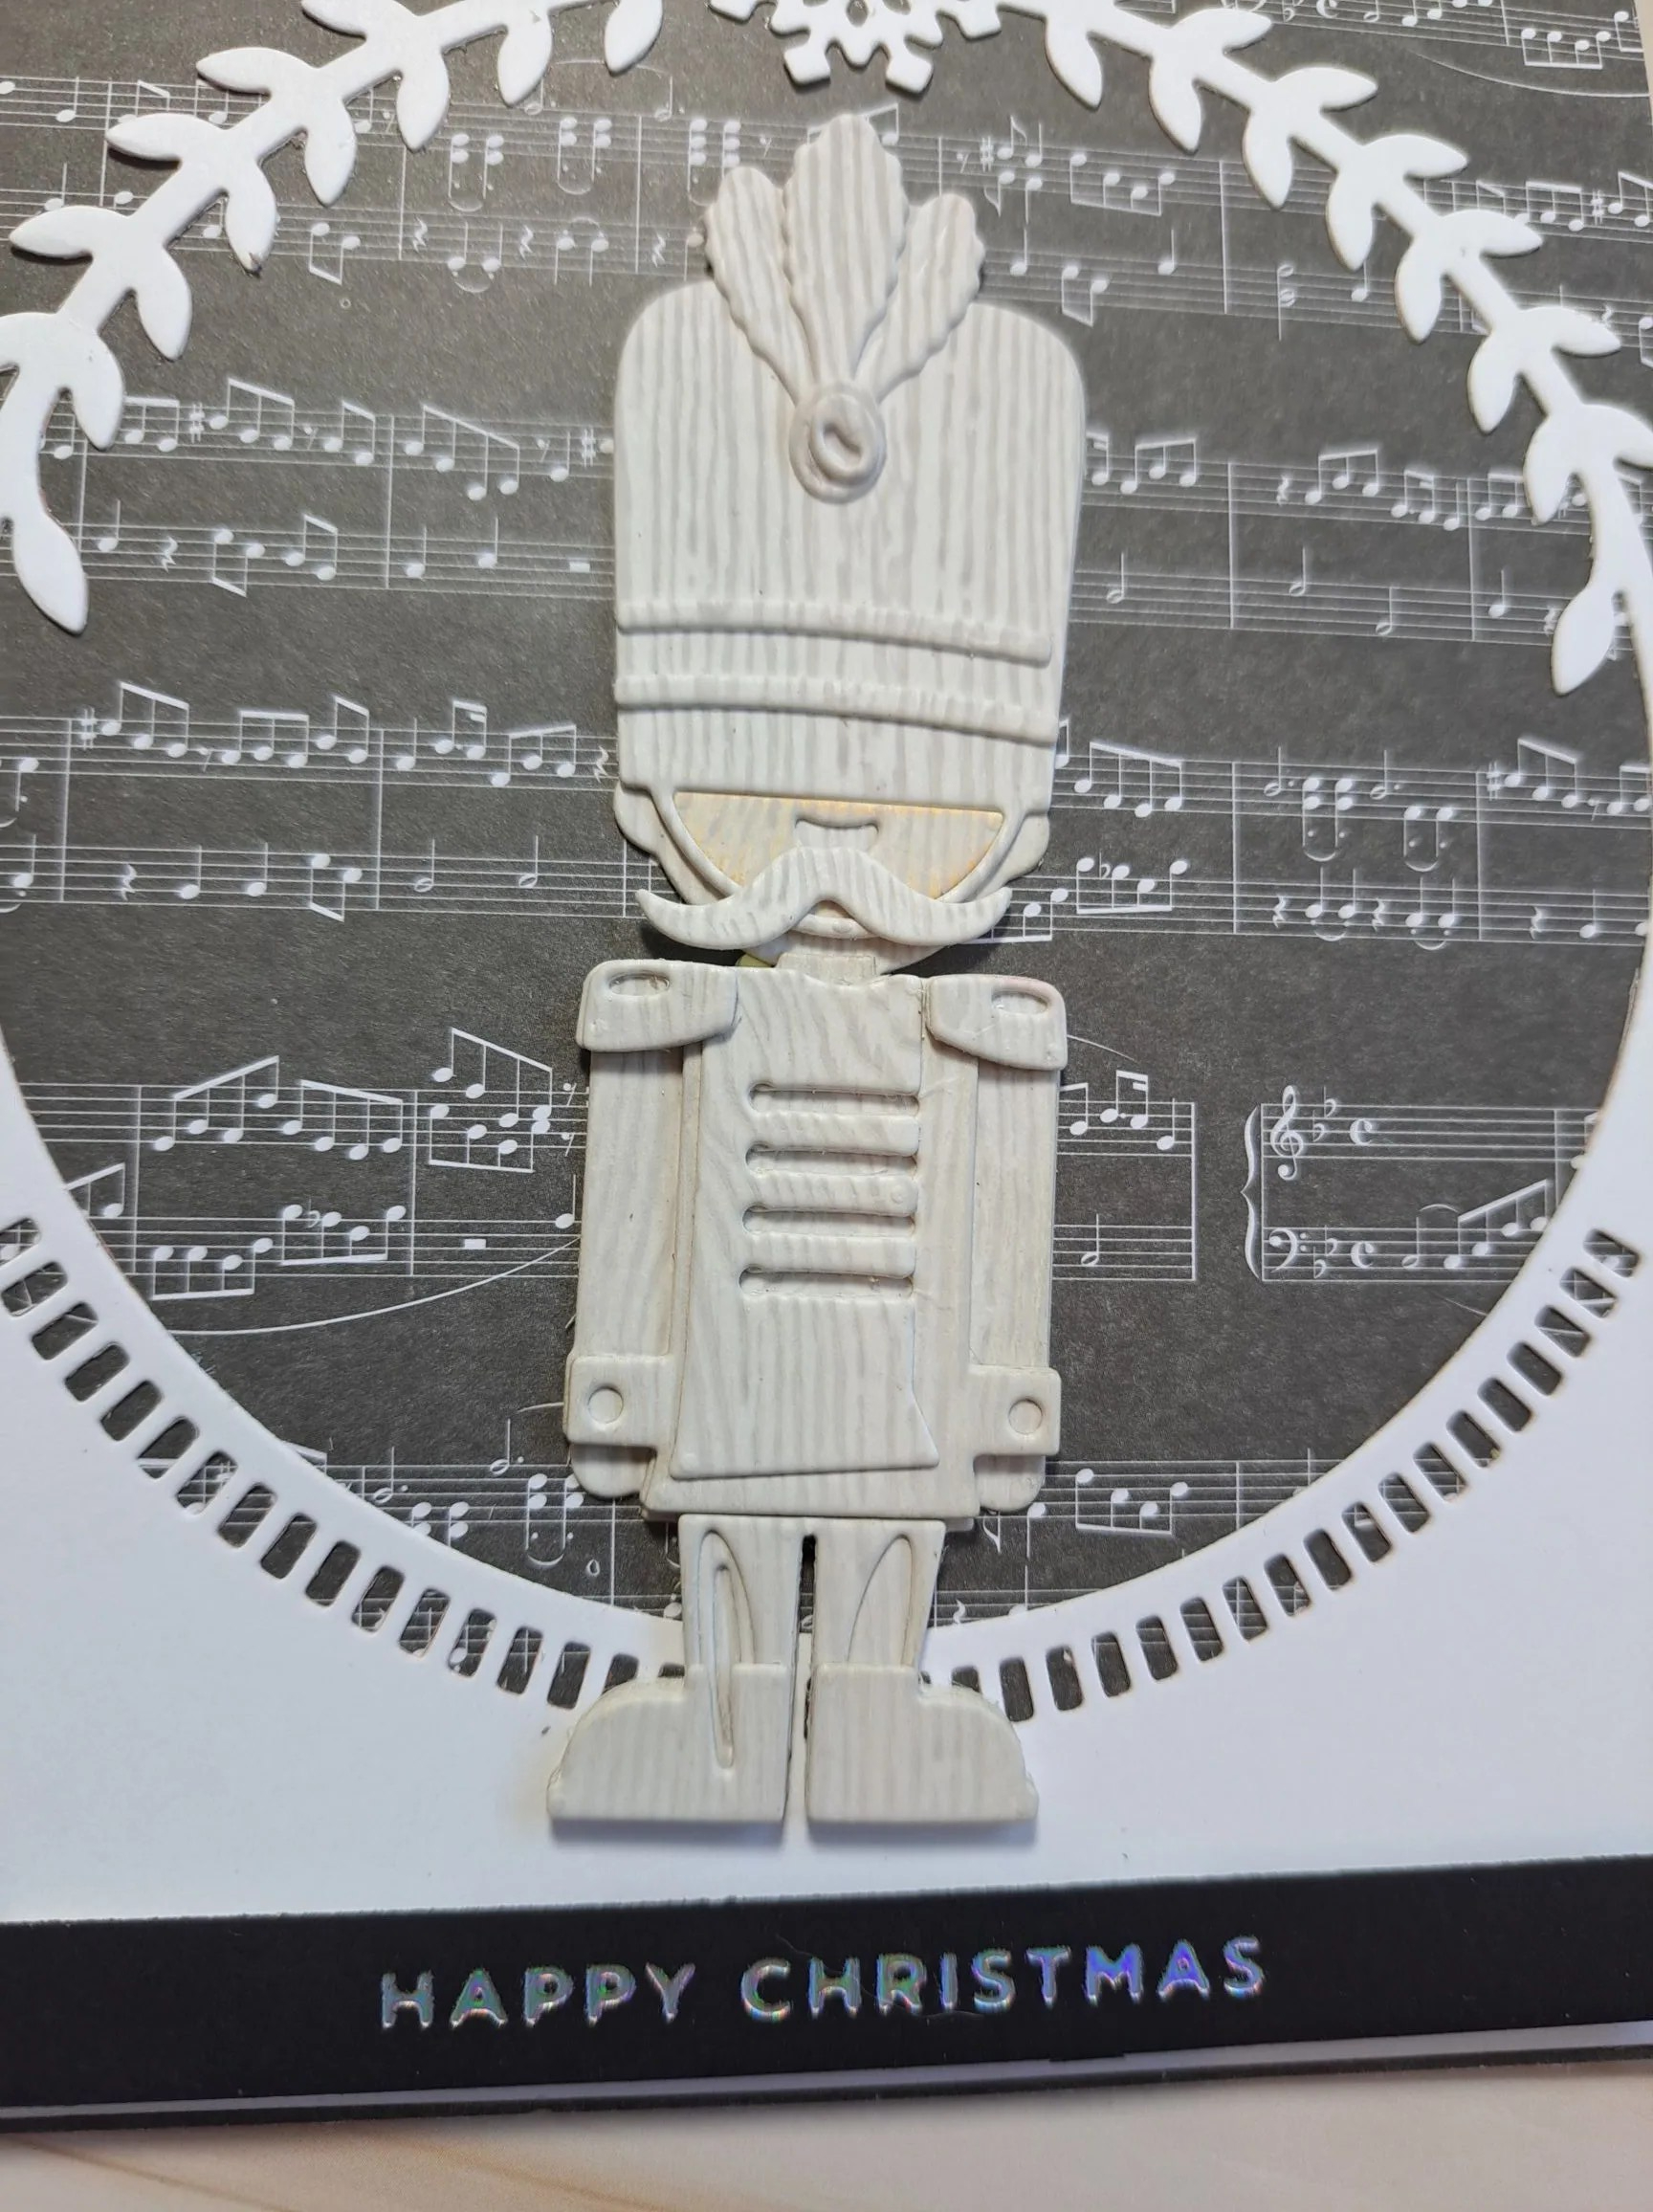
Hello. A slightly different direction from my usual makes. This time I have turned my hand to a tag……

I used the products from the most recent ‘Let’s Stamp Together’ from Scrapbook and Cards Today. This time round it was Spellbinders. Even though I haven’t done the actual class yet, I have been playing with the products.

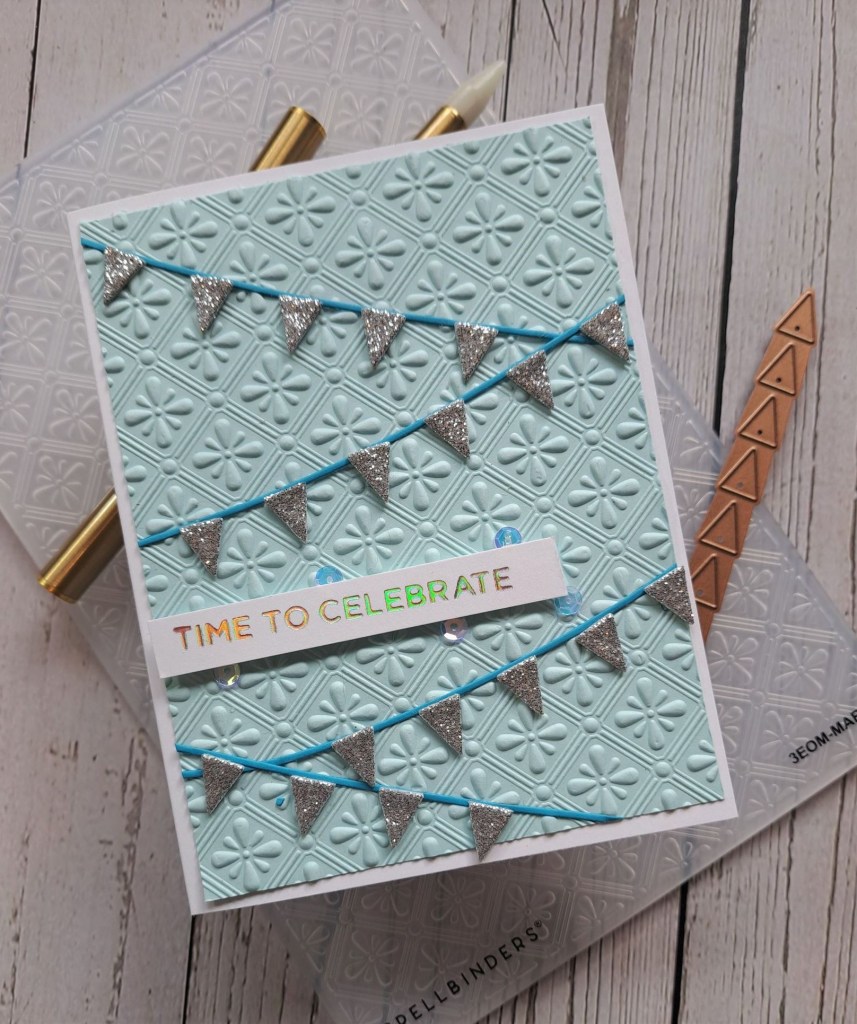
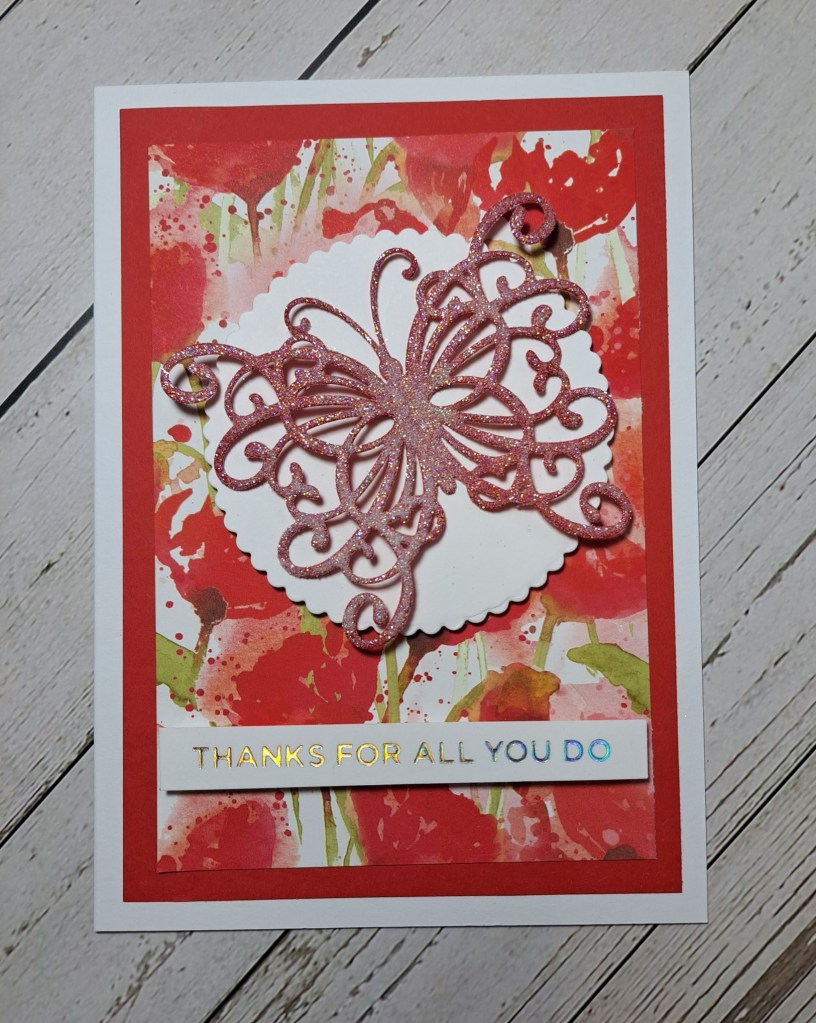
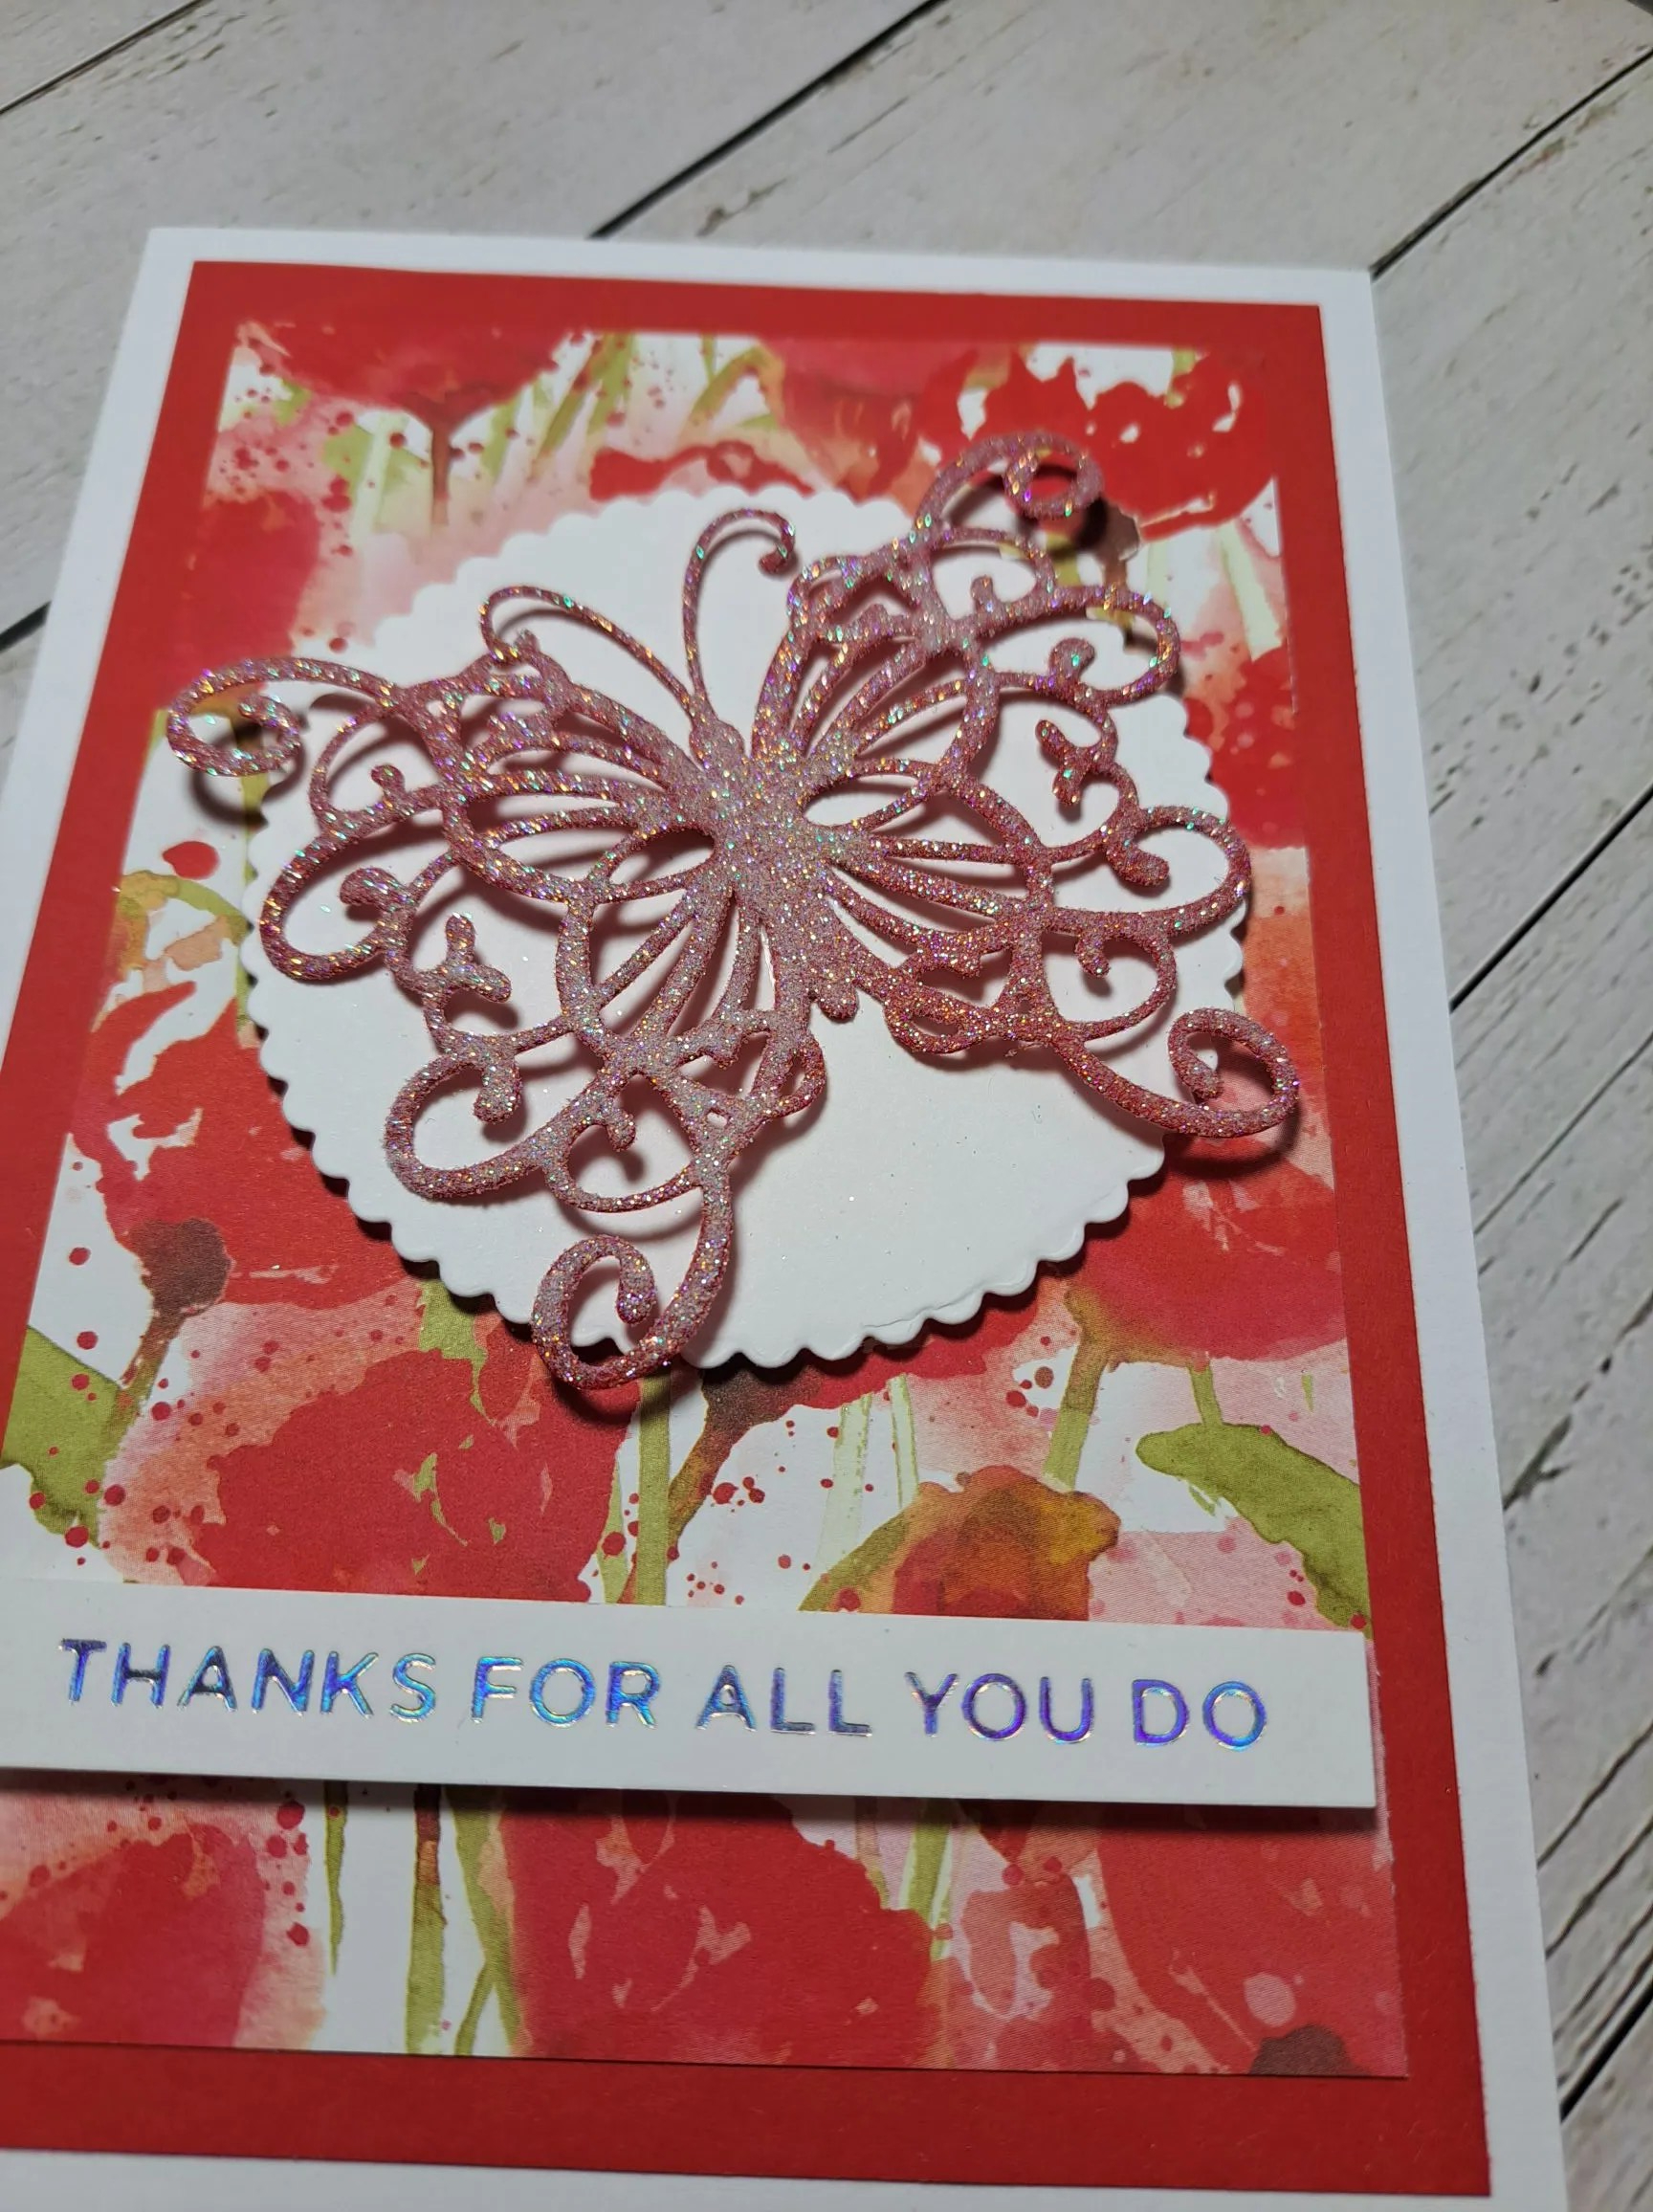
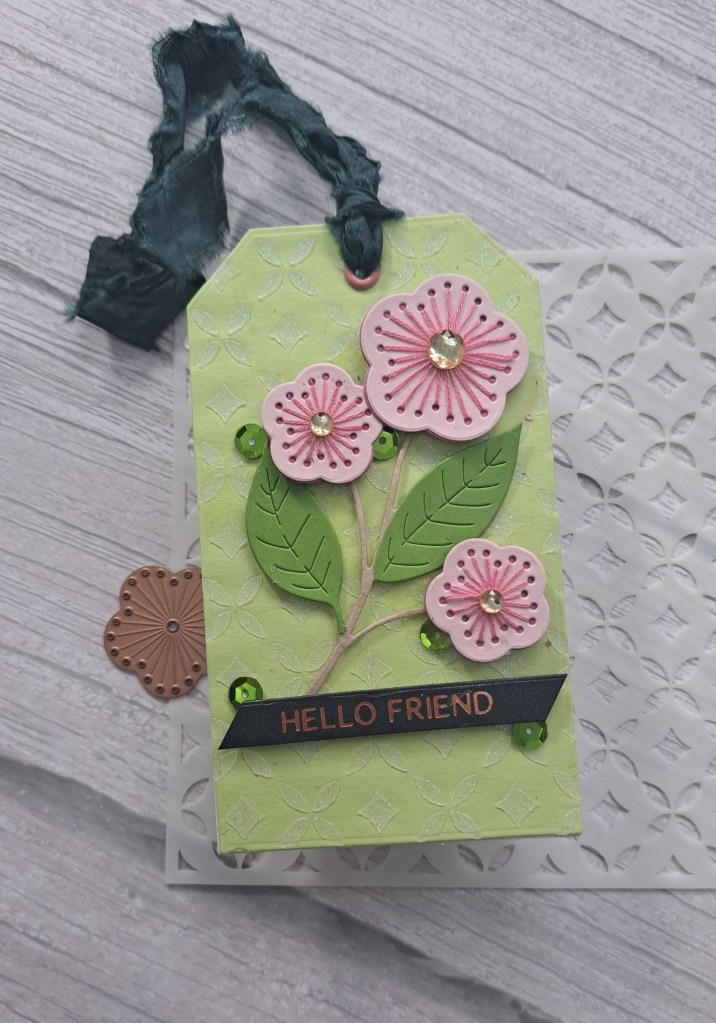
The tag was created from a stencil and glitter paste onto some light green card stock, then die cut using an MFT tag die. After running it through the die cutting machine, the glitter paste was more debossed than embossed, which I thought was a different look.

The flower stem was die cut from a light brown card stock, the flowers were die cut, then stitched. Before I adhered the flowers, I die cut some leaves which came with the set and stitched them, but they didn’t match the leaves on the stem, so I die cut the stem again, and just snipped the leaves off to add to the brown branch.

I then added the flowers, some faceted gold gems for the centre of the flowers, then added this to the tag.

Some green sequins for even more interest and dimension, and a previously foiled sentiment.

The ribbon was added after punching and adding the eyelet. I don’t have pink or light green ribbon, so I used this dark green ribbon. I have a stash of this ‘wrinkled’ ribbon, I forget where from now, and think that the tattered edges and wrinkles make for an interesting addition.

I shall be entering the following challenges:

Cut It Updie cuts and make a tag

Mix It Upanything goes option embossing

The Crafty Addictsanything goes

Ally’s Angelsanything goes

Thanks Very Much

Hello. I was in a fiddly mood for crafting today, so decided to use lots of little layering die cuts from Spellbinders:

This tree die with the flowers and leaves, are from one set. I die cut the tree from a light brown card stock, then die cut the leaves and flowers from Concord & 9th card stock in three shades of pink, and two shades of green.

I did have to go onto YouTube for the placement of the flowers and leaves, but it came together quite quickly.

I added some white enamel dots to the centre of some of the flowers and added lots of little itty bitty pieces of 3D foam to parts of the tree for some dimension.

I felt something else was needed on the background, so I dry embossed an Altenew stencil which was still out on my craft table from a previous card, which I thought added extra interest to the background without taking away from the main image.

The sentiment is a previously foiled strip, and I decided to use gold foiling on a grey strip – black would be too harsh, and I thought a white strip would get lost……

I shall be entering the following challenges:

Simon Says Stamp Wednesday Challengeanything goes

Tic Tac Toe challenge middle rowpink, die cut, stencil

Lil Patch Of Crafty Friends anything goes

Crafts Galore anything goes

Triple B challengebirds and/or butterflies and/or blooms

Birthday Banners

Hello and welcome. My second post of the day as the June Happy Little Stampersanything goes birthday‘ has started.

Here is my card:

I dry embossed a light blue panel and cut it down slightly to create the border from the card base.

The banner was die cut with blue card, and the triangle from the Spellbinders silver glitter foam – this is o very easy to die cut.

Once I decided on where I wanted each string and each triangle, I glued them down – and I even measured between each little triangle to make them even – did someone say OCD…….?

The sentiment was attached with 3D foam.

I hope you can come and join us with your birthday makes. xx

I shall be entering the following challenges:

Simon Says Stamp Wednesday Challengeanything goes

CYHTPembossing folder – option bird/bird houses not taken

Ally’s Angels anything goes

Cupcake Inspirationsanything goes

Joyeux Noel

Hello once again. The new challenge at The Holly and Ivy Christmas Challenge has started. Kate has taken over the helm for this challenge. Here is my card:

The background was created by die cutting a Pinkfresh Studio cover plate and adhering that to a brushed gold panel.

Now onto the main image – lots and lots of die cutting, piecing those itty bitty pieces together – and watching YouTube to figure out how to make her dance:

It’s actually quite an easy and simple idea to be able to create the ‘dancing’ and movement – ingenious if you ask me,

The dies are from Spellbinders, and cut using a mixture of patterned paper, black glitter foam, and gold.

I added the foiled sentiment, and also added some small gold gems to the centre of each snowflake.

I hope you can come and join us with your Christmas creations – anything goes Christmas. I look forward to seeing you in our gallery. xx

I shall be entering the following challenges:

12 Months of Christmas anything goes Christmas – option not taken

Jingle Belles RockChristmas and no stamping

Beyond The Blue interactive

CRAFT ChallengeChristmas

Christmas Craft CreationsChristmas and no stamping

Merry Little Christmas challenge atg Christmas

Floral Birthday Border

Hello. I attended the online Spellbinders Glimmer class this past weekend, and played with foiling – with just about every plate and sentiment set I had. I was glimmering for absolutely hours. Once I got the hang of it – I just kept foiling. Here is a card created with a foil plate from Pinkfresh Studio:

I had foiled the plate onto a white panel, then I used the matching stencils in Pinkfresh pink and lime green inks. I just stencilled harder with the same pink to create some variation, and added extra lime green to the base of some of the leaves.

I didn’t blend the centre of the flowers, but added some gold dots with a metallic gold paint marker from Spectrum Noir. I had bought them to use when I was doing the wax seals and highlighting the image – yet another kit I haven’t really played with yet……!

Once the blended panel was dry, I die cut the border with the matching die set, and added two more die cut layers in plain white for stability.

I thought the centre of the border was a little plain, so I dry embossed a stencil and inserted that embossed ‘off cut’ to create more interest in the centre.

The sentiment is also from my foiling sessions, added with some 3D foam strips, and I searched my stash for some pink and lime green sequins, and added them as you see.

I’m afraid I have become addicted to foiling – you are definitely going to see more of that in my future posts…..beware!

I shall be entering the following challenges:

Crafty Catzanything goes, option of lace, ribbon or twine not taken

Allsorts – anything goes option add embellishments – taken

Color Throwdownpink, lime green, white

Here Is A Place To startanything goes option of flowers and one other thing taken (+ sequins)

Get Creativeflowers

Double D Challengeflowers

Cardz 4 Galz – red, white, pink

Hello once again. Cardz 4 Galz has started a new challenge and this time the theme has been chosen by Pamela – a girlie card with red, white, and pink. Here is my card:

I struggled with this colour scheme a little – I am not a pink kinda girl 0 but it is a challenge, isn’t it, so I went with it and created a card I am quite pleased with.

Onto a 5 x 7 inch card base, I matted a piece of patterned paper with red.

The butterfly is an old one from Sue Wilson, which I die cut in red, then added a glue spray, then added glitter.

To ensure the butterfly didn’t get lost on the background, I added a scalloped circle, and then added the foiled sentiment.

I’m looking forward to seeing your red. white, and pink creations – maybe it will give me some ideas for future challenges with these colours……..

I shall be entering the following challenges:

Crafty Animals anything goes with an animal

MMM Challengeall creatures great and small

Shopping Our Stash something starting with ‘B’

Ally’s Angels anything goes

Christmas Soldier

The Holly and Ivy Christmas Challenge has started a new ‘anything goes Christmas/Festive’ challenge. Here is my card:

Channelling Tim Holtz yet again, I die cut the soldier layers from the white and grey woodgrain card stock – just colouring his little face a tiny bit. I also used some double sided sticky sheets for each piece – a great tip from Tim – not so much glue oozing out of the edges….!

The background is a piece of patterned paper, to which I added a Spellbinders die cut, and a foiled sentiment.

Doing the soldier this way – and many of the ‘Colorize’ dies I would imagine – would look great from this card stock….

I hope you can come and join us with your Christmas/Festive creations and get your stash ready and waiting for the end of the year. xx

I shall be entering the following challenges:

Most Magical Time of the Year anything goes Christmas/Halloween

Sparkles Forum Christmas ChallengeChristmas and non-traditional colours

12 Months Of Christmas anything goes Christmas – option of into the woods not taken

Creative Crafters Challenge anything goes

From Me To You

The Alphabet Challenge has started a new challenge. We have reached the letter ‘V’, and Debbie has chosen the theme of ‘Vellum’. Here is my card:

I first took some vellum and applied alcohol inks, I think two or three shades of green, moved it around – generally played really – and set that aside to dry. Once dry, I die cut the leaves – snipping one and adding to the larger image – and adhered with wet glue.

The card base is created with some linen textured card, and an arch die cut added.

I added the foiled sentiment strip, and I felt the card was done. No embellishments – just a very CAS card.

I hope you can come and join us with your ‘vellum’; creations. xx

I shall be entering the following challenges:

Here Is A Place To Start anything goes

Simon Says Stamp Wednesday Challenge anything goes

Sparkles Forum friendship

Love To Craftanything goes

Mix It Up anything goes – option no stamping – option taken

Snowy Scene

A little more crafty time created this card:

This card took a little planning, some drying time – and patience…..

I started by ink blending a piece of card with Distress Inks – Prize Ribbon and Hickory Smoke. Once dry, I stamped the trees in Versafine Black Onyx – and waited for it to dry again. Then splattered with white acrylic paint – and waited yet again.

Whilst waiting for all the drying to happen, I die cut the houses from The Greetery from ‘Ice White’ card stock from Pink frog Crafts here in the UK, pieced all the layers together – not a major issue – then stuck some black card stock on the back of the houses to fill in the windows.

I then die cut a circle from the front of the card base, die cut a larger circle from the ink blended panel – deciding which part I wanted to show through the aperture, glued that to the back of the card front – adding a white panel on the back to cover the mess. Sorry – the creative process……

I then placed the houses as you see – the smallest one with glue, and the other two with 3D foam squares, added a foiled sentiment – and done….

I shall be entering the following challenges:

Allsortsanything goes option winter blues

Color Throwdown grey, navy, white

Paper Fundayanything goes, option starry night

Peace On Earth anything goes Christmas

Lil Patch Of Crafty Friends anything goes

Ally’s Angels anything goes

Sending Snowflake Kisses

Hello there. I have been playing with different media over the weekend, and trying some new techniques. One of those I want to share on a card:

This card took quite a bit of thinking about – and a few changes along the way.

I started by die cutting the Hero Arts snowflakes ornament die out of silver glitter card stock, cutting off the ornament topper to create a circle. I then die cut a silver circle frame using a couple of different sized circle dies, and layered on top.

The blue background to the circle, which was previously created using Brushos, again die cut with a circle die and adhered to the back of the snowflakes.

For the background panel, I tried the ink pad to embossing folder technique – on both sides – debossed and embossed, to see what happened. I tried this several times, with different blue Distress inks, and liked this debossed panel the best. I adhered that to the white card base using 3D foam, then stuck down the snowflakes circle.

I wanted a little more bling, so I added some separate snowflakes die cut in the same silver glitter card, from a Pinkfresh Studio set, snipping and placing as you see – of course – this would have been easier had I done this prior to adhering the circle – but there we are……

I added the foiled sentiment – and then decided to add more shine by adding a little silver gem to each of the little snowflakes in the circle…….who knew there were many of them in there?

I shall be entering the following challenges:

CYHTPembossing folder – option Christmas

We Love 2 Createanything goes mixed media

Beyond The Blue snowflakes

Peace On Earth Christmas anything goes Christmas

Lil Patch Of Crafty Friendsanything goes