Hello once again. ABC Christmas Challenge has reached the letters ‘U’ and ‘V’. We have the Christmas themes of:
‘U is for Uncluttered’ & ‘V is for Vertical’
Here are my cards
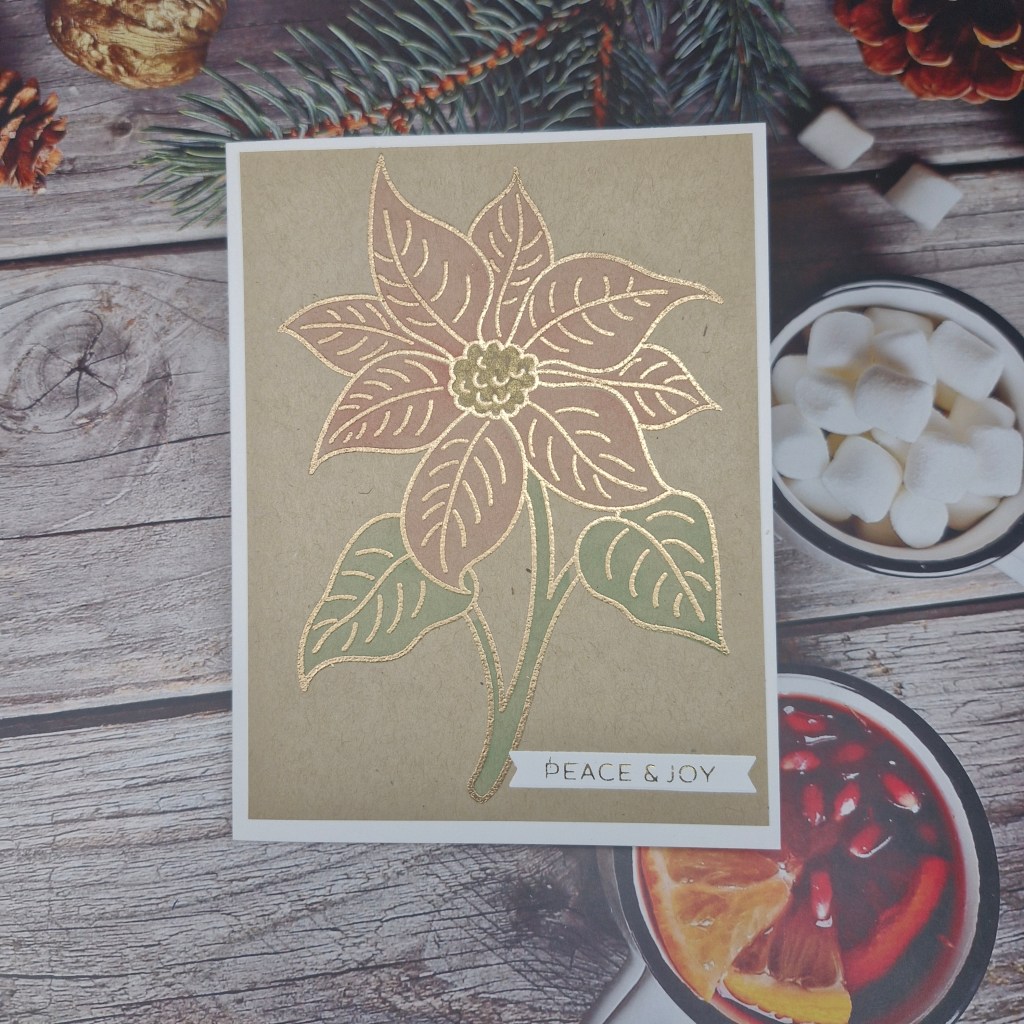
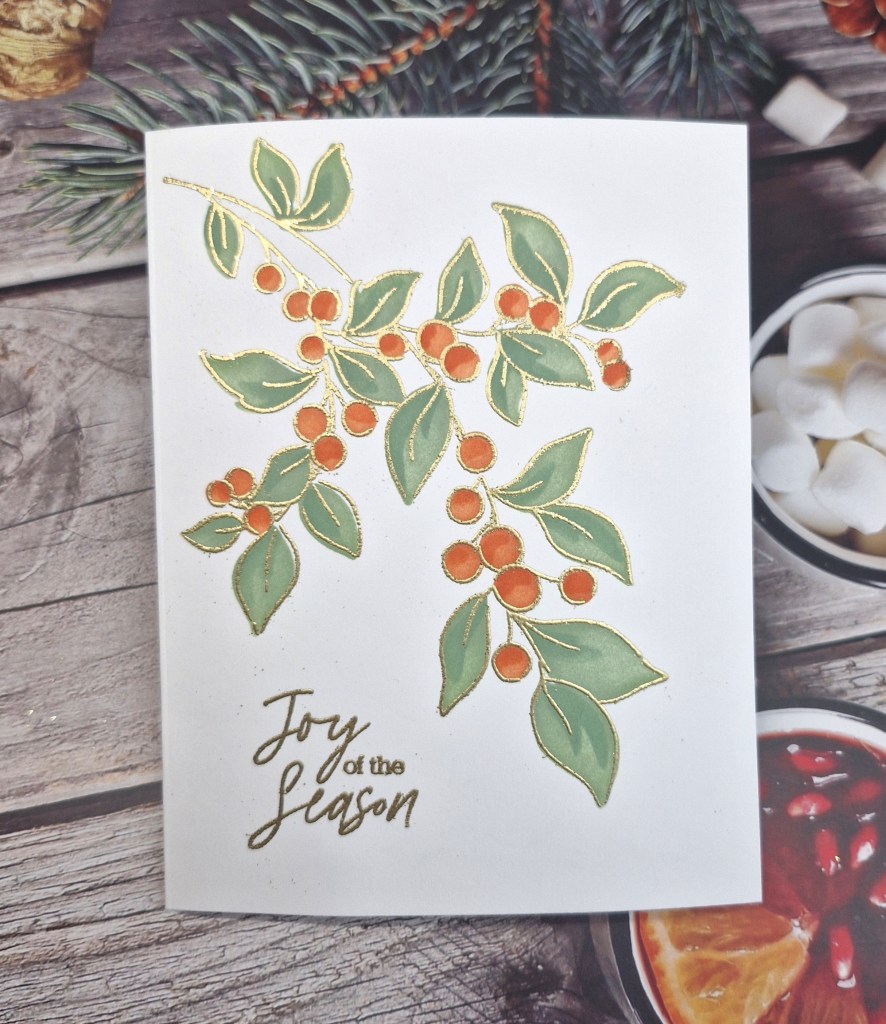
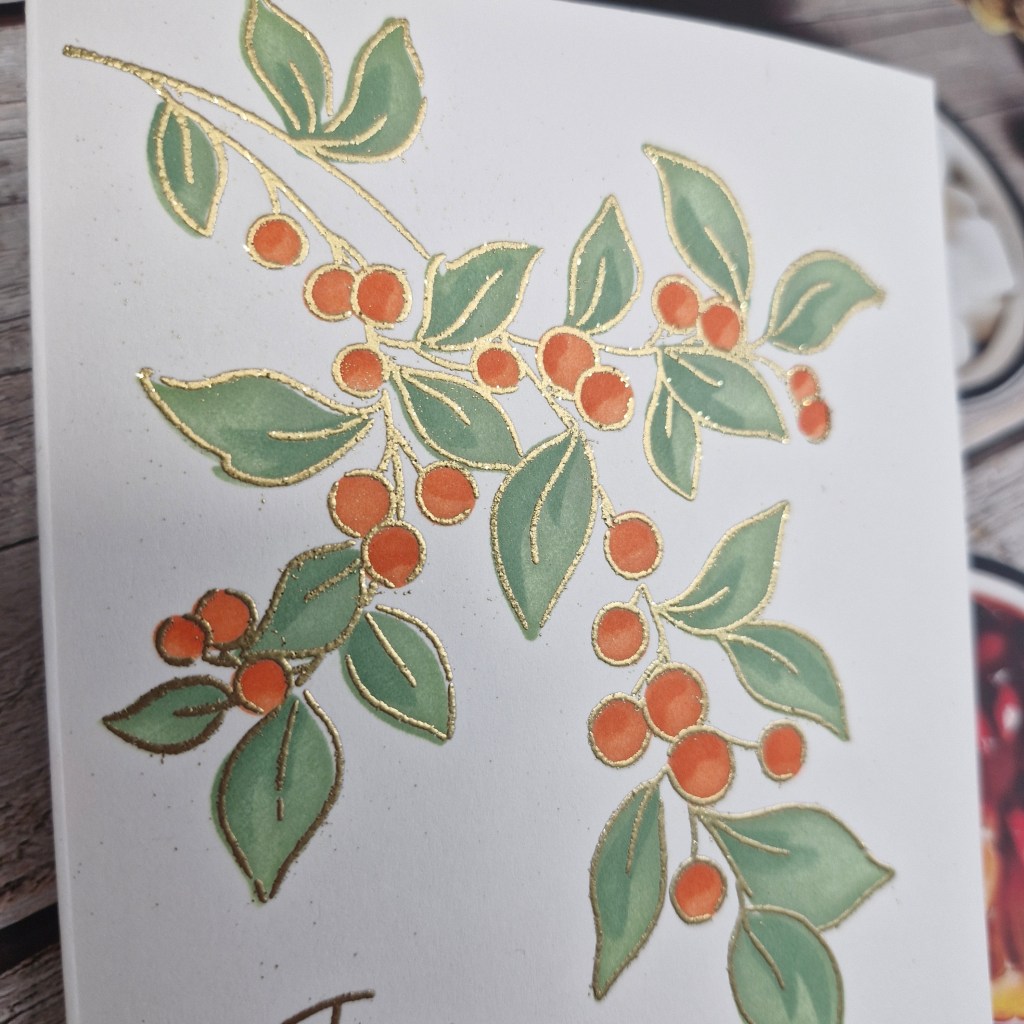
For the first card, I used the ‘Sketched Poinsettia‘ from The Greetery again, and gold heat embossed the image onto some Kraft card stock, using just the one layer of the layering stencils to colour it in. I wanted a softer overall feel to this card. The panel was cut slightly smaller than A2 and attached to a white card base, with the foiled sentiment attached as you see.
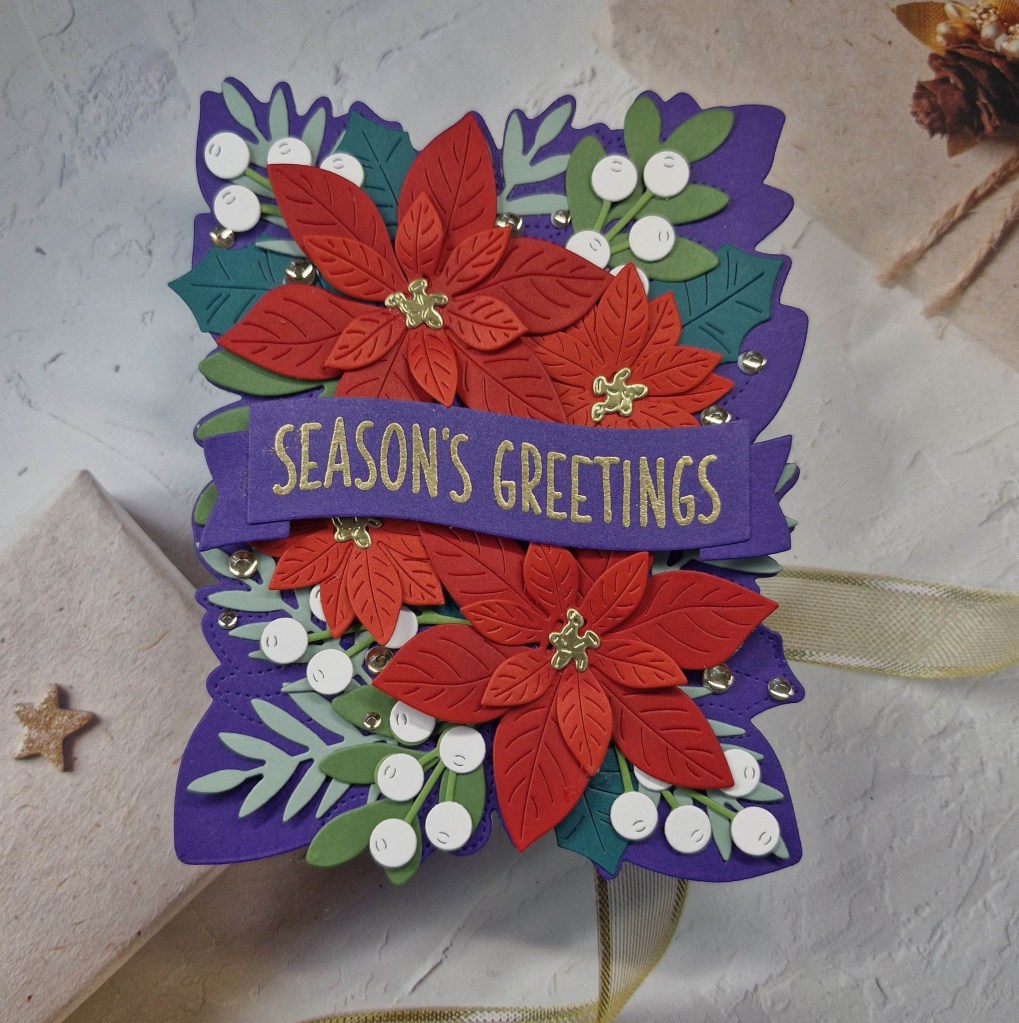
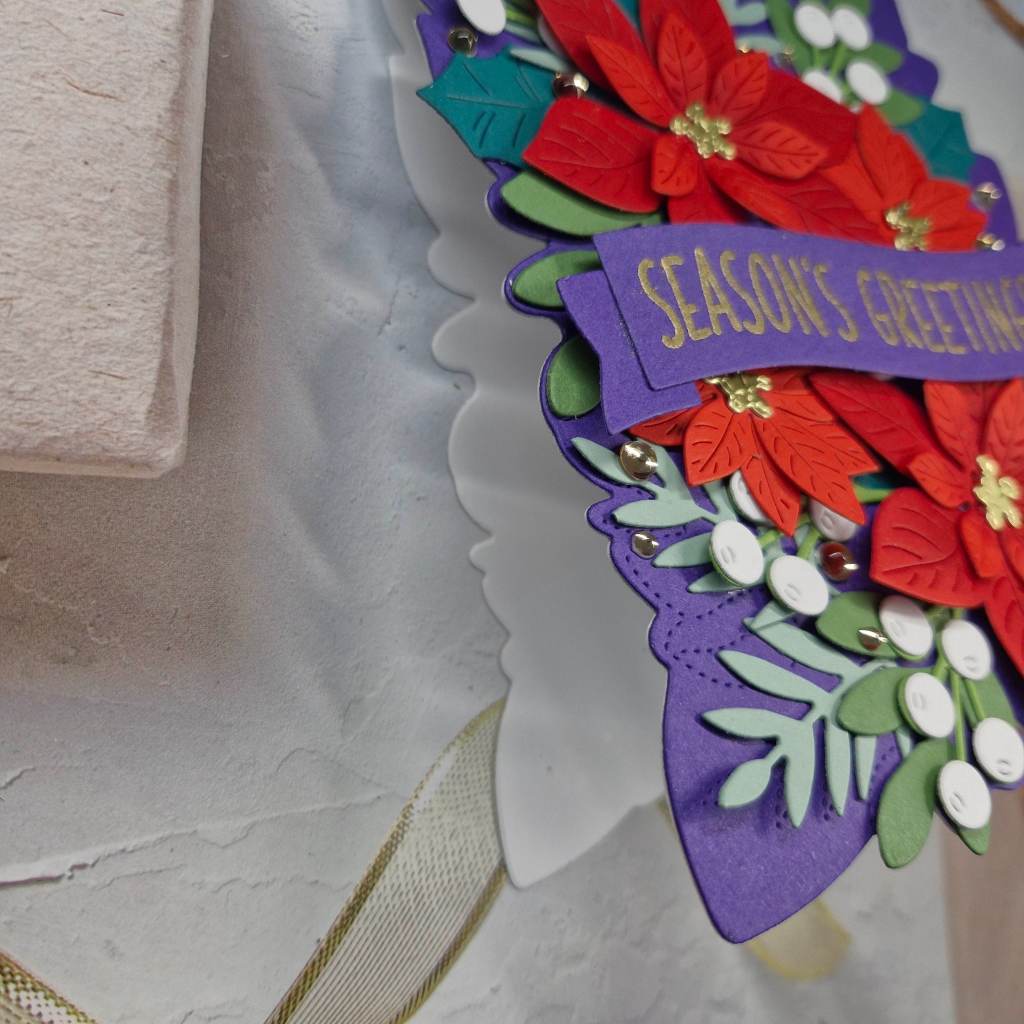
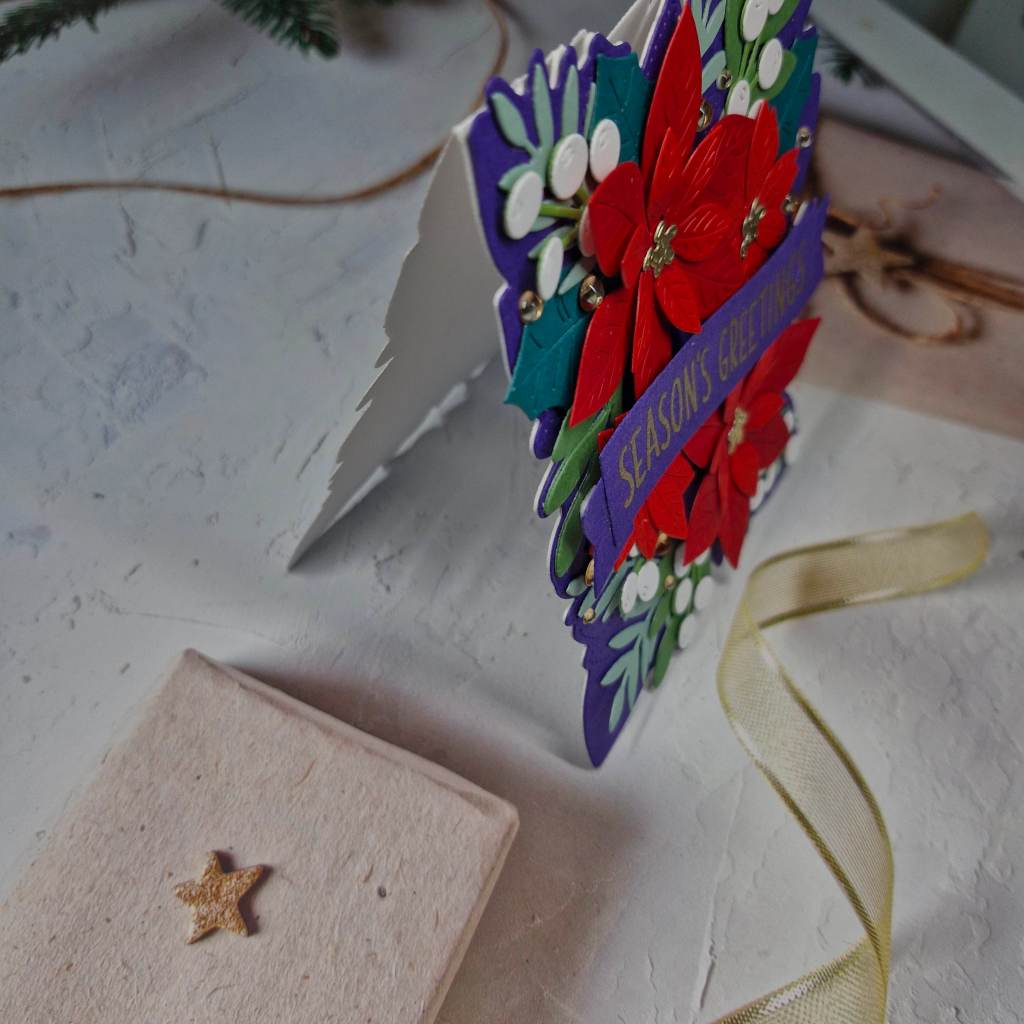
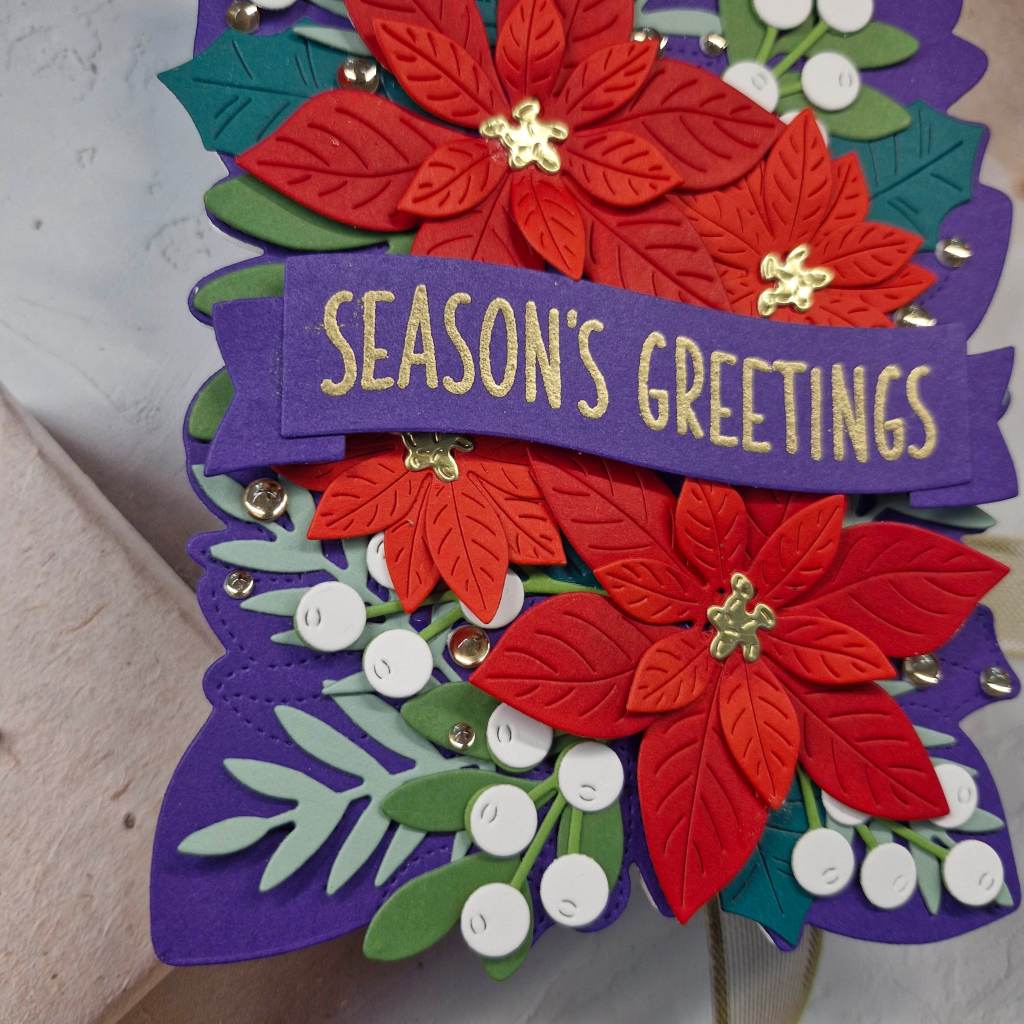
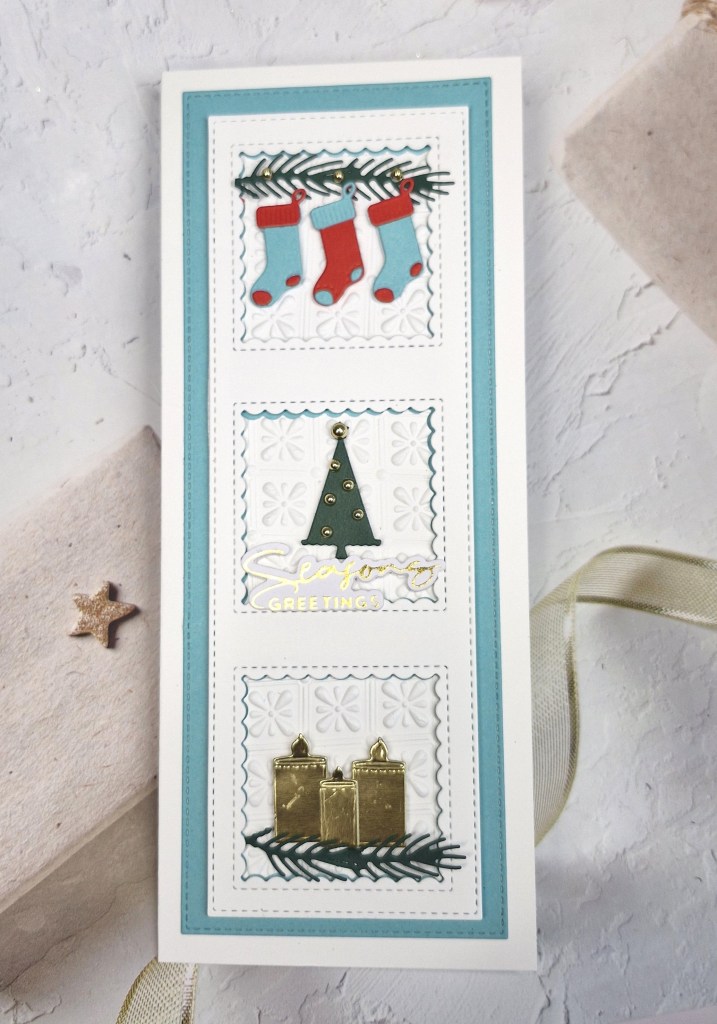
The second card took a little more time and planning.
To cover the vertical aspect of the challenge, I used a slimline card base. Onto that I used a Heffy Doodle slimline die set to create the blue layer, then the white layer with three windows. Each of the windows cut out a scalloped square and all three of those squares I ran through an embossing folder to create some detail, making sure the pattern was square for each of them.
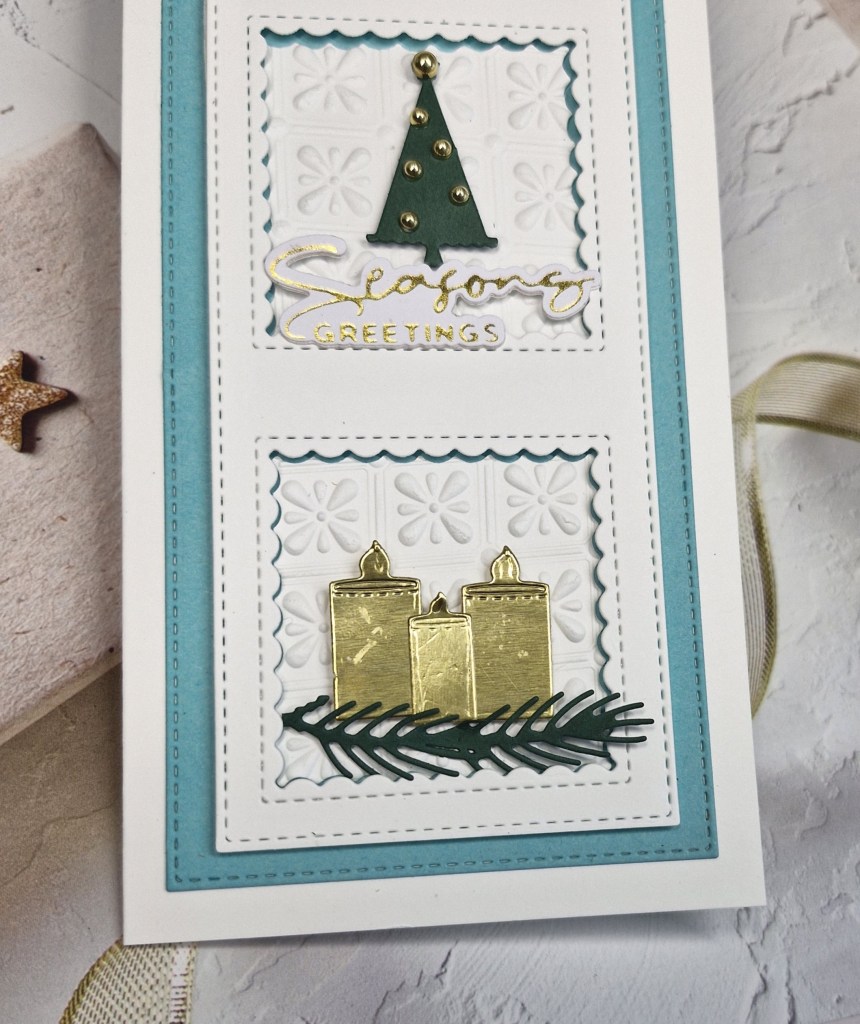
The layers were attached to the card base, the squares inserted, then I used a die set from The Greetery for the stockings, and a die set from Scrapbook & Cards Today – received as part of a recent virtual event – to create the tree and candles for the bottom two windows.
The greenery was also part of the die set, arranged as you see, and the foiled sentiment was added.

I hope you can come and join us with your Christmas creations following one or both of our themes. xx
I shall be entering the following challenges:
CYHTP – embossing folder – option of trees/leaves not taken
Cut It Up – use more than one die
Mix It Up – anything goes – option of fancy folds not taken
Merry Little Christmas Challenge – anything goes Christmas
Die Cut Divas – anything goes with die cuts
12 Months Of Christmas Link-Up – anything goes Christmas – option of snowfall not taken