Joyful Birdies

Hello. I have been spending a lot of time in my craft room to escape decorating work and have another card to share:

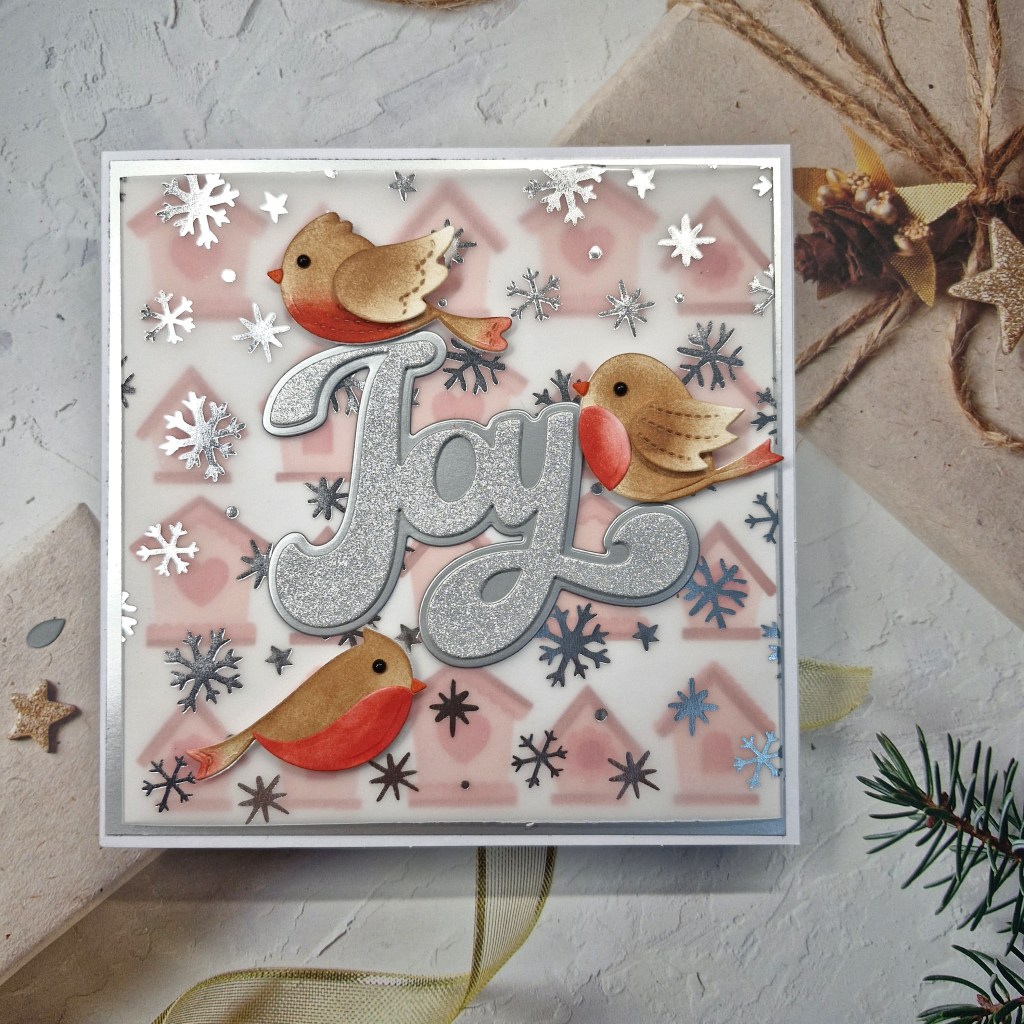
I used some Pretty Pink Posh products which I ‘found’ when I was searching for something else. I was inspired to use the bird house stencil, and the bird dies.

I first created the birdhouse stencilled background using Pinkfresh Studio inks. I used coral and pink tones, and then cut that panel into a 5.5 inch square – knowing I was going to use a 6 inch square card base.

I then die cut the birdies out of white card stock, then ink blended a brown and a red Distress ink. I wanted them to look like Robins. The beaks are so small I used an orange Copic, and the eyes are little black gems.

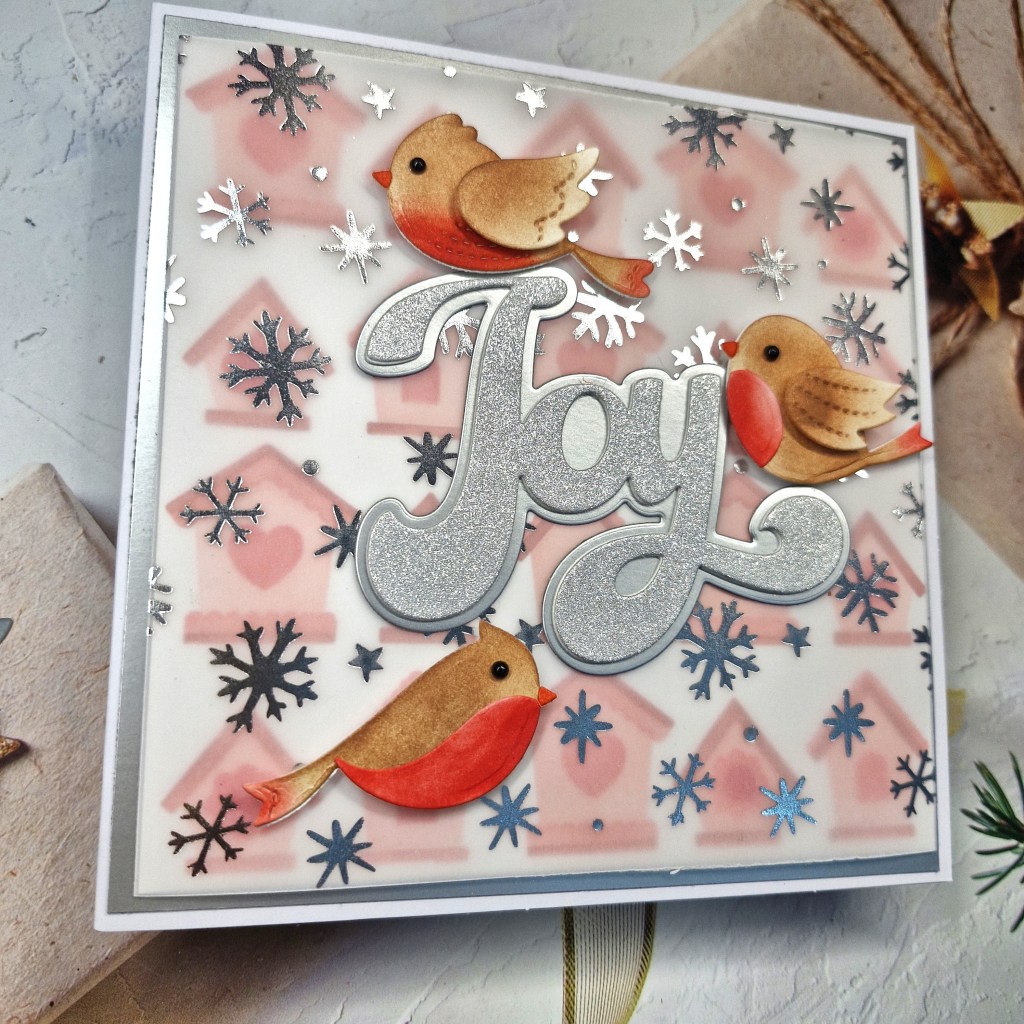
After placing the birdies on the background panel – they didn’t really stand out very much so I looked for a way of still showing the background stencilling and found this Polkadoodles vellum with silver snowflakes….

I cut that 5.5 inches by 6 inches, used a bone folder to score each end, then wrapped it around the sides to hold it in place, then added double sided tape. This way, there is no glue on the front of that snowflake acetate.

I then die cut the word ‘Joy’ from a Stamps Of Life die set provided to us for a virtual event – the shadow layer from a mat silver, and the word itself from a silver glitter non-shed card stock.

I die cut the word a couple more times and layered with the silver glitter word for a little more dimension and stability.

I first added the word with glue, then each of the little birdies was added with small pieces of 3D foam.

This is a very shiny and glittery card which makes it difficult to take a photo of – but I think you can see all the shine.

I shall be entering the following challenges:

Everybody Art Challengethings with wings

Simon Says Stamp Monday Challenge stencil it

Shopping Our Stashbirds and/or feathers

Polkadoodlesanything goes

Allsortsmagic of the season

Ally’s Angelsanything goes

Addicted to Stamps and More die cuts and stencils

Crafty Animalsanything goes with an animal

Stencilled Poinsettias

Hello there. I have had a little time from crafting as it was difficult to sit for long periods, but I had planed ahead for my DT cards. This card is for the new challenge at The Holly and Ivy Christmas Challenge‘:

The card was created using a Simon Says Stamp layering stencil set. I added some shading with a slightly heavier hand to the middle of the flowers, and along the edges of the leaves. I also used gold paste through the layer for the middle of the flowers.

The panel was then cut down, matted with a thin black layer, and a gold foiled sentiment on black card stock added.

I hope you can come and join us with your ‘anything goes Christmas’ creations. xx

I shall be entering the following challenges:

Creative Fingers anything goes

Peace On earth Christmas Challengeanything goes Christmas

Allsorts Challenge – flowers galore or anything goes

Merry Little Christmas Challenge anything goes Christmas

Lil Patch Of Crafty Friendsanything goes

MAWTT early Christmas

Stencil Funuse a stencil – option of birthday not taken

A Sunny ‘Hi’

Hello there. After a busy week, I was able to get to my craft room and play. Here is what I created for today:

I used a couple of die sets which were cabin counsellor gifts from the Concord & 9th Summer Camp. I first created the hot air balloon in bright and sunny colours, then the sun – obviously in yellow.

The background cloudy panel was created using Milled Lavender Distress ink and a Simon Says Stamps stencil. The ‘Hi’ sentiment is also from one of the die sets, layered three times – even the tiddle….

I then used Gina K Designs Master Layouts for the black layer and the cloudy layer.

I shall be entering the following challenges:

Addicted To Stamps and Moredie cuts and/or stencils (both)

Cut It Updie cuts and look up in the sky

Daisy Chain Challengesummer time

Inkspirational travel/journey mood board

Lil Patch Of Crafty Friendsanything goes

Simply Ellibelle’s I Spy Challengea sweet or warm and sunny colours

You Are Amazing….

Cardz 4 Galz has started a new challenge. Sue J has chosen the theme of Mother’s Day (US) or flowers for a friend. I went with flowers for a friend:

Onto a white card base I added a die cut layer from a Pinkfresh Studio die set to create the interest around the edges.

The main image was stamped and gold heat embossed, and the layering stencils used, including the one which allows you to colour the background behind the flowers. I then took a smaller die from the same Pinkfresh set and die cut that panel, and added it to the layers on the card base.

I added a foiled sentiment and some gold gems for more interest.

I hope you can come and join us with you creations following our themes. xx

I shall be entering the following challenges:

Allsorts – anything goes – option one for the girls

Make My Monday – flowers

Cupcake Inspirations – Mother’s Day of someone special feminine

Beautiful Blossoms – anything goes flowers/florals

Ellibelle’s I Spy – April Showers or May Flowers

Stencil Fun – stencils and option of flowers

Hey Chick….!

I have a fun card to share today:

The colour scheme is for one of the challenges I am entering, and as soon as I saw that yellow was in that challenge, I thought of chickens. No idea why – I don’t have chickens – but I remembered this Tim Holtz layering die set so I started from there.

I die cut the chickens from several shades of yellow card stock from Heffy Doodle. The egg was from the same Tim Holtz die set, and created using Lost Shadow Distress Oxide, and ink smooshed onto Kraft Heavystock. I loved how the oxide gave a mottled and chalky effect.

Once all the layers were glued together I decided I wanted to create a scene, so I ink blended Salvaged Patina Distress Ink and used a Lawn Fawn cloud stencil, and for the grass I used a Pinkfresh Studio green ink and a Lawn Fawn grass stencil again.

I also wanted a speech bubble and suitable sentiment, so I searched the Color My Life app and it came up with the speech bubble from Lawn Fawn which is meant to be part of a reveal wheel, and the sentiment from Stampin’ Up.

I die cut that stencilled panel with a stitched rectangle and adhered flat to a white card base.

I stuck down the two chicks and the sentiment with 3D foam, and wasn’t going to add an egg (I made three altogether) but decided to put it on at the last minute. In hindsight, I think I should have left it off the card. It kinda looks like the chick is sitting on a stone……..anyhoo. Hindsight is always 20/20….I think it’s cute and fun anyway.

I shall be entering the following challenges:

Color Throwdown celery green, yellow, aqua

Simon Says Stamp Wednesday Challenge things with wings

Crafty Catzanything goes – option of celebration not taken

Daring Cardmakersfeathers or something feathered

Stencil Fun stencils – option of patterns

Ready to do some gardening…..?

Hello. I have a CAS card to share today, using an older Sizzix die set:

I searched the tags in the ‘Color My Life’ app for any of my products with ‘garden’. Quite a few came up – I use tags a lot – and this older Sizzix die set came up. I am sure many of us are preparing and planning our gardens at this time of year – what to plant and where – and as I was searching for our wheelbarrow a few days ago, this die set seemed to speak to me.

I used a selection of different coloured card stock for the pots and watering can, with a silver framed wheelbarrow. The sentiment if from Spellbinders.

I was going to attach the die cuts to the base card, but I felt it needed a little something behind it, so I ink blended some blue that was left on my blending brush, then ink blended again using a stencil for some darker areas.

Although there are layers to this card, I feel they are clean layers, and therefore give an overall clean effect.

I shall be entering the following challenges:

Addicted to CAS – CAS garden

Clean and Simple on Friday – CAS Spring

Simply Less Is More – anything goes CAS

From Me To You….

Hello there. I have a card to share which I put the finishing touches to today:

This floral set is from The Greetery and includes, stamps, stencils, and dies.

I first stenciled all the layers and images then used the die to cut it out. Once I had that cut, I then worked on my background.

I layered a piece of black card stock. as I wanted to use a black and foiled sentiment, and onto that I layered a white piece, dry embossed using a ‘dotty’ embossing folder, and then splattered with black and gold Liquitex acrylic paints – the shimmery set.

I used a 5×7 inch card base, then realised the floral arrangement was just a little too short for this size, so I cut it in half………I know, I know – all that stencilling and I cut it – but I had a plan…..

The gold foiled sentiment strip was adhered with 3D foam across the middle, then the two halves of the floral arrangement – also on 3D foam – was kinda tucked into the strip. That made it slightly longer and just seemed to fit the size of card better.

I then added some gold faceted gems……and then…….realised the sentiment was in silver foil not gold……oh well – that just meant I had to stick some silver faceted gems down too – which I did onto some flowers! What a numpty!

Anyhoo – I hope you like it.

I shall be entering the following challeneges:

Color Throwdownpink, coral, dark purple, green,

Allsorts Challenge anything goes (option of school days not taken)

TTCRD anything goes

Crafty Calendar Challenge anything goes

Love To Craft Challenge anything goes