Holly Background

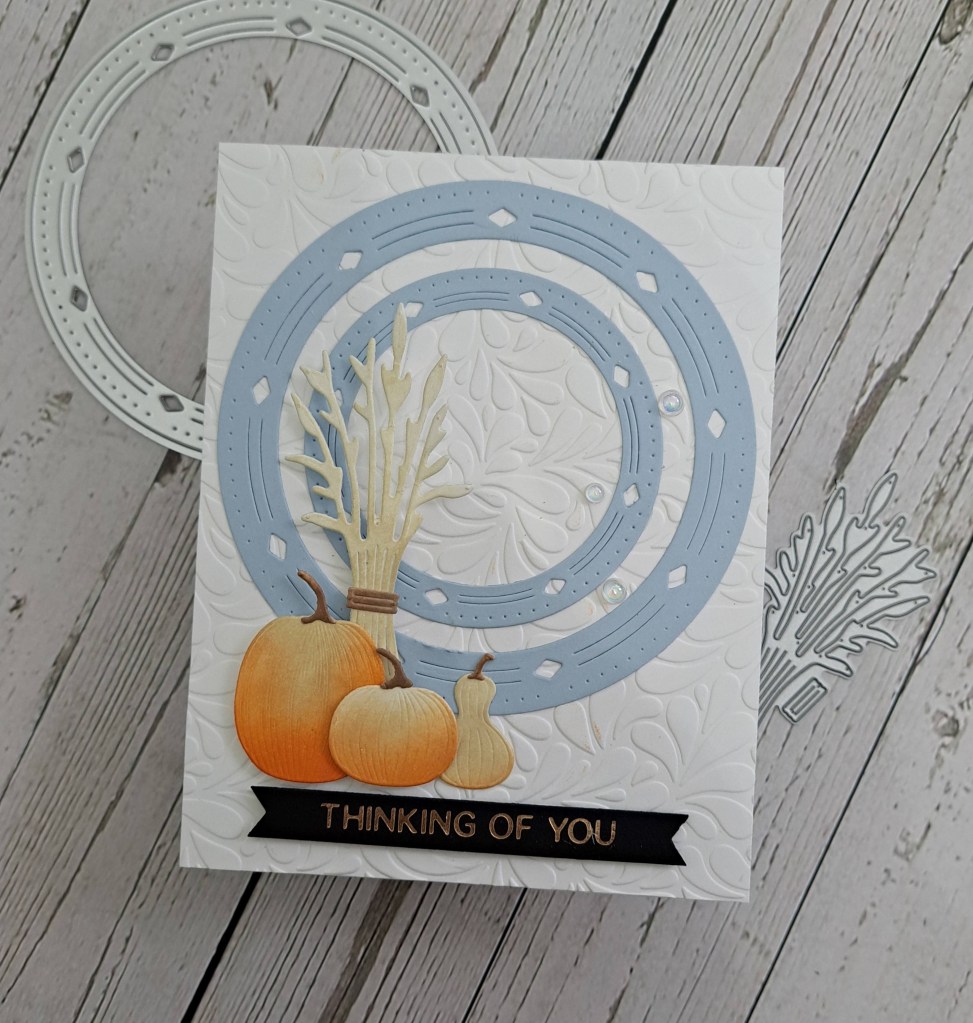
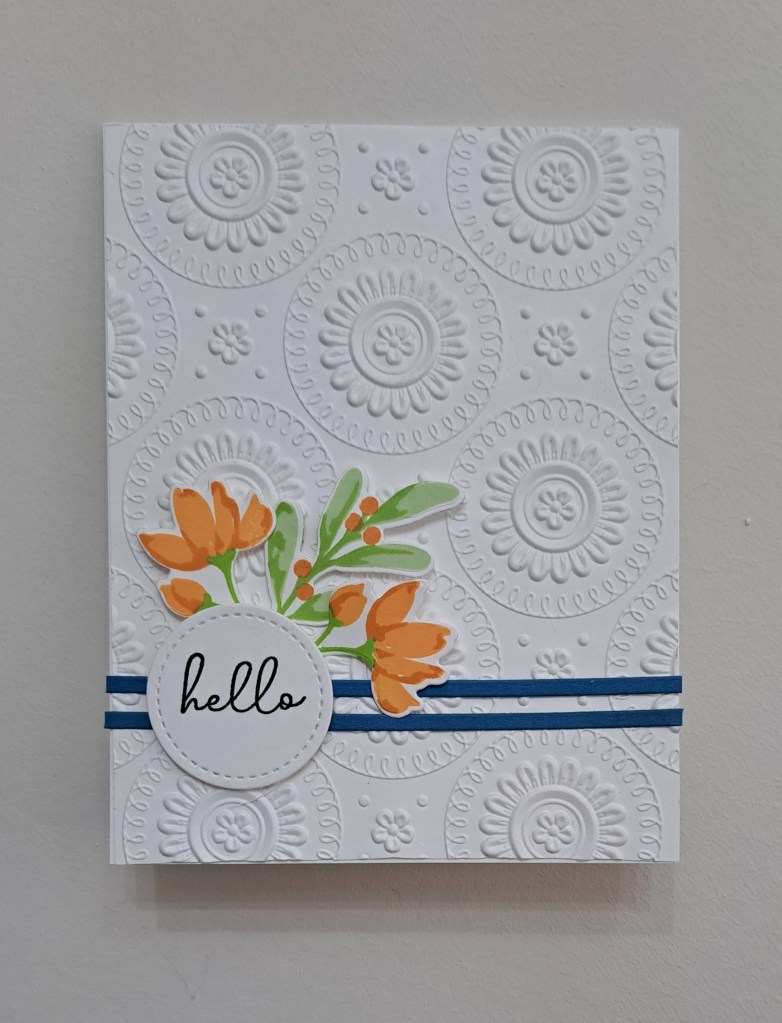
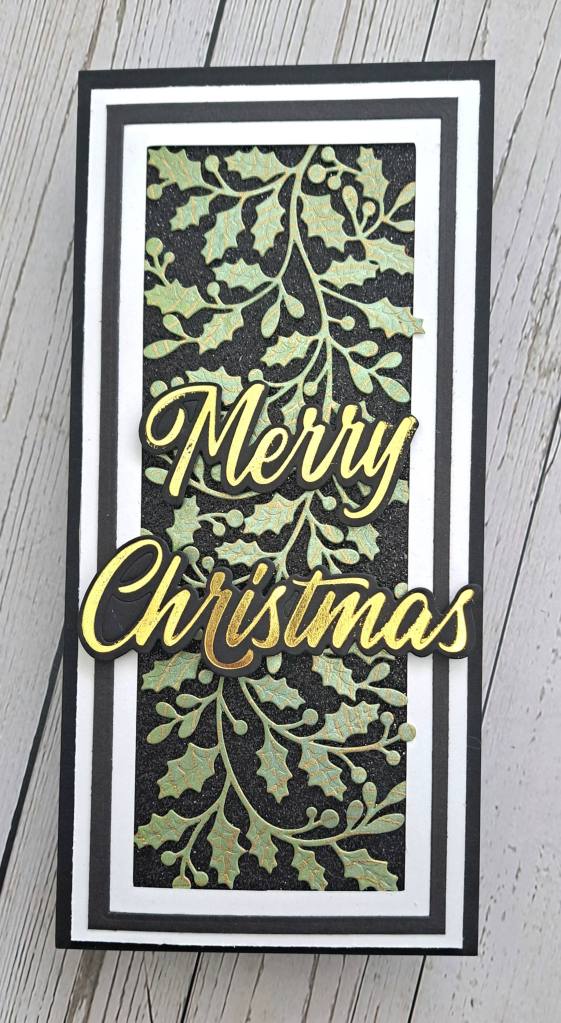
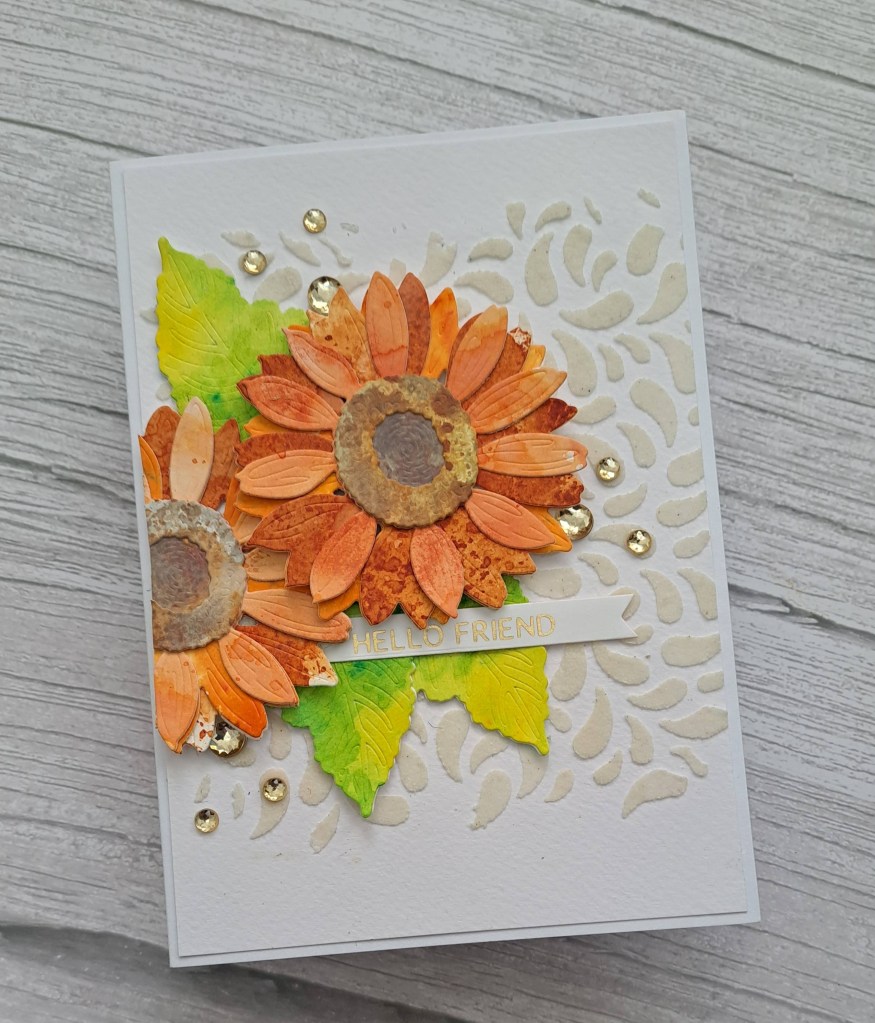
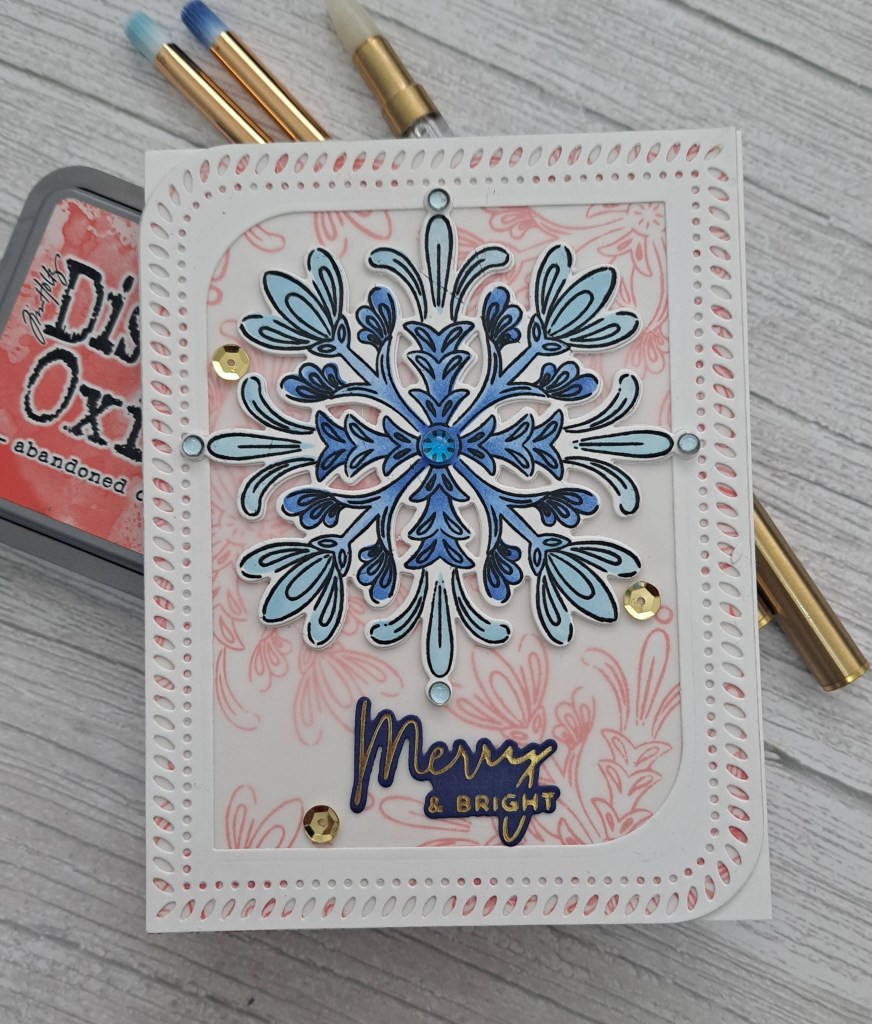
Hello once again. The Holly and Ivy Christmas Challenge has started a new ‘anything goes Christmas‘ challenge. Here is my card:

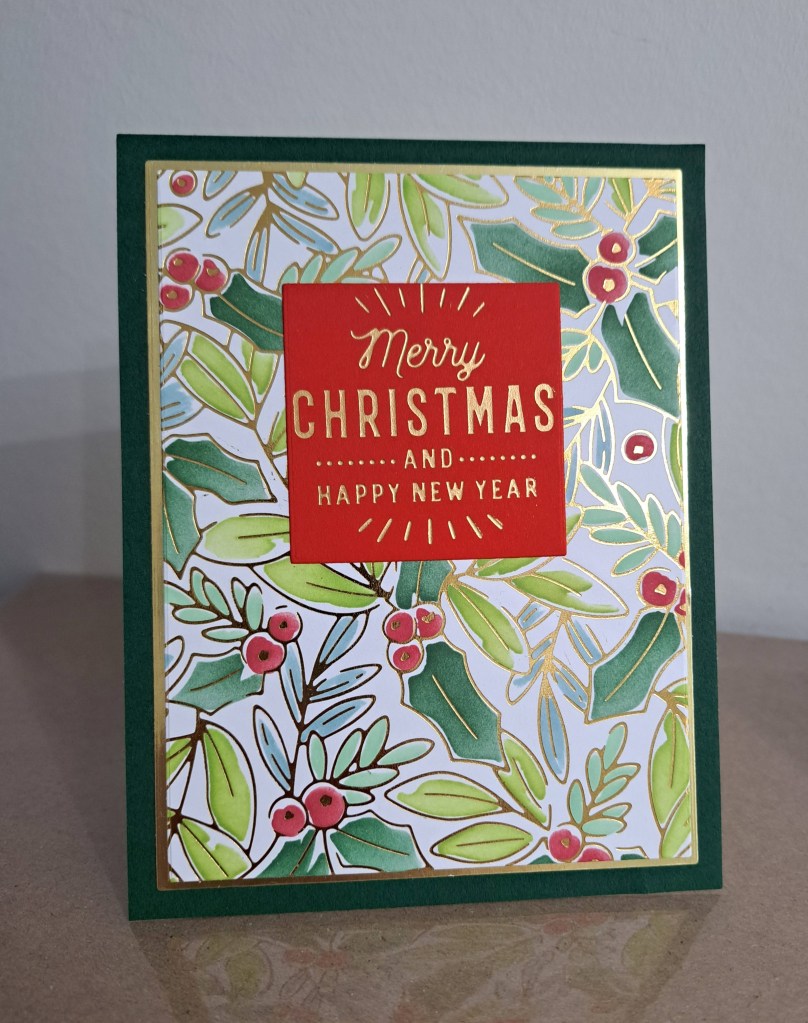
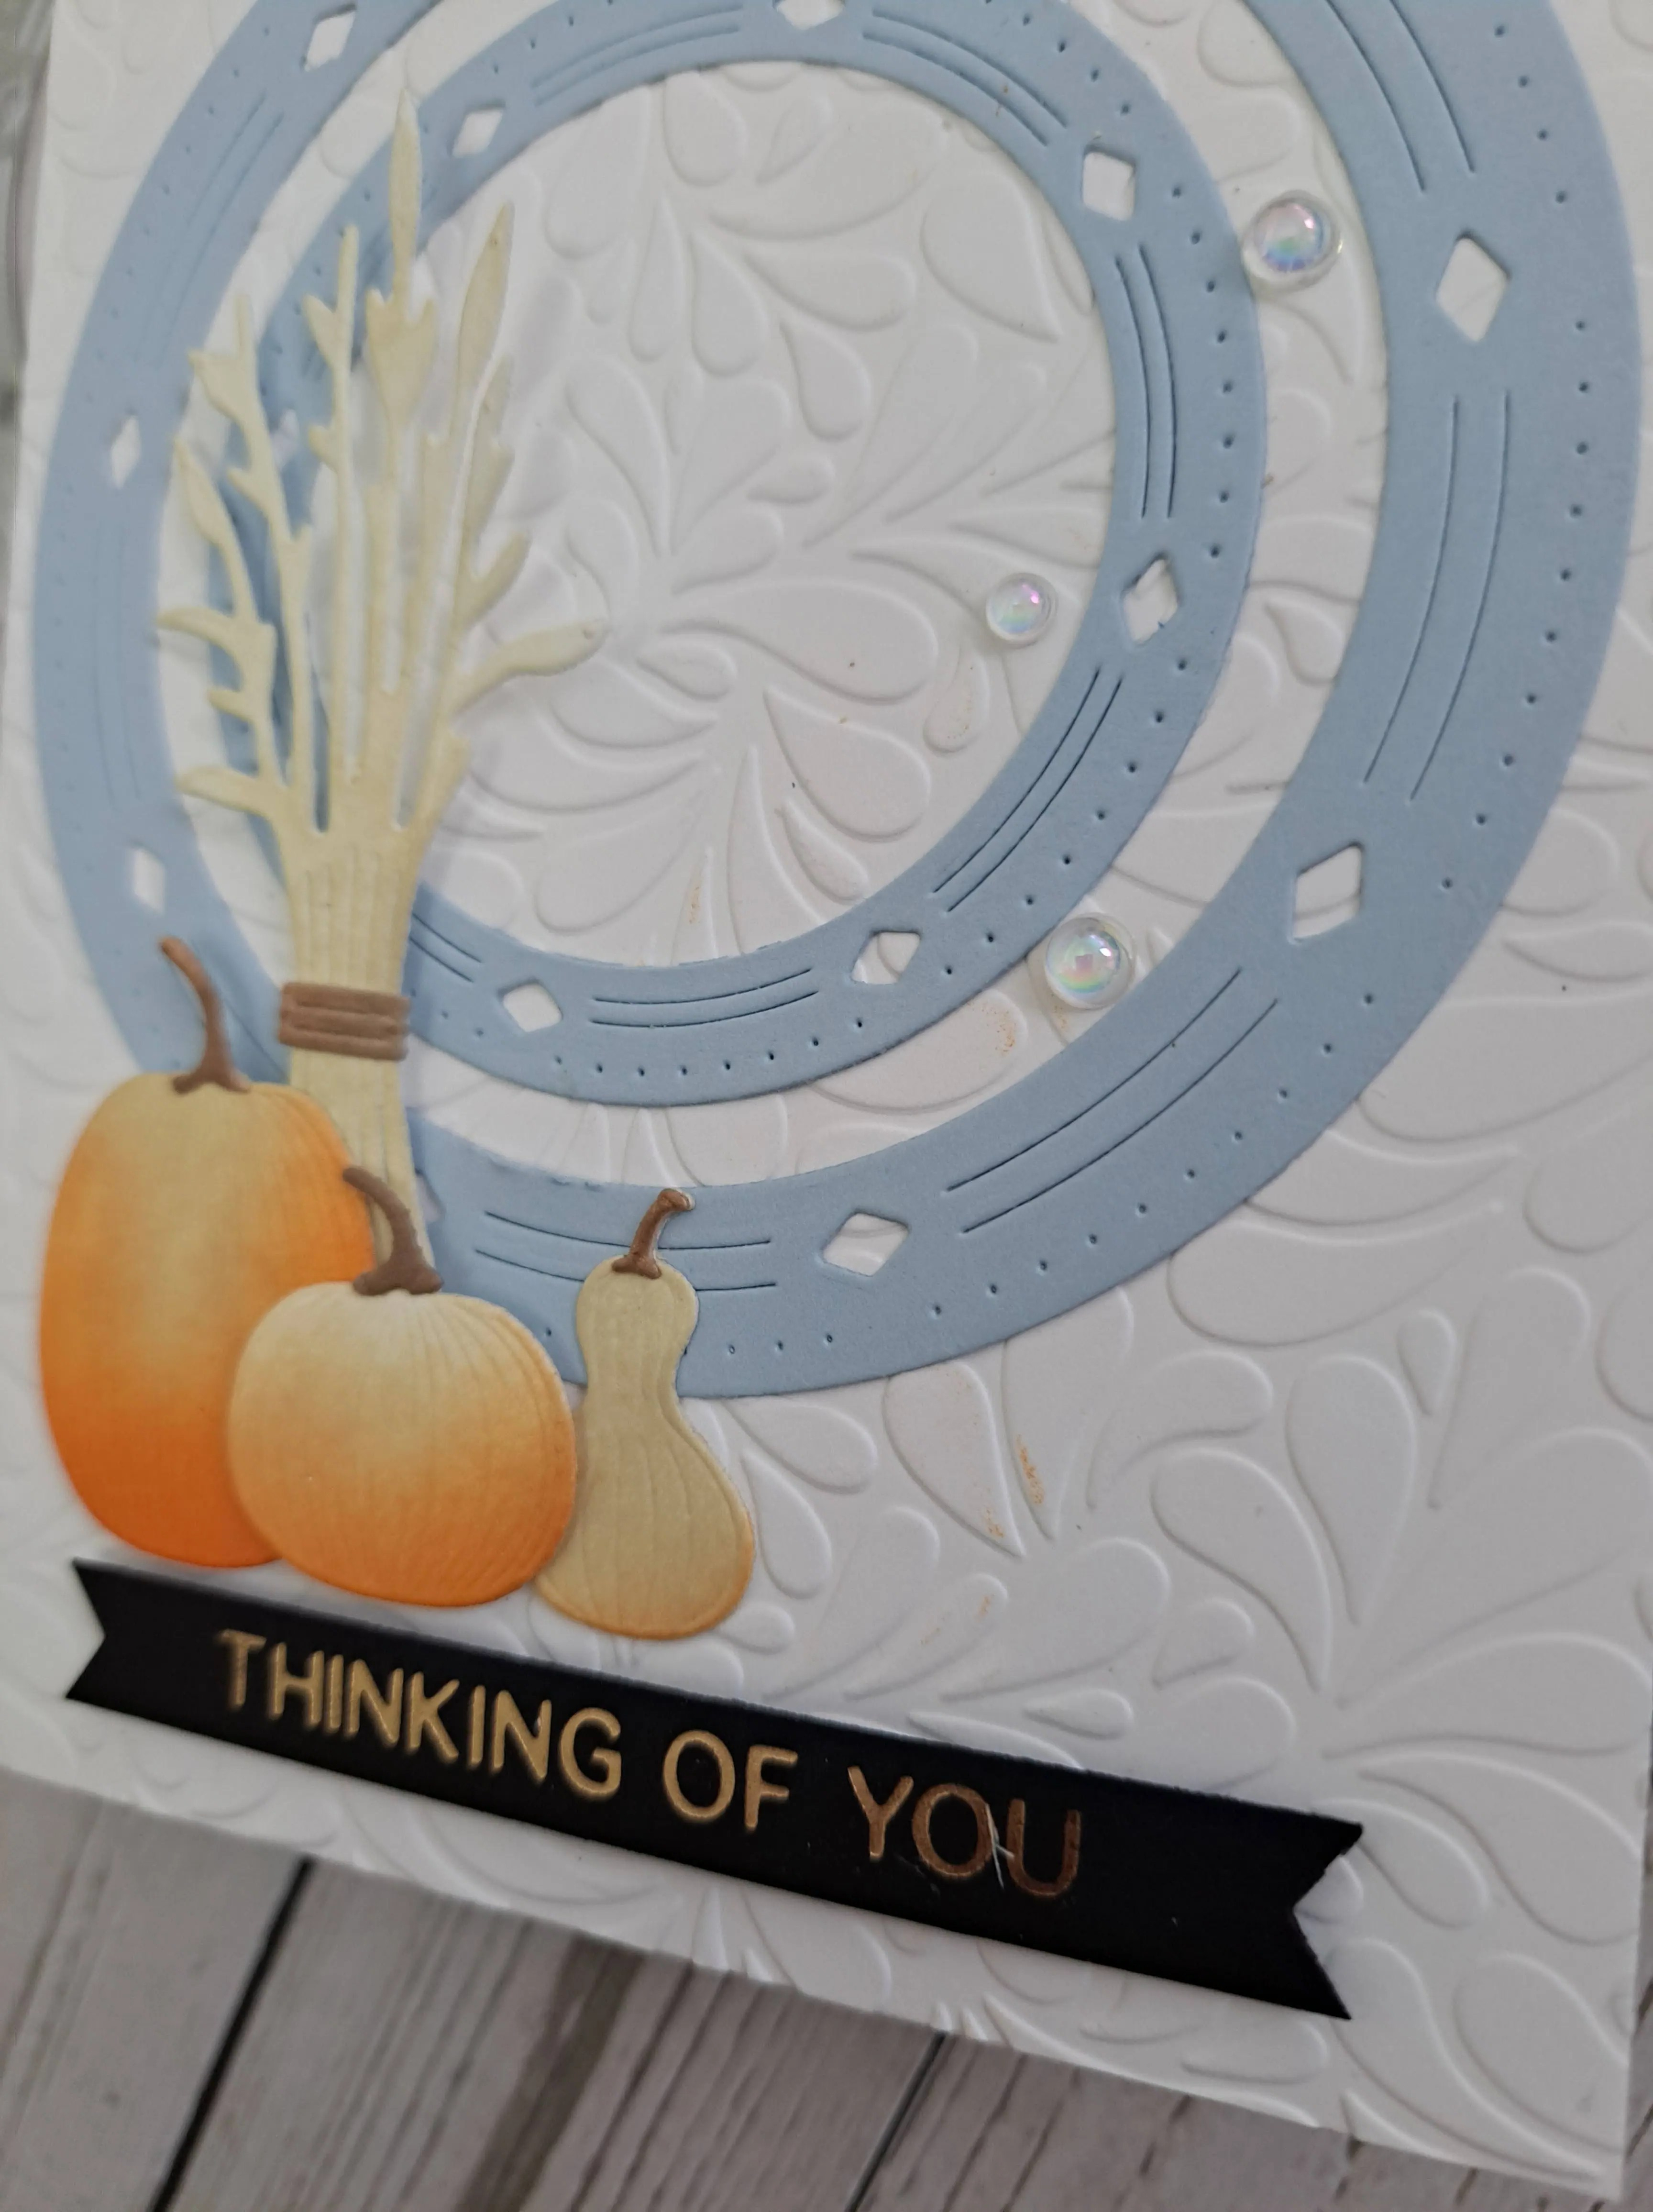
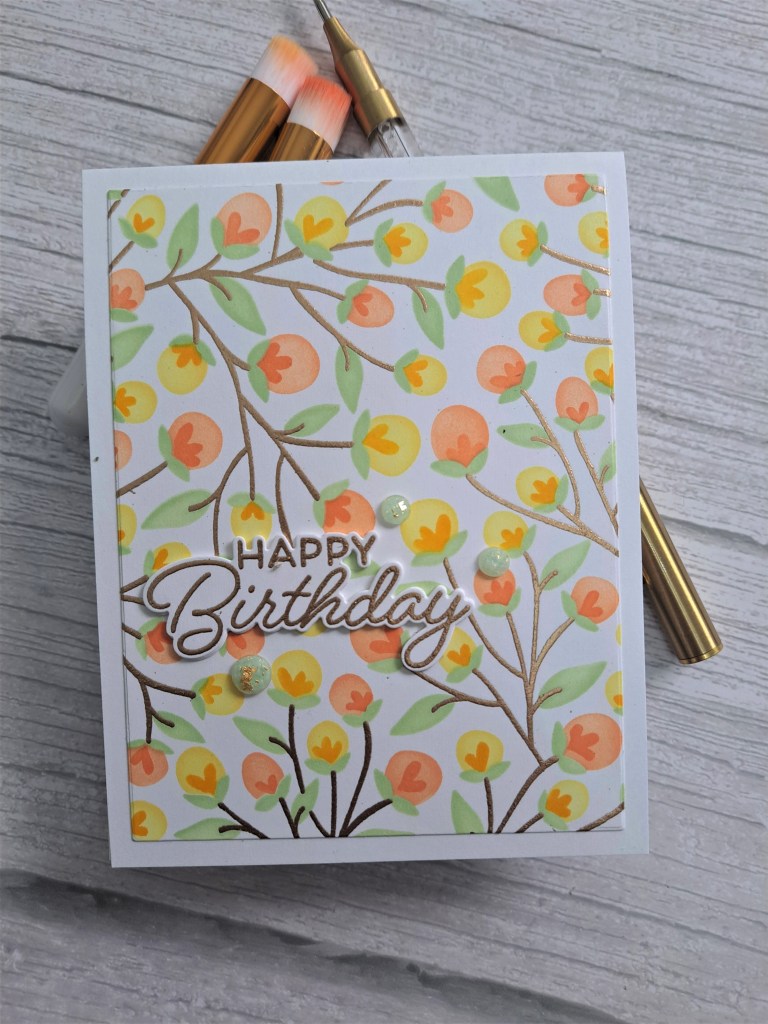
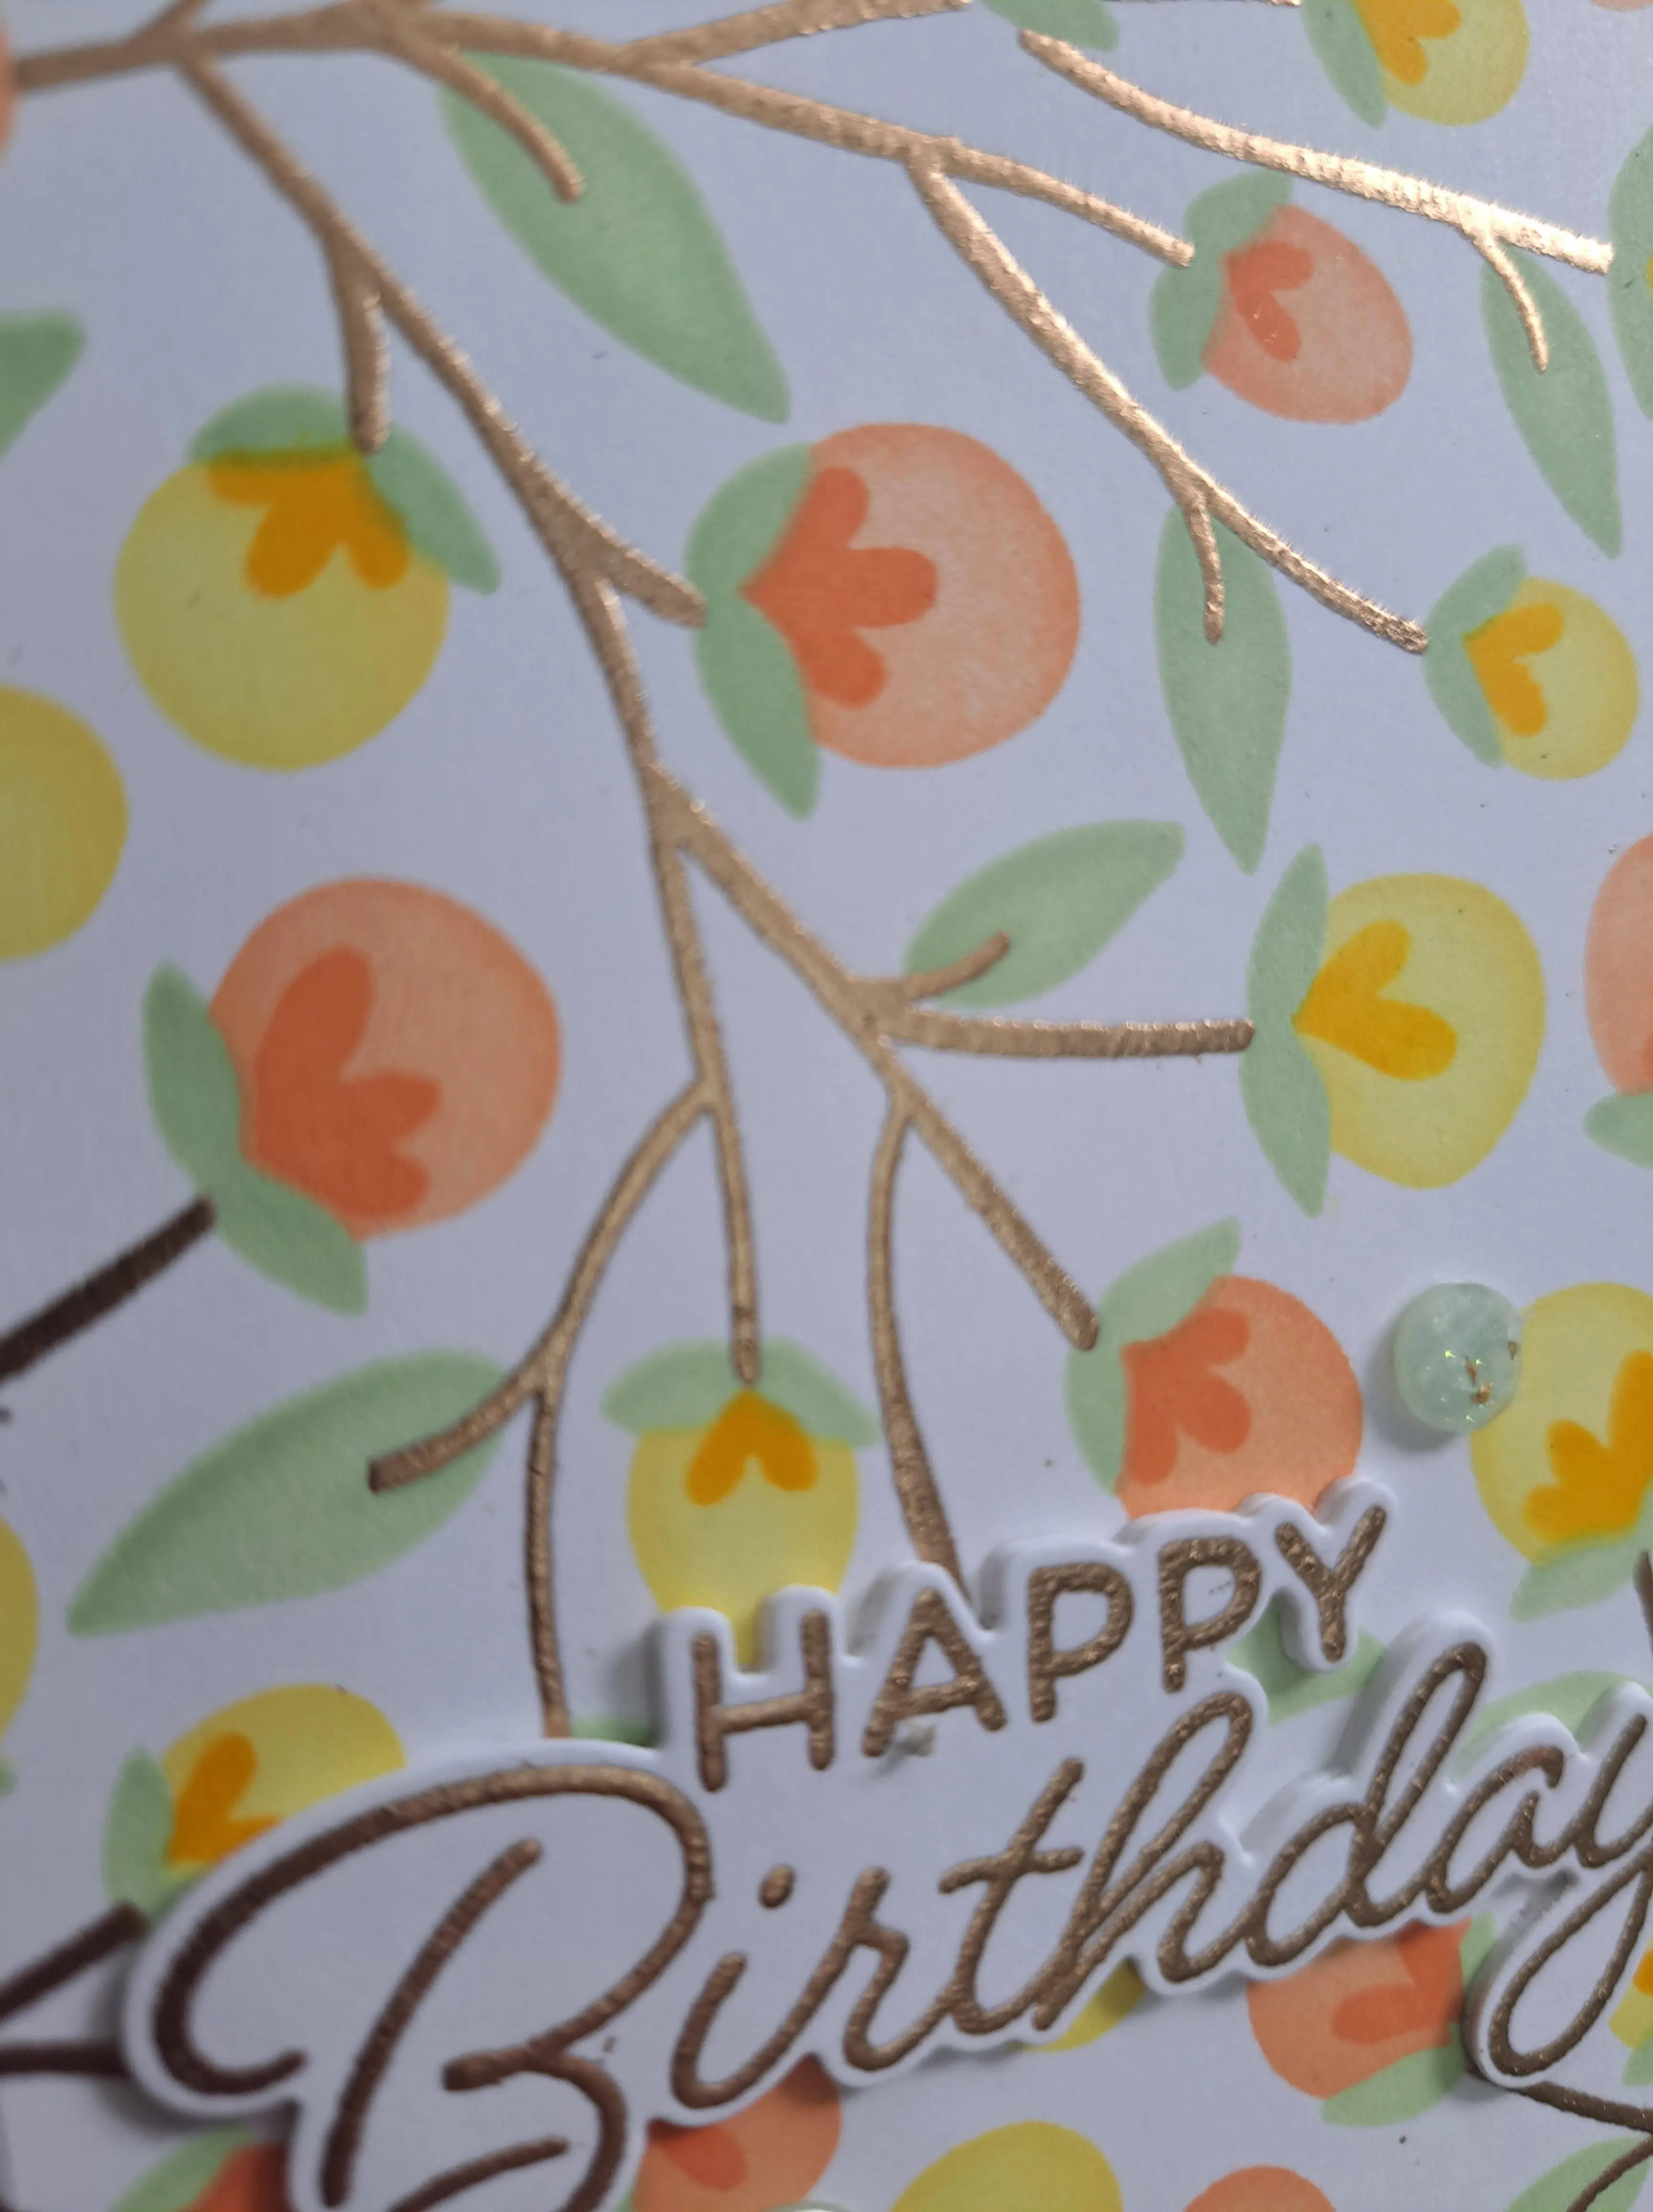
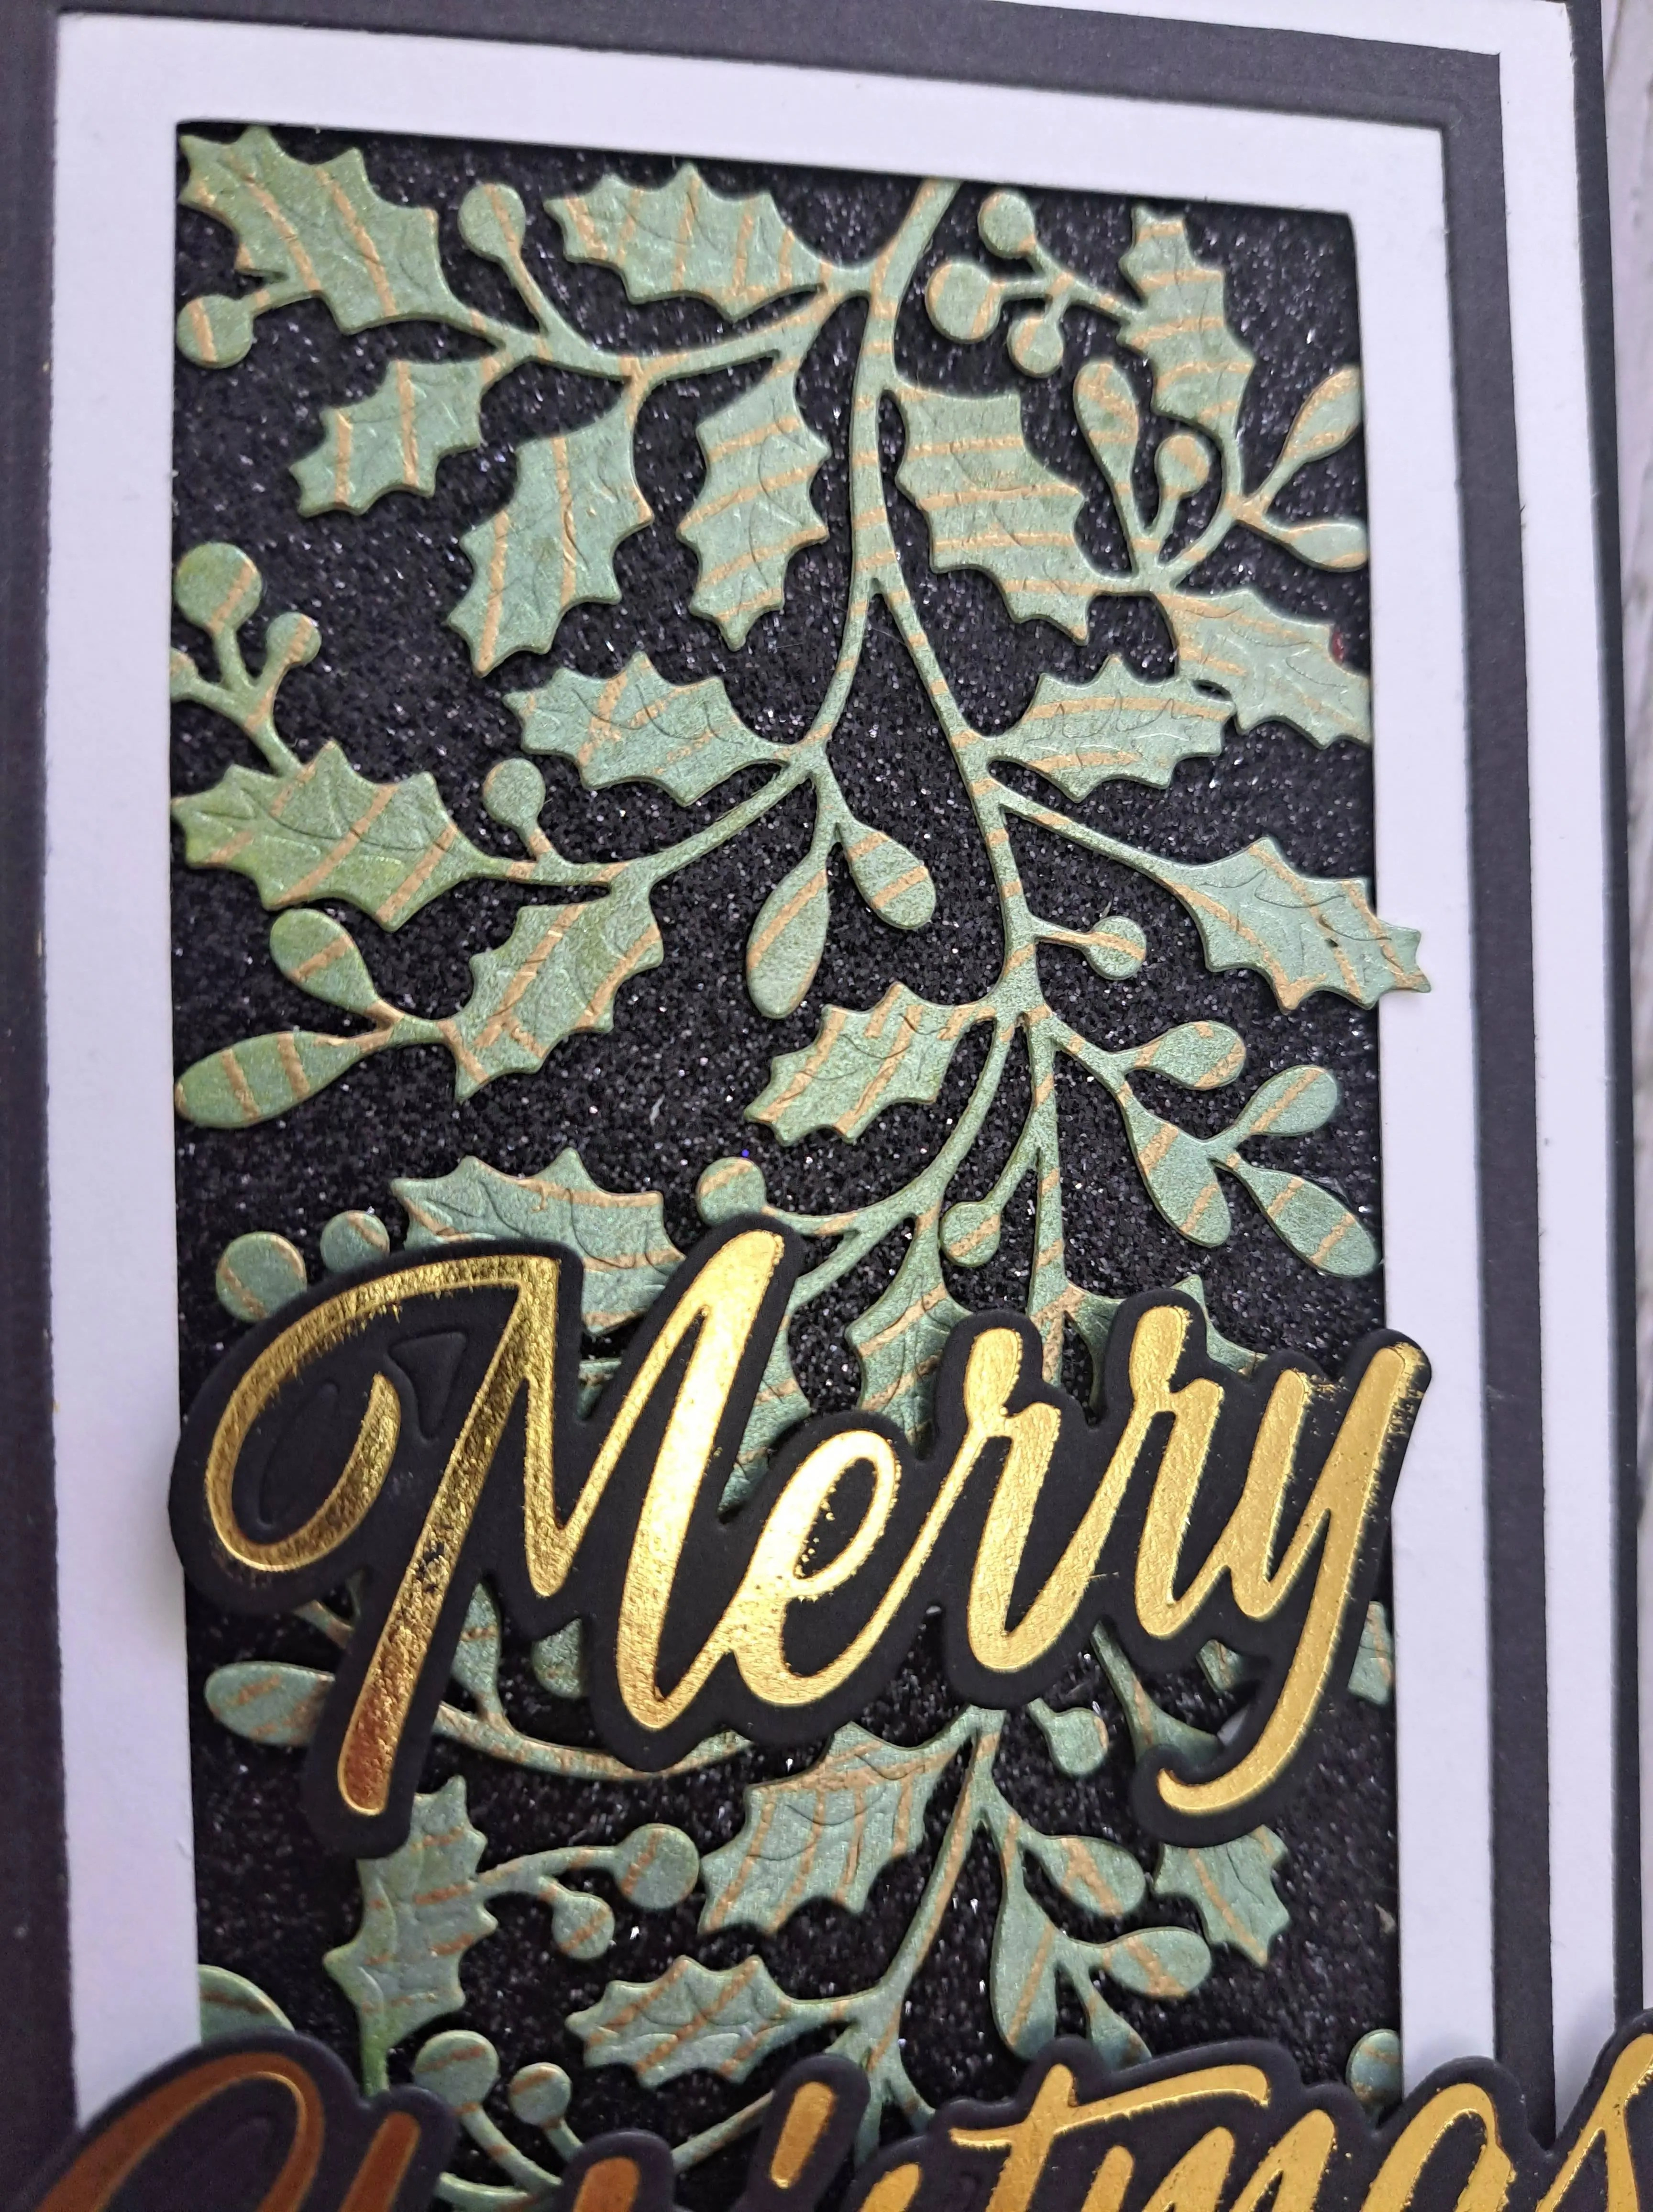
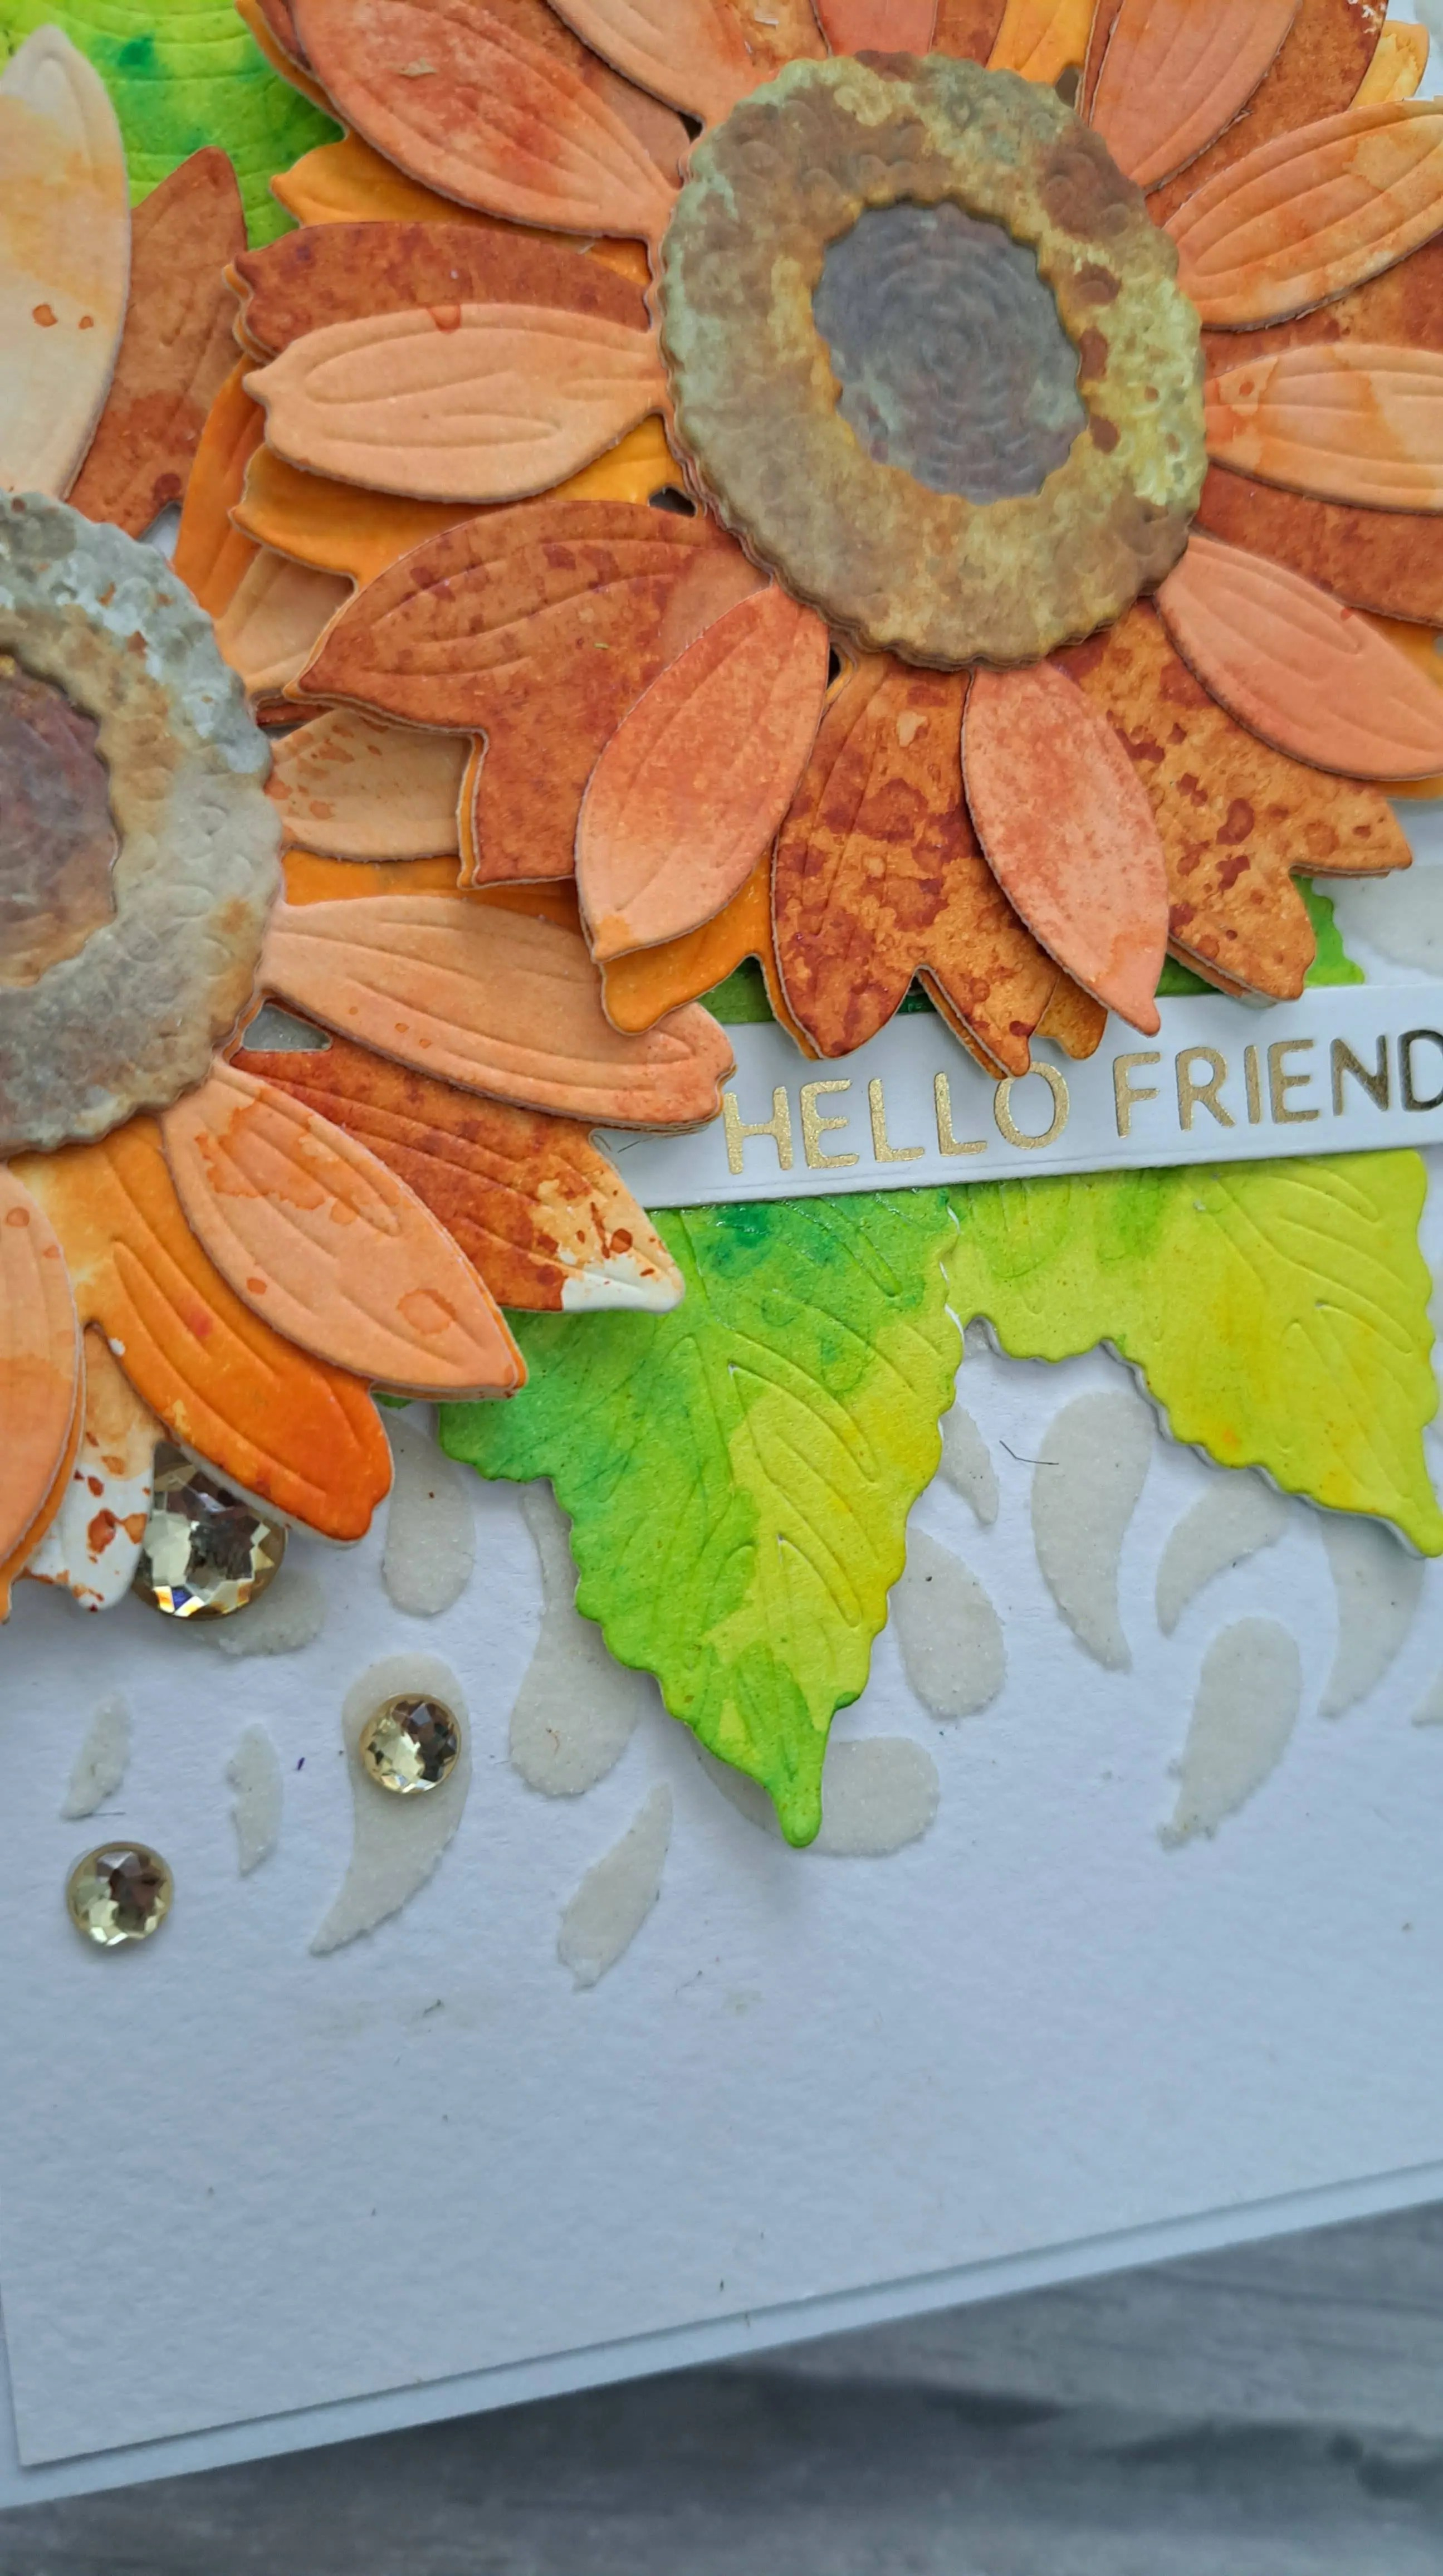
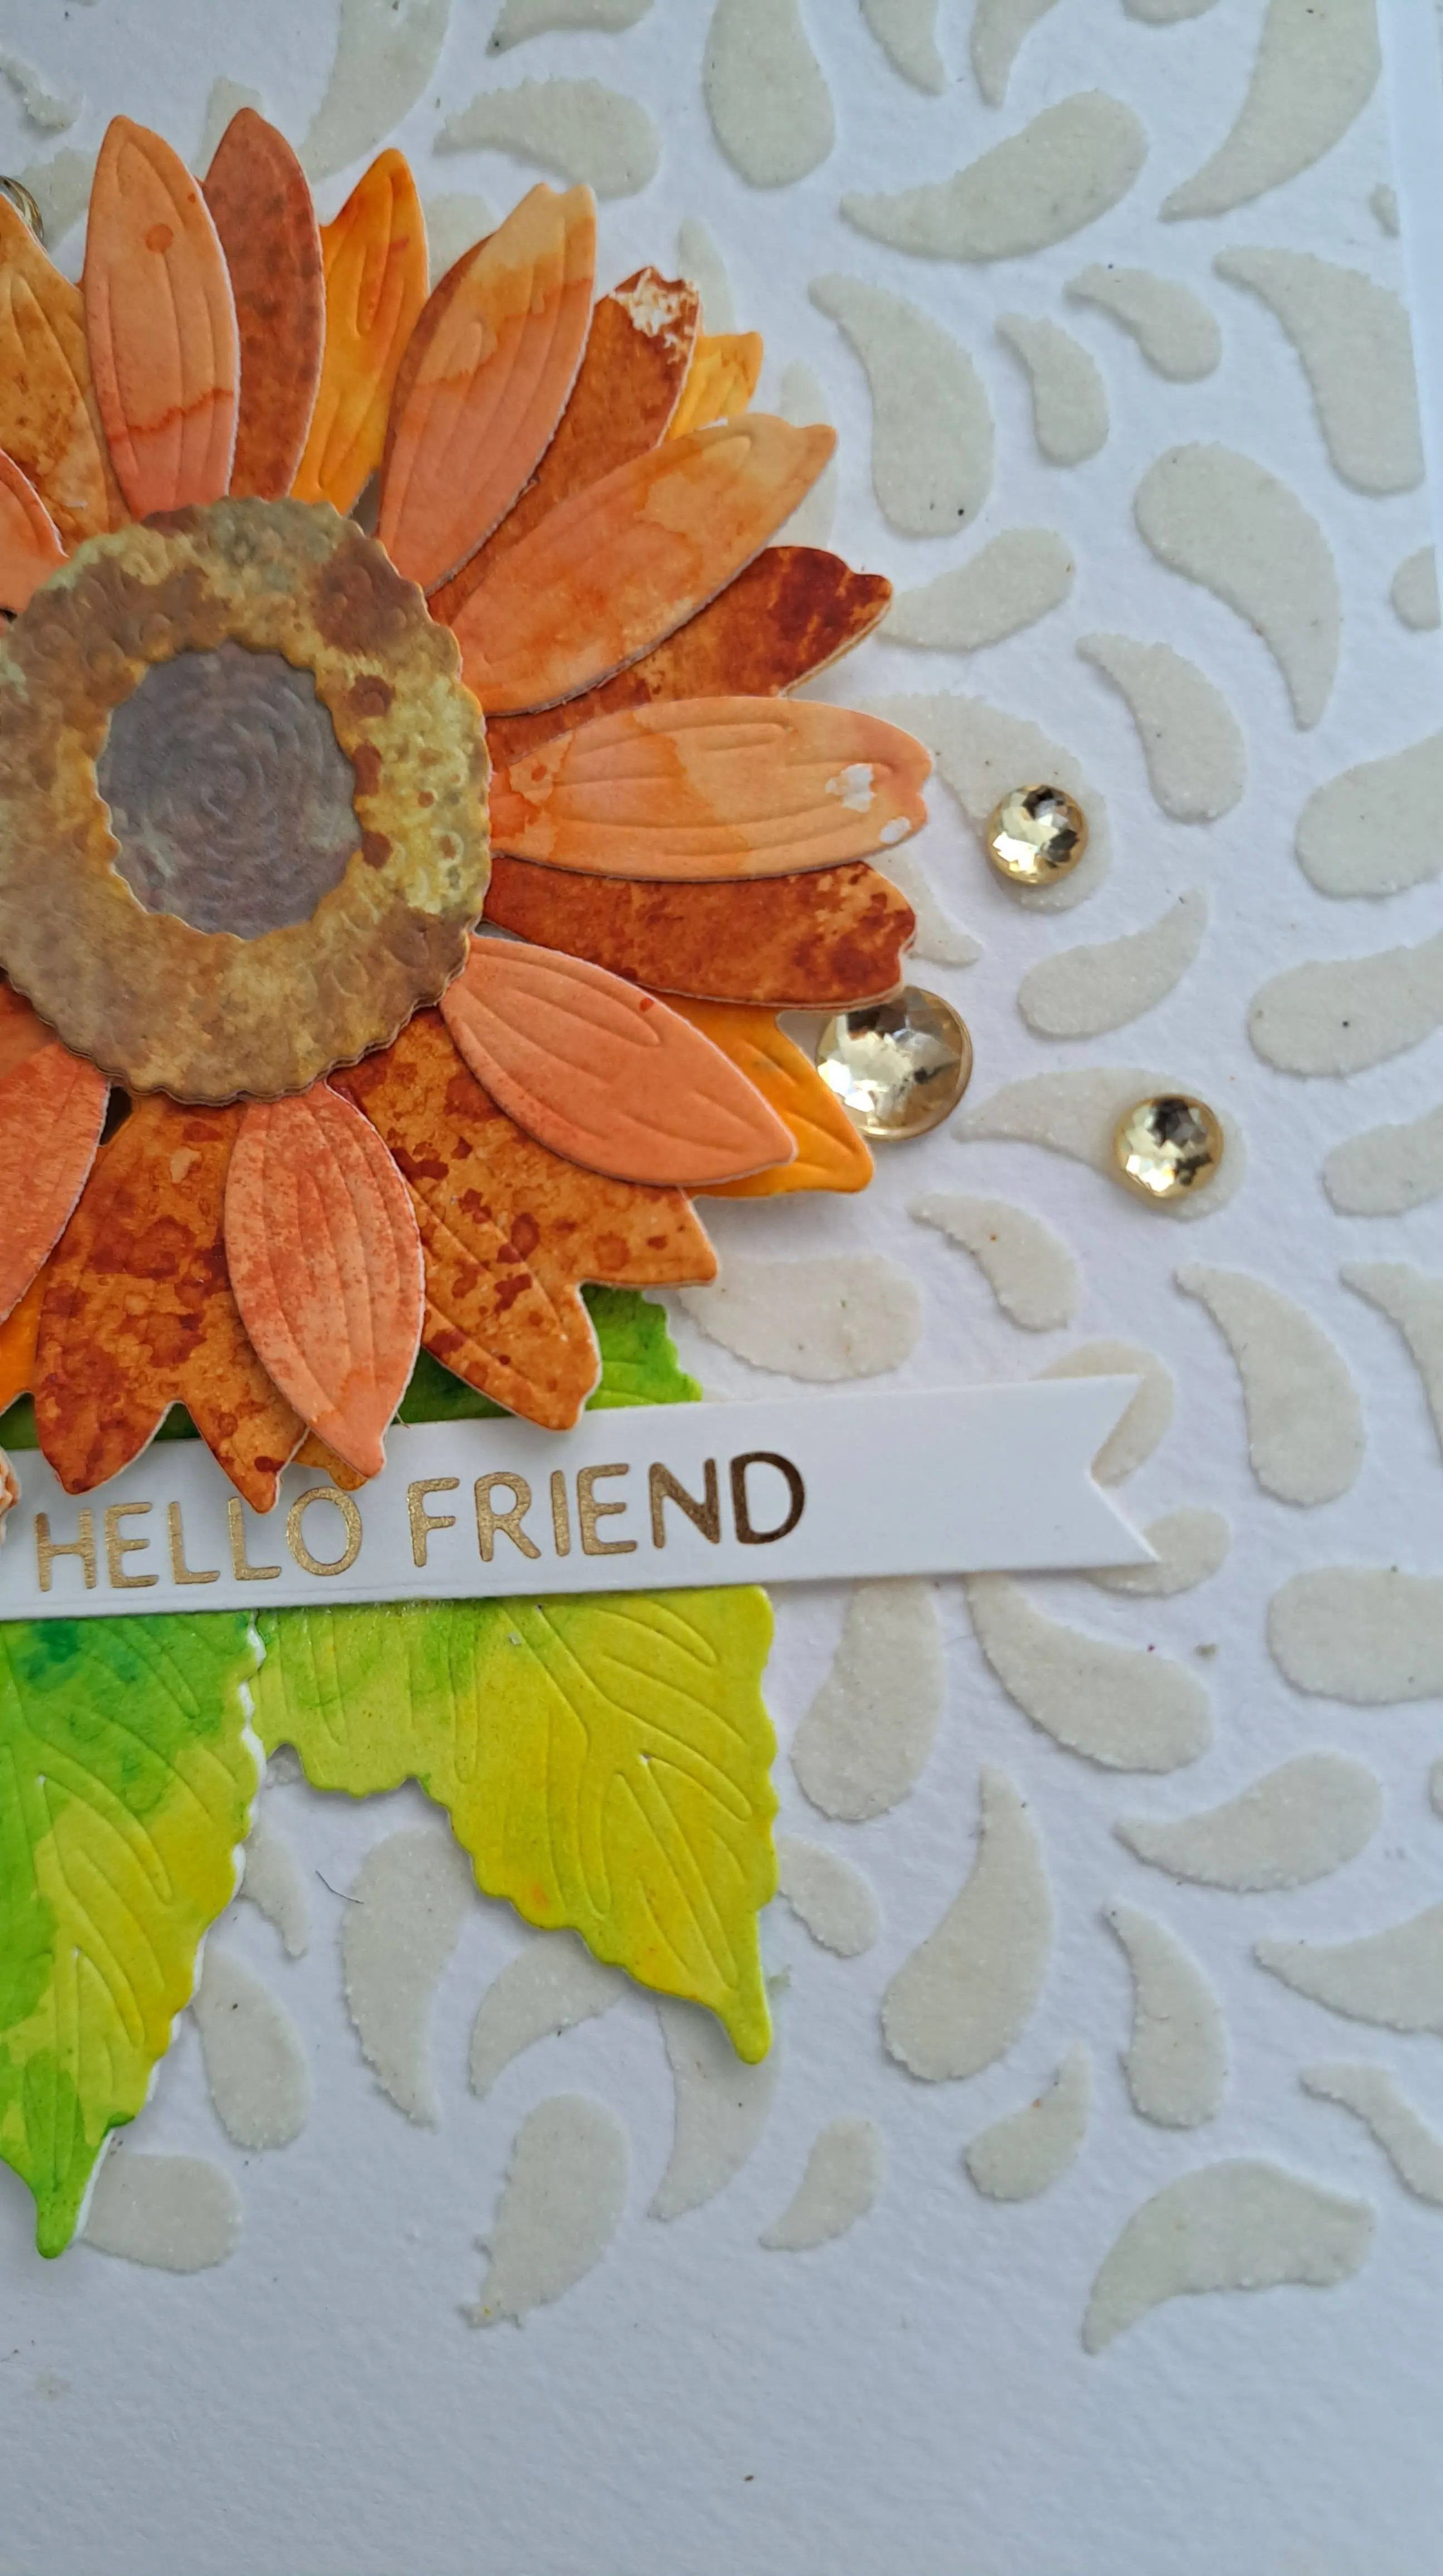
The background holly is a hot foil plate from Spellbinders, and hot foiled using gold. I then used the layering stencils to colour the images. As you can see, it is a whimsical kind of colouring – some bare areas not covered by the stencils – and I really like that look.

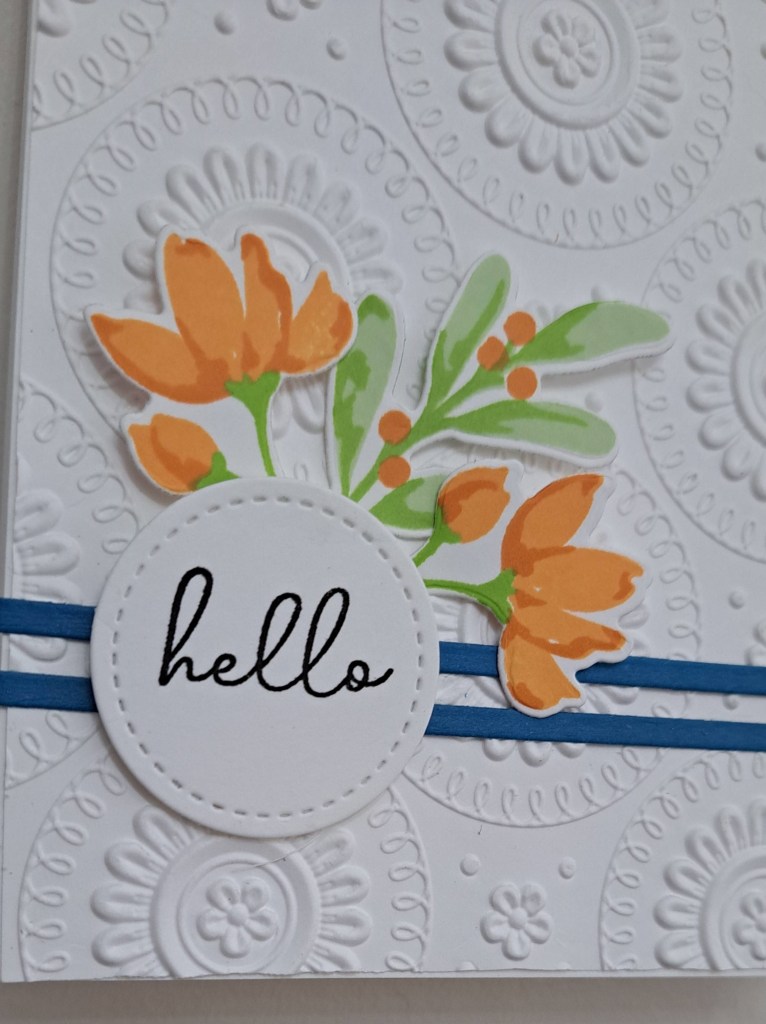
I used several shades of green for the leaves, and a deep red for the berries.

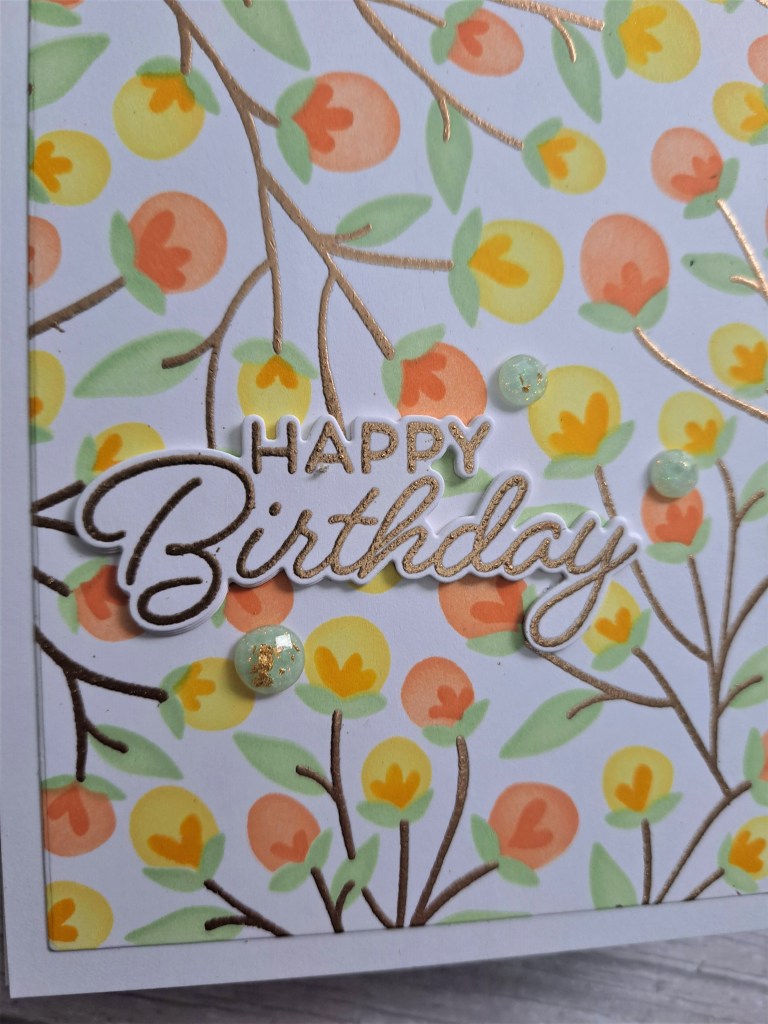
Once that was dry, I also added some gold with paint markers to the centre of the berries.

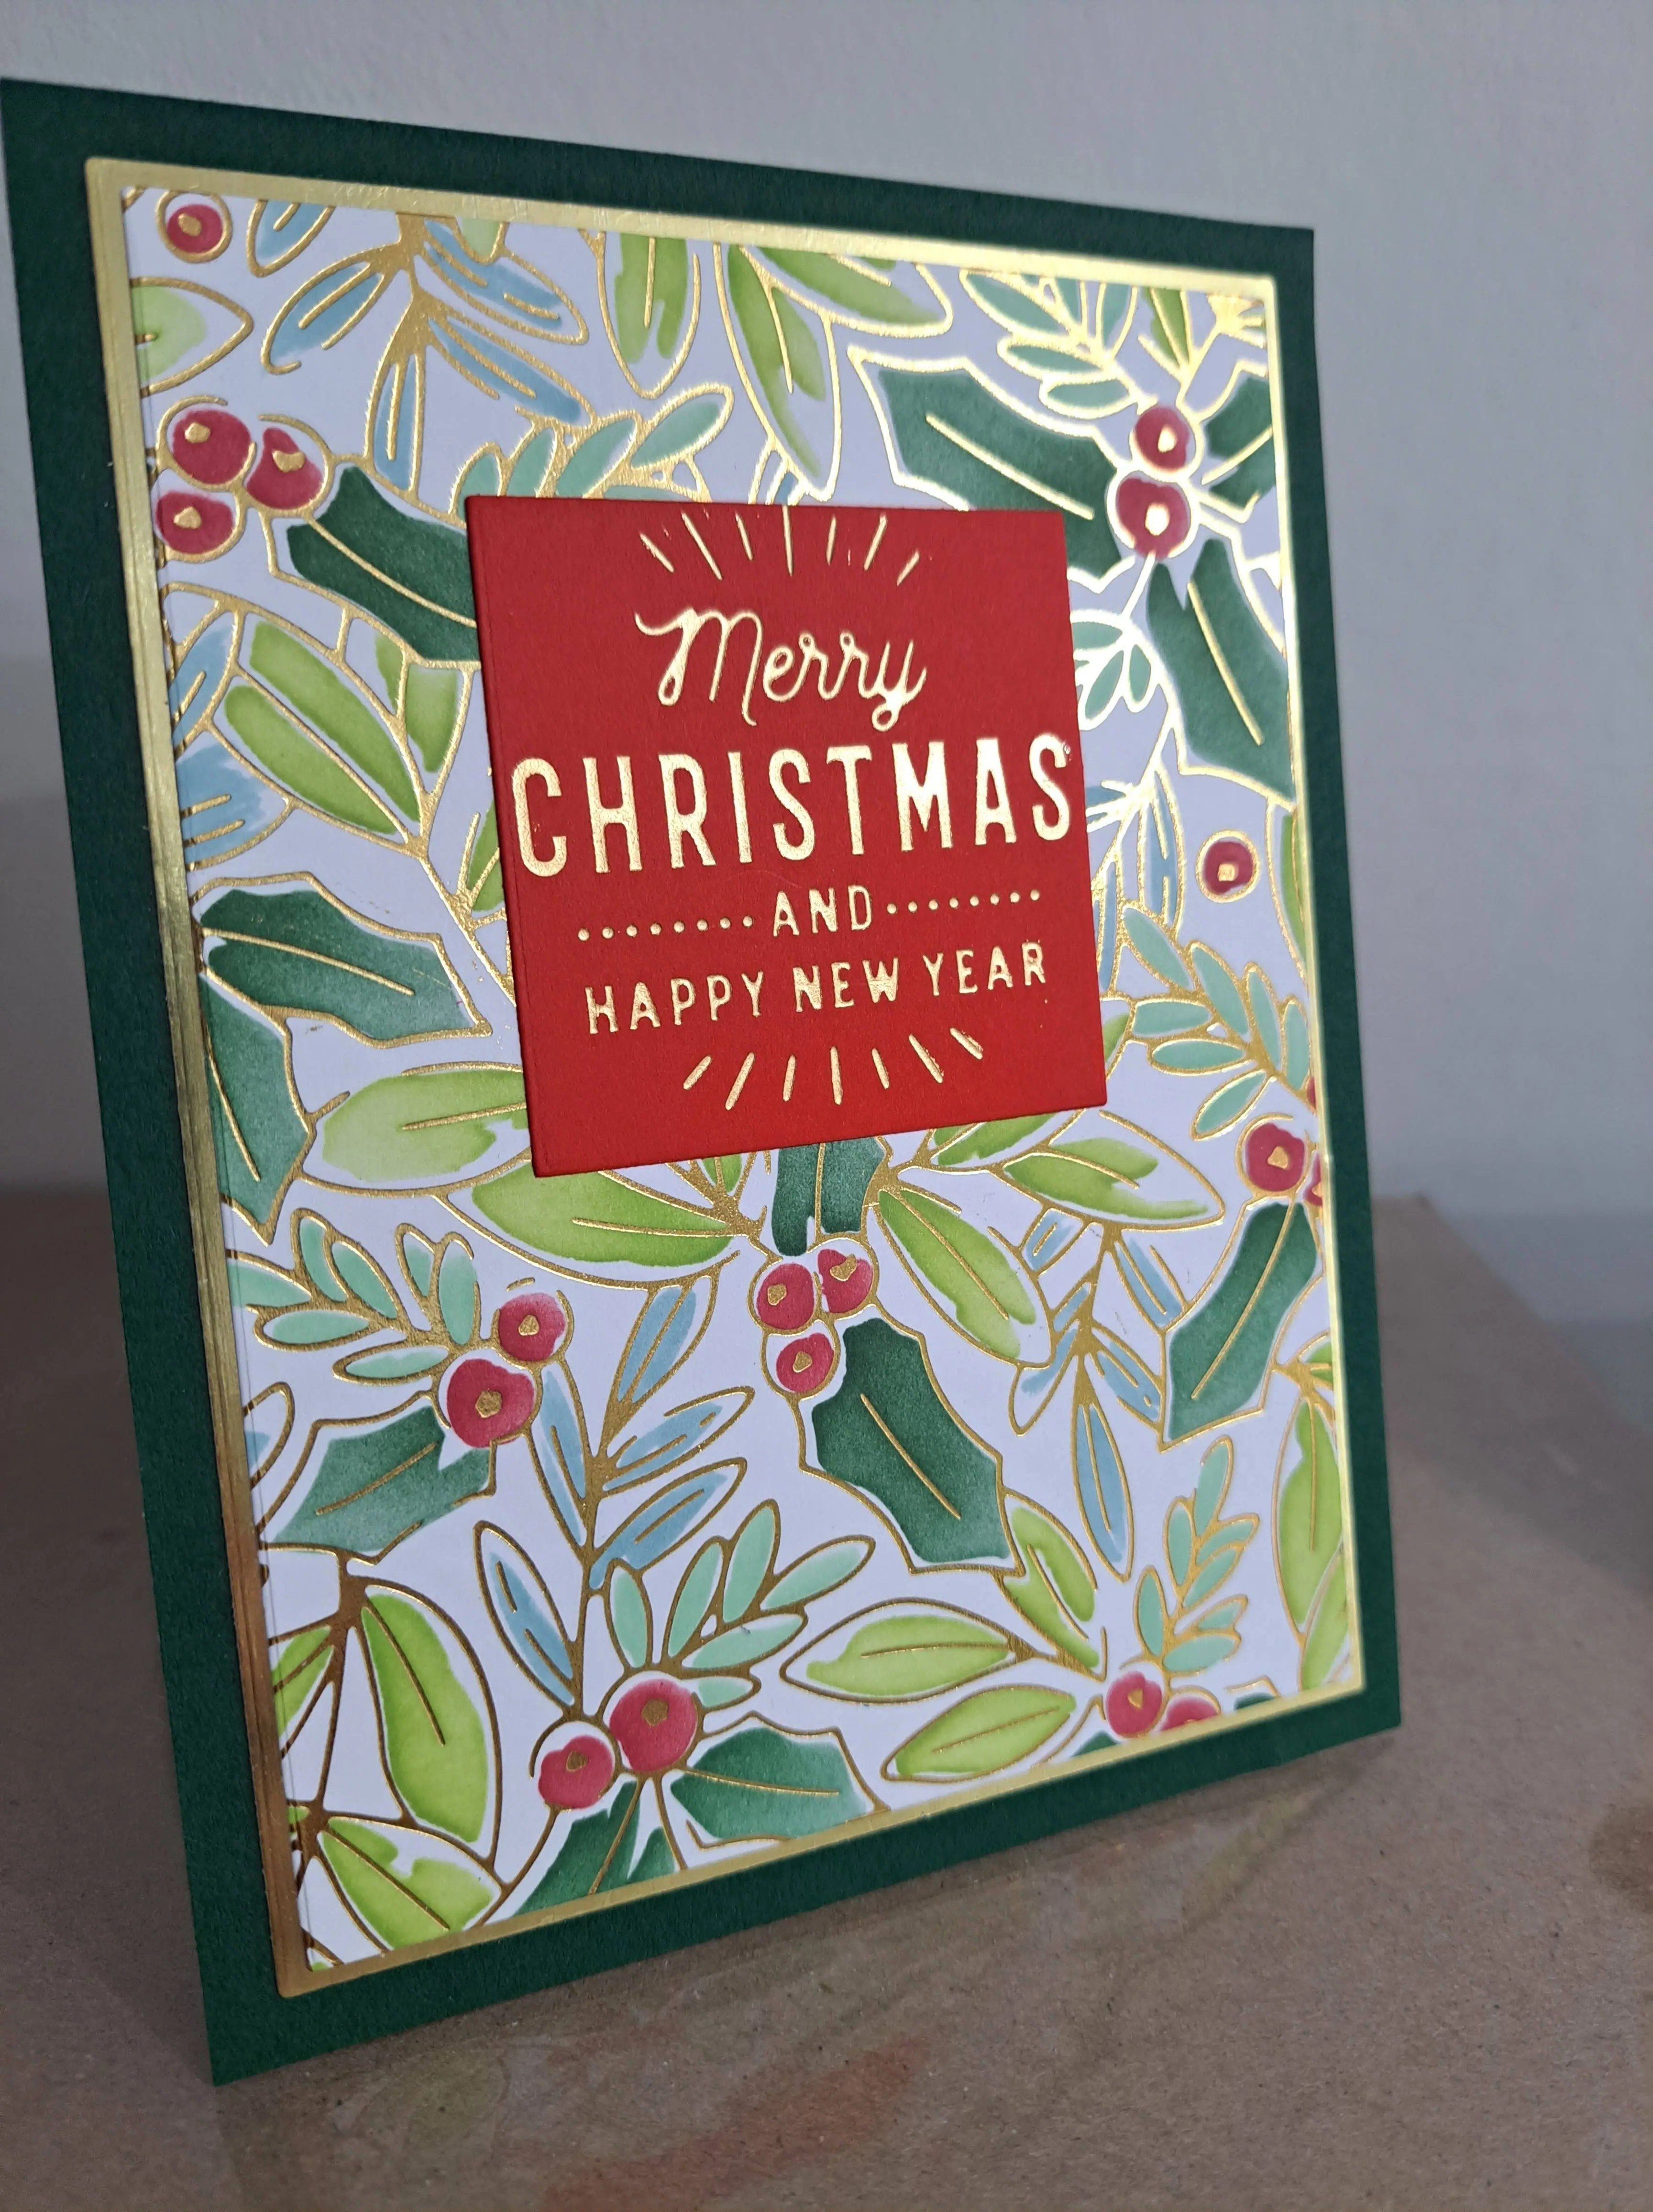
The sentiment was also hot foiled then die cut, and all layered onto a green card base with a thin gold matting layer.

I hope you can come and join us for this challenge. I am looking forward to seeing you in our gallery. xx

I shall be entering the following challenges:

Peace On earth Christmas Challenge – Christmas anything goes

Creative Fingers anything goes

Daring Cardmakers a bit of bling

Girlz Creative Christmas Challenge Christmas anything goes

Ally’s Angelsanything goes

Thinking of You

Hello. I wanted to share a card I made using some dies from The Greetery and Pinkfresh Studio:

The white panel is dry embossed using a Spellbinders embossing folder. The blue circles are from Pinkfresh Studio, and die cut using some Creative Expressions card stock.

I then took The Greetery die set, and cut the gourds and bushel out of white card stock. I used Distress Inks to colour them, Antique Linen was one colour, and I think the orange was either Carved Pumpkin or Spiced Marmalade……I can’t check as – for once – I tidied away after myself before I took the photo…..!

The elements were added as you see with either wet glue or 3D foam pieces, and a foiled sentiment strip attached, and then some iridescent gems for a little more interest.

I shall be entering the following challenges:

Color Throwdownorange, pale blue, cream

The Crafty Addictsanything goes

Cut It Updie cuts and add a sentiment

Simon Says Stamp Wednesday Challengeanything goes

Lil Patch of Crafty Friendsanything goes

Ally’s Angelsanything goes

Stencilled Floral Birthday

Hello. I have created a card using some Taylored Expressions products from the March 2023 Crop & Create:

The background stems are stamped and heat embossed with brass embossing powder.

I then used each of the four stencils to ink blend the flowers and leaves using a light yellow and a light orange ink from Pinkfresh Studio.

The layer for the darkest part of the flowers are on one stencil, but I used an itty bitty blender brush – also from Pinkfresh Studio – and blended a darker orange and a darker yellow onto the respective flowers. This wasn’t as daunting as you may think – those teeny tiny blending brushes worked a treat.

I then cut down the panel and mounted onto a white card base, adding the heat embossed sentiment – layered three times for extra thickness – and added some green gems which has some gold on them. I think these are from Spellbinders, and another virtual event – but I may be wrong…..

I shall be entering the following challenges:

Color Throwdownorange, yellow, green

The Flower Challenge anything goes with flowers

Pinspirationalbirthday and orange

Stencil Fun use a stencil, option to use orange taken

Beautiful Blossomsanything goes with flowers

Crafters Caféflowers

‘O’ is for Owl

At the Alphabet Challenge, we have reached the letter ‘O‘, and Meg has chosen the theme of ‘Owl‘. Here is my card:

This gorgeous owl die is from Honey Bee Stamps, and was part of the Crop and Create virtual crafting event in March of this year. I didn’t make all the cards from that event – yet – but this owl was just waiting for the right time for me to bring him out…..

The owl pieces were die cut from white woodgrain card stock, and following the video tutorial for that event, I ink blended some grey Distress Oxides, using varying pressure, to create the layered effect, and ink blended some bro for his feet. I used some brown woodgrain cardstock for the branch.

The background is a silver hot foiled frame from Altenew from a previous hot foiling session, and set into a Pinkfresh Studio die cut frame.

All elements were adhered as you see, and the sentiment is a also hot foiled – white onto a black strip of card.

I hope you can come and join us with your creations featuring and owl. xx

I shall be entering the following challenges:

Crafty Animalsanything goes with an animal

2 Crafty Critter Craziesanything goes with a critter

Ellibelle’s Corner anything goes

Triple BBirds and/or butterflies and/or blooms

Lil Patch Of Crafty Friendsanything goes

You’re Pawsome!

Hello once again. Cardz 4 Galz has started a new challenge. Caz is hosting this time, and she has chosen the theme of ‘Dogs or Puppies‘. Here is my card:

I used A Spellbinders embossing folder for the background white panel, matted with black, then added to a card base.

The dog house was created using a Spellbinders die set. This die set is to create a 3D dog house, but I just die cut the pieces I wanted for the front and roof, out of Lawn Fawn woodgrain card stock. The sentiment was added to the roof, and those pieces backed by white card to make the sentiment stand out a little more.

The dog is the Boston terrier, a die set from Simon says Stamp, and using darker card so he can stand out from the brown dog house more.

I hope you can come and join us with your dog or puppy creations. xx

I shall be entering the following challenges:

Crafty Animals anything goes with an animal

2 Crafty Critter Craziesanything goes with a critter

A Perfect Time To Craft anything goes

Ellibelle’s Corner anything goes

The Crafty Addicts anything goes

Lil Patch Of Crafty Friends anything goes

Snowflake Christmas

The Holly and Ivy Christmas Challenge has started a new challenge. We are always ‘anything goes Christmas‘. Here is my card:

Onto a white card base, I adhered a light blue panel which had been embossed using a Simon Says Stamp embossing folder.

The snowflakes were created using a die set from Spellbinders/Bibi Cameron, layered purple and silver glitter card (no shed), and these were attached with 3D foam. The purple glitter centres were created using that same silver no-shed card,. and colouring with a Copic colour I felt matched the base purple card.

Once attached, I added the foiled sentiment, then some purple iridescent gems I had in my stash.

I hope you can come and join us with your Christmas/festive creations. xx

I shall be entering the following challenges:

Krafty ChicksChristmas

Creative Fingersanything goes

A Perfect Time To Craftanything goes

Most Magical Time Of The Yearanything Halloween or Christmas

Peace On Earthanything goes Christmas

Floral Hello

Hello to you all.

My friend and I have just spent a couple of days away doing a Christmas Book Nook and a Veranda Nook……we had no idea what we were letting ourselves in for – so much work and fine detail needed for those projects. It absolutely blew my mind – so I had to come back and make a card as I know how to do that…..! I don’t think that is something I’m going to be doing much of in the future – but I really enjoyed what we did do.

I have a card to share using a new stamp and die set from the recent Stamptember collaboration with Simon Says Stamp and Concord & 9th:

I stamped all the images in the stamp set, but decided to use only these couple of sprigs for a more clean look.

The background panel is a 3D embossing folder from Spellbinders, adhered with tape. I die cut these three sprigs after stamping the two layers for each colour.

The two stripes of blue are from a little packet I keep my strips in, and the circle was die cut and stamped with an sentiment from that same stamp set.

The stamp set has a large poinsettia flower and even though I stamped and die cut that – it is sitting on my desk for another project – I didn’t want to cover up too much of the embossing.

I shall be entering the following challenges:

Color Throwdowngreen, orange, blue

Crafty Catz Weekly Challengeanything goes

Allsorts anything goesoption to add texture taken (3D embossing folder)

The Flower Challengeanything goes with flowers

CYHTPembossing folder – option of spooky not taken

Slimline Holly Christmas

The ABC Christmas Challenge has reached the letters ‘U‘ and ‘V‘. We want to see you Christmas/festive creations with the themes of ‘U for Use It Up’ and/or ‘V for Vertical‘. Here is my card:

Onto a black slimline card base I placed a piece of black glitter card, added a white frame, then a narrower black frame.

The holly was die cut from a piece of card created when playing with some techniques. I used a green mica spray and when that was dry, I stamped with a red rubber stamp and heat embossed in gold. You can see the detail of the gold heat embossing here:

I then used a slimline holly die from Sue Wilson, and arranged as you see – some hanging over the edge. That did take a while to adhere to the black glitter card, but I put something heavy on top and left it overnight.

I wanted a sentiment which would stand out from the background but not take over from the holly and the glitter background, so chose a gold foiled sentiment from Pinkfresh Studio.

I resisted adding even more bling with sequins as I think this card has enough shine and shimmer.

I hope you can come and join us with our Christmas/Festive projects following our themes. xx

I shall be entering the following challenges:

Peace On Earth Christmas Challengeanything goes Christmas

Love To Craft anything goes

Merry Little Christmas Challengeanything goes Christmas

Christmas Bingo 3 items from one column – ‘B’ column – black/free/no stamping

Sparkles Forum Christmas ChallengeChristmas flowers/foliage

Sunflowers For A friend

Hello again. I have a card to share from a very messy play time:

I first created the background panel by using stencil and grit paste onto water-colour card, so I could set that aside and let it dry.

I then ink smooshed some brown and orange Distress Inks onto different Distress White Heavystock panels and set those aside to dry.

I then found a piece of yellow and green paper, created during a gel plate session using either water-colours or acrylic paint (I can’t remember which), so I used that panel to die cut the flowers, and layered with another white die cut piece of card to add some stability.

Once dry, I die cut the layers from Honey Bee Stamps ‘Lovely Layers Sunflower‘, placing my dies where I wanted to add to get some white areas, solid areas, and some splattering from the ink smooshing.

The brown centres were die cut from some grey ink smooshing, but they were too grey, so I added some ink blending with brown Distress Oxides.

The next thing to do was stick everything down – I had forgotten what to use to glue things down onto the grit paste. My normal wet glue didn’t work, and I couldn’t find my gel medium – I must have a few containers stored ‘safely’ somewhere – so I used glossy accents….that seemed to have done the trick.

I then added the foiled sentiment and some gold facetted gems, stuck down with a drop of glossy accents.

I shall be entering the following challenges:

Simon Says Stamp Wednesday Challengestencil fun

FarmQuest Challengesunflowers

My Time To Craft In The Garden

We Love 2 Createanything goes mixed media

Ellibelle’s Corneranything goes

Die Cut Divaslayered die cuts or layer die cuts

Creative Artiste Mixed Media Challenge anything goes mixed media – use at least three mediums

Framed Snowflake

Hello. I have a card to share using a snowflake set from the recent Pinkfresh Studio Create and Connect event:

I created the background by stamping the snowflake image in Abandoned Coral Distress Oxide. The frame is from Pinkfresh Studio also, die cut in white, the inner portion die cut out, a layer of vellum also die cut with outer-most layer, glued to the back of the frame, and placed on top of the background.

I then stamped the snowflake in a light brown ink, left my snowflake where it was in the Misti, used all three layers of the stencils to colour it in, masking off portions so I had dark blue towards the middle, and light blue towards the outer portions. Those small blending brushes came in very handy for the itty bitty parts of the snowflakes.

I then placed the panel back into my Misti, and stamped with black ink.

The technique of stamping in a light colour, using the stencils, then stamping again in your darker colour, was learned from Pinkfresh events. It is a little anxiety provoking the first time you do it, and you have to ensure your card is placed into the corner both times of stamping – and you don’t remove the stamp, but I do like the darker outline when you stamp at the end.

I used the matching die for the snowflake, die cut another one to add to the back for a little more stability, then glued onto the card.

The sentiment is foiled and added with glue, then I added some gold sequins around the snowflake, and some dew drops to the four points and the centre.

I shall be entering the following challenges:

Color Throwdowncoral, light blue, navy blue

Simon Says Stamp Wednesday Challenge – stencil fun

Addicted to Stamps and More die cuts and/or stencils

Peace On earth Christmas Challengeanything goes Christmas

Merry Little Christmas Challenge – anything goes Christmas

Most Magical Time Of The Yearanything goes Christmas or Halloween