Jolly Cow Greetings

Hello. A little crafty fun and playing with the cow dies from Elizabeth Craft Designs:

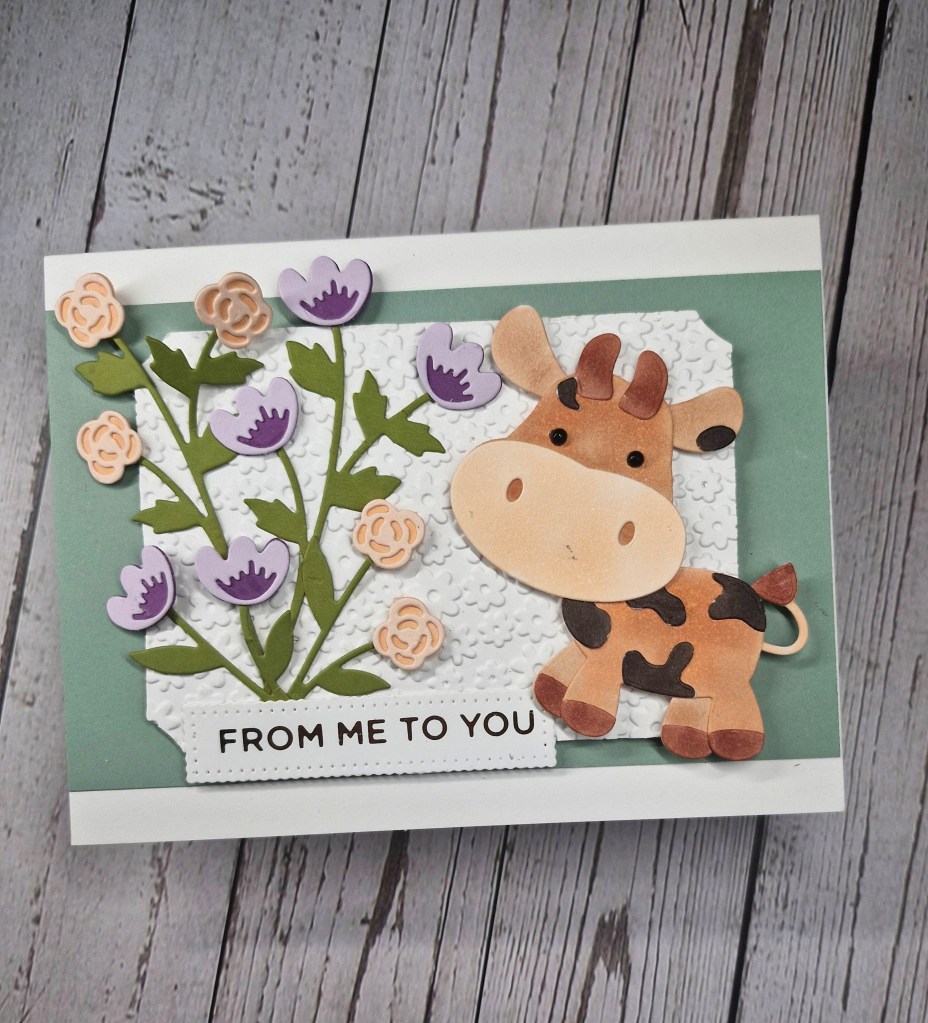
The theme at ‘Everybody Art Challenge‘ is Farm Animals. I knew I had a cow die and decided to have a play.

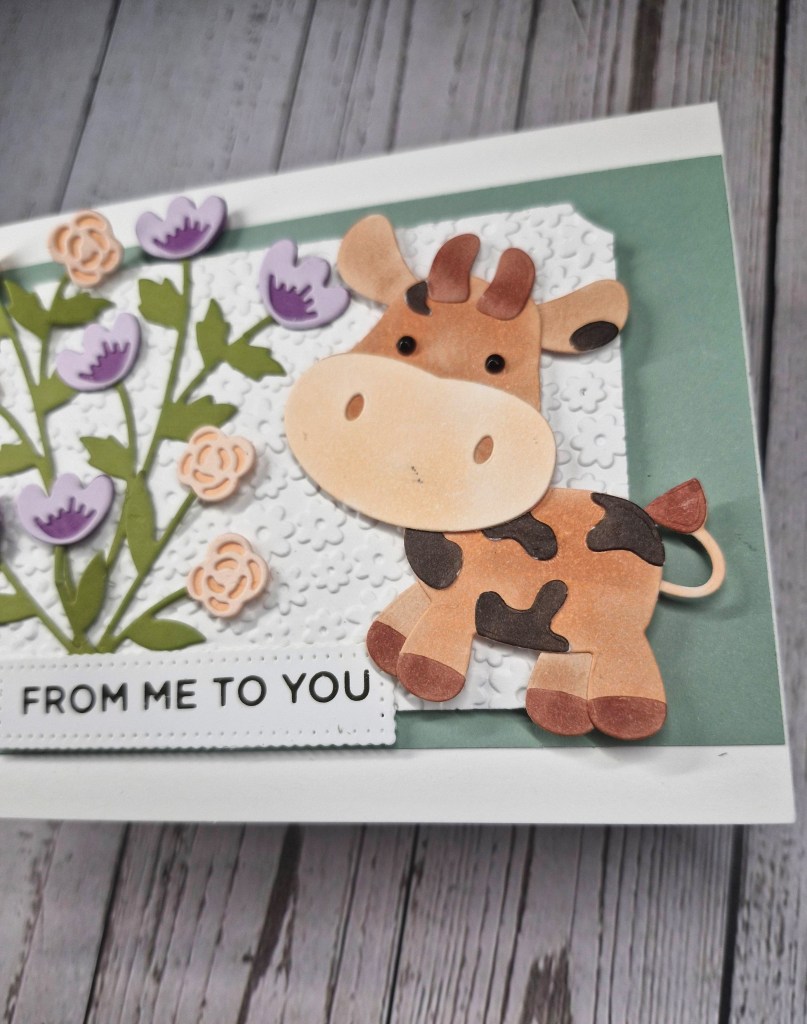
I die cut all the layers out of white card stock and coloured them with Copics. I wanted a brown cow with darker brown splotches so this is what I created. The hooves and the splotches are individual die cuts, coloured and glued on. The eyes are small black gems from Spellbinders.

The background is a stripe of sage card stock from Spellbinders, and the middle white panel was a fall-out from a previous die cutting session, dry embossed with an old Darice embossing folder, and adhered with 3D foam.

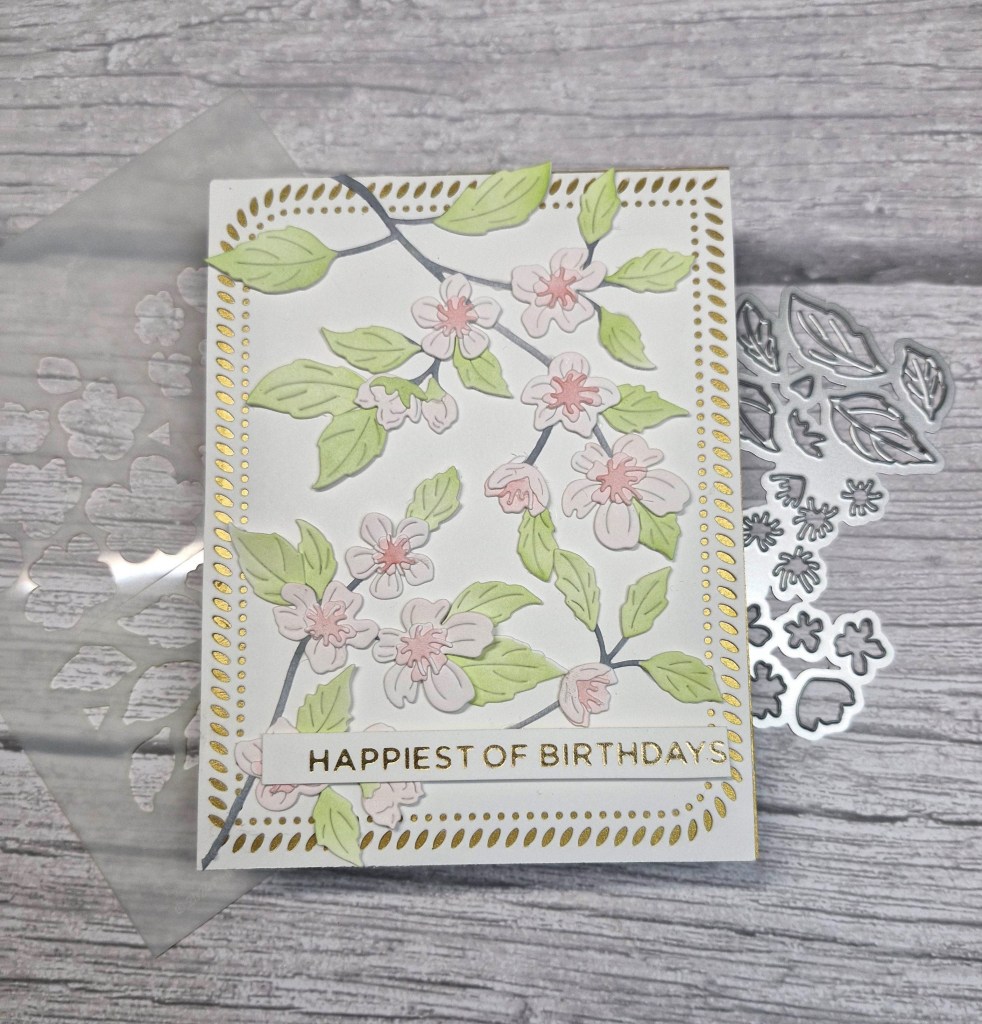
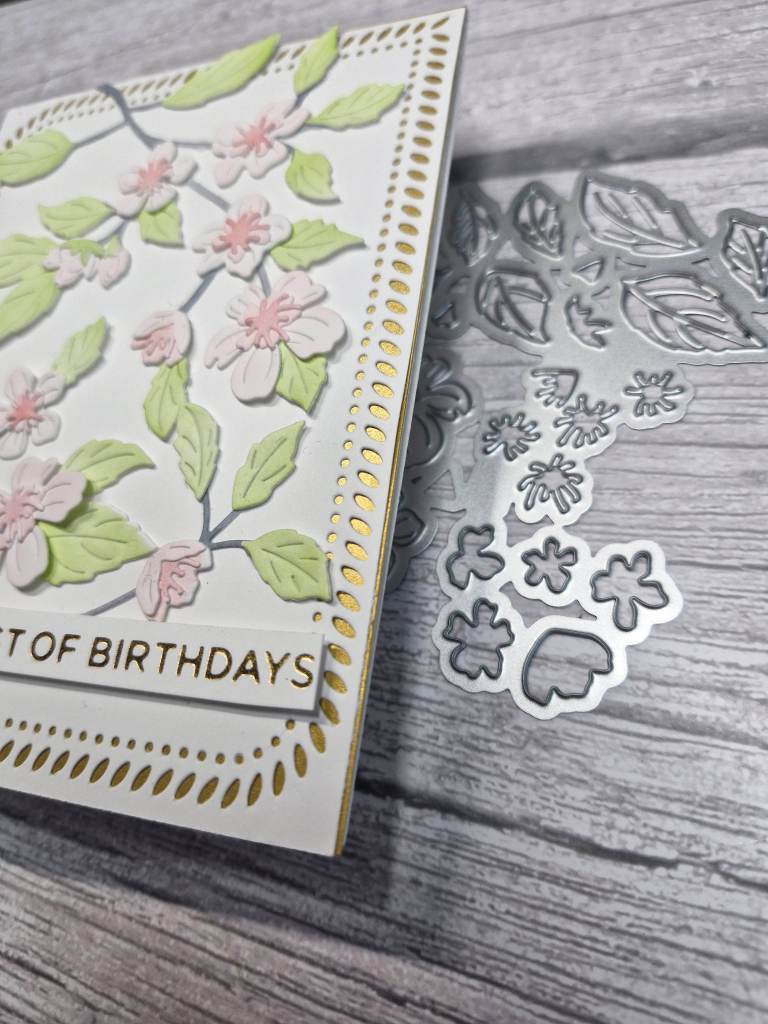
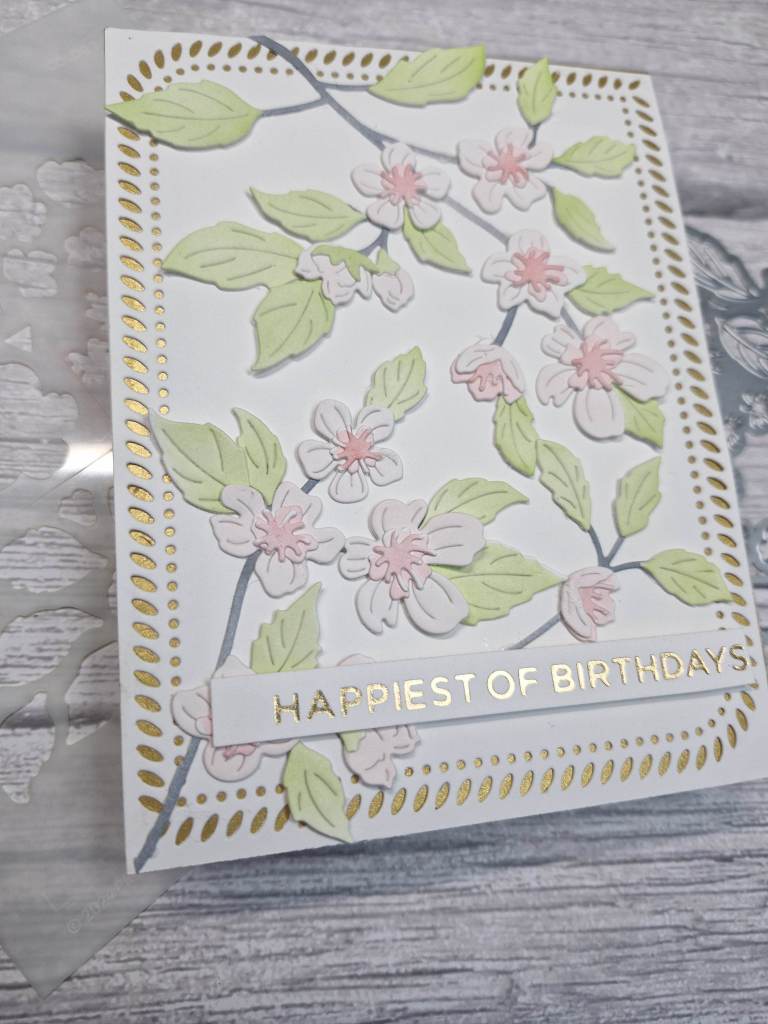
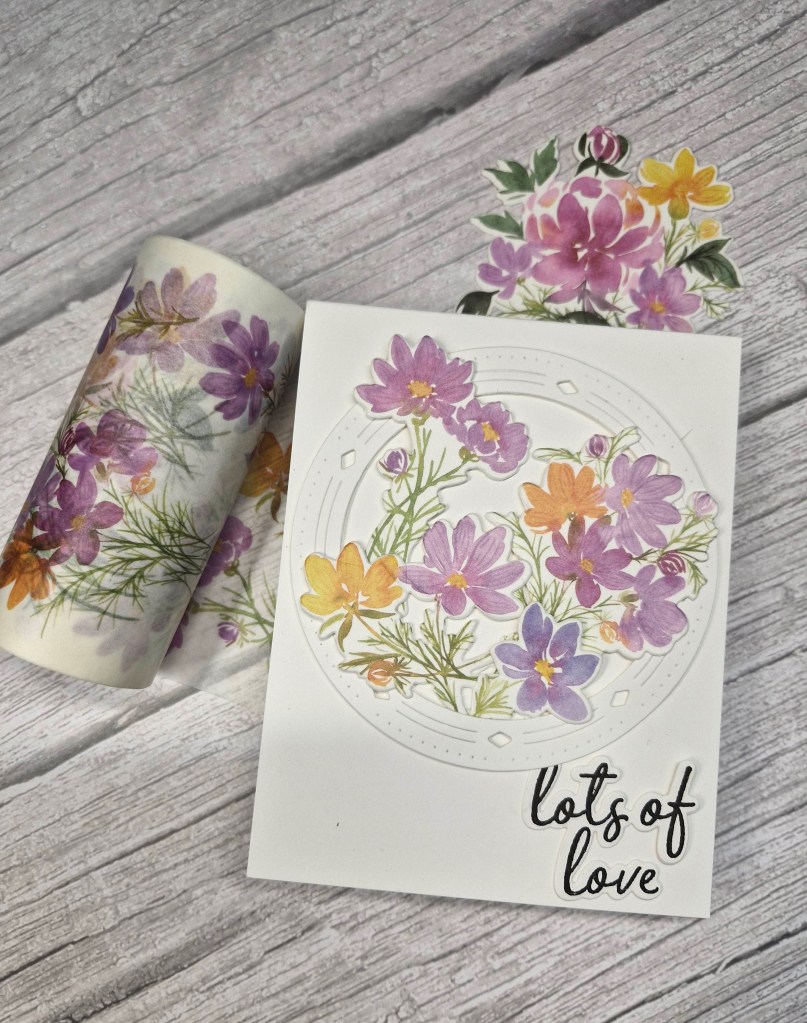
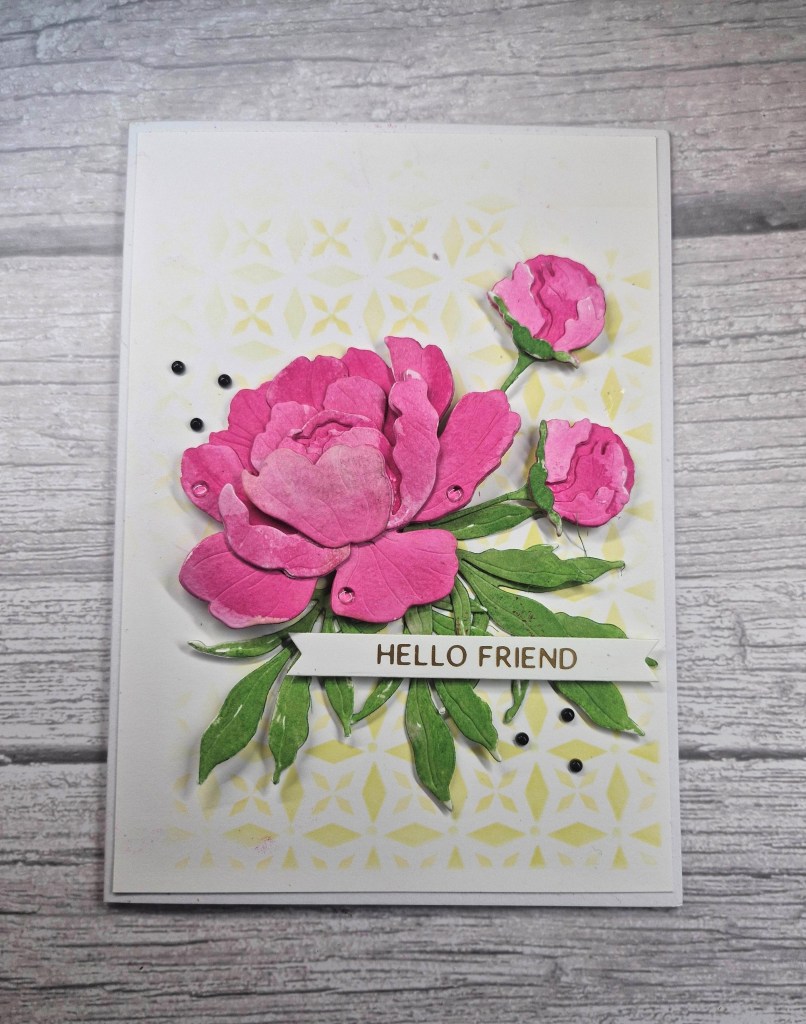
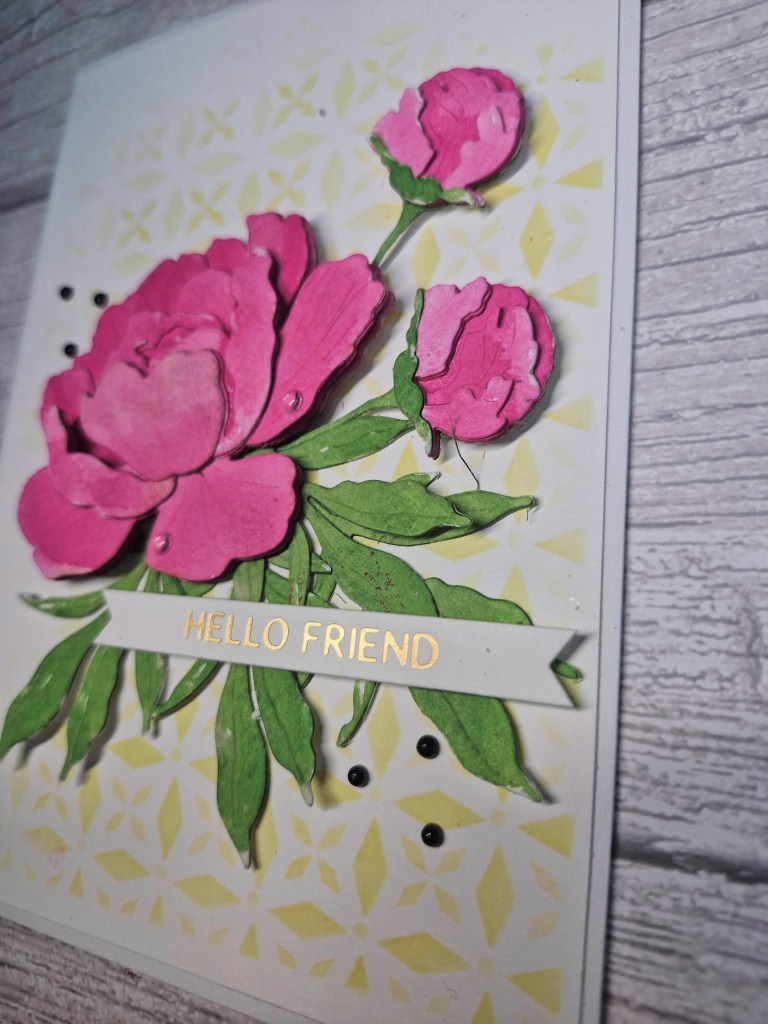
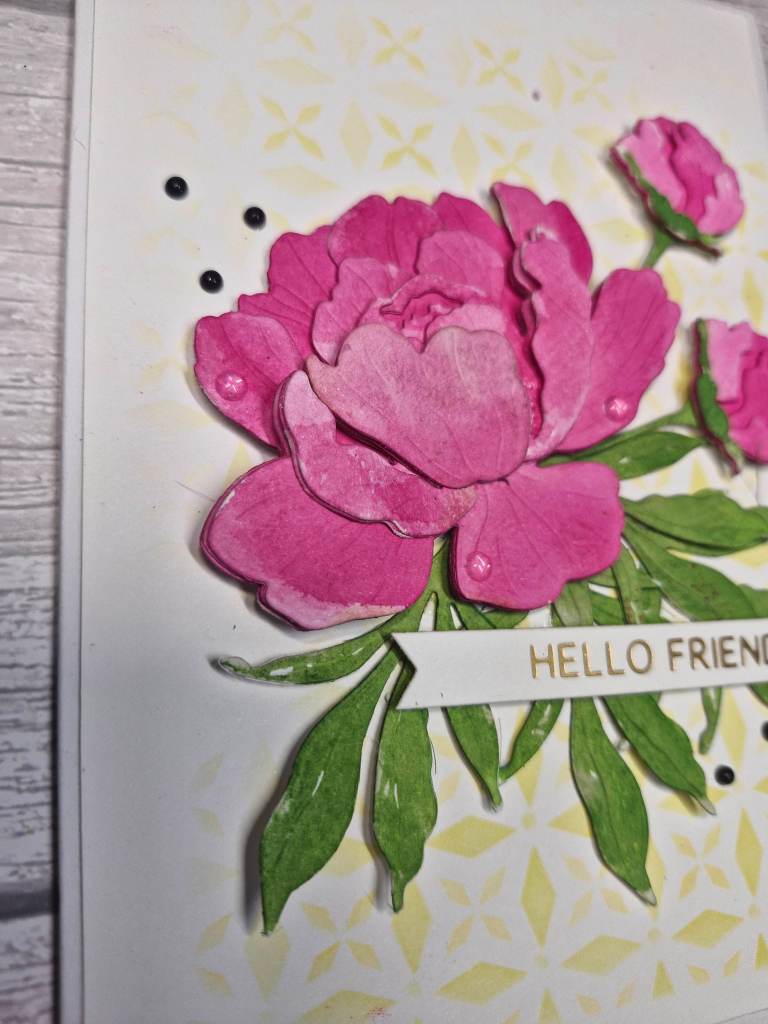
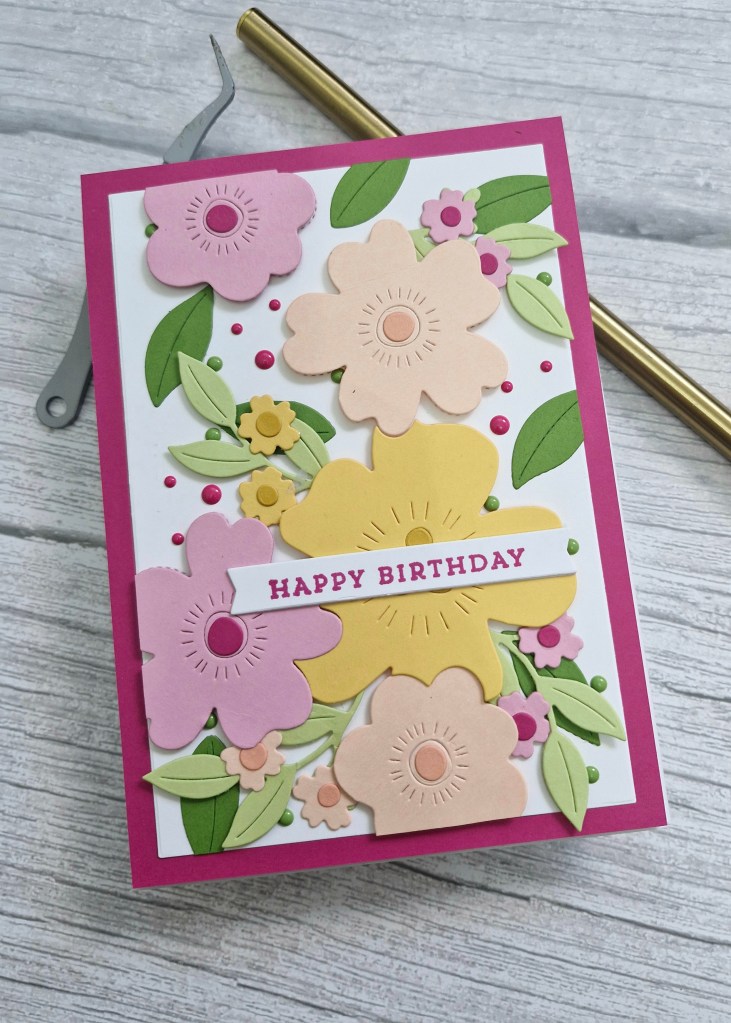
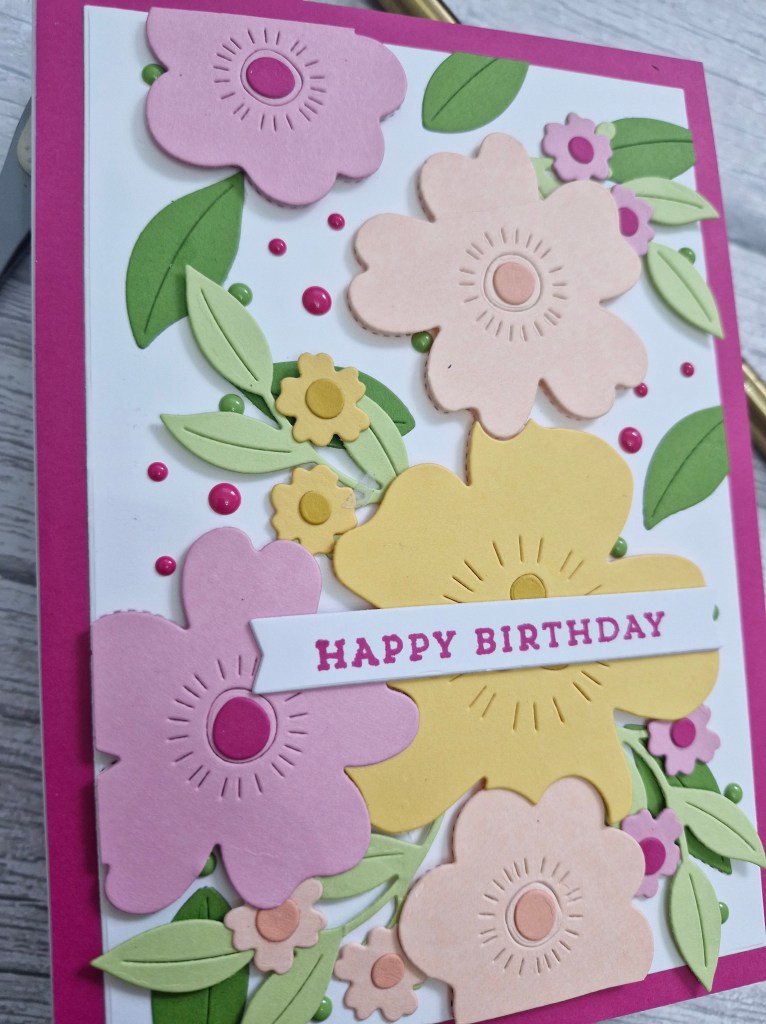
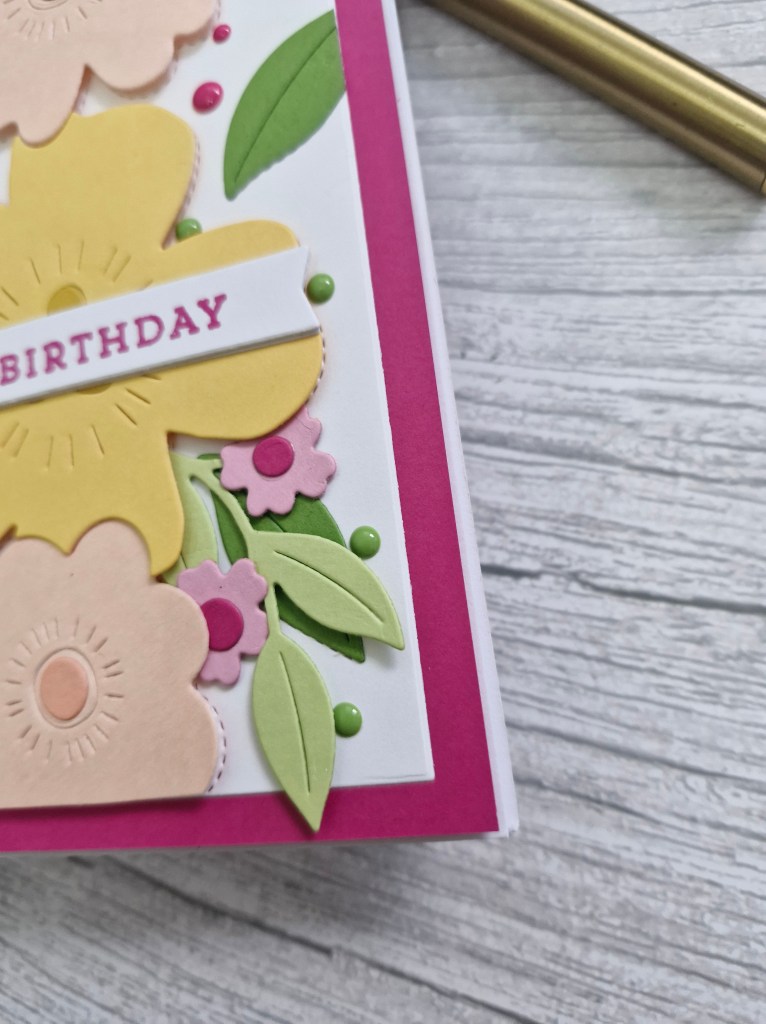
The flowers were created using dies from the recent Concord & 9th ‘In The Classroom – Spring Edition‘, layered and assembled.

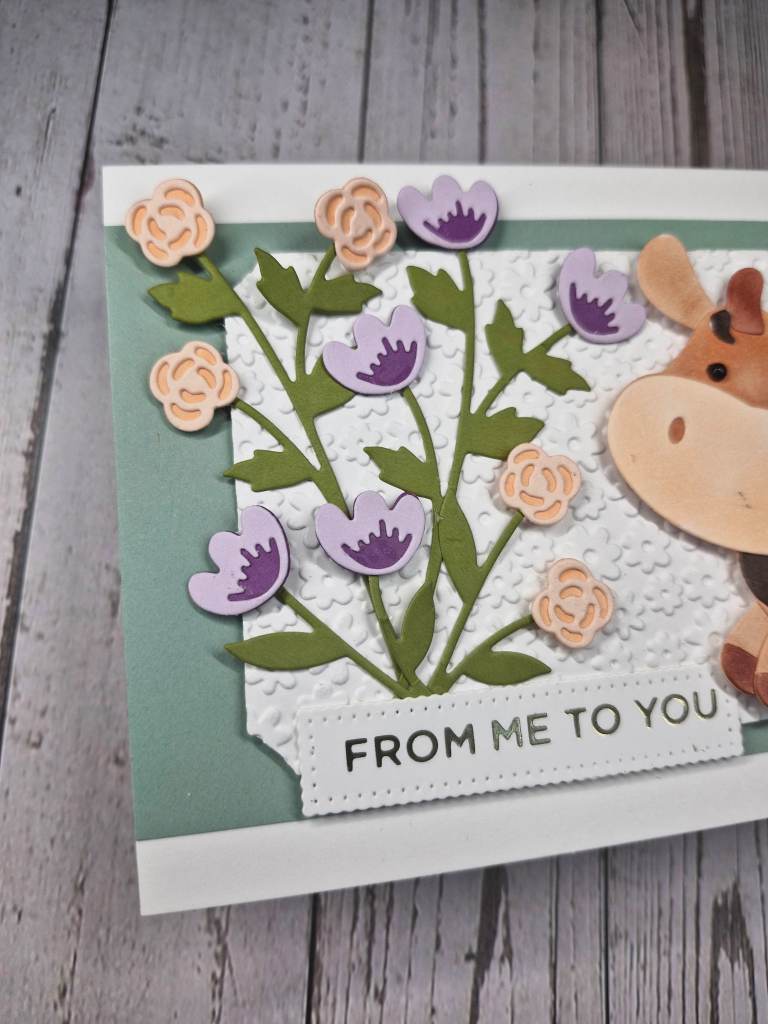
Once I decided on the layout, I attached each piece with a combination of glue and 3D foam squares, then added the previously foiled sentiment.

I may have to play with this cow die a little more, maybe create a whole herd of different coloured cows – maybe even rainbow cows…..hmmm……brain working overtime now….

I shall be entering the following challenges:

Everybody Art Challenge farm animals

Here Is A Place To Startanything goes

Simon Says Stamp Monday Challenge emboss it

Lil Red Wagon animal antics

Simon Says Stamp Wednesday Challenge anything goes

Creative Fingersanything goes

Crafty Gals Corneranything goes

Cherry Blossom Birthday

Hello there. I have another floral card today, created by using some layering dies from Pinkfresh Studio:

This set consists of layering stencils and dies. All the flowers and leaves are on one stencil with the different layers labeled and segmented. The die is one piece to cut the whole of the images out.

I used some pink and green inks, with grey for the branch. After die cutting the panel, I decided to do another so I had more images to play with and cover the card panel.

The background is a die cut with matt gold layered behind.

Once the flowers were arranged, I snipped any that were hanging over the edge, and added them also into some more open areas.

The sentiment was added – a previously prepared foiled strip.

I shall be entering the following challenges:

Here Is A Place To Start anything goes

Addicted To Stamps any occasion

Cut It Updie cuts and Happy Birthday

Lil Patch Of Crafty Friends anything goes

Ally’s Angels – anything goes

Beautiful Blossoms flowers

Lots Of Love…..

Hello once again. This card was created as I was totally intrigued by the current challenge at ‘As You See It’. The challenge theme is ‘Spring Flowers – in under 10 minutes’……

So – this was my second attempt at creating a card in under 10 minutes. The first card I was still using the stencil and not even got around to the die cutting part at the end of 10 minutes.

I had a rethink, and decided to go with some Washi tape from Pinkfresh Studio – that would take care of some stamping, colouring and die cutting all in one go – but little did I know that trying to get that Washi down smoothly would take more time than I anticipated.

However, it worked…..Here is my timer:

Just in the nick of time.

A plain white card base, a circle frame I die cut – within that 10 minutes – the Washi die cut pieces attached with glue and some 3D foam squares……the sentiment was also stamped and die cut (2 layers), then glued down…..I can see I’m also typing quickly – I still think I’m on a timer….!

I was going to add some bling – but time was running out and I hadn’t prepared for that….

So -an interesting challenge, which made me realise just how much time it takes to create a card generally – definitely far longer than 10 minutes……

As You See It – Spring Flowers in under 10 minutes

Peony Friend

Hello again. A little messy play to create this card:

The peony was created using the ‘Lovely Layers: Peony‘ from Honey Bee Stamps, and the colour scheme from the current Color Throwdown challenge.

My first job was to die cut each of the layers for the flower, buds, and leaves from water colour card stock. I used Crafters Companion water-colour card, not one I would normally for water-colouring, but for this flower I was going with messy and imperfect.

I used Picked Raspberry Distress Ink, smooshed onto my glass mat, spritz of water, then just dolloped and swiped it onto the die cuts. I tried to keep the lower die cuts darker, and added a little more colour into the back areas I knew were going to come through and be seen.

I did the same with the leaves, a couple of shades of green – only because my first green wasn’t dark enough for me so I went darker – and even messier. I didn’t get full coverage, but that is what I was aiming for – just a dollop and a swipe of colour.

Whilst the die cuts were drying, I used a large panel of white card stock – this card is 5 x 7 inches – and used a Hero Arts layering stencil and some yellow Distress Ink to create the subtle background. I used all three layers, but the same colour.

I wasn’t concerned about getting full coverage with the stencil either – some areas softer than others, and an uneven edge.

Once that stenciled panel was adhered to the card base, I glued all the floral and bud layers – rolling the edges of the leaves round a pen to create more dimension in the leaves – and played around with the layout until I was satisfied.

The sentiment was added – a hot foiled strip – and I added some black enamel dots instead of splatters – and some clear dots onto some of the petals of the peony.

Every now and again I get into a messy playing mood, and just create backgrounds, use paste, and generally get my hands inky. That way I have panels I can use in the future, especially when I want to die cut for backgrounds, or die cut elements to add to a card.

I shall be entering the following challenges:

Color Throwdownpink, yellow, green

Try It On Tuesdayuse a stencil

Lil red Wagonflorals

Lil Patch Of Crafty Friendsanything goes

Ally’s Angels anything goes

Beautiful Blossomsflowers

Elephant Birthday

At The Alphabet Challenge, we have reached the letter ‘Z‘. Deborah has chosen the theme of ‘Z is for Zoology‘. We want to see your projects featuring animals Here are my cards:

I decided to make the background grey and have the elephants in colour. A flip-around really.

The background is dry embossed using a Spellbinders embossing folder.

The elephants were stamped using the ‘Color Layering Elephant’ from Hero Arts, in tones of the colours you see. Once stamped, they were die cut and set to one side.

The balloon background panel is from My Favourite Things, and inverted. I have seen most projects with the balloons coming up from the bottom, but I wanted mine to come from the top.

Once that balloon panel was cut, I used some Copics which matched each elephant, coloured some pieces of card, then used a balloon die to cut them out, gluing them to the white balloons on the background panel.

I attached the elephant, stamped and attached the sentiment, then added glossy accents to the balloons.

I hope you can come and join us with your projects following our theme. xx

I shall be entering the following challenges:

We Love 2 Createanything goes mixed media (die inks, Copics, glossy accents)

Creative Artiste Mixed Mediaanything goes mixed media (die inks, Copics, glossy accents)

Lil Patch Of Crafty Friends anything goes

Ally’s Angels anything goes

Crafty Gals Corner anything goes

Spring Flowers

Hello there. I am hosting the new challenge at Cardz 4 Galz, and I chose the theme of:

‘Spring Flowers with dies and/or punches’

Here is my card:

This die set was part of the Concord & 9th ‘In The Classroom’ virtual event I attended last year. Big and Bold is the name of the set – and they certainly are big and bold flowers.

There is a die which you use for the background to place stitch marks on a panel, then you use the other dies for the flowers and leaves. You can use the flowers alone, but as you can see, the flowers are cut to perfectly line up with each other.

I die cut quite a few extra of the florals and leaves, and added them round and about the main big flowers, adding some matching enamel dots in places.

I hope you can come and join us with your projects following our theme. I look forward to seeing you in our gallery. xx

I shall be entering the following challenges:

Make My Monday Spring

Everybody Art Spring

Ellibelle’s Corner anything goes

Die Cut Divas anything goes with die cuts

Here Is A Place To Startanything goes – option of ‘hip to be square’ not taken

Beautiful Blossomsflowers

Dancin’ Gingerbread

Hello. I ma hosting the new challenge at ABC Christmas Challenge. We have reached the letters ‘E’, ‘F’, and ‘G’. The Christmas themes are:

E is for embossing, F is for Faux, and G is for Gingerbread

I have also put a couple of stamp sets for a random winner:

I went with the Gingerbread theme. Here is my card:

The little gingerbread girls are from a Spellbinders die set, and you can make them as is, or you can make them dance. Of course, I made them dance:

I first die cut all the elements, and before gluing together most of the elements.

The background is a hot foiled panel – from Spellbinders – attached with glue.

To assemble the gingerbread so they dance, the head stays in one place. You add 3D foam to the centre of the head, attach the ringed die cut piece to the bodies, place over the 3d foam on the head – and stick that head down…..

Swinging bodies ensue…..

I hope you can come and join us with your Christmas creations following our themes, the Design Team have a variety of inspiration for you. xx

I shall be entering the following challenges:

Peace On Earth Christmas Challengeanything goes Christmas

Lil Patch Of Crafty Friends anything goes

Crafty Catzanything goes – option of monochrome not taken

Creative Fingersanything goes

Ellibelle’s Corneranything goes

Sparkles Forum Christmas ChallengeChristmas with plaid or tartan

Excited Congrats…

Hello again. I have a card to share using some of the products from the recent Pinkfresh Studio ‘Create and Connect Event’:

This floral arrangement is from the ‘Lantern Botanicals’ stamp set, now on general release, but was provided as part of our event kit.

I stamped the floral images four times – minus the lantern at the top of the stamp – in a light ink, onto textured cream/linen card stock. The stamp was left in the Misti so I could stamp again with a darker brown ink after ink blending.

I then used the three layering stencils to colour the leaves and flowers, wondering if I had made an error using the textured card. I did stamp on the smooth side, but as you can see some of the texture came through with the ink blending. I think this gives and almost vintage feel to the images, so I carried on blending all four of them.

Once coloured, I then placed each piece back in the Misti, ensured it matched, then stamped again with a darker brown ink.

These were all then die cut, and extra layers cut and adhered together to create more stability and depth to them.

I used another A2 piece of the linen card, played with arranging the images, then glued them down – snipping the ones that hung over the edge, and adding little pieces if there were any large spaces.

The sentiment was stamped in the same dark brown ink, die cut, extra layers added, then attached to the card:

I added some iridescent gems in spaces. I like how these gems pick up the light, but also the colour of anything around them.

I shall be entering the following challenges:

Color Throwdownpeach, sage green, cream

Beautiful Blossomsflowers

Simon Says Stamp Wednesday Challengeadd a sentiment

Ellibelle’s Crafty Wednesdayanything goes

Die Cut Divas anything goes with die cuts

Here Is A Place To Start anything goes

Vintage Telephone

The Alphabet Challenge has reached the letter ‘Y‘, and Meg has chosen the theme of ‘Yesteryears/Vintage’. Here is my card:

I immediately thought of the old fashioned phones we used to have, and this die set from Time For Tea designs is one I have had for while and never used.

I die cut all the phone elements in several shades of teal, and layered them together. Once assembled, I used a 5 x 7 inch card base to allow for the large sentiment – also from Time For tea Designs.

I decided to use a patterned paper for the background, from Lawn Fawn I believe, and used grey tones to allow the colour of the telephone to be the centre of attention.

I saw a little reel on one of the social media sites which showed how the younger generation has no idea, no clue how to use these old rotary phones, many had never even seen them before……and how often just we pick up the phone to call someone and chat, rather than sending a message or texting…..? I think actually talking to someone on the phone is going to be a lost art form…

I hope you can come and join us with your projects which follow our theme. xx

I shall be entering the following challenges:

Ally’s Angels anything goes

Lil Patch Of Crafty Friendsanything goes

Creative Inspiration Challengeanything goes

Die Cut Divasanything goes with die cuts

Here Is A Place To Startanything goes – option of ‘hip to be square’ not taken

Delivering Warm Hugs

Hello there. The Holly and Ivy Christmas Challenge has started a new ‘anything goes Christmas‘ challenge. Here is my card:

I had fun creating this card with all those die cuts. I have to be in ‘the zone’ when I do this, but I enjoy the process.

The background panel is dry embossing using a Spellbinders embossing folder, and adhered flat to the card base.

The mug, marshmallows and candy canes are from Spellbinders, die cut and assembled with a mixture of glue and 3D foam.

the sentiment is heat foiled, and some silver sequins added for extra sparkle.

I hope you can come and join us with your Christmas creations. xx

I shall be entering the following challenges:

Simon Says Stamp Wednesday Challengeanything goes

CYHTP embossing folder – option of squares/circles not taken

Creative Fingers anything goes

Ally’s Angelsanything goes

Christmas Craft CreationsChristmas with stencils or embossing folder

Jingle Belles Christmas and mainly die cuts