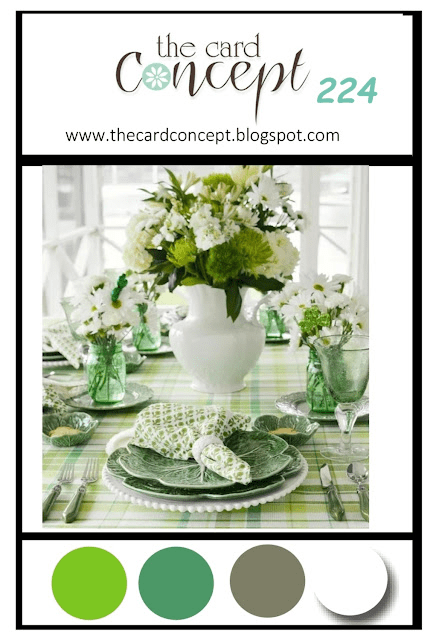
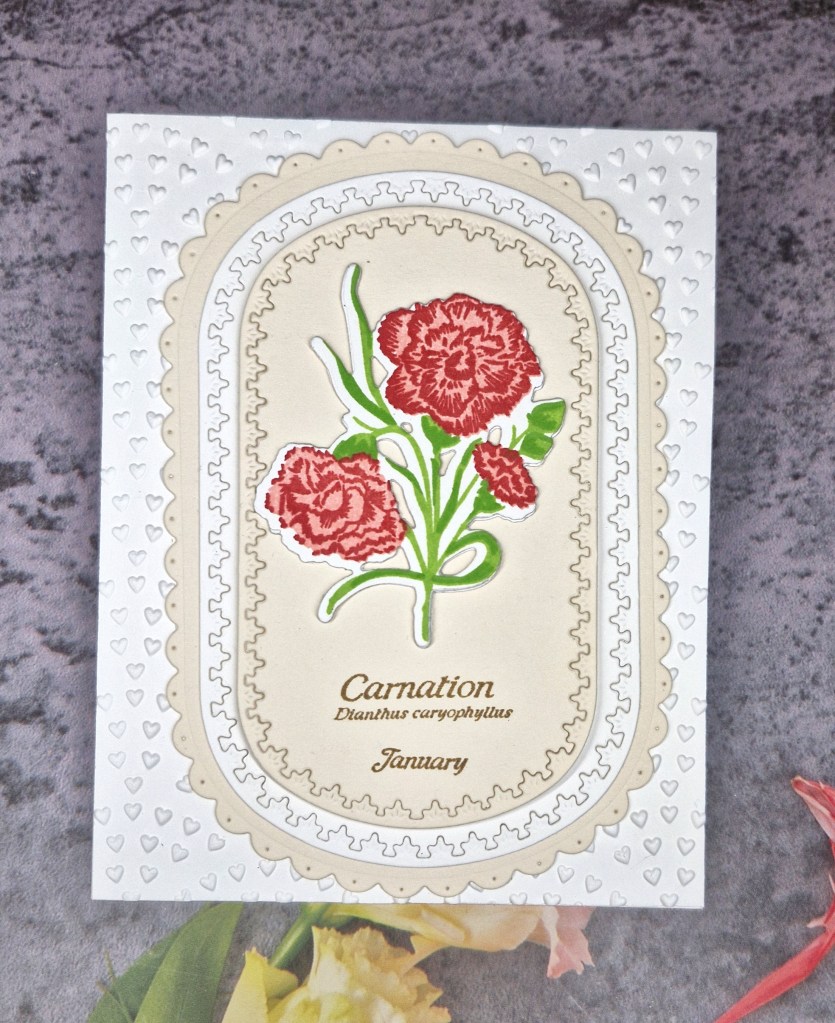
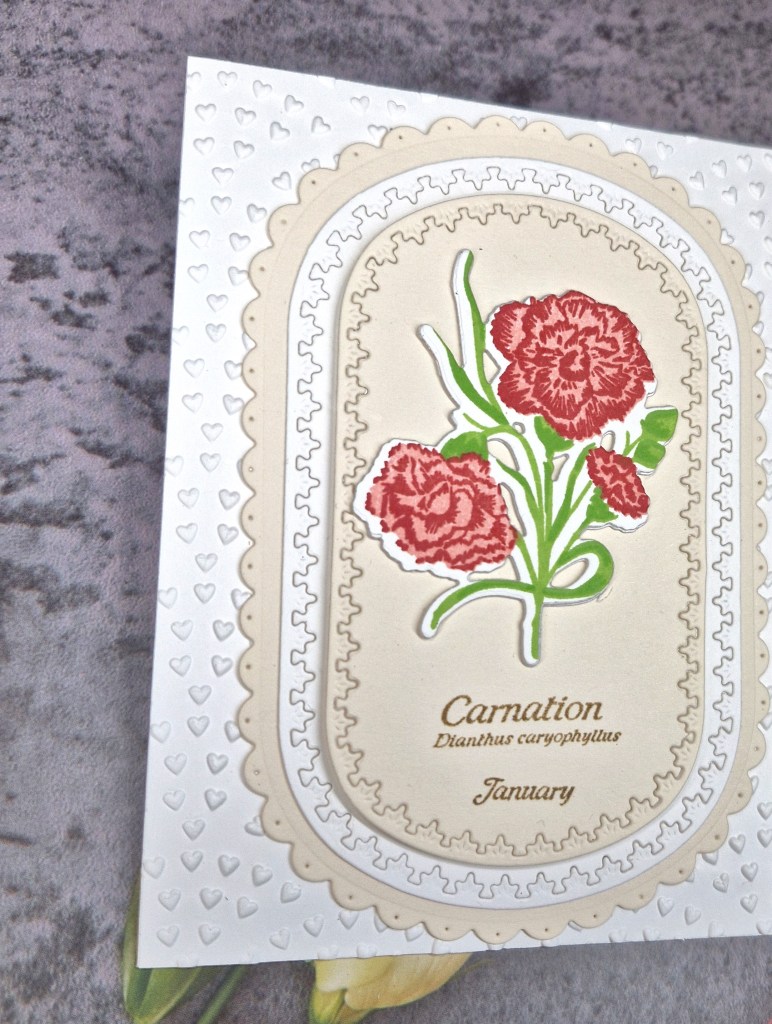
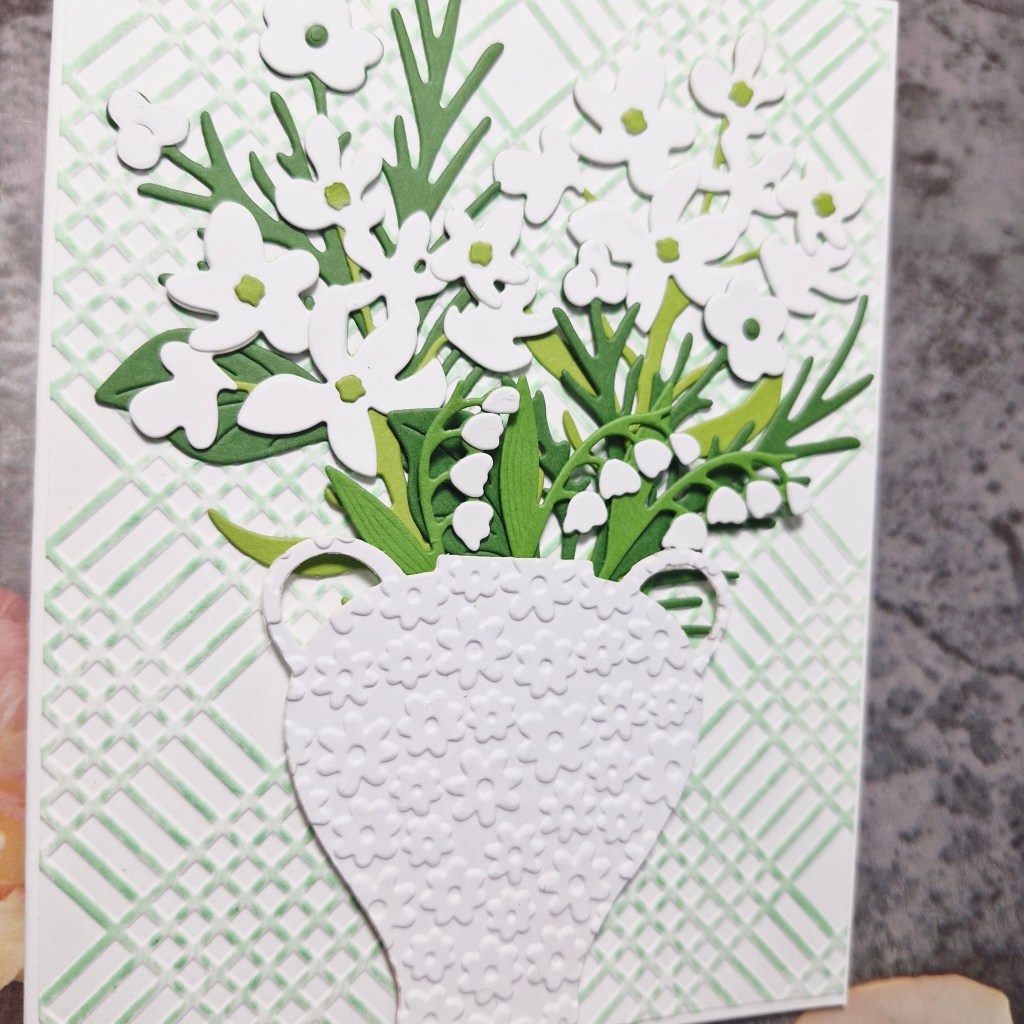
Hello. I made this card the past couple of days inspired by the current challenge at The Card Concept, and their photo inspiration. I was inspired by all the different greens, the white flowers, and the plaid background – as well as the vase, of course:
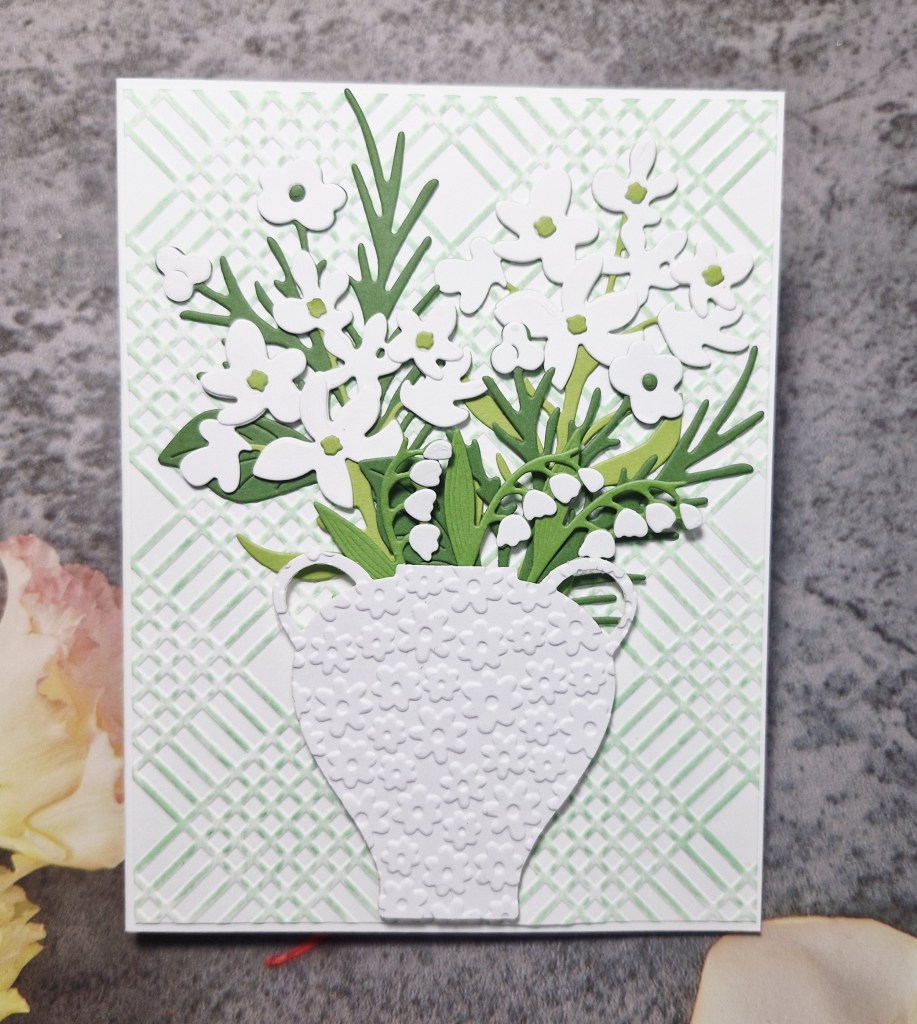
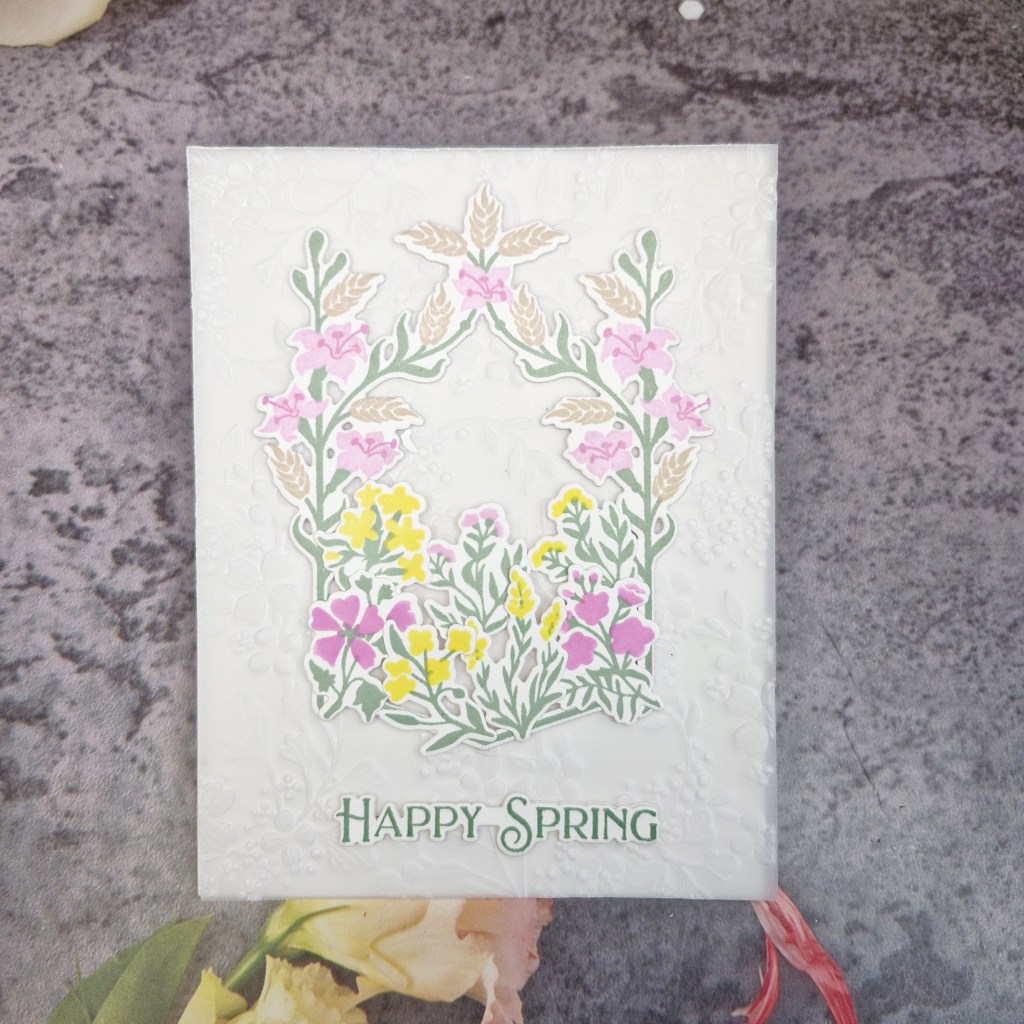
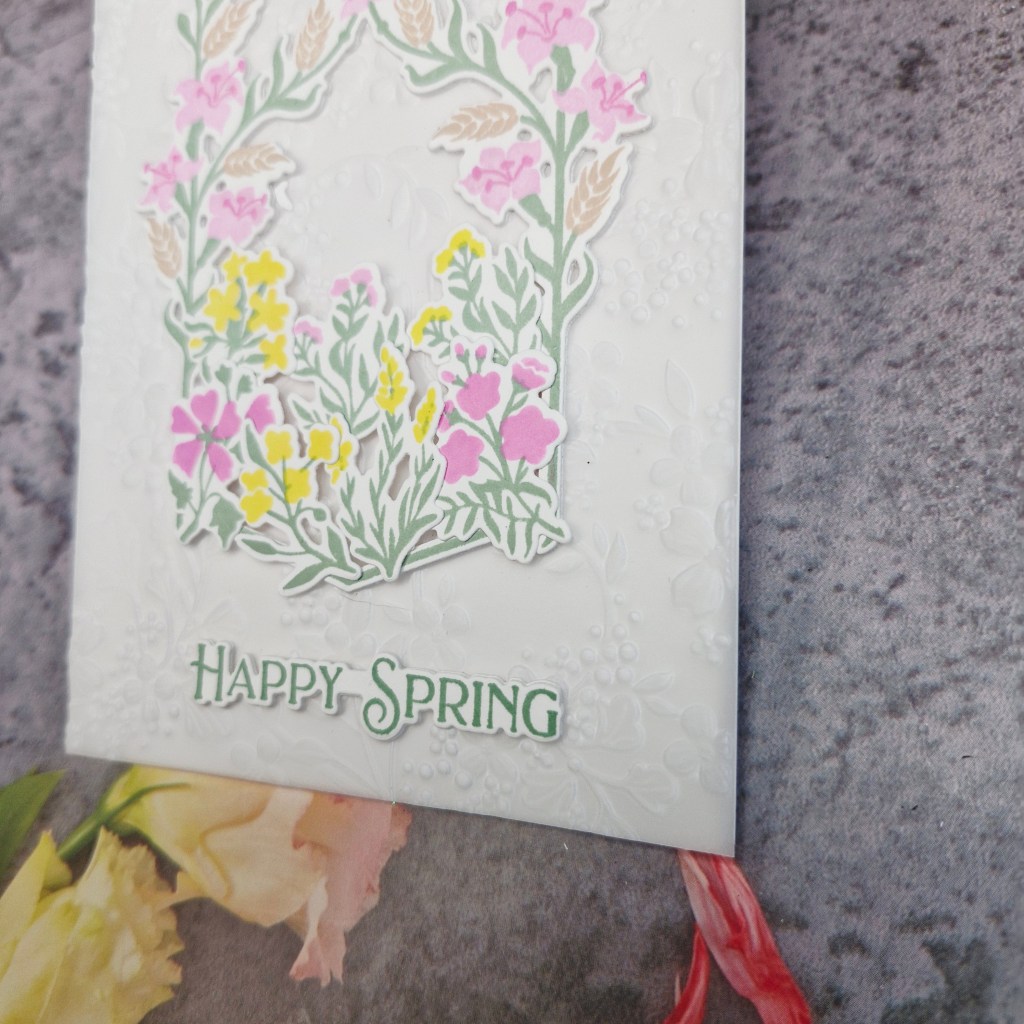
My first job was to search the Color My Life app to find a vase, this one popped up which is from Spellbinders, and one of their ‘Fresh Picked’ die sets. This was die cut twice and layered, for a little more stability, and then run through with an older Darice embossing folder to add detail.
The next step was to search through the app again for a plaid background – this is an embossing folder, again from Spellbinders – which I used with a plain white piece of card, then ran a light green ink pad across the top after embossing, so it ‘grabbed’ the raised areas. This panel was cut down very slightly, and adhered to a white card base.
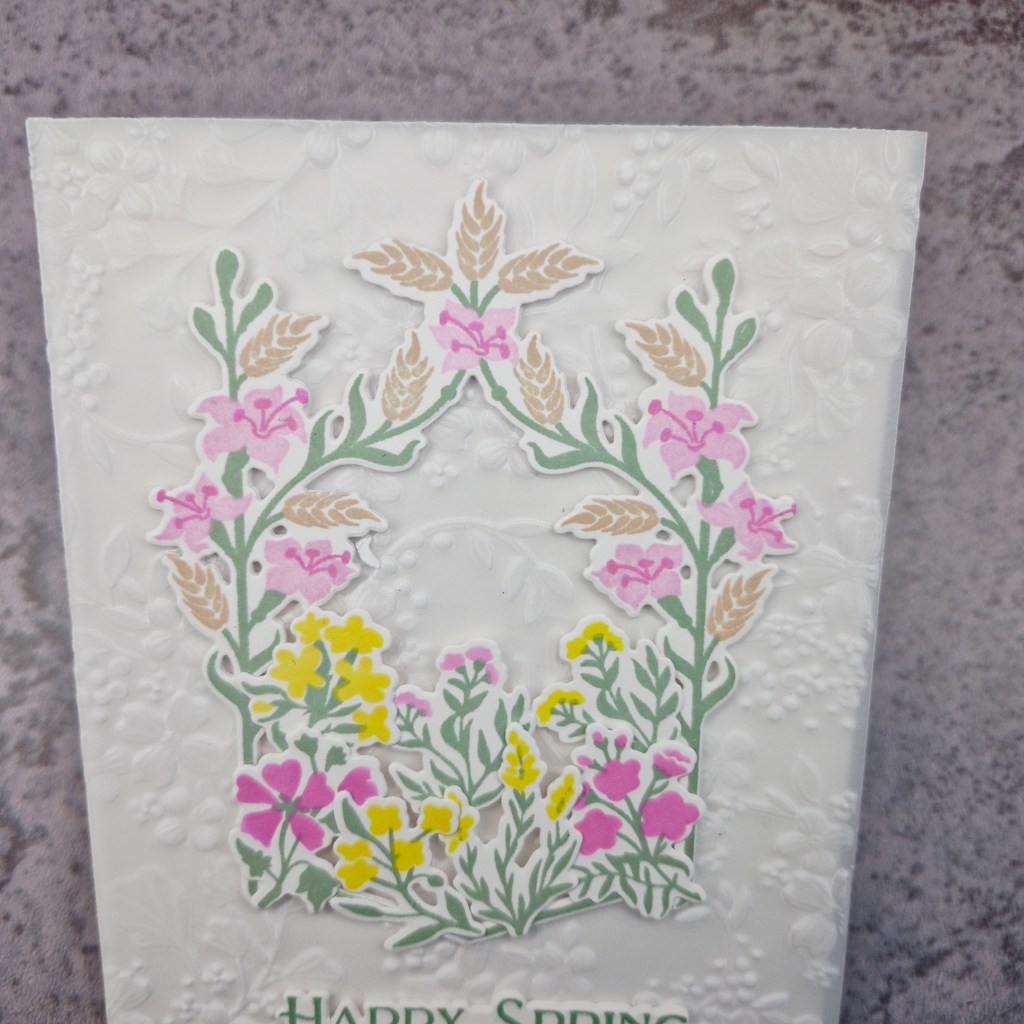
Now to the flowers and foliage – the dies are from The Greetery, die cut with tones of green card from Spellbinders and Concord & 9th for the stems, then die cut again to obtain the white florals, and layering together.
The abundance of floral elements was glued onto the card base – using the vase as a guide – then the vase adhered with 3D foam so it caught the stems.
I was then searching through for sentiments, but didn’t find what I wanted – they all seemed to interfere with the overall look I wanted – so I didn’t add one.
I will be entering th3e following challenges:
The Card Concept – photo inspiration
CYHTP – embossing folder, option of sympathy not taken
Lil Patch of Crafty Friends – anything goes