Hello everyone. I have a card to share inspired by some challenges:
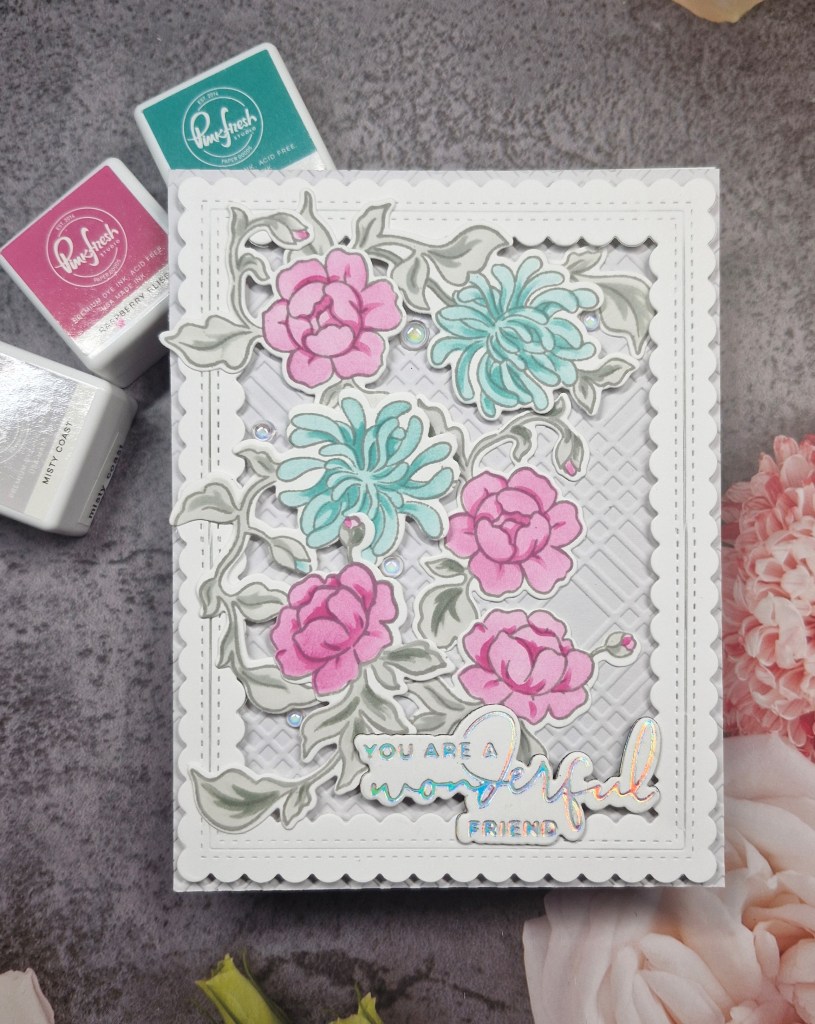
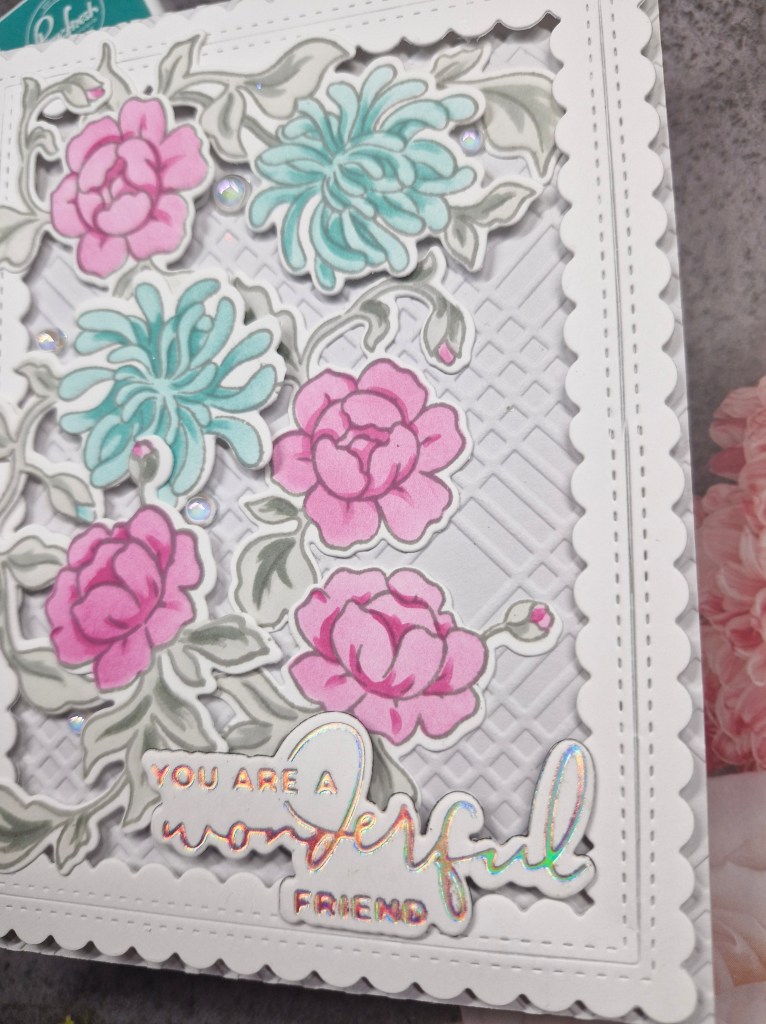
The background is a dry embossed panel using a Spellbinders embossing folder – one of my favourites – and Spellbinders ‘Fog’ card stock, adhered flat to a card base.
The frame is from Pinkfresh Studio, and is actually a square die set, but I did some partial die cutting to make it a rectangle, big enough for the A2 card base.
The flowers – also from Pinkfresh Studio – were stamped in a grey ink, then ink blended using the matching layering stencils, Pinkfresh inks, and then die cut with the matching die set.
I played around with the layout of the flowers until I was happy, and added them with a mixture of glue and 3D foam.
I added the foiled sentiment with 3D foam strips and some iridescent gems, as the foiling is iridescent.
Hello everyone. A new challenge was due to start at The Holly and Ivy Christmas Challenge – anything goes Christmas is our theme – as always, but our leader has been unwell, so there won’t be a challenge for this next two weeks.
I have decided to still post my card for some challenges:
This bauble was created using a Spellbinders die set. There are two baubles in the set, but I chose to use just one of them for this card.
The background is embossed using a Spellbinders embossing folder and blue card stock, then a blue ink blended around the outside to create an almost glowing centre.
The bauble and all the elements were die cut out of red, navy, blue, and silver glitter card stock, then all placed on the main background piece as you see. And – yes – all those itty bitty silver hearts were inlaid back too……a little fiddly, but I think worth it.
I adhered the background panel to a card base, then added the bauble with 3D foam, also adding some silver twine behind the top of it- I failed doing a bow soooo many times, that I decided the twine was good as it looks here.
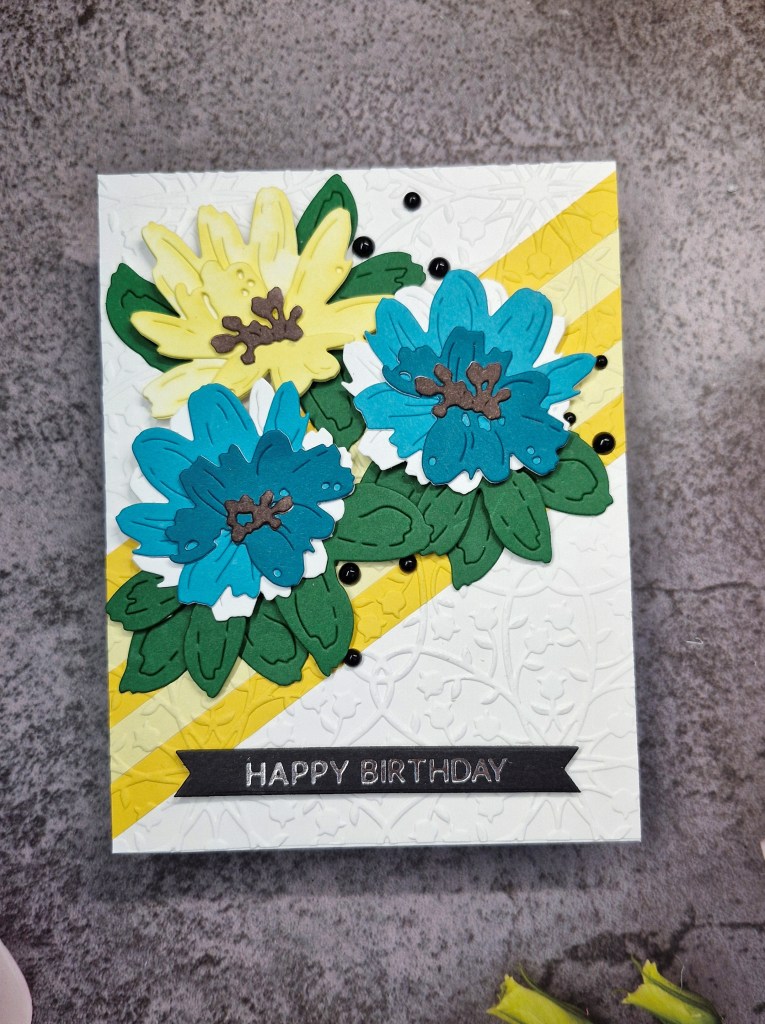
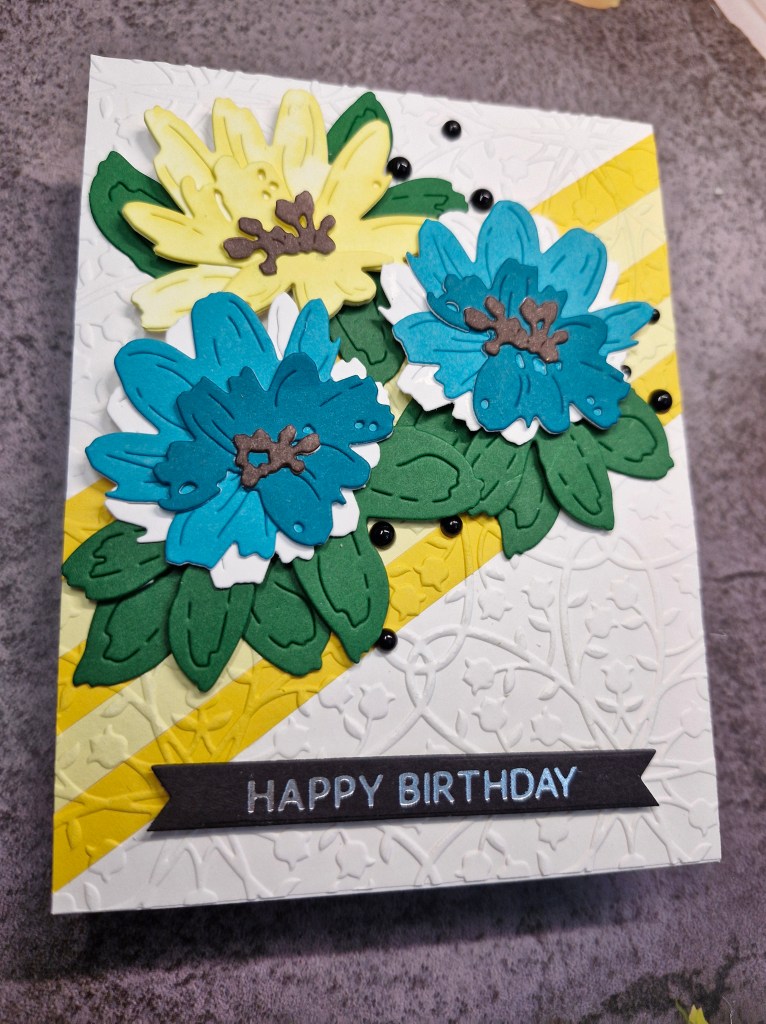
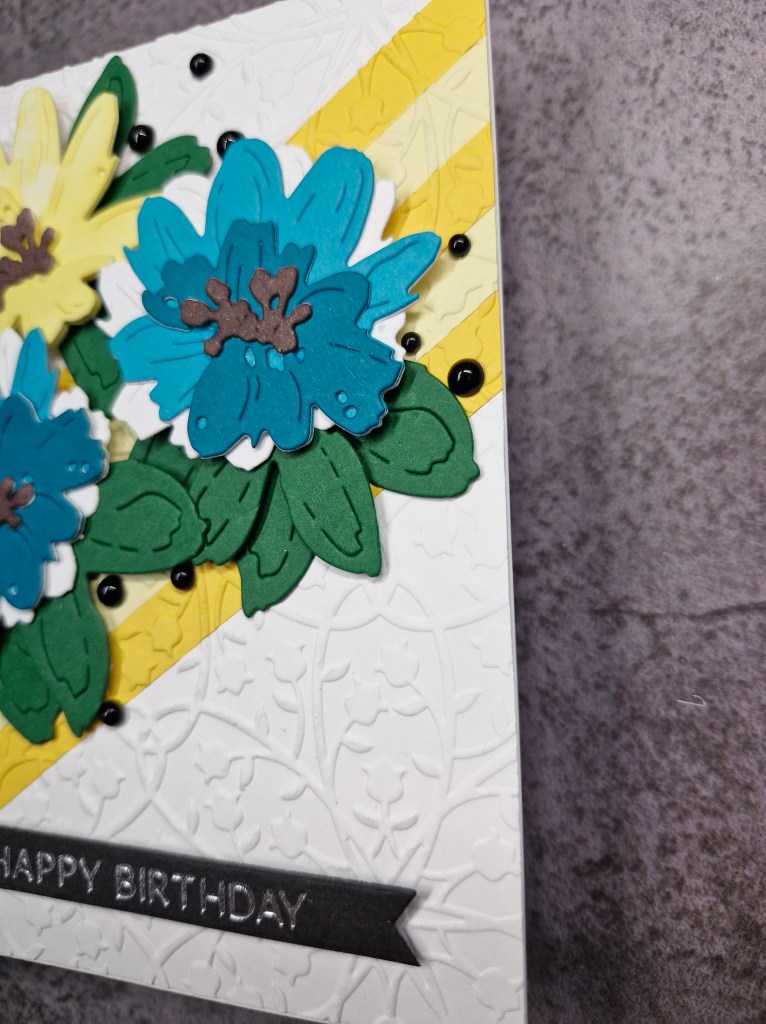
Hello again. I haven’t posted for a few days, but I have been playing in my craft room. I have done a little mixed media project from a virtual event last weekend, and I will show what I have made at some point, but for today I have this card to share:
The background panel was created by adding some diagonal yellow strips of card, then dry embossed using a Spellbinders embossing folder. This way, the embossed pattern ran across the whole panel.
The layered flowers are from a die set from Waffle Flower, and I used some older Altenew ombre card packs to create them, colouring the centre parts with a Copic marker.
Once they were layered, I decided to add a white layer beneath the teal/aqua flowers, so they stood out a little more from the background.
I chose a dark green for the leaves to make them really pop.
I was going to go with just the teal/aqua flowers, but decided to add the yellow ink blended flower to complete the trio.
The foiled sentiment was added, and as I chose a black foiled strip, I added some black gems, also from Spellbinders.
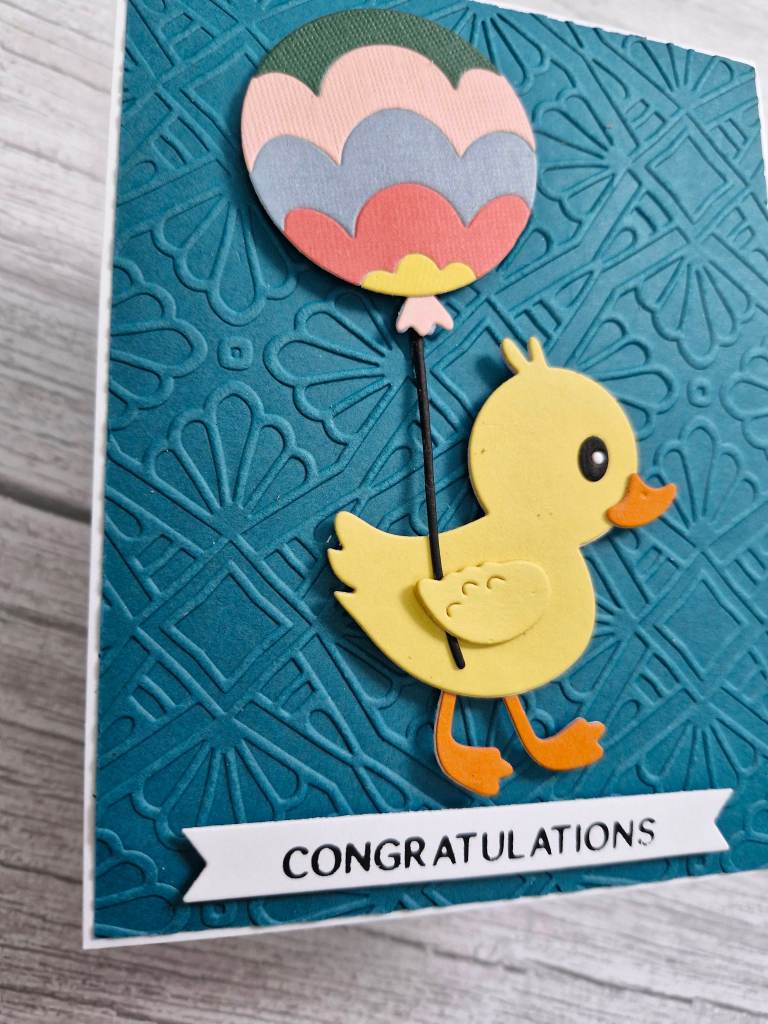
Hello once again. Cardz 4 Galz has started a new challenge. Helen has chosen the them of ‘Cute Animals’ Here is my card:
I just had to use this cute little duck again, so I die cut the elements and layered them together, leaving a little piece under the wing unglued to add the balloon string.
The balloon was die cut several times to get all the colours to layer.
Once the duck and balloon were sorted, I used an embossing folder to create the background – I wanted a bright and colourful card, and thought the little duck would stand out from this colour.
The sentiment is foiled and added somewhat as a grounding for the duck.
I am from an area in England where we call everyone ‘duck’ – a term of affection – to strangers and friends alike. I believe this is sometimes a little difficult for people to appreciate if you aren’t from the Sheffield/Yorkshire area – but if anyone from England calls you ‘duck’ – then take it as a friendly greeting……xx
I hope you can come and join us with your cute animal themed creations. xx
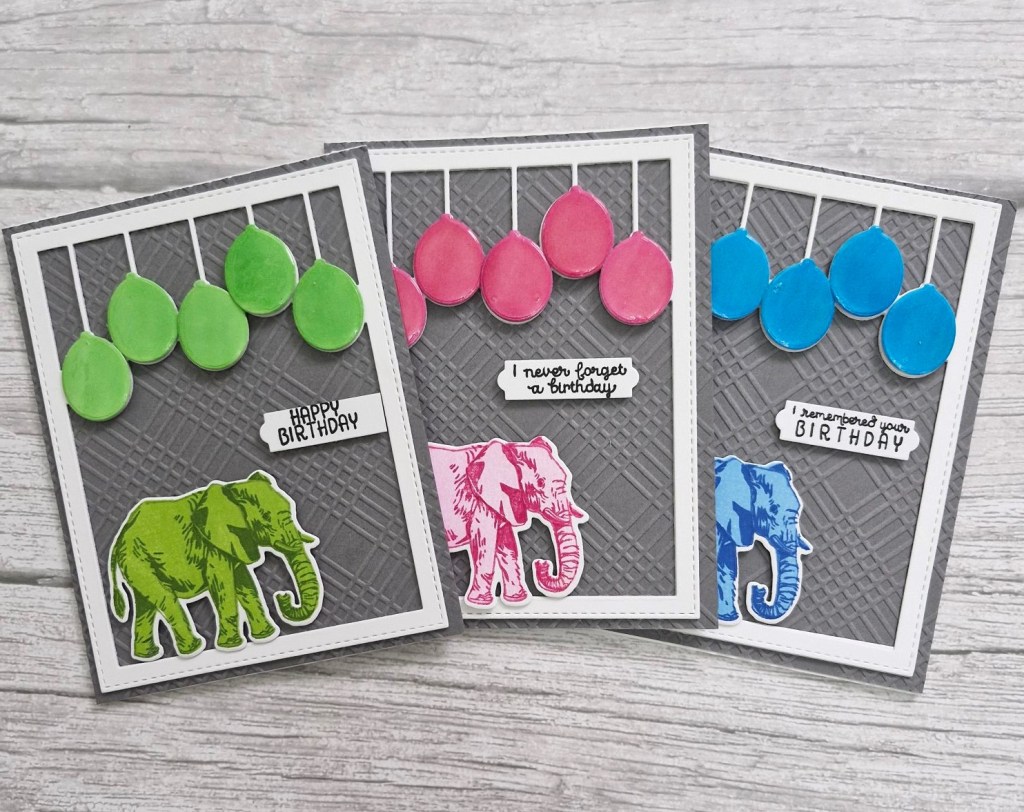
At The Alphabet Challenge, we have reached the letter ‘Z‘. Deborah has chosen the theme of ‘Z is for Zoology‘. We want to see your projects featuring animals Here are my cards:
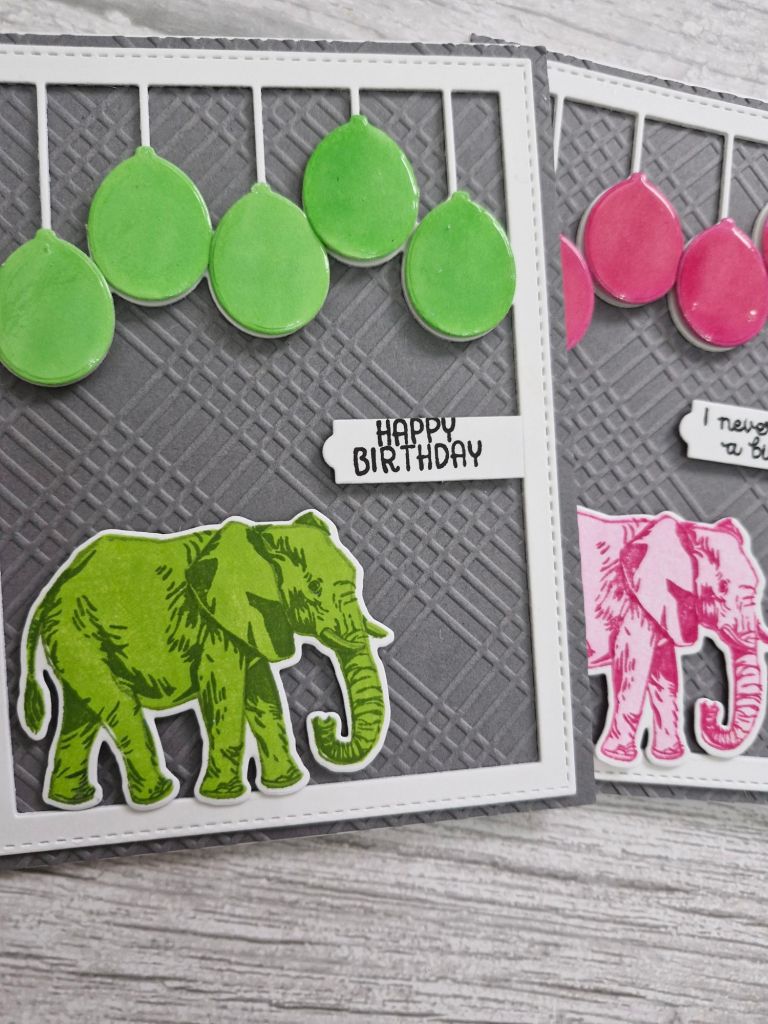
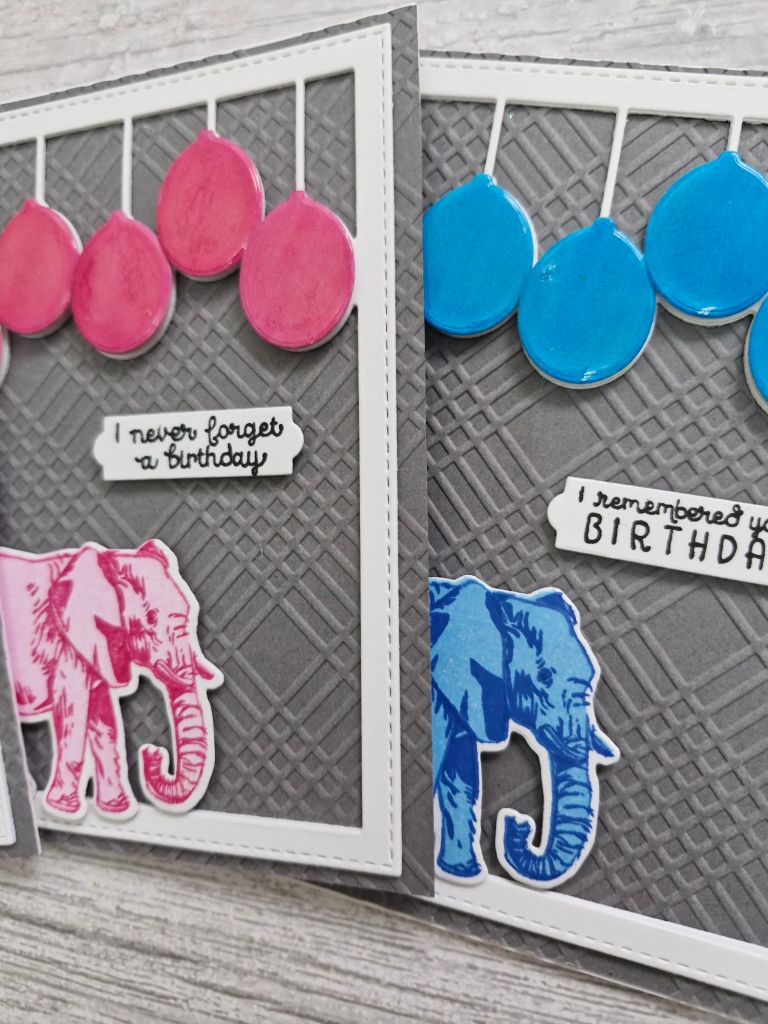
I decided to make the background grey and have the elephants in colour. A flip-around really.
The background is dry embossed using a Spellbinders embossing folder.
The elephants were stamped using the ‘Color Layering Elephant’ from Hero Arts, in tones of the colours you see. Once stamped, they were die cut and set to one side.
The balloon background panel is from My Favourite Things, and inverted. I have seen most projects with the balloons coming up from the bottom, but I wanted mine to come from the top.
Once that balloon panel was cut, I used some Copics which matched each elephant, coloured some pieces of card, then used a balloon die to cut them out, gluing them to the white balloons on the background panel.
I attached the elephant, stamped and attached the sentiment, then added glossy accents to the balloons.
I hope you can come and join us with your projects following our theme. xx
I shall be entering the following challenges:
We Love 2 Create – anything goes mixed media (die inks, Copics, glossy accents)
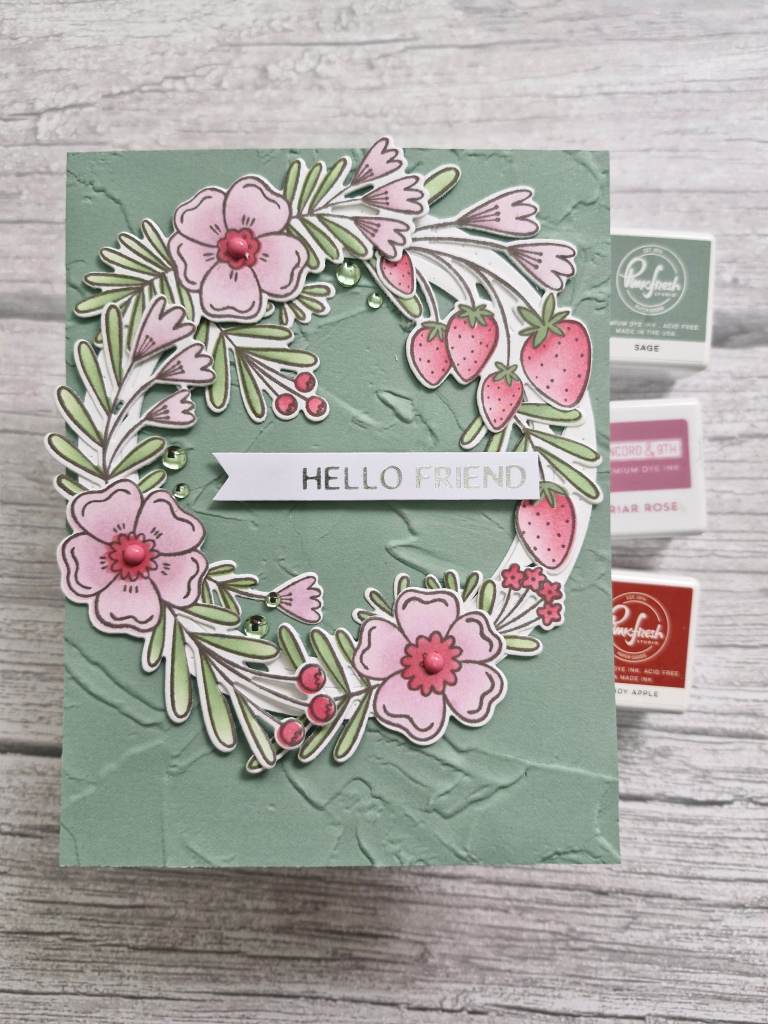
Hello there. I have been absent for a few days as I was trying to catch up with some virtual events I had over the past few weeks. All card making and crafting of course. One of the stamp, stencil and die sets I have used for this card is from the Pinkfresh Studio Create and Connect event:
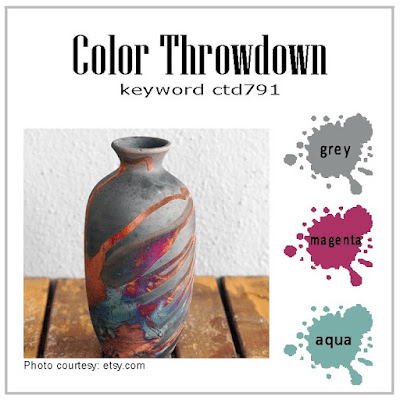
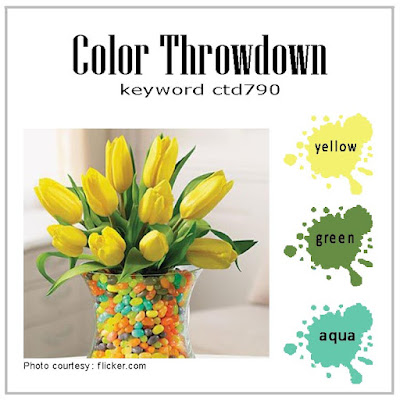
I first stamped the A2 floral image with a light grey ink using my Misti, and kept the stamp on the lid. I then ink blended using the current colours from Color Throwdown, and the three inks you see in the picture.
The layering stencils – of which there are five for this image – were all used, but I did use different colours on one layer of some of the stencils. I also tried to create some dimension on the same image with the same ink – heavy handed to one side, and lighter hand to the other.
Once ink blended, I replaced the panel back into the Misti, then stamped the image again with a darker colour a browny grey – I thought black would be too stark. Lessoned learned from the Pinkfresh event – stamping again after you ink blended……it is a heart-stopping moment, and I have made mistakes in the past – but trust the Misti, and ensure your panel is in the corner each time you stamp.
The whole panel was die cut with the matching die – which cuts all the elements out in one pass through the die cutting machine.
The background is a piece of Sage card stock from Spellbinders, dry embossed using an older embossing folder from Stampin’ Up, then glued flat to the white card base.
I then used the Fancy Circles die set – also from Pinkfresh Studio – and die cut the large circle three times, die cut the centre out with another of the circles, then layered them together for a more substantial circular base for my wreath. I could have used any nesting circles, but at this point I wasn’t sure if any of the circle would be showing until I had arranged my elements.
The circle was glued to the embossed panel, and the images arranged, adhered with glue, and the smaller pieces tucked in where I thought they were needed.
The sentiment is heat foiled and added as you see, and some green gems glued around.
I do like to attend the virtual events from several companies in the United States, and even though there are added customs charges to some of them, I find the event itself, the instructors, and the way they are organised is something I will keep doing. I have ‘rationalised’ the events I attend though………..kinda……!
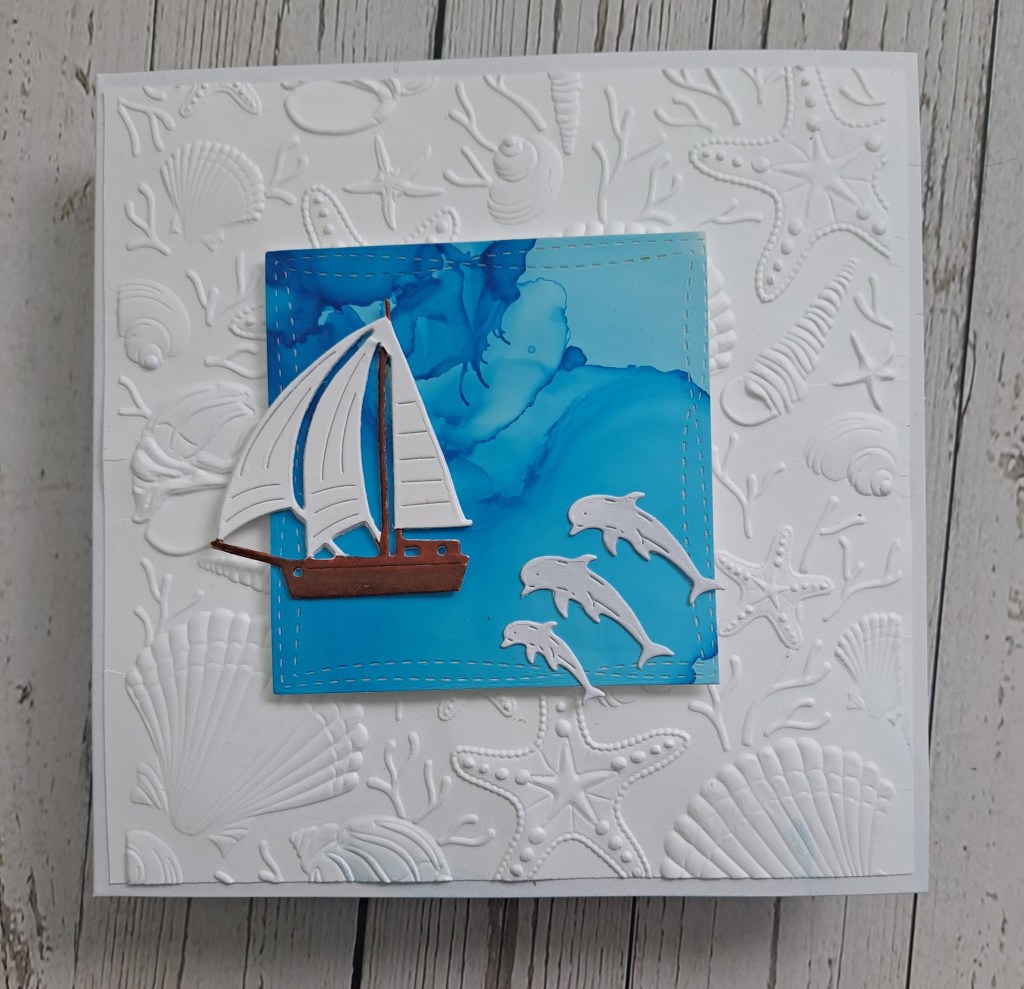
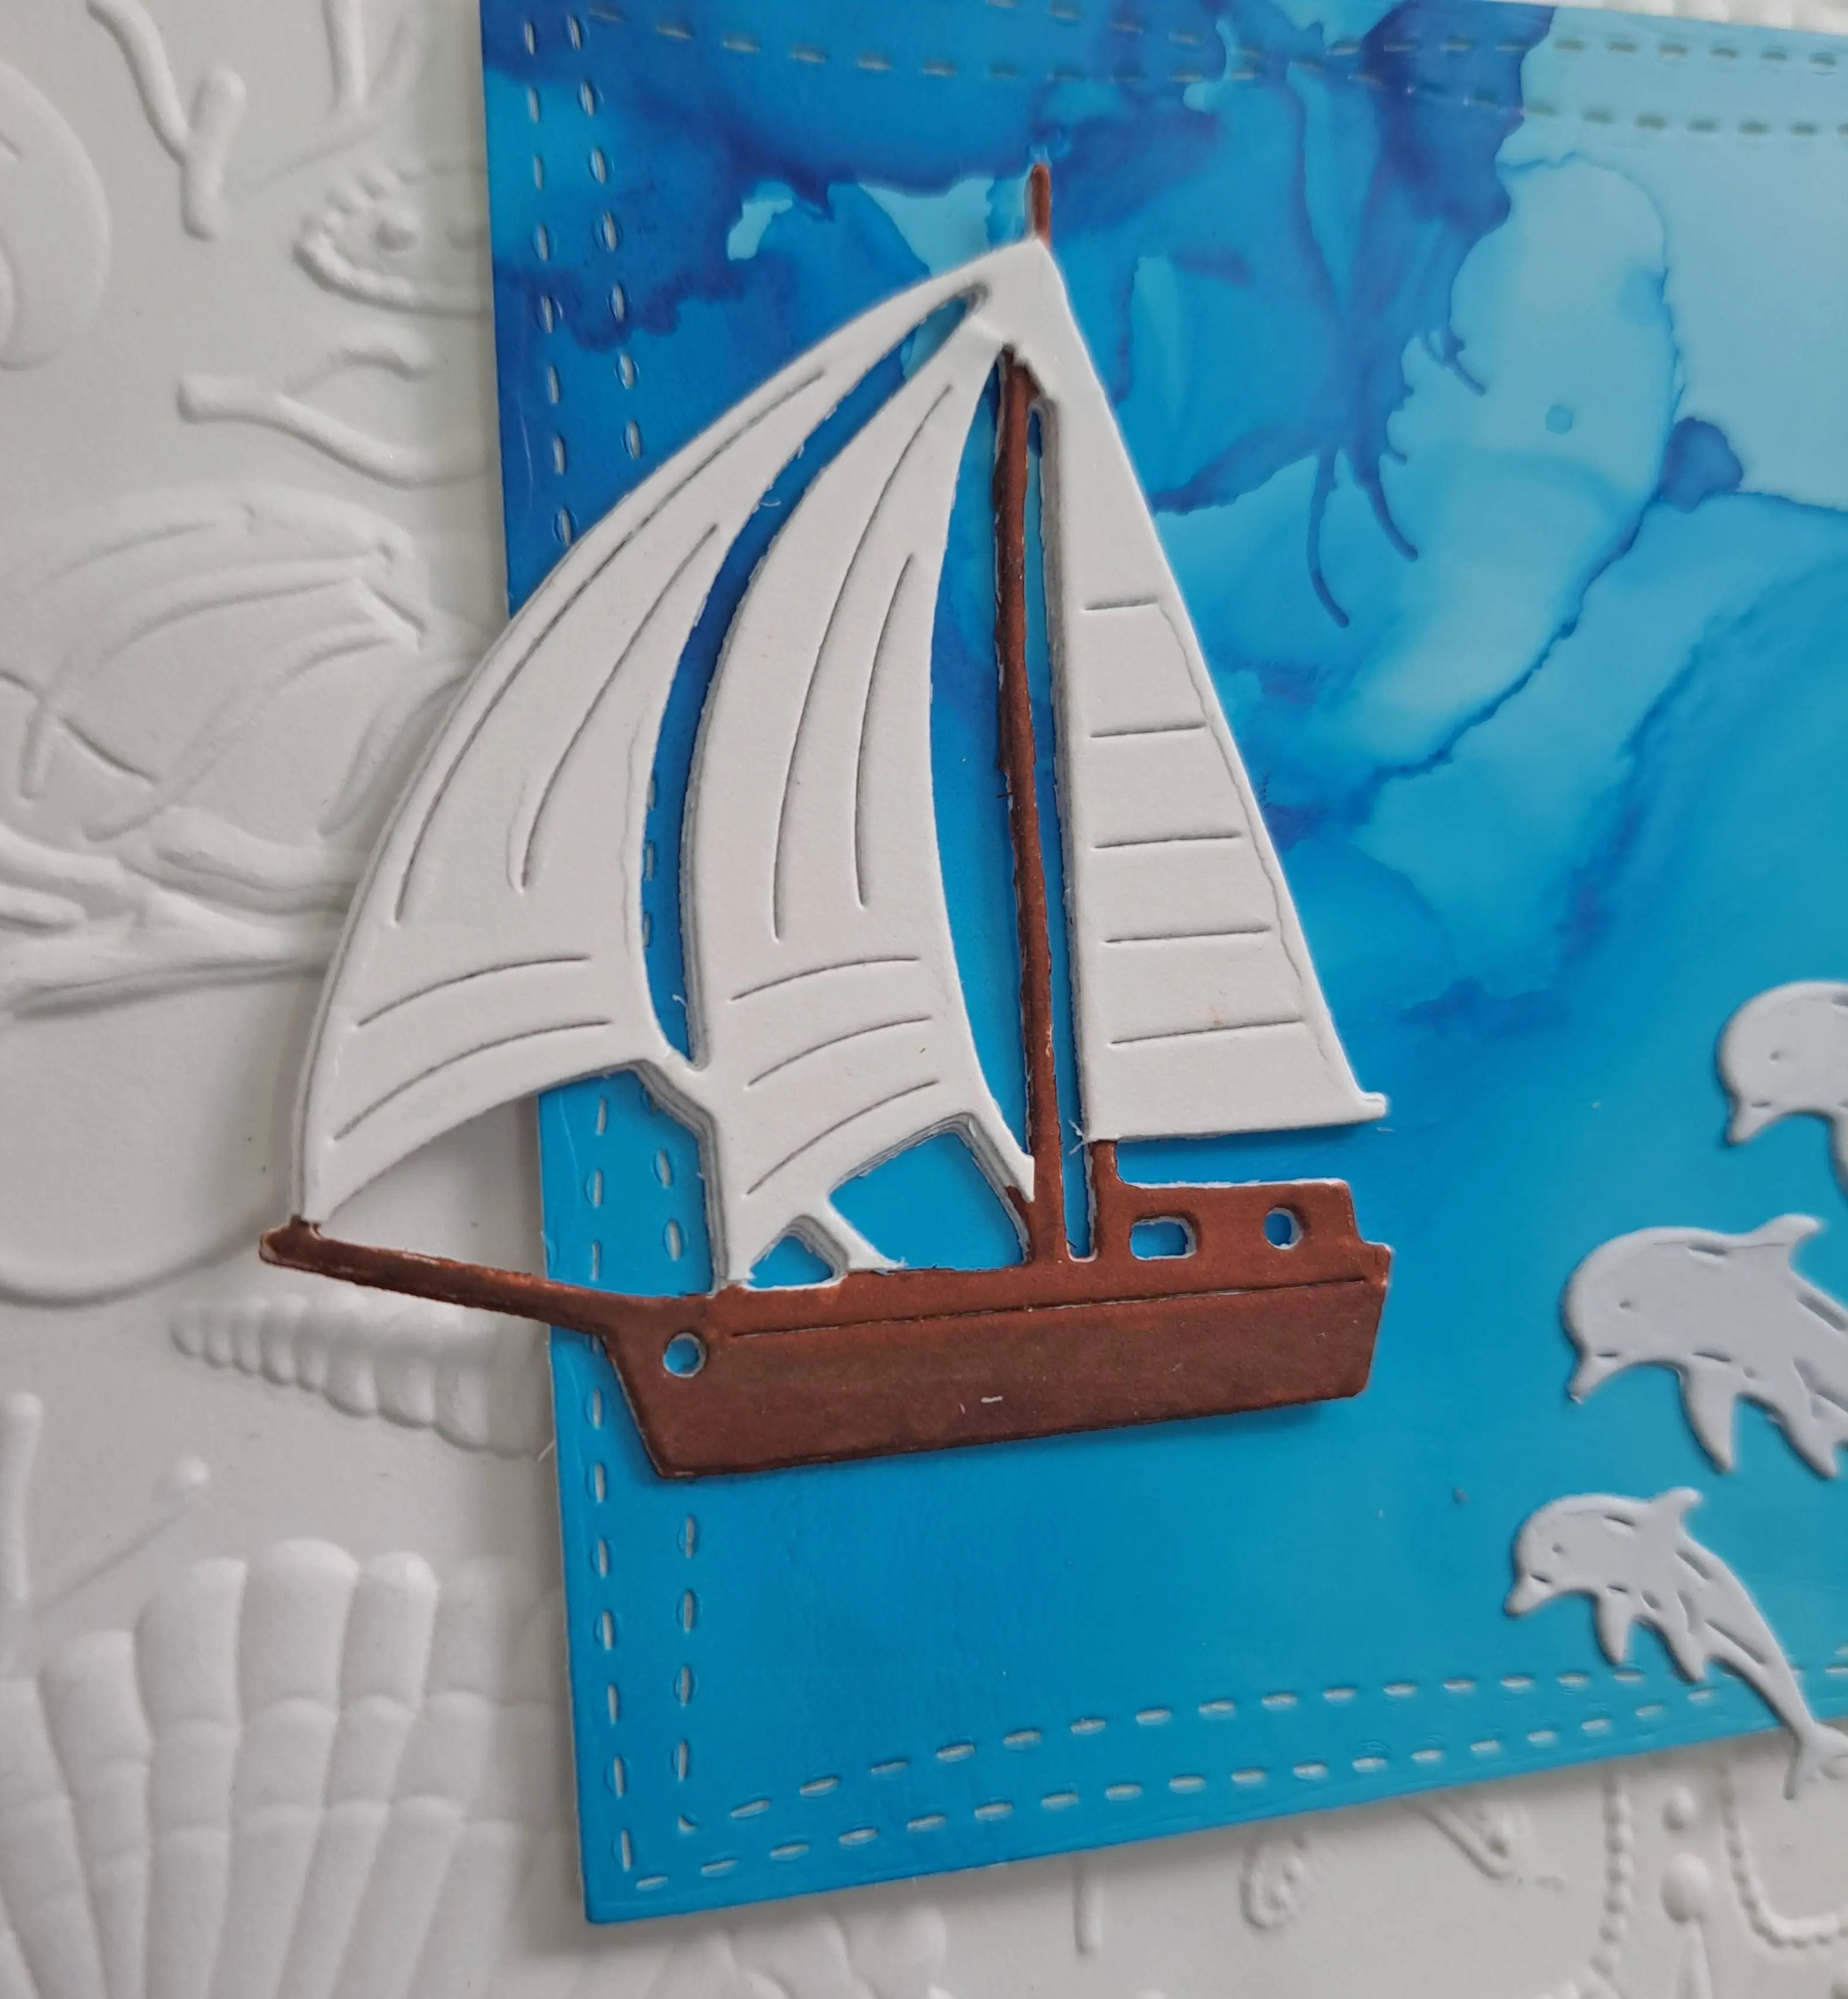
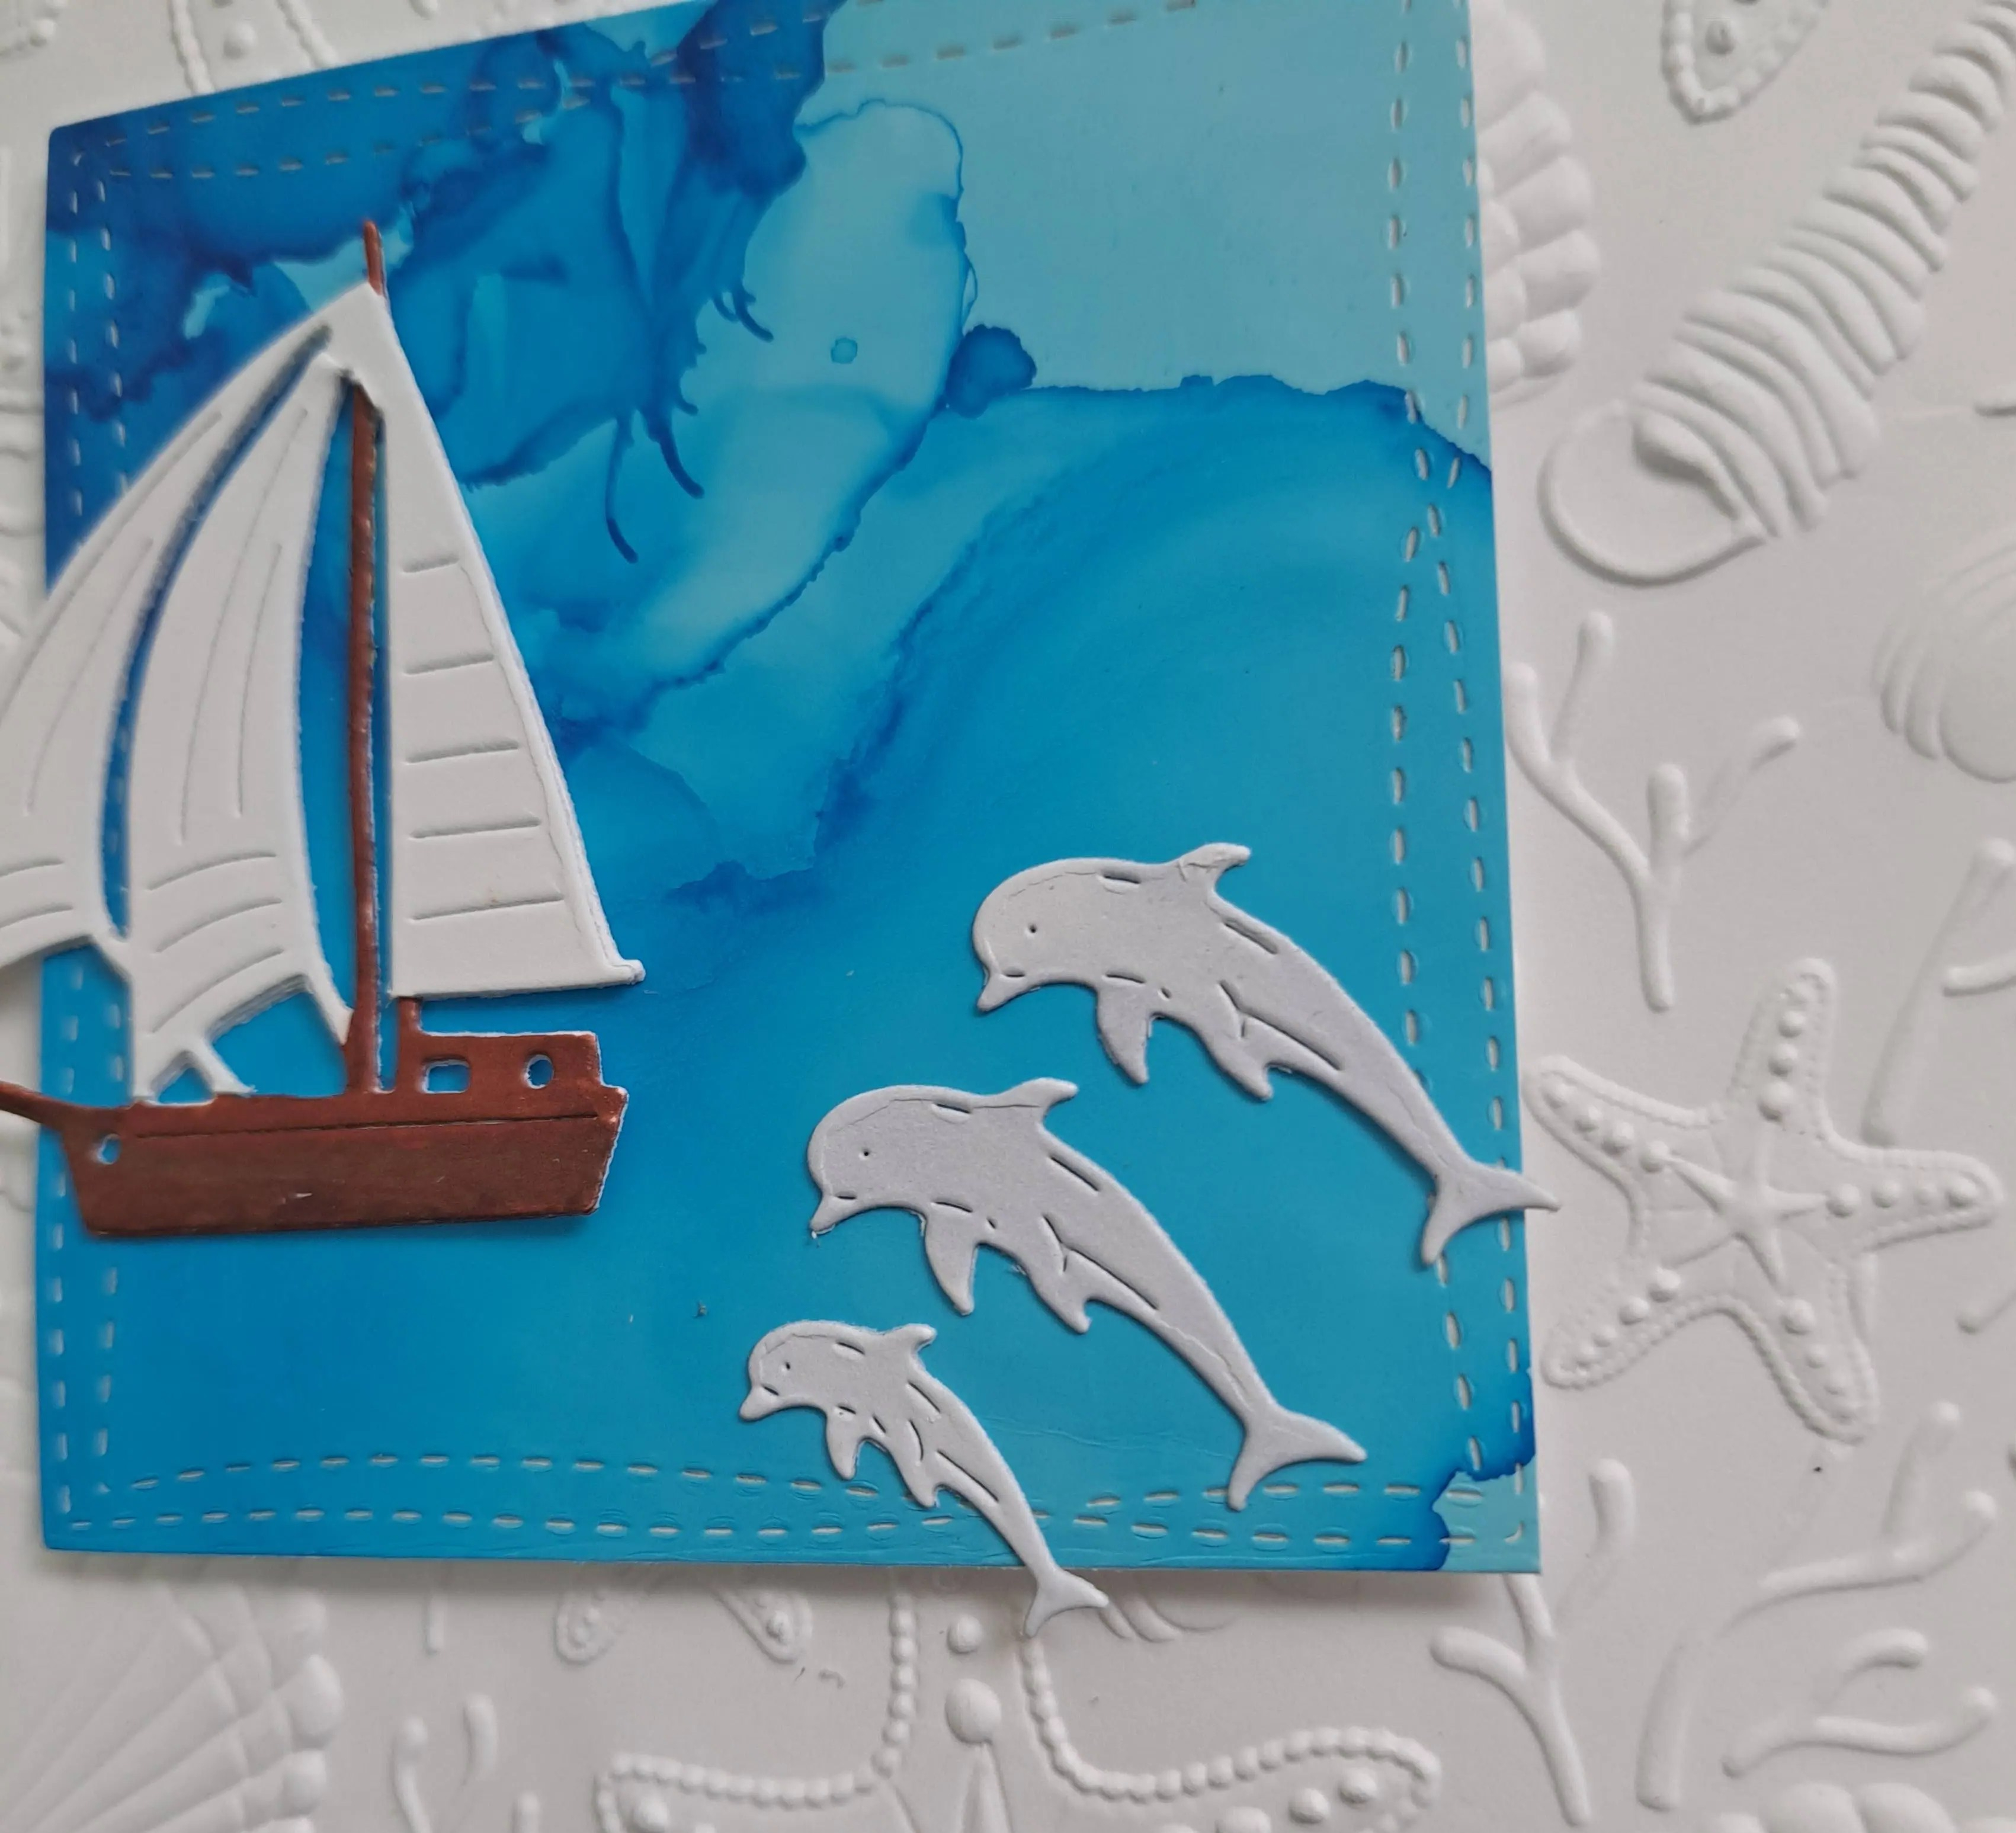
Hello again. Cardz 4 Galz has started a new challenge. Johanna has chosen the theme of ‘Sea Scape’ Here is my card:
The boat and dolphins are from a die set from Charlie and Paulchen. I started by die cutting the boat twice out of white card stock. On one of the boat die cuts, I coloured the mast and boat itself with a couple of brown Zigs, then the other white die cut I snipped the sails from and adhered onto the coloured die cut.
The dolphins I coloured with a grey Copic marker.
I then die cut a square out of a piece of Yupo paper I had used my alcohol inks on, and arranged the boat and dolphins as you see. I thought the wonky stitching on this die set would look like waves and add more interest.
I thought the blue alcohol inks looked like there was a swirly weather ahead and the dolphins were chasing the boat to warn it…….the way my mind works sometimes astounds me……
The white background panel was created using a Spellbinders embossing folder to continue to nautical theme.
I hope you can come and join us with your sea scape creations. xx
I shall be entering the following challenges:
We Love To Create – anything goes mixed media (Zigs, Copics, alcohol inks)
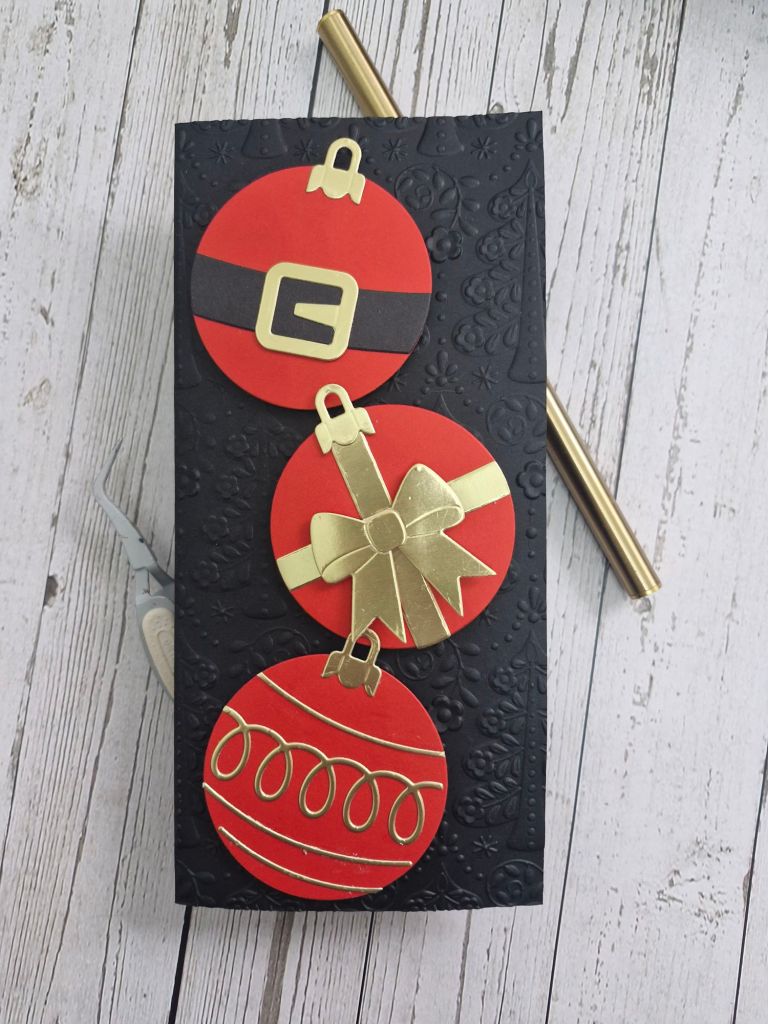
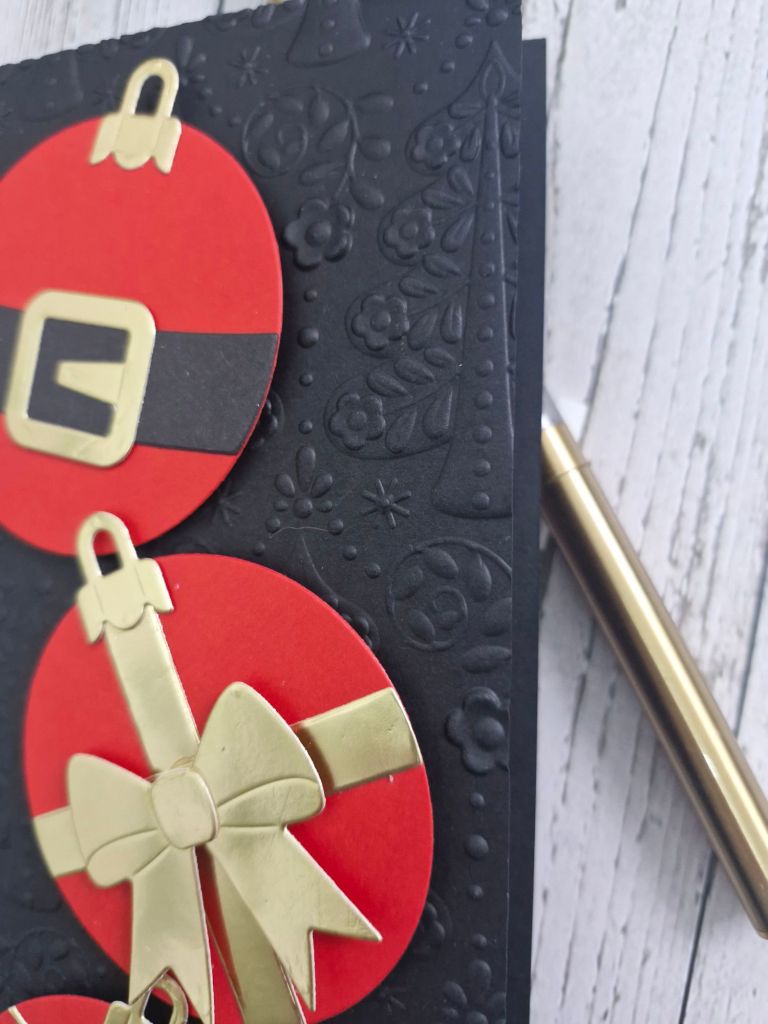
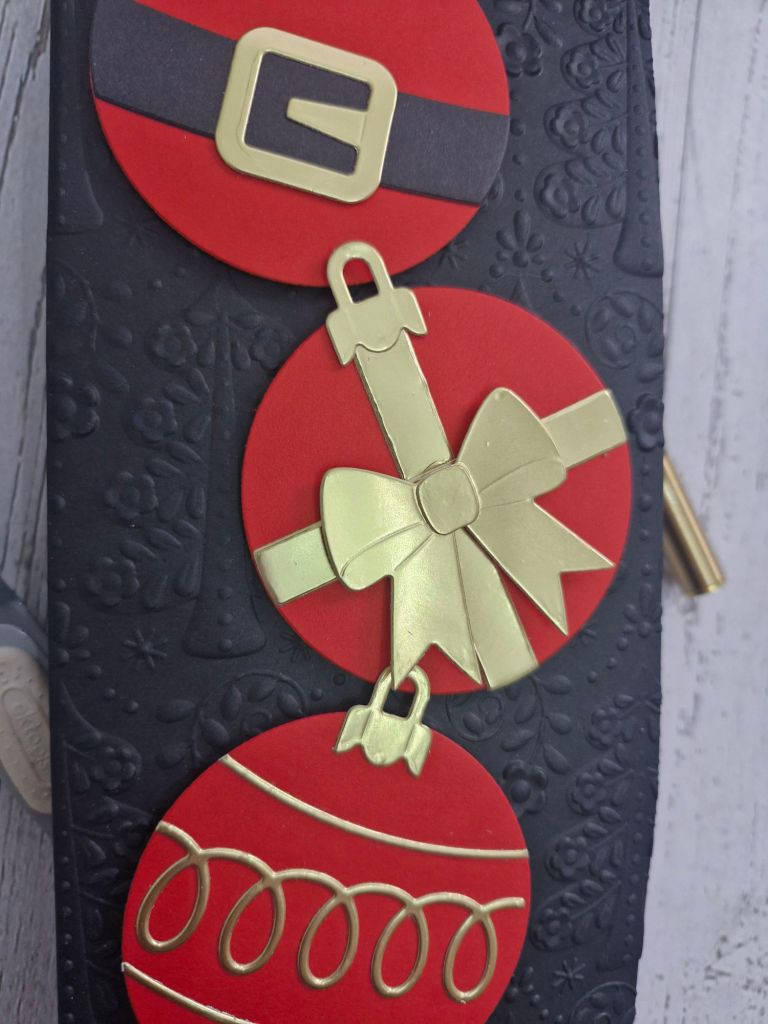
I chose to go with a slimline card so I could arrange three of these large baubles from Spellbinders. I first die cut all the elements for the baubles in red, gold, and black, then assembled them before I thought of the background.
I did think of adding a panel to a white card base, but just to make things a teensy bit more difficult for me, I used a black card base. This was too plain, so I dry embossed the card front using a Spellbinders embossing folder. These embossing folders are large, they measure 3.5 x 8.5 inches, so virtually any card size could be used this way – you just have to make sure the edge of the embossing folder meets the fold of the card base just right….
I toyed with the idea of adding twine to the top of the baubles but I had no-where for the twine to adhere on the back as this was the actual card front. So I adhered with 3D foam and at a jaunty angle.
No sentiment for this card. I’ll attach a white panel on the inside when it comes time to send this, and add a verse or sentiment that way.
I hope you can come and join us with your Christmas creations. xx
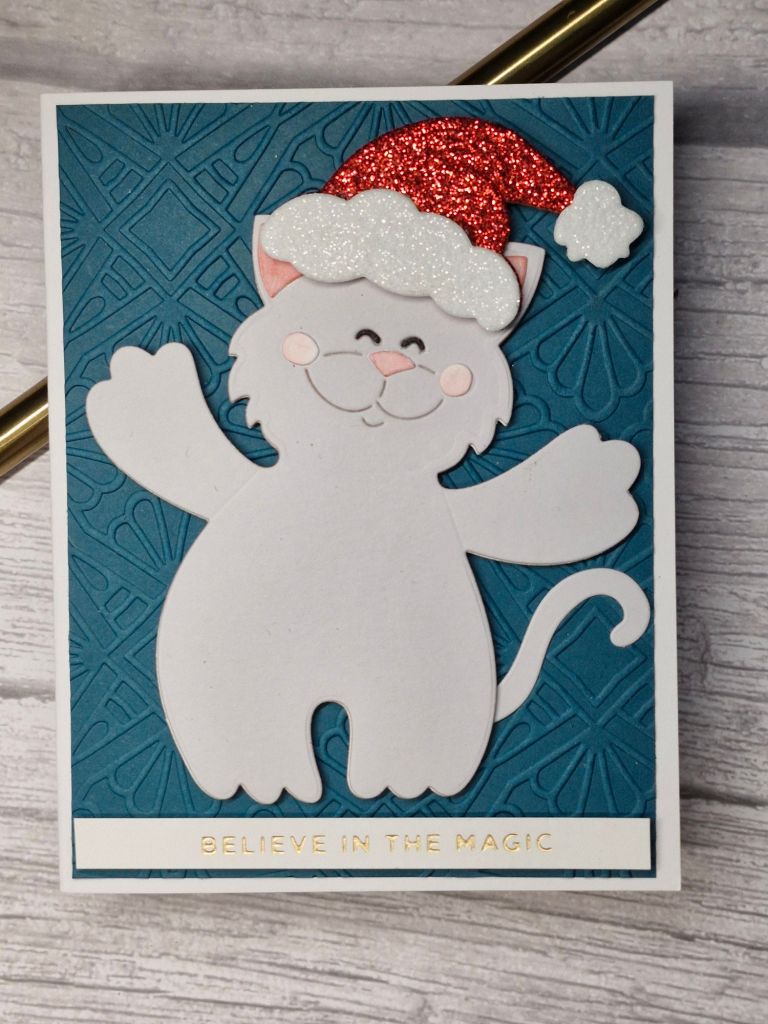
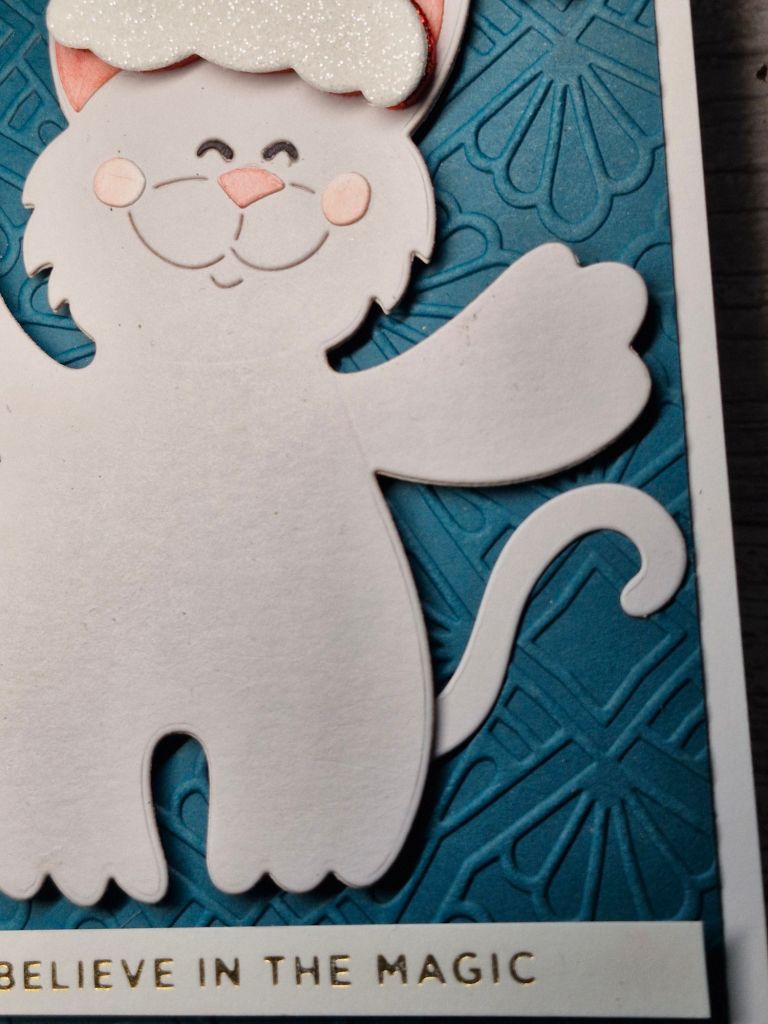
The ABC Christmas Challenge has reached the letters ‘C‘ and ‘D‘, Helene is hosting this time round, and we have the themes of ‘Cats’ and ‘Dogs‘ – Christmas of course. Here is my card:
I used this large cat die set from Spellbinders/Stampendous to create the cat. A few layers to him, but quickly put together. I coloured the ears, nose and mouth before adding them.
I wanted a hat large enough to be able to fit his head, so searched the CML app to find one in my stash. I Saw this – also from Spellbinders – so I die cut the two layers from glitter foam.
I then chose the colour background which would enable to cat to stand proud and used an embossing folder. The sentiment is from a previous foiling session
I hope you can come and join us with your Christmas creations featuring a cat and/or dog – the Design Team has some fabulous inspiration for you. xx
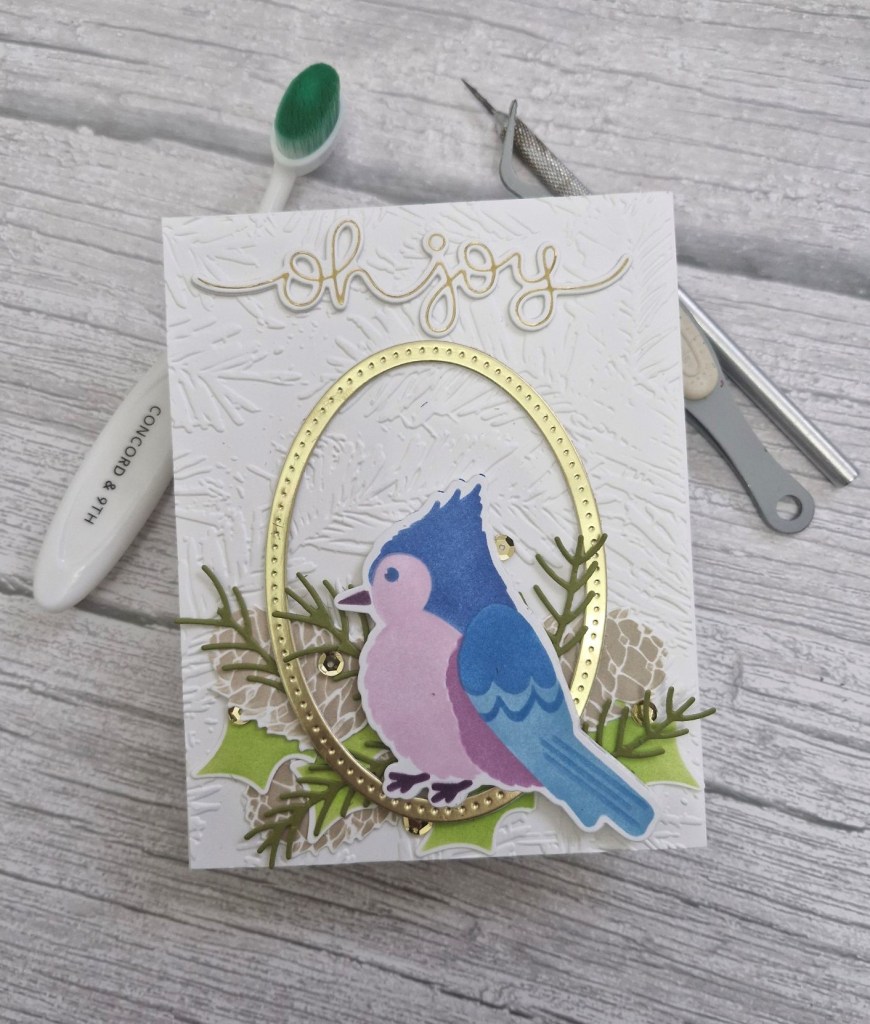
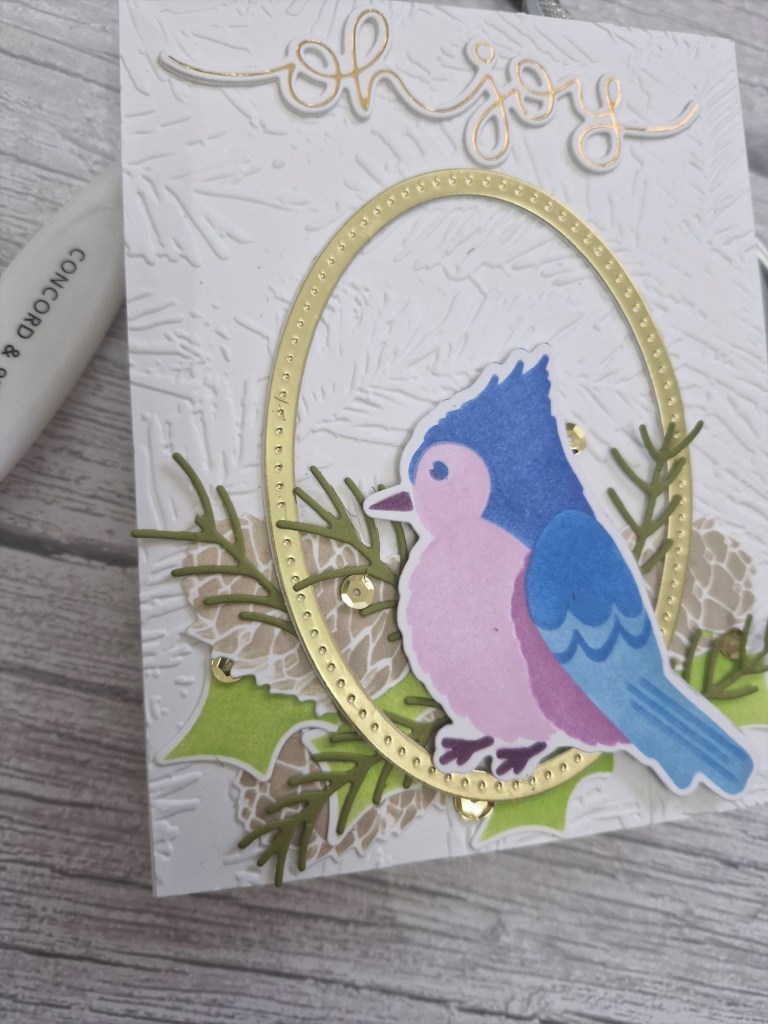
The Holly and Ivy Christmas Challenge has started their new challenge – the theme is always ‘anything goes Christmas’. Here is my card:
I decided it was time to use some products I had received as part of a virtual event last year. I hadn’t gone through the classes at all, so I am trying to use the products, even though I wasn’t following the actual classes.
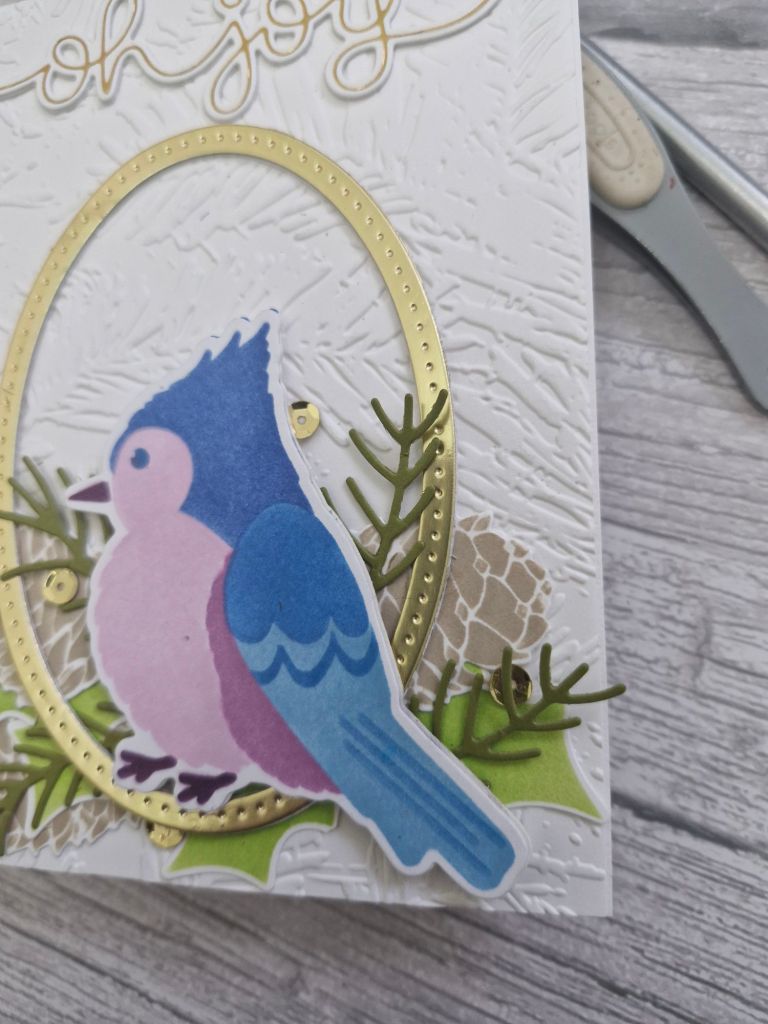
The background is a Spellbinders embossing folder, and onto that I adhered the stitched oval which was layered three times, the top layer being the gold layer. I only attached the top half of the oval initially, as I knew I wanted to layer some foliage under it.
The bird is a layering stencil from the SCT class, die cut then stencil – easier to layer that way. I then sued a stencil for the holly and the pine cone, then used the matching dies for those.
The bird was attached first with 3D foam strategically placed, then the foliage elements inserted.
The foiled sentiment from Lawn Fawn was added, and then some gold sequins.
I hope you can come and join us, it would be great to see you in our gallery. xx
I shall be entering the following challenges:
Ellibelle’s Corner – something old and/or something new (new layering stencils)