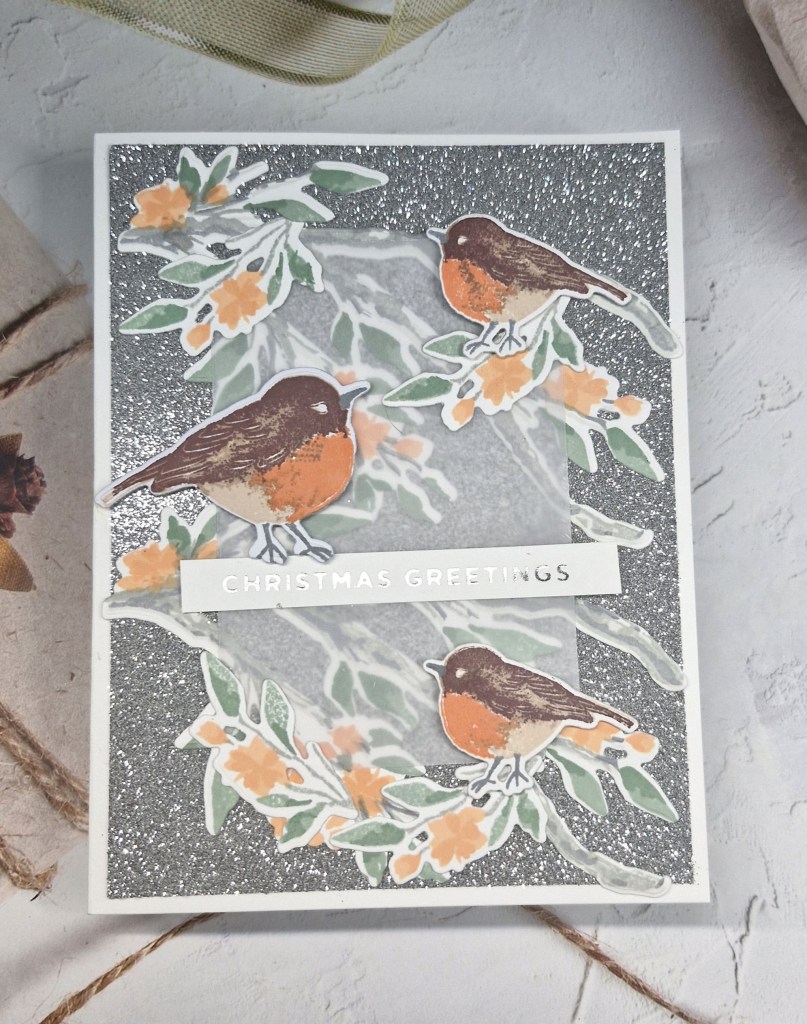
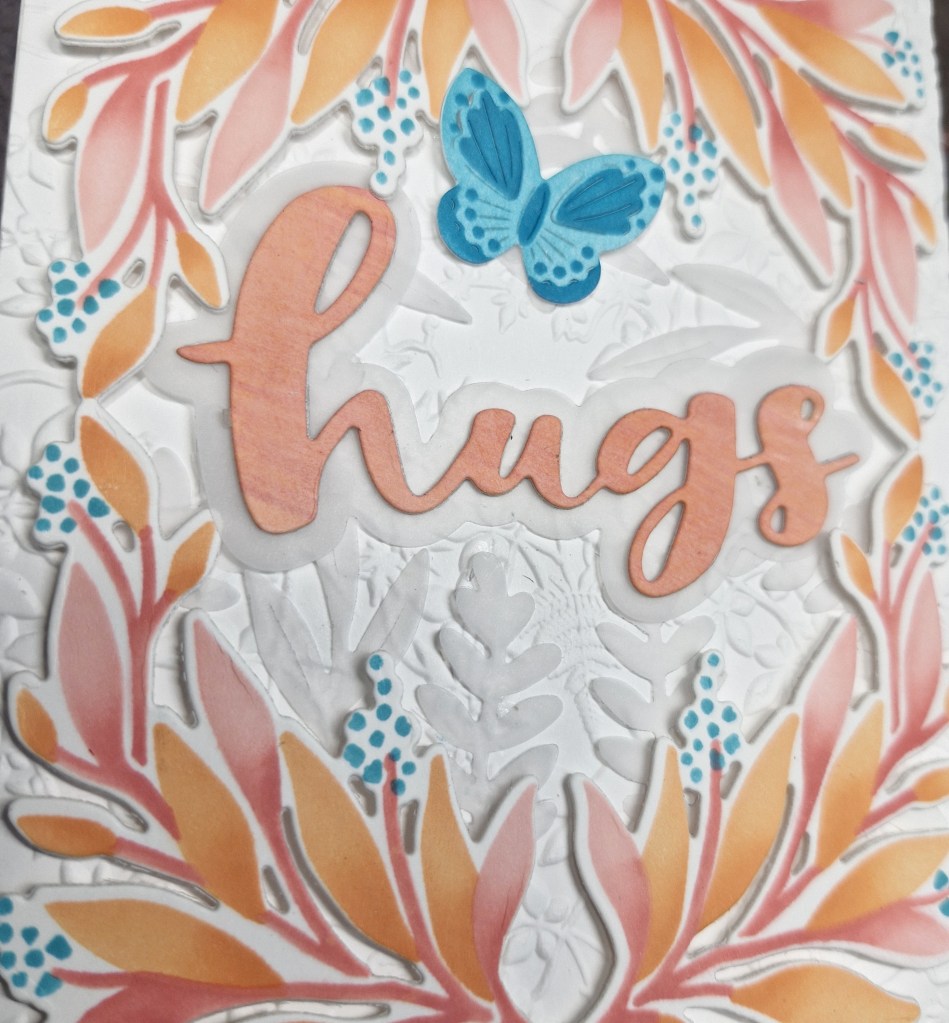
Hello everyone. There is a new challenge at Cardz 4 Galz. Johanna is hosting, and she has chosen the theme of ‘Use Vellum’. Here is my card:

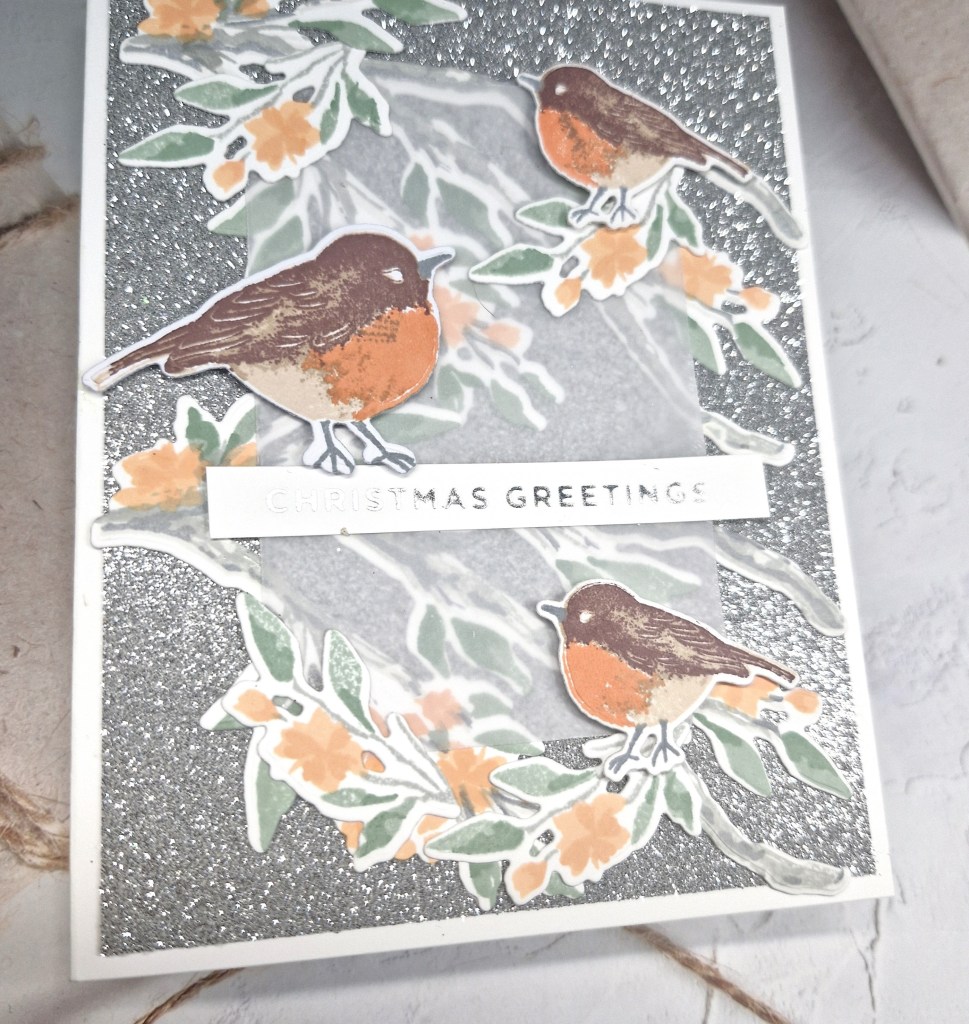
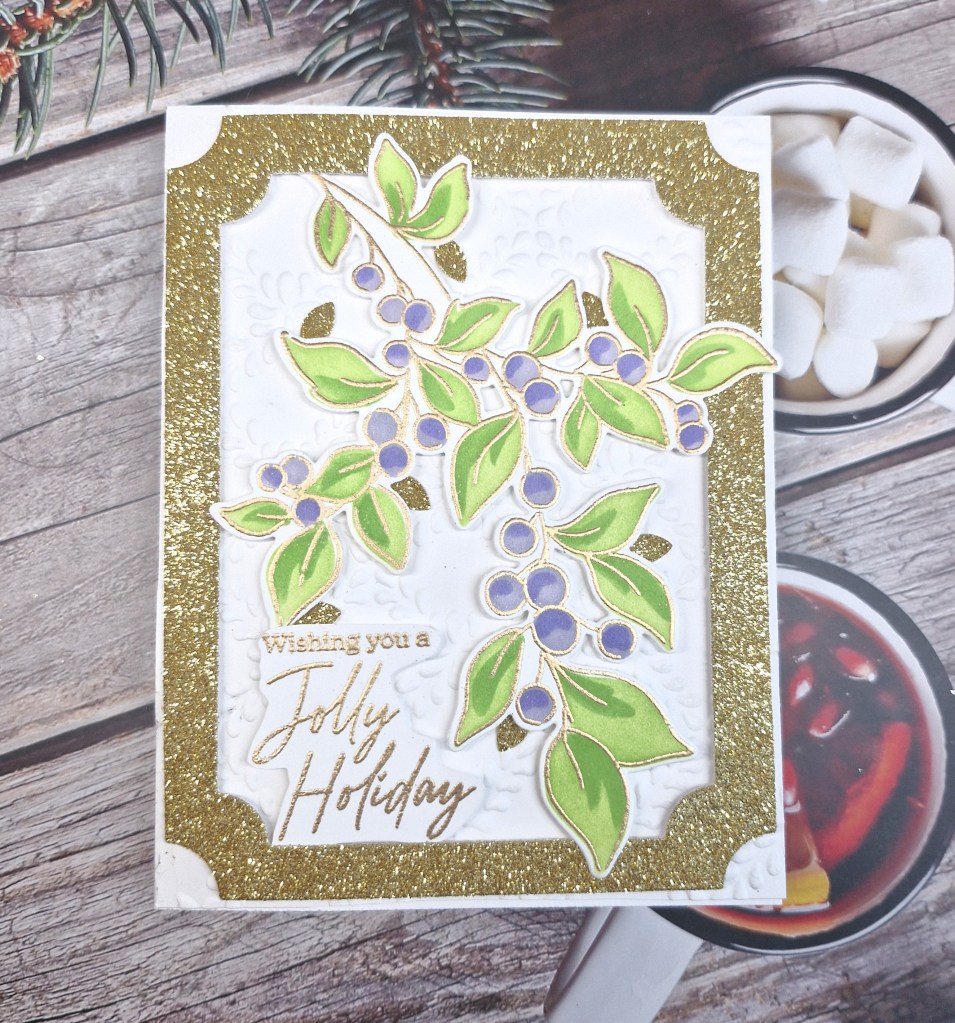
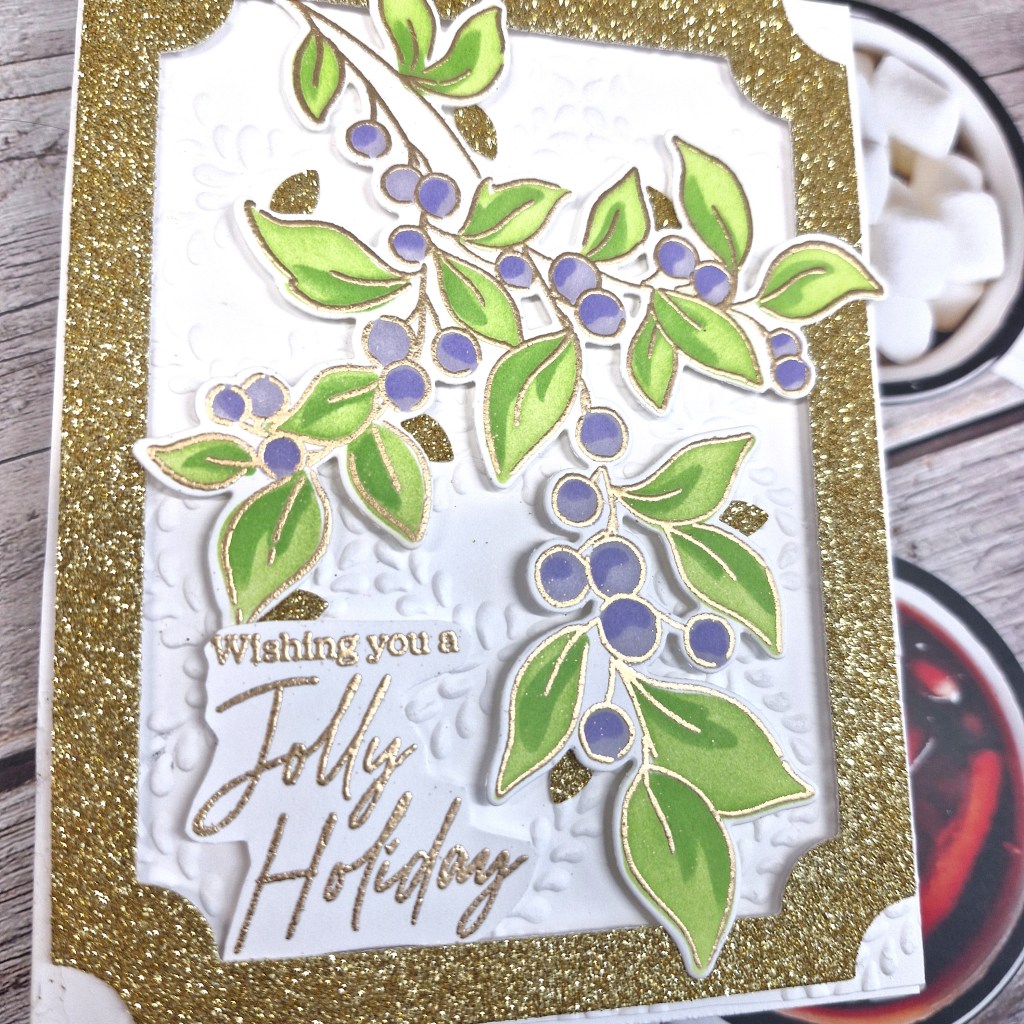
I started by ink blending the leafy frame from The Greetery, using all of the layers from the stencil set and Pinkfresh Studio inks, adding some darker ink towards the bottom of each leaf, then die cut using the matching die.
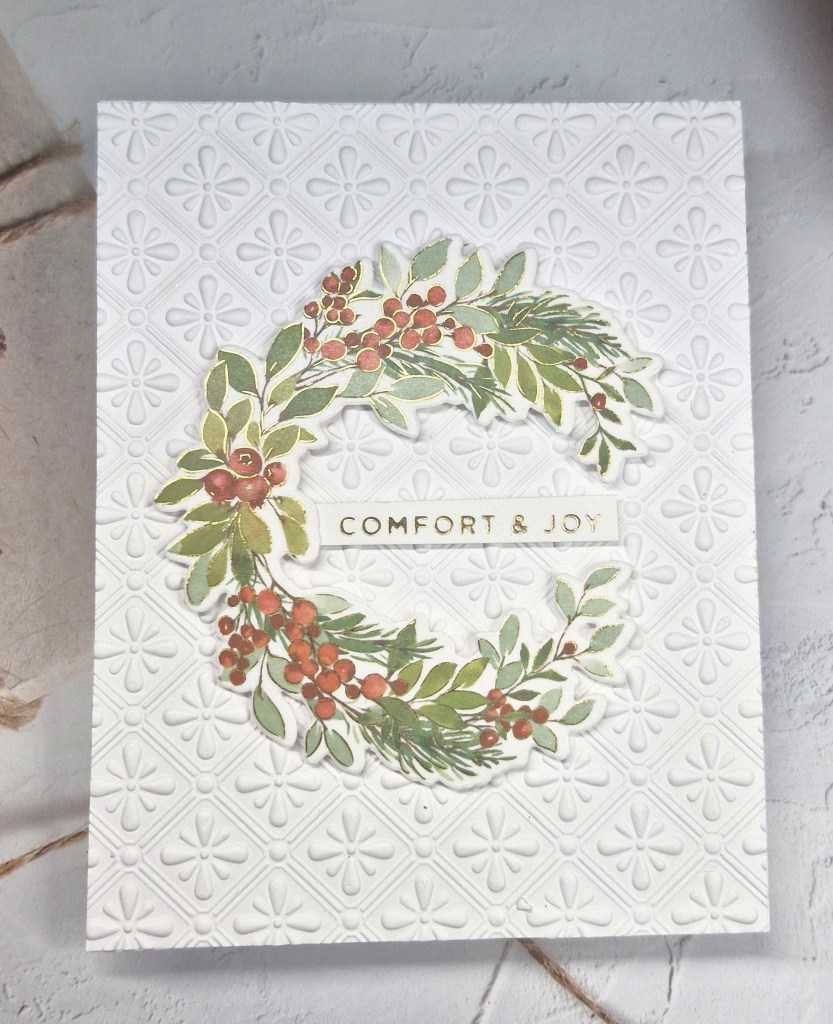
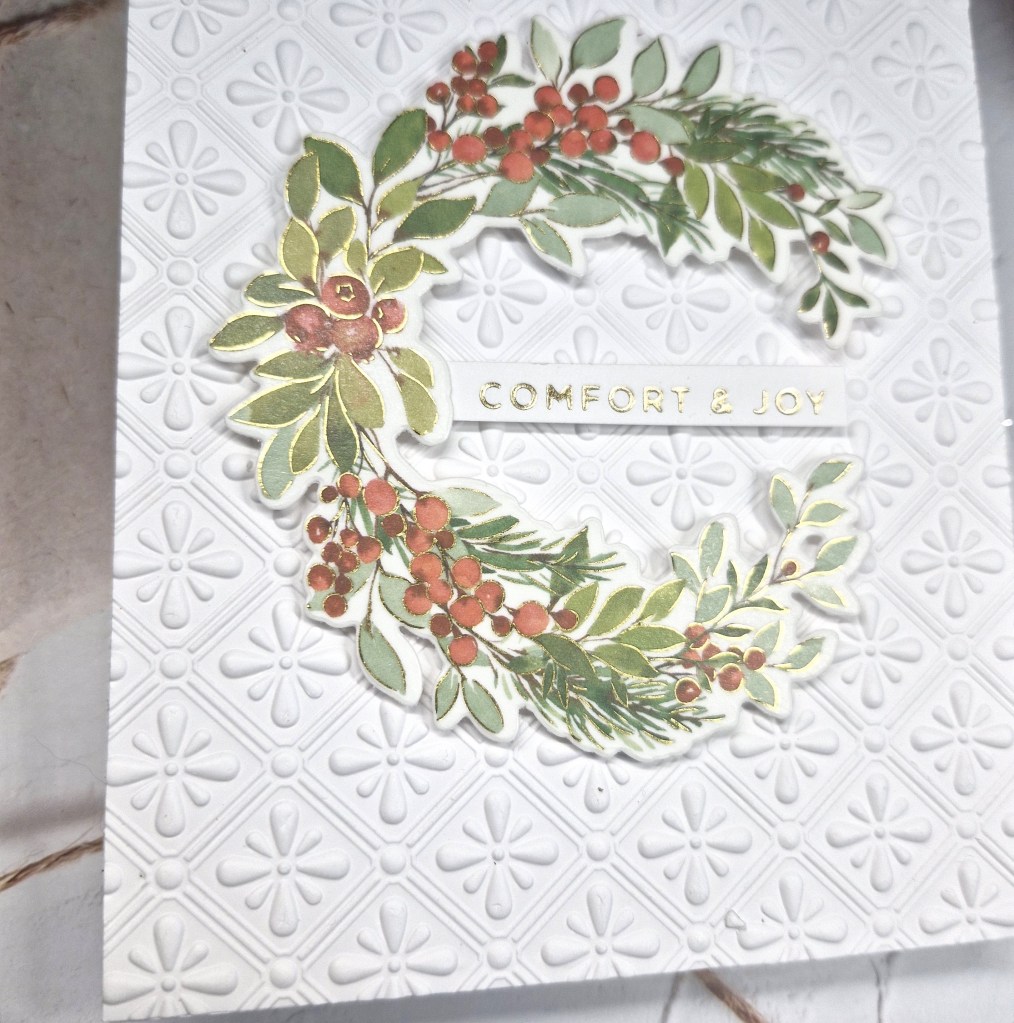
The background panel was created using an embossing folder, onto which I attached the frame using small pieces of 3D foam.
I then took the vellum and die cut some extra foliage to place around and about to create more subtle details.
The sentiment was created by swiping one of the ink pads I had used for the ink blending, and using a Time 4 Tea Designs die, with the shadow layer also in vellum.
I hope you can come and join us with your projects using vellum. xx
I shall be entering the following challenges:
Ellibelle’s Corner – anything goes
A Cut Above – anything goes with die cuts
Crafts Galore – anything goes
Stencil Fun – use stencils – option of trees or leaves taken
Triple B – birds and/or butterflies and/or blooms
Creative Fingers – anything goes