Hello everyone. I’m popping in to share a card created using the photo inspiration from the current Just Add Ink Challenge:
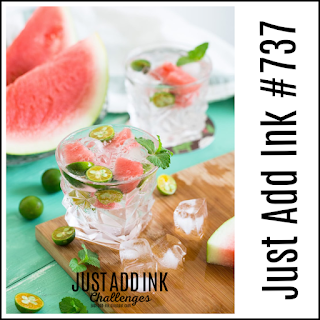
Here is the photo they used for inspiration:
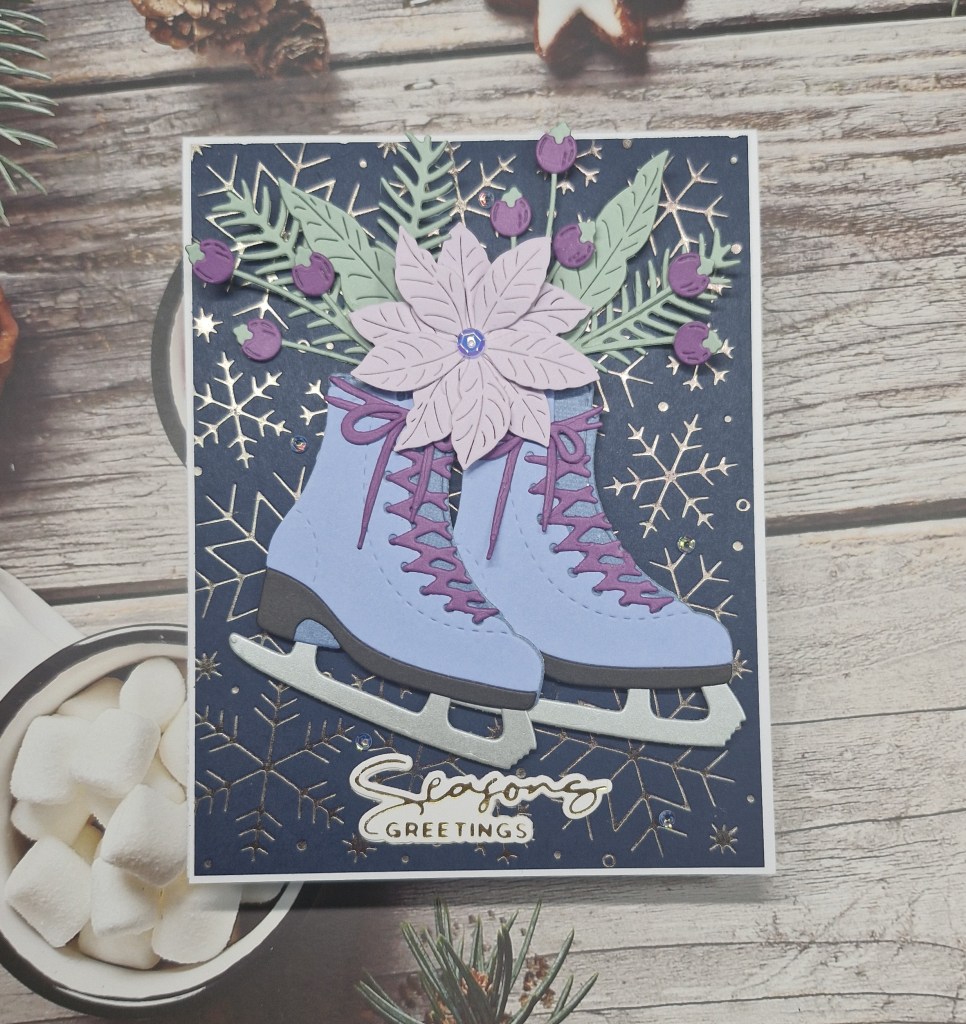
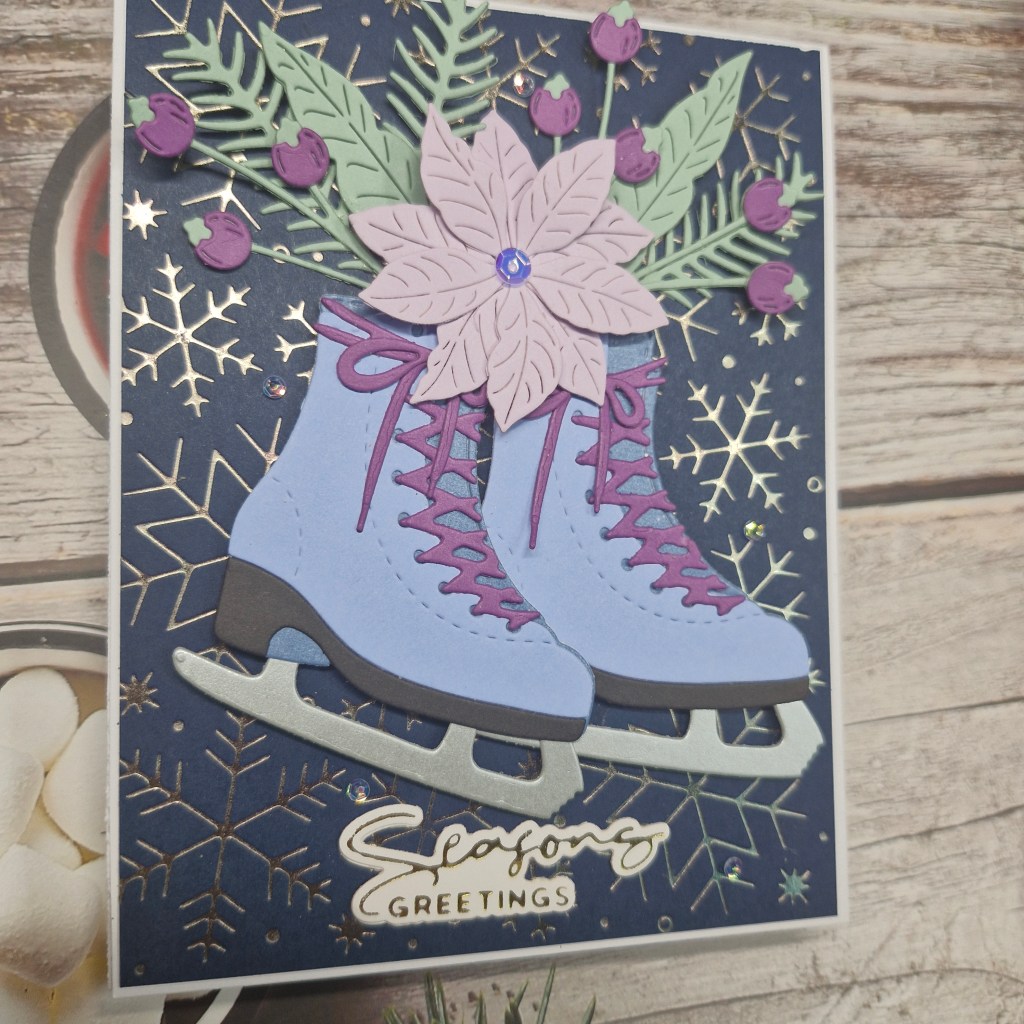
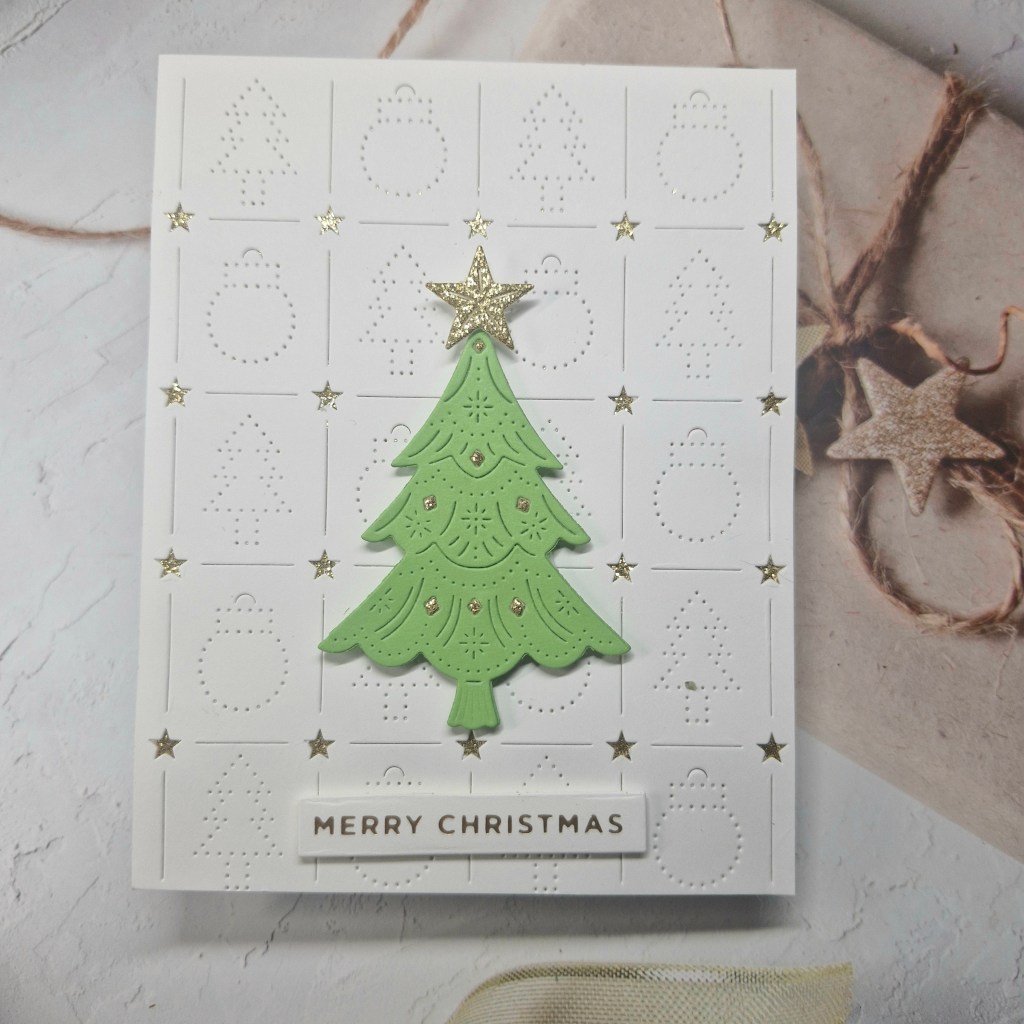
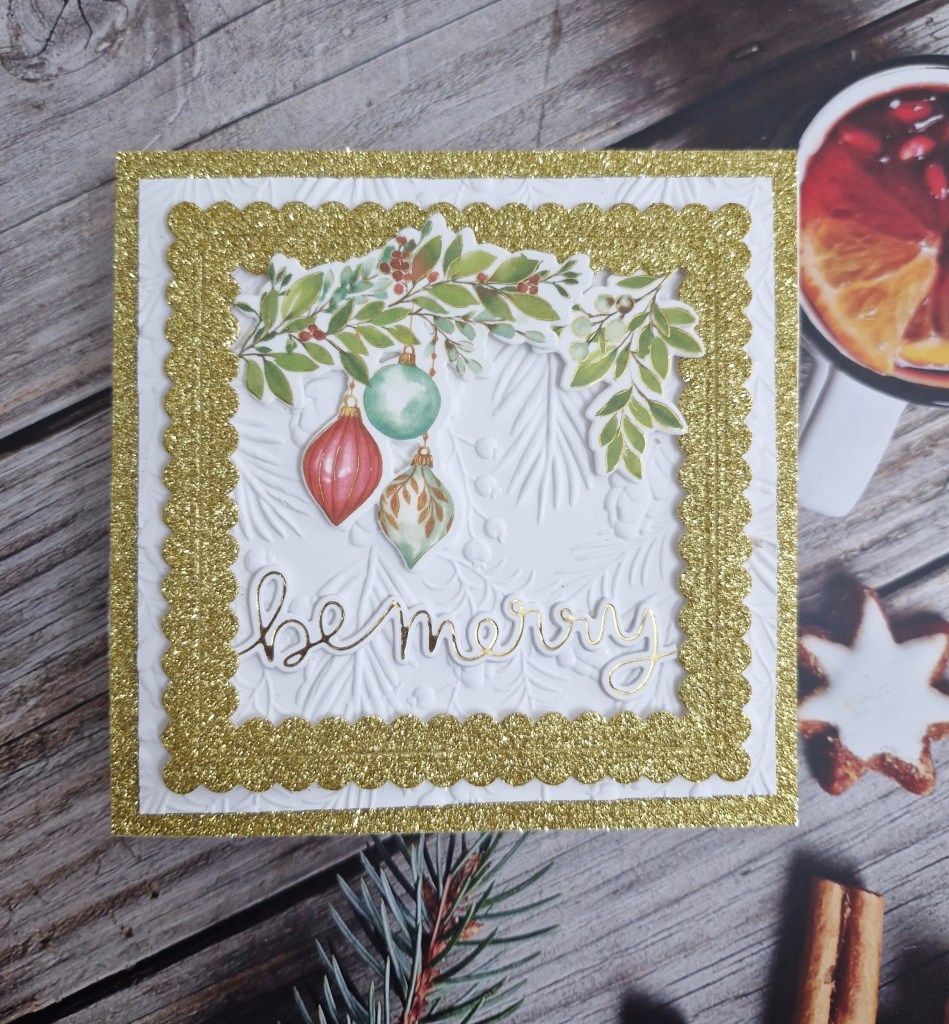
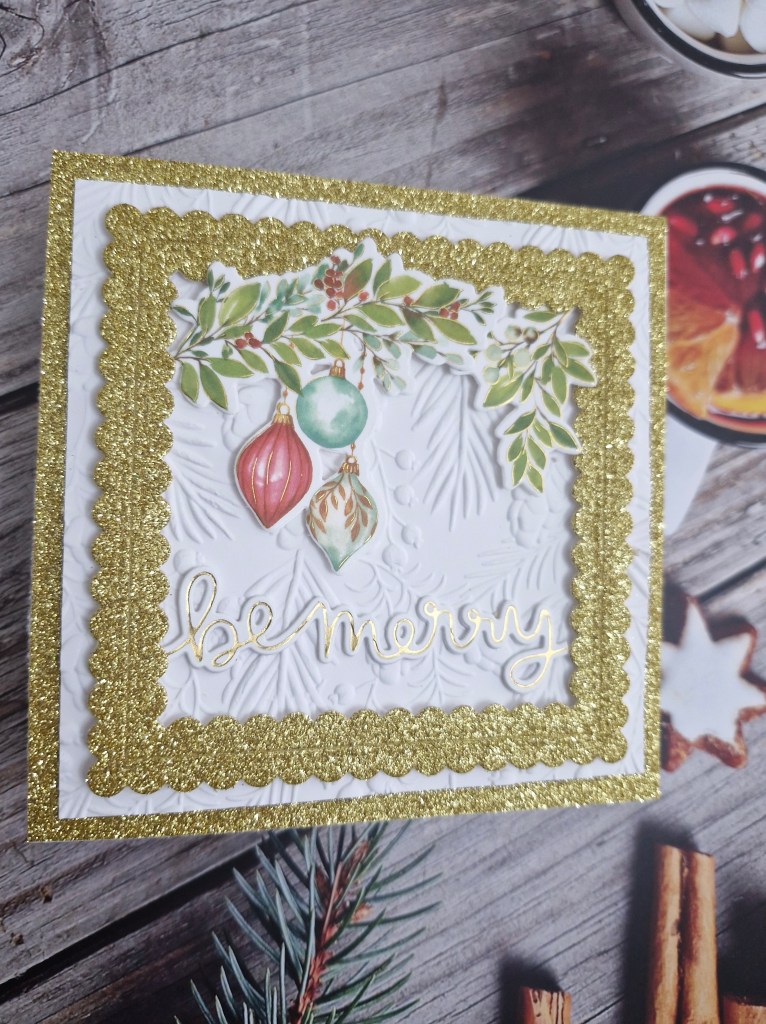
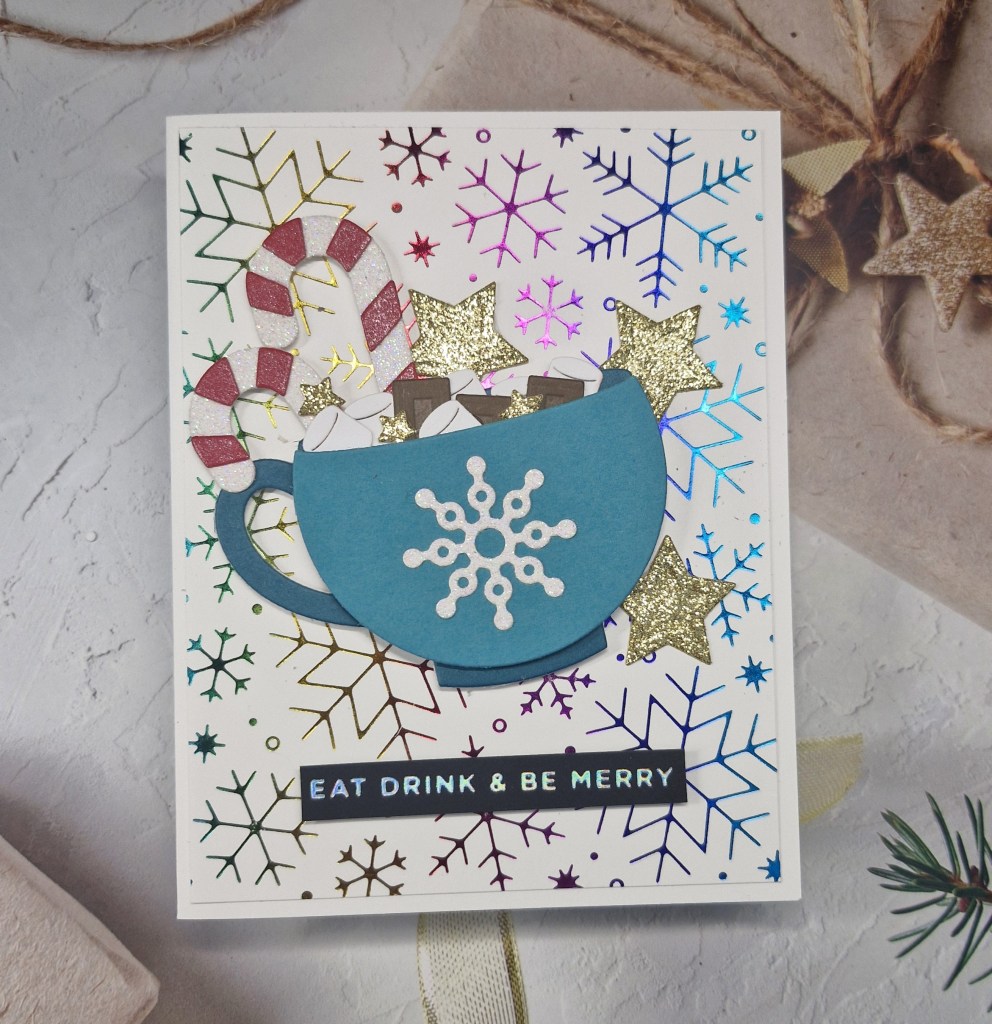
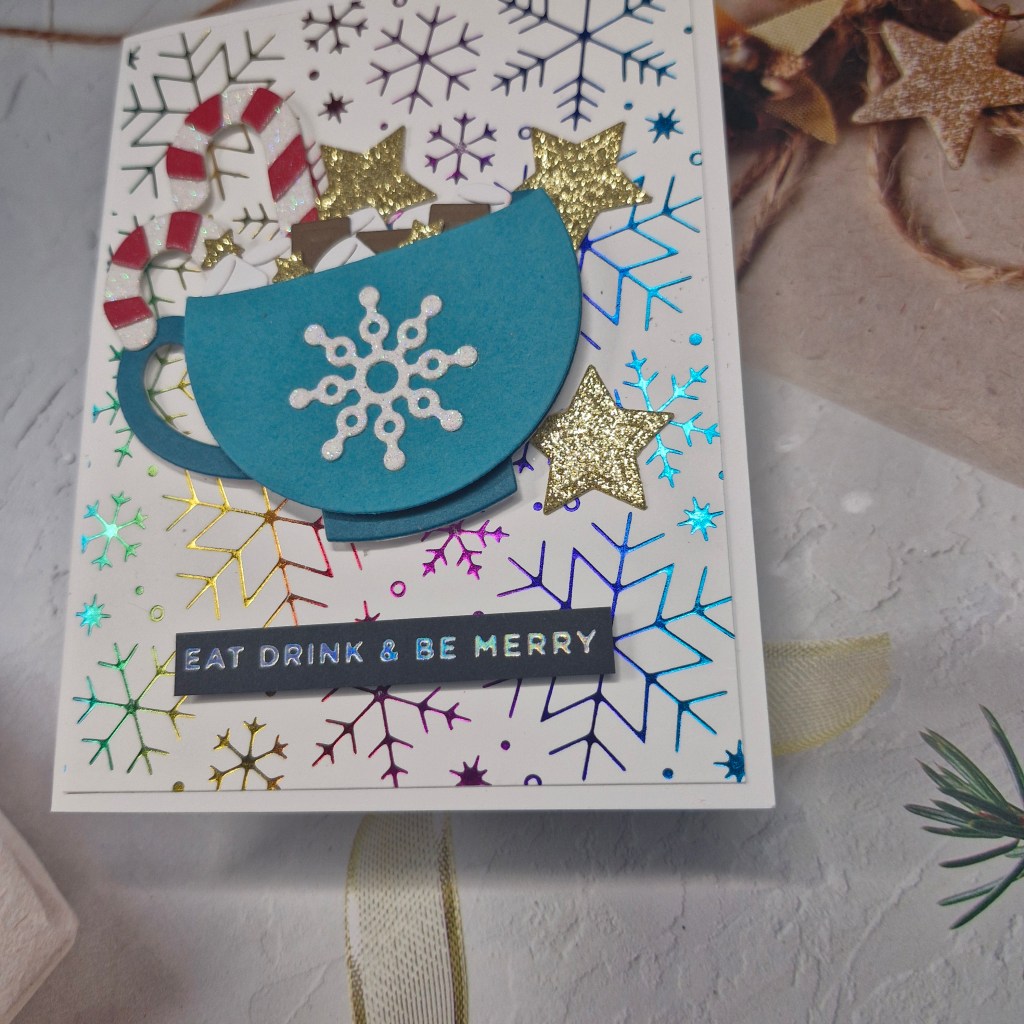
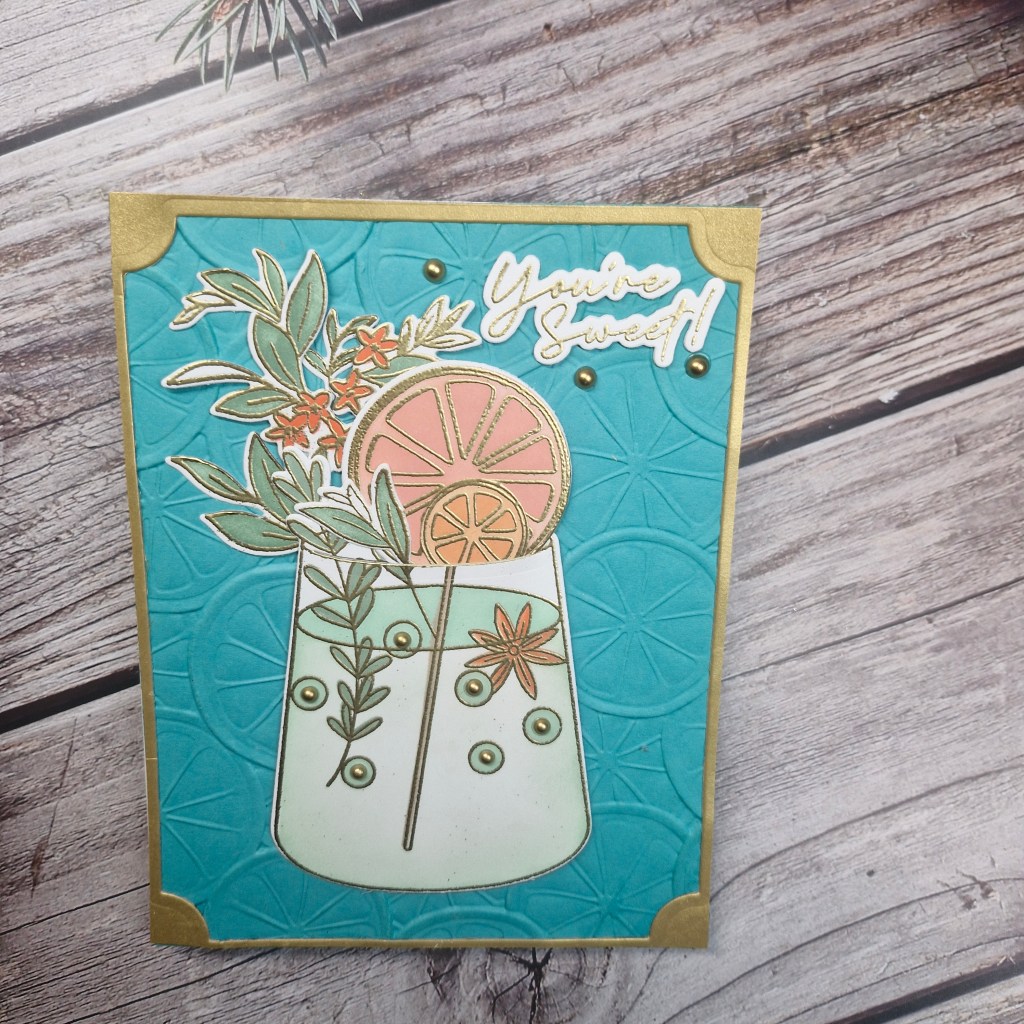
And here is what I created:
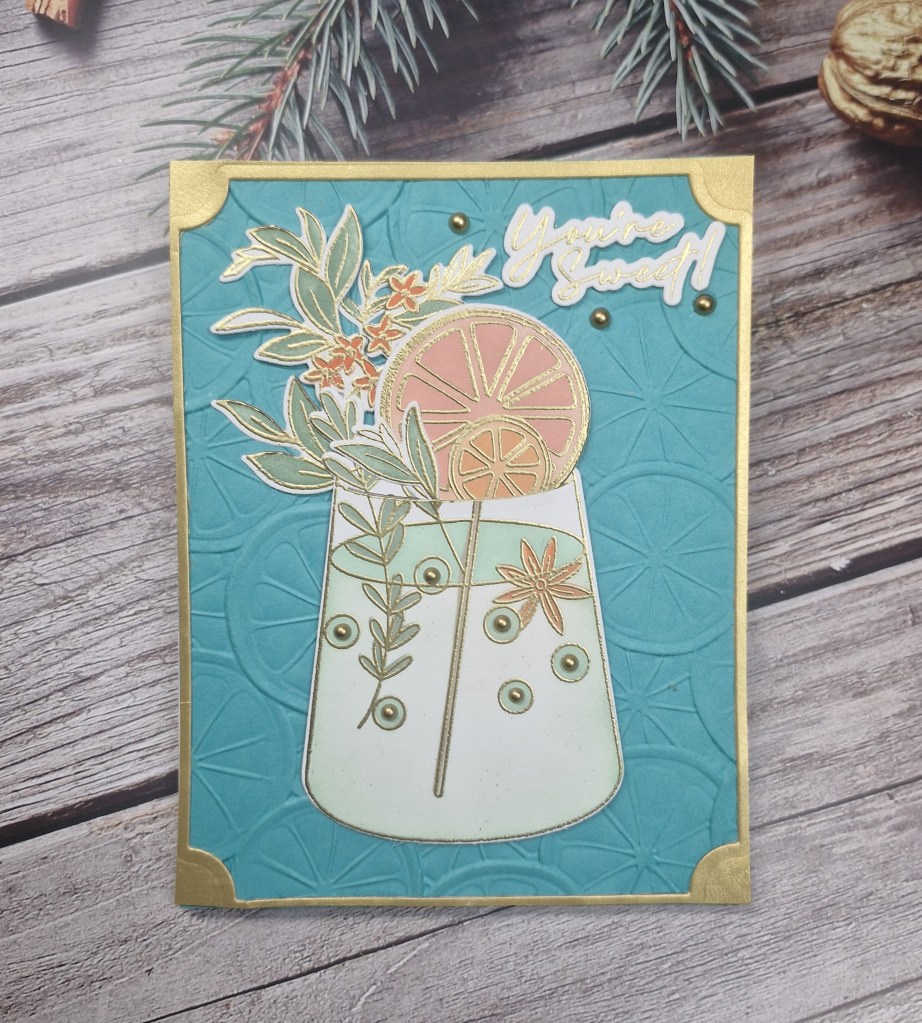
I was inspired by the glass and the colour scheme, as well as the use of fruits.
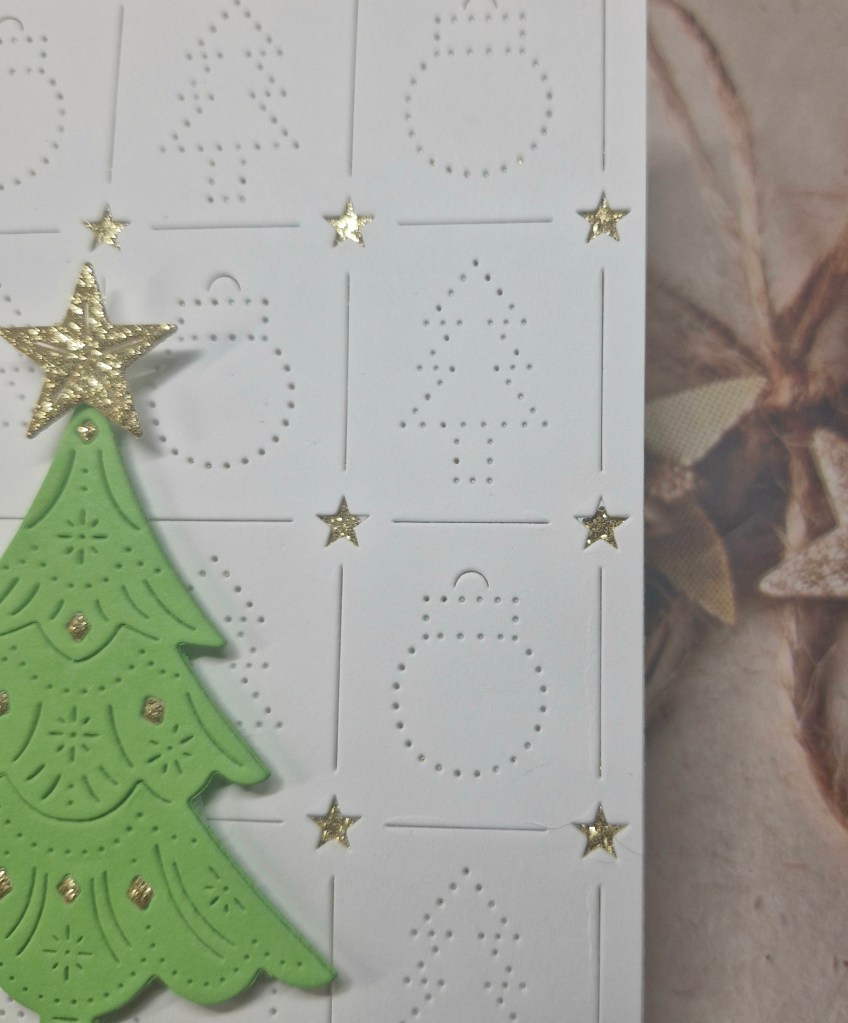
I started by creating the background panel using Concord & 9th card stock and a Spellbinders embossing folder. This was then glued flat to a card base.
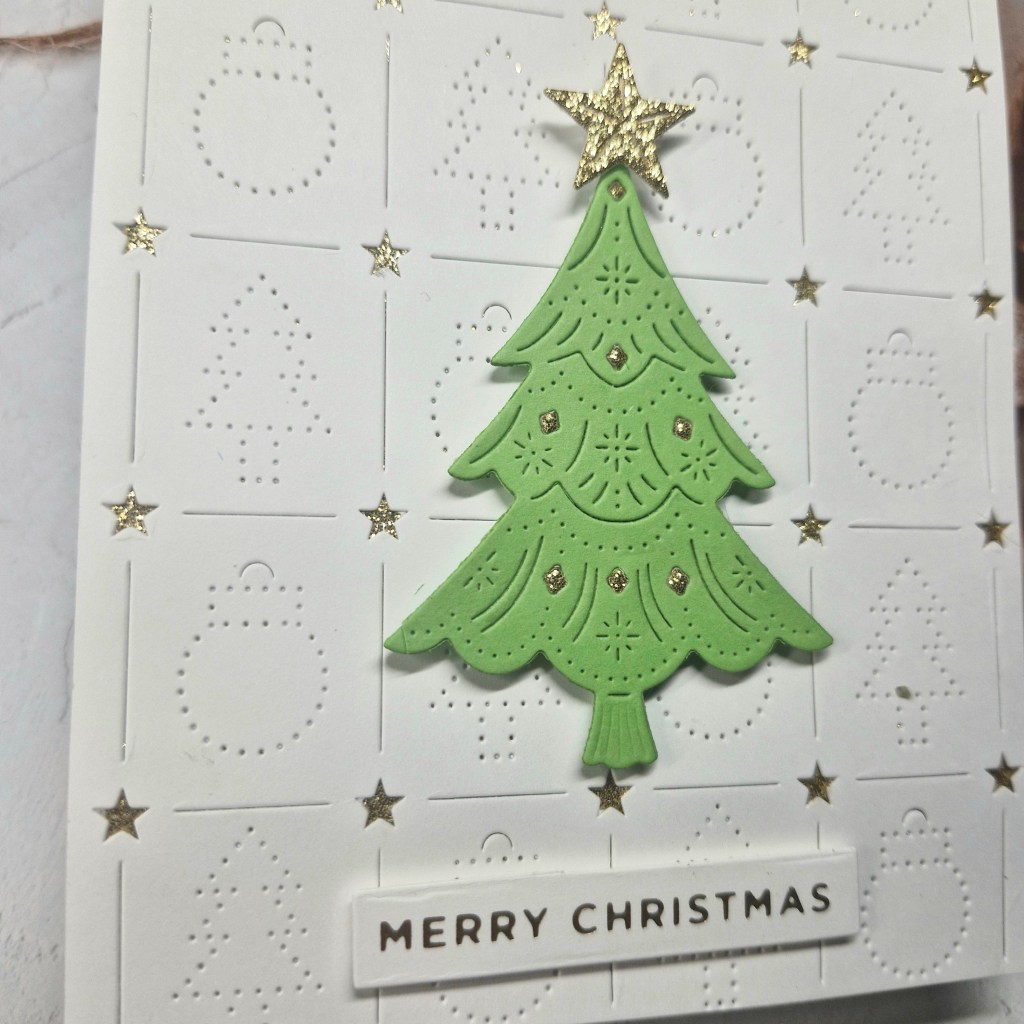
The glass, fruit, and foliage images are all from Pinkfresh Studio, and a mixture of a couple of sets.
The images were stamped then heat embossed with gold embossing powder, then all images coloured using the relevant layering stencils. I used Pinkfresh inks in a couple of coral and pink tones for the fruit, then a couple of green tones for the leaves.
The glass itself is actually from a Christmas/holiday set and was part of one of their virtual events, but I thought it would work for this and not be a Christmas card.
The glass has a notch cut into it near the top and into that I inserted the two pieces of fruit and a couple of leaves. The fruits all come die cut as one piece – several pieces altogether – so I cut them apart and picked the pieces I wanted.
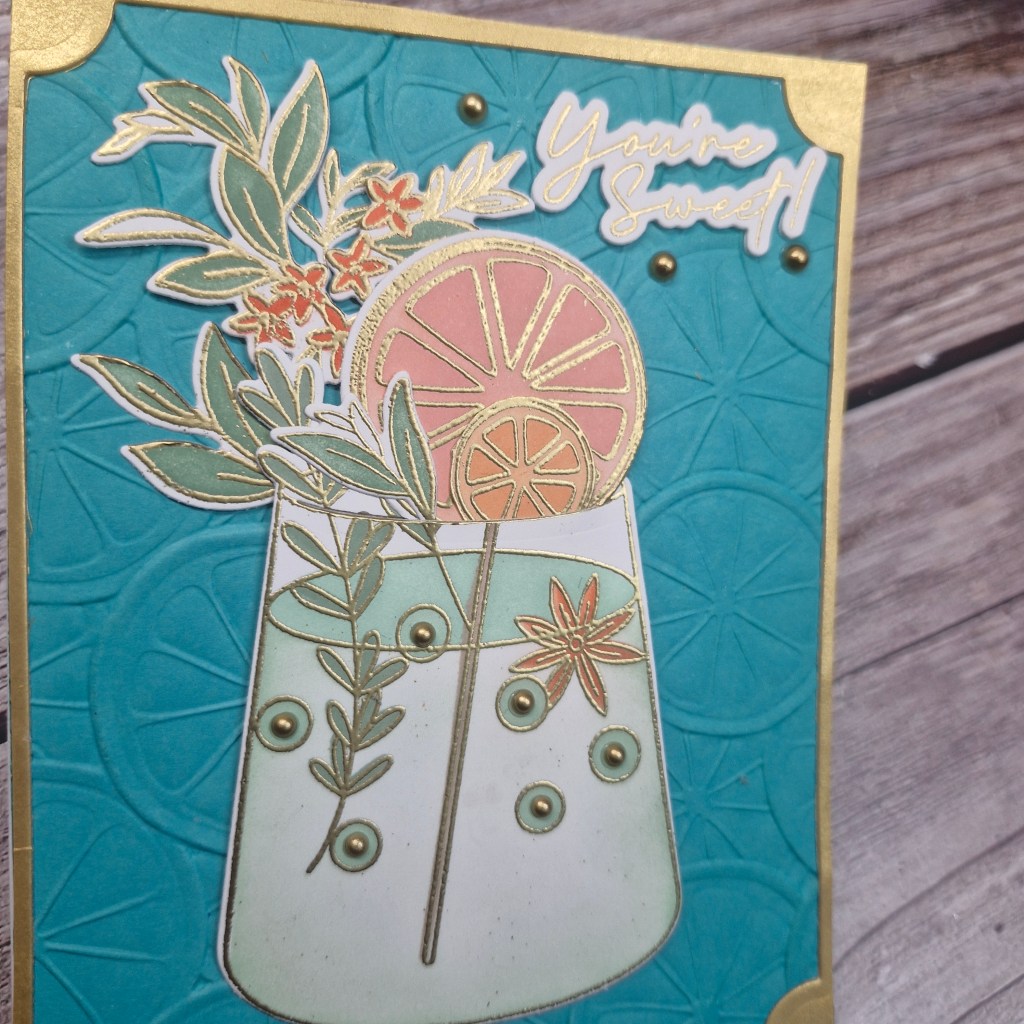
I wanted to add a brushed gold frame, so die cut one out – then decided I liked the look of the ‘off cut’ from the frame – the outside piece we generally throw away – it seemed more suitable as it wasn’t too thick – thank goodness I centred in on the panel in the first place! The proper frame will be used on another project….
The glass and foliage were arranged on the panel, then I used low tack tape to pick the whole thing up – added thinner 3D foam to the back, then stuck it all down in one go. I little glue to some areas laying on the top.
The foiled sentiment was added – three layers altogether o make it more stable, and then brushed gold gems added as you see.
I shall be entering the following challenges:
Just Add Ink – photo Inspiration
Love To Craft – anything goes
Lil Patch Of Crafty Friends – anything goes
Crafty Catz – anything goes – option to use a die taken
Creative Artiste – anything goes mixed media