Hello once again. It is time for the next challenge at Cardz 4 Galz. Debbie is hosting, and has chosen the theme of:
‘Easel card’
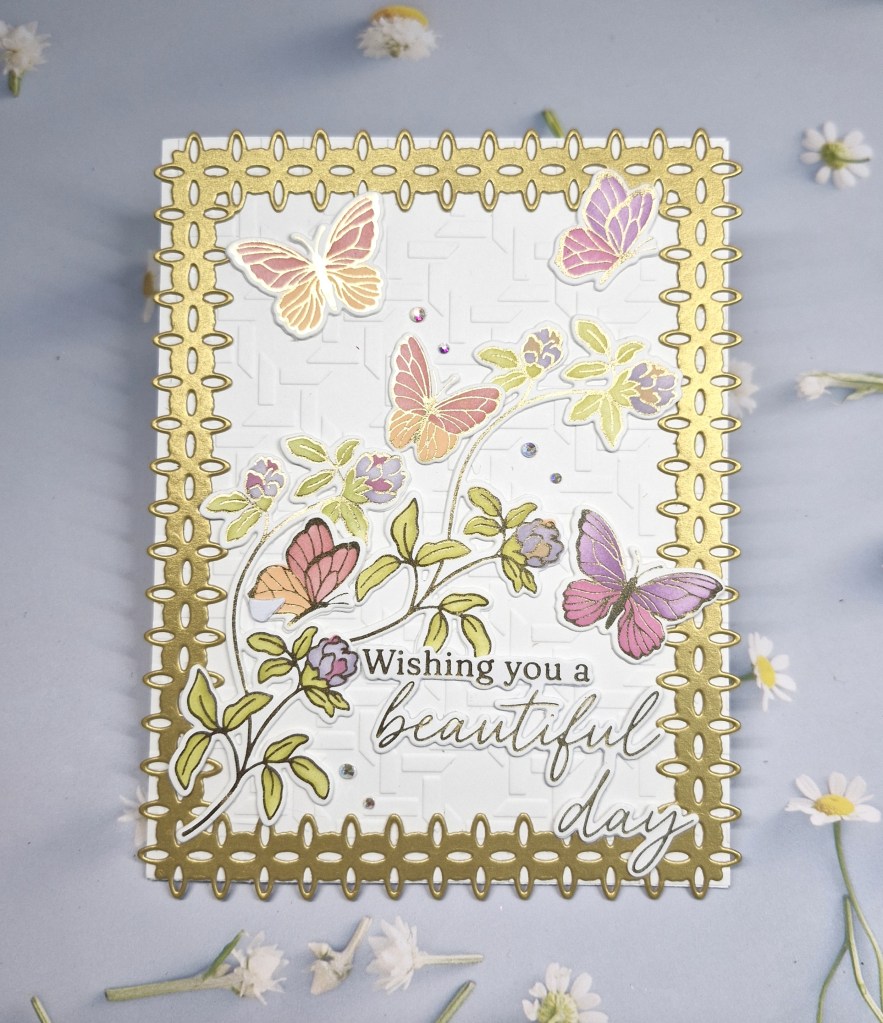
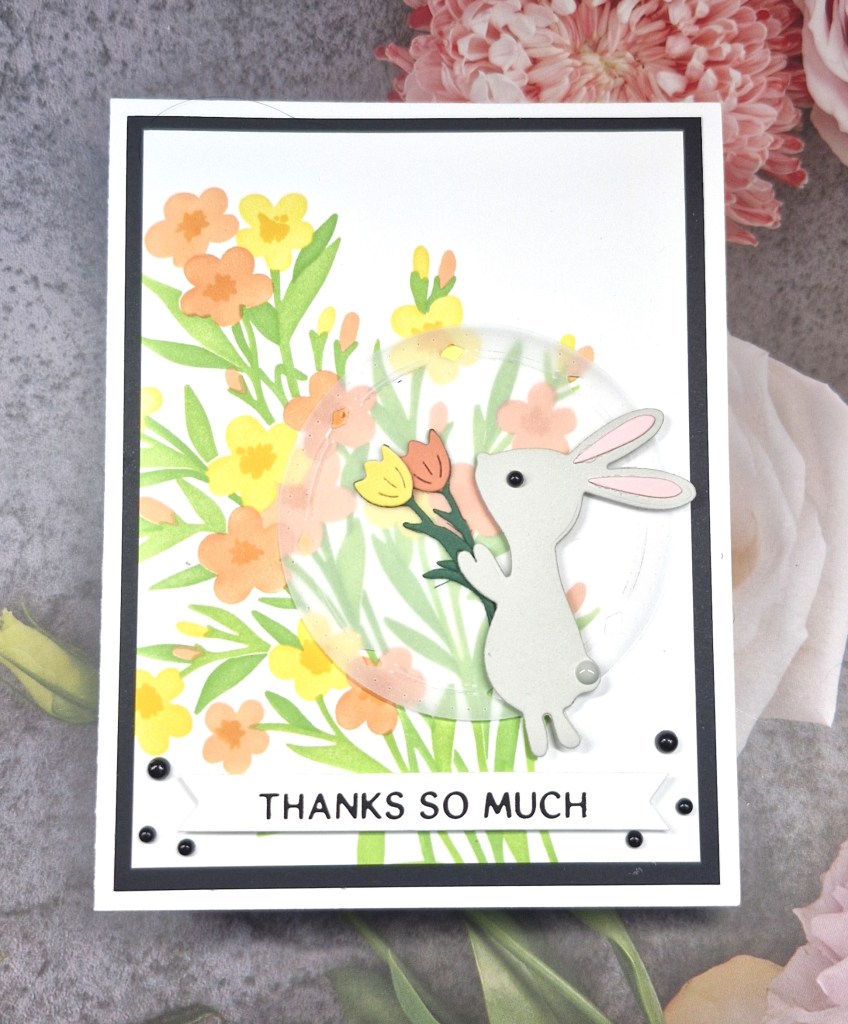
Here is my card:
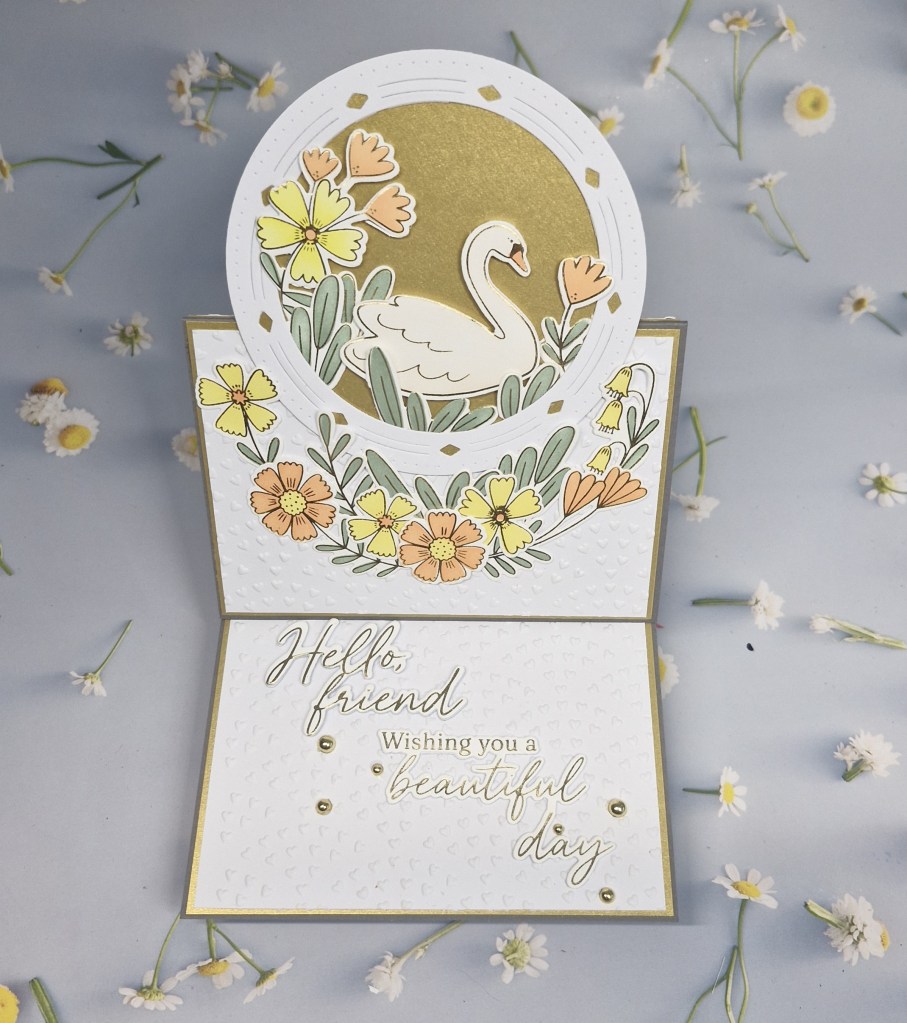

For the base of the easel card I used a 5×7 top-folding card. I knew I wanted a larger card to ensure I managed to get everything on there.
The front of the card was scored, then I cut a slightly smaller piece of brushed gold card stock for edge of the visible sides – three in total – and before attaching to the card base I die cut the circle from the larger piece for behind the swan.
These three pieces of gold were attached, three pieces of white card stock cut down to layer on top, and each of those three pieces were placed into an embossing folder from Spellbinders to add some interest, then glued down.
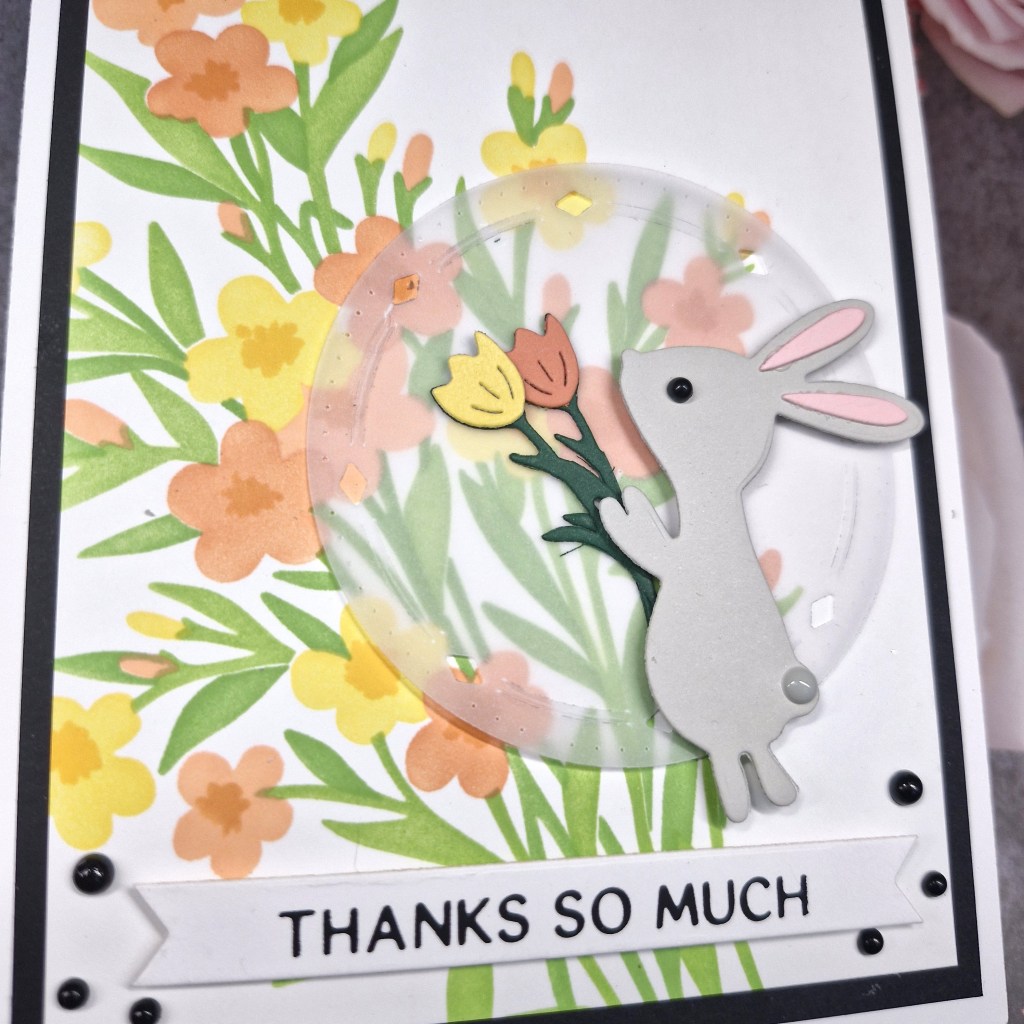
The next step was to hot foil the swan and floral images. This is from a Pinkfresh Studio set received from their ‘Create & Connect’ event in February of this year. Once hot foiled, all the images were ink blended using the matching layering stencils, then die cut with the matching dies.
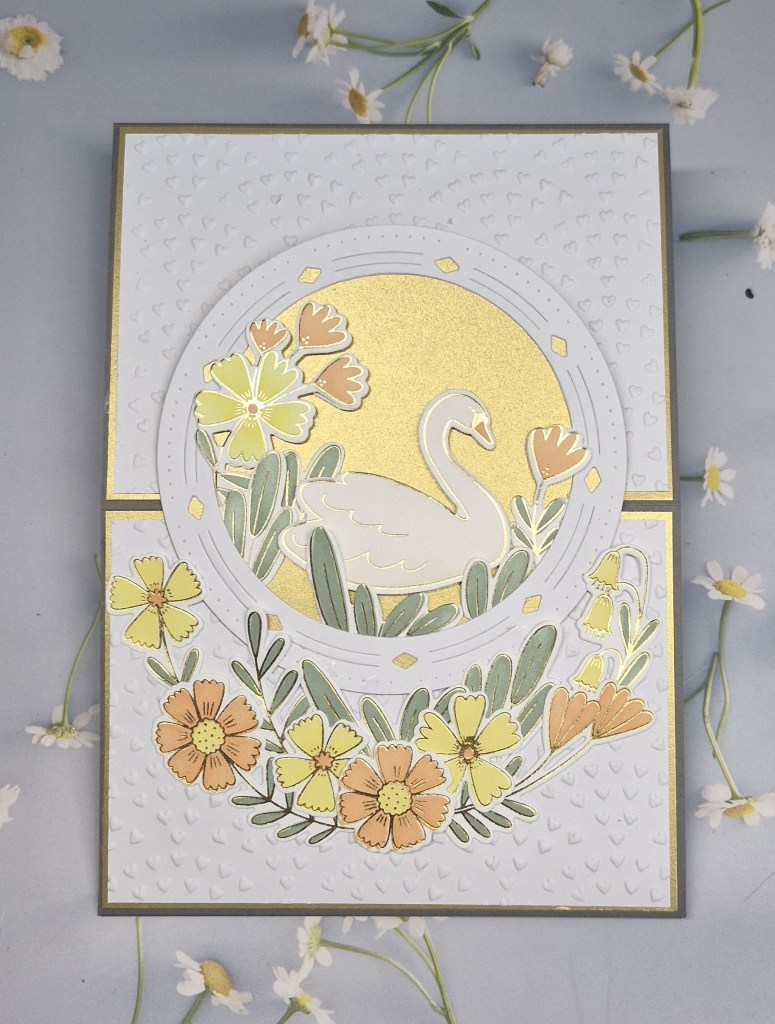
The circle frame is also from Pinkfresh Studio, the gold circle previously cut added to the back, the swan and some florals added, then attached to the easel card.
The rest of the images added below the circle to form a swag.
The next step was the sentiment, which I used as the ‘stopper’ to allow the easel to stand open, and this was two hot foiled sentiments, die cut at least several times for depth, and glued down. Gold gems added for further interest.
I hope you can come and join us with your easel card creations. xx
I shall be entering the following challenges:
Lil Patch Of Crafty Friends – anything goes
Mix It Up – anything goes – option of paper piecing not taken
Love To Craft – anything goes
Tic Tac Toe – top right to bottom left diagonal – die cuts – free – ink blending
The Flower Challenge – flowers and add embossing – heat or dry (embossing folder)