Merry Christmas – GDT 52CCT

Hello everyone. One of my previous creations was chosen as the winner for the November theme at 52 Christmas Card Throwdown, and as such was invited to be a Guest design team Member for an upcoming challenge. The challenge starts today, and the theme is to create using a previous colour theme from 2024. All the previous themes are listed on the top of their blog page.

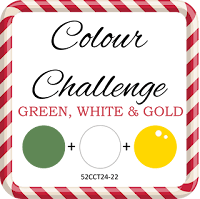
I chose to use the colours from June 2024:
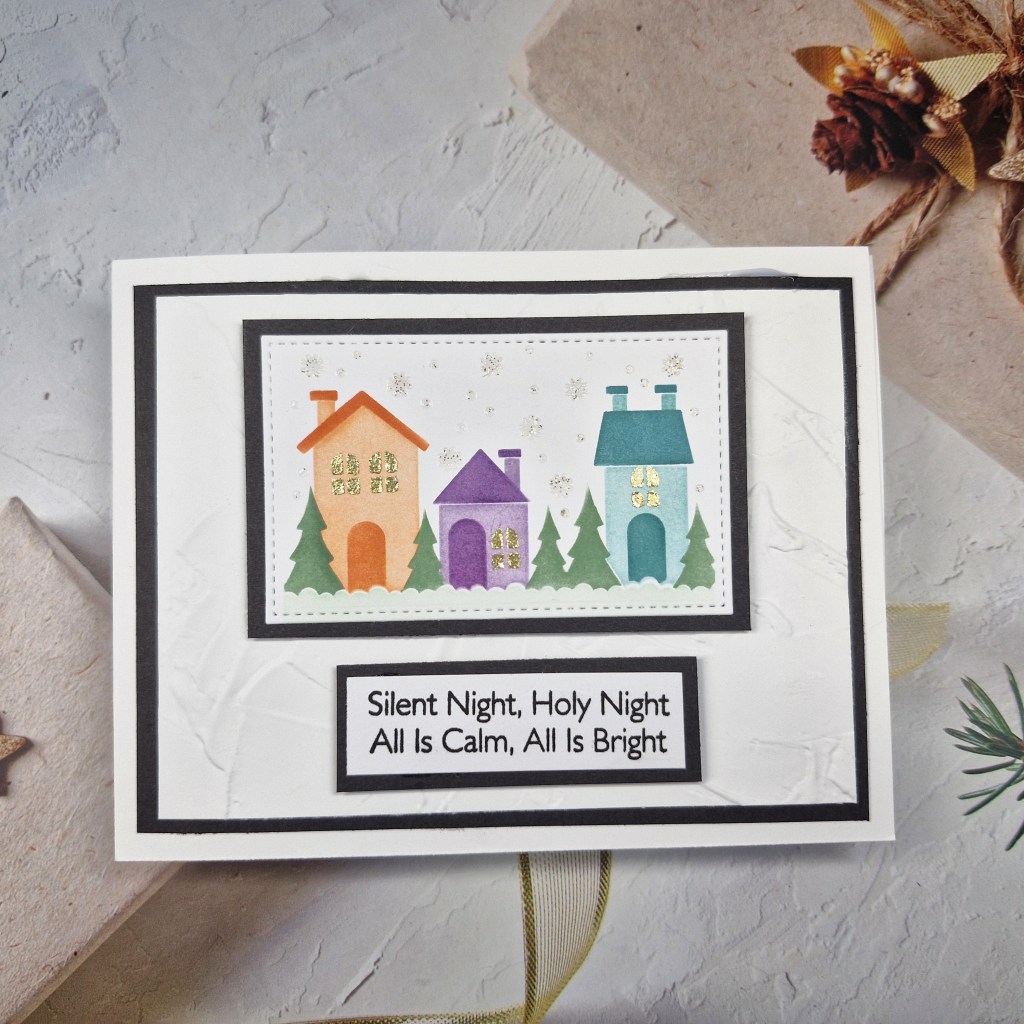
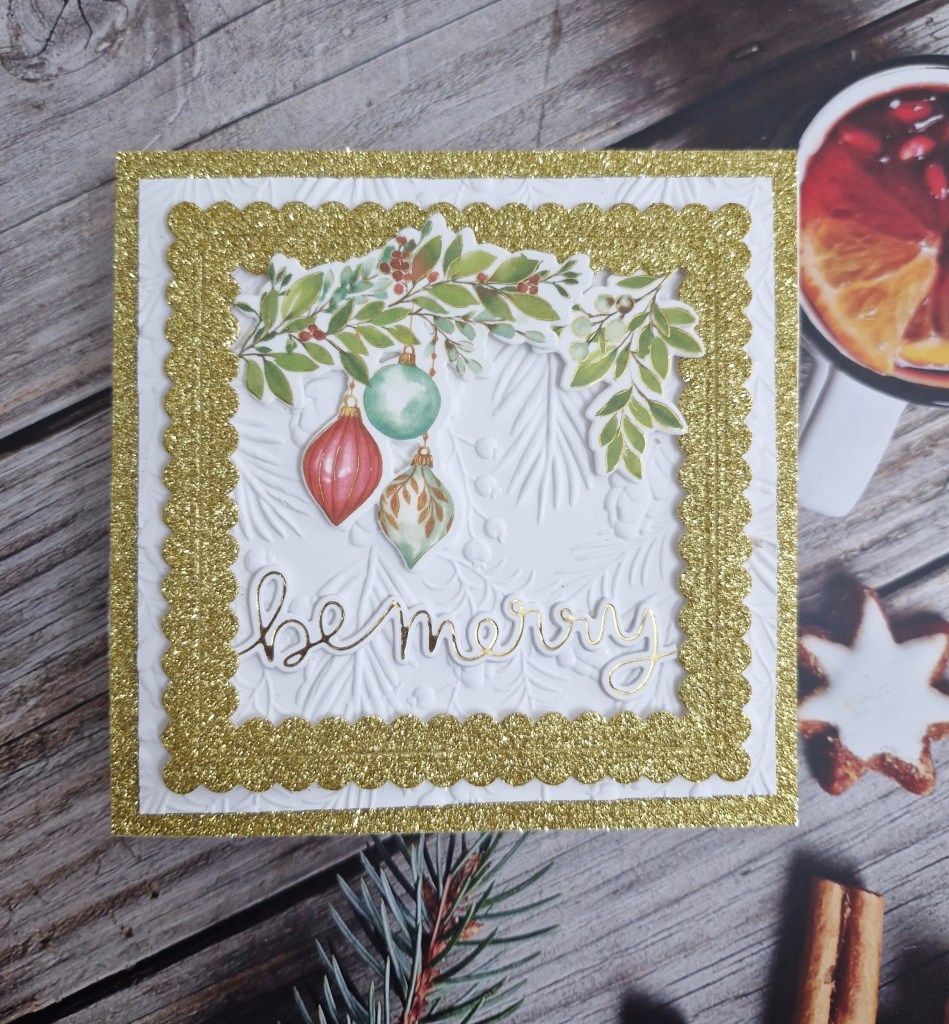
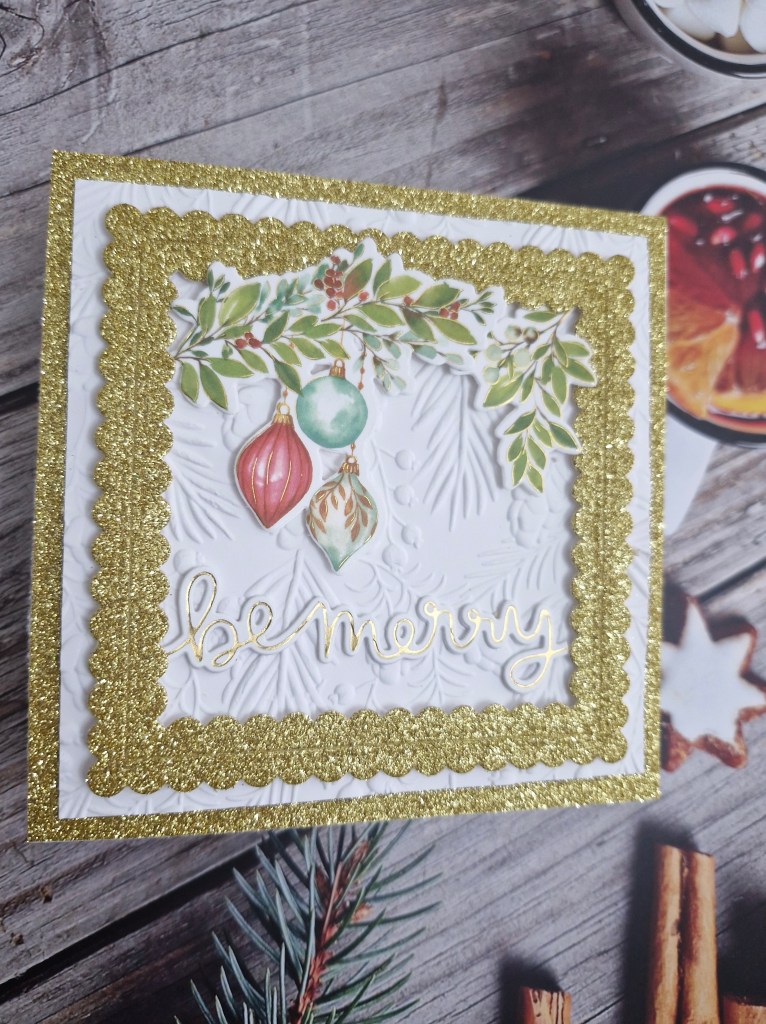
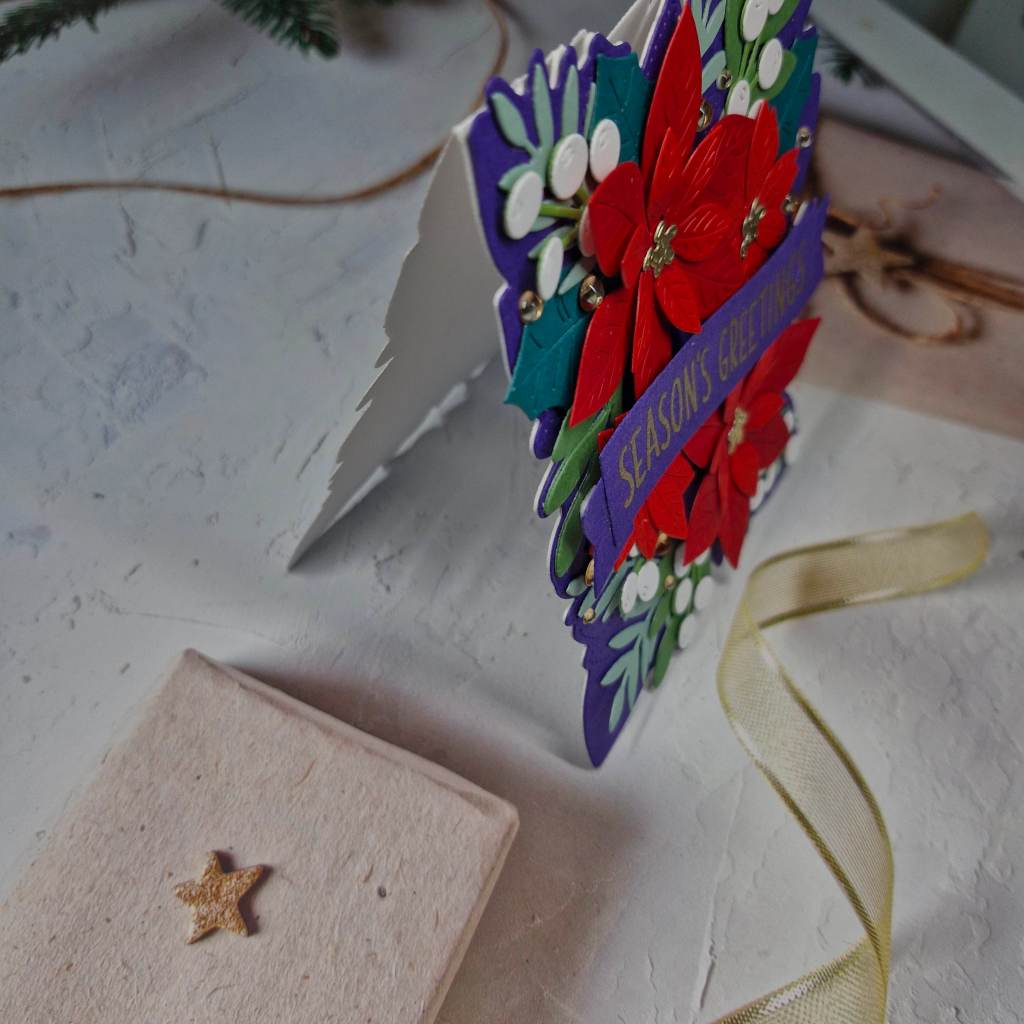
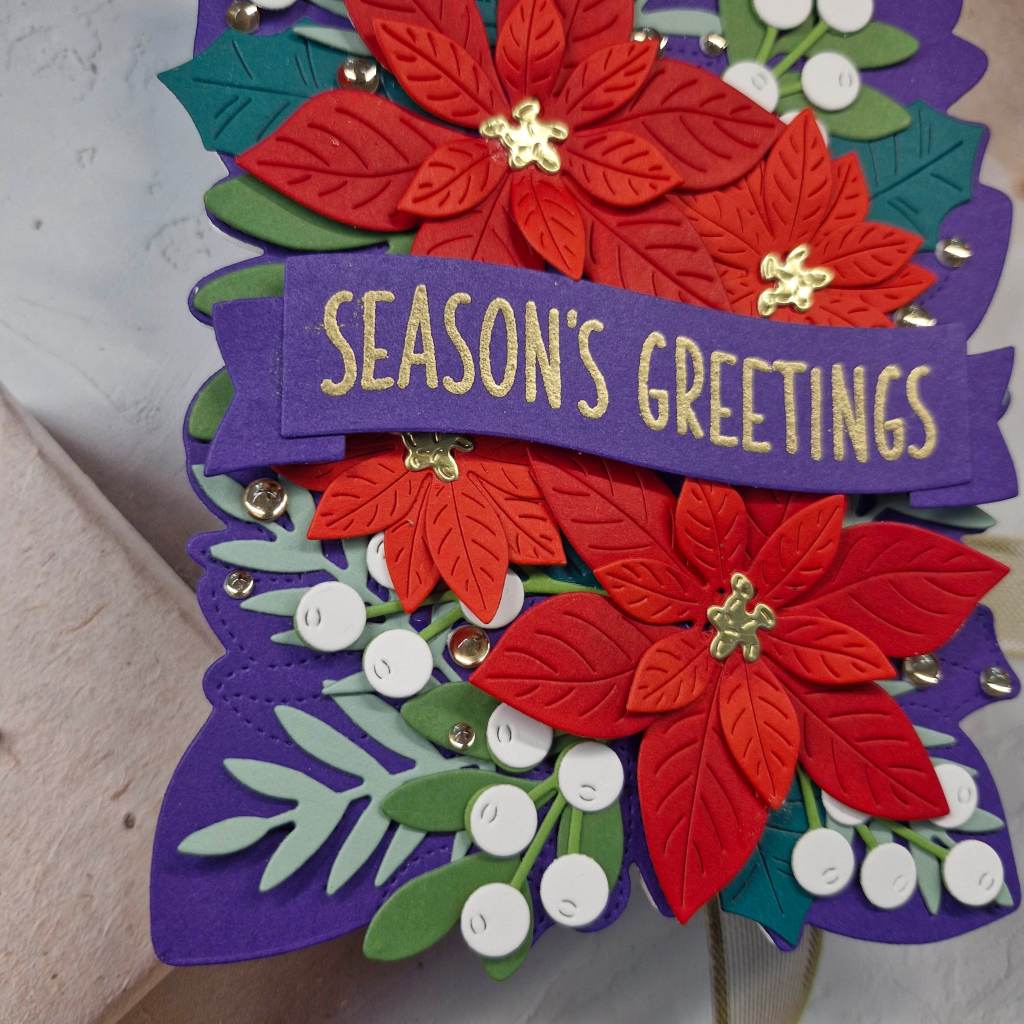
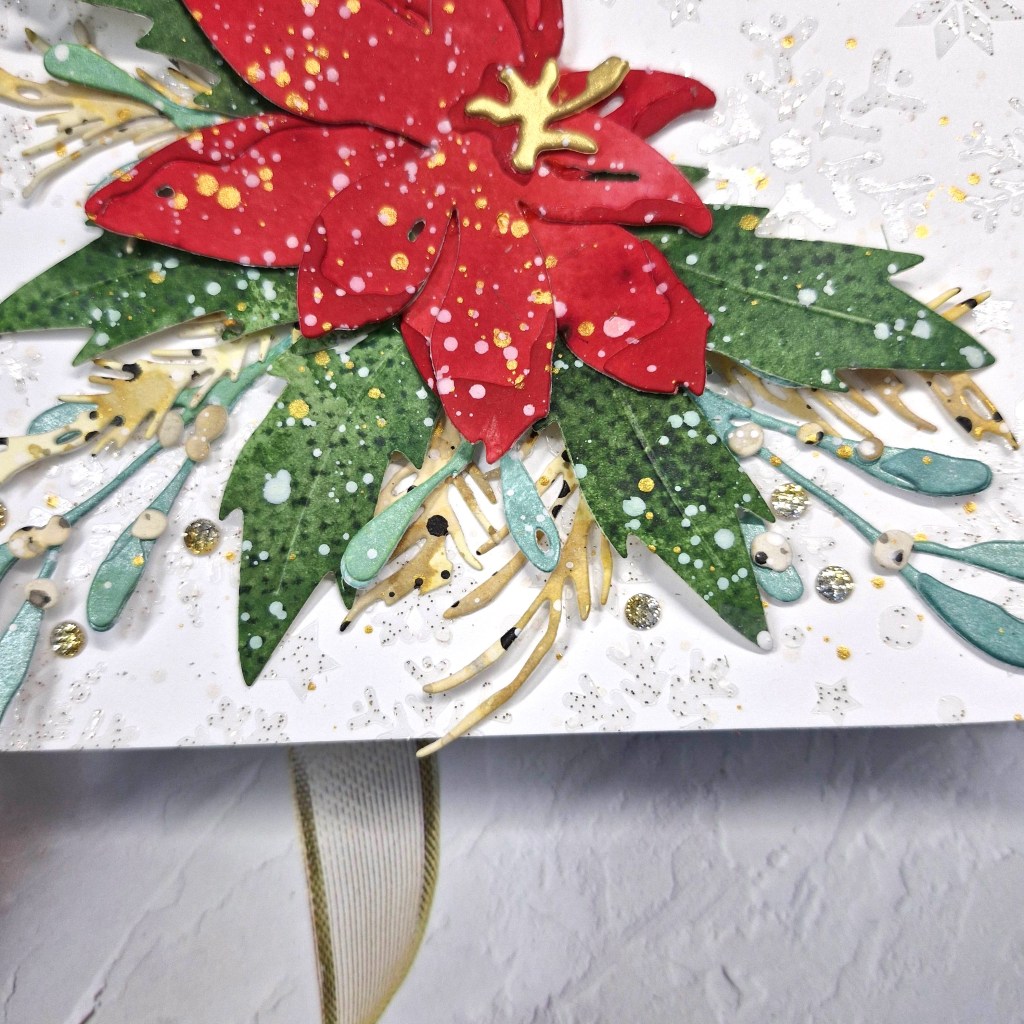
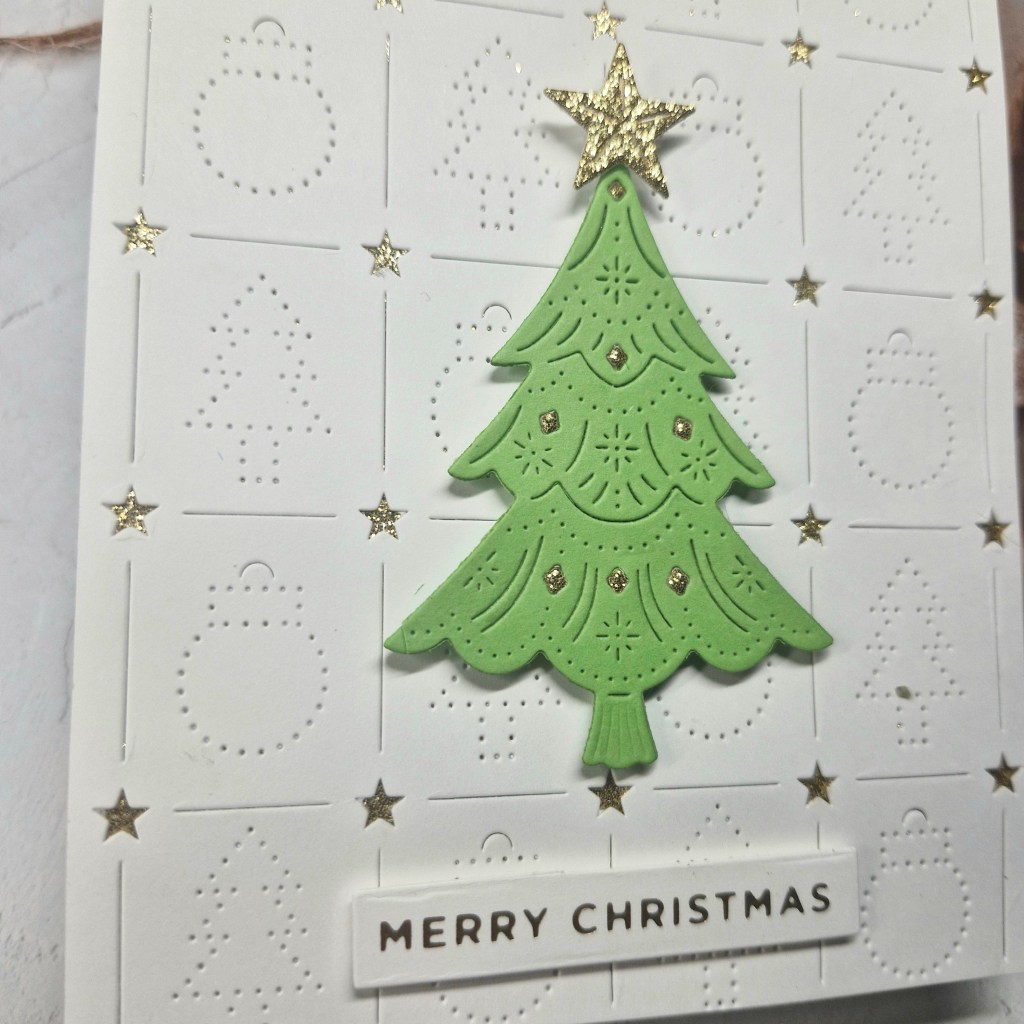
Here is my card:

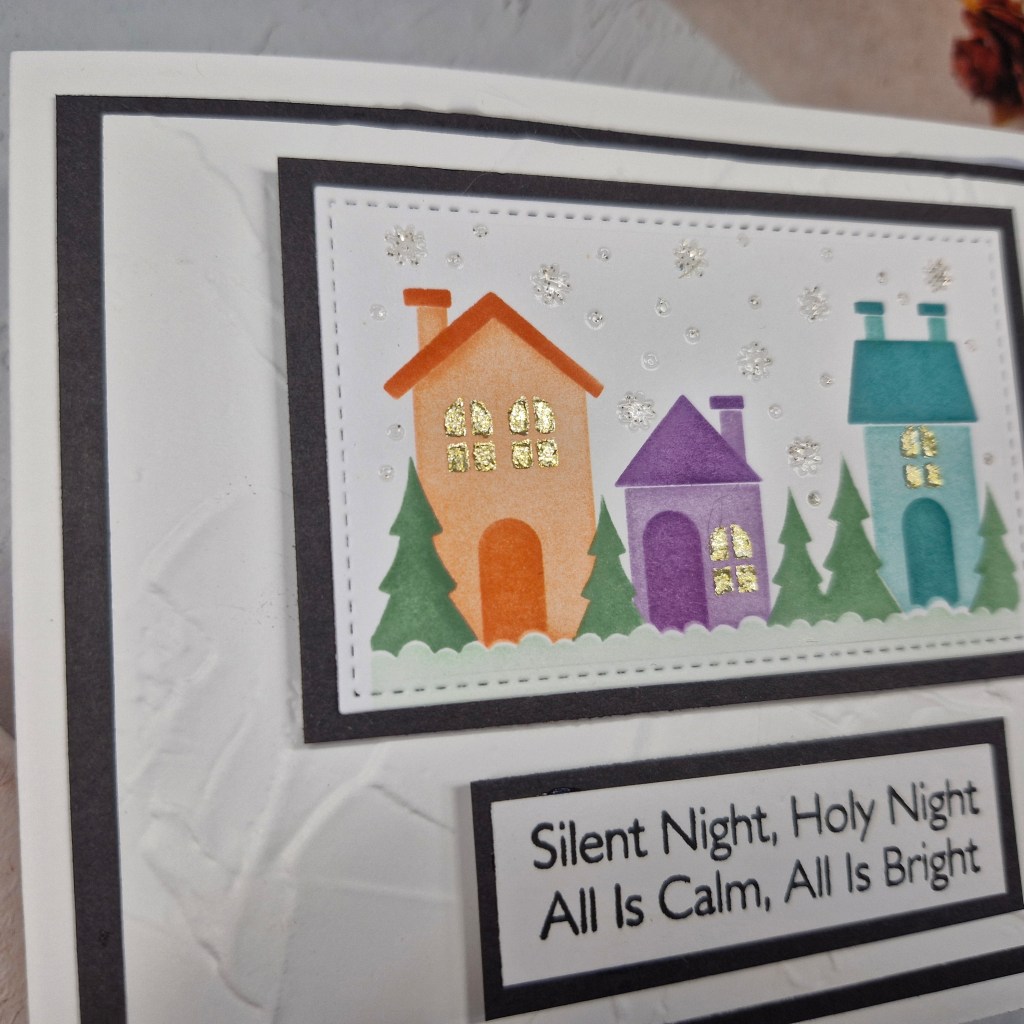
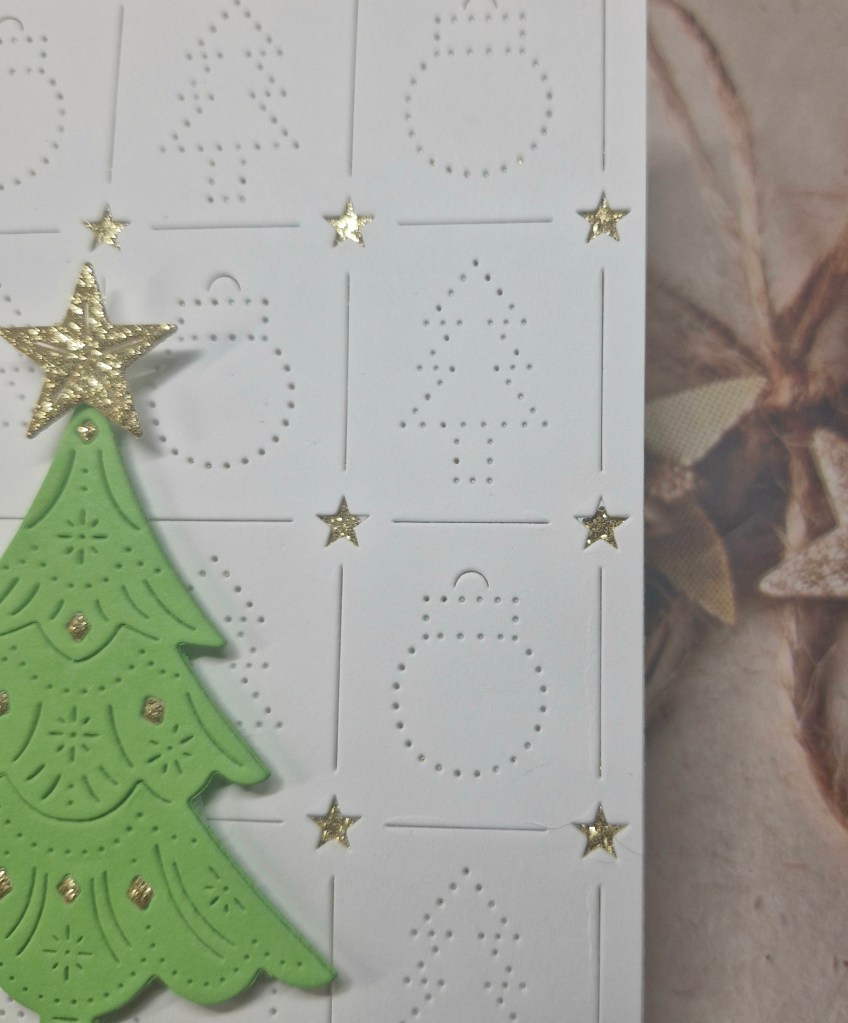
The background panel is a cover plate from Pinkfresh Studio called ‘Festive Grid’. I used a white A2 panel for this. The stars fall out of the cover plate, so behind them I used Pinkfresh Studio gold glitter card stock, then a thin 3D foam to adhere to a card base.

I then die cut the tree and stars. The tree is a freebie from ordering at The Greetery, and die cut using some Heffy Doodle card stock. As the little diamonds also fell out of the tree, I die cut it again using the gold glitter card stock and inlaid each of the little diamonds into the green tree. The star is also die cut form the same gold glitter card stock and adhered as you see.

The final touch was to add a gold foiled sentiment.

I hope you can come and join the team choosing a previous colour theme – there are certainly lots to choose from. xx

I shall be entering the following challenges:

Mix It Up anything goes with option of paper piecing

Merry Little Christmas Challengeanything goes Christmas

Ellibelle’s Corneranything goes

A Cut Above anything goes with die cuts

12 Months Of Christmas Link Up anything goes Christmas

Silent Night, Holy Night

Hello again everyone. The Alphabet Challenge has reached the final challenge of the year. We have reached the letter ‘S‘, and Melissa has chosen the theme of:

‘Silent Night’

Here is my card:

These houses were ink blended using a Simon Says Stamp stencil set called ‘Snowy Village’. There are 5 little stencils to create this scene, and I used all of them.

Pinkfresh inks were used for the houses and trees, gold paste for the windows, and Tim Holtz glitter paste for the snowy background. I obviously had to wait to allow the pastes to dry between those last two layers – patience is not one of my virtues when it comes to card making – but I managed…..

I stamped the sentiment – from an MFT stamp set – then layered that with a black panel.

The little village was die cut using a stitched rectangle die and again layered with black, and the next layer down was cut then dry embossed using one of my favourite embossing folders from Stampin’ Up.

I hope you can come and join us – I am looking forward to seeing your creations in our gallery. xx

I shall be entering the following challenges:

Everybody Art Challengehouse/home

Tic Tac Toetop right to bottom left diagonal – metallic – embossing (wet or dry) – die cuts

A Perfect Time To Craft anything goes

Pinspirational anything goes

12 Months Of Christmas Link-Up – anything goes Christmas

Here Is A Place To Start anything goes with option Happy Holidays

Stencil Funstencil – option Winter/Christmas

Be Merry

The last challenge for the year has started at Cardz 4 Galz. The challenge finishes on 22nd December, and we will be having a break until the new challenge on 9th January.

Billie A is hosting this time round, and she has chosen the theme of ‘Christmas‘. Here is my card:

I cut a square of the Pinkfresh Studio gold glitter card stock the same size as the square card base. Before adhering, I die cut the square scalloped frame using a Pinkfresh Studio die set out of the centre – it would be hidden behind the white panel.

The white square was cut, then dry embossed using a Spellbinders embossing folder. This white was layered onto the gold, then the gold frame adhered on top.

The baubles and foliage are washi tape from Pinkfresh Studio and arranged as you see, then the gold foiled sentiment from Lawn Fawn added.

I hope you can come and join us with your projects following our theme. xx

I shall be entering the following challenges:

Double DChristmas Ornaments

A perfect Time To Craft anything goes

Dragonfly Dreams Christmas

Avenue 613 Create anything goes with option of any winter holiday

Pinspirationalanything goes

Christmas Crafts All Year Roundbows, gifts, decorations

12 Months Of Christmas Link Up anything goes Christmas

Season’s Greetings

Hello once again. ABC Christmas Challenge has reached the end of the alphabet for this year, and Marie is hosting. We have two themes for you to create your Christmas/festive creations with:

Y is for Your favourite colours

and

Z is for Zoo Animals

Here is my card:

Obviously, I chose to go with my favourite colours. I love the traditional red and green for Christmas, and having this purple back panel really made them pop.

This die set is from Concord & 9th, and it has been a really popular set – I can see why. I was lucky enough to get it the first time round, but it didn’t take me long to play with it.

I die cut the base layer from the dark purple card stock. On that layer are the dotted outline for suggestions of where to place your other elements – I kinda went a little rogue, as you can see, but the dotted areas you can see on the base add something I think.

This purple layer was added to a white card base, one I die cut with that base die to create the shaped card.

All the floral elements and the foliage were die cut, many more times than was actually needed, and I went to town with the placements. I only used the poinsettias and not the other flower that came with the set, and added them first – two larger flowers and two smaller flowers.

The foliage and leaves were die cut using several tones of green, and the mistletoe berries I kept white.

A little gold die cut for the centres of the poinsettias, and of course I added gold gems here and there:

The sentiment was heat embossed onto a purple strip, die cut with the banner die, and the two little tag ends added.

This was added strategically across the centre of the card – so much dimension under there I used 3D foam and glue to get it to stick.

I hope you can come and join us with your Christmas creations following one of our themes. xx

I shall be entering the following challenges:

Peace On Earth Anything goes Christmas

Crafty Catz Weekly Challenge anything goes – option of Christmas presents not taken

The Flower Challengeflowers – add sparkle

A Perfect Time To Craftanything goes

A Cut Above anything goes with die cut

Pinspirationalanything goes

12 Months Of Christmas Link Upanything goes Christmas

Triple Bbirds and/or butterflies and/or blooms

A Birthday Vase

Hello again. More creating in my craft room and this time I created this card:

I was inspired by the mood board at Just Add Ink and the vase of red flowers that was in their picture. Funnily enough, one of the die sets from the Spellbinders Advent Calendar was this vase with some flowers, so I used that die set, and some of the flowers from another day in the Advent Calendar – as well as the sentiment banner.

I first created the background by dry embossing a hot foil plate from Crafty Meraki ‘Loopy Hearts’. I like how the hearts are there in the background – I used the debossed side – and give a subtle texture. Onto that panel I splattered some gold acrylic paint to bring in some of the gold from the mood board.

The wooden shelf piece is a die which embosses wood grain into the die cut, and I used a light brown card stock.

The vase was die cut from grey – I was tempted to add texture of a pattern but I went without – let the flowers and the background take centre stage.

I then used Spellbinders green card stock, and some red card stock from Heffy Doodle for the leaves, stems, and the flowers. These were layered as needed, and the centre of the flowers were die cut with Pinkfresh Studio gold glitter card stock.

I always die cut more than I think I need so I can play around with the design.

The wood grain strip was adhered with glue, then the vase adhered with 3D foam pieces at the edges and the flower placement began. Glue was added to the bottom of the stems, but I added small pieces of 3D foam to the flower heads themselves.

I had extra gold glitter circles from die cutting the flowers centres, so I used them as glittery accents instead of gems of sequins – waste not, want not…..

The sentiment and banner are also from the Advent Calendar, die cut in the same red card stock with a gold layer behind to shine through the letters.

I don’t really like to use glitter itself, but I am a great fan of glittery card stock, preferably gold – and this glittery card stock from Pinkfresh Studio is one of the most sparkly – and doesn’t shed…..such a bonus!

I shall be entering the following challenges:

As You Like It gold, silver or glitter and why – nope, no glitter, not for me – too messy

Just Add Inkmood board

Beautiful Blossoms flowers

Creative Fingersanything goes

Crafty Catz anything goes – option of anything for presents not taken

AAA Birthday birthday with layers

Snowman Tag

Hello once again. I have been busy making tags the past couple of days and I have one here to share:

This cute little snowman is one of the dies from the Gummiapan Advent Calendar. As soon as I opened him up – day one I think – I began thinking of how to use him.

I took a medium sized tag and ink blended with a couple of blue Distress Oxides. I then used the same blue Oxide pads and ink smooshed on top of the blending, also adding some water droplets. I used my heat tool and set it off ot the side.

The snowman was die cut from white glitter card stock, and another layer of white card for a little bit of stability for the arms. Before adding the white card stock layer, I stuck down some black card to go behind the eyes.

The hat was die cut from Spellbinders black glitter foam, and attached. There is a little slit in the base of the hat so the snowman head can be inserted just a tad.

The eyes and buttons are little black gems, and the glitter carrot nose was coloured with a Copic marker.

The background tag was dry, so I added some silver low-shed glitter card for a little hill, and added the snowman.

The snowflakes were die cut with a Simon Says Stamp snowflake tag set from the same glitter low-shed card and adhered with glue, snipping off where they hung over the edges. and an iridescent gem added to each of the centres, and few tiny gems around and about the background for more sparkle.

The final touch was to add some blue ribbon from my stash.

I shall be entering the following challenges:

Ally’s Angelsanything goes

Addicted To Stamps and More Christmas

Simon Says Stamp Wednesday Challenge – winter blues

Creative Fingersanything goes

Mix It Up anything goes – option of paper piecing not taken

Ellibelle’s Corner I Spy – something for Christmas

Creative Inspiration anything goes

MAWTT Christmas Characters

Dragonfly Dreams Christmas

2 Sisters On The BlogChristmas with blue tones

Gift Tag Scene

Hello once again. I have a good excuse to play in my craft room due to the sever weather we are having. I created a few gift tags. I wanted to use my Altenew embossing paste, and found it was useable – I have had it for quite a while – but I needed to use it up pretty pronto. I took a whole host of tags and stencilled a lot of them with several stencils I had, and set them all aside to dry overnight.

Today I created this tag:

This manila tag I left the top part unshaded, and used the Brutus Monroe ‘Starry Night‘ stencil with the Altenew embossing paste, then used the paste to create a thick and uneven bottom to it. I wanted this bottom to look like a snowfall – all the ridges and peaks. This was left to dry overnight.

The houses were created using Spellbinders ‘Mantle Village‘ die set, card stock from Concord & 9th and Heffy Doodle. The houses have a second whole layer behind the front so I could piece back in the windows, using Spellbinders brushed gold card stock, or replacing the grey ones. I pictured some rooms with lights on, and some rooms without – that sounded good in my head, anyway!

I am more partial to gold, silver less so, and really do not like to use glitter. I don’t mind glitter card stock – but glitter in it’s loose form – no thank you. I find it too messy, and difficult to control.

The trees were die cut and assembled, and as the Altenew paste was now dry, I created my scene. The houses and trees adhered as you see with a mixture of wet glue and a little 3D foam behind to top of the upper two houses.

It was then I found out the bottom paste was not completely dry – even left overnight – I must really have put a thick layer down there – so some of the white paste found it’s way onto a tree or two – darn those mucky fingers…..I decided to carry on and finish anyway.

I added some Pinkfresh Studio glitter gems – these gems are silver and gold but I do like how they sparkle.

The finishing touch was to add a red ribbon from my stash.

It was only when creating this post did I realise a little red bit of fluff from the ribbon had found it’s way onto the bottom of the tag – that paste is a magnet, I truly think it is…..!

I had a house left over, so used it on this smaller tag – very simple – paste through he same stencil, paste on the bottom to create the hill, house and trees adhered, and some little gems to fit in-between the stencilled stars:

I shall be entering the following challenges:

Addicted To Stamps and More Christmas

As You Like It gold, silver, or glitter – explained above – no glitter for me thank you :)

Paper MinutesChristmas – not a card

Inkspirational Mood Board – inspired by the houses

Mix It Up anything goes – option of paper piecing taken

Ellibelle’s Corner – I Spy something for Christmas

Everybody Art – house/home

Crafty Catz Weekly Challengeoption anything to do with presents taken

12 Months Of Christmas Link Up anything goes Christmas

Guest Designer Creative Artiste Mixed Media

Hello there. I was thoroughly pleased and excited to be offered a chance to be Guest Designer at the new Creative Artiste Mixed Media Challenge, when THIS card was chosen as winner by their Design Team.

The theme is always ‘anything goes mixed media’. Here is my creation:

I started by creating the background by using a snowflake stencil from Funky Fossil and Distress Texture paste in ‘Sparkle’. This set off to one side to dry and I then moved to creating some panels with Colorsparx watercolour powders in red and green – these were then set to dry, and for the other foliage, I created some panels using Distress Inks and Distress Mica sprays.

I already had an ink smooshed panel of lighter brown and dark splatters which I dug out ready to use.

Once all the panels were dry, I used Tim Holtz ‘Holiday Brushstroke 3‘ die set for the poinsettia and leaves, Spellbinders gold card stock for the centre of the poinsettia, and Sizzix ‘Buds and Branches‘ for the other foliage. The layers of the poinsettia glued together, and the edges with a Brutus Monroe Tricolour ink pad for more shadow.

The snowflake panel a was adhered to a square card base, and the floral and foliage images around to my satisfaction then attached with either 3D foam pieces or glue.

Some snow effect was added splattering Liquitex acrylic iridescent ink in white and gold, a foiled sentiment attached, and then some Pinkfresh Studio ombre glitter drops – I do like sparkly gems.

I absolutely loved creating this project. Mixed media is quite scary for me, but I have found that if I just go with my gut – it usually turns out reasonably good.

I hope you can have a go yourself and join the challenge this time round. xx

I shall be entering the following challenges:

Try It In Tuesday traditional Christmas

Ally’s Angels anything goes

Crafty Gals Corner anything goes – option of three or more layers taken

Beautiful Blossoms florals

Love To Craft anything goes

Ellibelle’s Corner I Spy – something for Christmas