Happy, Happy Birthday

Hello everyone. I am here with a card for the new challenge at A Perfect Time To Craft. I was chosen as one of the winners for the December 2024 challenge, as as such took up their offer of being a Guest Designer for an upcoming challenge.
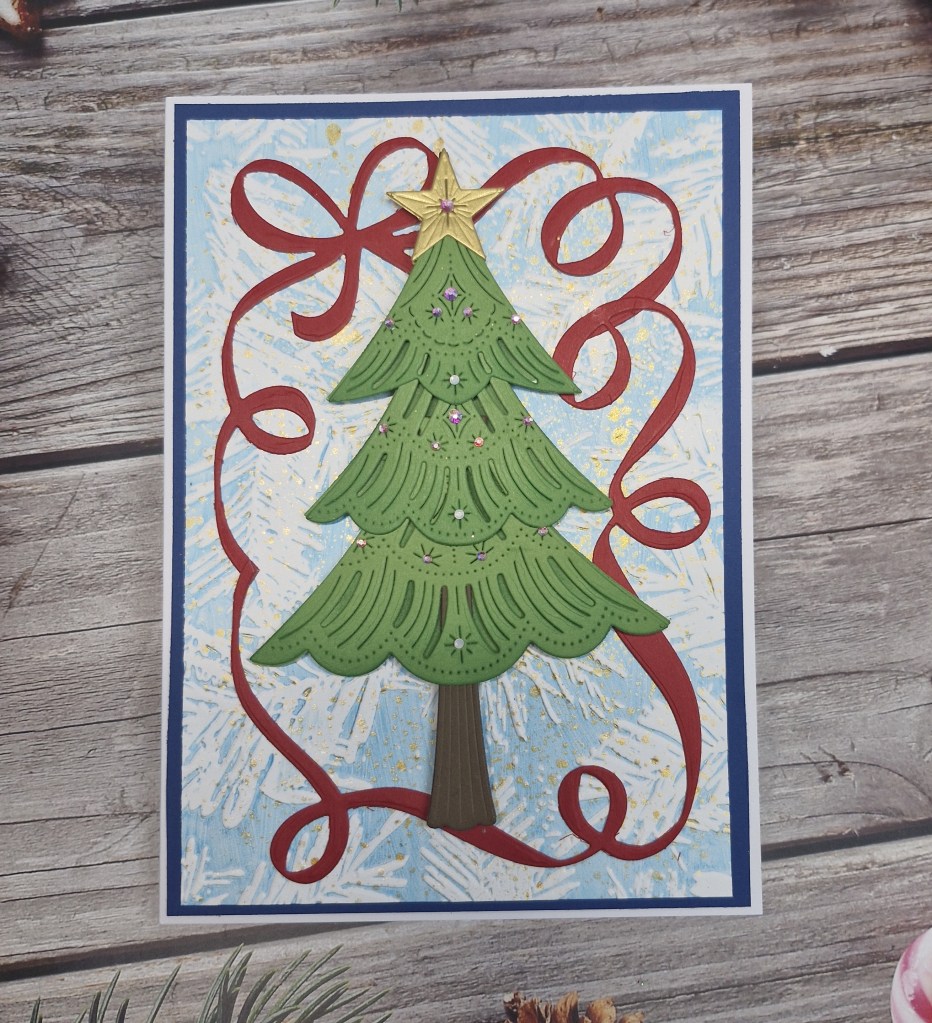
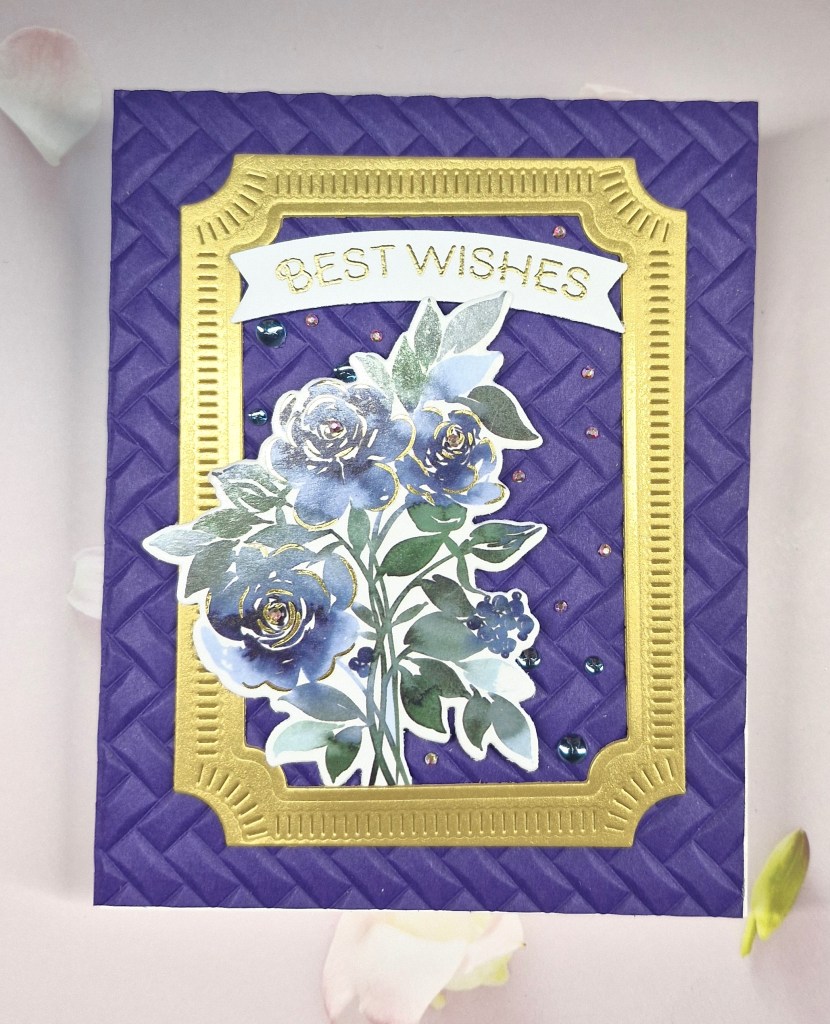
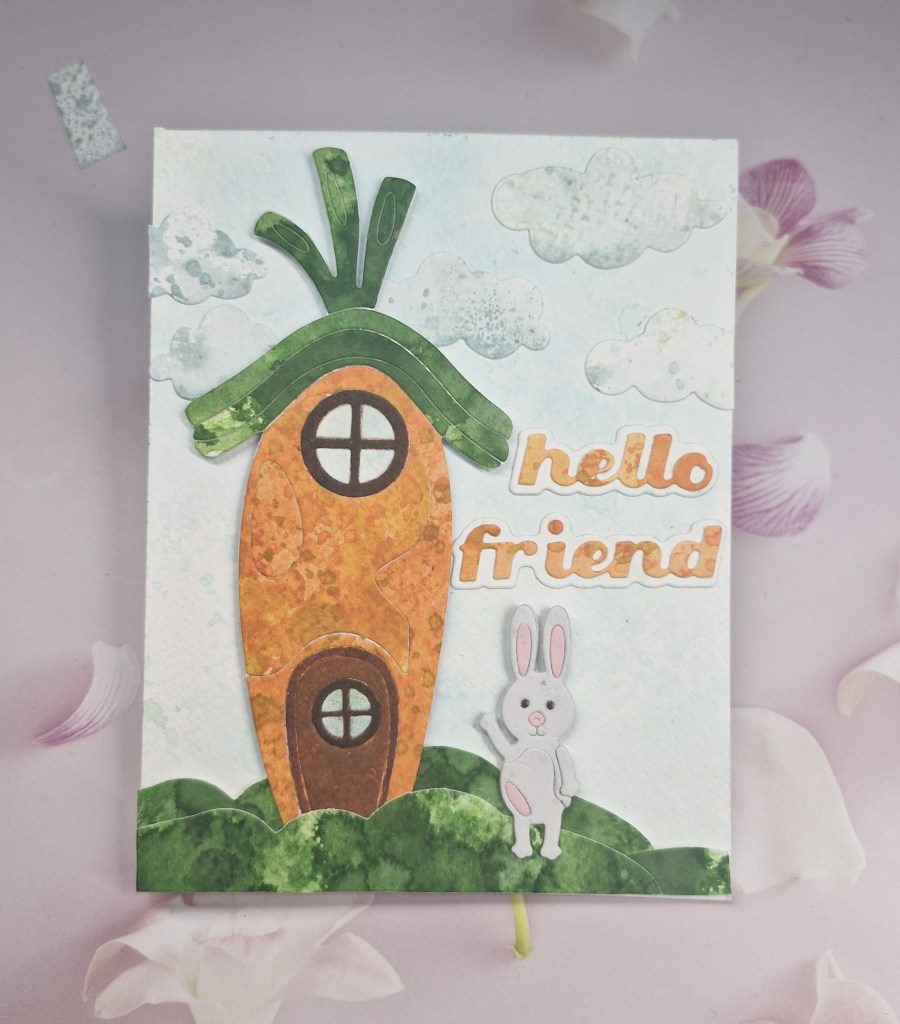
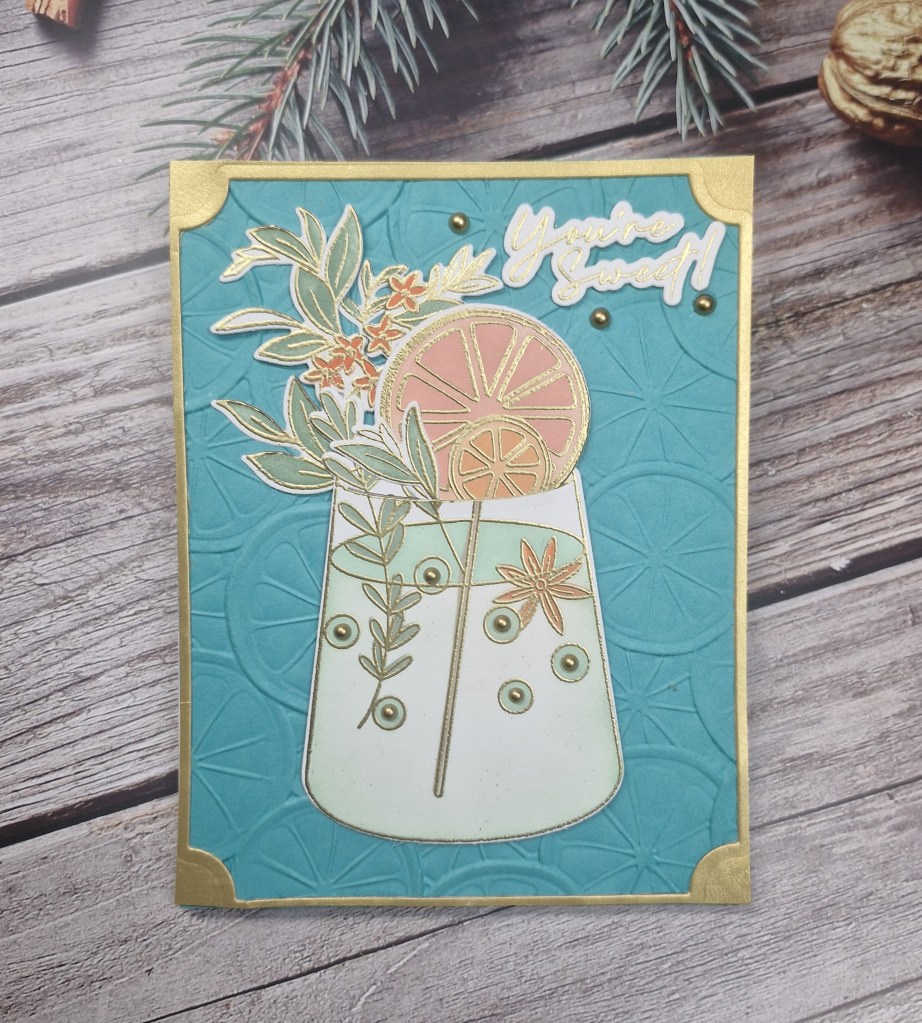
Here is my card:

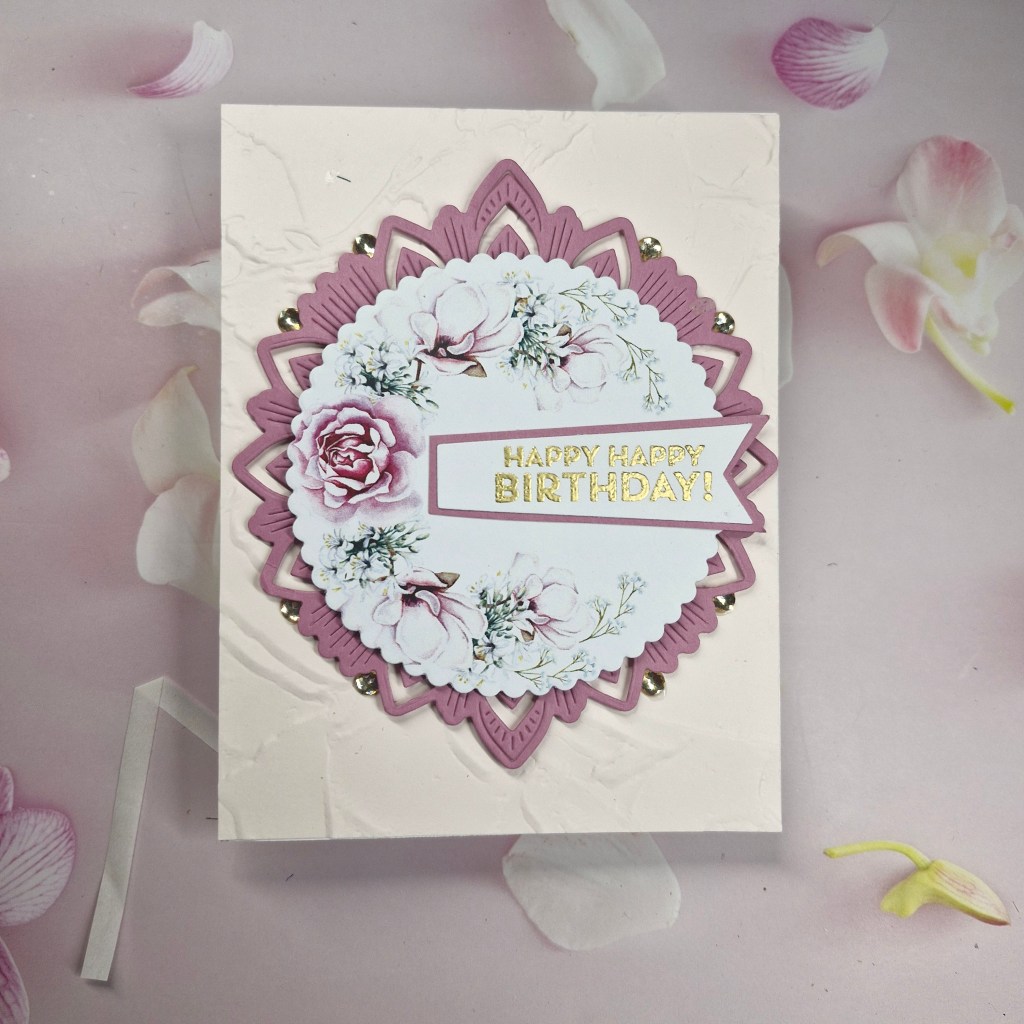
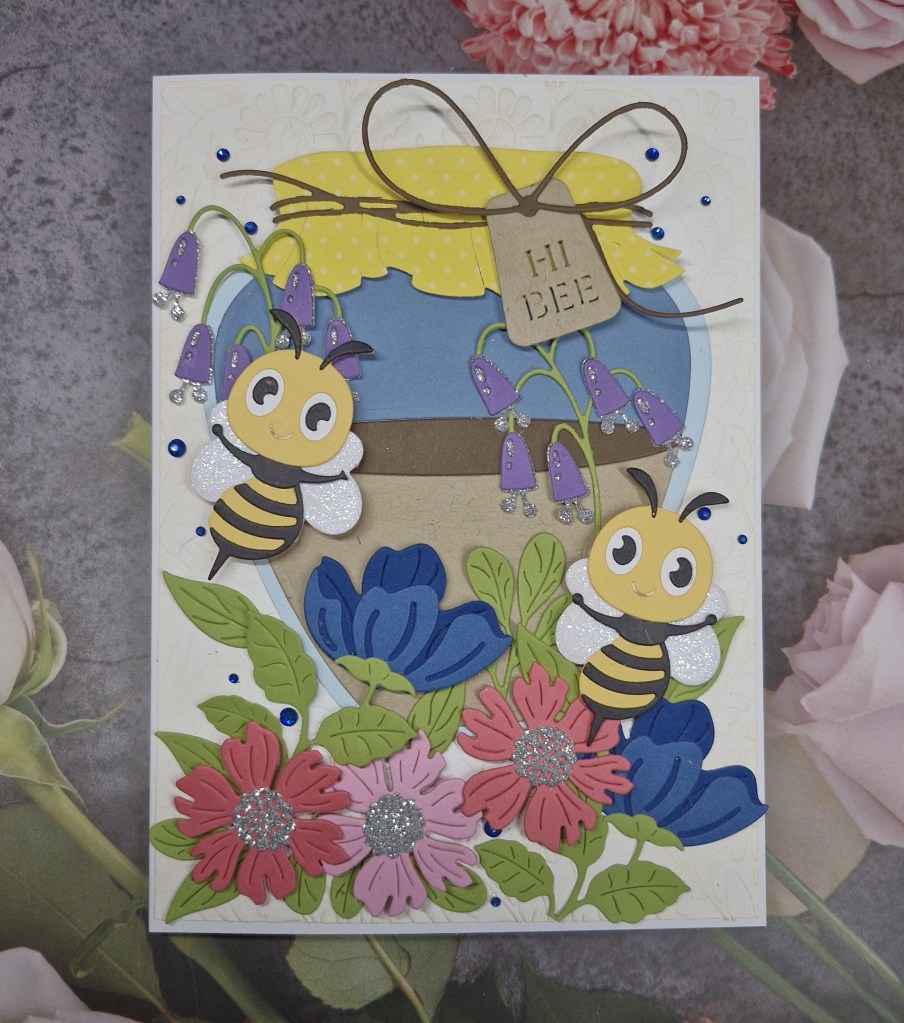
I was allowed to choose from digital images and saw this suite of images from Anne Constantly-Carding site. The ‘Pink Blooms‘ set has some lovely background papers and floral images, so many I was stuck for choice.

I don’t work very often with digital images, as I don’t really know how to manipulate them,. and my printer doesn’t like to print on anything much thicker than paper…

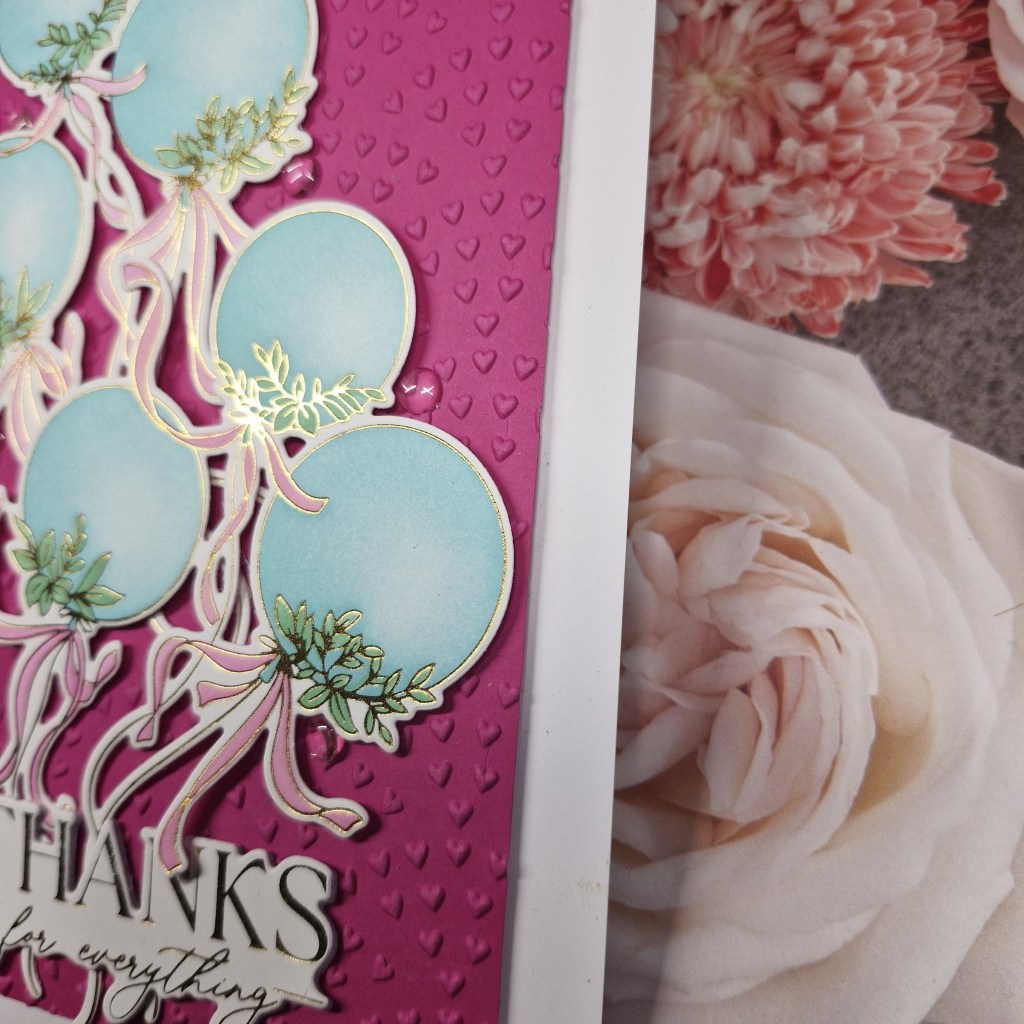
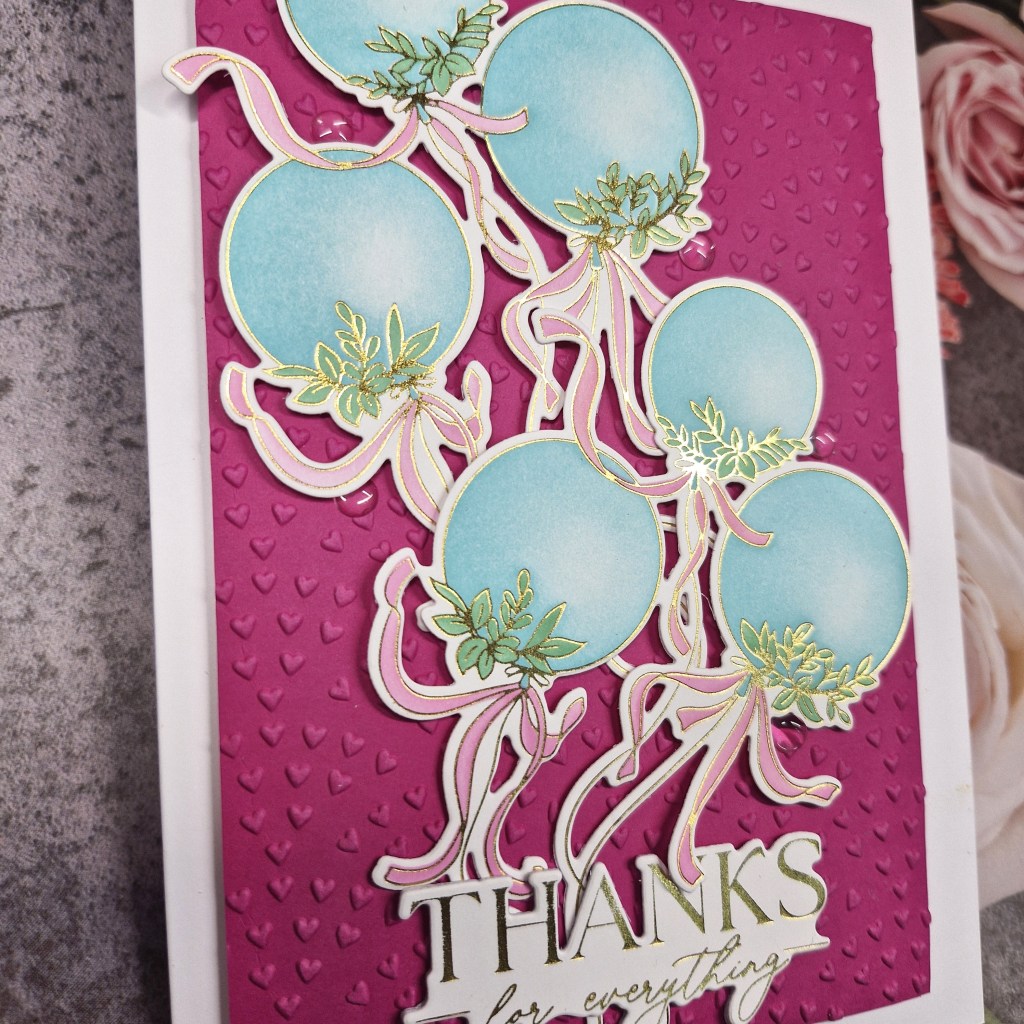
I first printed all the images onto paper, then attached those sheets to a white card. After deciding which image I was going to use, I took a scalloped circle die which fit this circular image perfectly, and die cut.

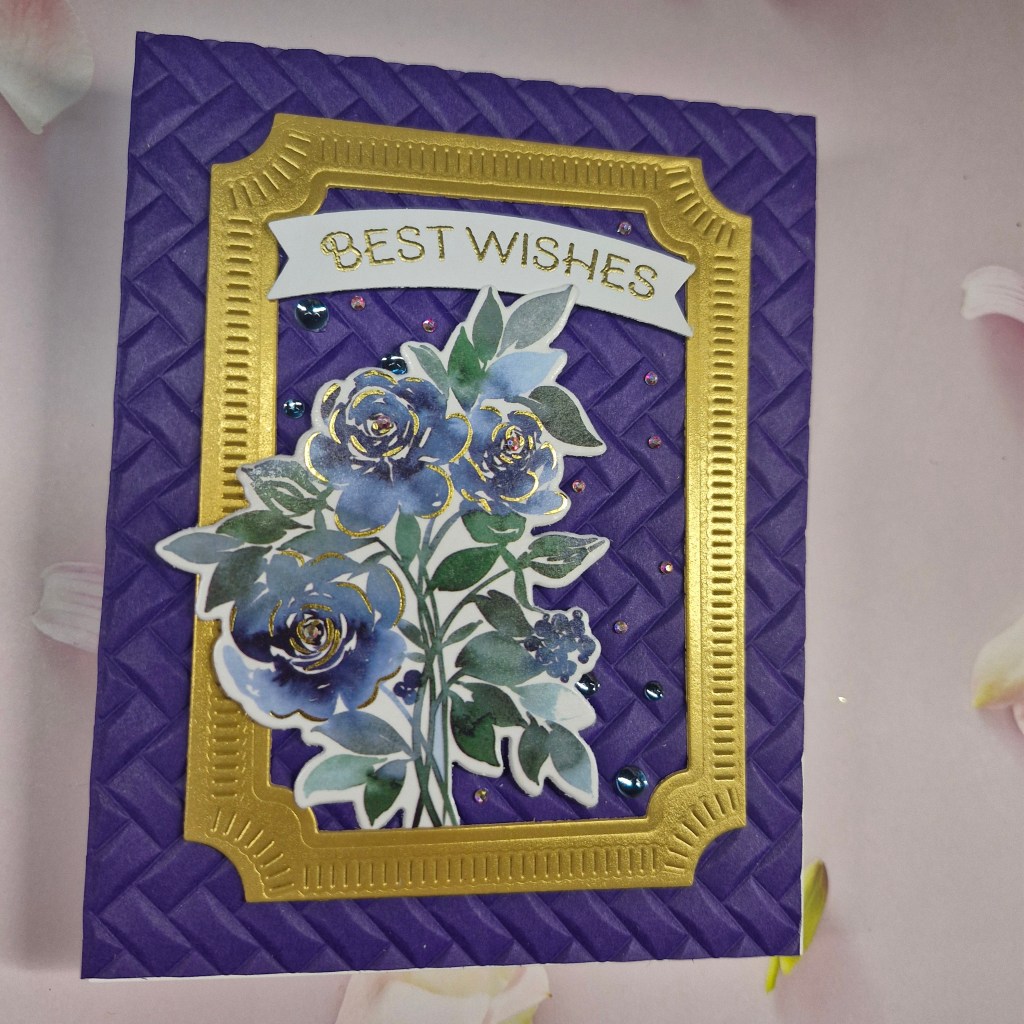
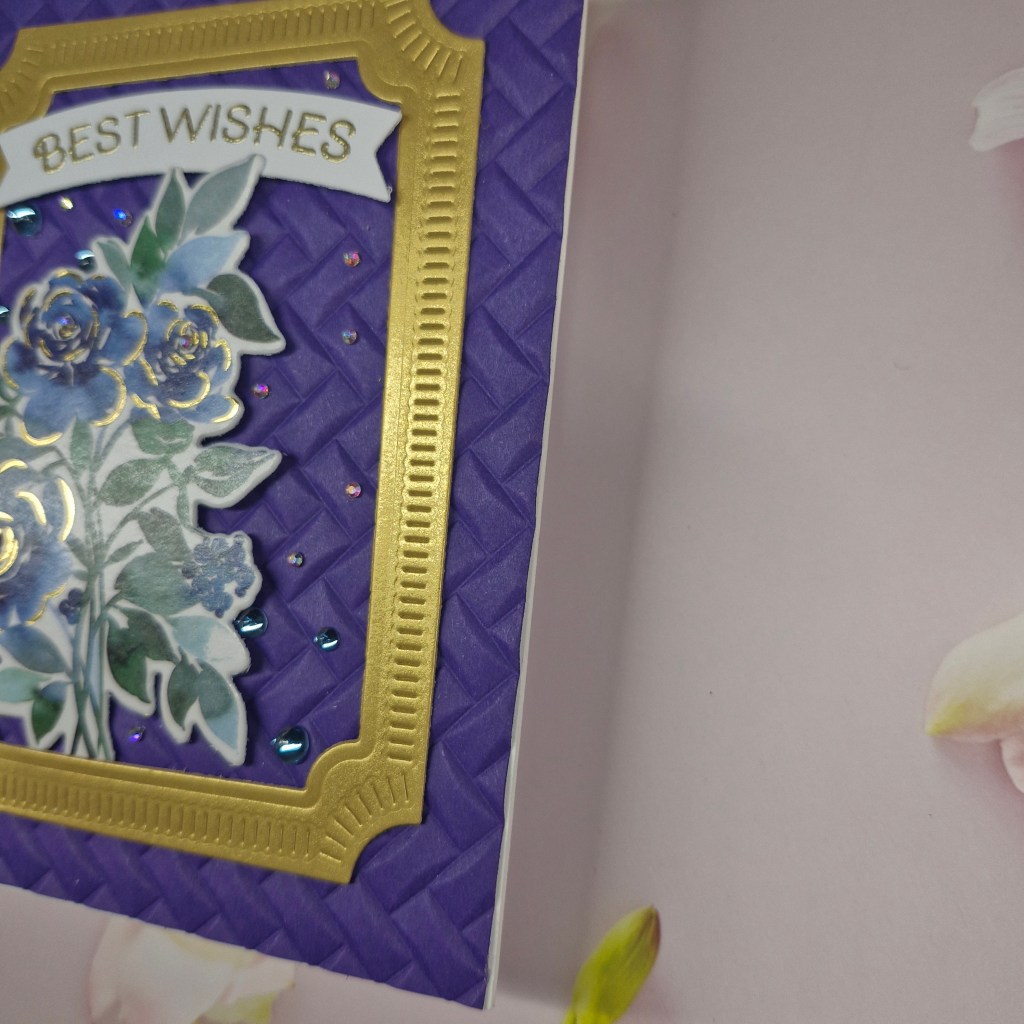
The background panel is actually a blush card stock – even though it looks cream on the photo – and dry embossed using a Stampin Up embossing folder. The ‘Ornate Circle‘ die from Pinkfresh Studio seemed the pe4rfect frame for the floral circle, and die cut using Concord & 9th ‘Briar Rose’ card stock.

The layers were attached as you see, and some gold gems added around the ornate frame.

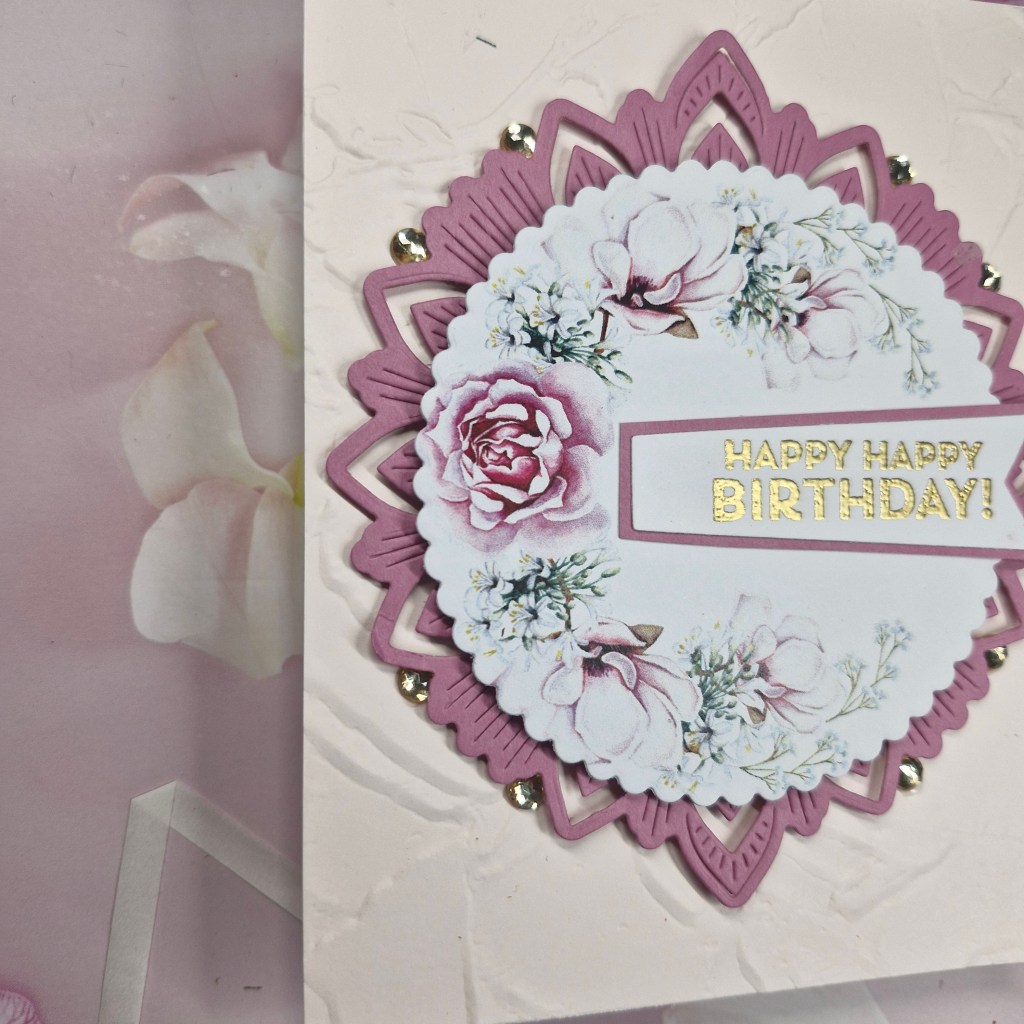
The sentiment is also from Pinkfresh Studio, and heat embossed with gold.

I hope you can come and join the fun at A Perfect Time To Craft. Their challenge is always ‘anything goes’, and you can enter as many times as you wish. xx

Oh Christmas Tree

Hello everyone. The Holly and Ivy Christmas Challenge has started a new challenge – anything goes Christmas. Here is my card:

I started by creating the background. Using a Spellbinders embossing folder, I inked up smoother side of the folder, and an it through the machine with a white card panel. This created the embossed leaves, but the blue background to them. I then used gold acrylic ink and created some splatter.

The card base is 5×7 inches, a slightly smaller blue panel adhered, then the white and blue embossed panel was cut slightly smaller than that and glued down.

The tree is a die set from The Greetery, – an interesting die set and an interesting way to put all the levels together. All layers were die cut with the same green card stock, then a little ink blending along the bottom for a slightly darker look – some added dimension.

Once I had set the tree on the background, I though it needed a frame, so I also used the Ribbon Frame die set. As this ribbon frame was created for an A2 panel – I die cut two, did a little snipping, and elongated it to fir the 5×7 card.

The ribbon and tree were attached, and some very sparkly gems added to areas on the tree.

I shall be entering the following challenges:

Crafts Galoreanything goes

A Cut Aboveanything goes with a die cut

Lil Patch Of Crafty Friends – anything goes

12 Months Of Christmas Link Upanything goes Christmas – option of couples not taken

CYHTPembossing folder – option of masculine not taken

W is for Wings

Hello once again. It is time for the new challenge at The Alphabet Challenge. Having reached the letter ‘W‘, Billie A has chosen the theme of ‘W is for Wings‘. Here is my card:

This was created using a lot of die cuts – I mean a lot. Several sets from Spellbinders, and a little patience….

I chose a cream background panel for this 5×7 inch card base, and used a Spellbinders embossing folder. It is a little difficult to see in the photos – but it is there…..

I then used lots of different coloured card stock for each of the layering die cut elements, along with some glitter card stock for the wings of the bees, and the centre of the larger flowers.

I made sure eyes of each of the bees were glued so it looked like there were looking towards the centre, or even looking towards each other – the way my mind works sometimes….!

I added some blue sparkly gems around and about – even more bling and sparkle – and it looks like I couldn’t fit anything else on there – that’s why I used a larger card base.

I hope you can come and join us with your creations featuring wings – lots of scope there. xx

I shall be entering the following challenges:

2 Crafty Critter Craziesanything goes with a critter

Crafty Animalsanything goes with an animal

MAWTTthings with wings

A Cut Aboveanything goes with die cuts

Lil Patch Of Crafty Friendsanything goes

Ally’s Angels anything goes

Best Wishes

Hello there. Cardz 4 Galz has started a new challenge. Pamela is hosting and she has chosen the theme of ‘Embellishments’. Think gems, sequins, buttons, bows, etc. Here is my card:

The background panel is a purple card stock and dry embossed using a Spellbinders embossing folder.

I die cut the frame from a Pinkfresh Studio die set out of brushed gold card stock, then added the washi tape blue roses – again from Pinkfresh Studio. I only used one of the multiple images from the strip of washi tape, the others are for another project.

The sentiment is heat embossed, and my nod to the challenge theme was to add multiple gems – some small sparkly gems and a few larger coloured gems.

I hope you can come and join us with your projects incorporating our theme. xx

I shall be entering the following challenges:

Crafts Galoreanything goes

Tic Tac Toetop left to bottom right diagonal – enamel dots – die cuts – dry/heat embossing

A Cut Aboveanything goes with a die cut

Lil Patch Of Crafty Friends anything goes

Beautiful Blossoms anything goes with flowers/floral

Congrats – You deserve It

Hi there. Popping in to share another project created using the products from this past weekend’s Pinkfresh Studio virtual event.

I have the need for 6 congratulations cards, as the rest of my nurse practitioner team have been given a higher grading/banding. In the UK, we have certain ‘band’ levels which rise with seniority and qualifications, so their hard work and university courses have really paid off for them.

It has taken them 2 years of a Masters course at university on top of doing their day-to-day jobs, all that writing and actually jumping through hoops – it has taken a while – but they have finally been successful. Congrats to them all.

Here is my set of cards:

It probably took me a couple of hours to create these, but once you get going, all that ink blending on all those panels just goes quickly.

I first hot foiled the image, then started to ink blend. I did start with purple, but went to the coral colour and decided to keep them virtually the same after that. A couple of tones to create the dimension on the balloons, then each panel was die cut with the matching die set. I cut an extra of the balloon image for each one and glued together to create a little more stability.

I then hot foiled the sentiment, again used the matching dies, and added more blank die cuts behind those too.

The background panel was also a plate which had stitched detail, and adhered flat to the card base.

The extra little floral elements I added just for a little more colour.

This image – the stamp set, hot foil plate, layering stencils, and matching dies – are all just one set of products from one class – there are 4 other classes I have yet to do with other products………I can see a lot of Pinkfresh Studio projects coming your way….

I shall be entering the following challenges:

Fab’n’Funky stitching – real or faux

Addicted To Stamps and Moremake your mark

Ellibelle’s Corneranything goes

Ally’s Angels anything goes

Hello Friend

Hello everyone. I have a fun card to share with you made as Guest Designer for the new challenge at Ellibelle’s Corner I Spy challenge. The new theme is ‘no designer paper‘ Here is my card:

When I saw this carrot house and bunny from Picket Fence Studio – ‘Welcome Home Bun Bun‘ – I just had to have it. Such a fun and different die set.

Rather than using different coloured card stock, I created some panels using Distress Inks and played with ink smooshing. I used a couple of orange and a couple of green ink pads, wanting the panels to have lots of texture, and lots of layers, also adding some brown to the orange panel, just for more interest and dimension.

Once these panels were dry, I used the dies for each section then used the back shadow layer to glue all the parts together. I am glad this back layer was added as it makes gluing all the layers so much easier.

The background panel was created using Speckled Egg and again ink smooshing to give a soft pale blue sky, and the clouds were die cut from an ink smooshed panel using Salvaged Patina – or was it the other way round……?!

The window frames and door – die cut from the orange panel – were rubbed into some dark brown Distress Ink to make then stand out a little more. The windows were also die cut from the light blue piece of card and the ‘glass’ areas inlaid.

The bunny was die cut from a light grey card stock with the pink areas die cut and inlaid, and the sentiment from Spellbinders was created by using some left over spare orange and blue ink smooshed panels.

This was actually quite a fiddly card to make – you can see where all the die cuts are, and making them different colours, inlaying some of the die cuts – a little time consuming, but I must have been in a fiddly mood as I enjoyed the process,

I hope you can join us with your creation following the new theme. xx

Thanks For Everything

Hello everyone. I have a card to share using new products from Pinkfresh Studio. This press plate, stamp, die, and colouring stencils are from the Pinkfresh Studio event happening this weekend. I made this putting my take on the products whilst the live event:

I began by hot foiling the press plate of the balloons, then used the layering stencils to colour them. I created some dimension with varying the pressure of the ink blending brush, and also added a slightly darker blue to the left and under-side of each balloon.

I then hot foiled the sentiment – also products from the event – then die cut it and stacked a couple more layers beneath that.

This is a 5×7 inch card, and I used a ‘Dragonfruit‘ piece of card stock and a Spellbinders embossing folder for the background, adhered with a layer of foam, and attached to the card base.

The two balloon images were adhered with 3D foam beneath each balloon, then the sentiment glued down.

I also added some clear drops from Altenew:

I shall be entering the following challenges:

Festive Fridayincorporate at least three items – pink, glossy drops, ink blending, words of encouragement/kindness, balloons

CYHTPembossing folder, option of using something beginning with ‘F’ taken – foiling

Addicted To Stamps And Moremake your mark

Stencil Funuse a stencil – option of pink and/or red taken

ABC Christmas Challenge – C & D

Hello there. The ABC Christmas Challenge has started their second challenge of the year. The letters are ‘C’ and ‘D’ and we have chosen the themes of:

C is for Cute

and/or

D is for Die Cuts

Here is my card which incorporates both of the challenge themes:

This was another mixed media card and using some products received as part of the Gummiapan Advent Calendar. I just loved the gnome feeding the reindeer, and as I already had the trees from a previous order, I thought they would work to create a scene.

I started with the background, and used a Pinkfresh hot foil plate to create an imprint in the card. I then used Distress Oxide inks to swipe across the back of the card so the details would remain white as they were deeper. I added some water – not too much as this was normal card not water-colour card – then when dry I splattered on some gold and white acrylic paint.

For the main images, I did use water-colour card stock and my Zig water-colour markers – something I haven’t used for a while.

The images were die cut then water-coloured, gluing together once dry. The gold stars were painted using my gold marker.

I cut the snow bank free hand and attached before adding the images.

I hope you can come and join us with your Christmas/festive creations following one of both of our themes. xx

I shall be entering the following challenges:

Love To Craft anything goes

Lil Patch Of Crafty Friendsanything goes

Merry Little Christmas Challenge anything goes Christmas

Cut It Updie cuts – and this certainly makes me smile

Creative Fingersanything goes

2 Crafty Critter Craziesanything goes with a critter

Crafty Animals anything goes with an animal

Delivering Warm Hugs

Hello once again. The Holly and Ivy Christmas Challenge is starting a new ‘anything goes Christmas’ challenge. Here is my card:

I first created thew background panel using a stencil from Funky Fossil. I used a light blue card stock, then white pigment ink for the snowflakes. This was cut down to slightly less than an A2 card panel.

The central die cuts are from The Greetery and the die is called ‘Frost Buds’. The branch part was die cut from some white glitter card stock, and the buds themselves cut from silver glitter card stock. These were layered and added as you see.

I die cut some extra small pieces and added them to the background, then added some glitter gems to the centre of each of the die cut snowflakes.

The sentiment is from a previous foiling session.

I hope you can come and join us with your Christmas creations – anything goes is the theme. xx

I shall be entering the following challenges:

Christmas (or not) Bingo column G – free – pearls/gems – die cuts

Love To Craft anything goes

Merry Little Christmas Challengeanything goes Christmas

Crafty Catzanything goes – option to use a die taken

12 Months Of Christmas Link Up Christmas anything goes – option of couples taken – a couple of branches

Stencil Funuse a stencil – option of pinks and reds not taken

You’re Sweet

Hello everyone. I’m popping in to share a card created using the photo inspiration from the current Just Add Ink Challenge:

Here is the photo they used for inspiration:

And here is what I created:

I was inspired by the glass and the colour scheme, as well as the use of fruits.

I started by creating the background panel using Concord & 9th card stock and a Spellbinders embossing folder. This was then glued flat to a card base.

The glass, fruit, and foliage images are all from Pinkfresh Studio, and a mixture of a couple of sets.

The images were stamped then heat embossed with gold embossing powder, then all images coloured using the relevant layering stencils. I used Pinkfresh inks in a couple of coral and pink tones for the fruit, then a couple of green tones for the leaves.

The glass itself is actually from a Christmas/holiday set and was part of one of their virtual events, but I thought it would work for this and not be a Christmas card.

The glass has a notch cut into it near the top and into that I inserted the two pieces of fruit and a couple of leaves. The fruits all come die cut as one piece – several pieces altogether – so I cut them apart and picked the pieces I wanted.

I wanted to add a brushed gold frame, so die cut one out – then decided I liked the look of the ‘off cut’ from the frame – the outside piece we generally throw away – it seemed more suitable as it wasn’t too thick – thank goodness I centred in on the panel in the first place! The proper frame will be used on another project….

The glass and foliage were arranged on the panel, then I used low tack tape to pick the whole thing up – added thinner 3D foam to the back, then stuck it all down in one go. I little glue to some areas laying on the top.

The foiled sentiment was added – three layers altogether o make it more stable, and then brushed gold gems added as you see.

I shall be entering the following challenges:

Just Add Ink photo Inspiration

Love To Craftanything goes

Lil Patch Of Crafty Friendsanything goes

Crafty Catzanything goes – option to use a die taken

Creative Artiste anything goes mixed media