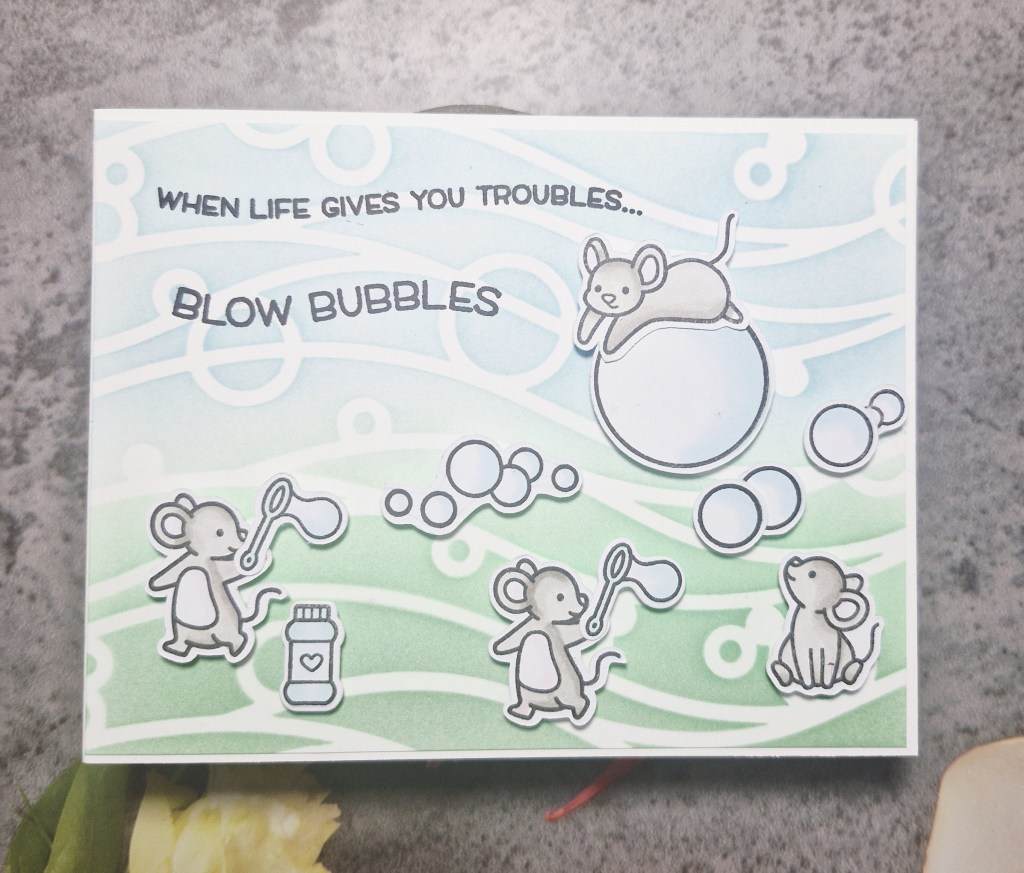
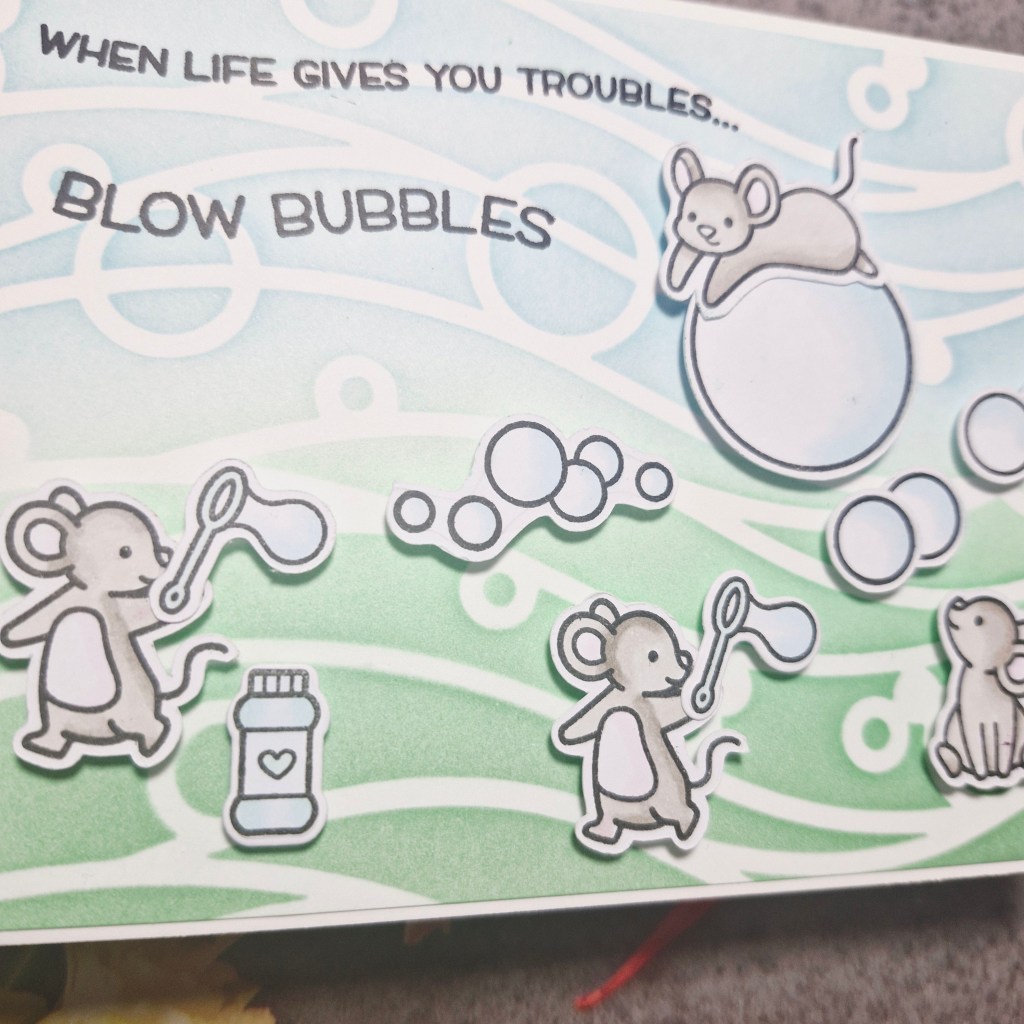
Hello. This card was inspired by the current challenge at The Card Concept:
Here is the challenge inspiration picture:

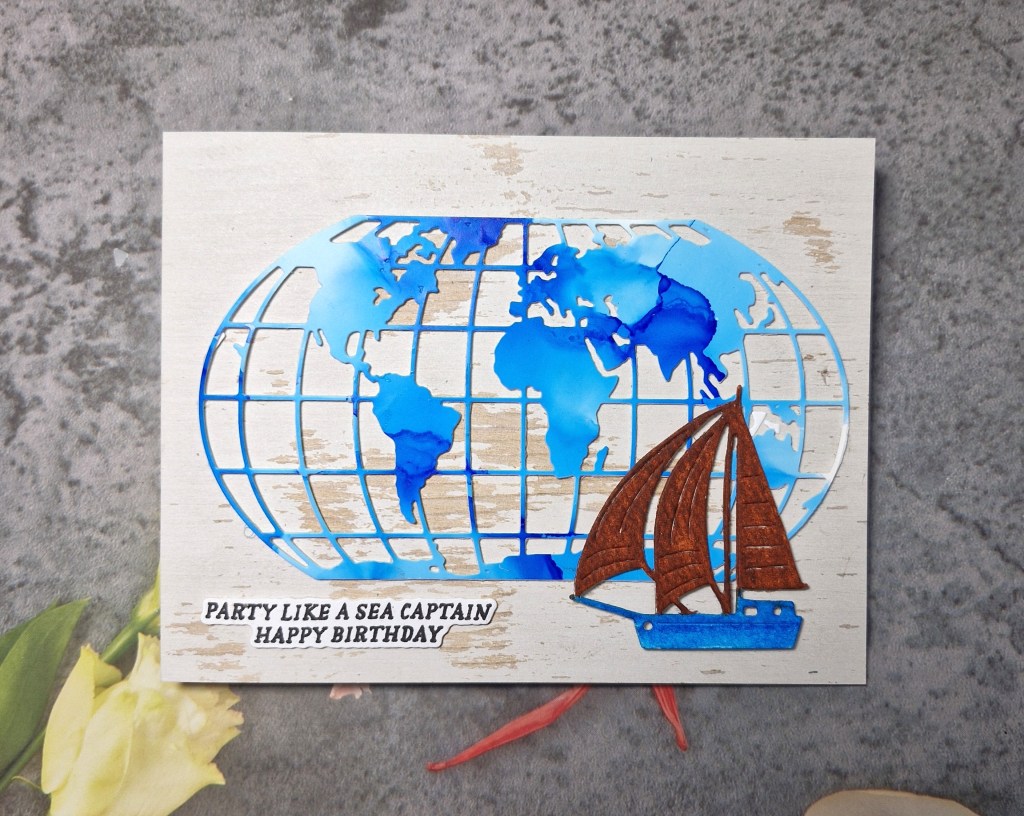
The nautical theme and the ship caught my eye, as well as the maps on the wall behind.
I searched through my CML app for ‘map’, and this die from Tim Holtz/Sizzix called ‘Destination’ popped up, so I die cut with a previously created alcohol ink and Yupo paper background panel. I had a couple of blue panels – some lighter, some darker, but I loved the vivid blue of this panel.
Once die cut, I layered it a couple of times with white card, as the Yupo paper itself is quite thin and flimsy.
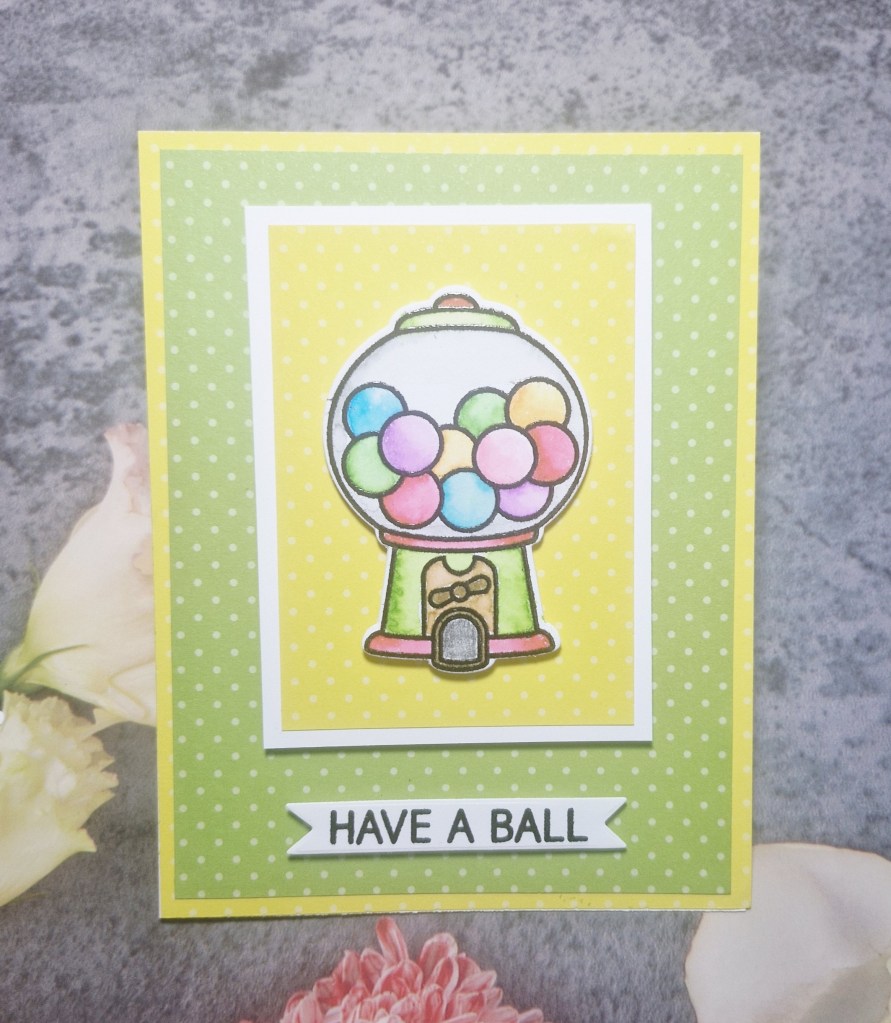
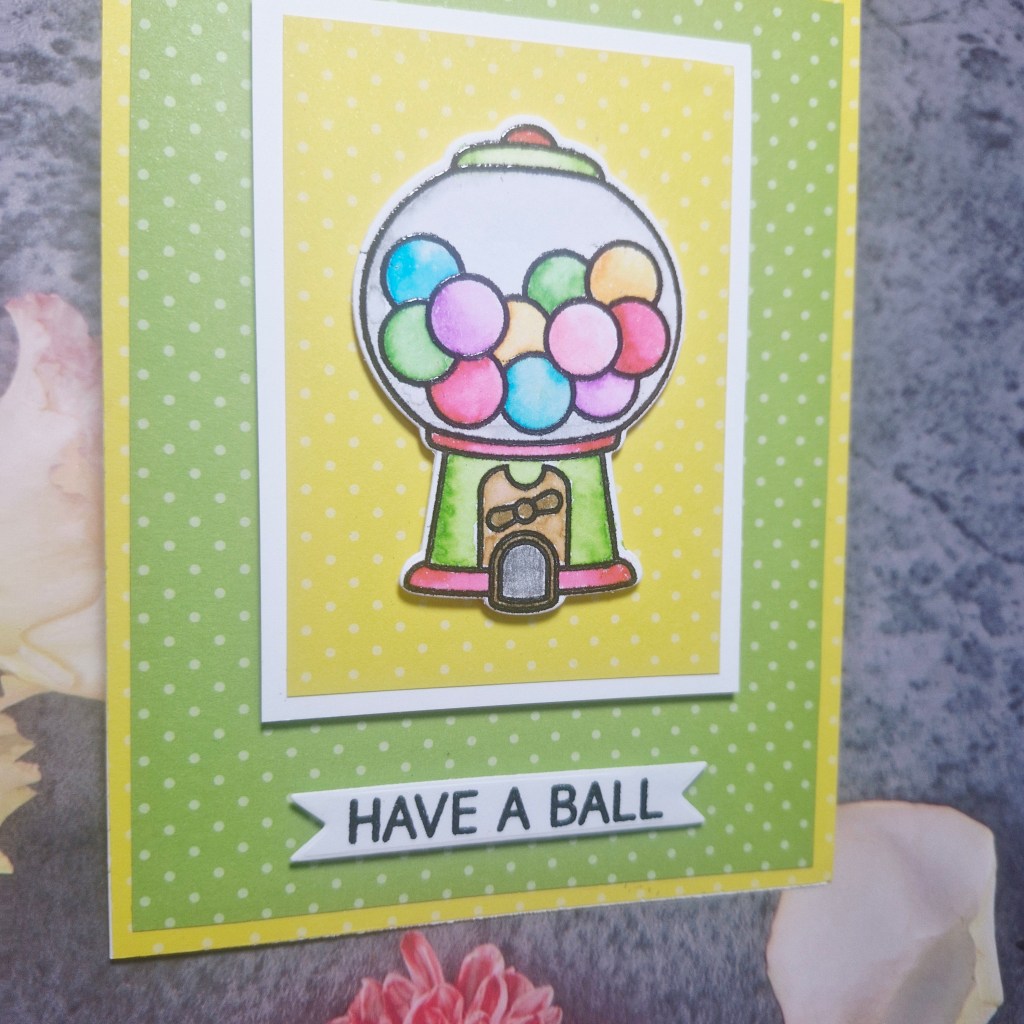
I searched again in the CML app for ‘boat’ and one of the items which came up was this die from Gummiapan, which I die cut it several times out of Distress water-colour card stock. I snipped the sails off, and coloured them with Zigs, adding on top of the base die cut, choosing a colour which would stand out from the blue map die cut, then coloured with boat hull with another Zig marker in a similar blue to the map.
I found this sentiment from Spellbinders, stamped then die cut.
For the distressed wooden background panel, I used a Stampin’ Up piece of patterned paper, cut to the size of the A2 card base, then added all the elements on top.
As mentioned, I shall be entering the challenge at The Card Concept.