Hello everyone. It is my turn to host at Cardz 4 Galz, and I have chosen the theme of:
Hugs & Kisses
Here is my card:
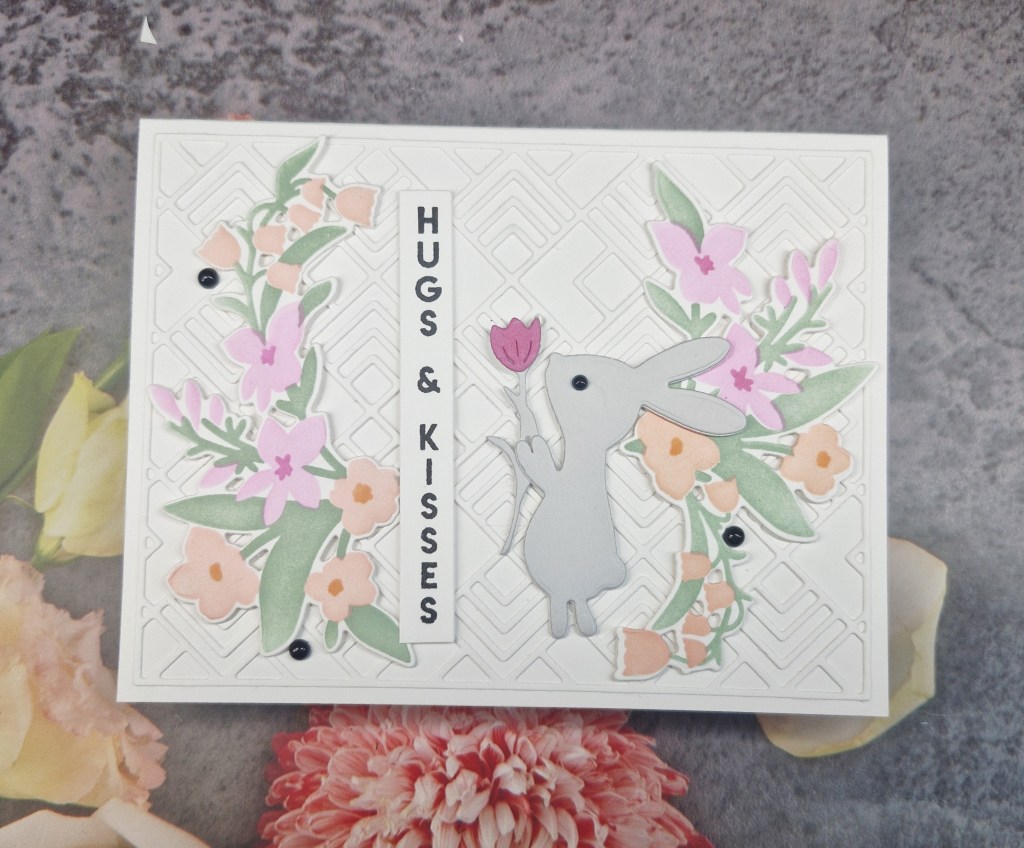
I first created the little bunny using a die set from The Greetery, which also included the little flower it is holding.
The florals to either side are a layering stamp and die set – also from The Greetery, and created using Pinkfresh Studio inks.
The background was created die cutting a panel out of white card stock using a cover plate die – I think from Pinkfresh Studio – then attaching that to a white card base.
The bunny and the florals were then added with thin 3D foam pieces.
The sentiment is from Heffy Doodle.
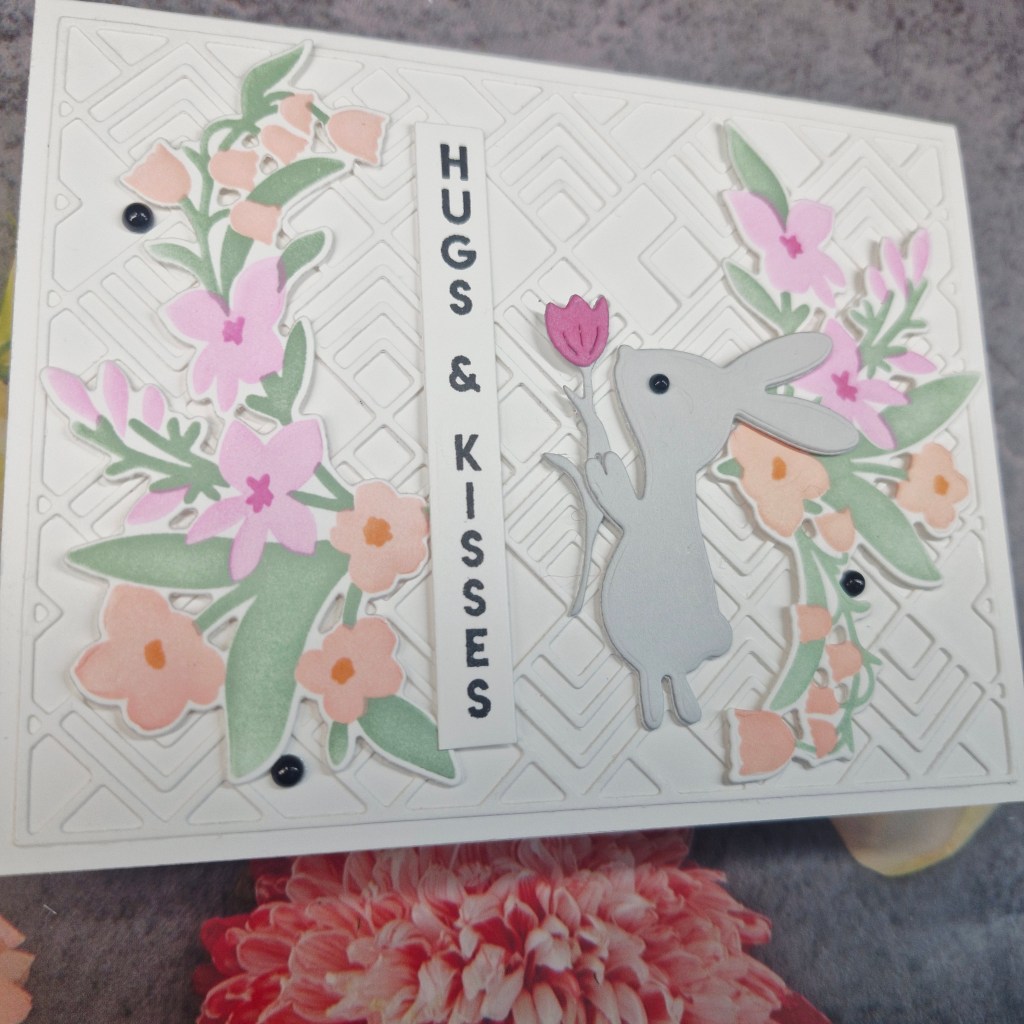
The final touch was to add some black gems as the eye for the bunny, and three more as you see.
I hope you can come and join us with your creations following our theme. xx
I shall be entering the following challenges:
Inkspirational – hugs & kisses
Critter Crazy – anything goes with a critter
Crafty Animals – anything goes with an animal
A Cut Above – anything goes with a die cut