Hello there. Cardz 4 Galz has started a new challenge. Caz has chosen the theme of ‘Clean and Simple’. Here is my card:
I chose a Heffy Doodle image, stamped then coloured with Copics, and die cut with the matching die set.
I then die cut a circle into white panel, added a piece of previously created ink smooshed card behind the aperture, and then added the image so he was poking his head out of it.
The sentiment was stamped and cut into a strip, adding as you see.
I hope you can come and join us with your CAS creations. xx
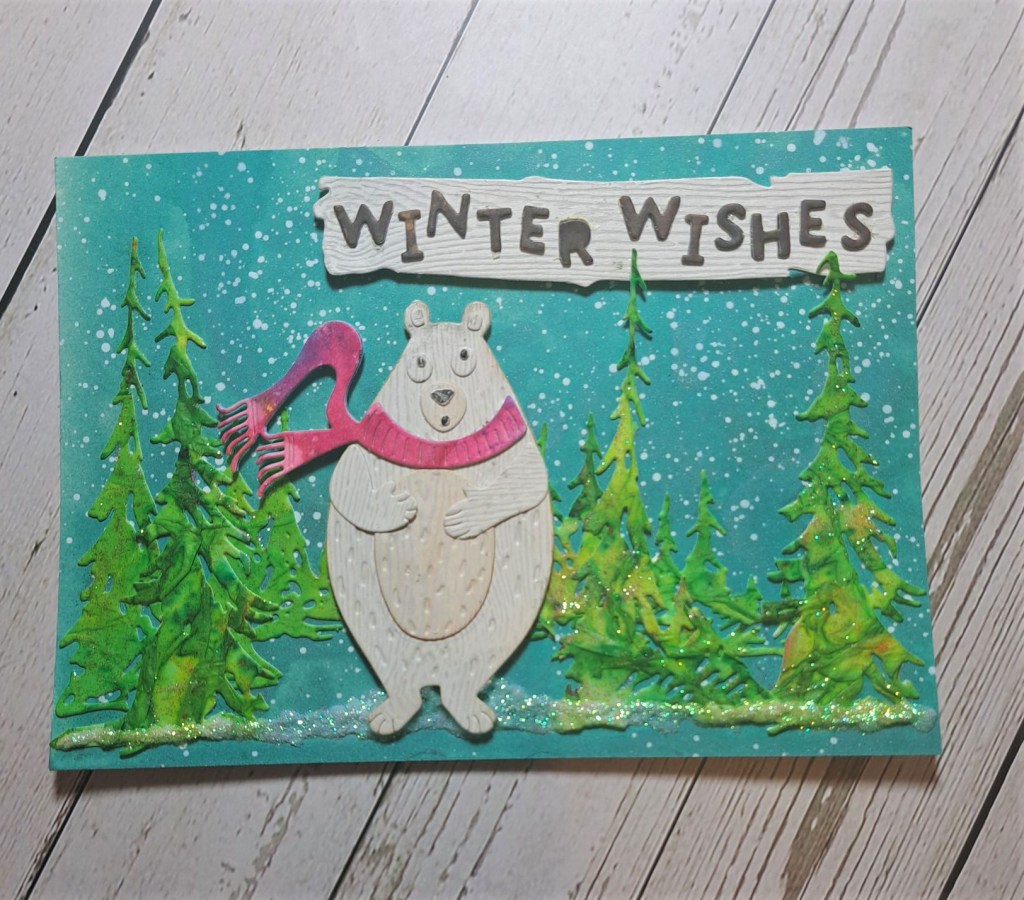
Hello once again. The ABC Christmas Challenge is at the beginning of the alphabet again. Helen is hosting this time round, and we want to see your ‘A for Anything goes’ and ‘B for Bears’ Christmas creations. Here are my cards:
A is for Anything Goes
B is for Bear
As you can see – two very different styles of cards.
The first CAS card is using s Clearly Besotted image, stamping, colouring with Copics, then using an oval to die cut, layering that white oval with black, then adding a foiled sentiment.
The second definitely not CAS card took a little more preparation.
I sprayed some Tim Holtz mica spray onto some Distress Heavystock card, splattered with white acrylic paint and set aside to dry.
I then totally channeled Tim Holtz from one of his YouTube videos, and die cut the bear from white and grey wood grain card stock, layered together, then added a pink scarf using a previously created ink smooshed panel.
The trees were die cut from a panel of card onto which I had glued some tissue paper, added water, added Brushos, then when dry added some gold wax. The die cutting of the trees flattened the ridges on the trees – but if you add the wax prior to die cutting then the detail is still there.
I snipped and placed the trees, added the bear, added some white glitter drops for the snow on the ground, then added the sentiment – die cutting the ‘board’ from the same white and grey card stock, and adding the letters in a haphazard fashion – I struggle with straight when I do a sentiment like this, so I went overboard with the higgledy-piggledy.
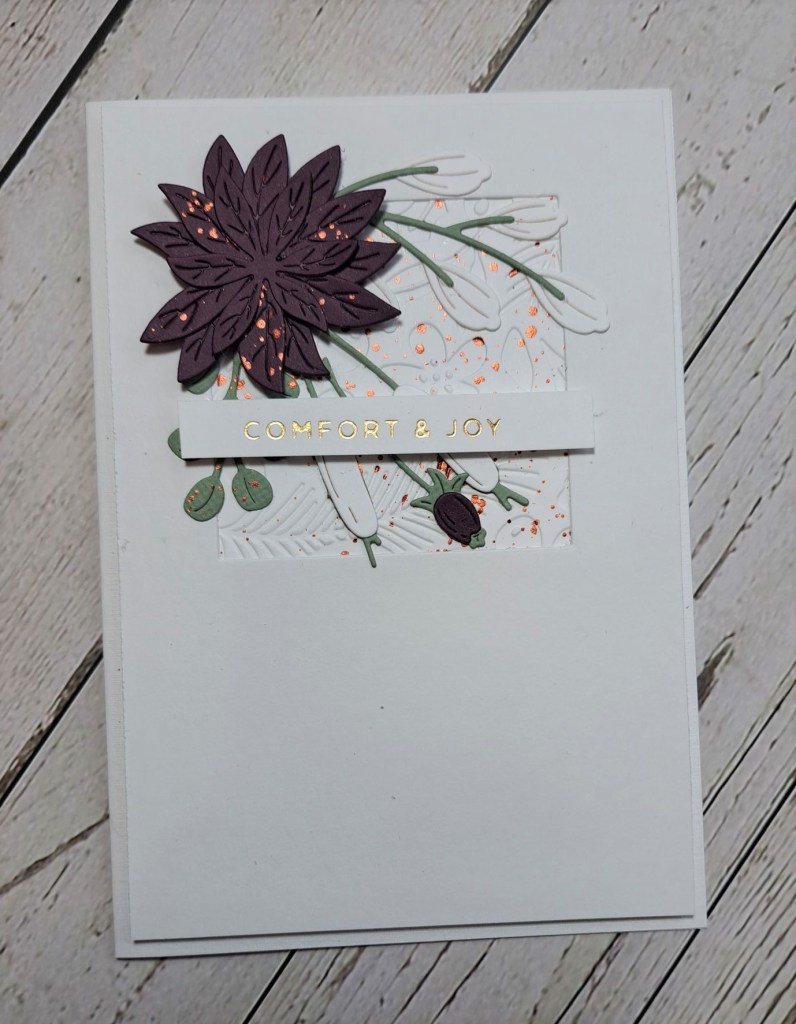
I dry embossed and white piece of card then splattered it with a bronze metallic acrylic paint. Whilst that was drying, I die cut and assembled the poinsettia and the added foliage, splattering the poinsettia with the same bronze paint.
I then die cut a square into a panel that was slightly smaller than my card base, added the splattered embossed piece behind the opening, then arranged the flower and foliage as you see.
The sentiment is a previously foiled strip.
I am hoping you can join us and start to create your Christmas card stash ready for the end of the year. xx
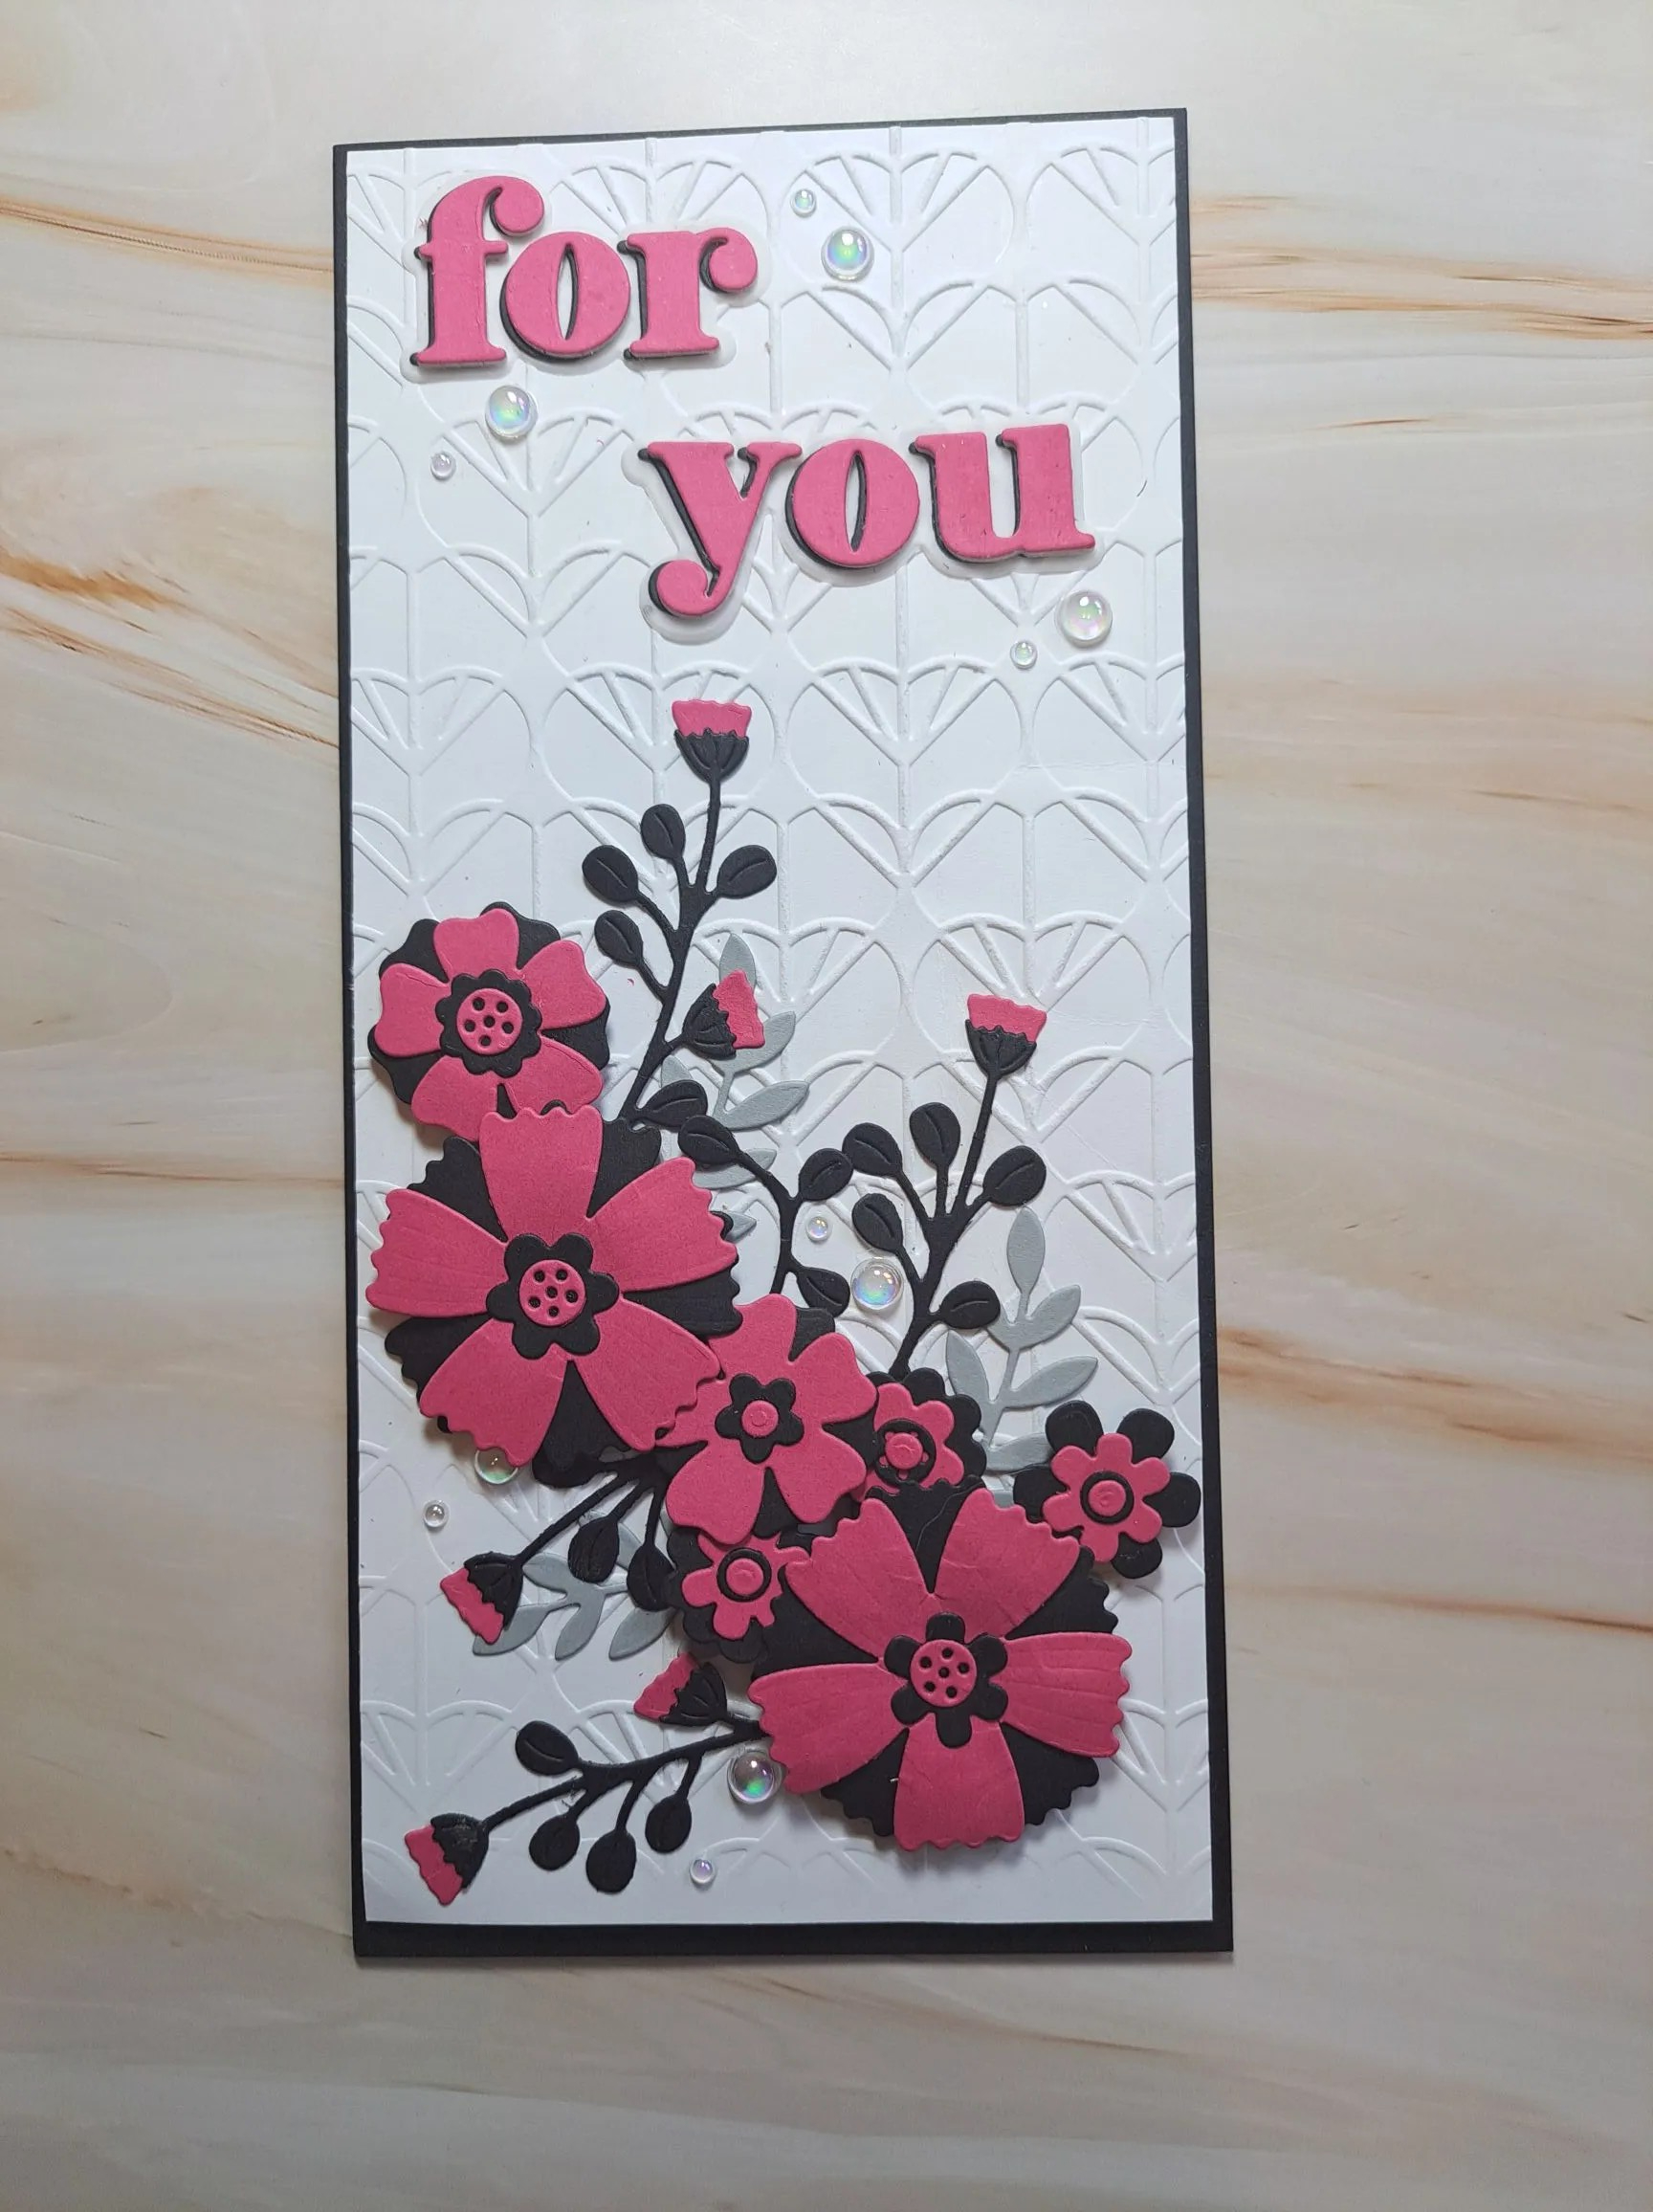
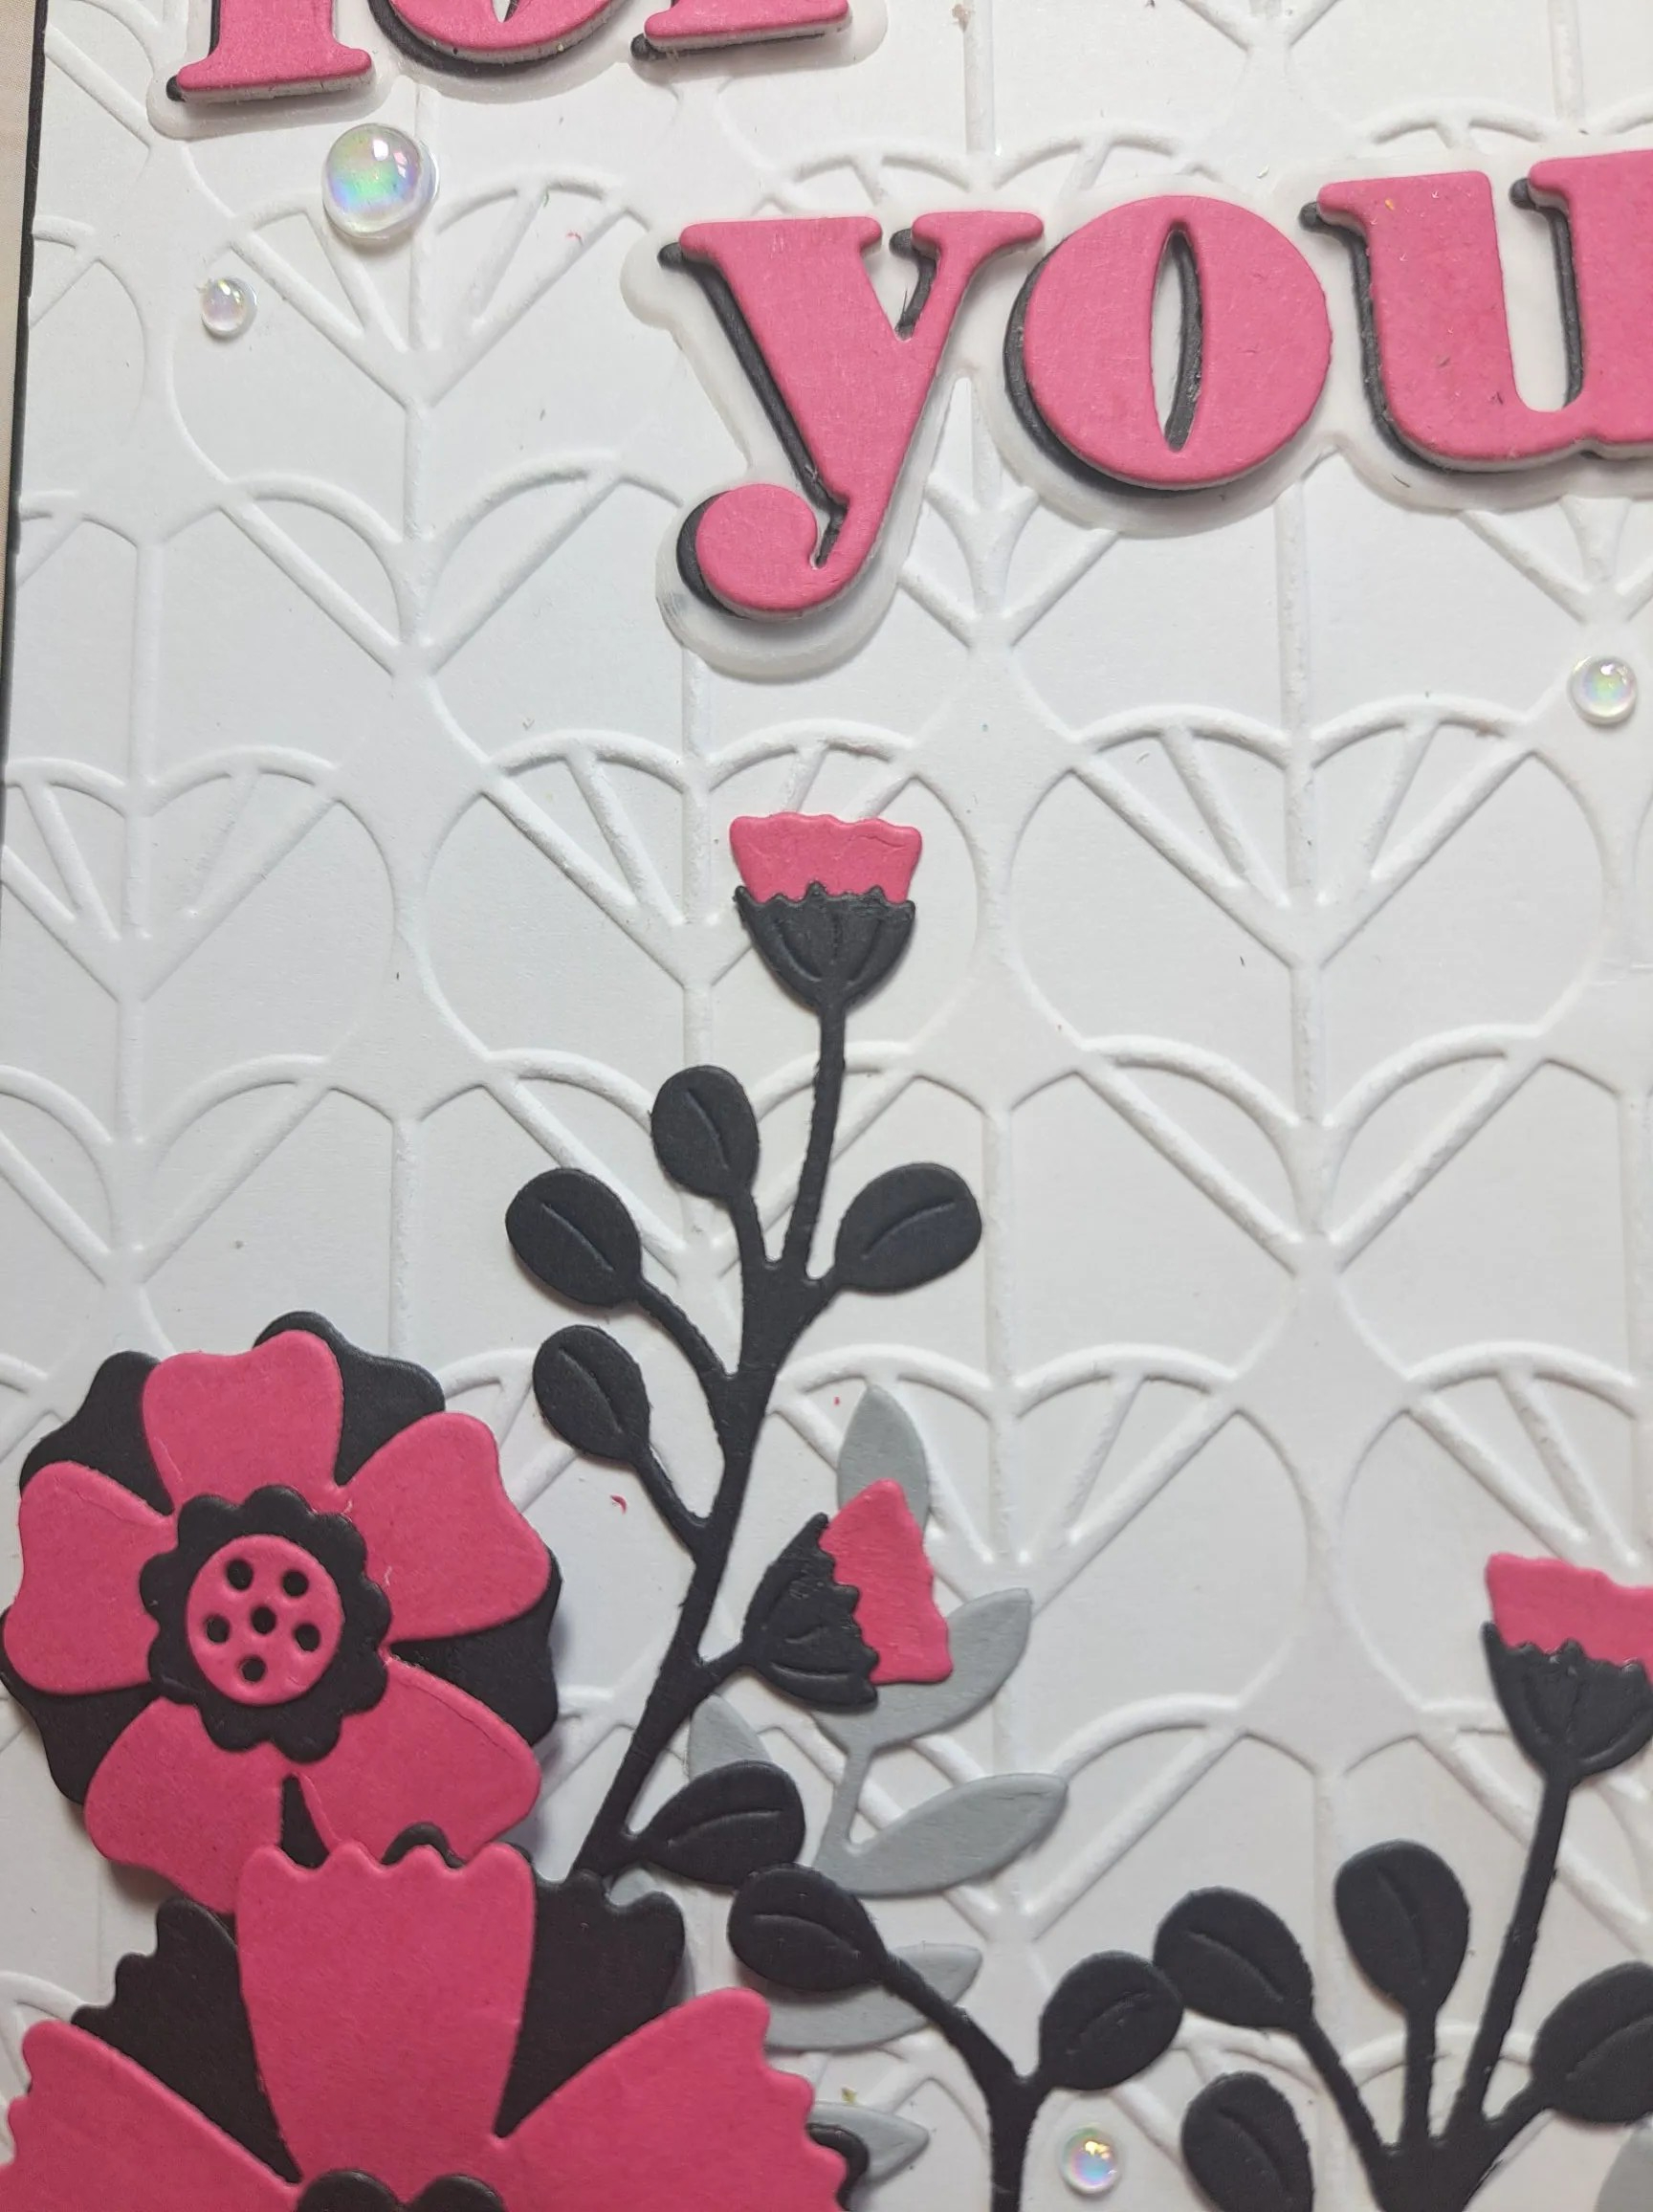
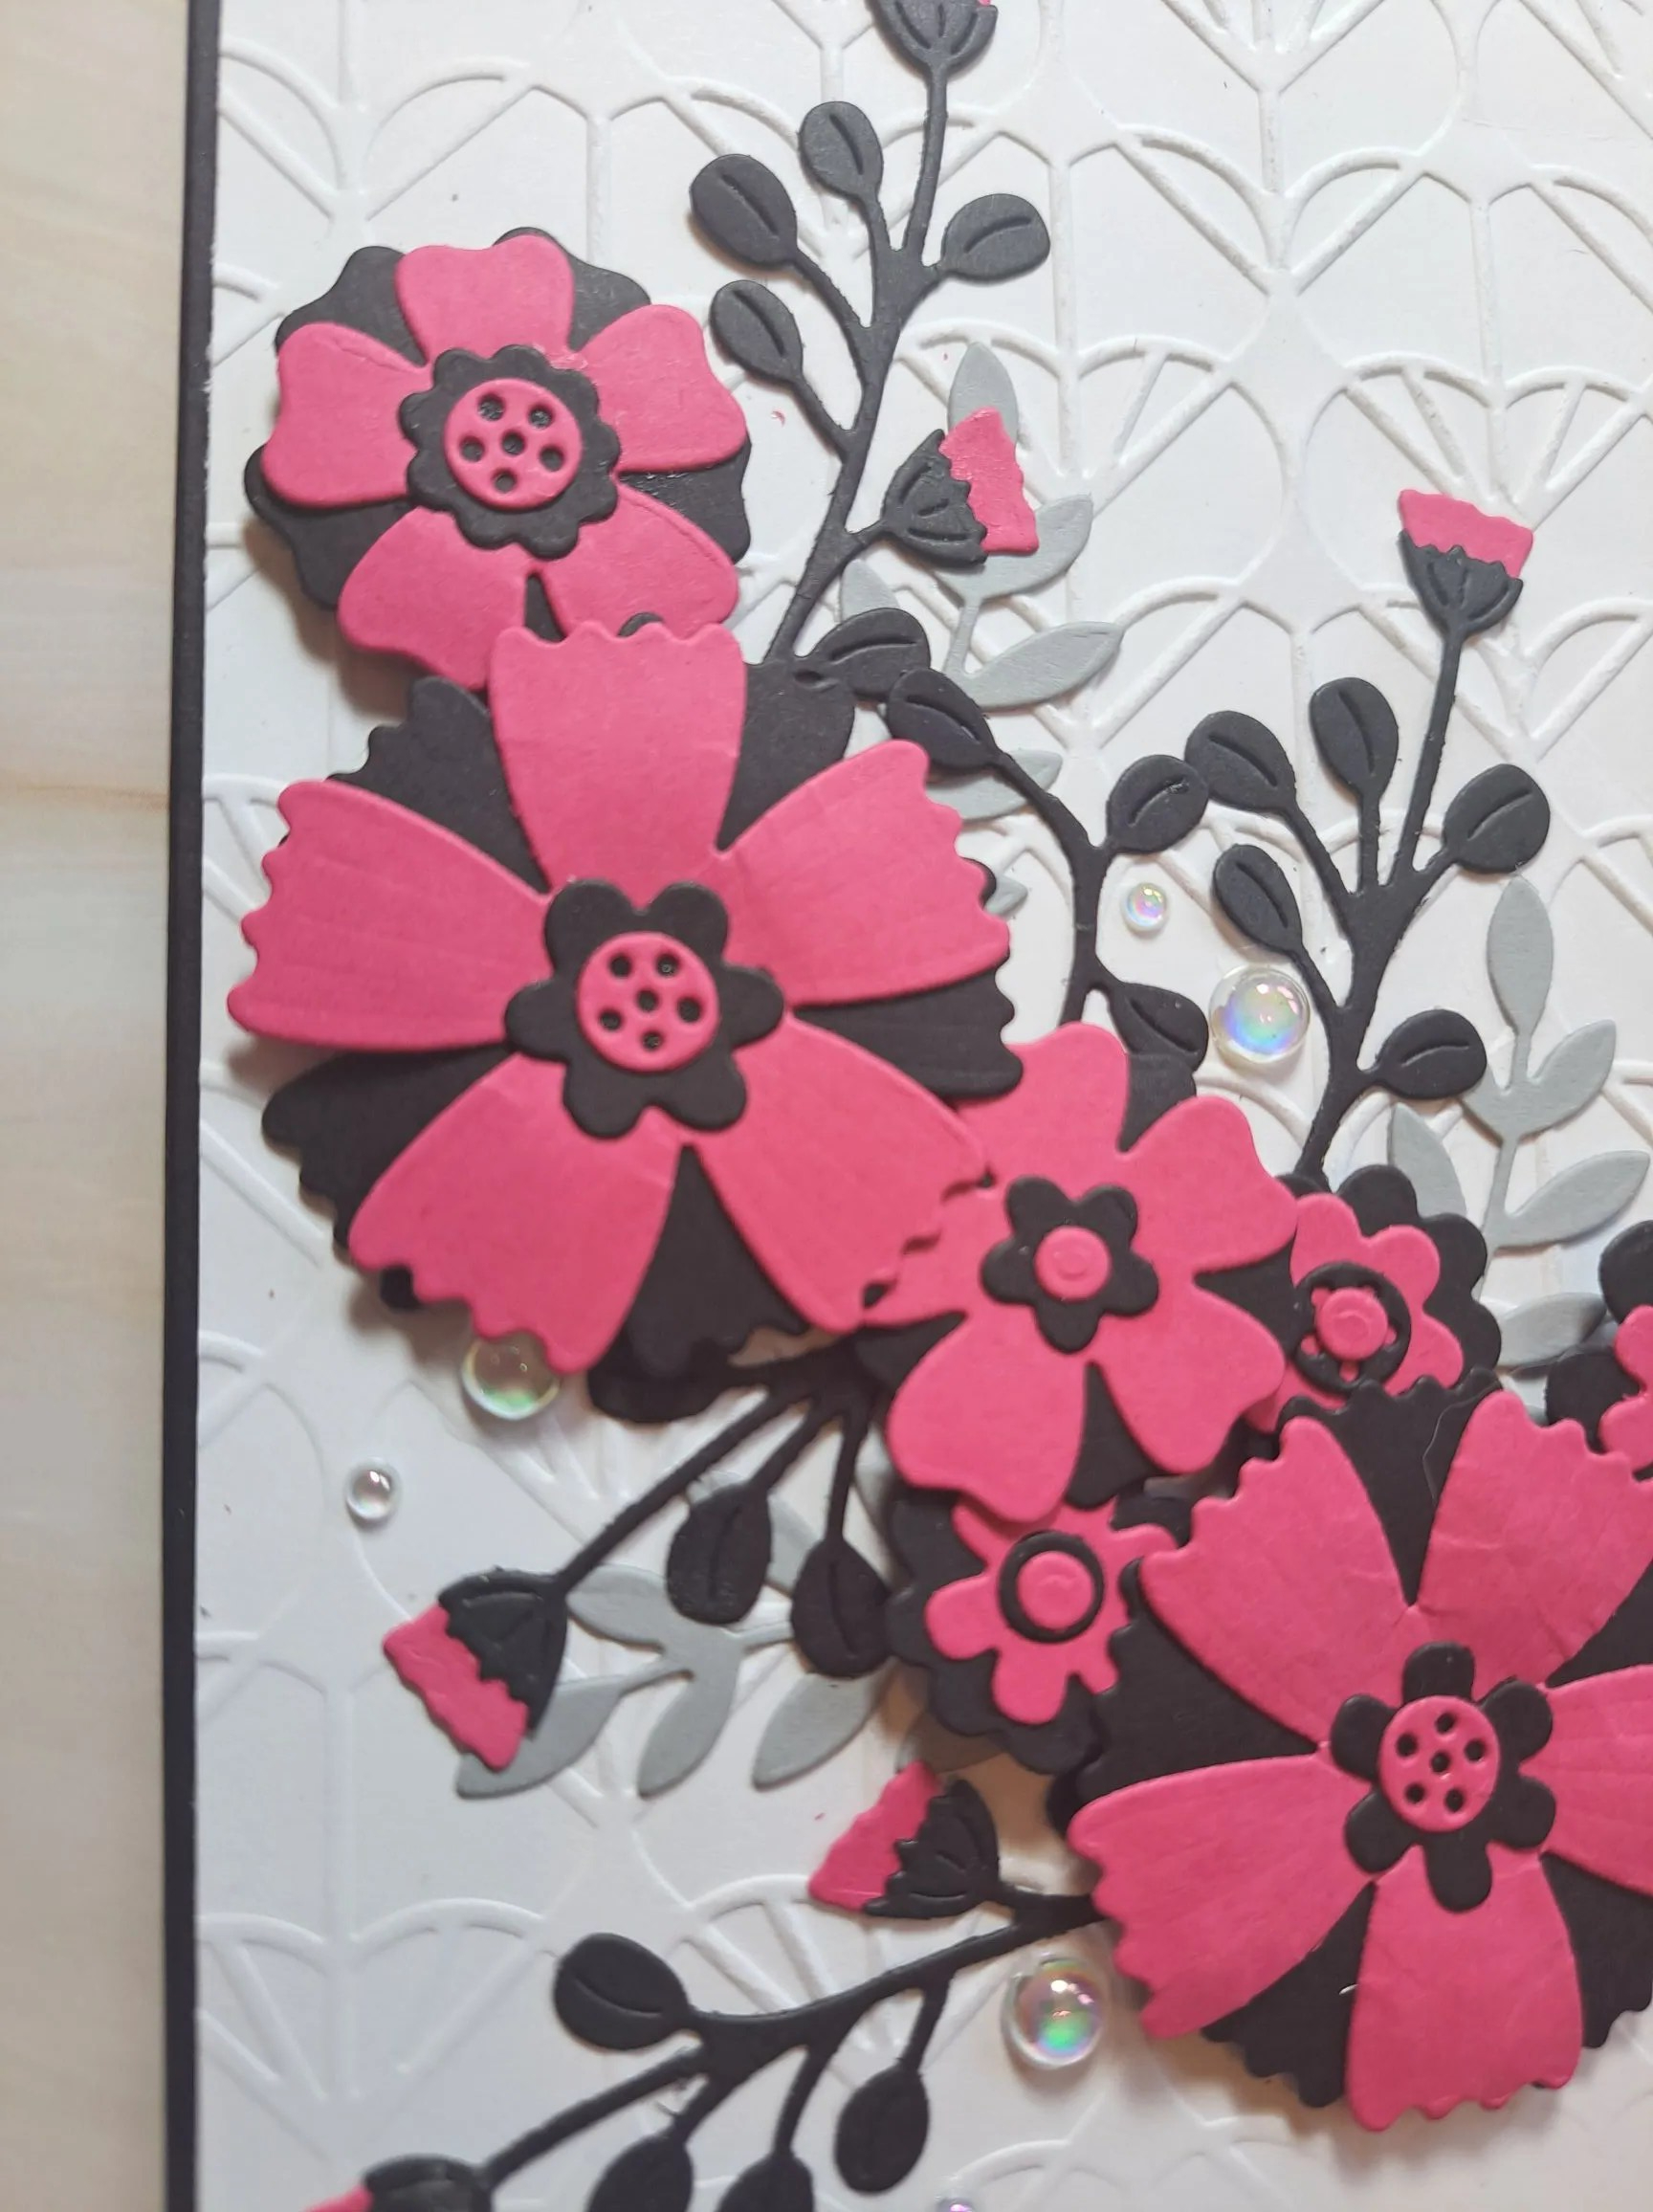
Hello. I have a slimline card to share with you today incorporating some new products from Spellbinders – dies and embossing folder:
Onto a black slimline card base I adhered a dry embossed panel with 3D foam – this card has a lot of dimension – this is just the beginning….
I die cut the flowers and leaves from various Spellbinder sets in black, magenta and grey, played a little with which colour for which layer, mixed and matched, then arranged them onto the card base.
The flowers were adhered with 3D foam squares, with the leaves and stems attached using glue.
The sentiment is from the Spellbinders Advent Calendar, die cut with a top layer of magenta, two layers of white, then a bottom black layer – slightly off-set.
A final touch was to add some gems – in groups of two – around the sentiment and the floral arrangement.
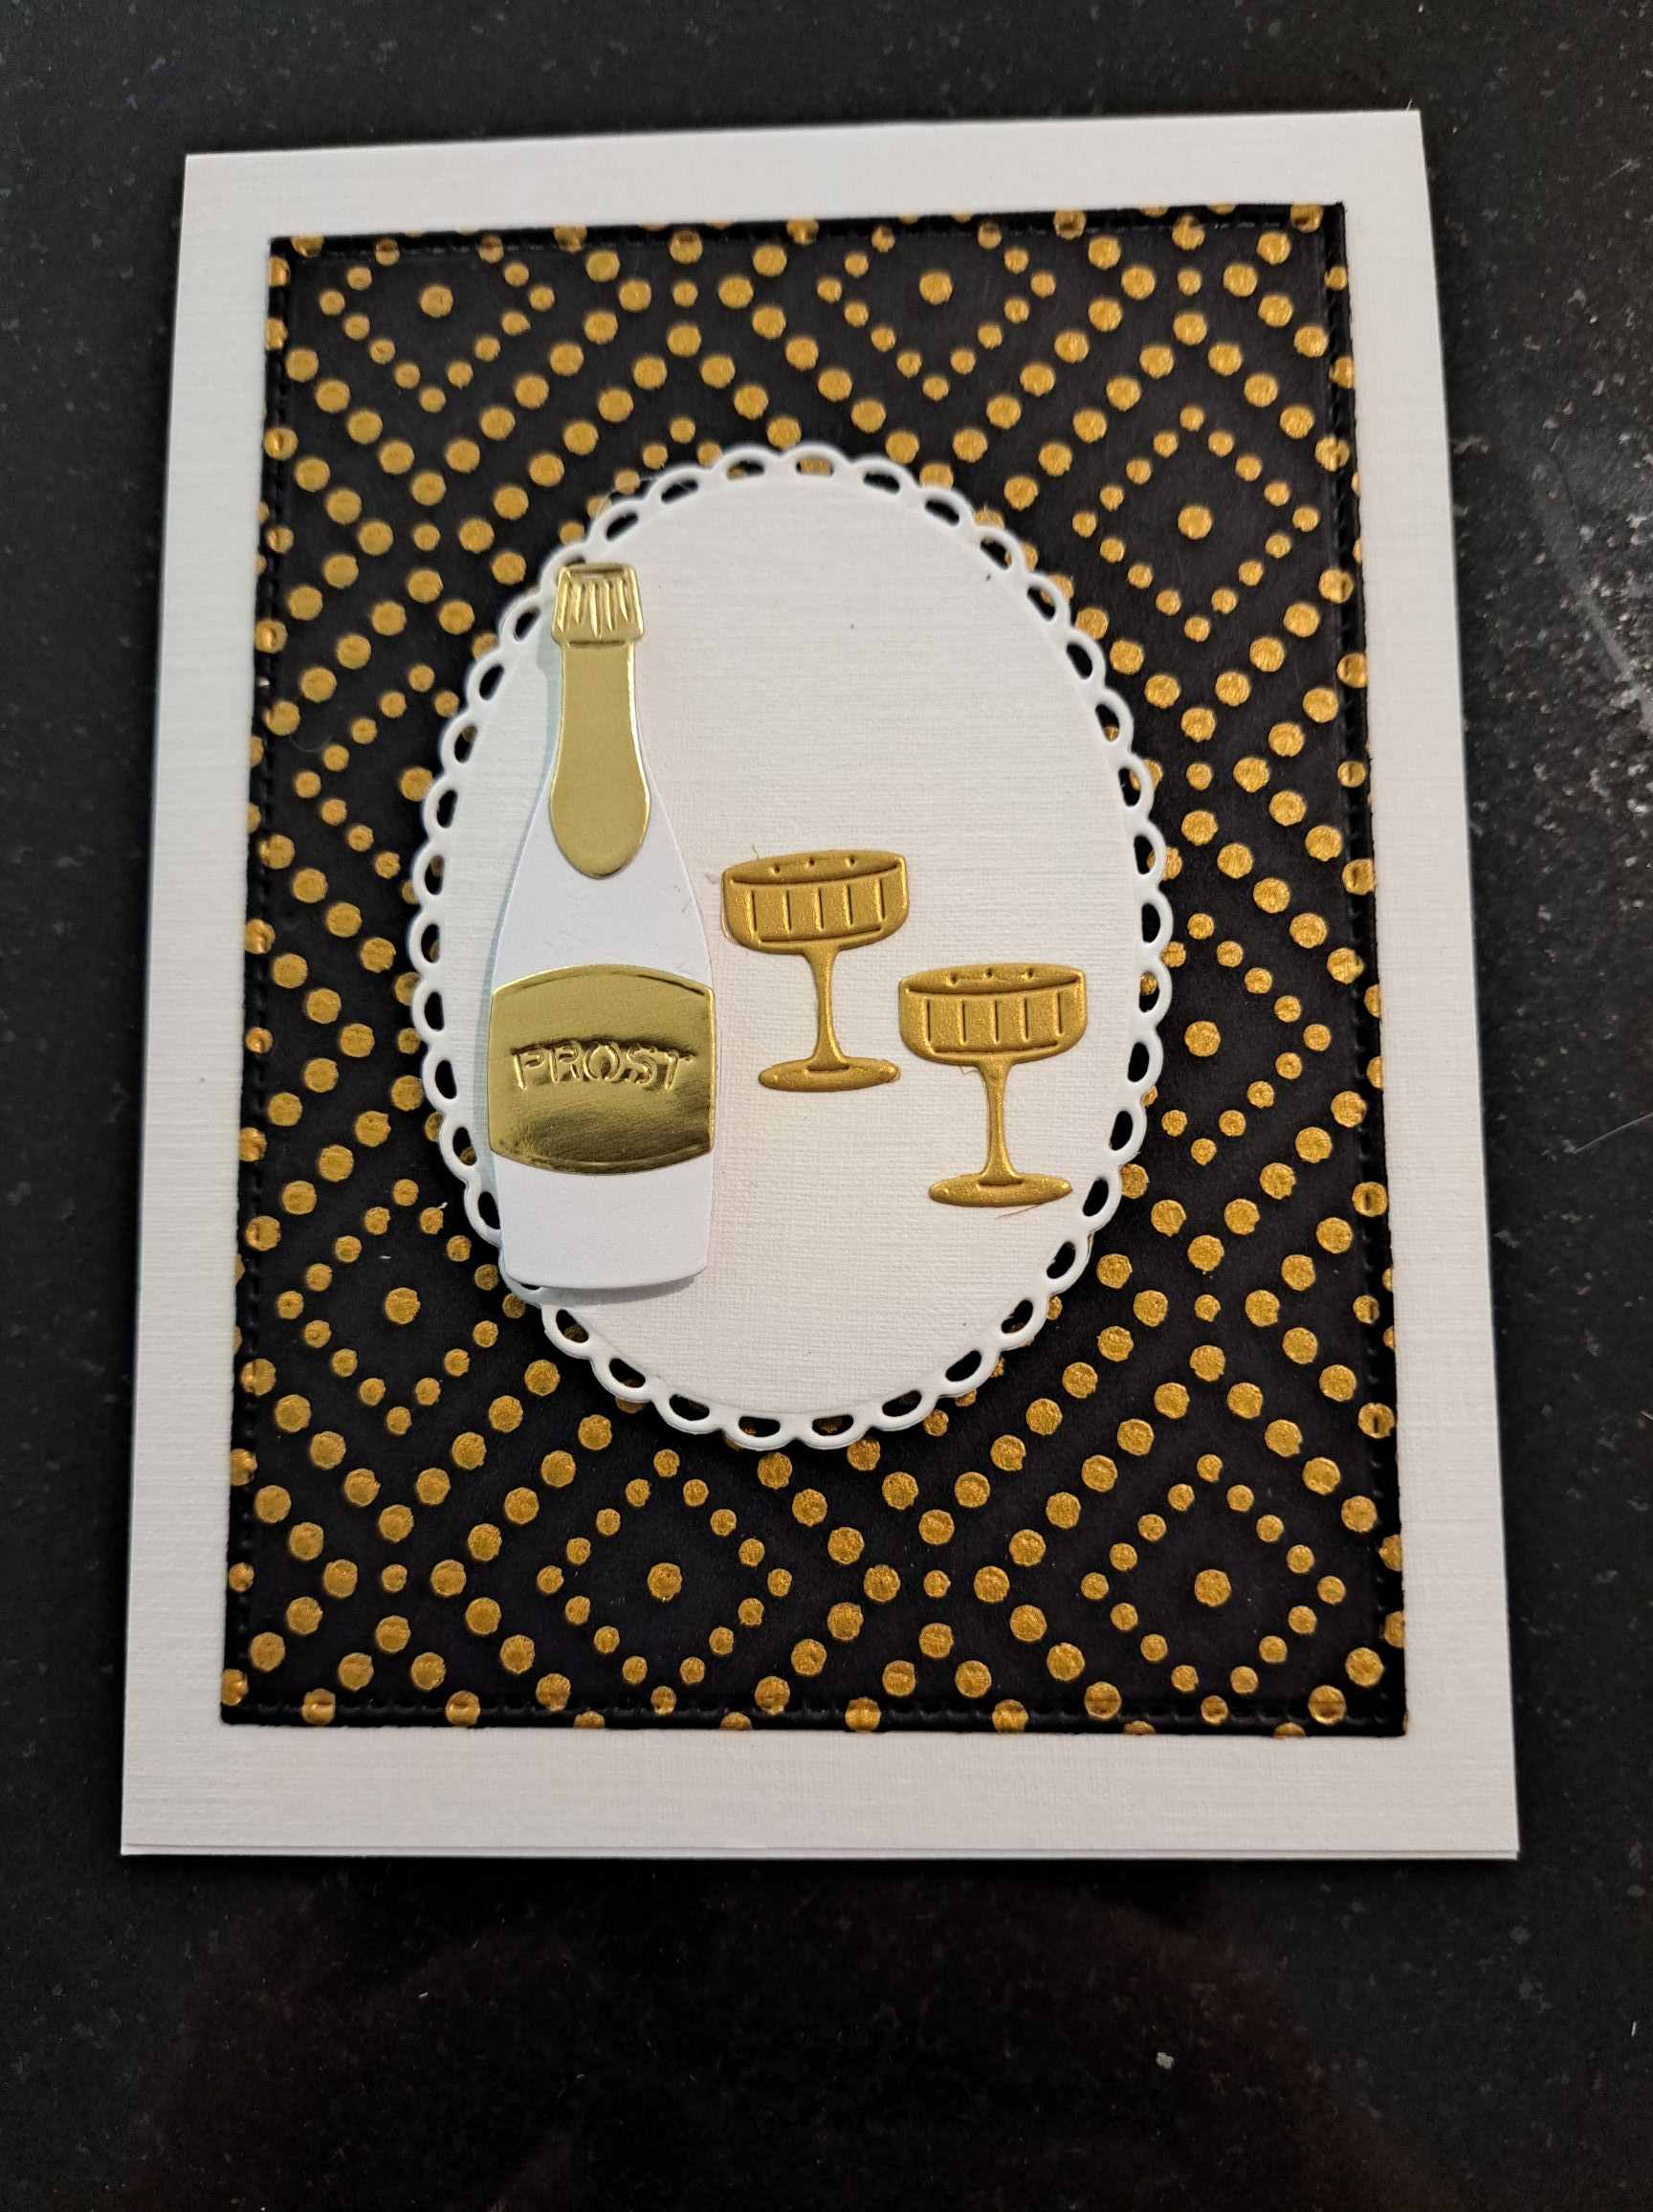
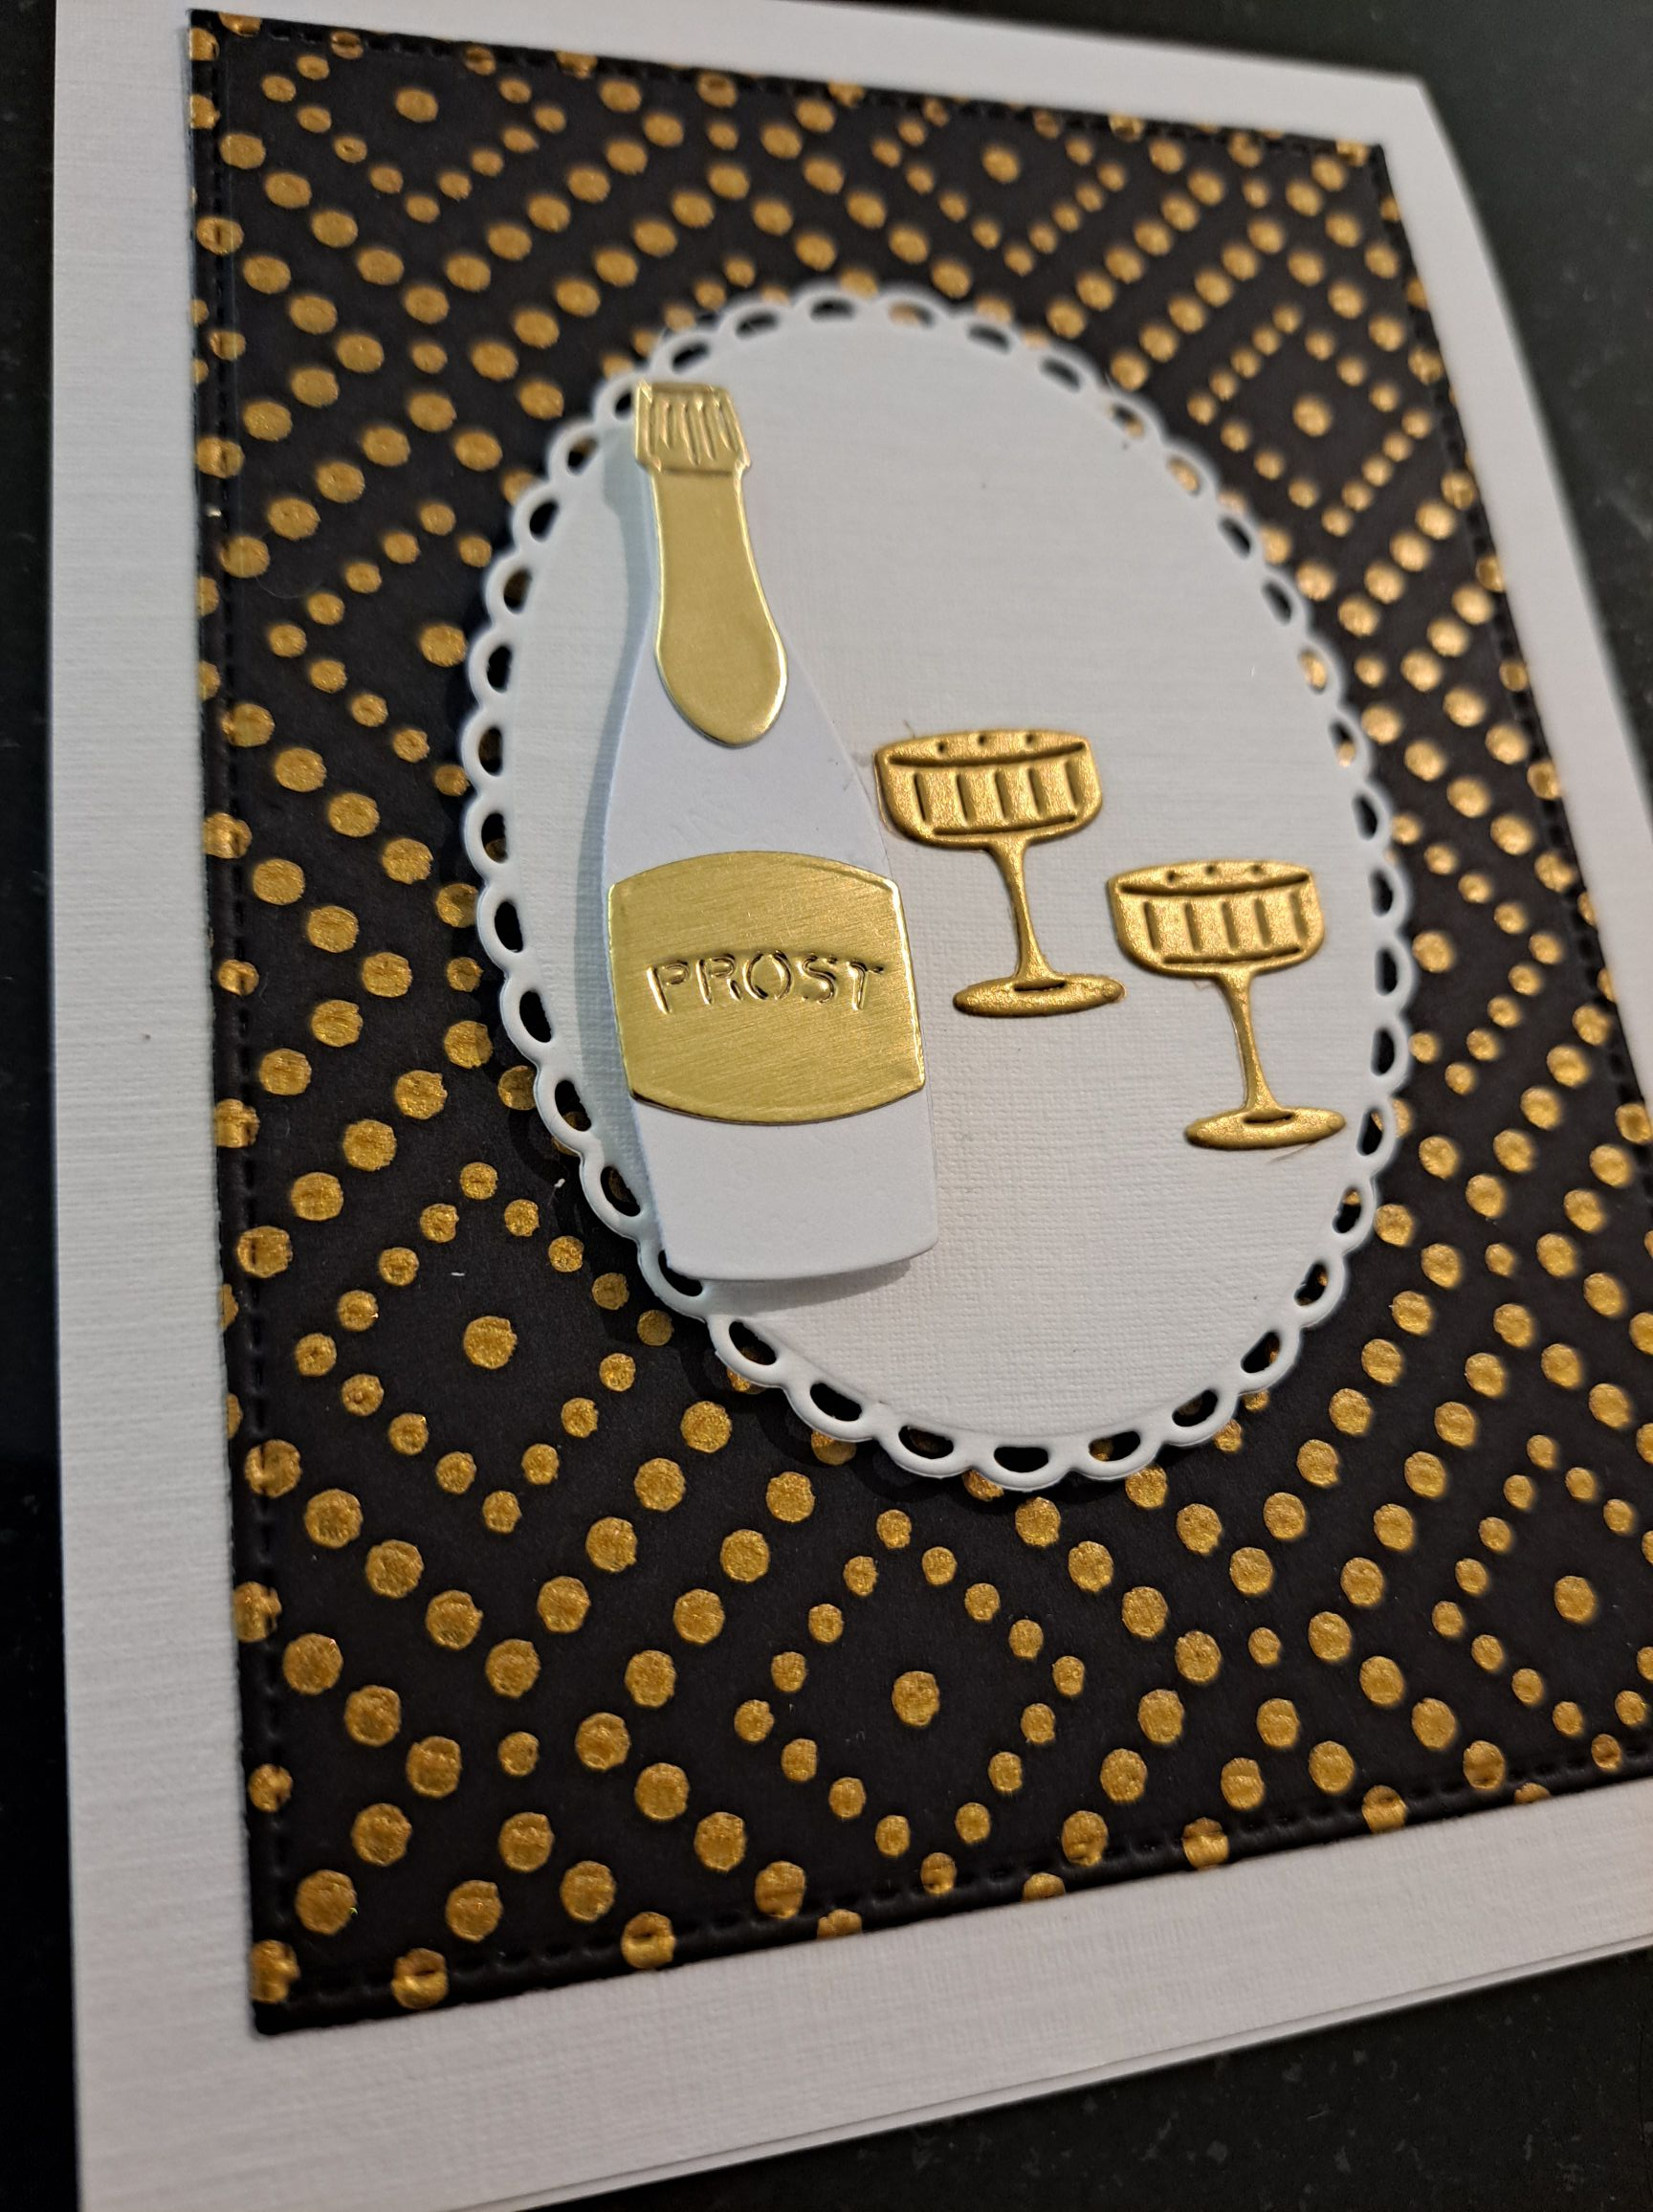
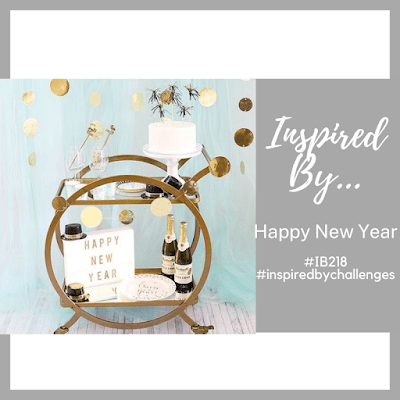
Hello. I hope you are well. I am having a small group of friends round tonight for a New Year’s Eve get-together – some drinks and nibbles and we usually play some games. I thought I would create a card for them all for the occasion.
I used a previously created background panel – a black piece of card, a Spellbinders stencil, and some gold paste.
I then die cut the white oval using a Gina K Designs Master Layout die as a base for the main images.
The bottle and glasses are from Charlie and Paulchen, and I die cut the bottle out of white, then the bottle top and label out of shiny gold card stock, and the glasses out of a matt gold card stock.
I like how the word for the bottle label has ‘Prost’ embossed into it, and the details on the bottle cork and glasses are really very effective and detailed. I can see I will use this die set more in the future for celebrations and birthdays.
I wish you all the very best for the New Year…… xx
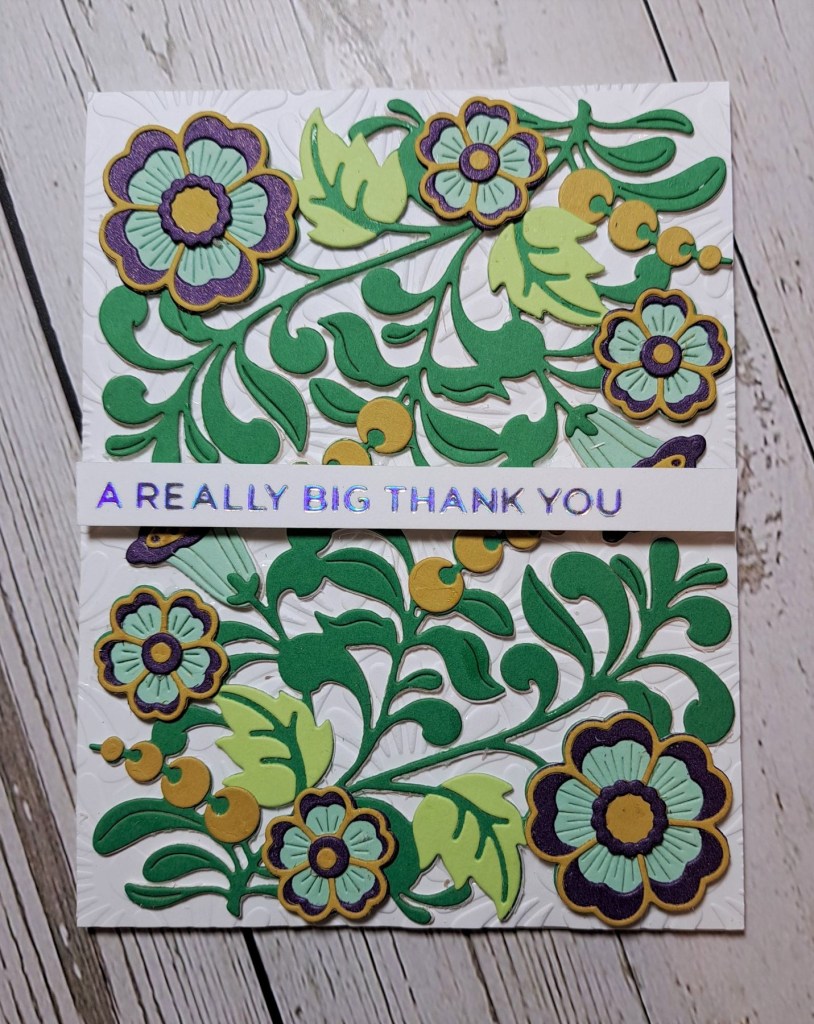
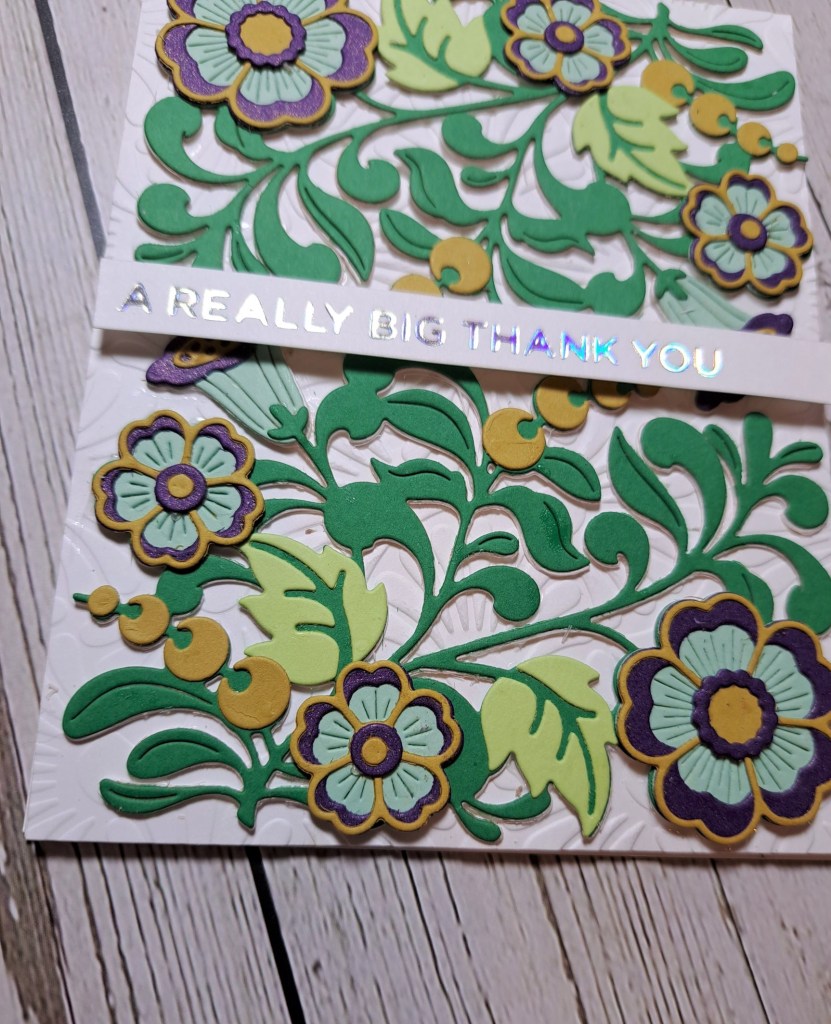
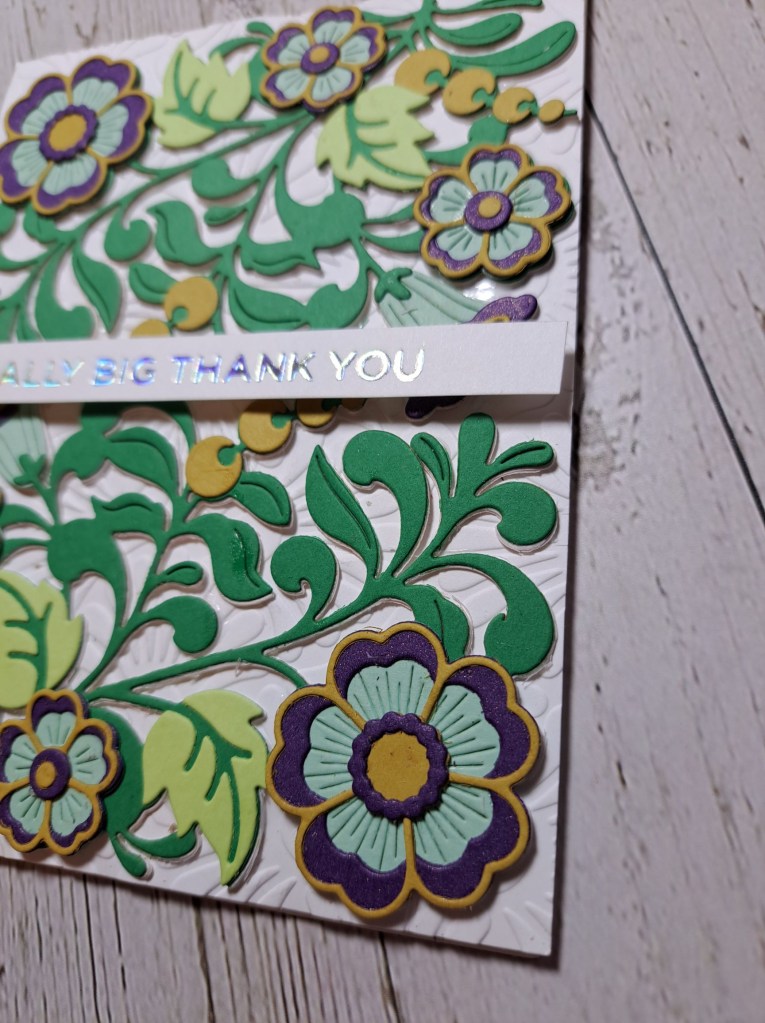
Hello once again. The Alphabet Challenge has started a new challenge. We have reached the letter ‘T’, and Caz has chosen the theme of ‘Thank You’. Here is my card:
I dry embossed a white panel and adhered it to a white card base. I then die cut the elements from the November 2022 small die of the month in varying colours of card stock, and layered them all together. I did play with the colours and layers a little until I came up with a colour scheme I was happy with, and then repeated that to create two of the floral designs.
To create a little more stability in these I die cut the same base layer a couple more times in white card stock and layered them behind.
I decided which orientation I wanted for these two florals, and added a foiled sentiment across the middle.
I hope you can come and join us this time round – I look forward to seeing you in our gallery. xx
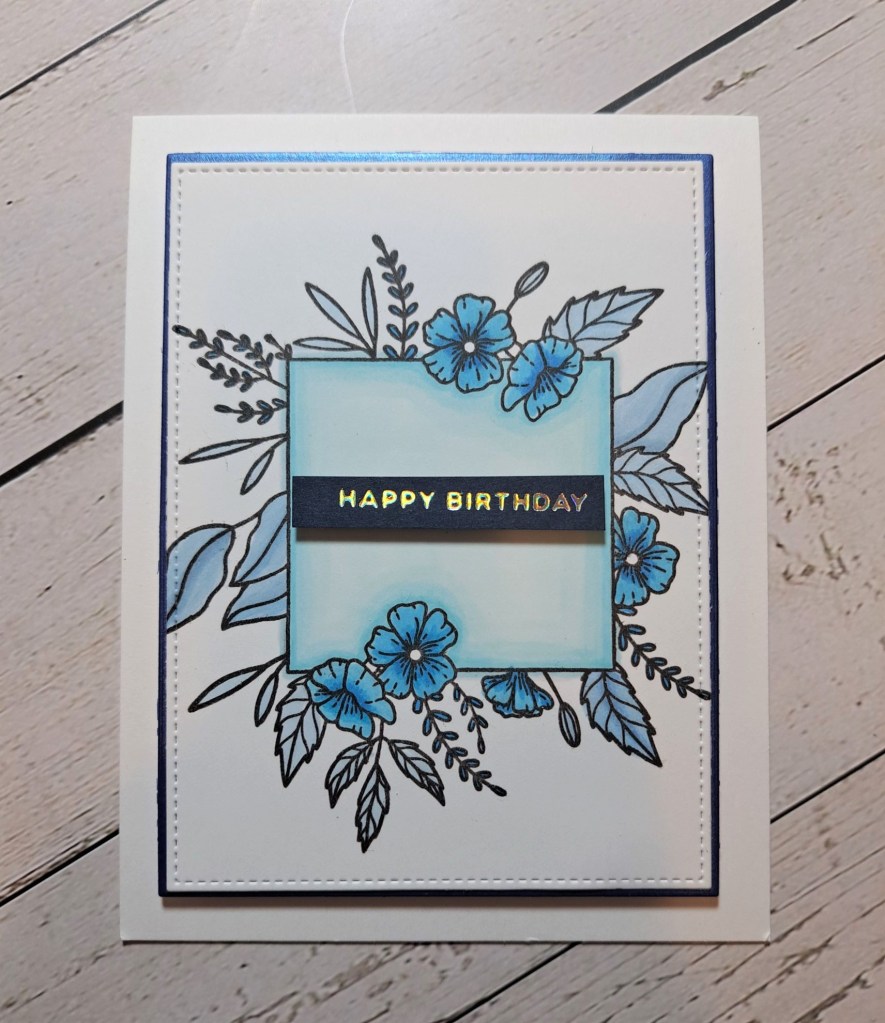
Hello there. I hope everyone is well and had a good Christmas. I am popping in as Cardz 4 Galz has started a new challenge. This time we want to see your projects from any of our themes from 2022. I chose ‘Shades Of Blue‘ from September, as I missed this one – away on a great holiday. Here is my card:
For the main image I used a stamp and stencil set from Honey Bee Stamps – first stamping the image, then instead of using the layering stencils, I chose to colour the images with varying blue tones of Copics.
I even attempted to fade the blue tones across the open white area in the middle – quite pleased with first attempt doing that.
I then die cut the image with some stitched rectangle dies, cut a blue panel for a very small rim, and then layered onto the card base.
The sentiment is a previously foiled strip from my stash – I feel another foiling session coming on very soon….
I hope you can come and join us – you certainly have a great choice of themes from the past year – I look forward to seeing your creations. xx
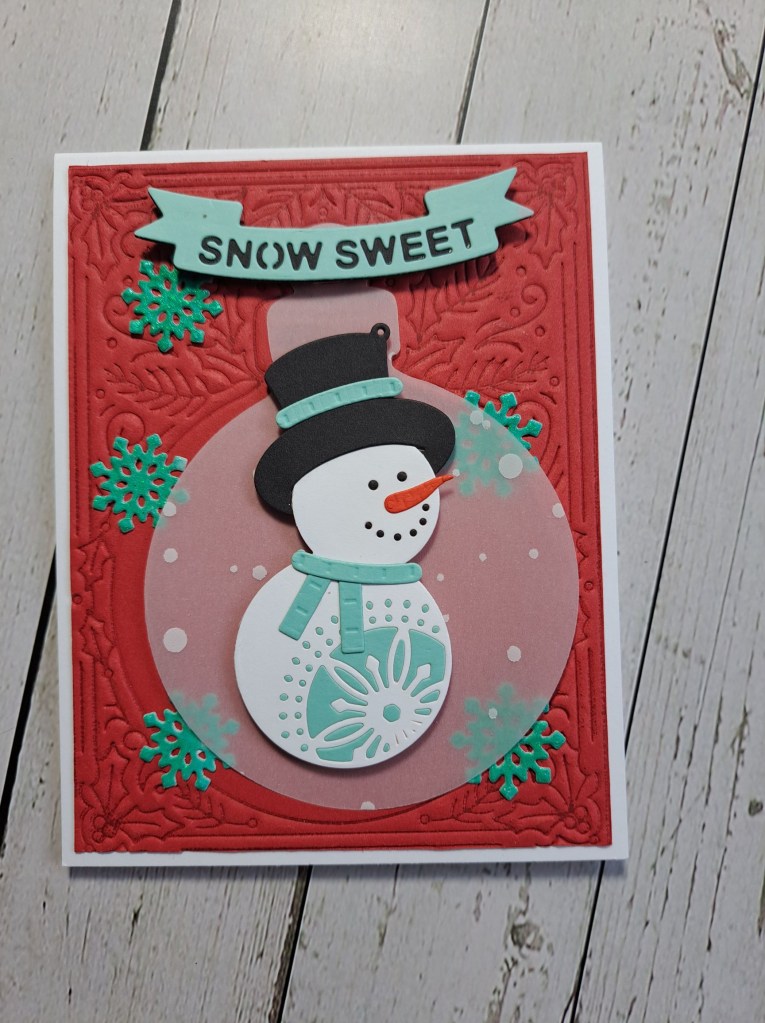
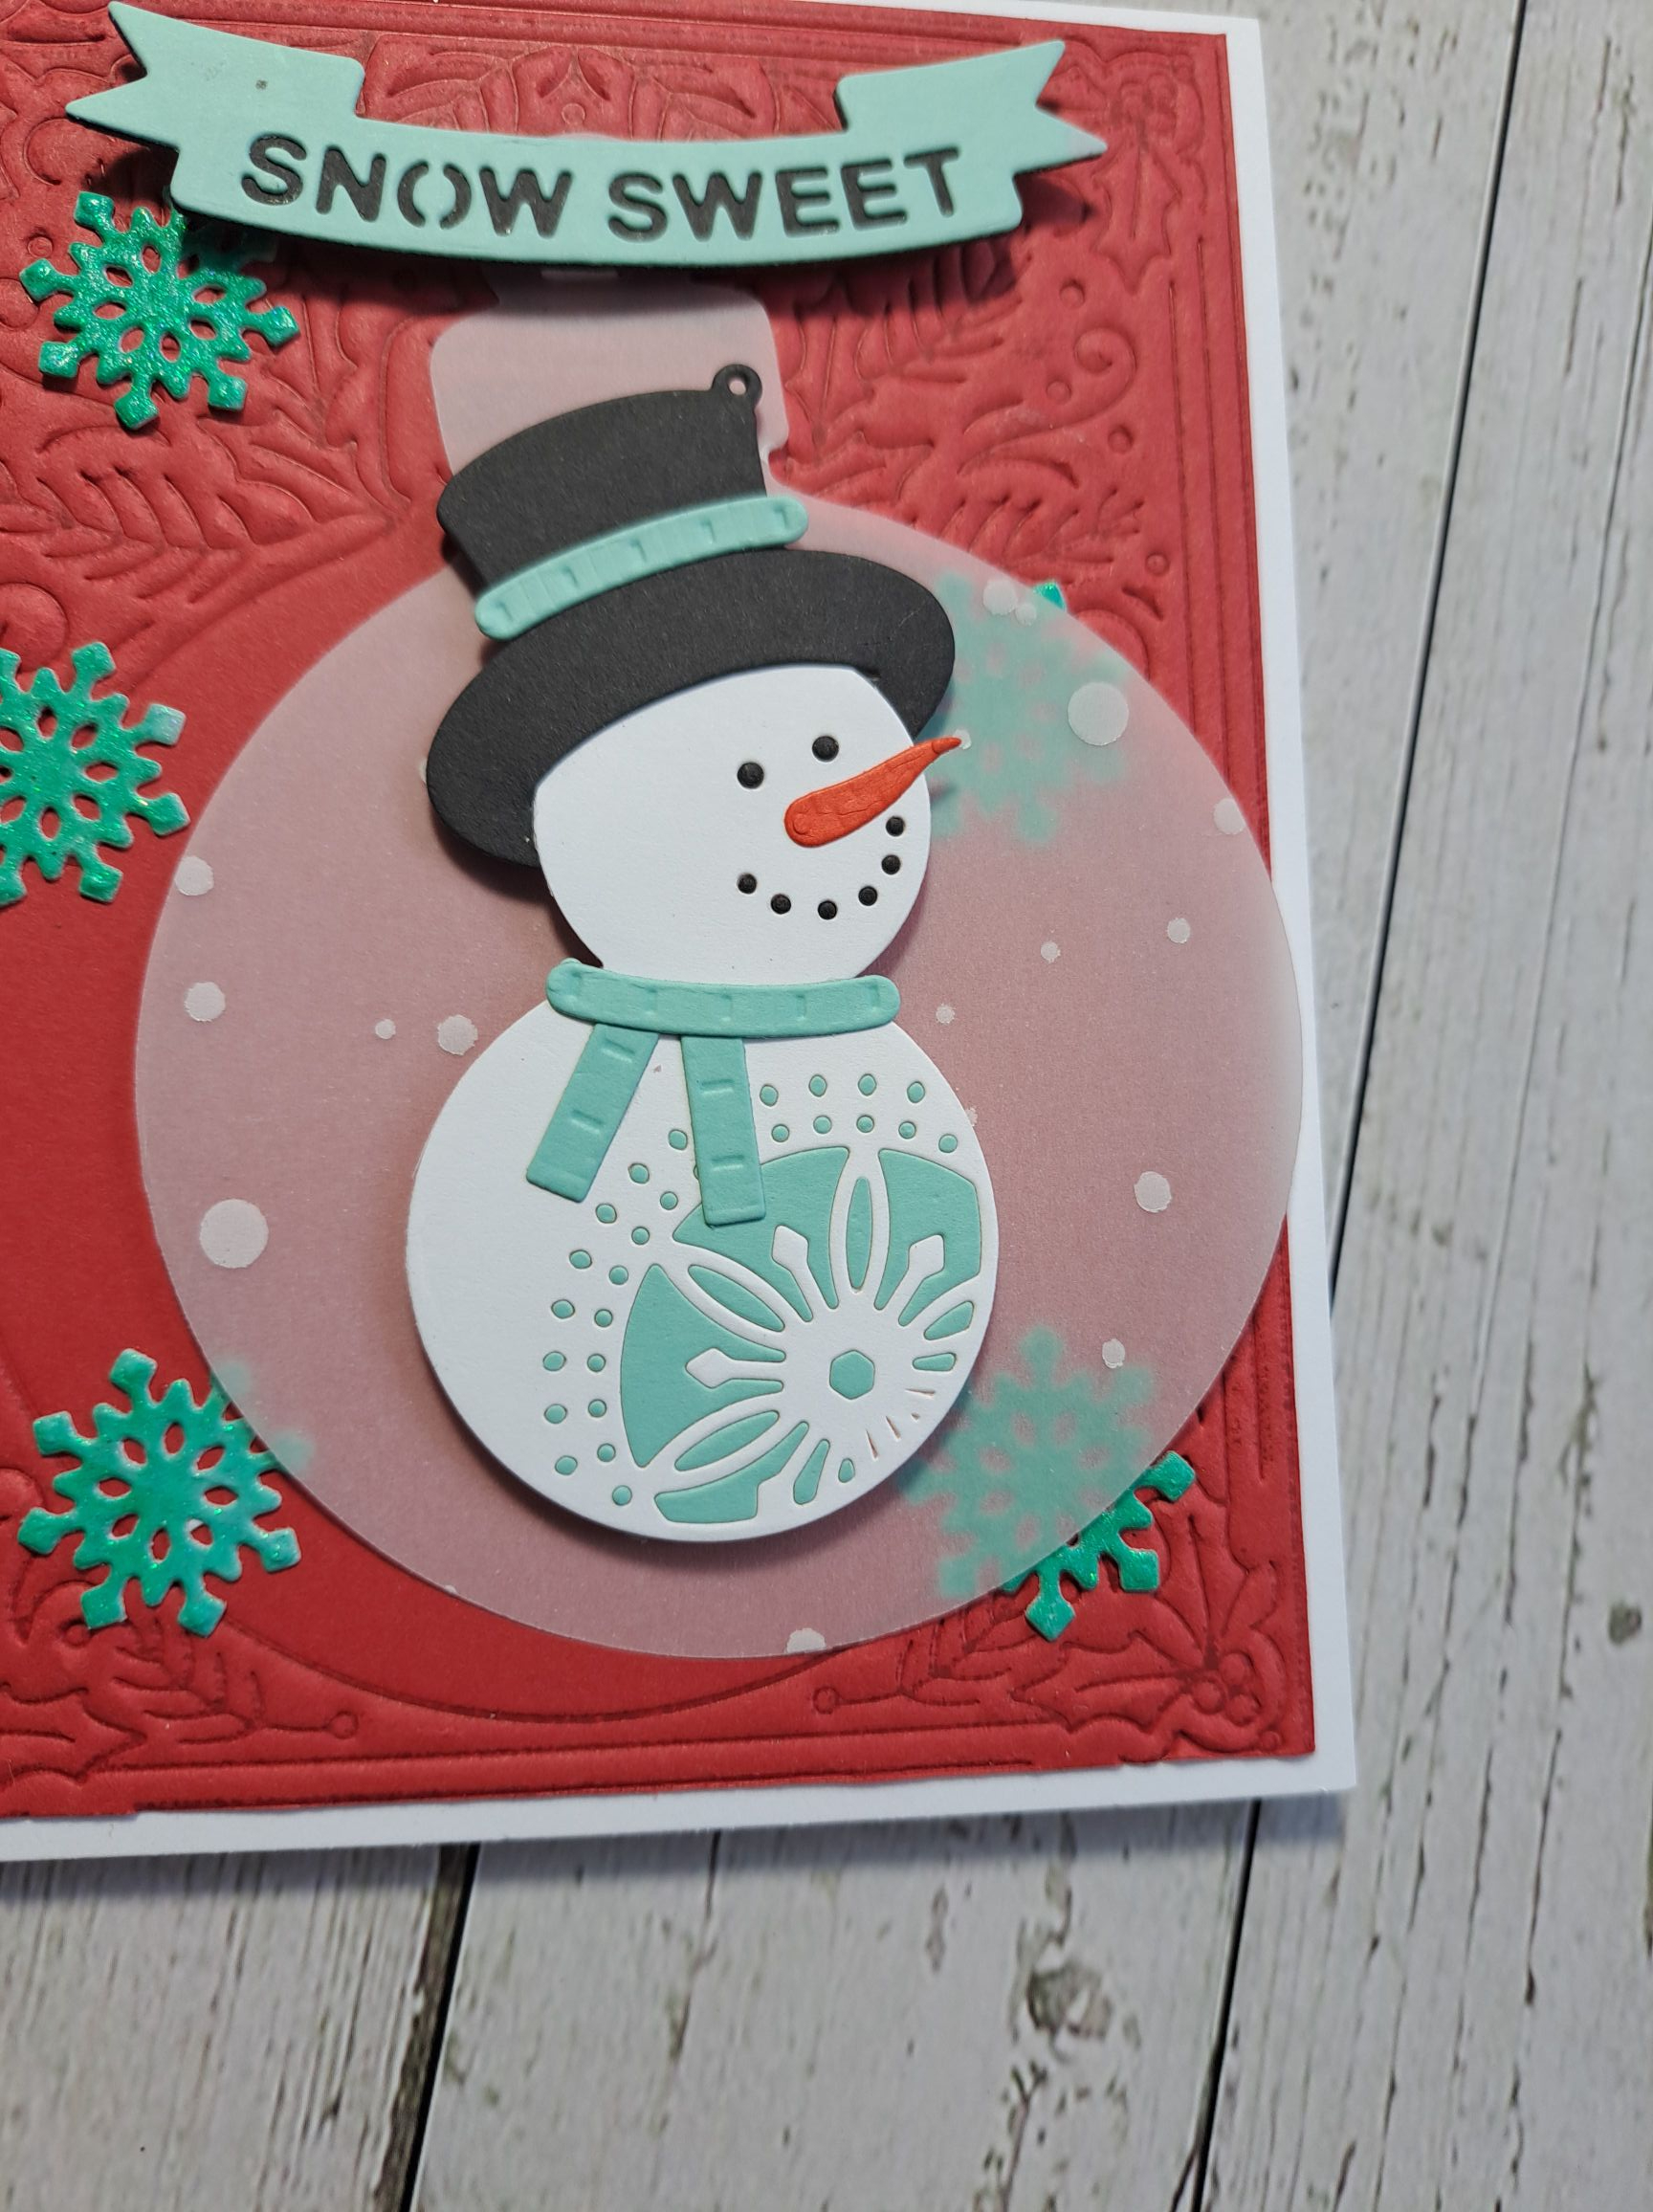
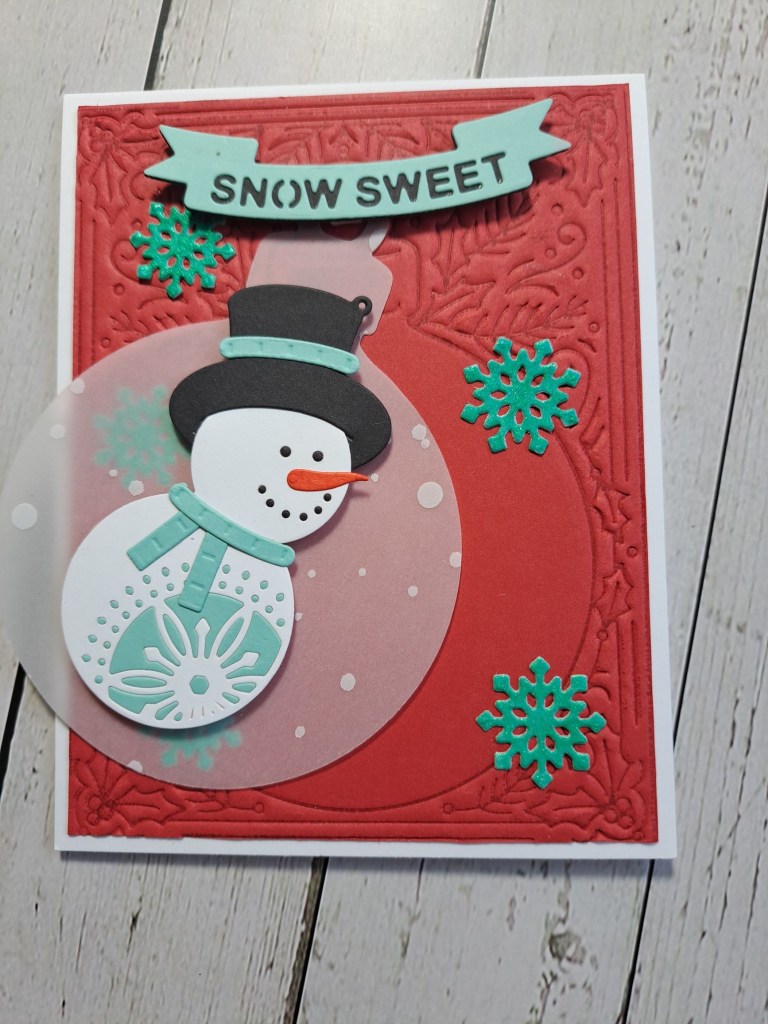
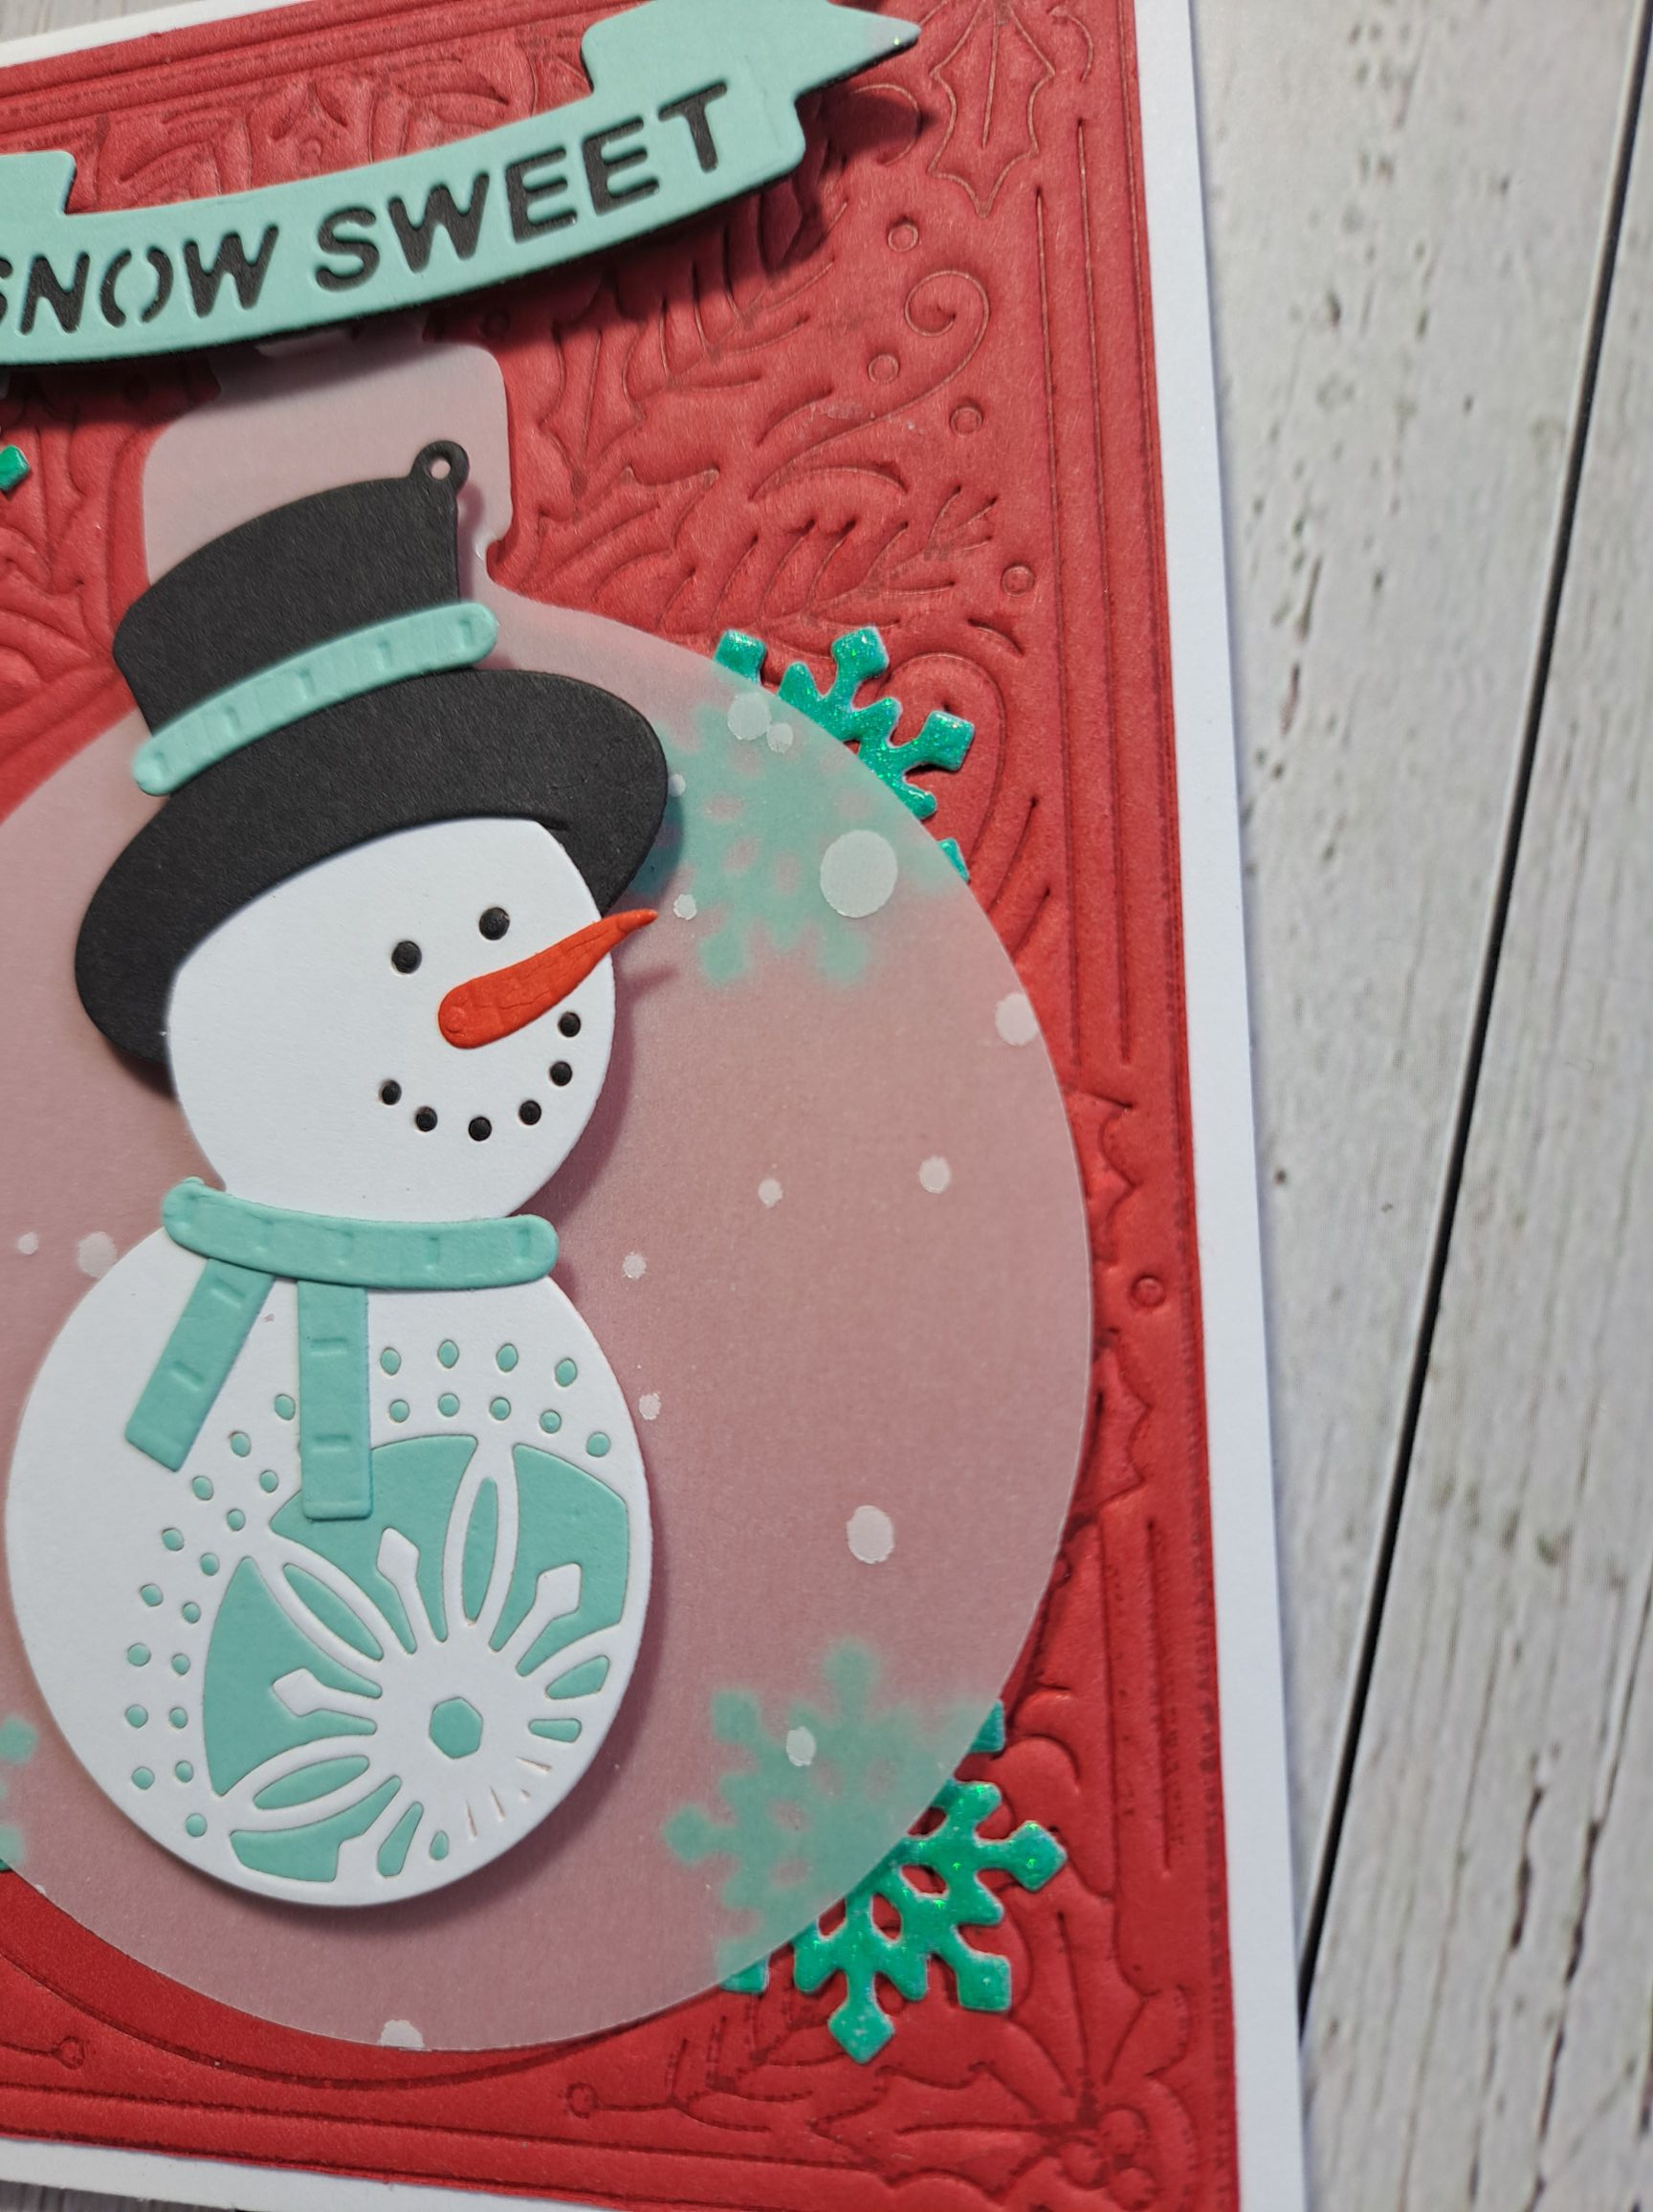
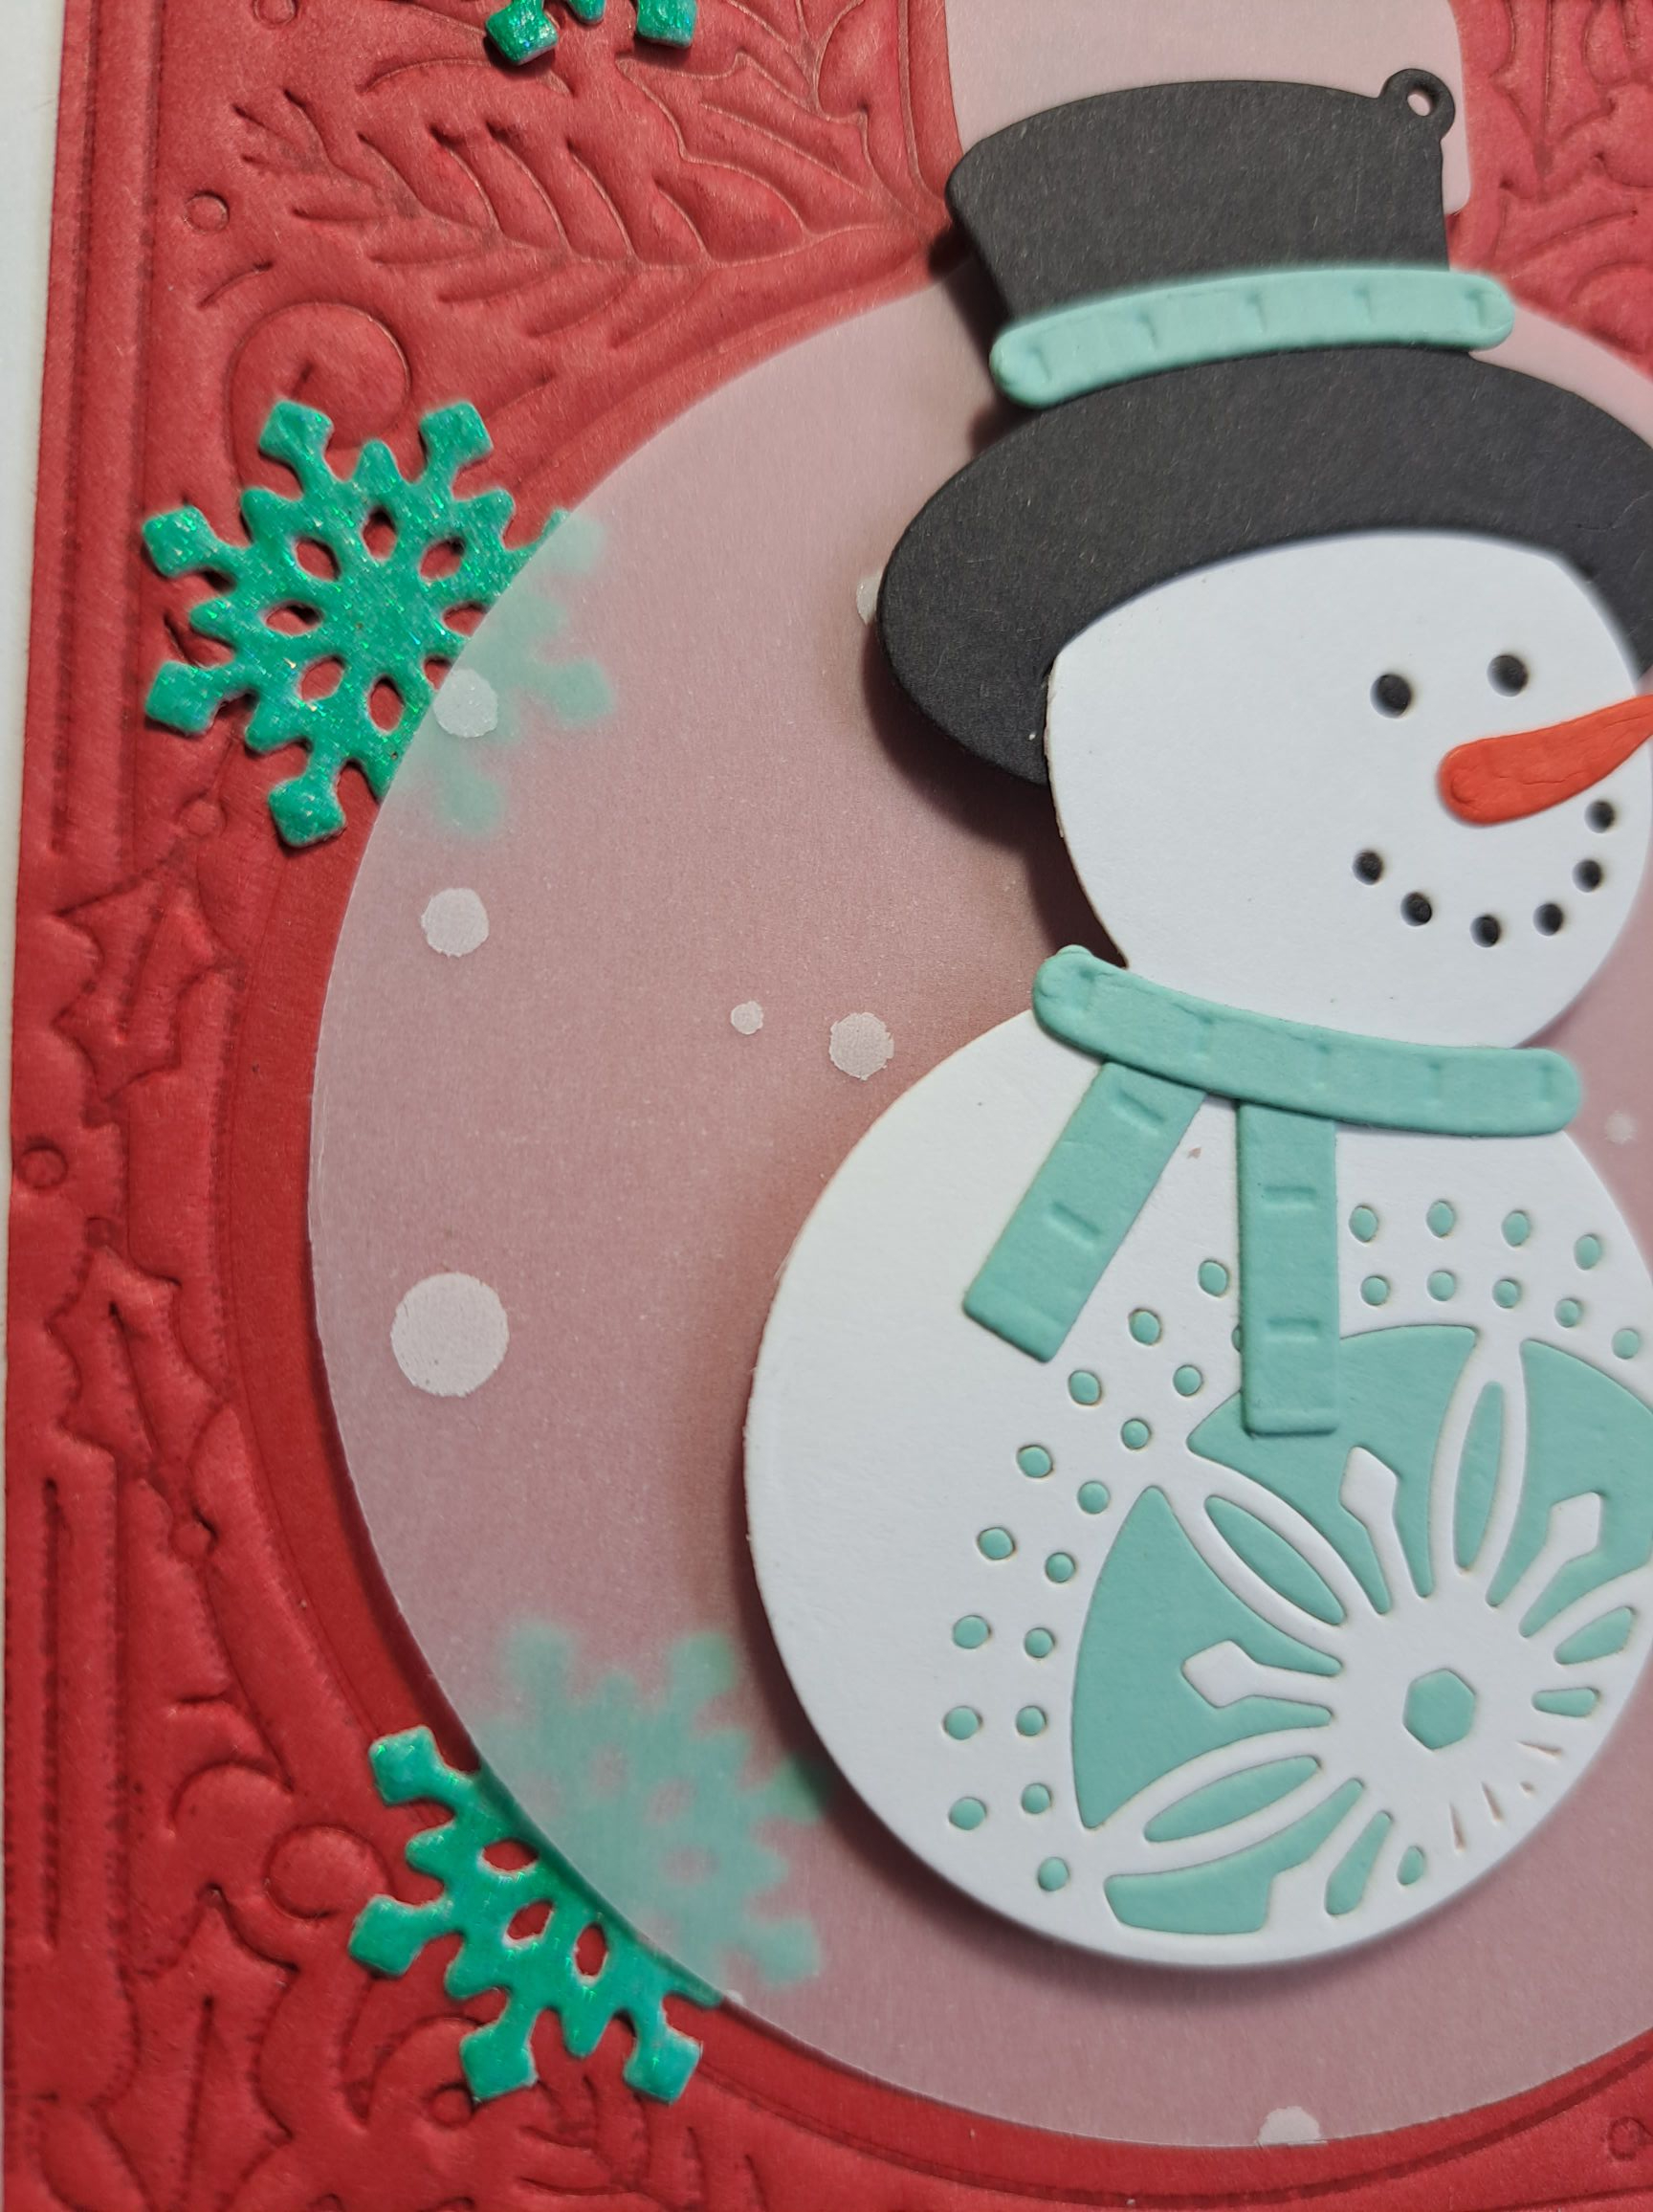
Hi, I hope you are doing well. I have a card to share using a technique from a virtual class by Hero Arts and some Spellbinders products:
The background red panel was created during a virtual class run by Hero Arts. Jennifer McGuire dry embossed a foil plate – after inking the plate……..to say I was amazed and astounding is putting it lightly.
I inked the foil plate with red ink, and ran it through by die cutting machine to create this debossed panel with red ink in the grooves – it makes the detail stand out more. She also suggested white ink – I have a couple of those panels to hand for the future.
The vellum has white ‘snow’ on it, and I die cut with a bauble die from Hero Arts – the one that matches the foil plate – and attached it with a small 3D foam square through the bauble ‘hole’ at the top – so it swings just a little.
I put the snowman together by die cutting two circles which had double sided tape on them, placing them behind the snowman body and head, paper-piecing all the little light blue shapes into the belly, and paper-piecing the little black dots for the eyes and mouth. The carrot nose is a separate die which I die cut from a little piece of card I coloured with an orange Copic marker.
The hat has a little cut to insert the snowman head – very well thought out – and then I added the scarf, and actually added an extra scarf piece around the base of the hat.
Once the snowman was adhered to the vellum, I thought some more detail was needed, so I took some white glitter card stock – a new white shimmery card from Pink frog Crafts here in the UK – and used a BG Copic to colour the glitter card – then die cut some snowflakes, adhering them as you see.
The sentiment is from the same snowman die set from Spellbinders – a black banner in the back, the light blue in the front with the words die cut out of it.
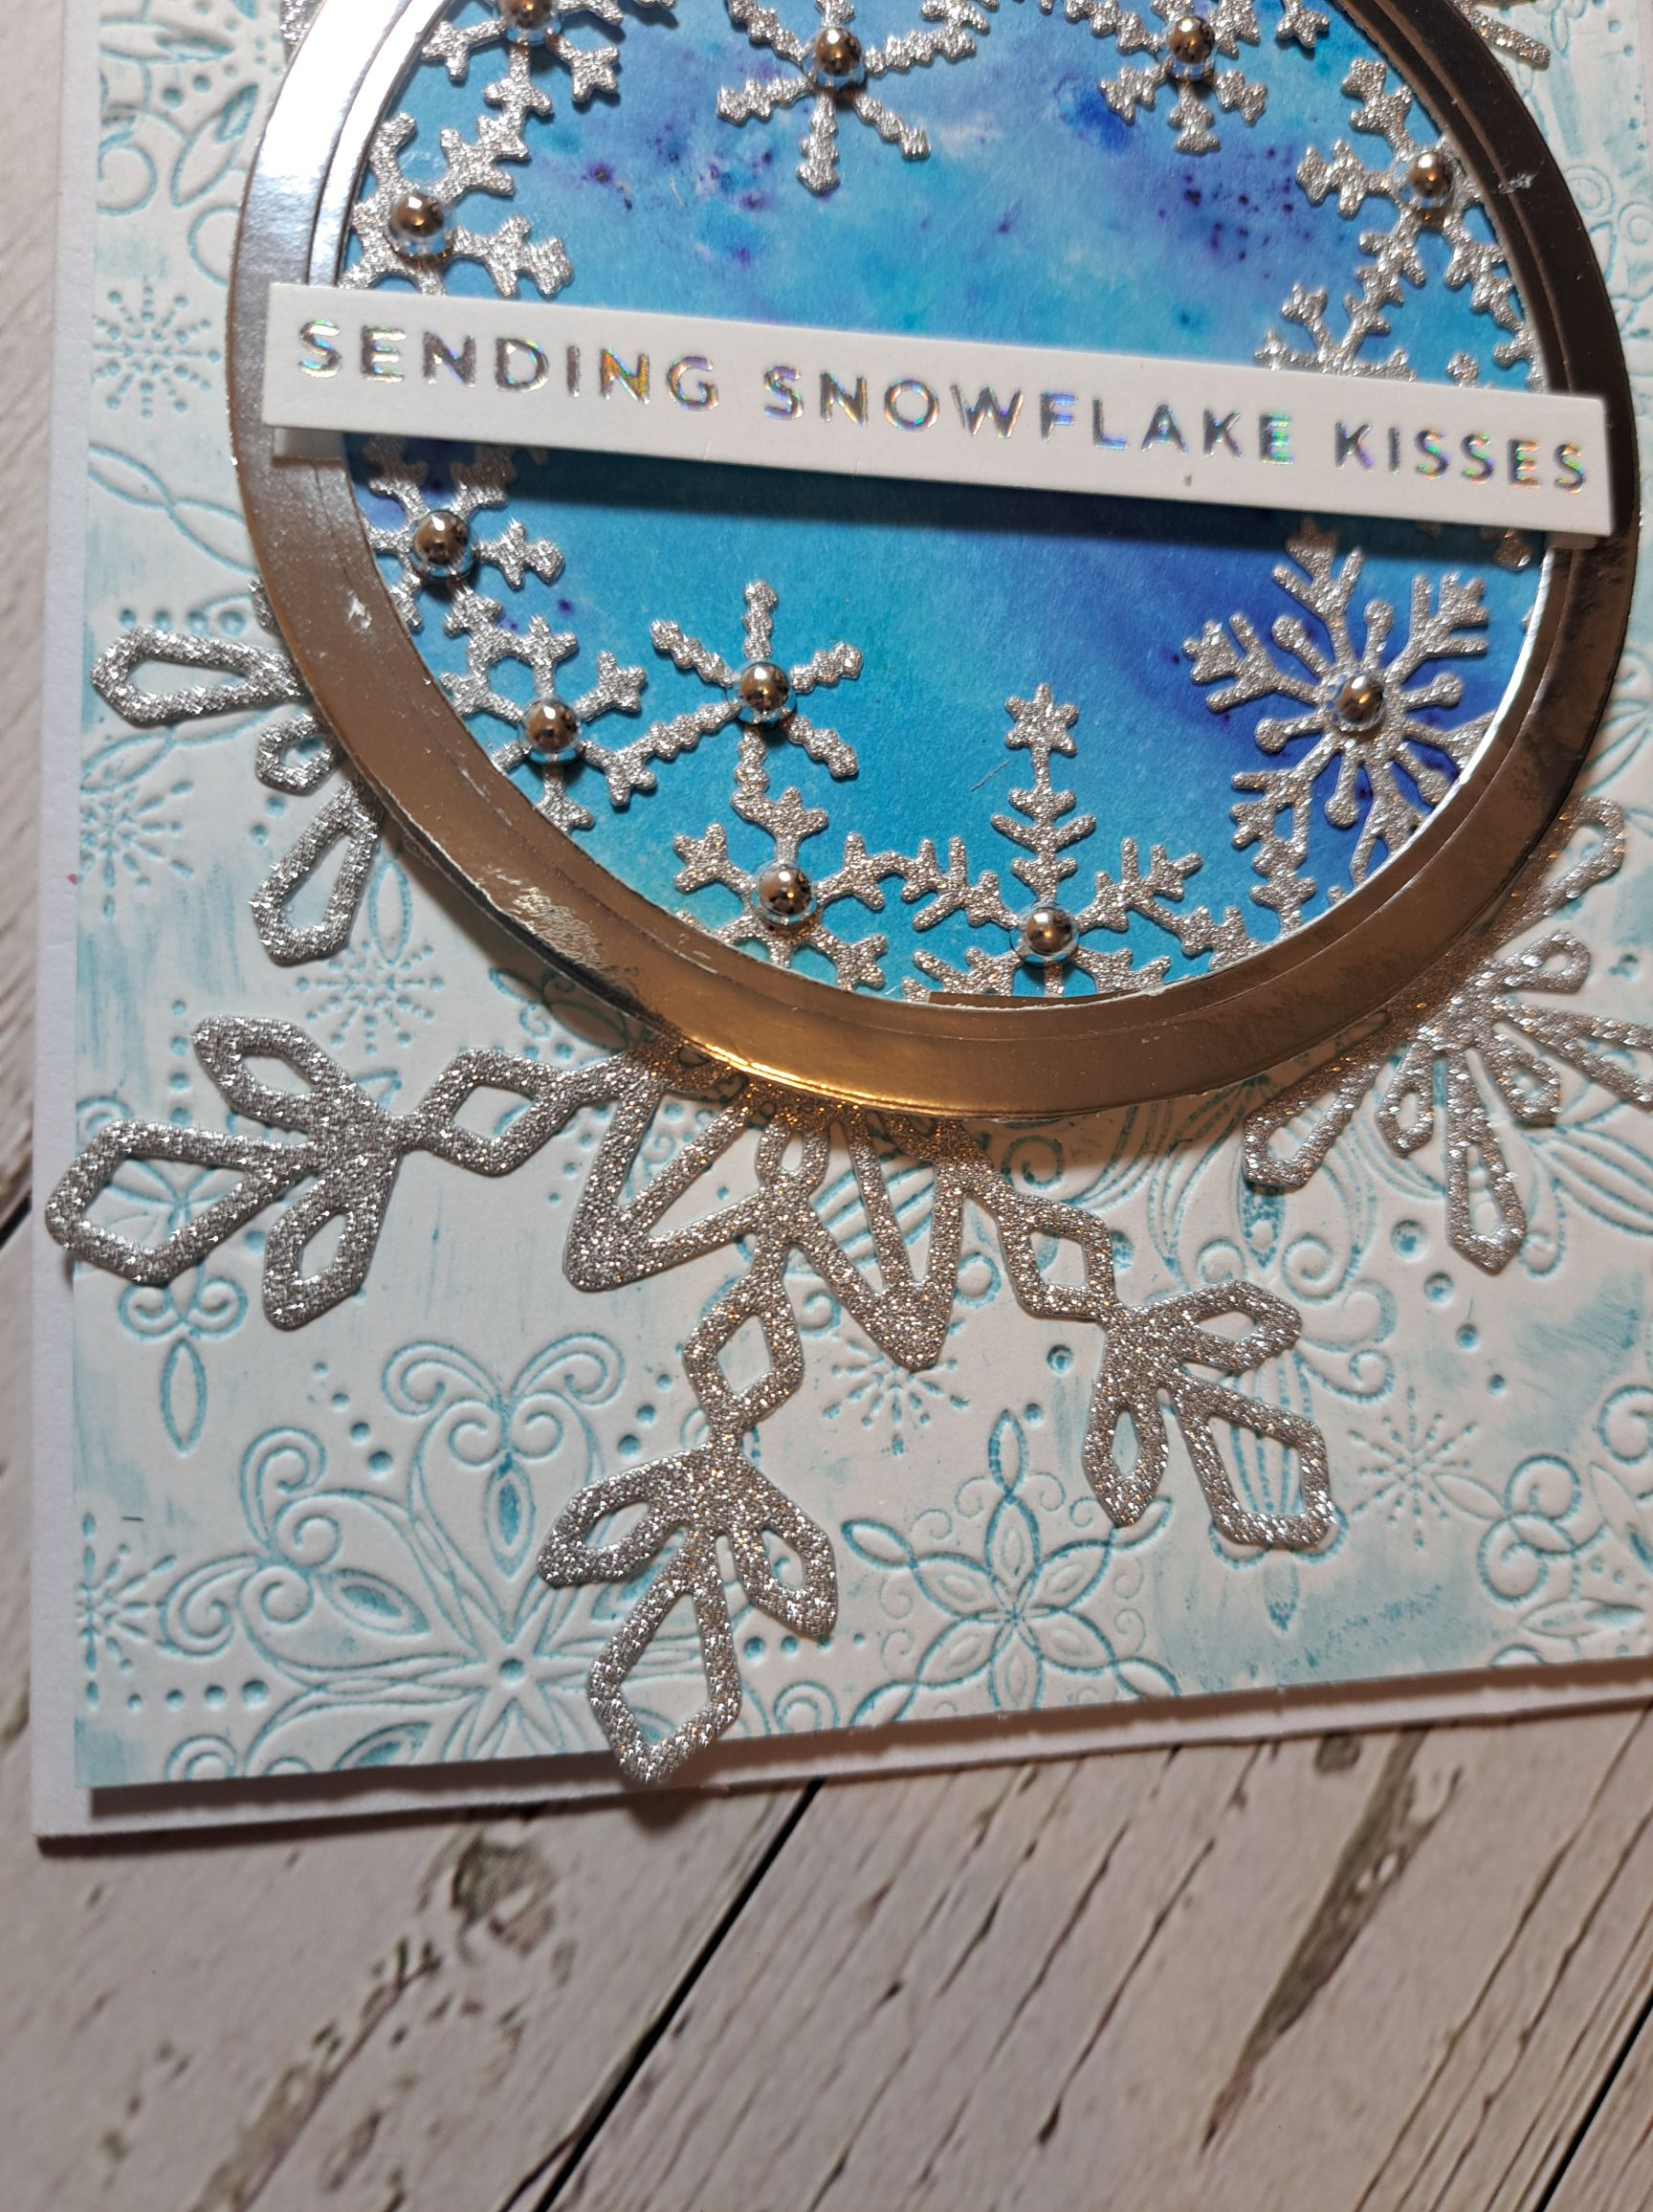
Hello there. I have been playing with different media over the weekend, and trying some new techniques. One of those I want to share on a card:
This card took quite a bit of thinking about – and a few changes along the way.
I started by die cutting the Hero Arts snowflakes ornament die out of silver glitter card stock, cutting off the ornament topper to create a circle. I then die cut a silver circle frame using a couple of different sized circle dies, and layered on top.
The blue background to the circle, which was previously created using Brushos, again die cut with a circle die and adhered to the back of the snowflakes.
For the background panel, I tried the ink pad to embossing folder technique – on both sides – debossed and embossed, to see what happened. I tried this several times, with different blue Distress inks, and liked this debossed panel the best. I adhered that to the white card base using 3D foam, then stuck down the snowflakes circle.
I wanted a little more bling, so I added some separate snowflakes die cut in the same silver glitter card, from a Pinkfresh Studio set, snipping and placing as you see – of course – this would have been easier had I done this prior to adhering the circle – but there we are……
I added the foiled sentiment – and then decided to add more shine by adding a little silver gem to each of the little snowflakes in the circle…….who knew there were many of them in there?
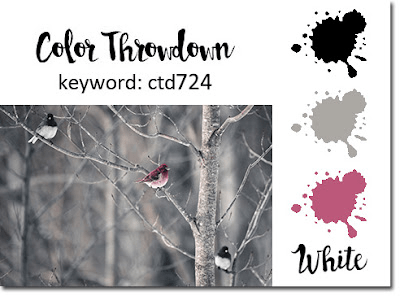
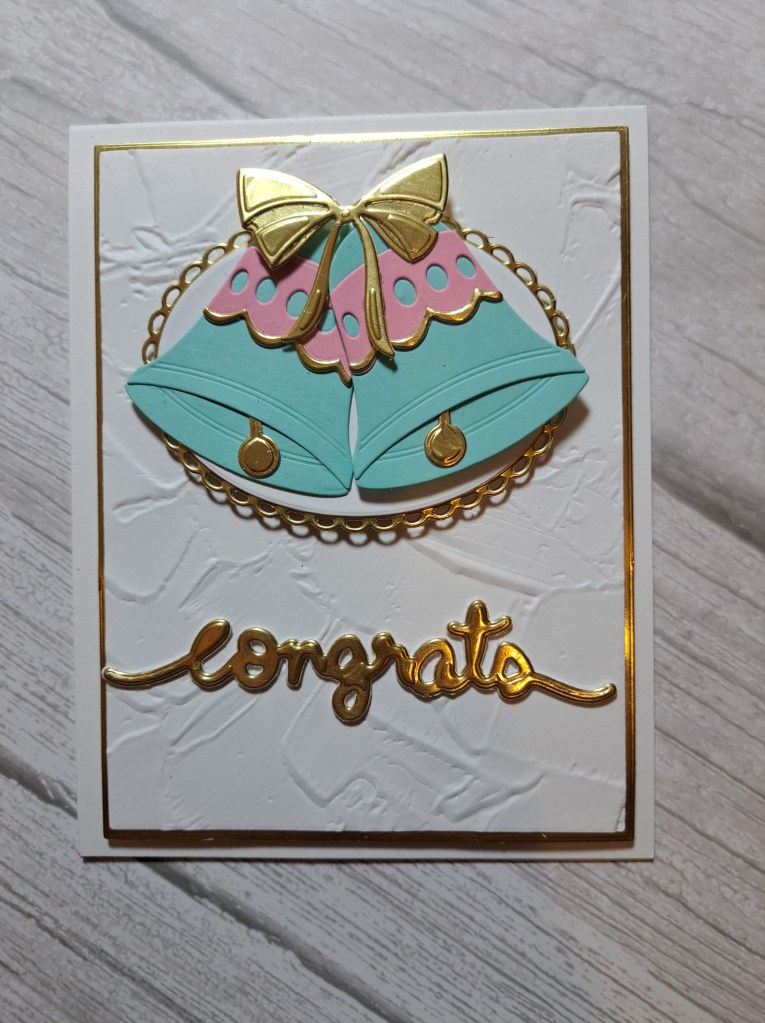
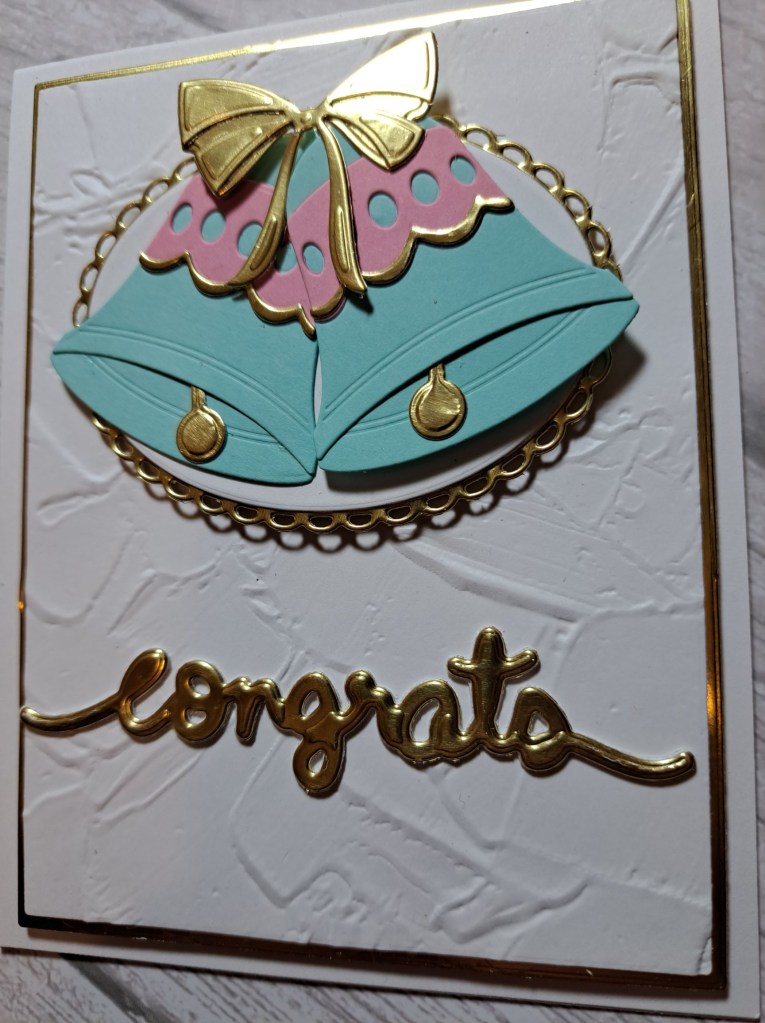
A little more crafty playing yesterday to create this card:
I began by picking the colours out for the current Color Throwdown Challenge and then browsing the ‘Color My Life’ app for ideas. I had no idea where I wanted to go with these colours.
I decided to use these new-to-me dies from Honey Bee Stamps to create a couple of bells, which I die cut and created first. I then decided I wanted a dry embossed background, so turned to one of my favourite embossing folders from Stampin Up.
I wanted a gold layer beneath the embossed layer, so after cutting the panel, I die cut the sentiment – from Lawn Fawn – out of the middle, then layered the two panels together, adding to the card base with 3D foam.
I played with the placement of the bells, but thought a little more dimension was needed, so I used two ovals from a Gina K Designs Master Layouts set, and stuck everything down as you see.
The sentiment was added, but only after I had layered the gold with a couple of white die cuts.