Hello everyone. I have a card to share inspired by several challenges:
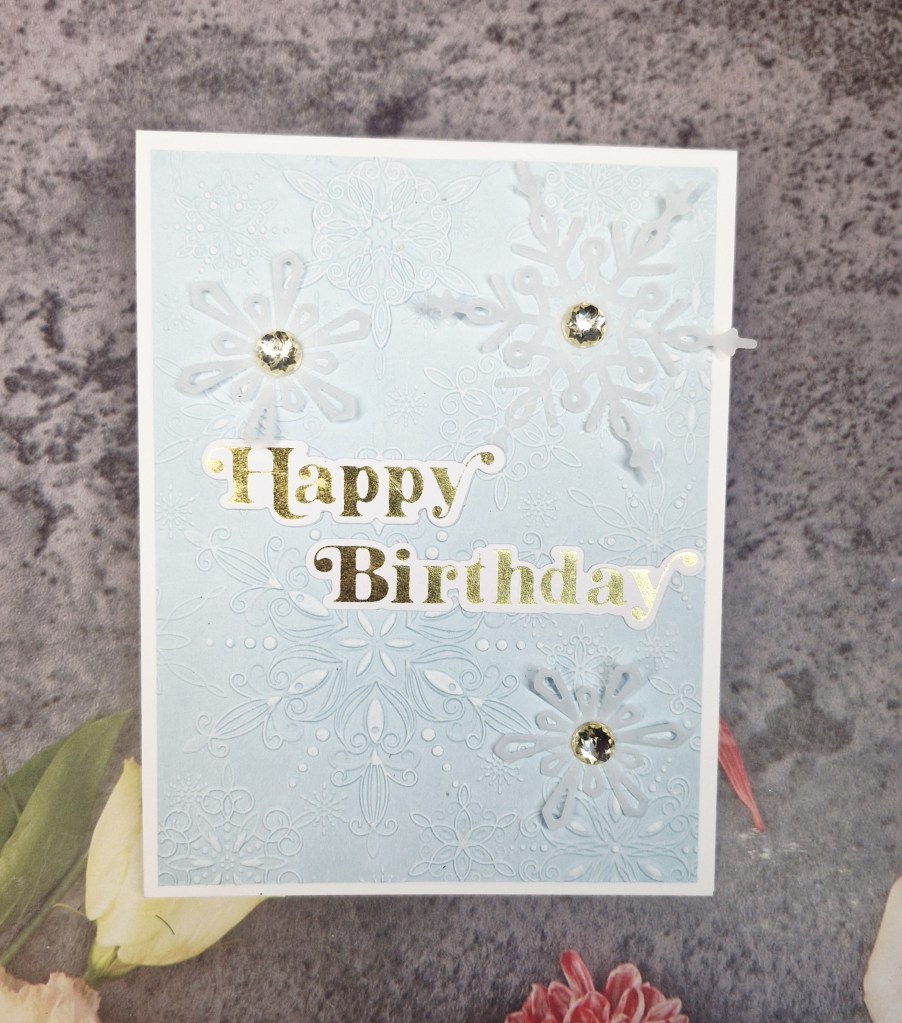
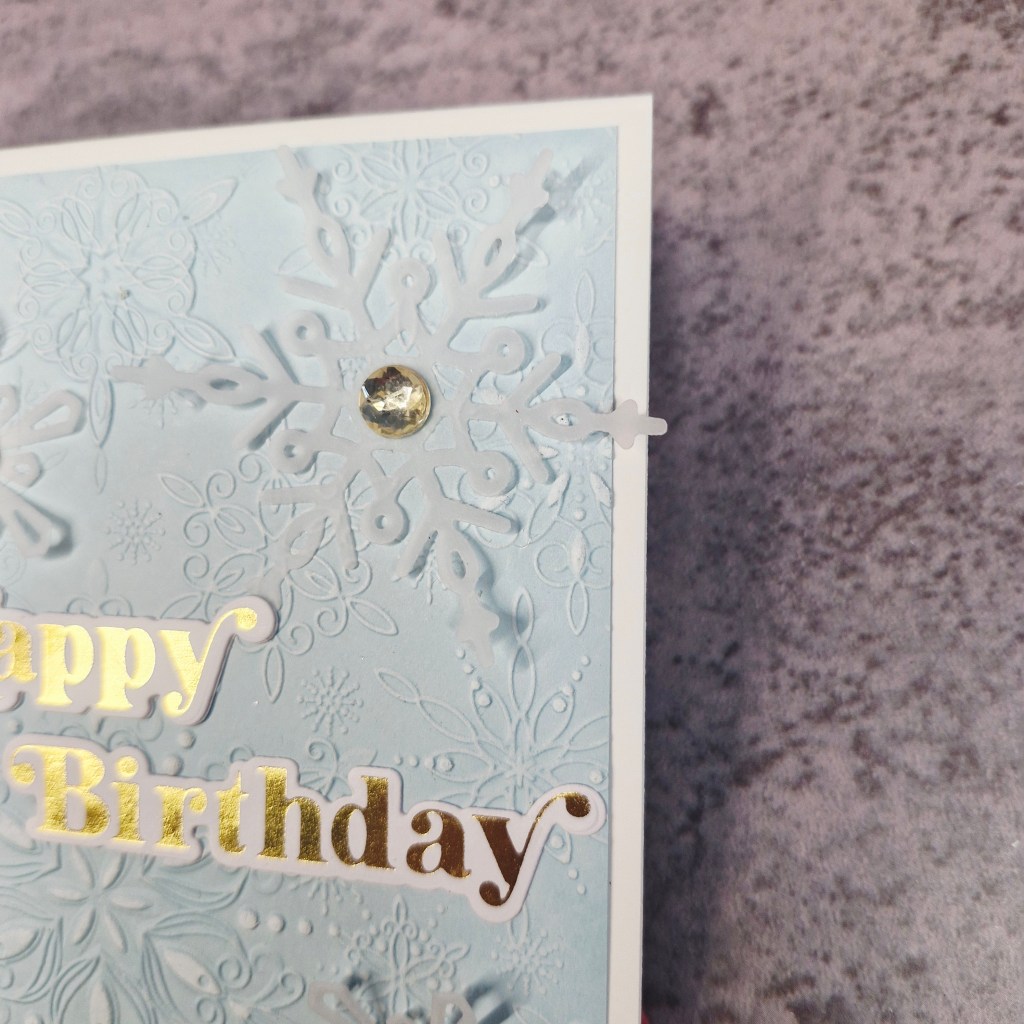
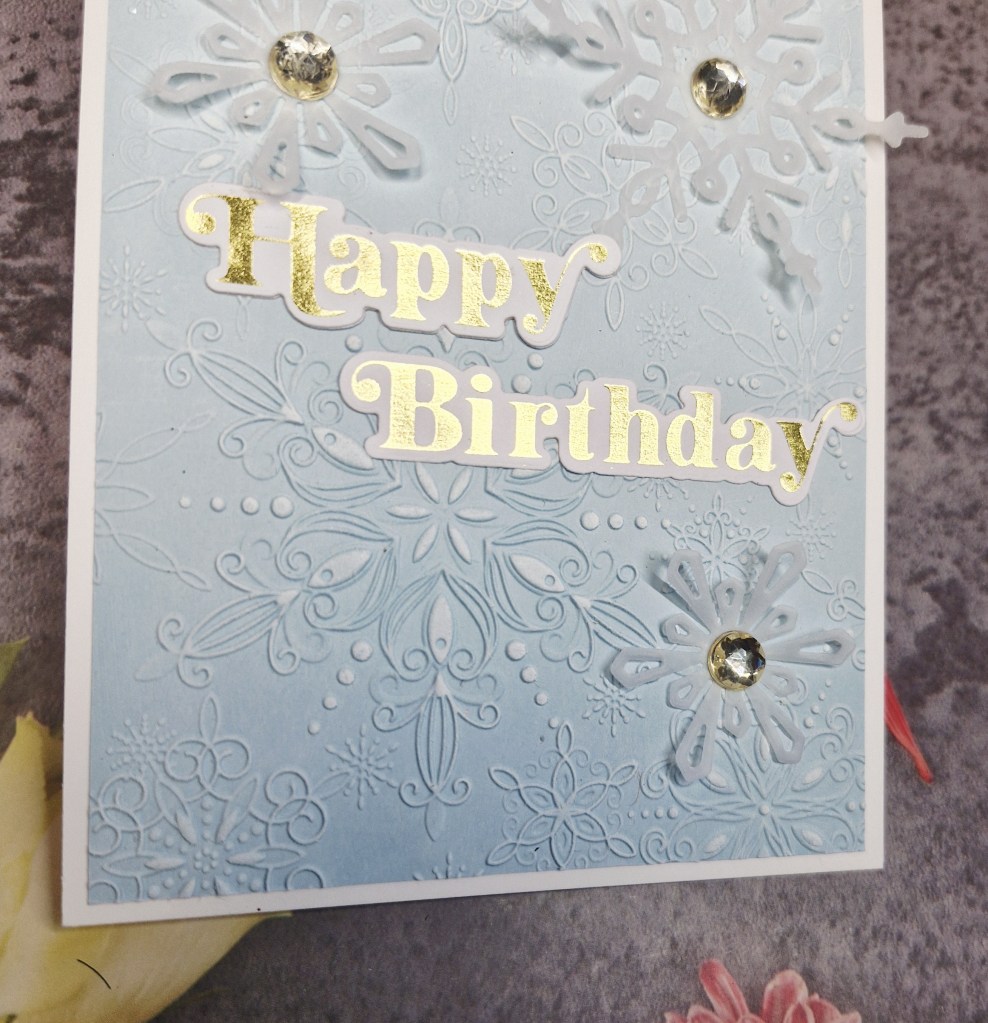
I started this card by taking a light blue piece of card and using a Simon Says Stamp snowflake embossing folder. I then ran – very gently – a white pigment ink pad over the top to bring out some of the embossing d3etails on the snowflakes.
This panel was then cut down slightly so I could a have a thin white border around when attached to the card base.
I then used some Pinkesh Studio snowflakes and die cut them out of vellum, attaching with a little tape runner to the blue panel, and adding gold gems to the centre of each snowflake.
The final step was to add the gold foiled sentiment.
I shall be entering the following challenges:
Seize The Birthday – birthday with the option of snowflake background taken
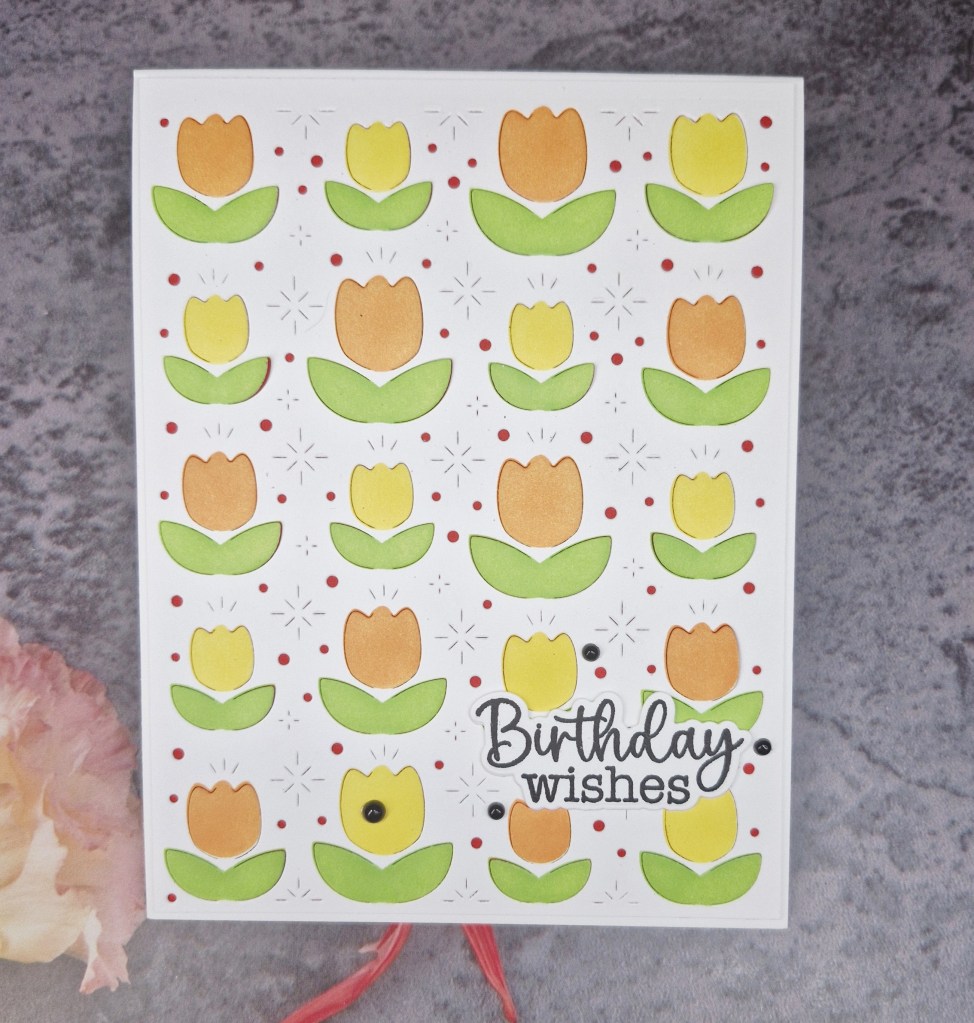
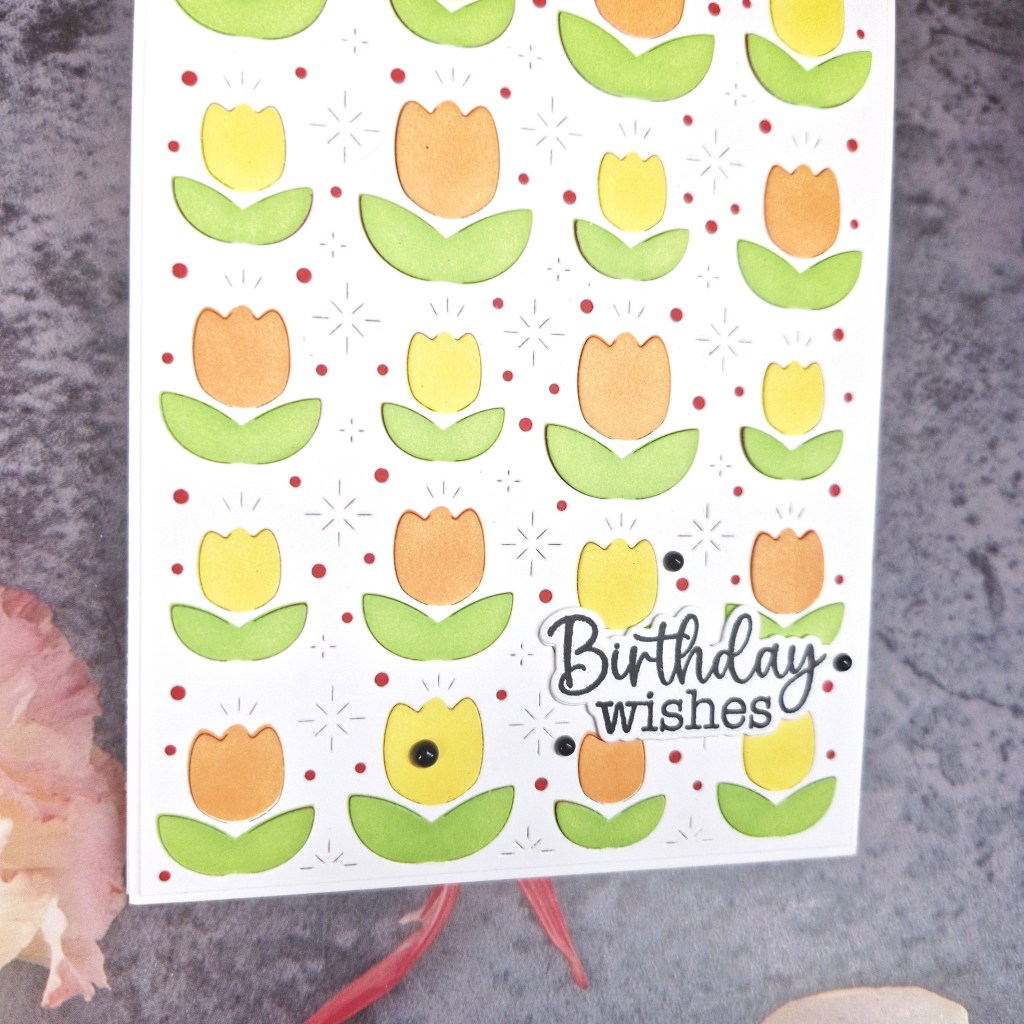
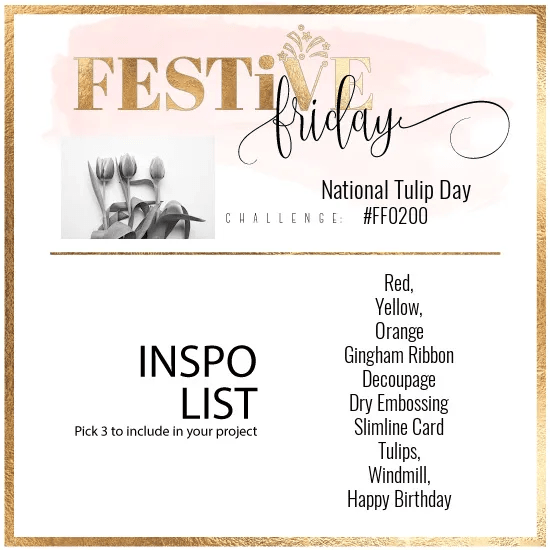
I have a card to share inspired by the current challenge at Festive Friday. When I saw their them was National Tulip Day, and aw the list to choose three items from the list, I remembered I had this die and stencil set from Waffle Flower that I have never used – time to play:
The first step was to die cut the panel, and then ink blend using the matching stencil set. I chose to use orange and yellow for the flowers, two colours from the provided list, but then I also added a backing piece of red paper which you can see behind the die cut panel.
Once all attached to a card base, I stamped and die cut the birthday sentiment – another item from the list – and adhered as you see.
I wanted the sentiment to be quite bold, which is why I chose black, so I also added some black enamel dots.
Quite a bright and cheery card to help get over this snow hump we are having in the UK at the moment. xx
I shall be entering the following challenges:
Festive Friday – at least three items from inspiration list – orange, yellow, red, birthday, tulips,
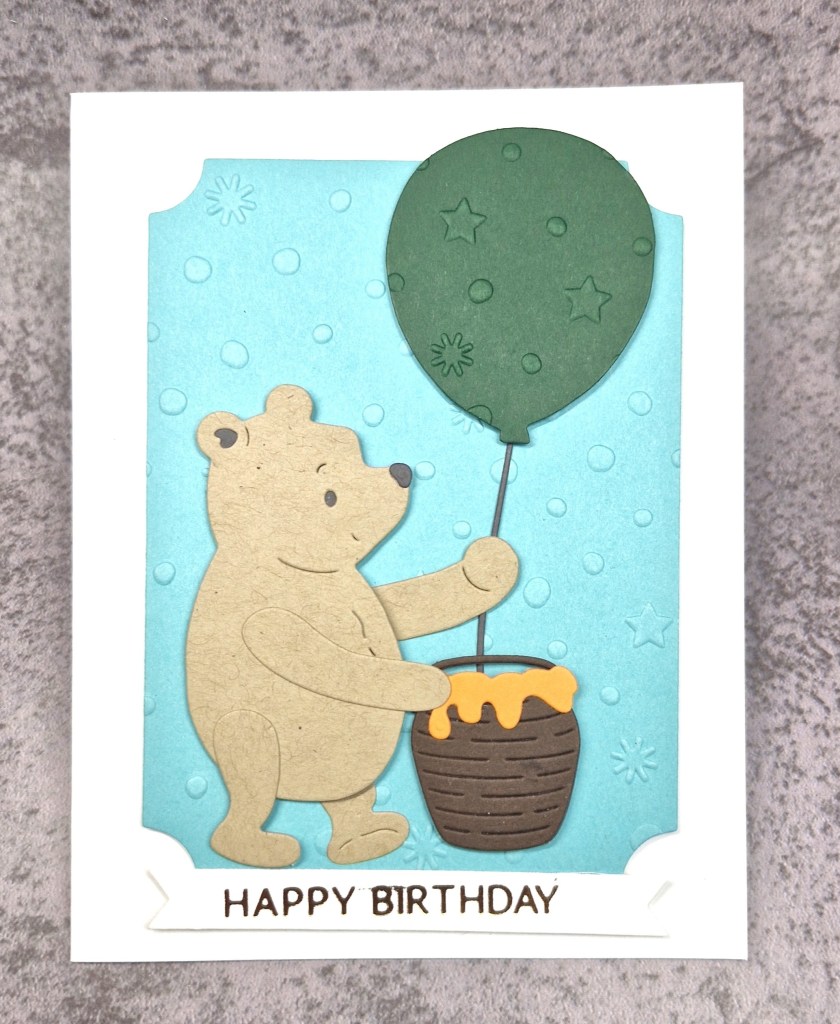
Hello everyone. I had a little play in my craft room today to create this fairly simple card:
I used some new dies to me from Spellbinders which included Pooh bear and some of his friends. These were bought as part of a Facebook live sale from one of our UK companies – Sir Stampalot. They do this sale once a month, and I generally pick up a few crafty bargains.
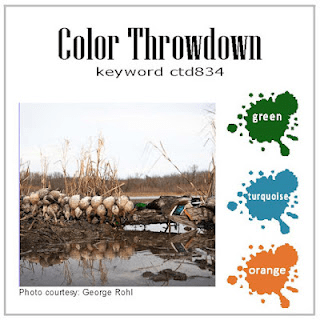
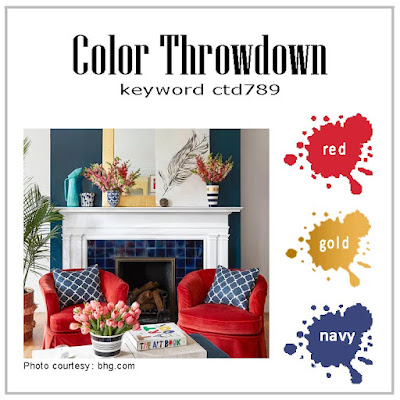
I started by die cutting Pooh himself, then the honey jar and the balloon. I chose colours from the current Color Throwdown challenge – which I haven’t entered in quite a while. The balloon and honey jar were then cut
Once the bear was die cut, I used another die for the turquoise back panel. I thought the panel and the balloon looked a little plain, so I used an embossing folder to add some details. I can’t remember who this is from, and it isn’t in my CML app.
The panel was adhered with 3D foam tape, then I added the bear, ensuring all the other elements fit in. The gold foiled sentiment was then added last.
Hello once again. I am here with a creation for the new challenge at The Alphabet Challenge. The theme has been chosen by Melanie, and she has chosen:
Z is for Zoom – anything which goes fast
Here is my card:
I used a Spellbinders die set to create the plane and banner, and a mixture of acrd stock from Concord & 9th and Spellbinders.
I did have to watch a YouTube video several times to be able to layer each part in the correct way – but I managed to achieve it – finally.
Once the plane and banner was assembled, I used an MFT stencil to create the background clouds. I wanted lots of clouds, and lots of dimension so I used a blue card panel and some slightly darker blue ink to create it.
The panel was adhered flat to the card base, the plane and banner attached with a thin 3D foam, then some clear enamel dots added here and there.
I hope you can come and join us with your creations following our theme.
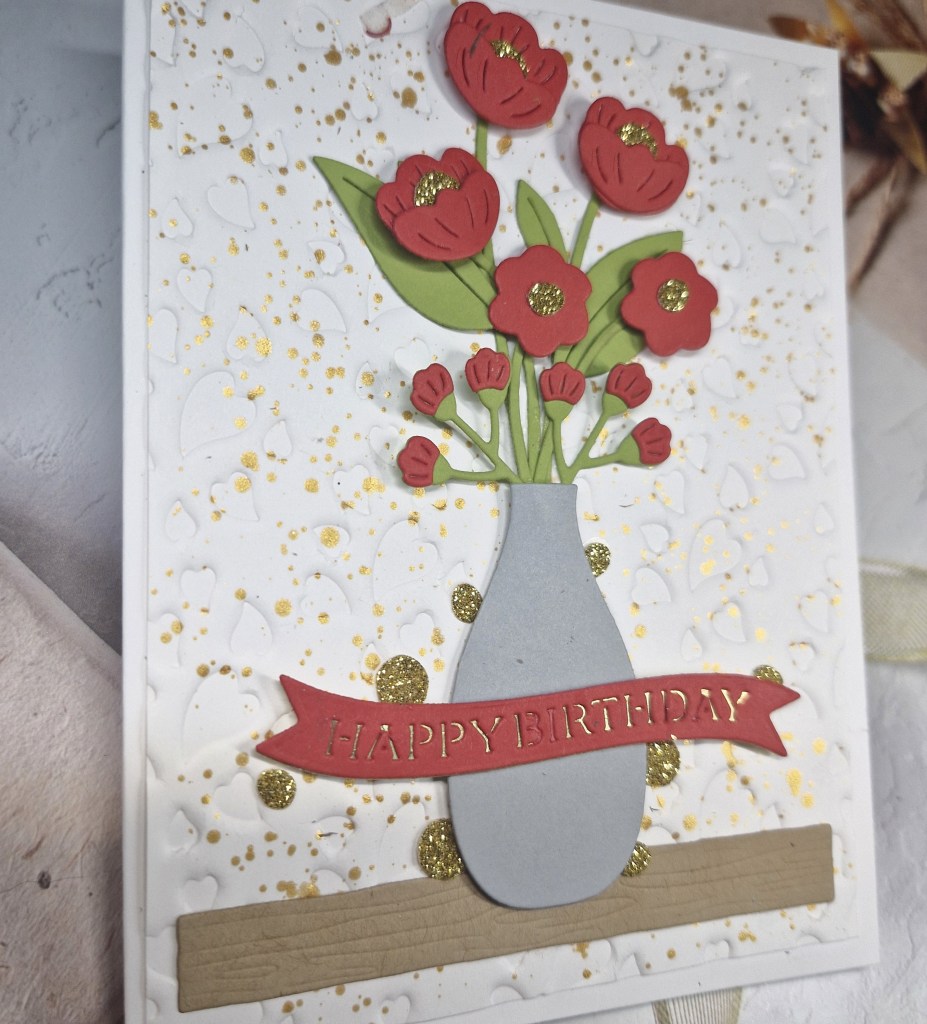
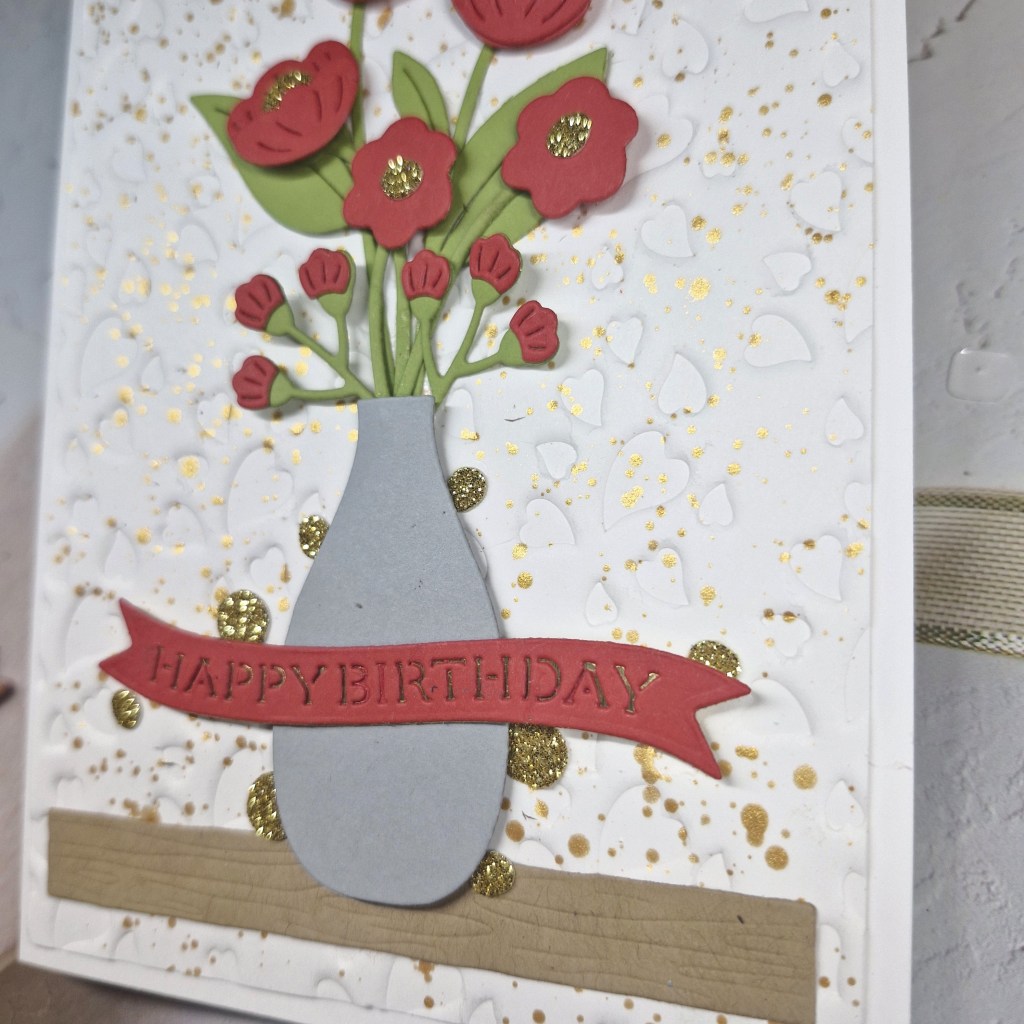
Hello again. More creating in my craft room and this time I created this card:
I was inspired by the mood board at Just Add Ink and the vase of red flowers that was in their picture. Funnily enough, one of the die sets from the Spellbinders Advent Calendar was this vase with some flowers, so I used that die set, and some of the flowers from another day in the Advent Calendar – as well as the sentiment banner.
I first created the background by dry embossing a hot foil plate from Crafty Meraki ‘Loopy Hearts’. I like how the hearts are there in the background – I used the debossed side – and give a subtle texture. Onto that panel I splattered some gold acrylic paint to bring in some of the gold from the mood board.
The wooden shelf piece is a die which embosses wood grain into the die cut, and I used a light brown card stock.
The vase was die cut from grey – I was tempted to add texture of a pattern but I went without – let the flowers and the background take centre stage.
I then used Spellbinders green card stock, and some red card stock from Heffy Doodle for the leaves, stems, and the flowers. These were layered as needed, and the centre of the flowers were die cut with Pinkfresh Studio gold glitter card stock.
I always die cut more than I think I need so I can play around with the design.
The wood grain strip was adhered with glue, then the vase adhered with 3D foam pieces at the edges and the flower placement began. Glue was added to the bottom of the stems, but I added small pieces of 3D foam to the flower heads themselves.
I had extra gold glitter circles from die cutting the flowers centres, so I used them as glittery accents instead of gems of sequins – waste not, want not…..
The sentiment and banner are also from the Advent Calendar, die cut in the same red card stock with a gold layer behind to shine through the letters.
I don’t really like to use glitter itself, but I am a great fan of glittery card stock, preferably gold – and this glittery card stock from Pinkfresh Studio is one of the most sparkly – and doesn’t shed…..such a bonus!
I shall be entering the following challenges:
As You Like It – gold, silver or glitter and why – nope, no glitter, not for me – too messy
Hello everyone. It is my turn to host the new challenge at The Alphabet Challenge. Having reached the letter ‘E‘, I have chosen the theme of ‘embossing – wet or dry’. Here is my card:
I started by die cutting all the elements from a couple of Spellbinder die sets, and used a mixture of Concord & 9th and Spellbinders card stock.
Deciding to go landscape, and dry embossed a panel and adhered it flat to the card base.
I played around with the layout, knowing that the ampersand would be sat on top of the florals – which took a little figuring out when it came to 3D foam – where to place it, and how many layers………the ampersand was die cut a couple of times and layered together for added stability, and also ended up with 2 or 3 layers of itty bitty 3D foam pieces – I do like to make my life harder….!
I hope you can come and join us with your creations matching the theme – I look forward to seeing your creations. xx
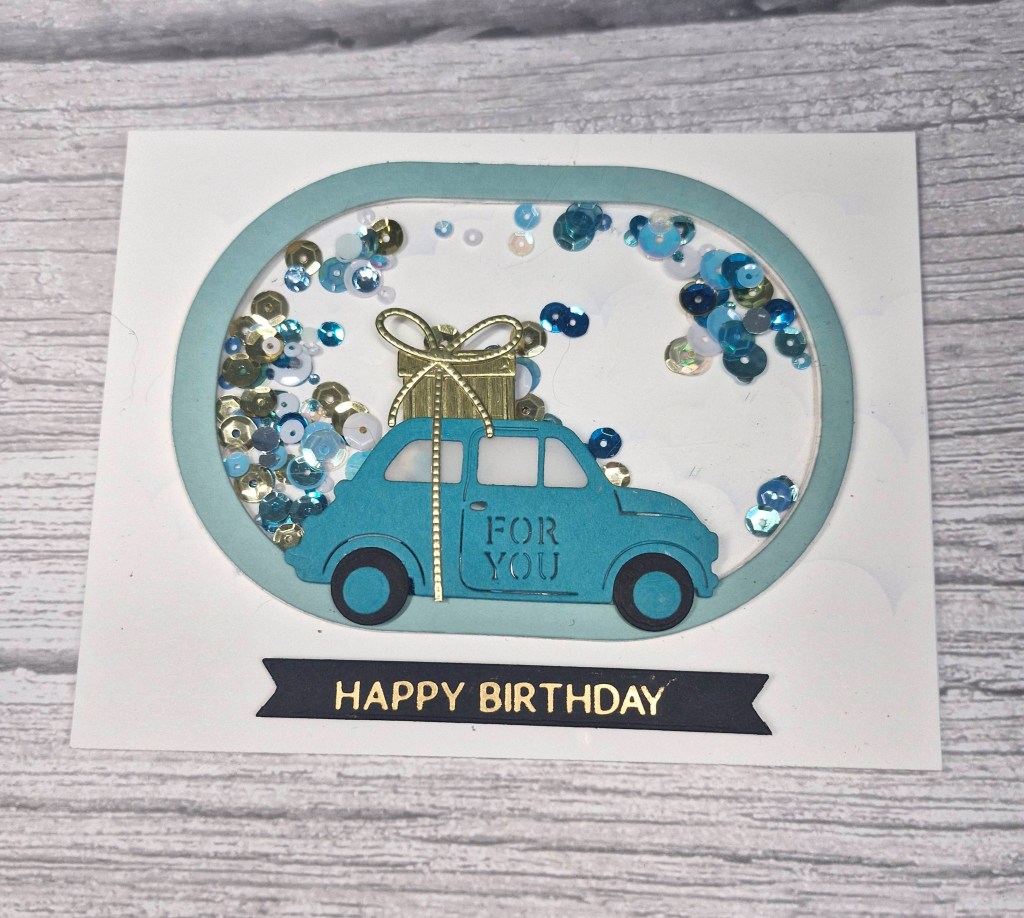
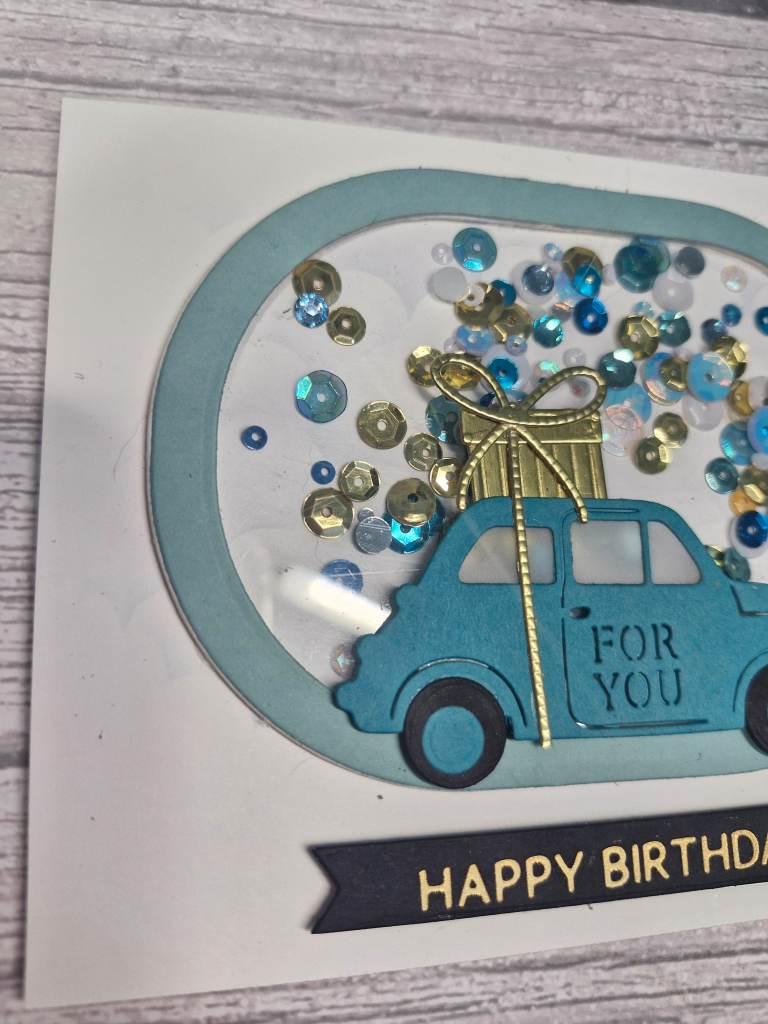
Hello once again. The Alphabet Challenge has reached the letter ‘C‘, and Billie A has chosen the theme of ‘Cars‘. Here is my card:
The shaker element was created using Spellbinders ‘Stylish Ovals’ dies – two dies together to create the frame – cutting the shape several times in white, then a top layer of a light blue/teal. I prefer to use die cuts for the walls of the shaker instead of 3D foam as I think it keeps the edges neater.
Once the white layers were stacked together, and glued to the card base, I added the sequins, then added the top layer to which I had adhered the acetate.
I used a Spellbinders die for the car, from the Spellbinders Advent Calendar 2023, assembled all the layers, then glued that down to the acetate – slightly overhanging the lighter blue/teal as though this was the road……
A foiled sentiment was added for completion.
I hope you can come and join us with your creations following our theme. xx
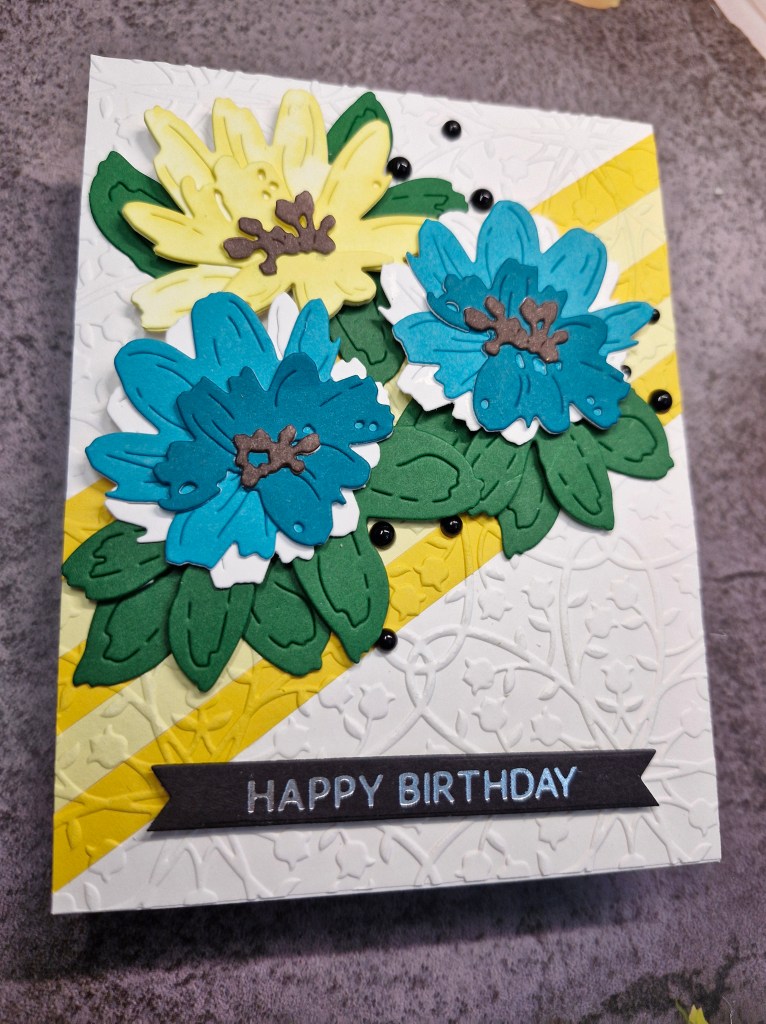
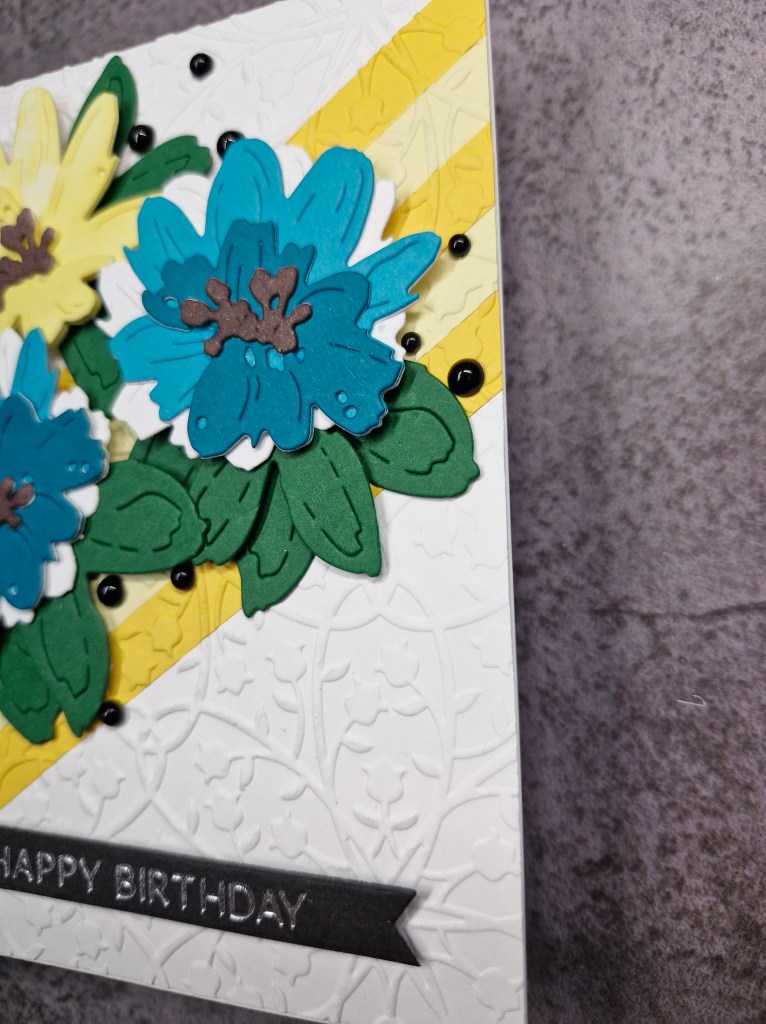
Hello again. I haven’t posted for a few days, but I have been playing in my craft room. I have done a little mixed media project from a virtual event last weekend, and I will show what I have made at some point, but for today I have this card to share:
The background panel was created by adding some diagonal yellow strips of card, then dry embossed using a Spellbinders embossing folder. This way, the embossed pattern ran across the whole panel.
The layered flowers are from a die set from Waffle Flower, and I used some older Altenew ombre card packs to create them, colouring the centre parts with a Copic marker.
Once they were layered, I decided to add a white layer beneath the teal/aqua flowers, so they stood out a little more from the background.
I chose a dark green for the leaves to make them really pop.
I was going to go with just the teal/aqua flowers, but decided to add the yellow ink blended flower to complete the trio.
The foiled sentiment was added, and as I chose a black foiled strip, I added some black gems, also from Spellbinders.
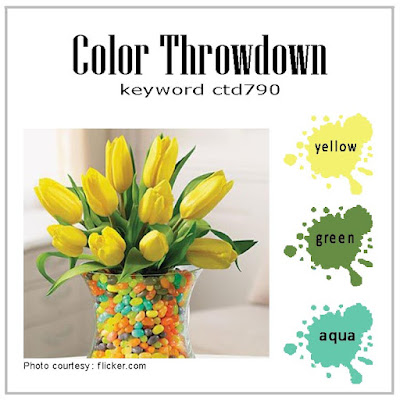
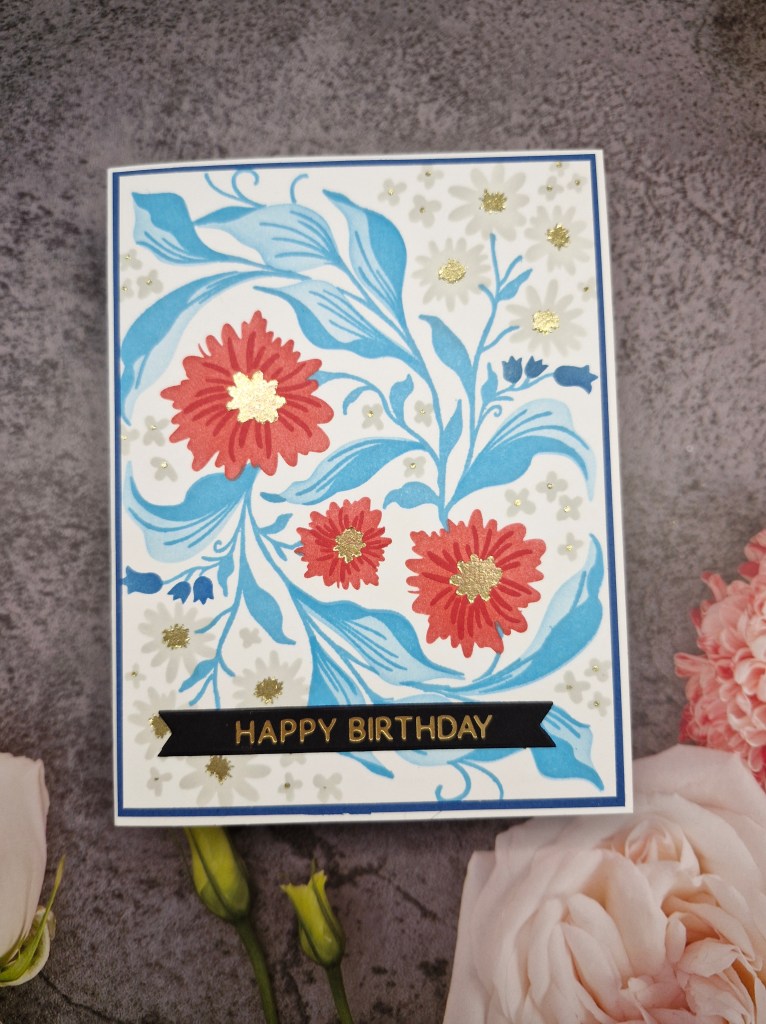
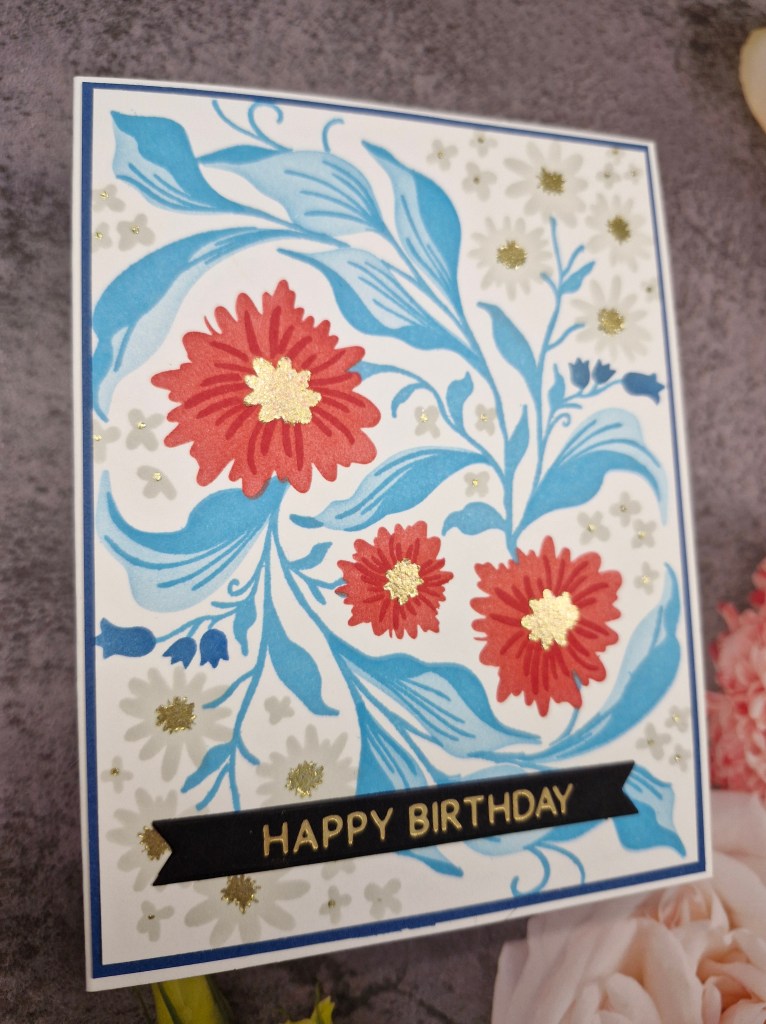
Hello again. A little time to craft today to create this card:
Using the colors for the current Color Throwdown Challenge, I used some new layering stencils from The Greetery. The inks are from Pinkfresh Studio, the same colour but stamped a couple of times to create a darker colour, and the centre of the flowers was using some gold Tonic Studios paste.
This panel was then cut down slightly layered with a blue card stock, then adhered to the card base.
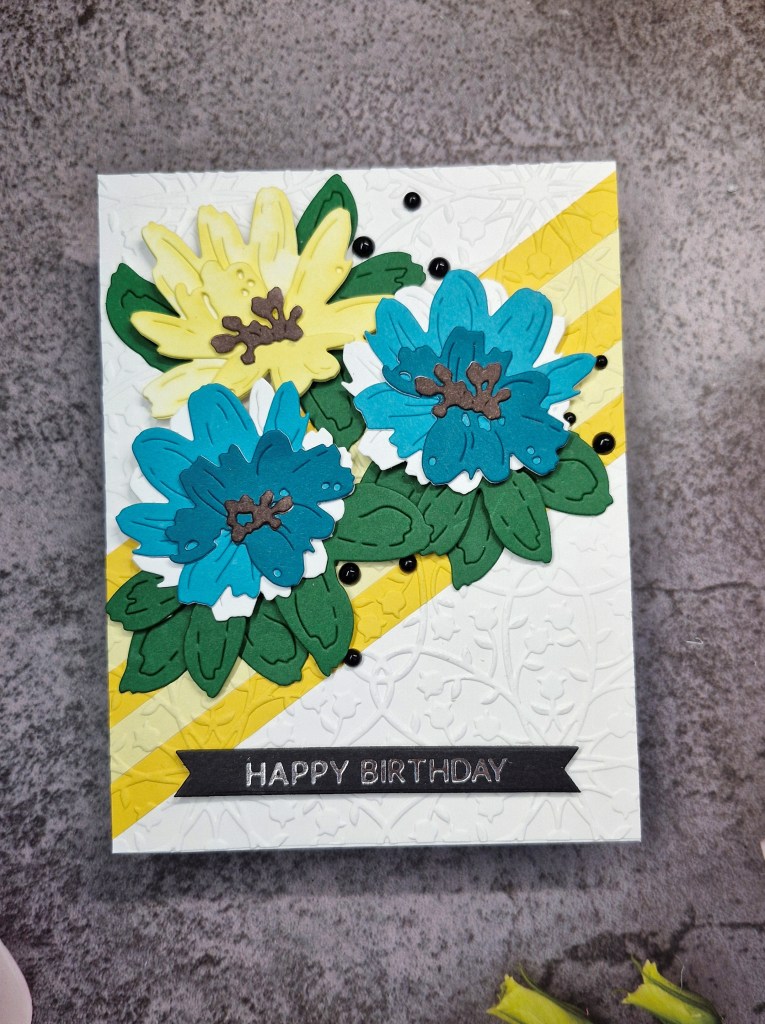
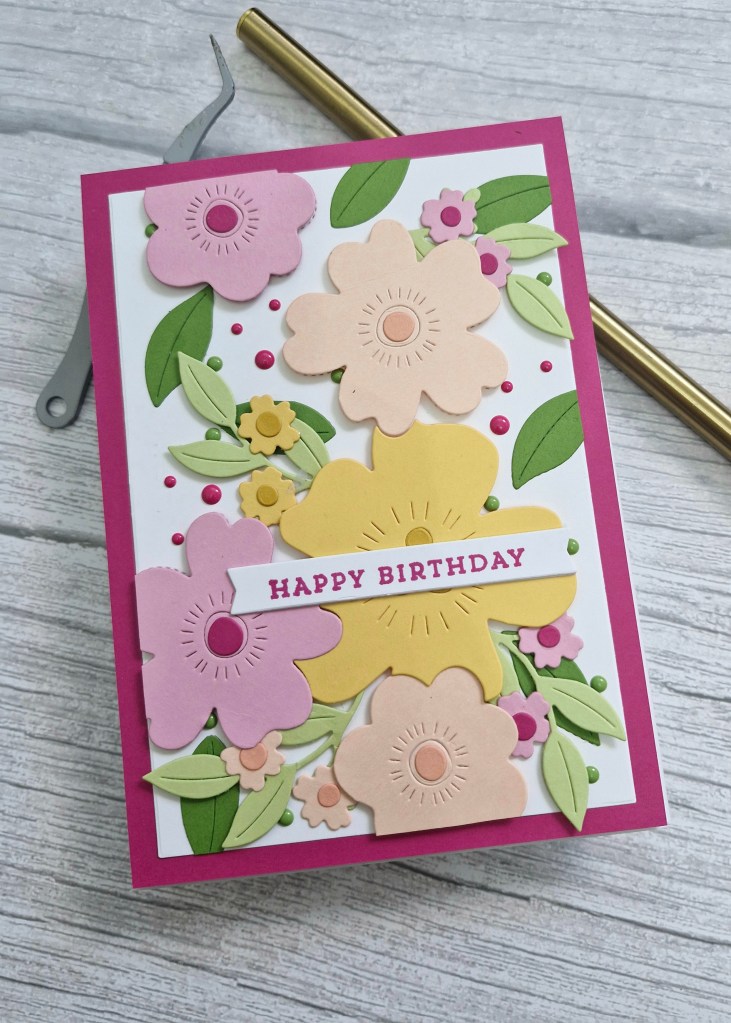
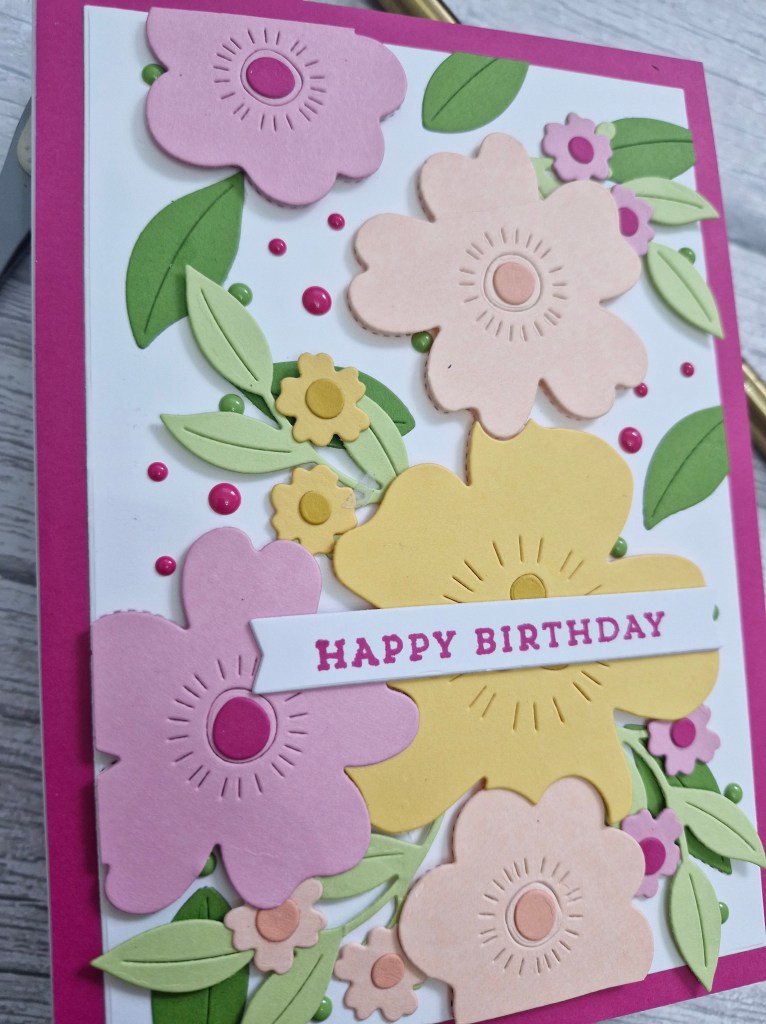
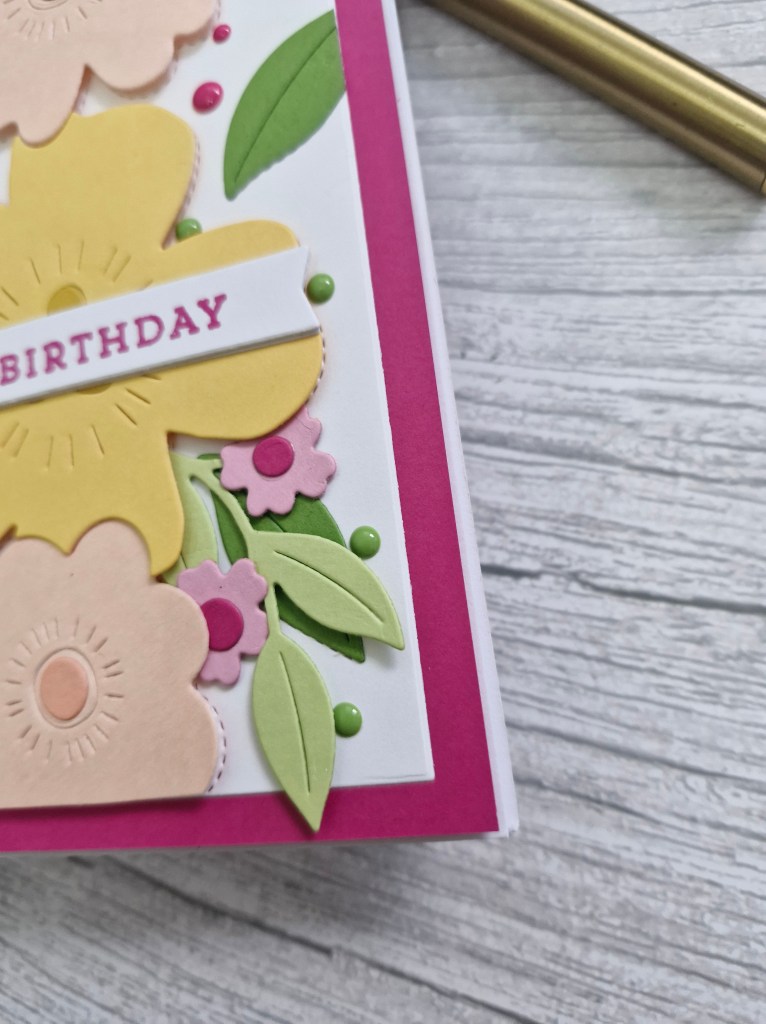
Hello there. I am hosting the new challenge at Cardz 4 Galz, and I chose the theme of:
‘Spring Flowers with dies and/or punches’
Here is my card:
This die set was part of the Concord & 9th ‘In The Classroom’ virtual event I attended last year. Big and Bold is the name of the set – and they certainly are big and bold flowers.
There is a die which you use for the background to place stitch marks on a panel, then you use the other dies for the flowers and leaves. You can use the flowers alone, but as you can see, the flowers are cut to perfectly line up with each other.
I die cut quite a few extra of the florals and leaves, and added them round and about the main big flowers, adding some matching enamel dots in places.
I hope you can come and join us with your projects following our theme. I look forward to seeing you in our gallery. xx