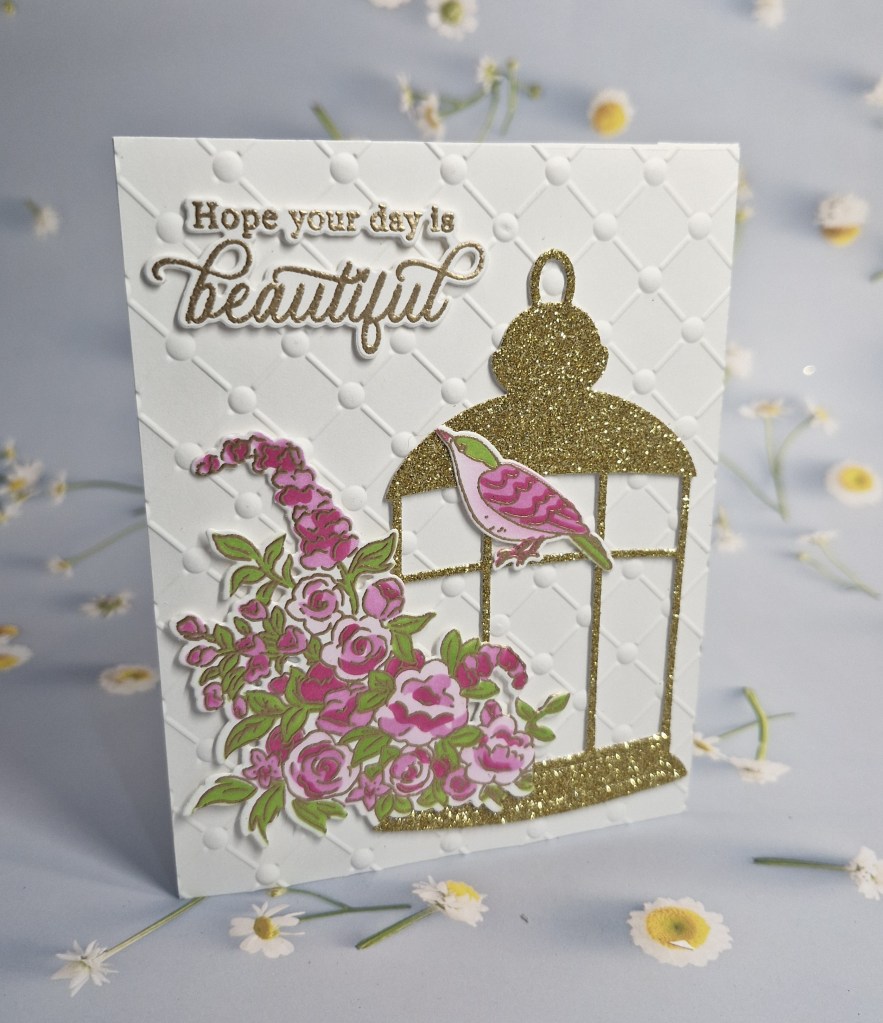
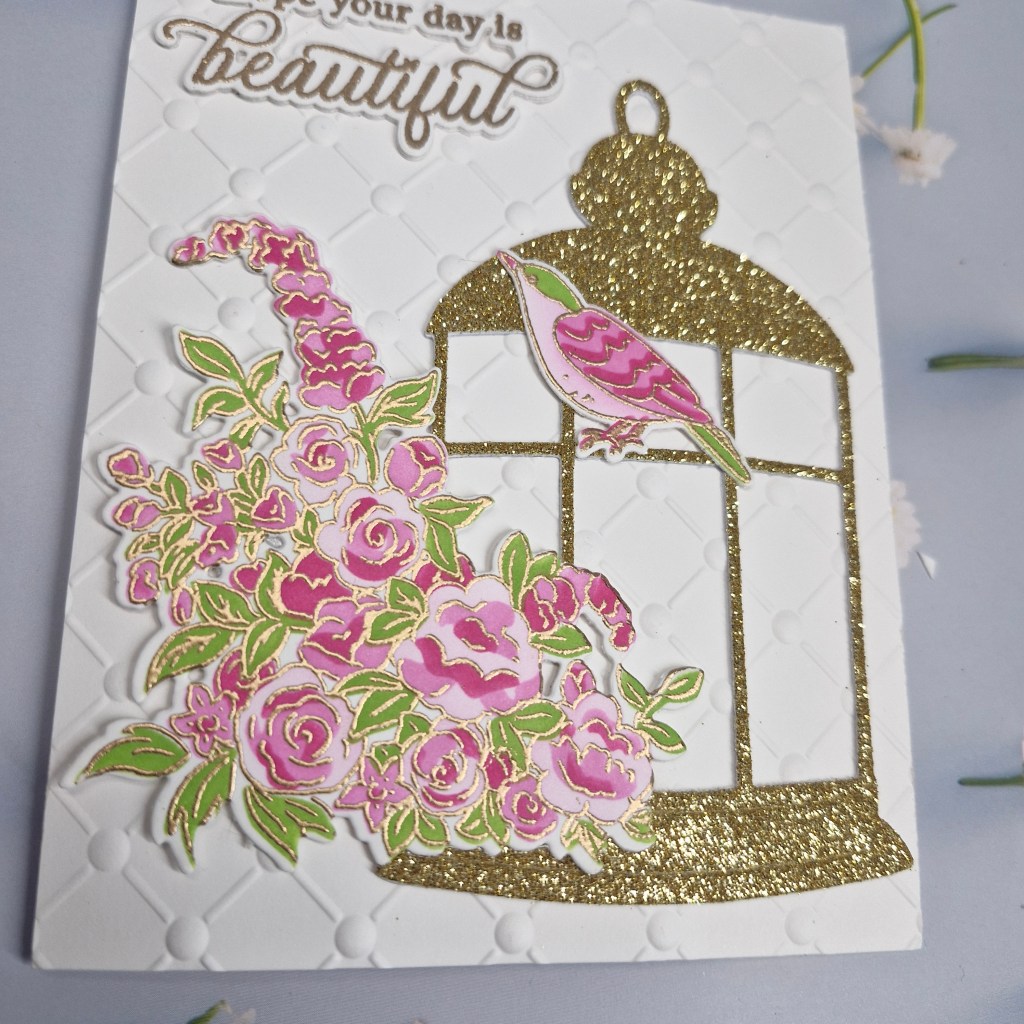
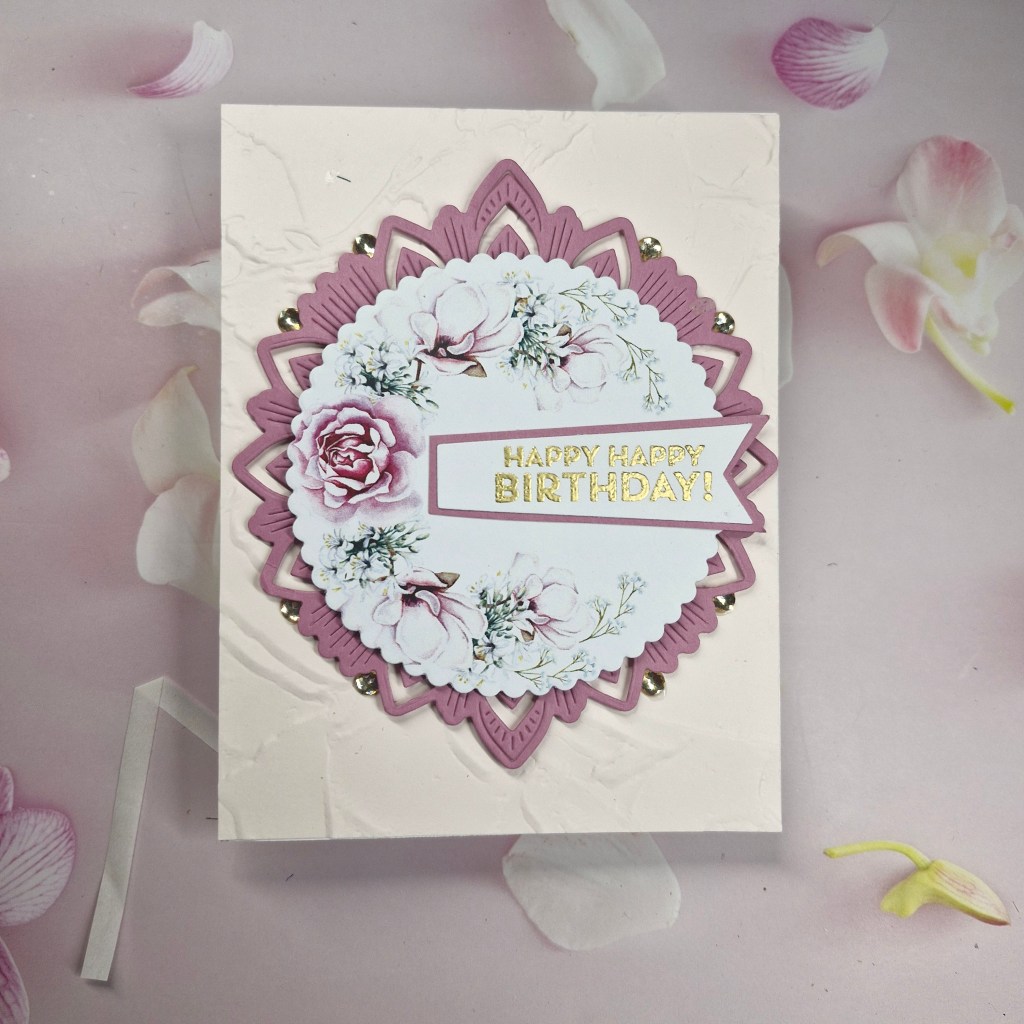
Hello. I have certainly been having some crafty play this weekend. I have another card to share using products from yet another virtual event from 2024 – I really need to organise the products from these events and play more with them.
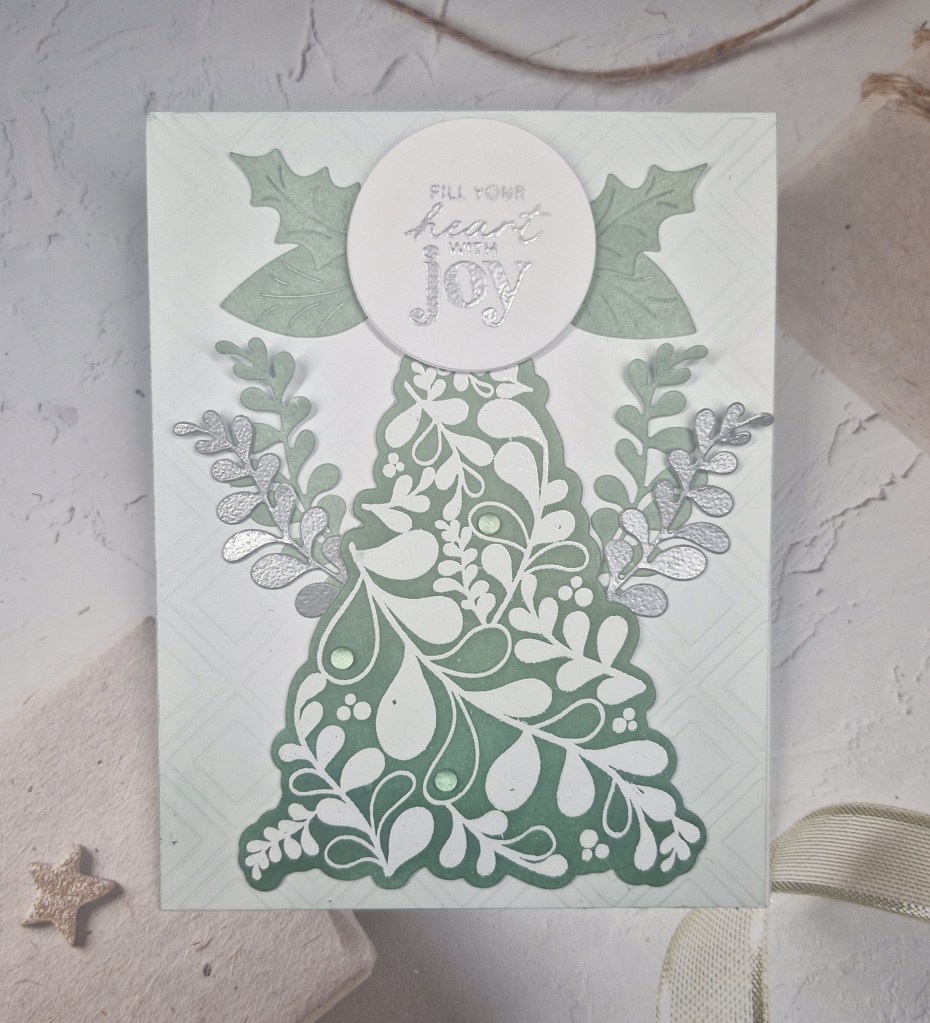
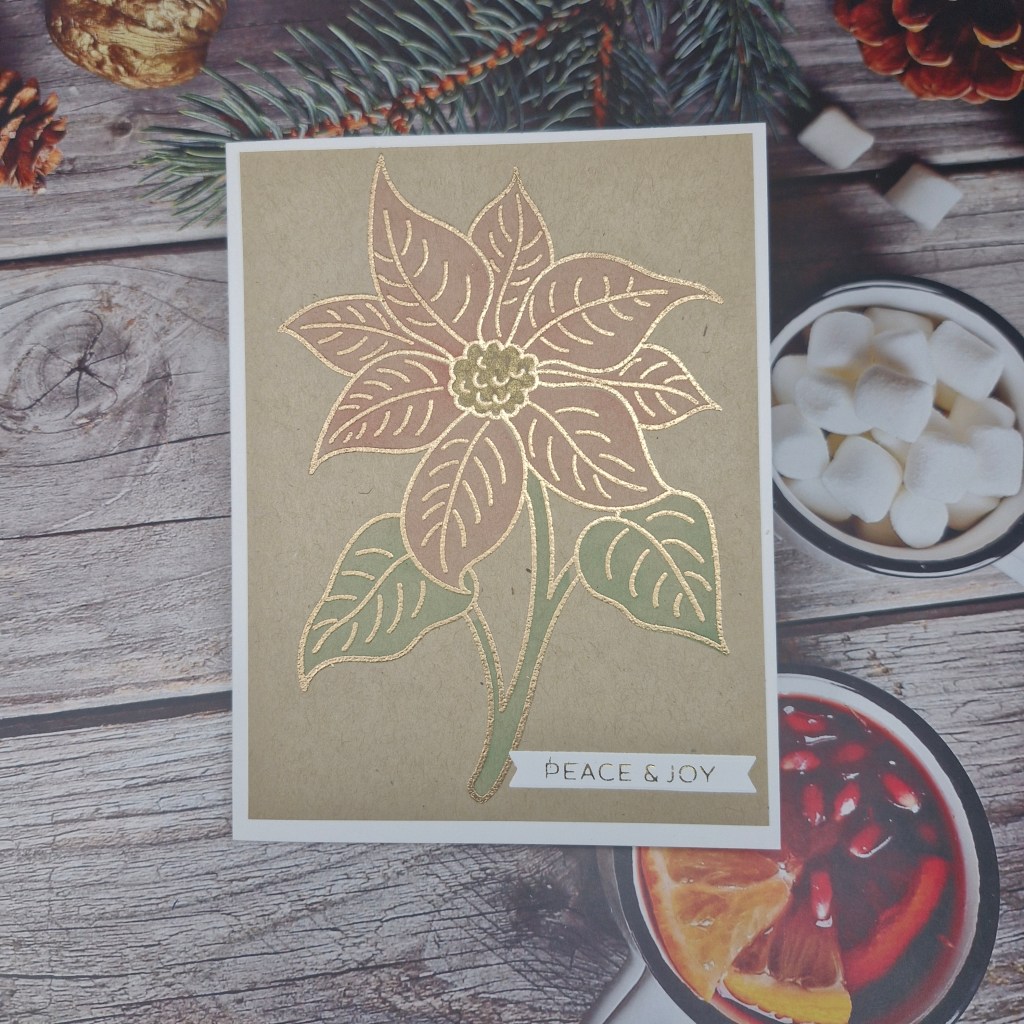
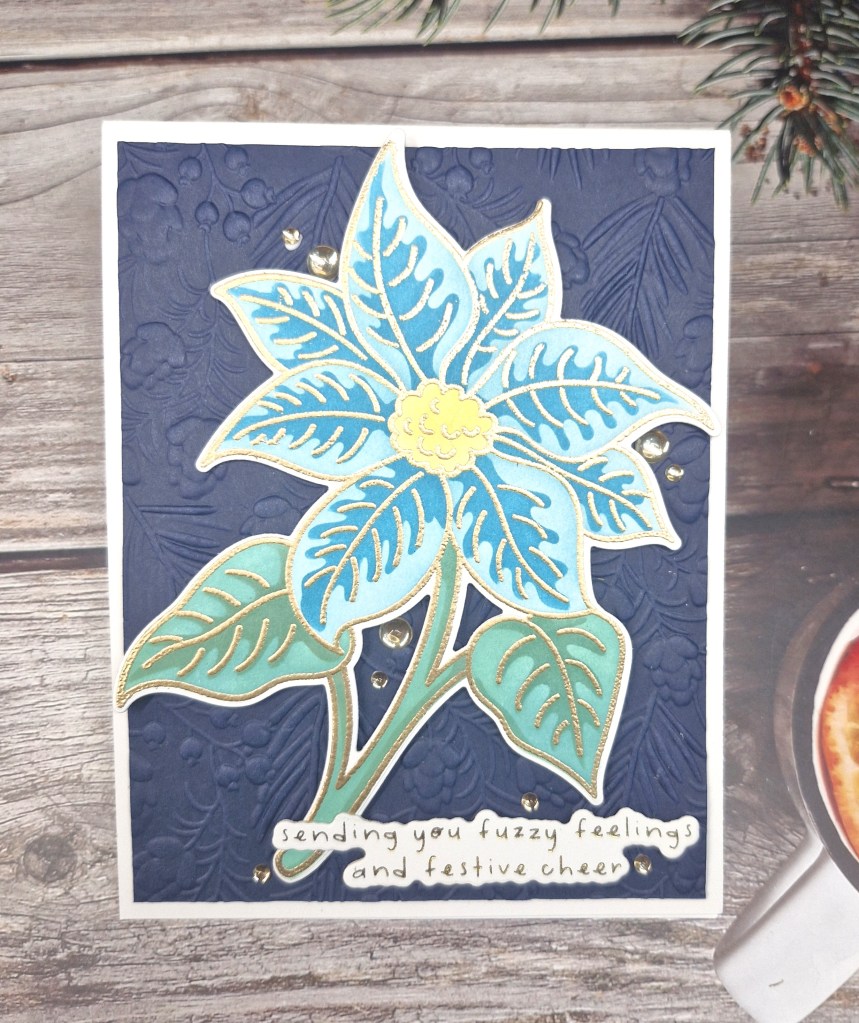
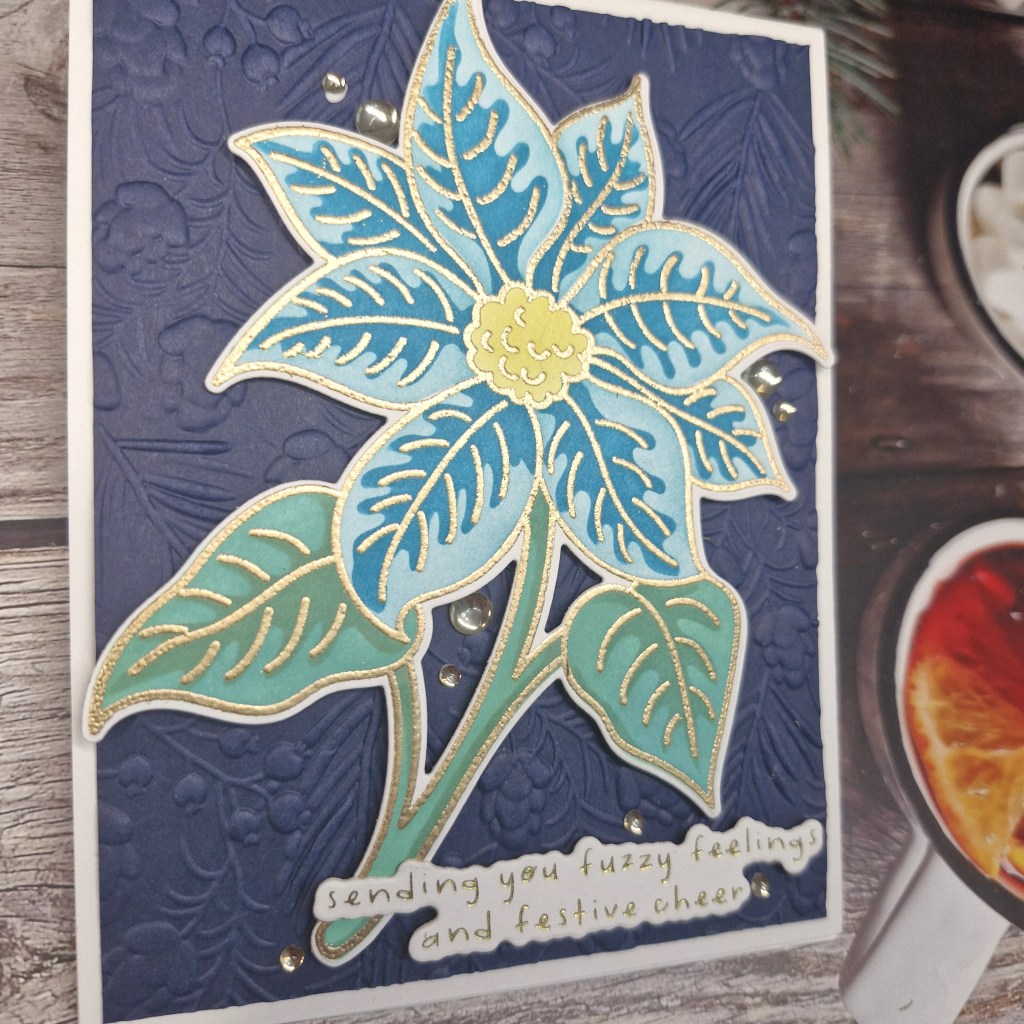
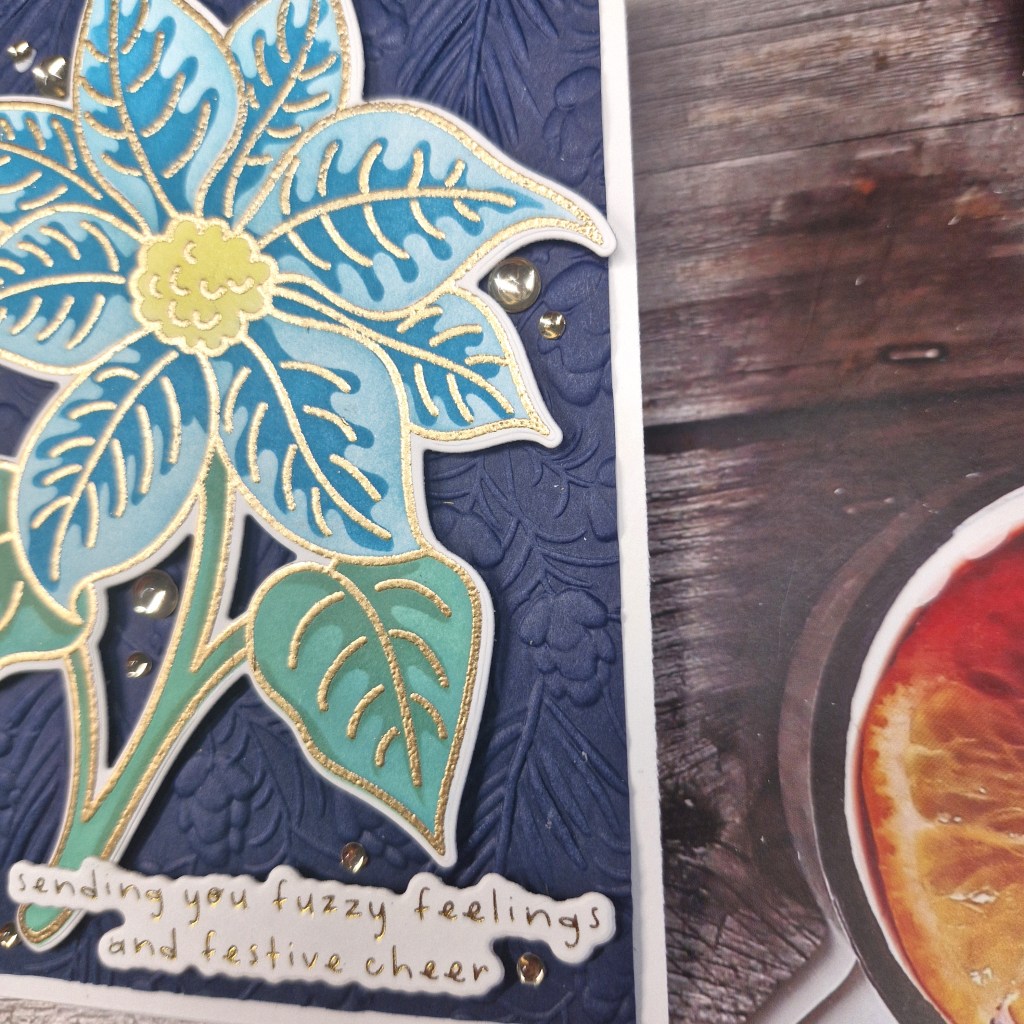
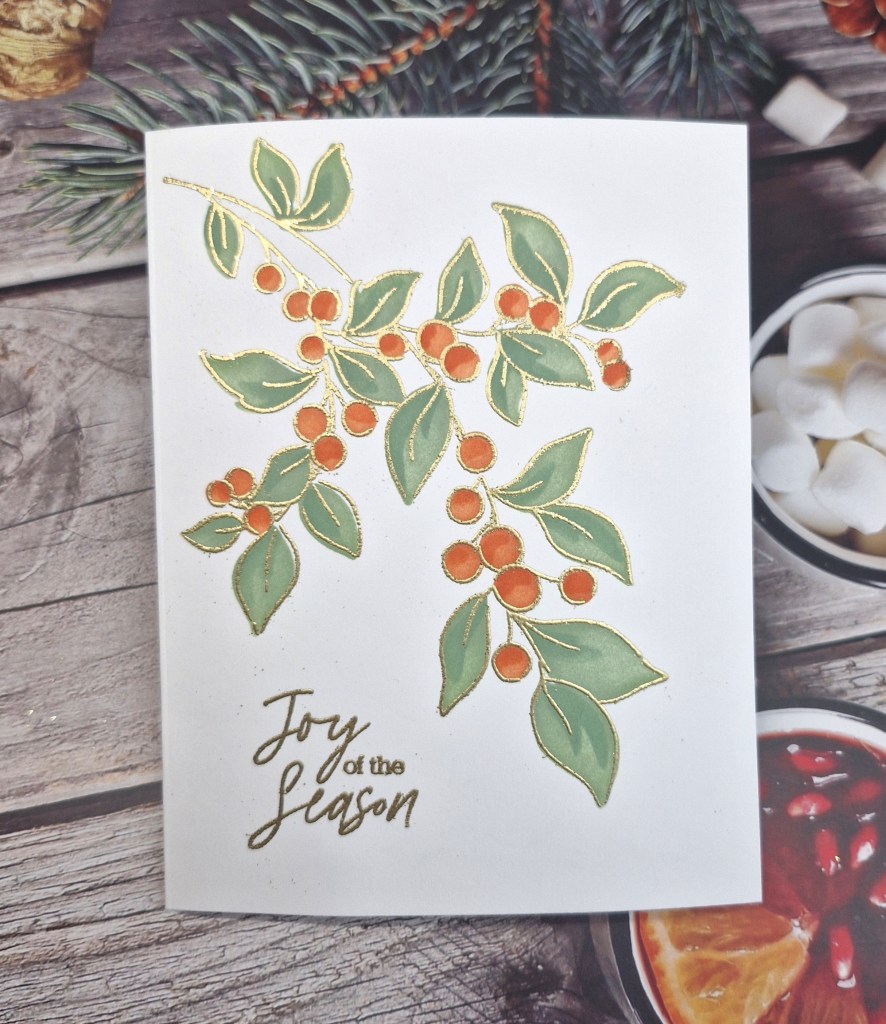
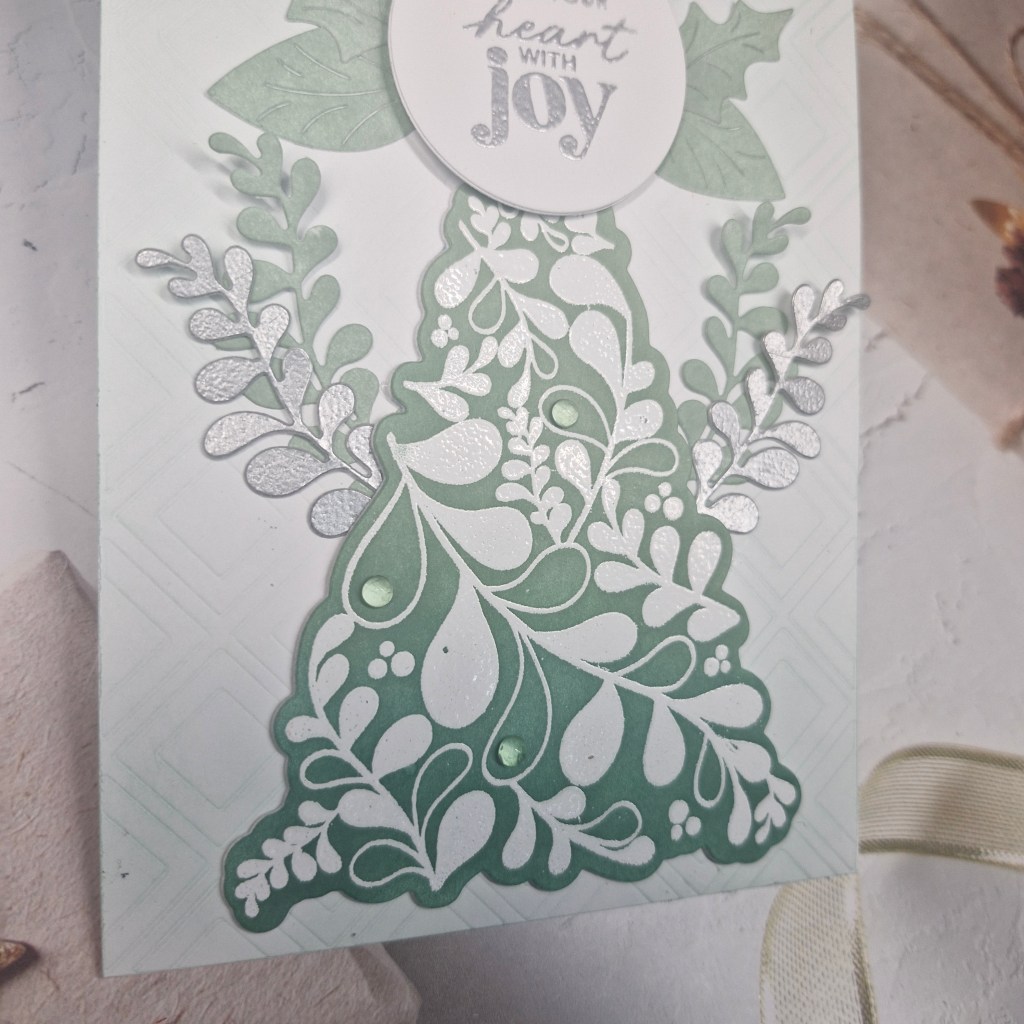
The tree image was stamped onto white card stock and white heat embossed – all the white on the tree is from this embossing. I then used three tones of green from Pinkfresh Studio and ink blended – light at the top, going darker further down the tree.
After wiping excess ink from the white embossing, I then used the matching die to cut it out.
The background panel was dry embossed using a cover-plate, then using my green blending brush – no further ink added – I then lightly went around the edges to create a subtle halo effect in the centre of the panel.
The sentiment was heat embossed in silver, and cut out with a circle die. I used the same silver embossing powder to create a panel out of which I die cut some foliage. I also ink blended a smaller panel in the green, and used that to cut out more foliage.
After sticking the background panel down, I die cut two more trees from white card stock and layered them together, adding the coloured tree on top. This was stuck down to the panel, the foliage added, and then the sentiment added to the top of the tree – I didn’t want it obscuring too much of the tree – hence the placement at the top.
The final addition were three clear drops – just three – I restrained myself…..
I shall be entering the following challenges:
Crafters Café – anything goes – option of Christmas taken
Ally’s Angels – anything goes
Peace On Earth – anything goes Christmas
Merry Little Christmas Challenge – anything goes Christmas