I little to play in my craft room today, which I needed after a four hour Teams meeting:
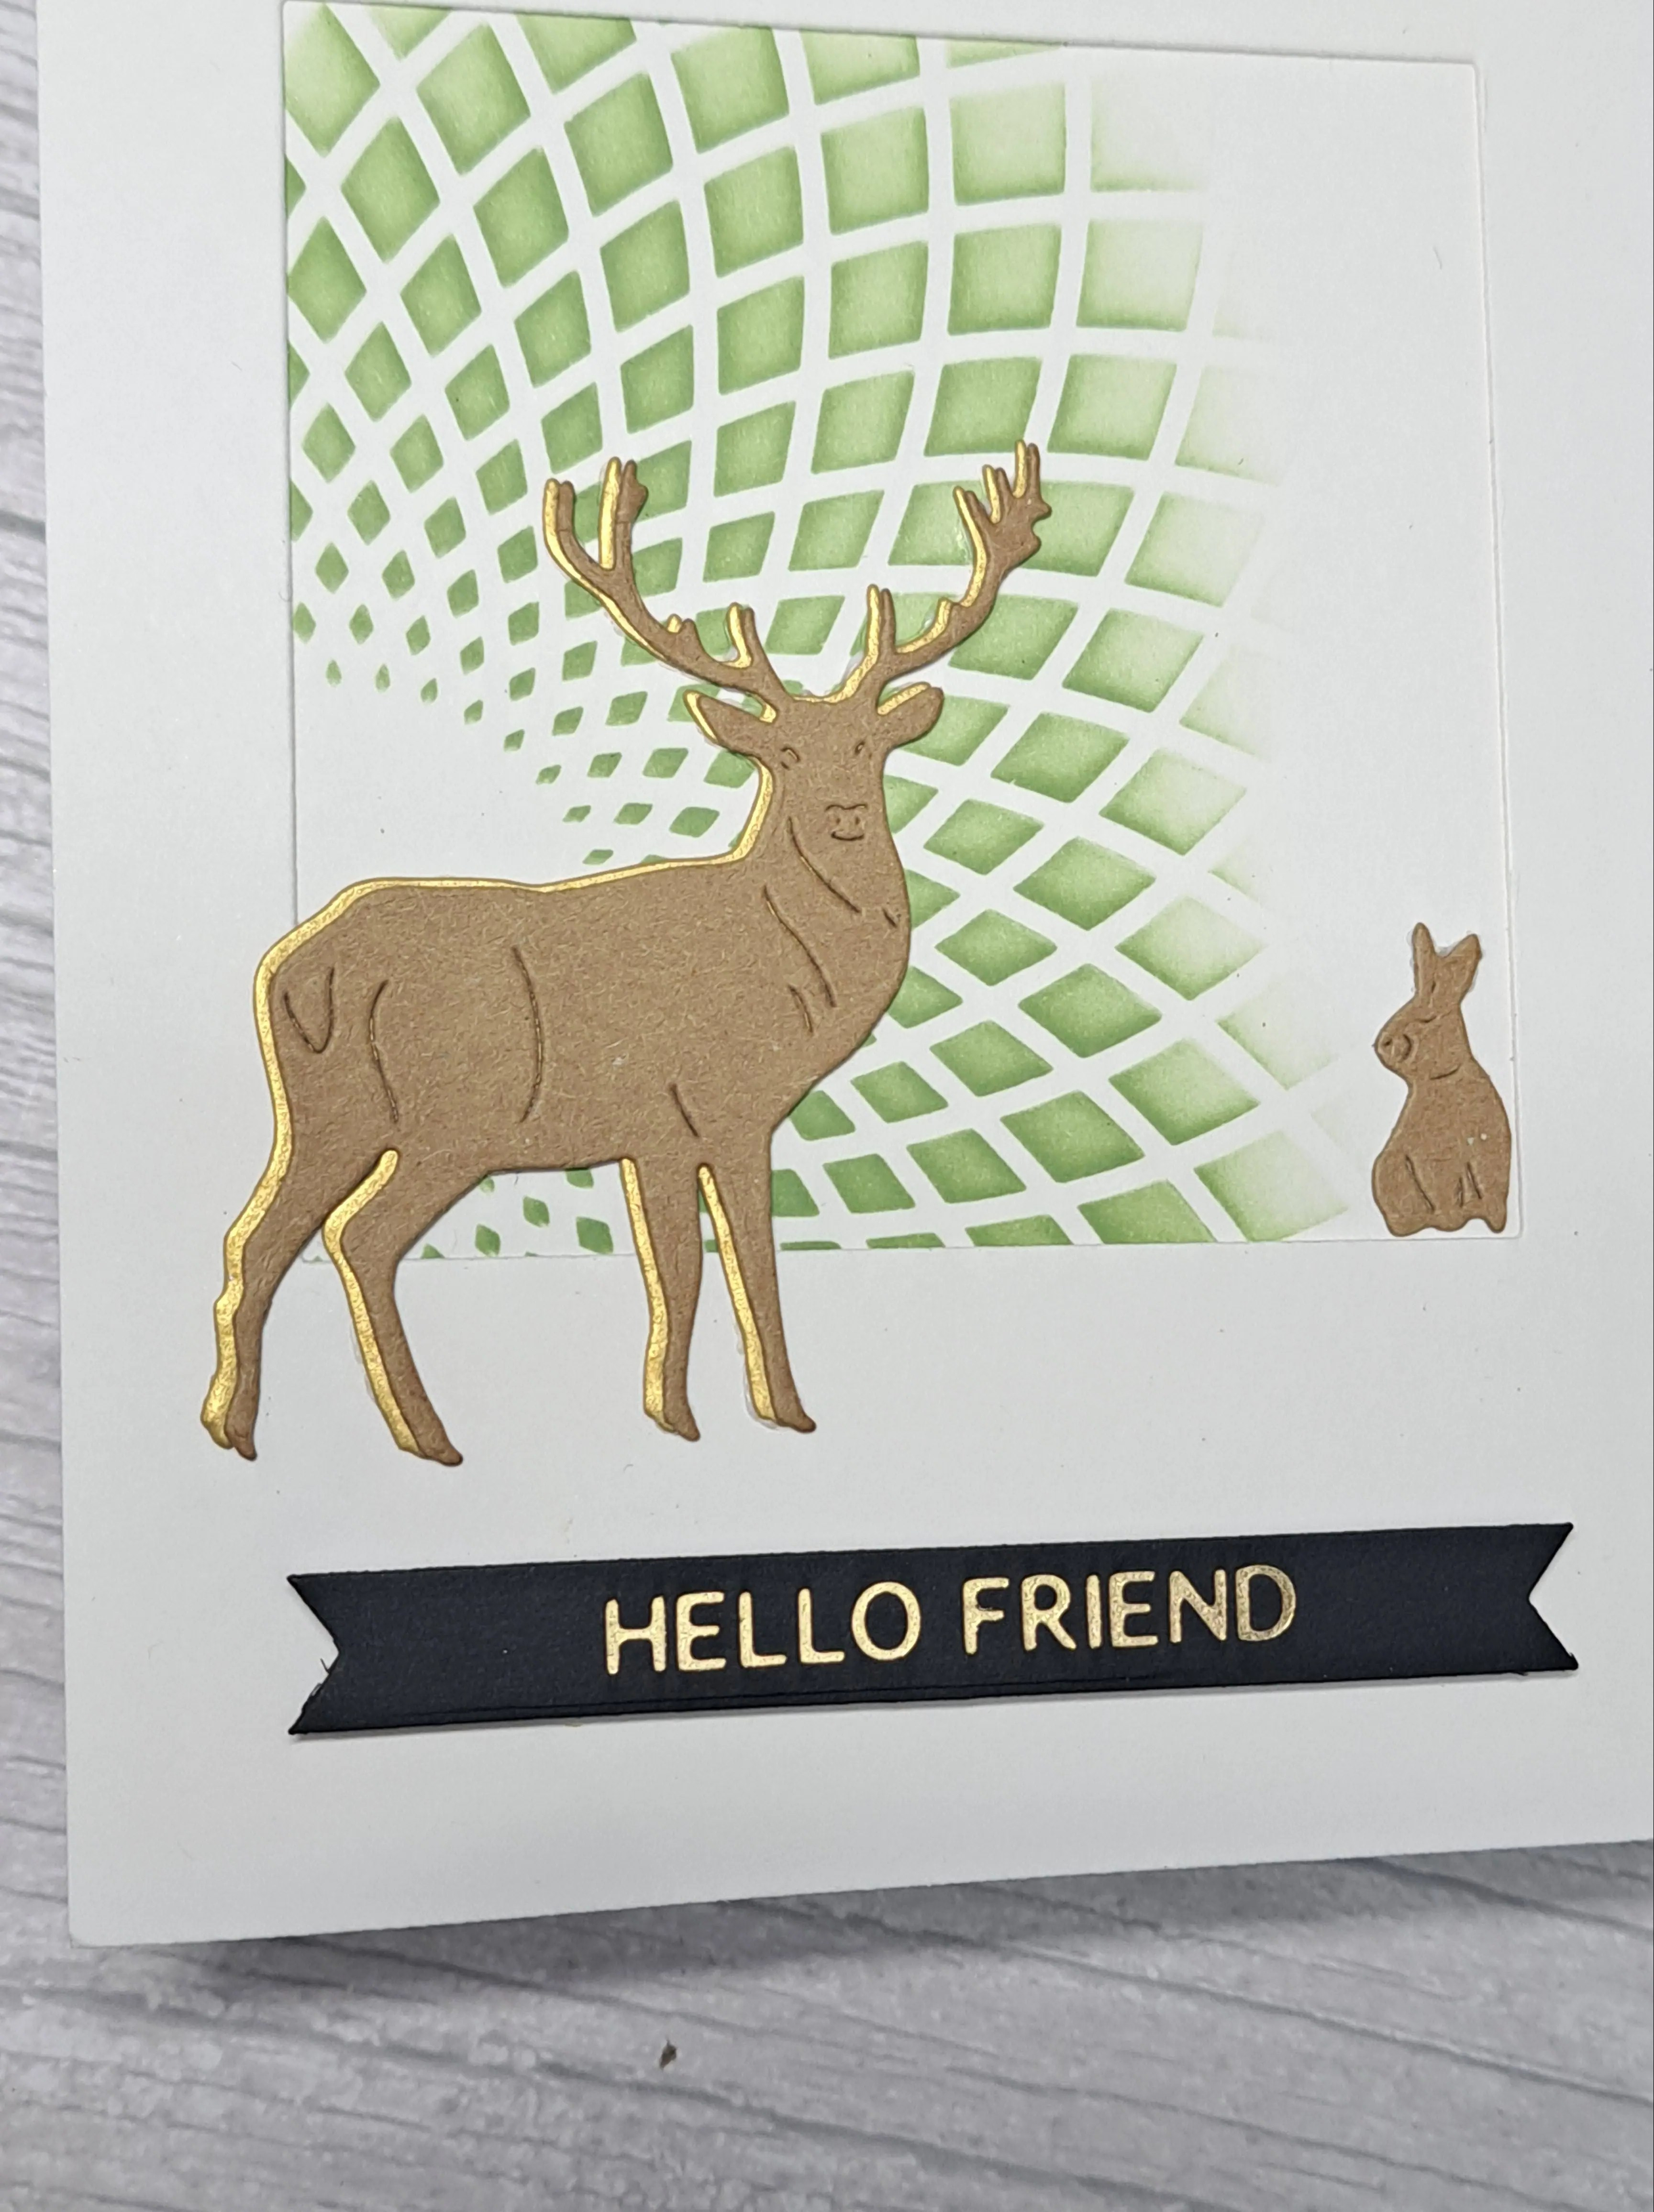
Onto a white card base, I ink blended some Bundled Sage Distress Ink through an Altenew stencil.
I then die cut a square aperture into a white card panel. and stuck that down to the card base.
The deer and rabbit are from a die set from Charlie and Paulchen, cut with Kraft card, and behind the stag I also placed a gold layer, slightly off set, for a little more interest.
The foiled sentiment was added, created from a previous foiling session.
A new challenge has started at The Holly and Ivy Christmas Challenge. The theme is always ‘anything goes Christmas‘. Here is my card:
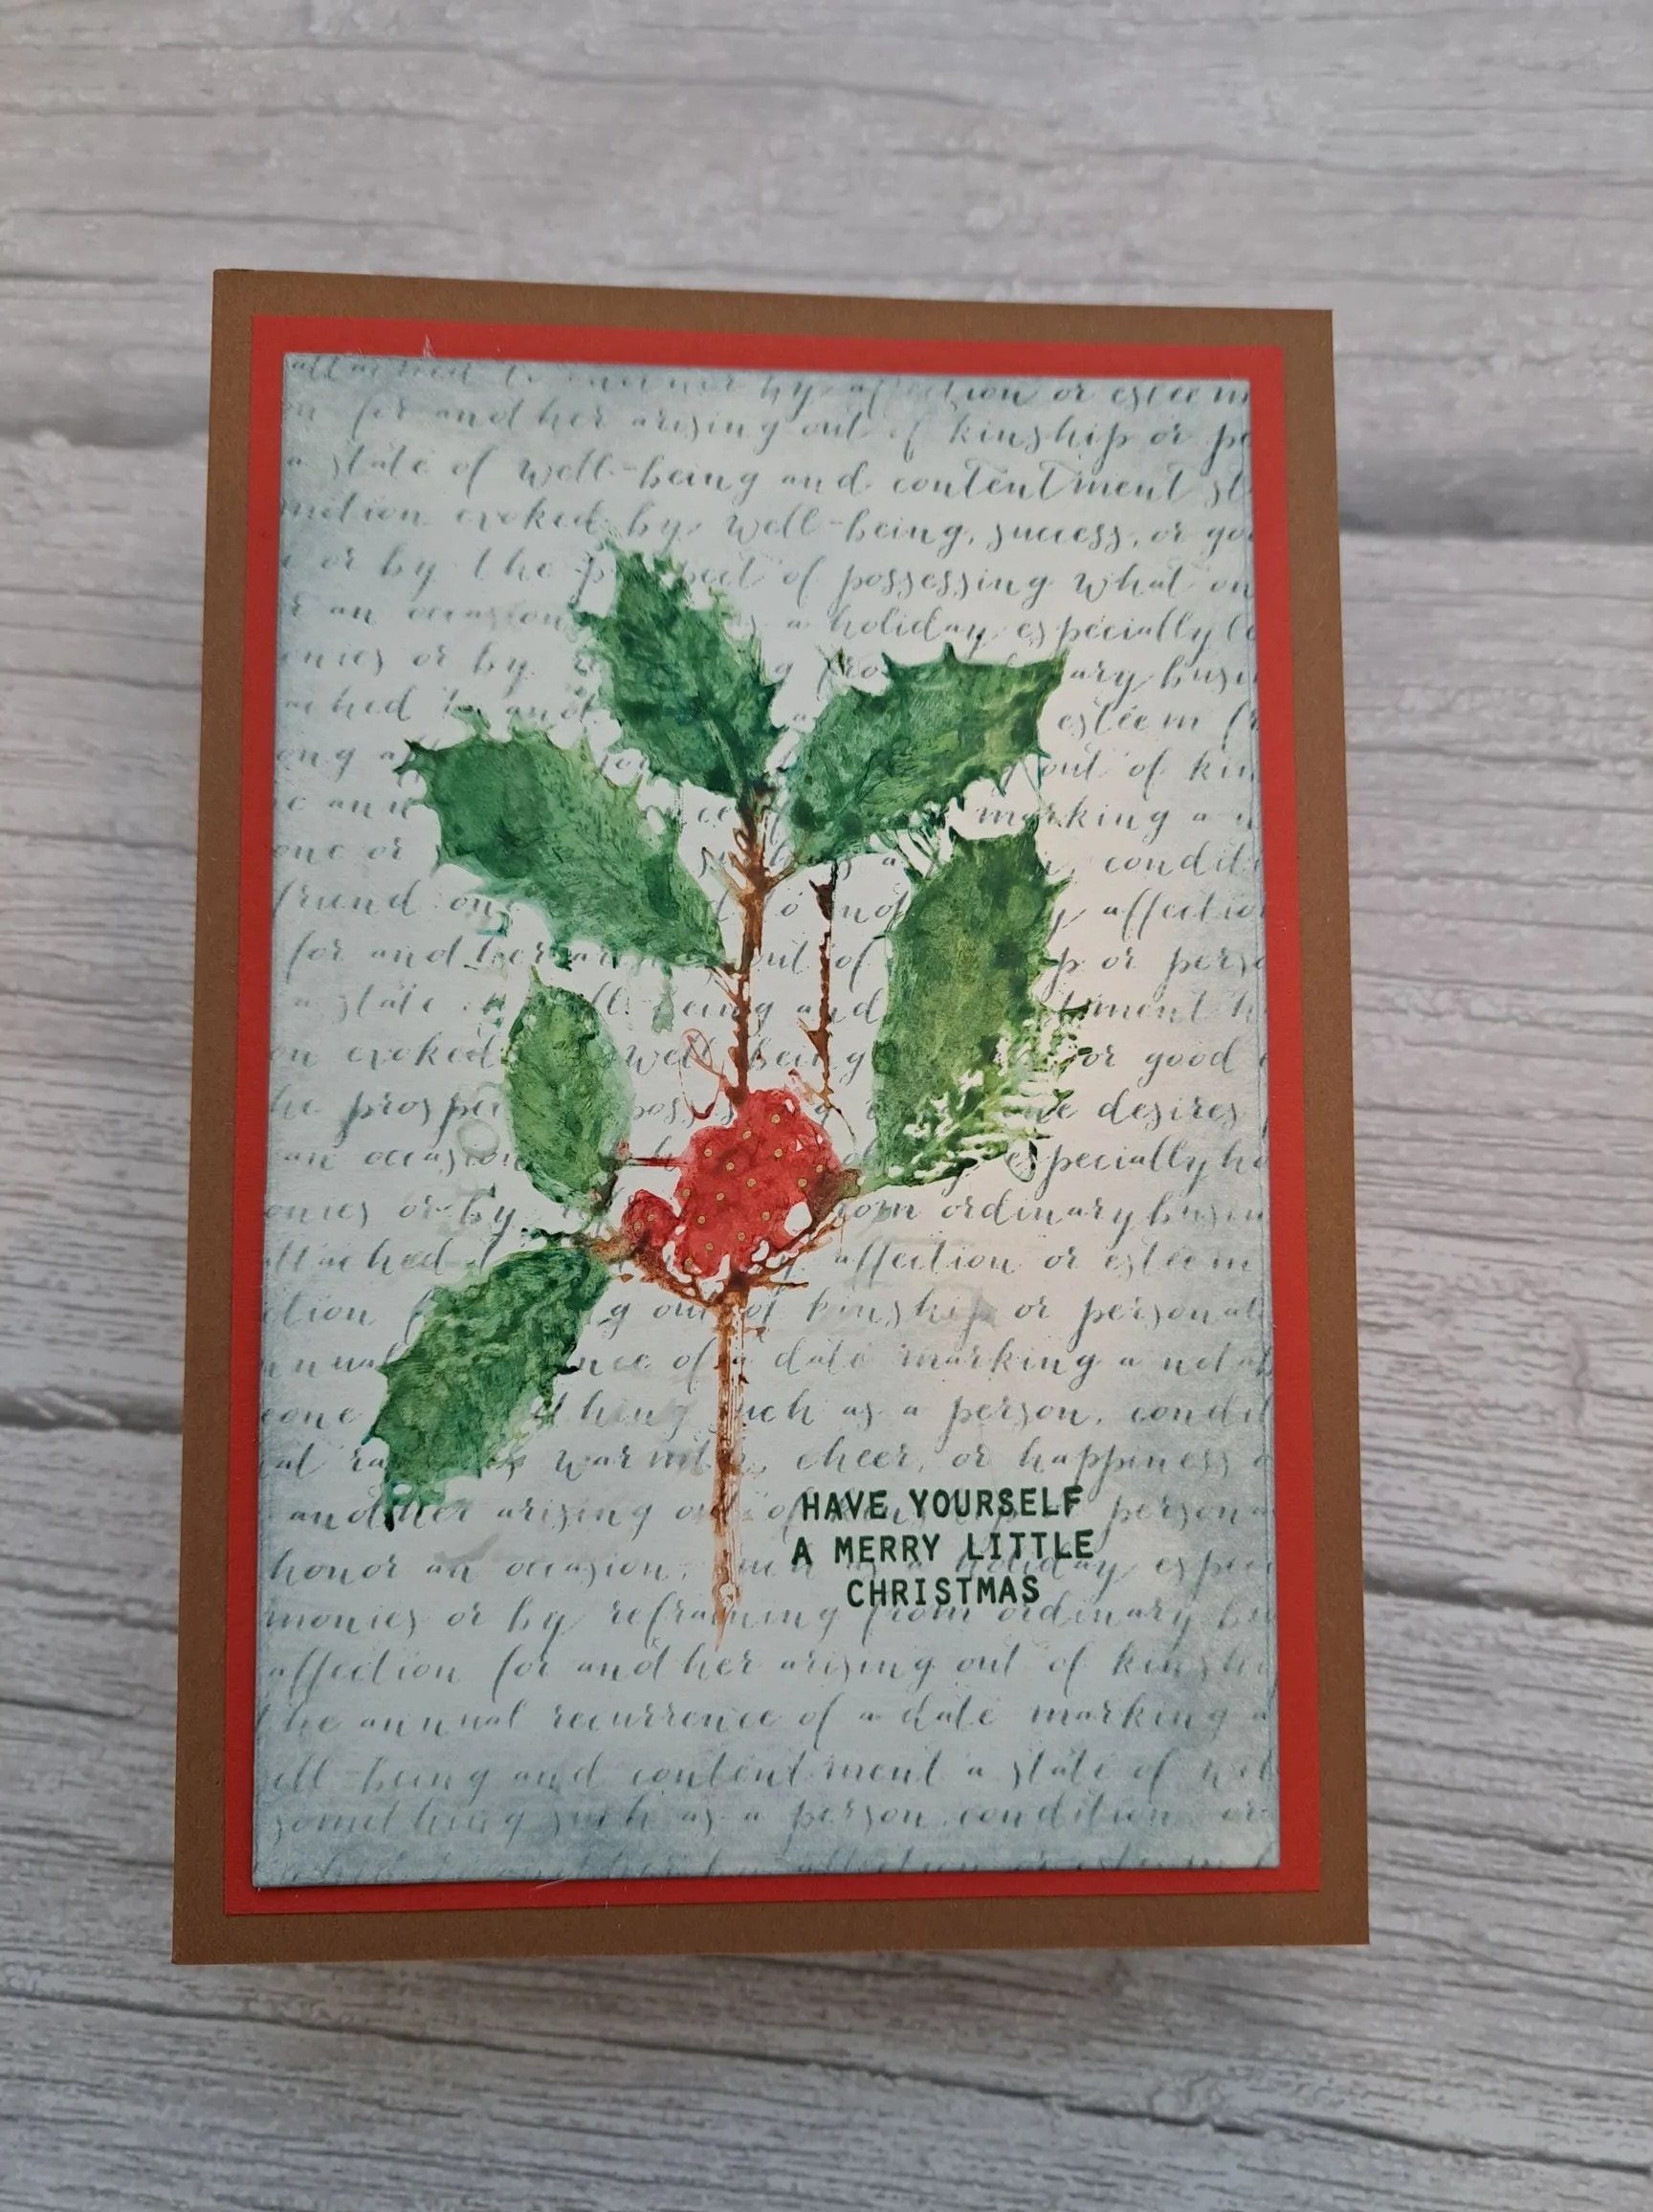
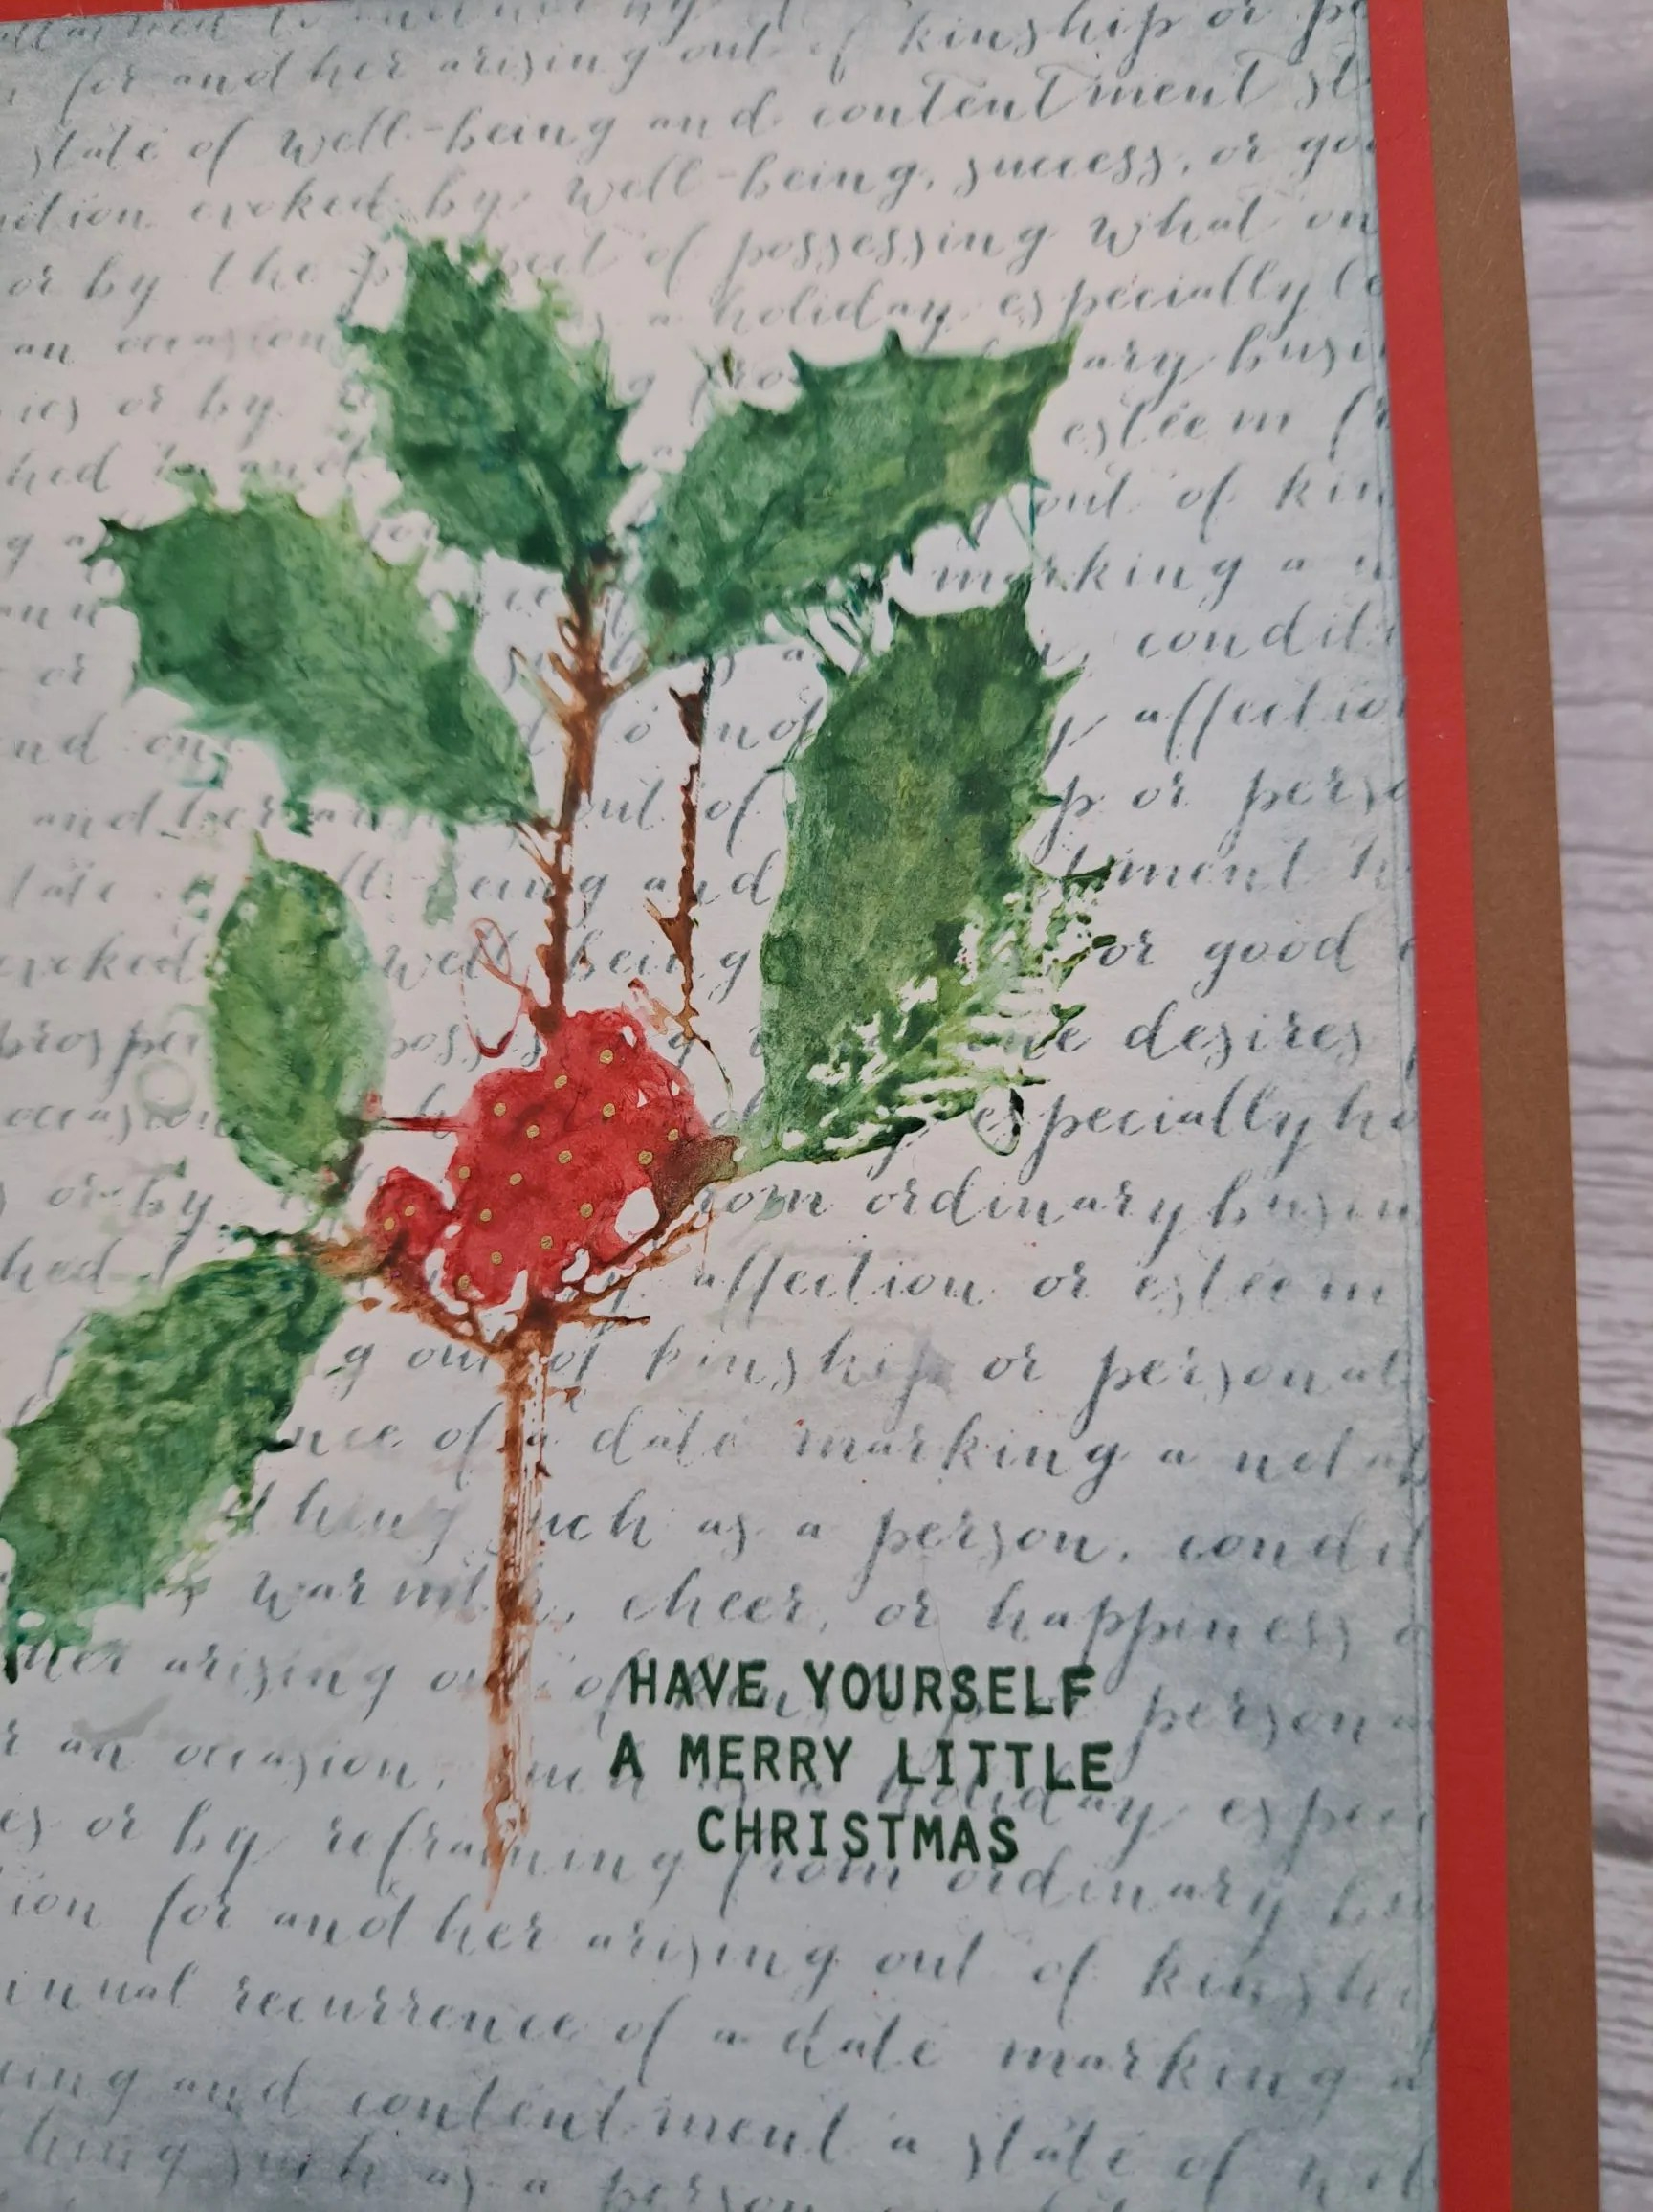
I first stamped a Hero Arts background script onto a white piece of card in a water-proof ink, then ink blended around the edges, taking the colour inwards a little haphazardly.
Then I had a go at a newish technique for me. I used a Tim Holtz red rubber stamp, and Distress pencils, slightly wetting the stamp, drawing the colours on with the pencils, a little spray of water – and stamp…..I think I did this a couple of times, adding a little less water the next time, but I really like how it turned out. I may have to have a further play with this technique in the future.
Once that was dry, I attached to a red layer, then a Kraft card base.
I felt the berries needed a little something-something, so I added some gold highlights to them:
The sentiment is stamped using a Tim Holtz stamp in Distress Oxides to match one of the pencils I used.
I hope you can come and join us with your Christmas/Festive creations. xx
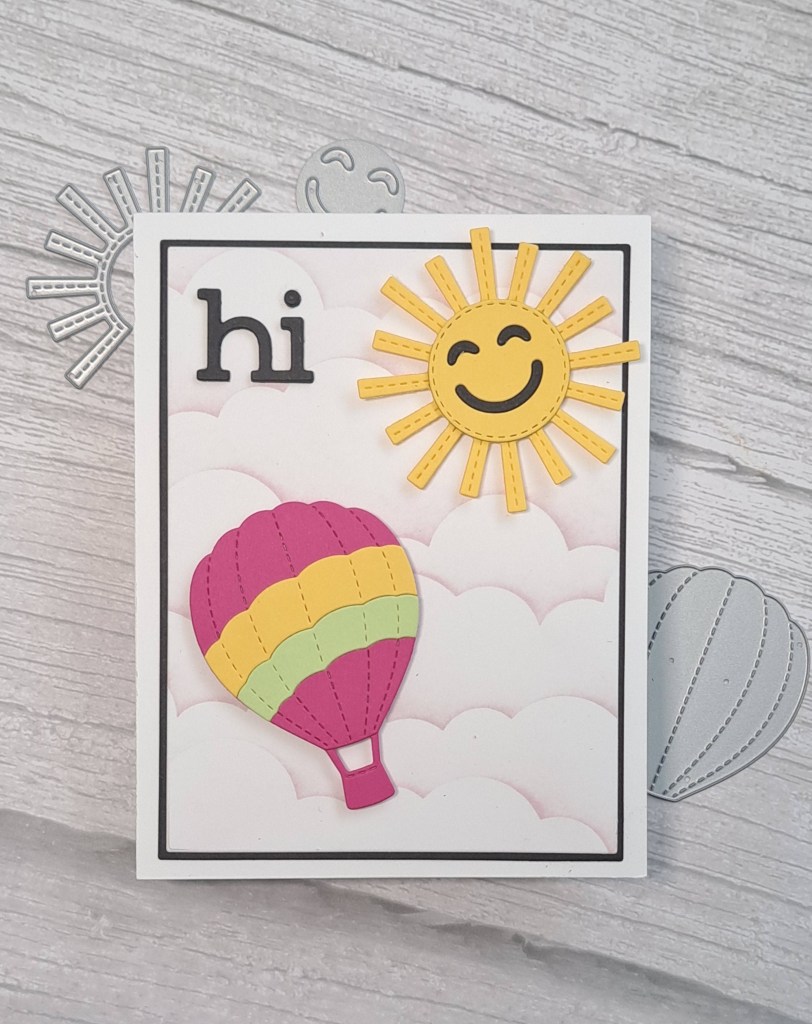
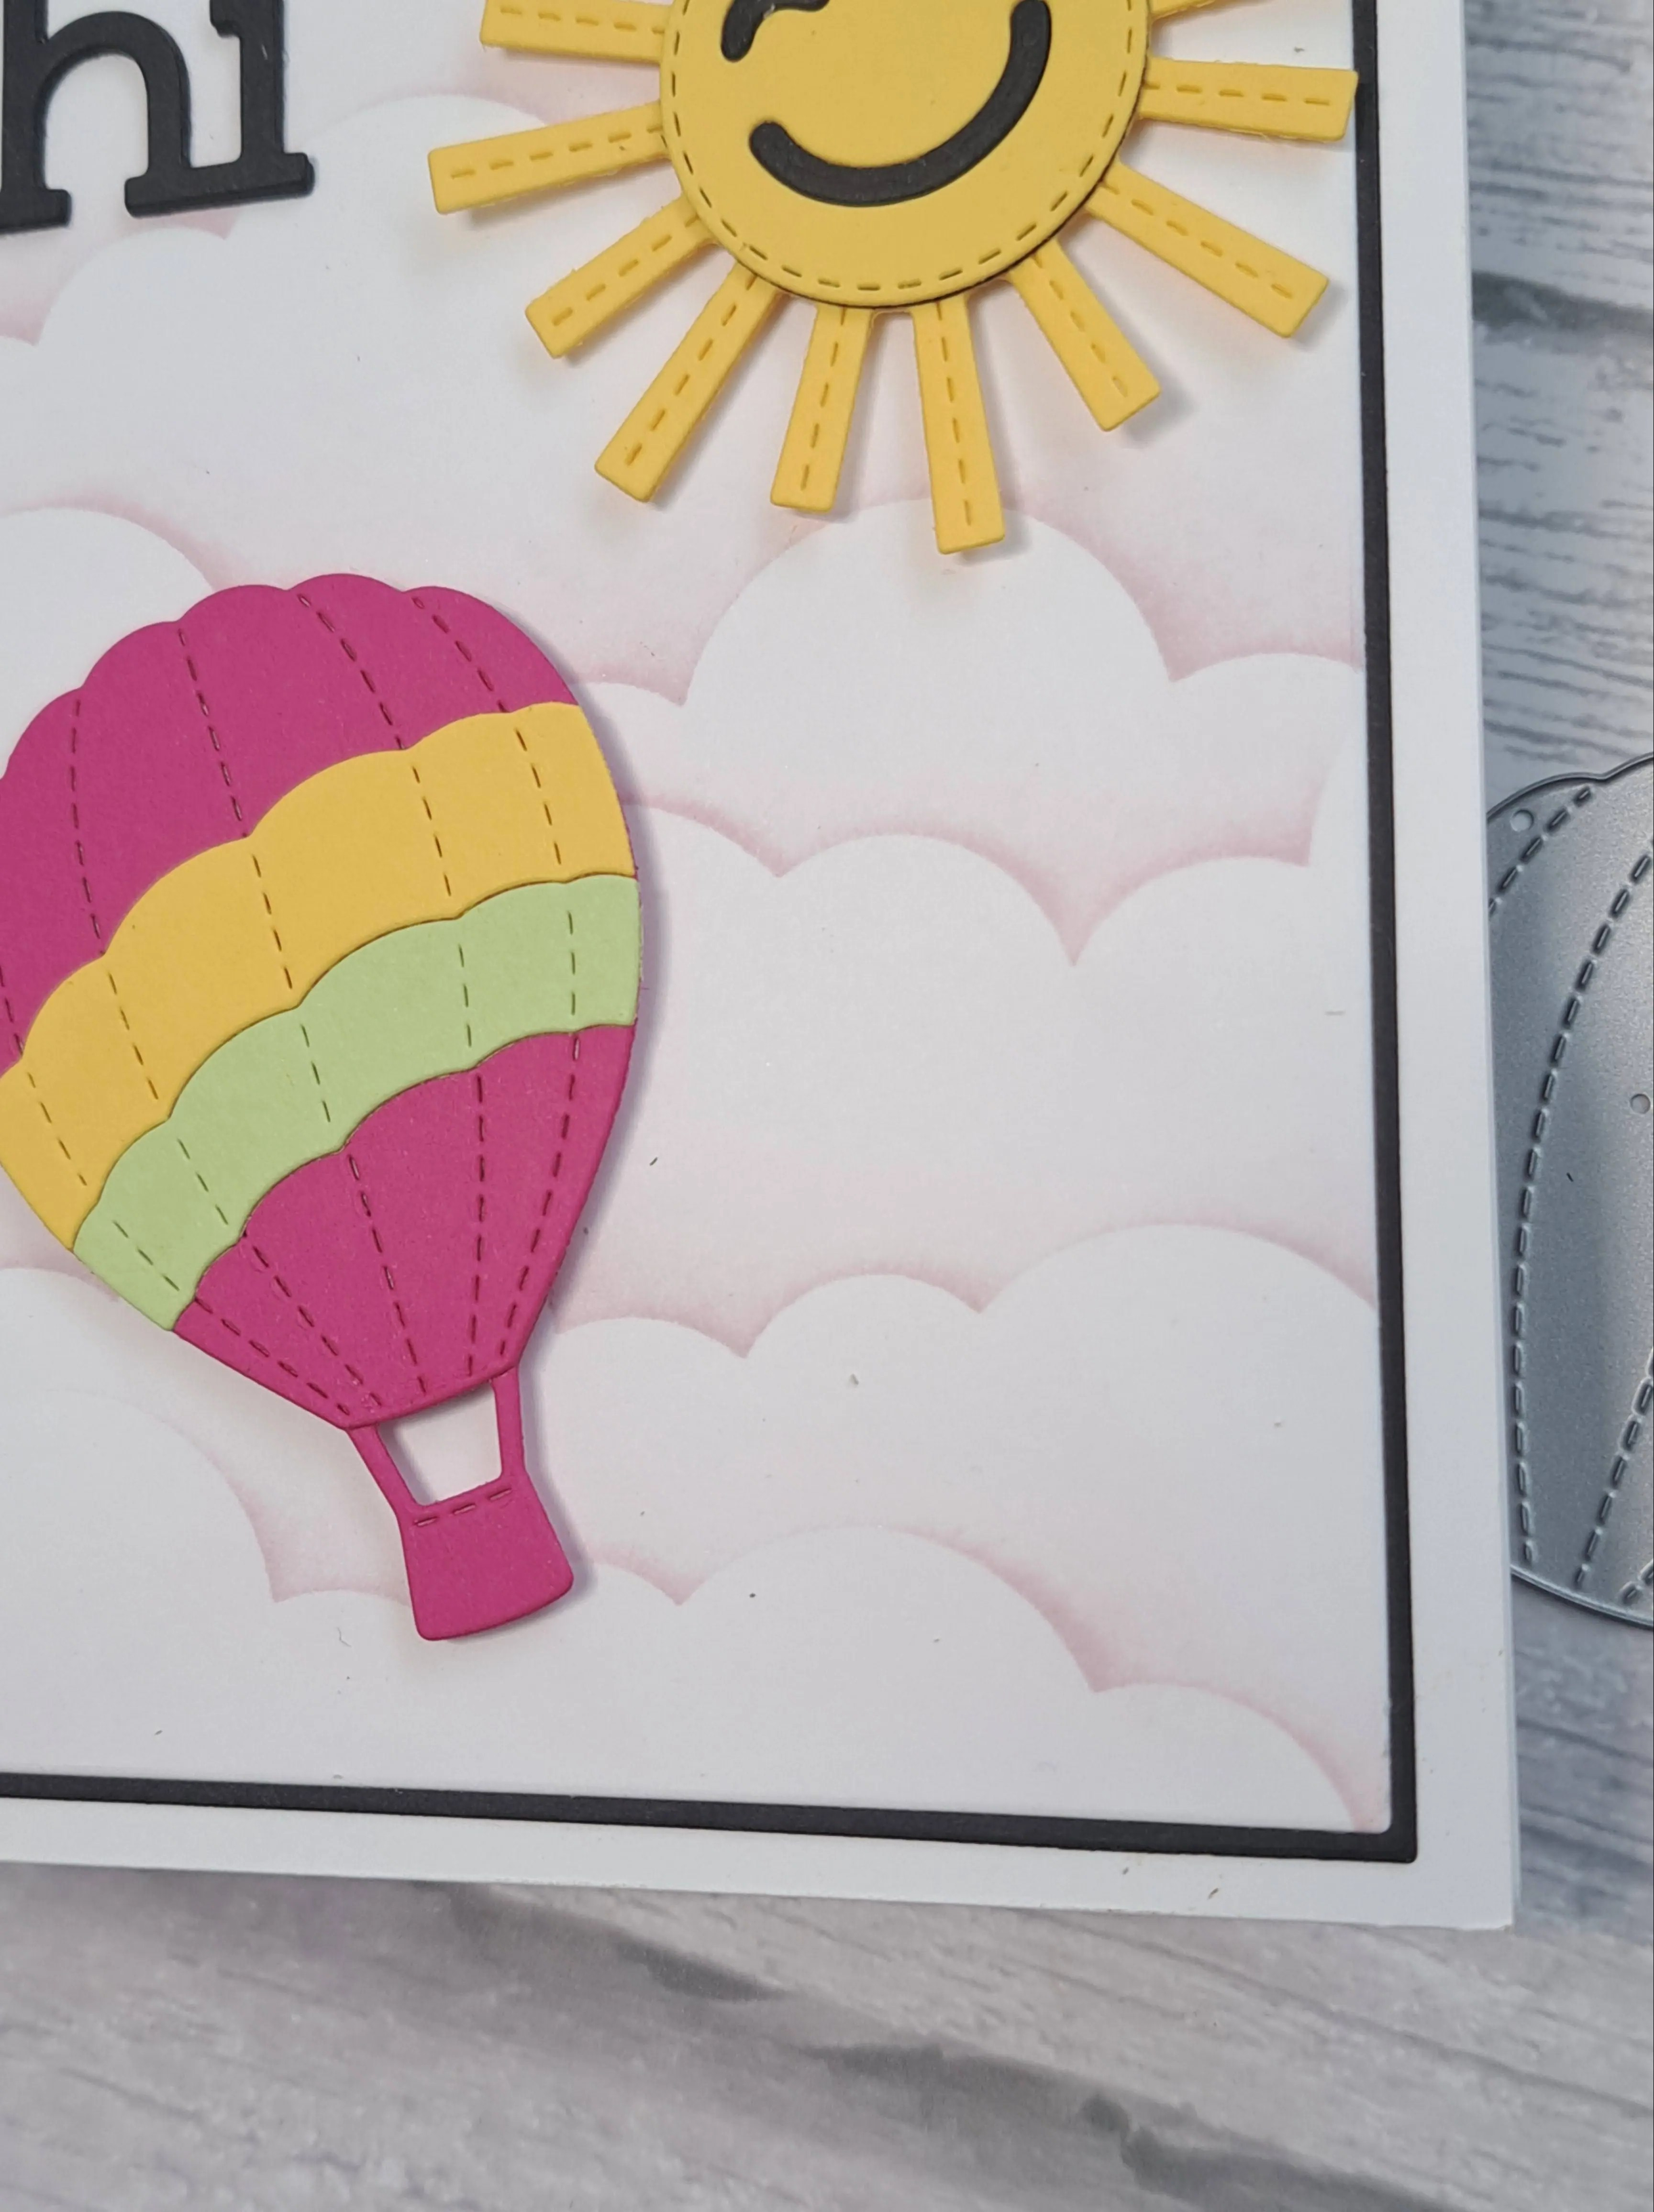
Hello there. After a busy week, I was able to get to my craft room and play. Here is what I created for today:
I used a couple of die sets which were cabin counsellor gifts from the Concord & 9th Summer Camp. I first created the hot air balloon in bright and sunny colours, then the sun – obviously in yellow.
The background cloudy panel was created using Milled Lavender Distress ink and a Simon Says Stamps stencil. The ‘Hi’ sentiment is also from one of the die sets, layered three times – even the tiddle….
I then used Gina K Designs Master Layouts for the black layer and the cloudy layer.
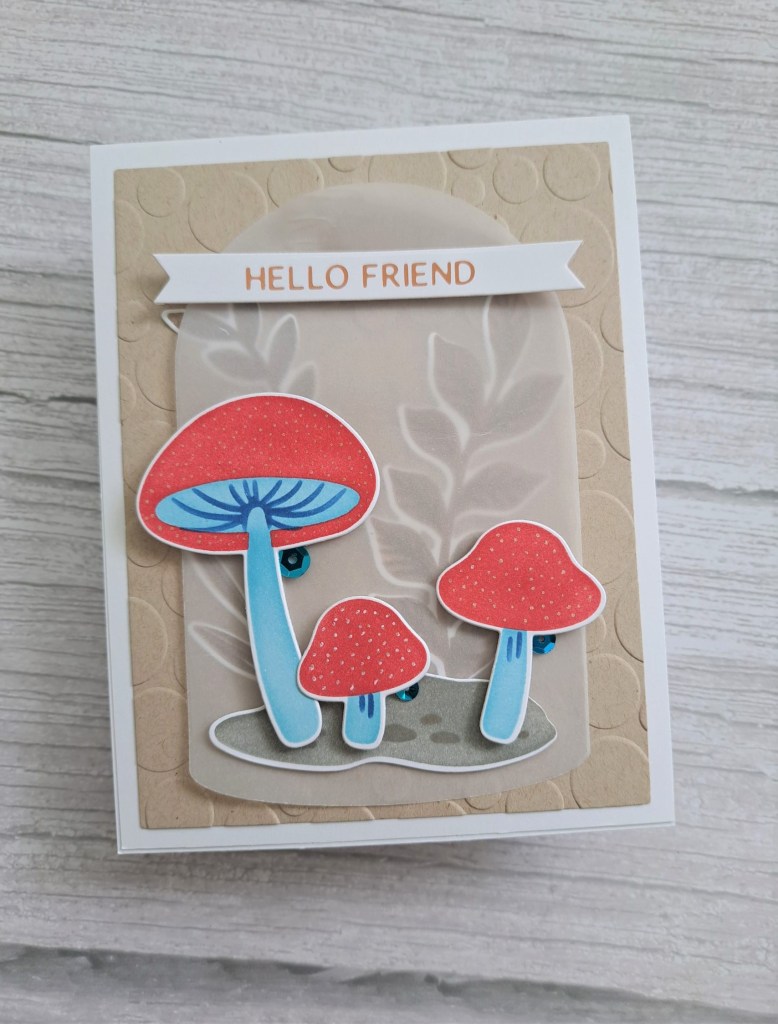
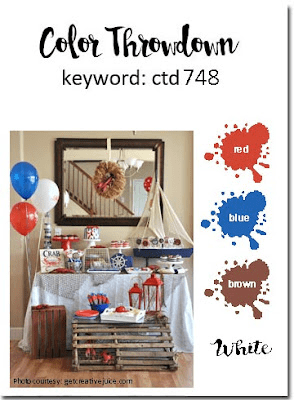
Hi once again. I have used this sentiment quite a lot in the past few weeks. I obviously like it, but I can’t keep having the blog post with the same title, so I just added the theme. Here is the card I created:
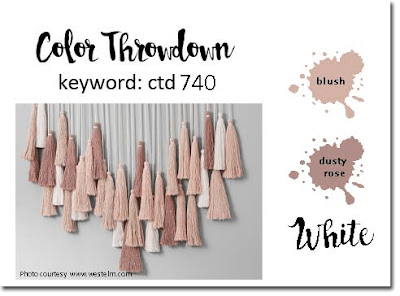
I have had this stencil and die set from Pinkfresh Studio since attending one of their virtual crafting events. I haven’t completed that class yet, but I wanted to use the set when I saw the colours for the current Color Throwdown challenge.
I stencilled the mushrooms in red and blue inks from Pinkfresh Studio, then stencilled the leafy sprigs in a brown from Altenew. A little grey for the ground/sand stuff at the bottom.
I then used the matching die and played around – for quite a while – with the layout and design.
The final card has a light brown dry embossed background, using a Spellbinders embossing folder. I then die cut the glass dome from some vellum, played around a little more, and decided the brown leafy sprigs were best going behind the vellum. In that way, they aren’t disturbing my trio of mushrooms, and yet still create some background interest.
The sentiment strip was added to the vellum, and behind the solid elements of the mushrooms and sentiment I added glue to adhere the vellum to the light brown embossed panel.
The mushrooms needed something more, so I added some gold shiny dots:
And juts a little more bling with some blue sequins.
This card looks deceptively simple – and yet it took me while to get the ink blending, the layering, and the final composition to where I was happy.
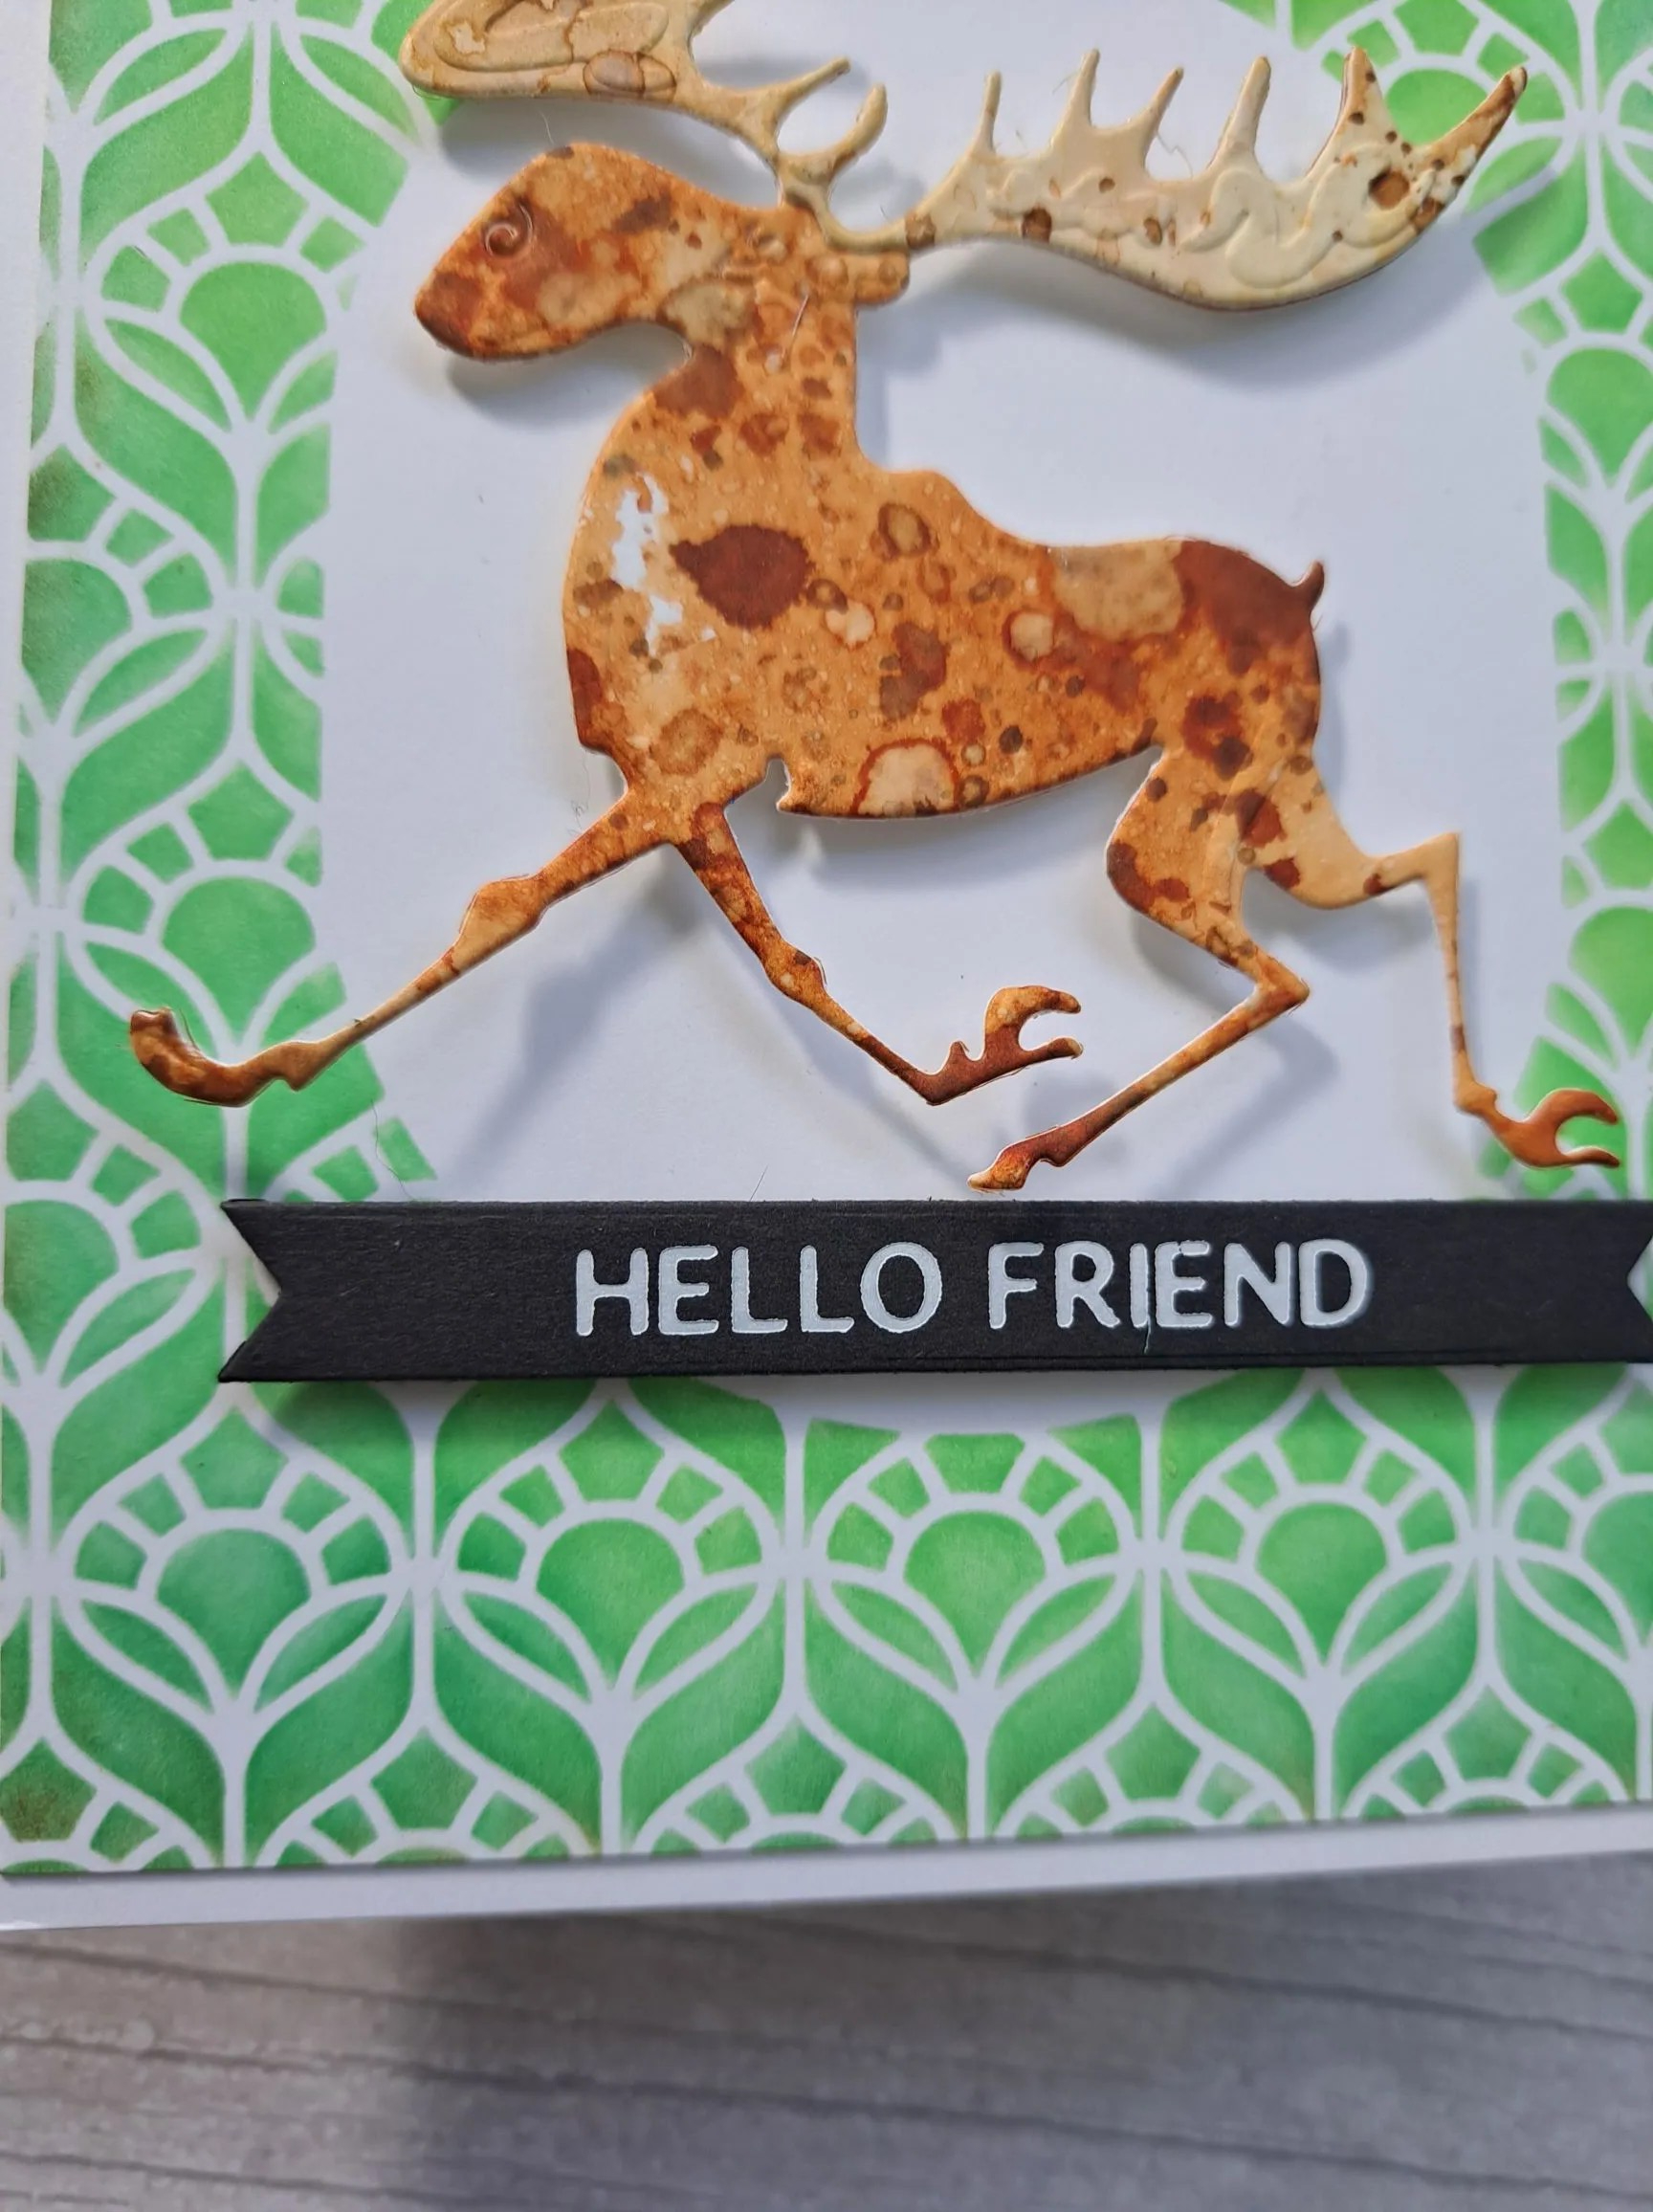
A change in craftiness with this card – I wanted some messy crafting:
I started by creating the background panel. This is a Spellbinders stencil from a recent class, and I masked off the centre oval shape, then ink blended the two Distress Inks that you see. I added some brown around the edges for some darker contrast.
I then ink smooshed a couple of card panel – Distress Mixed Media Heavystock – with darker browns on one panel, and lighter browns on another. Once they were dry I used the Tim Holtz ‘Merry Moose‘ die, as I haven’t used him for quite a while. I wanted to enter a challenge where the theme was ‘deer’ – and then had to Google if a moose was a deer or something quite different – thankfully, a moose is part of the deer family – phew!
A simple white foiled sentiment to complete the card.
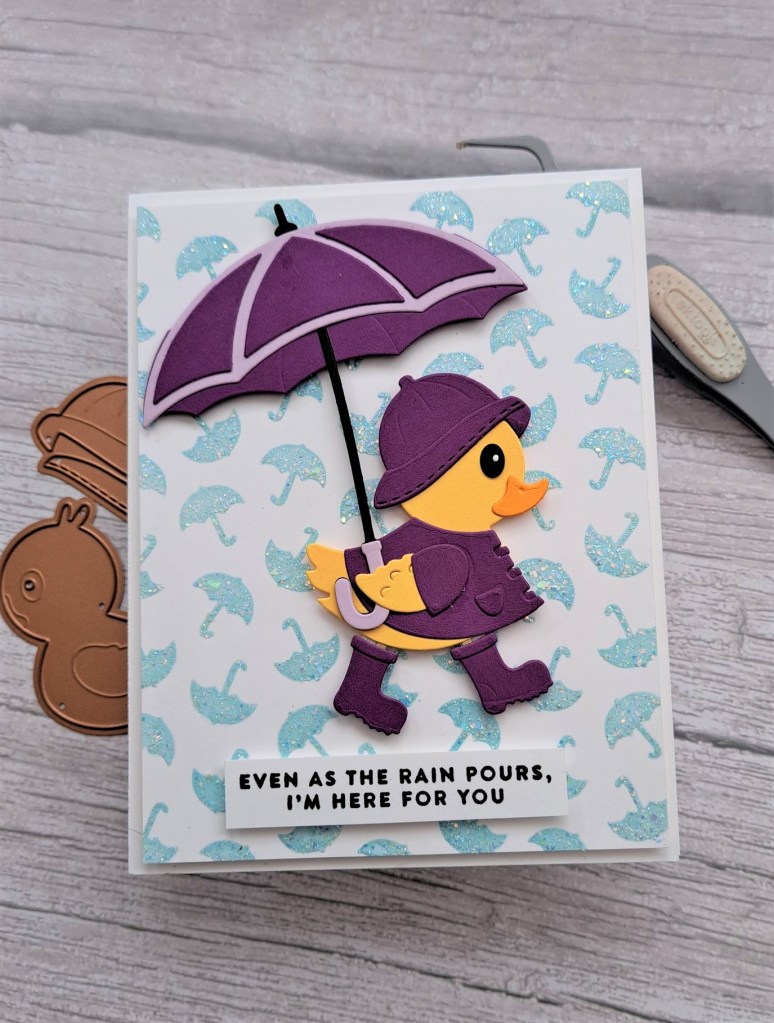
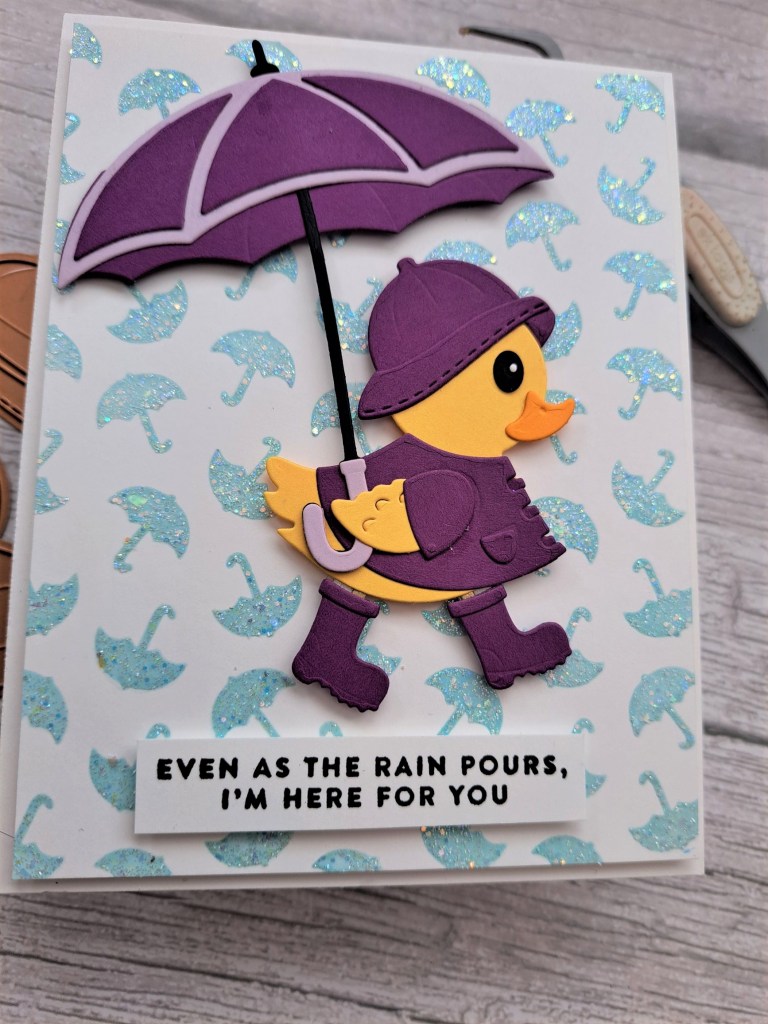
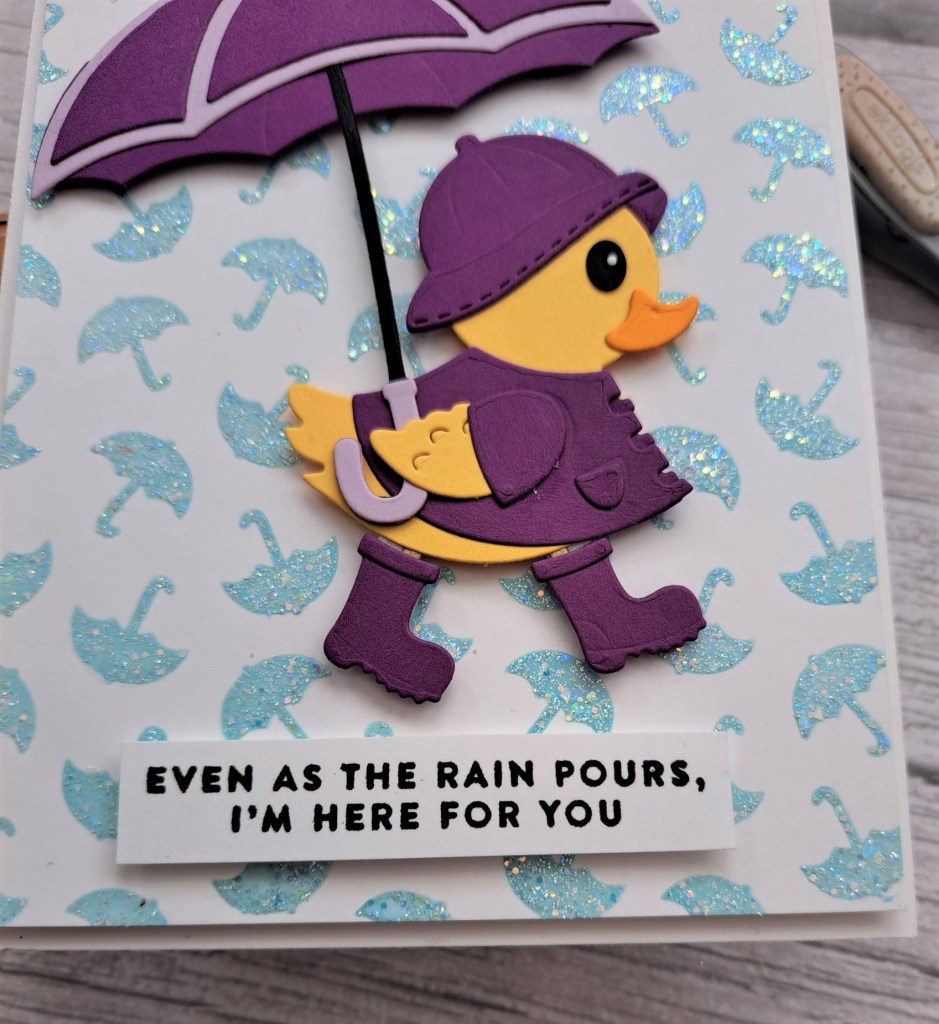
Hello. I spent some time in my craft room yesterday and created this card:
I wanted to use this cute little duck from Spellbinders, so I die cut all the elements from some new colours from Concord & 9th.
The background was created using a stencil from Clearly Besotted, ink blending the umbrellas with Salvaged Patina Distress Ink, then stencilling some Ranger glitter paste on top of the umbrellas. Putting that aside to dry, I searched through the Color My Life app for a suitable sentiment, and this came up from Simon Says Stamp on one of their butterfly sets.
I stamped that in Versafine black onyx, and arranged everything onto the card base.
I felt the card needed something else, so I also die cut the umbrella from another Spellbinders set, and added that – thank goodness I didn’t glue the wing down completely on the duck – I was able to slot it in behind.
I feel that this little duck may be making some further appearances on my blog posts…..
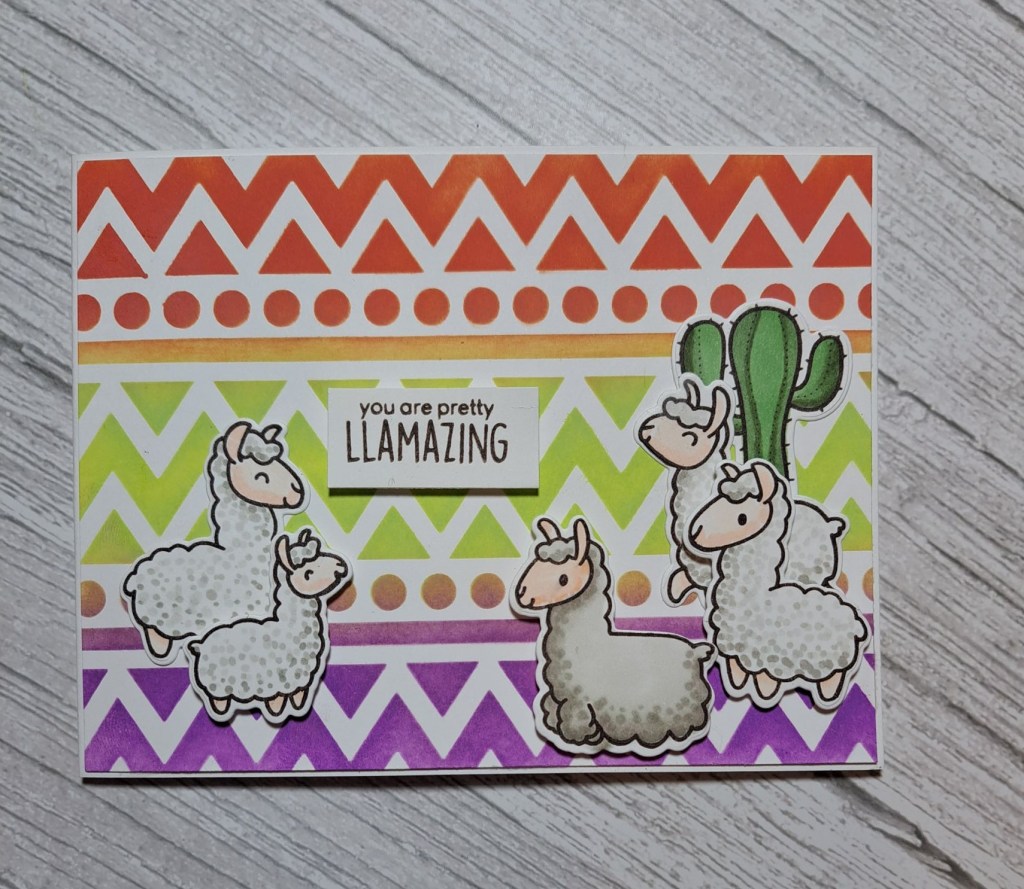
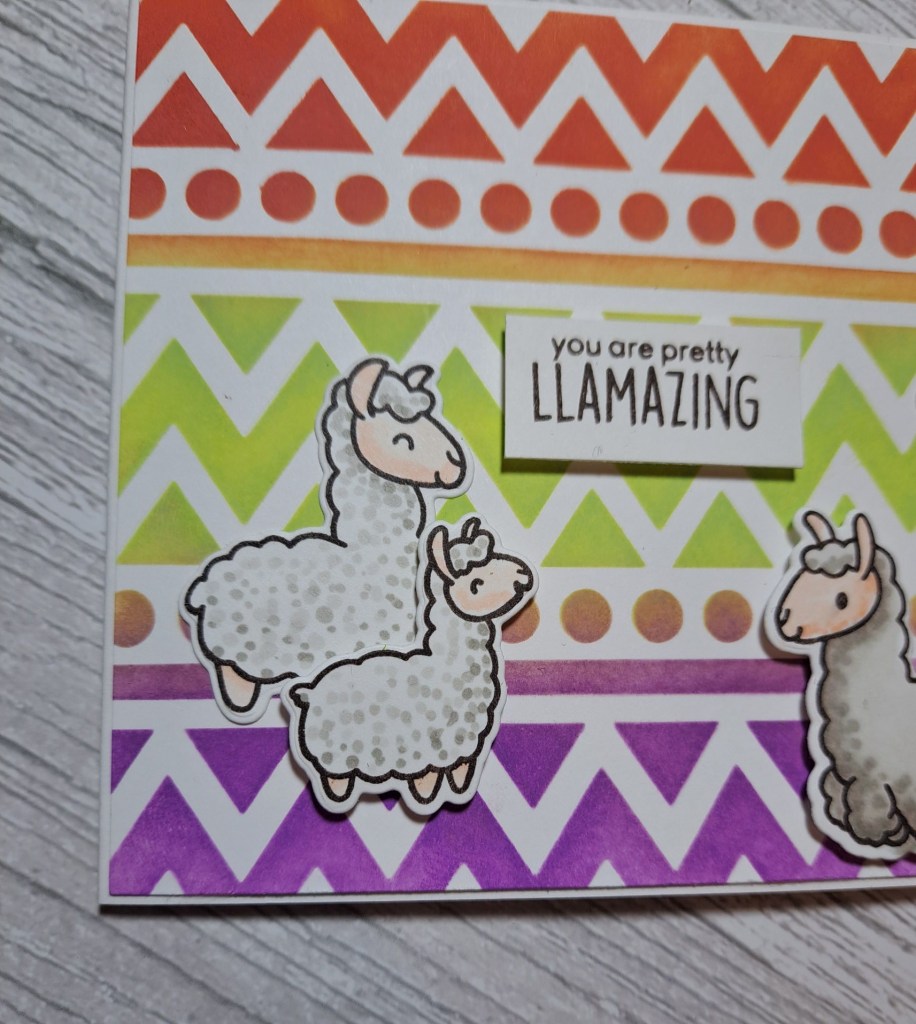
The new challenge theme at Cardz 4 Galz has been chosen by Johanna – backgrounds. Here is my card:
My background was created using a stencil from Time For Tea Designs, and ink blending with Distress Oxides. I used three colours, but the overlap between each colour created two more, so I achieved almost a rainbow effect.
The images are from Heffy Doodle – stamped, coloured with Copics, then die cut with the matching dies.
I tried a different way of colouring – dotting instead of the usual solid colouring – and I think this creates dimension in their coats. I may well be doing this technique again as I like the effect.
I wasn’t going to use all of the llamas, but I just couldn’t resist.
I hope you can come and join us with your background themed cards. xx
Hello. I attended the online Spellbinders Glimmer class this past weekend, and played with foiling – with just about every plate and sentiment set I had. I was glimmering for absolutely hours. Once I got the hang of it – I just kept foiling. Here is a card created with a foil plate from Pinkfresh Studio:
I had foiled the plate onto a white panel, then I used the matching stencils in Pinkfresh pink and lime green inks. I just stencilled harder with the same pink to create some variation, and added extra lime green to the base of some of the leaves.
I didn’t blend the centre of the flowers, but added some gold dots with a metallic gold paint marker from Spectrum Noir. I had bought them to use when I was doing the wax seals and highlighting the image – yet another kit I haven’t really played with yet……!
Once the blended panel was dry, I die cut the border with the matching die set, and added two more die cut layers in plain white for stability.
I thought the centre of the border was a little plain, so I dry embossed a stencil and inserted that embossed ‘off cut’ to create more interest in the centre.
The sentiment is also from my foiling sessions, added with some 3D foam strips, and I searched my stash for some pink and lime green sequins, and added them as you see.
I’m afraid I have become addicted to foiling – you are definitely going to see more of that in my future posts…..beware!
I shall be entering the following challenges:
Crafty Catz – anything goes, option of lace, ribbon or twine not taken
Allsorts – anything goes option add embellishments – taken
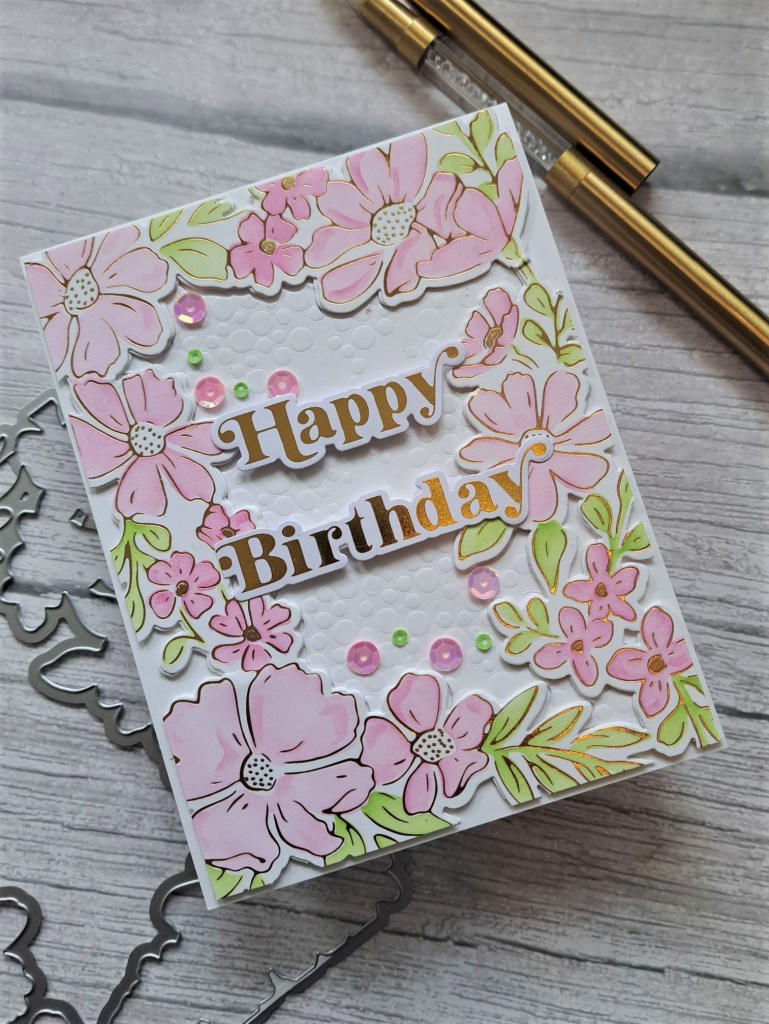
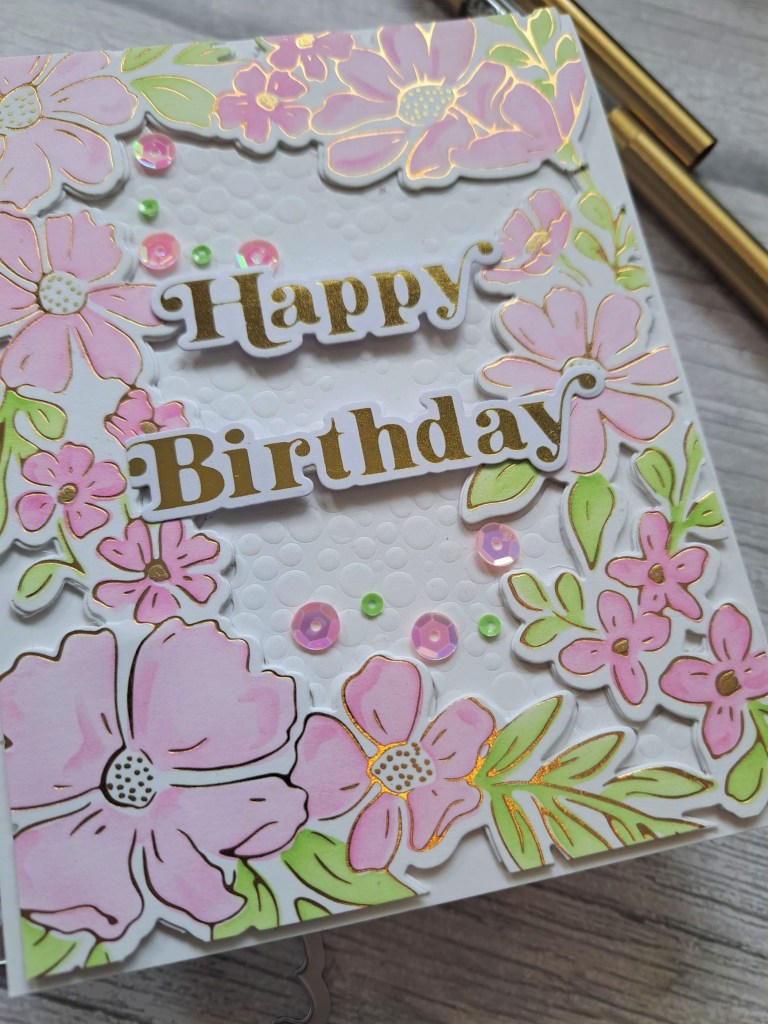
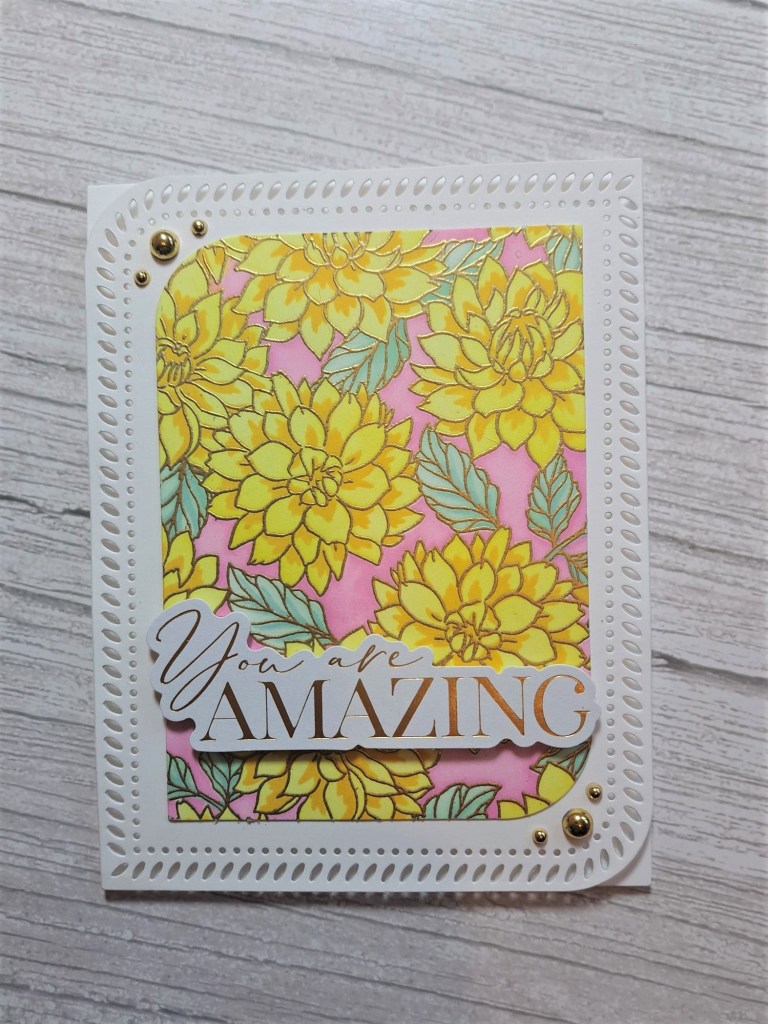
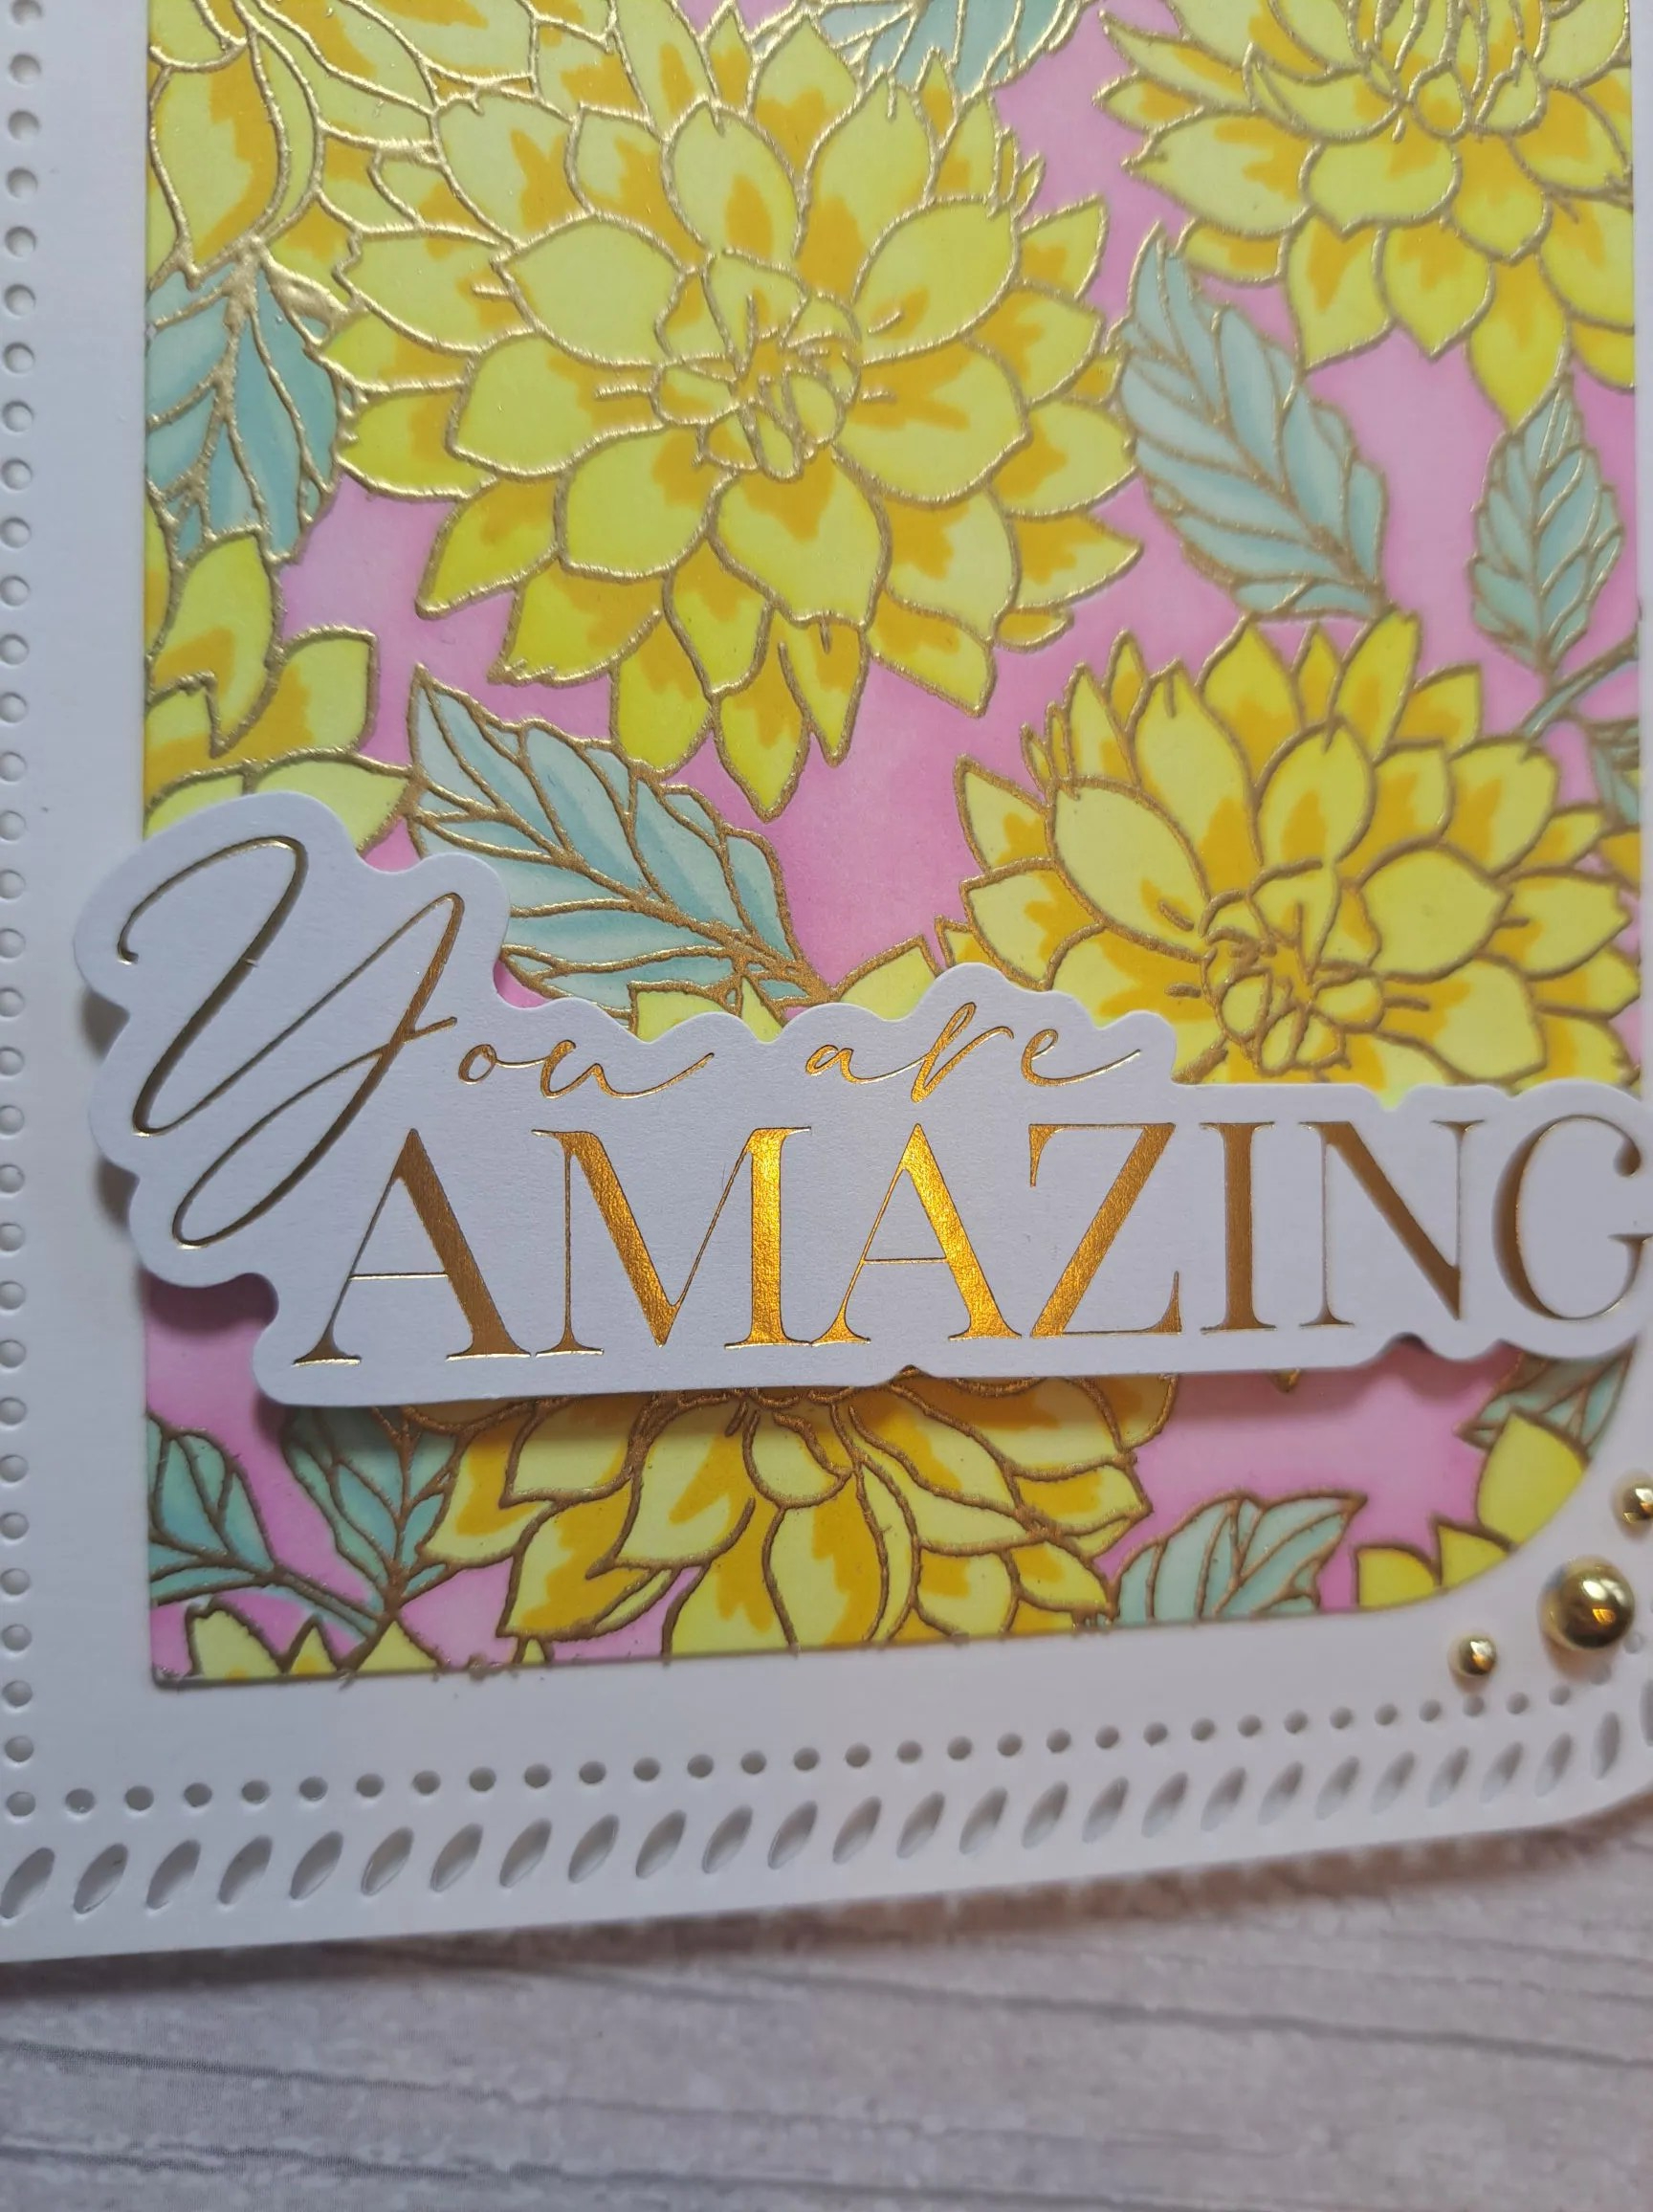
Cardz 4 Galz has started a new challenge. Sue J has chosen the theme of Mother’s Day (US) or flowers for a friend. I went with flowers for a friend:
Onto a white card base I added a die cut layer from a Pinkfresh Studio die set to create the interest around the edges.
The main image was stamped and gold heat embossed, and the layering stencils used, including the one which allows you to colour the background behind the flowers. I then took a smaller die from the same Pinkfresh set and die cut that panel, and added it to the layers on the card base.
I added a foiled sentiment and some gold gems for more interest.
I hope you can come and join us with you creations following our themes. xx
I shall be entering the following challenges:
Allsorts – anything goes – option one for the girls
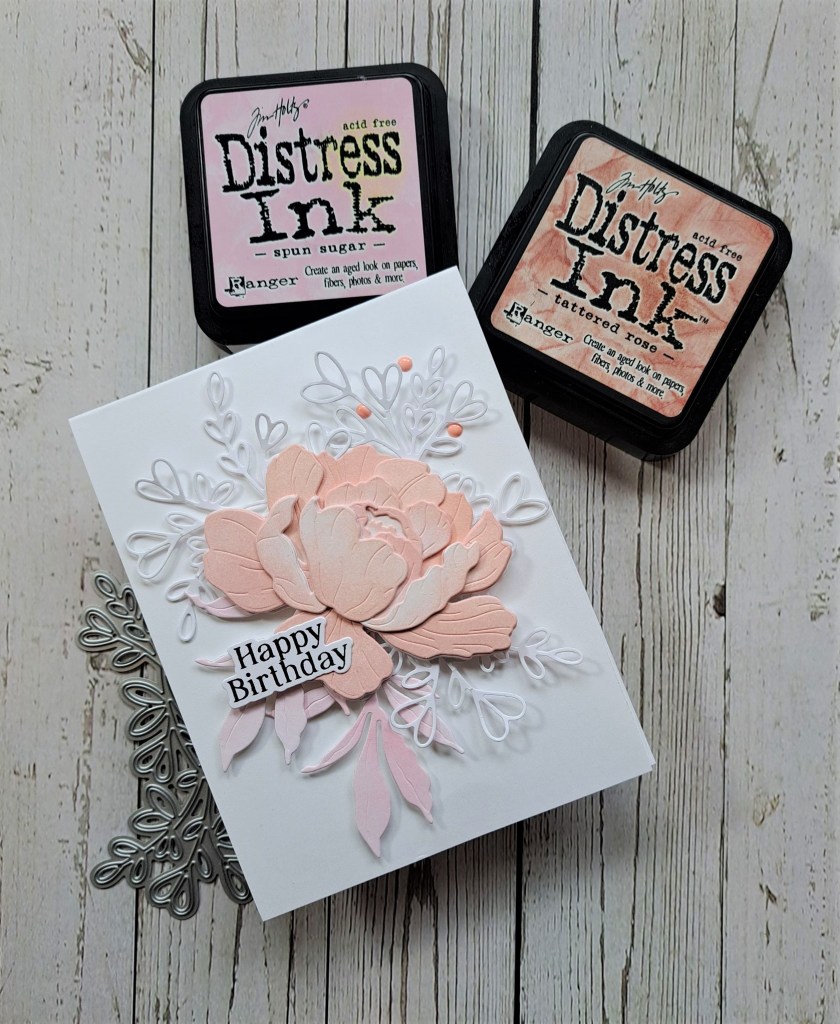
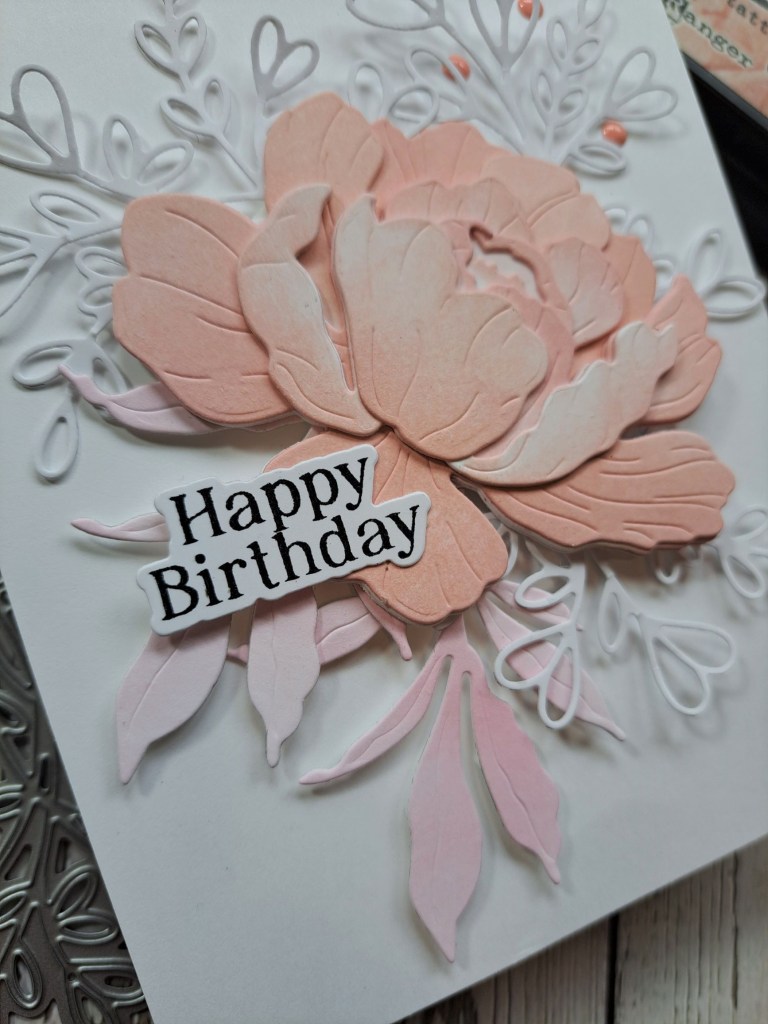
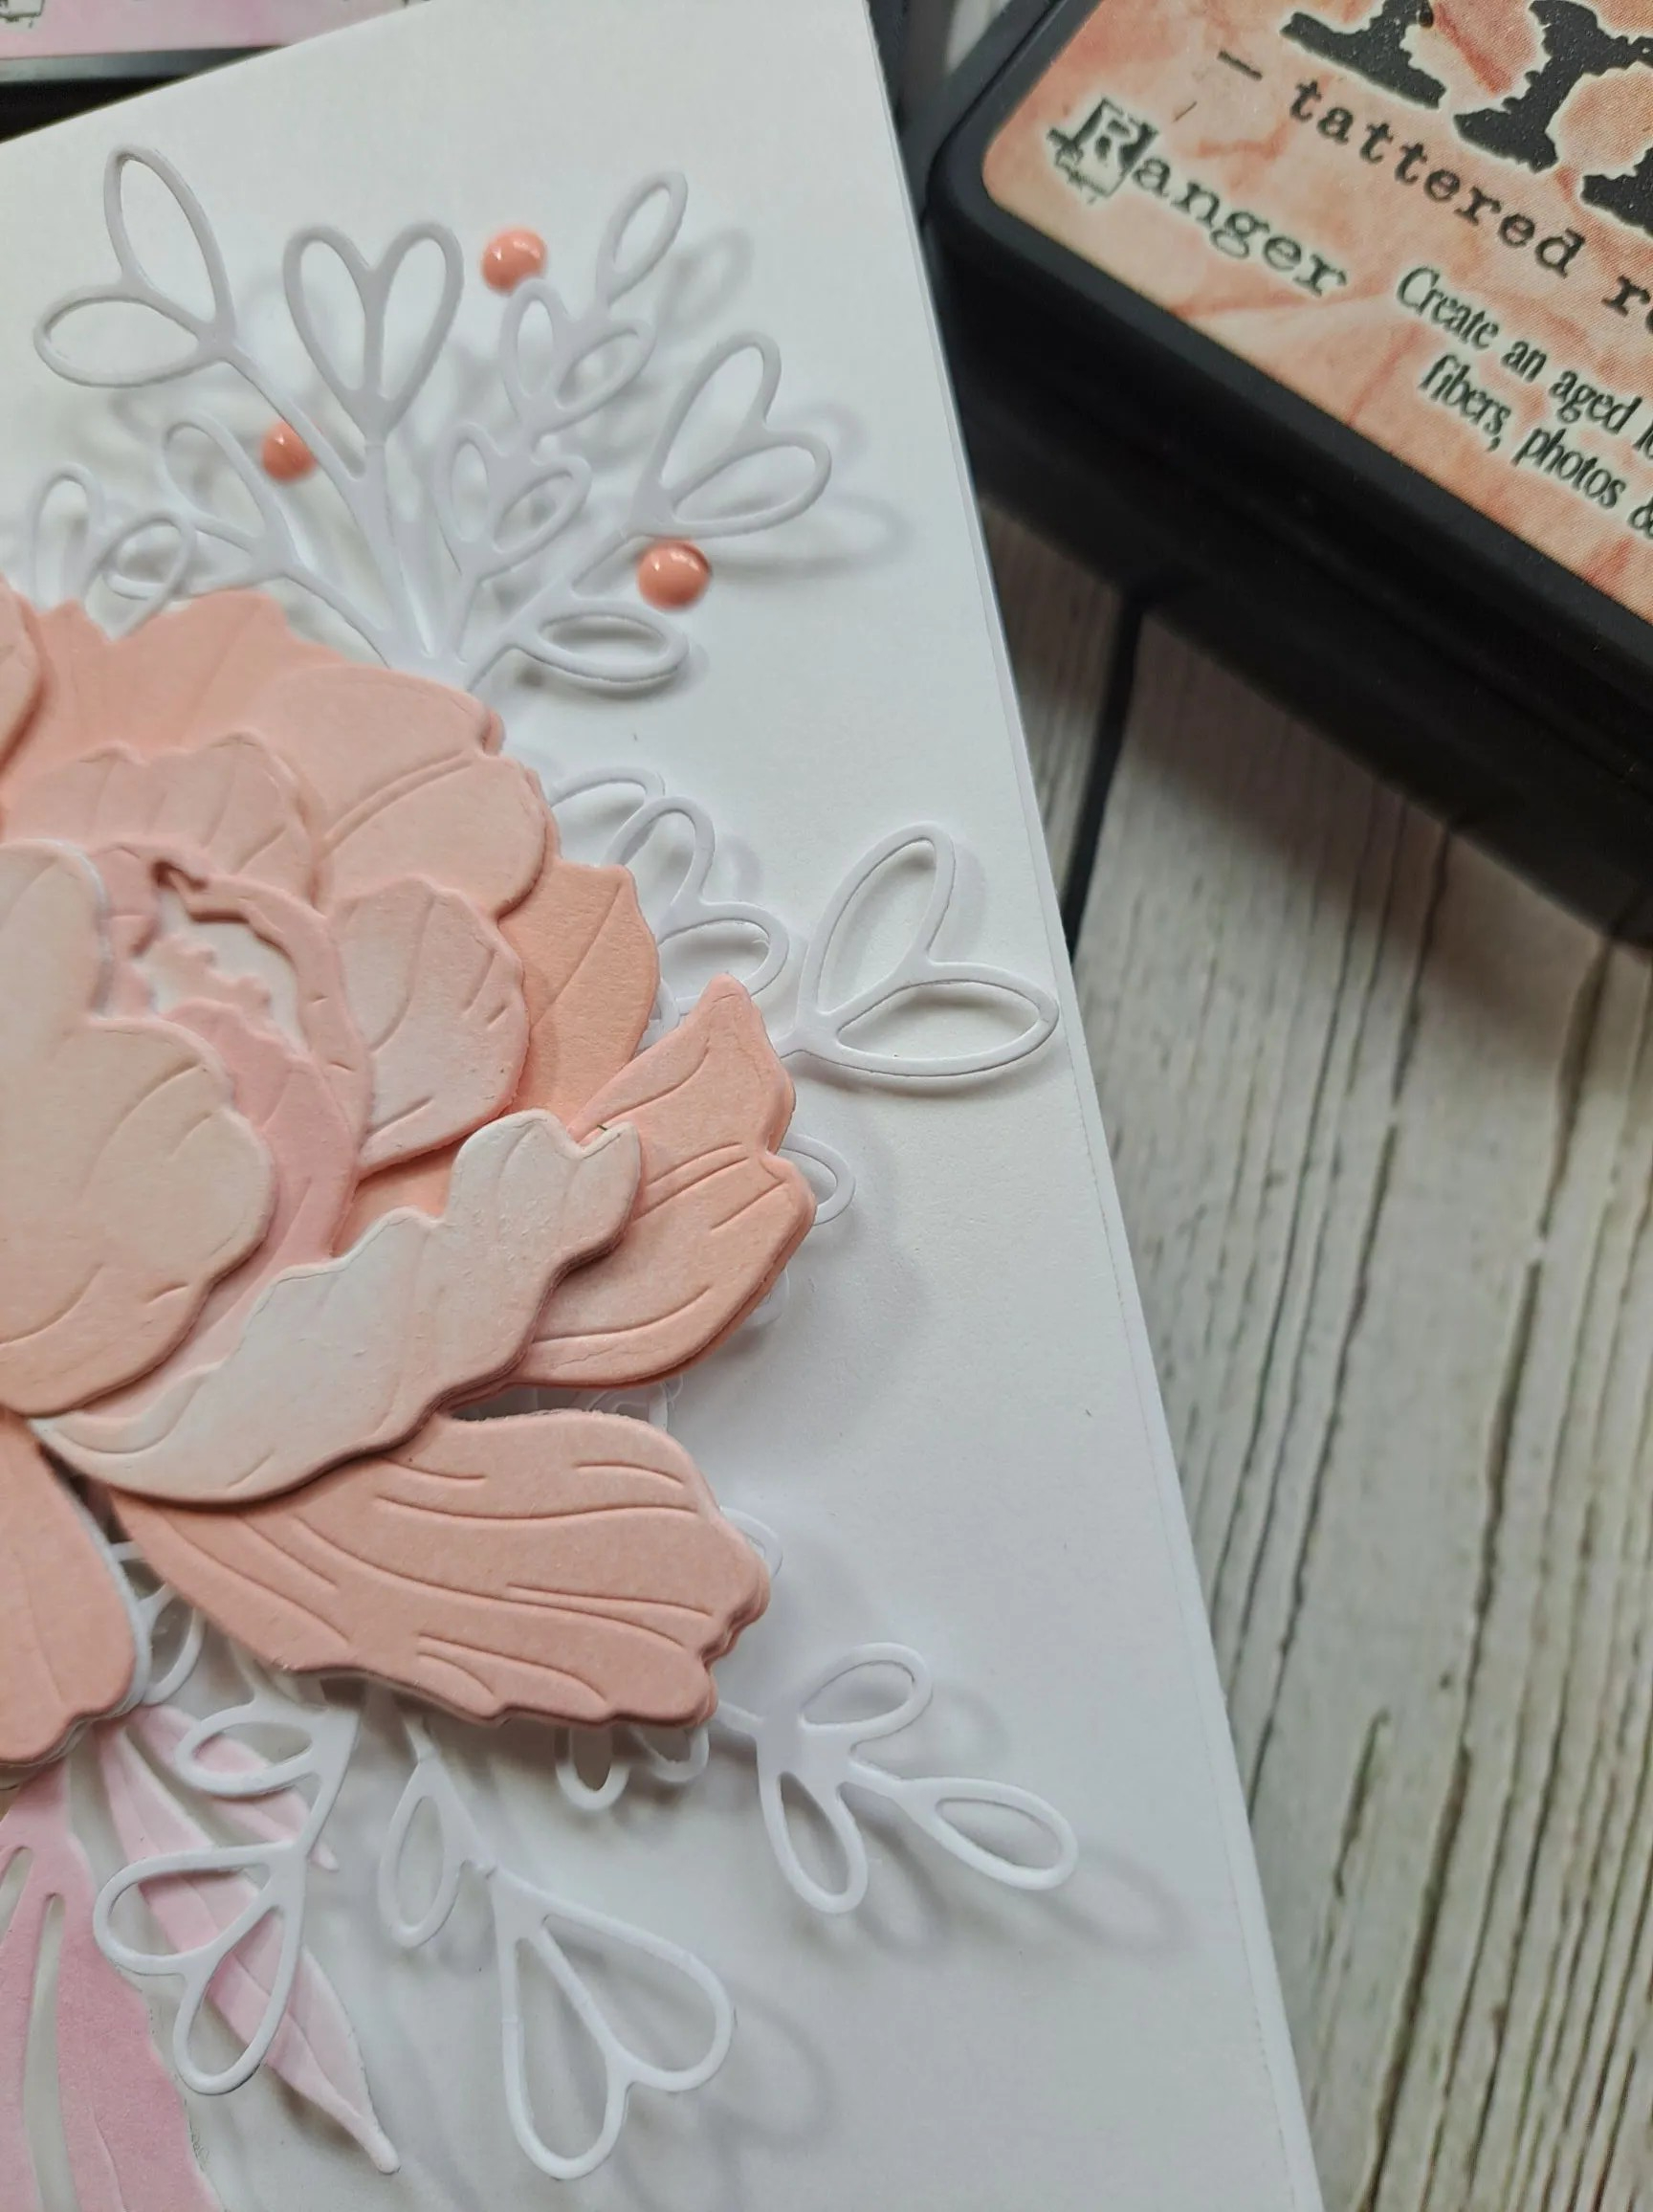
Hello. I have a card to share using some die sets from Honey Bee Stamps:
I wanted to use the three colours for the current Color Throwdown Challenge and was stumped. I mentioned the colours to a friend of mine, and she instantly said ‘peony’…….I searched the Color My Life app for what peony items I had (quiet a few actually) and this die set just spoke to me.
I ink blended a panel of Distress White Heavystock with Spun Sugar Distress Ink – keeping it quite light, and not being too perfect – and die cut the leaf from that due set twice.
On another panel I die cut the flower layers first, then ink blended the Tattered Rose Distress Ink afterwards – I wanted to vary how strong, how blended, and how smooth I wanted the blending to be, depending on which part of the flower showed when all layered together.
I die cut three of the ‘Lovely Layers Heart Vine’ outlines and arranged them behind the rose and leaves:
Once I had the placement I wanted, I used some ‘Press’n’seal’ to pick the whole arrangement up and attach 3D foam to the back, and then stick down. The leaves were not stuck down any other way and left loose to give even more dimension.
I stamped the sentiment then used the matching die to cut it out, and arranged as you see.
I also added some enamel dots to the top right corner.