Hello there. A new challenge has started at Cardz 4 Galz, Helen has chosen the theme of:
‘Purple & Green’
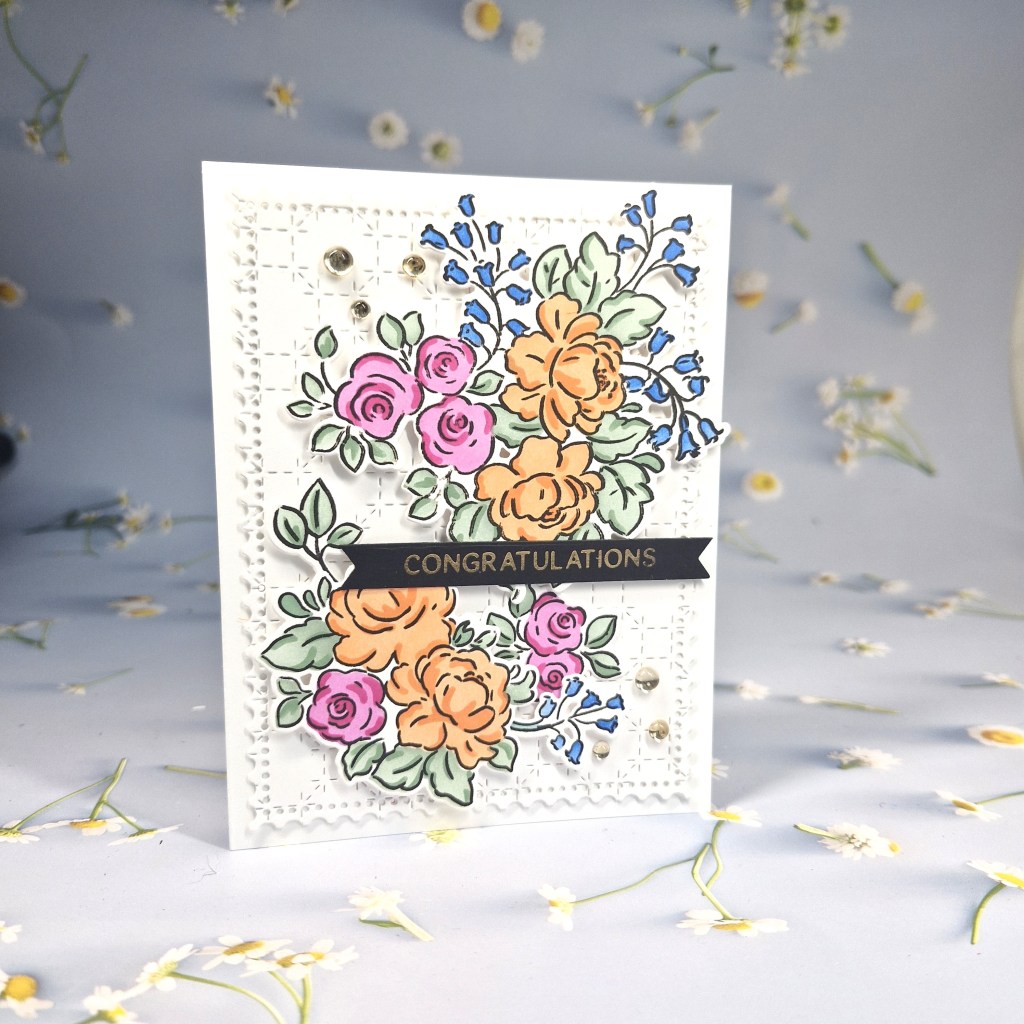
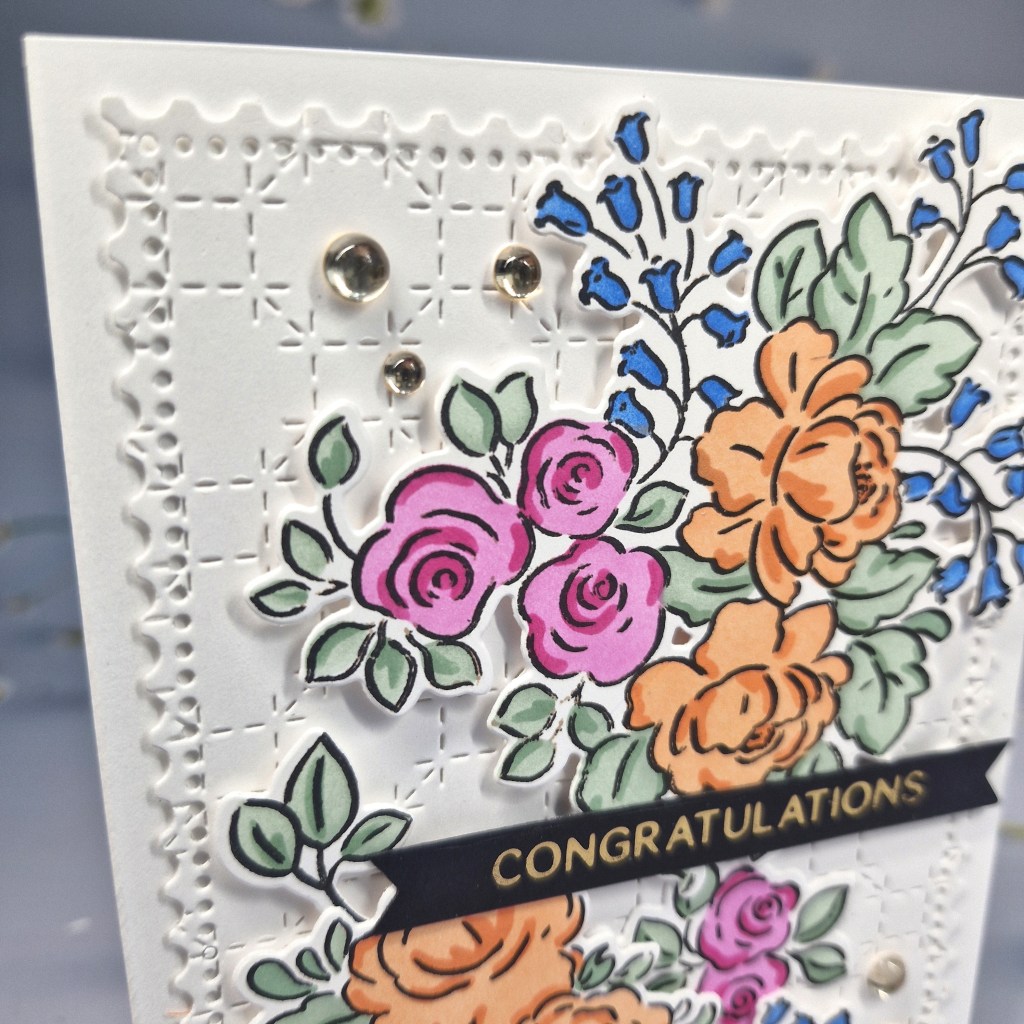
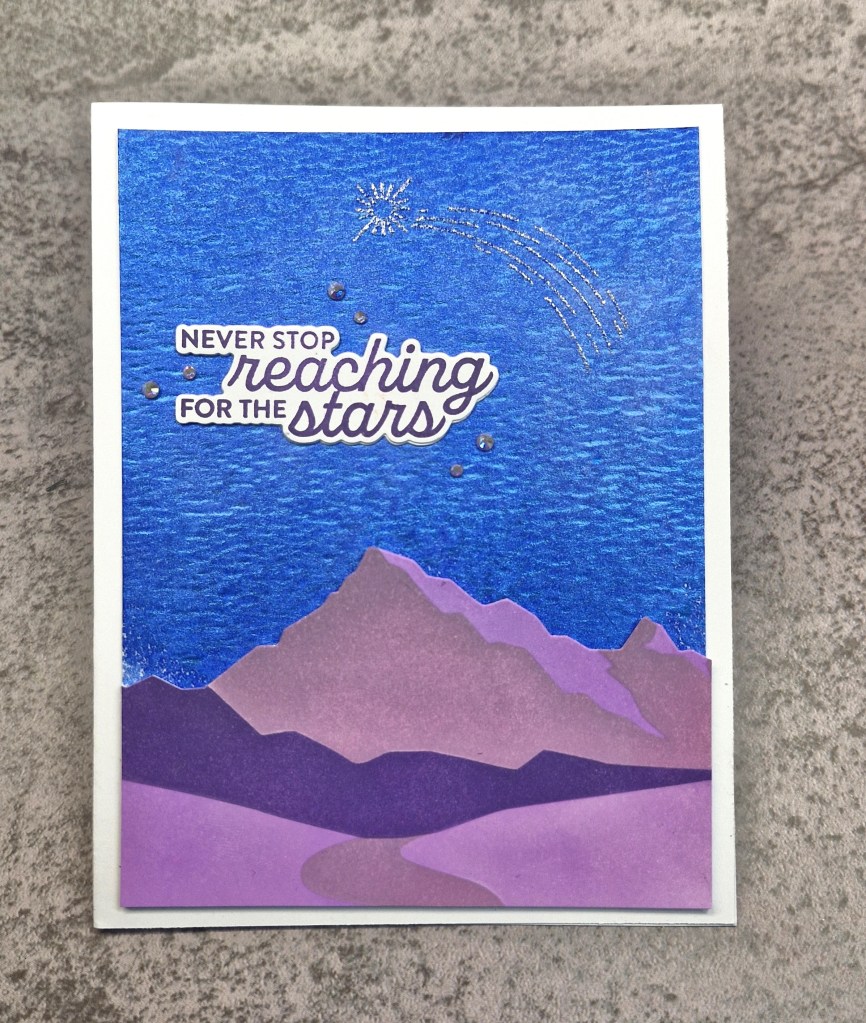
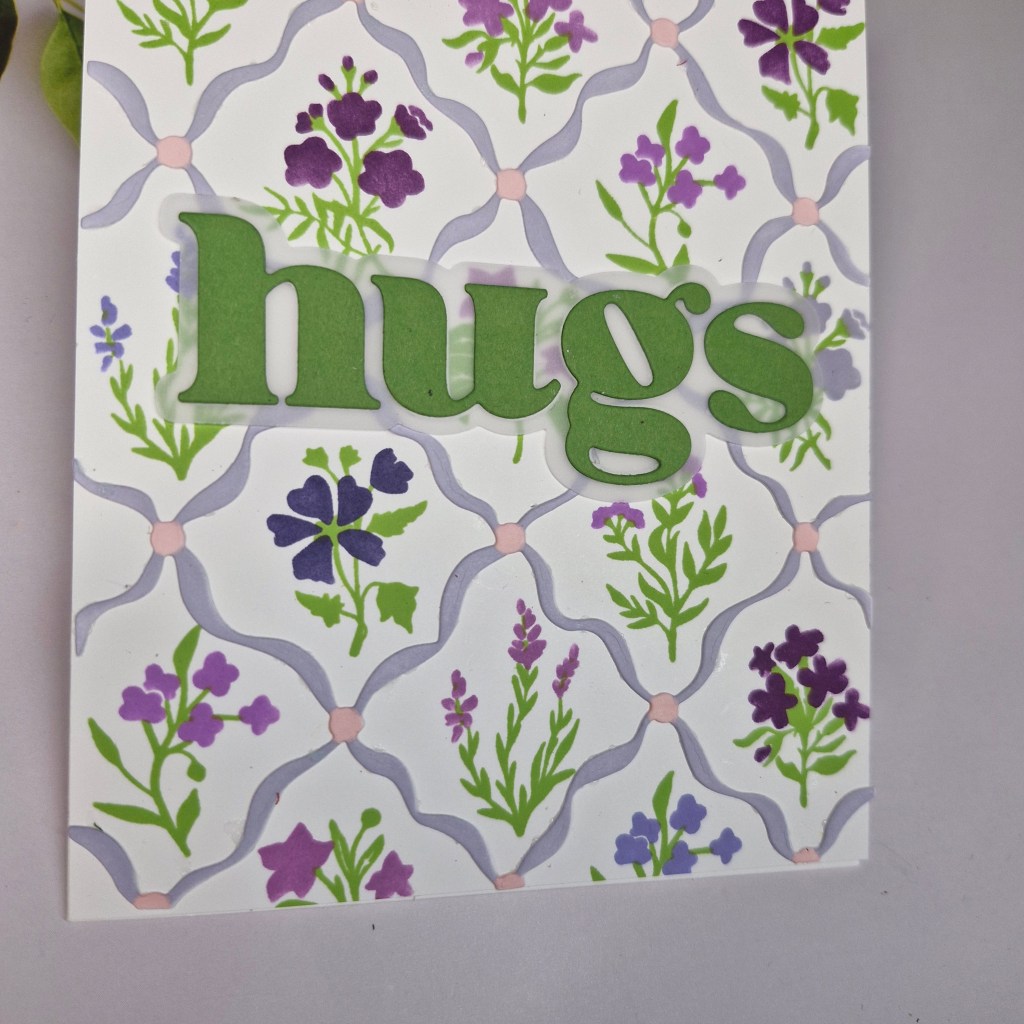
Here is my card:
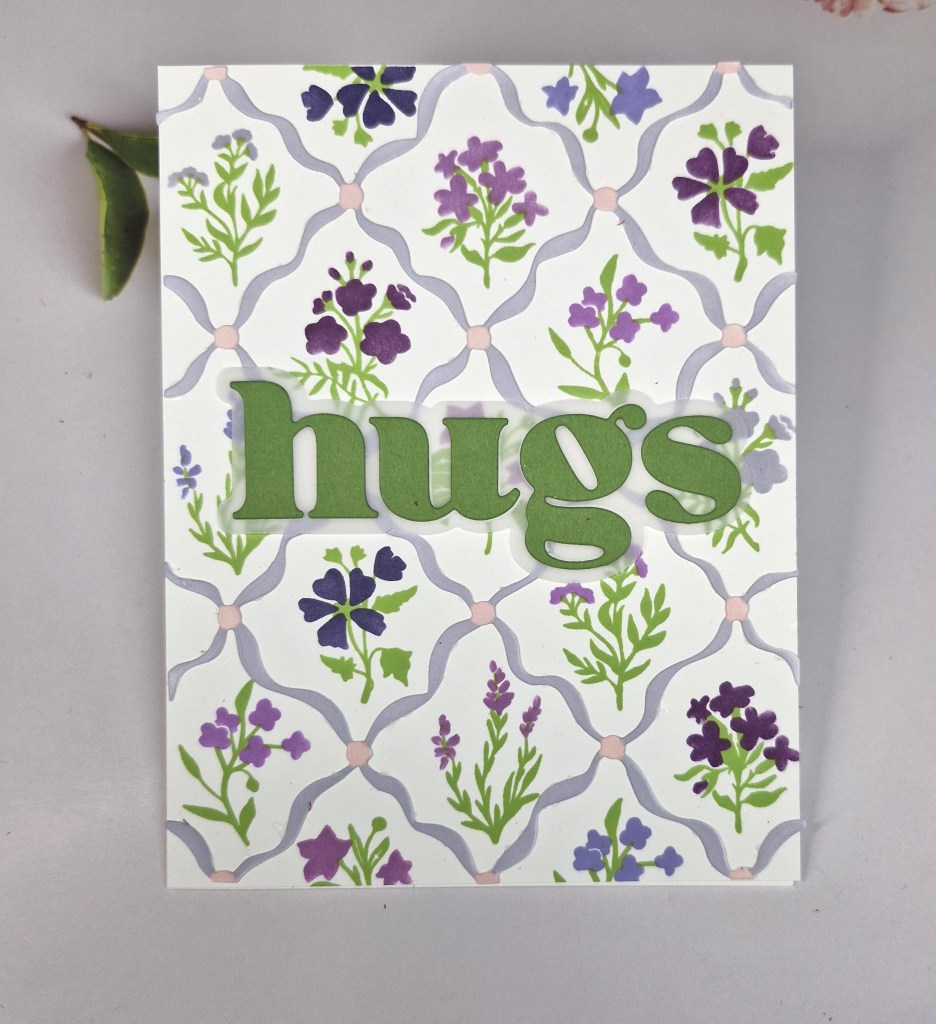
For this card, I chose to go with products from Concord & 9th, and The Greetery.
The first thing I did was to use the ‘Bitty Botanicals‘ stamp set for the green foliage, then added the various tones of purple for the flowers using the matching stencils.
I then added the ‘Diamond Ribbons‘ stencil and die set combo to create the trellis and attached that with glue so each diamond framed each of the floral images.
Onto that, I added a word die from Concords & 9th, with the shadow layer being from vellum.
I hope you can come and join us with your creations following our theme of purple and green. xx
I shall be entering the following challenges:
Ellibelle’s Corner Garden Party – anything in of from the garden
Crafters Café – flowers
Ally’s Angels – anything goes
Mix It Up – anything goes – option of fancy folds not taken
Love To Craft – anything goes