Hello once again. I have a card to share for the new challenge at The Alphabet Challenge. We have reached the letter ‘W‘, and Tee has chosen the theme of:
Wildflowers
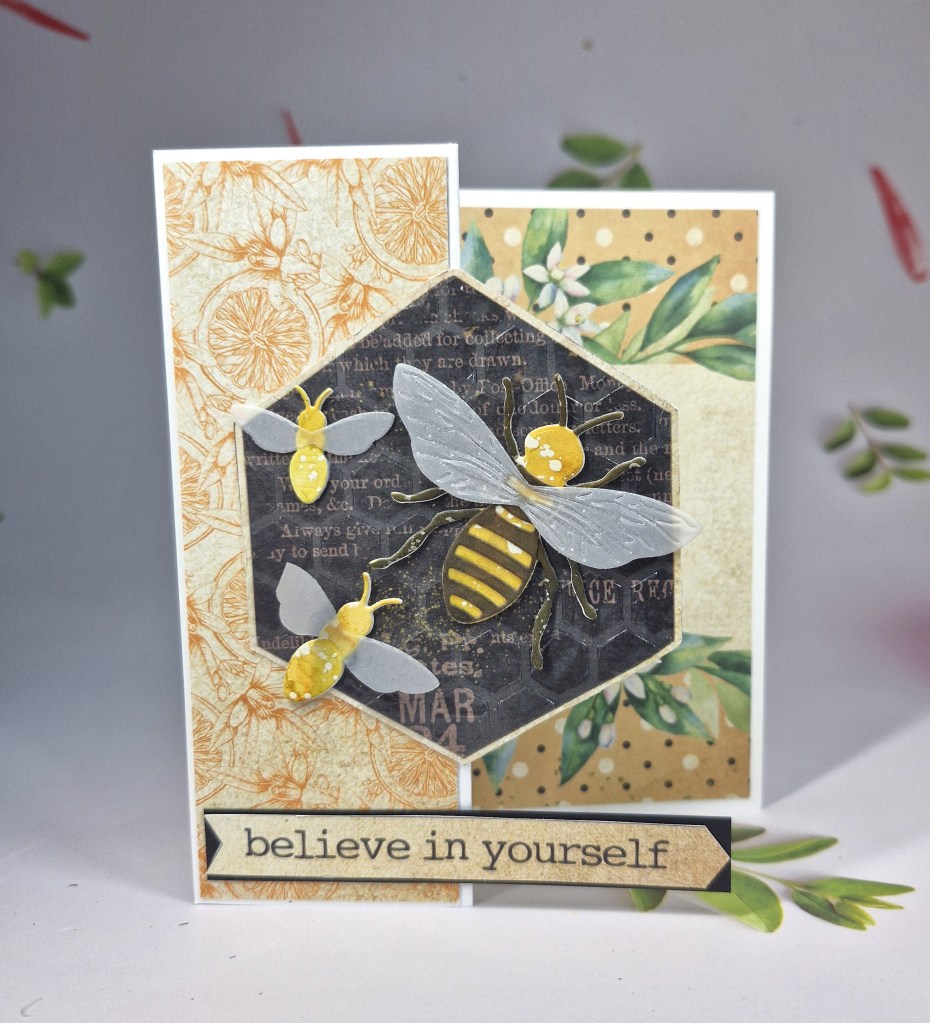
Here is my card:
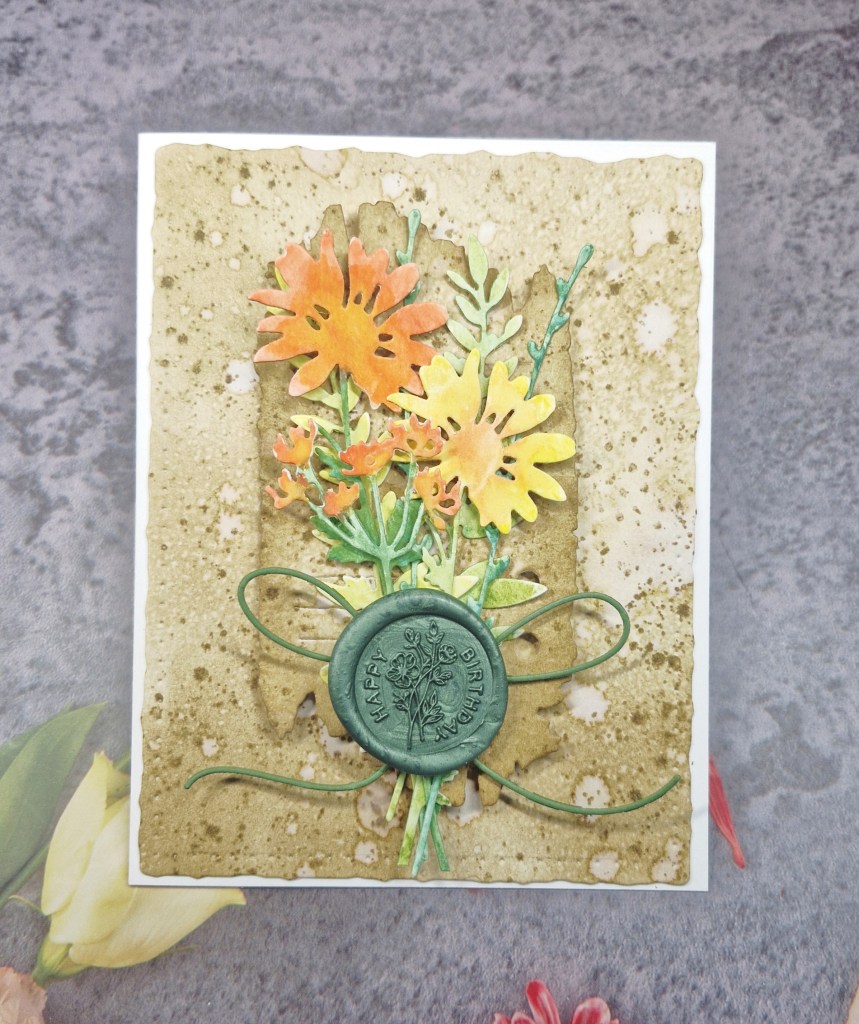
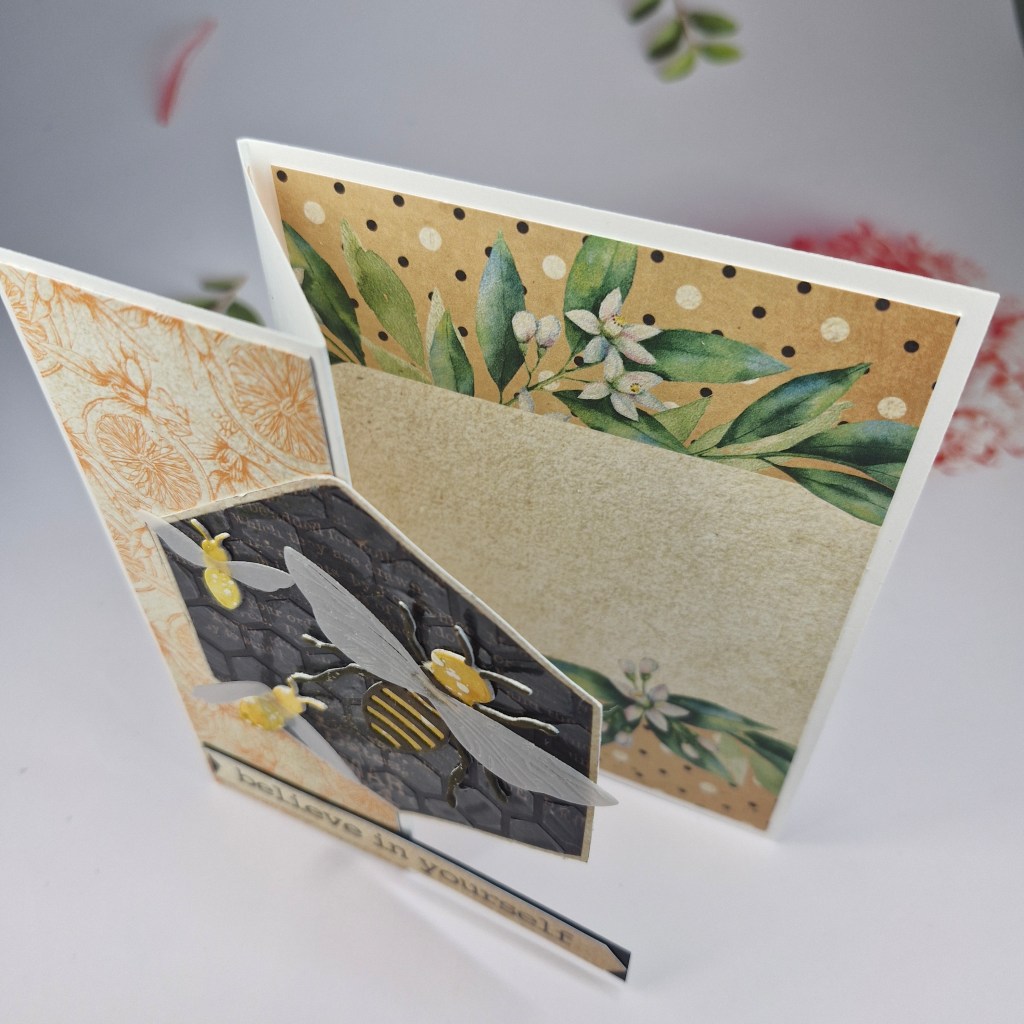
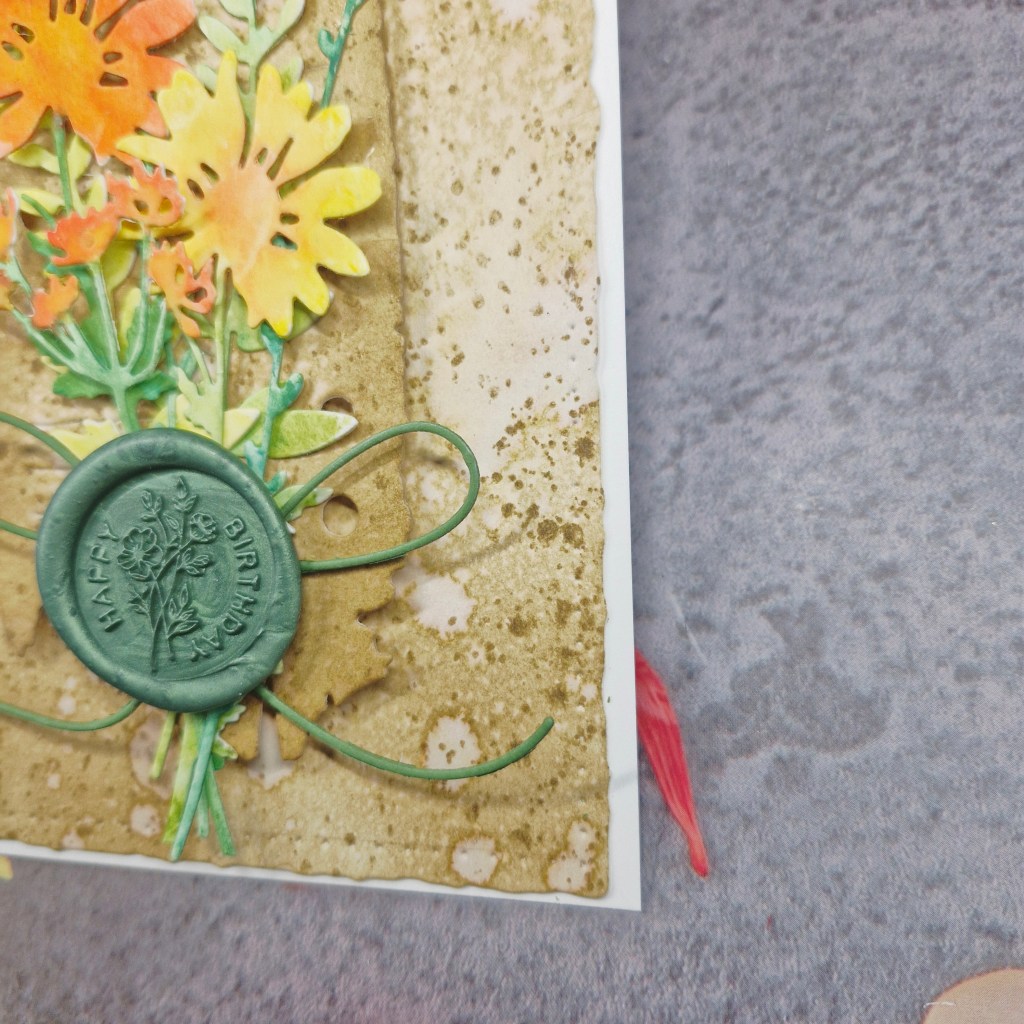
I decided to go mixed media with this, as I already had the background panel made from a class with Jenn Shurkus.
The background was created using ink blending onto a white panel, adding water splatters and then ink splatters. I created two panels – one slightly darker. Once dry, I cut down the lighter panel using the Tim Holtz ‘Deckle’ guillotine to give a torn edge effect, then with the darker panel I used a Gummiapan die from their 2024 Advent Calendar to create two tickets which I overlapped.
I like the torn edges, the holes, and the lines on these dies, which added further interest.
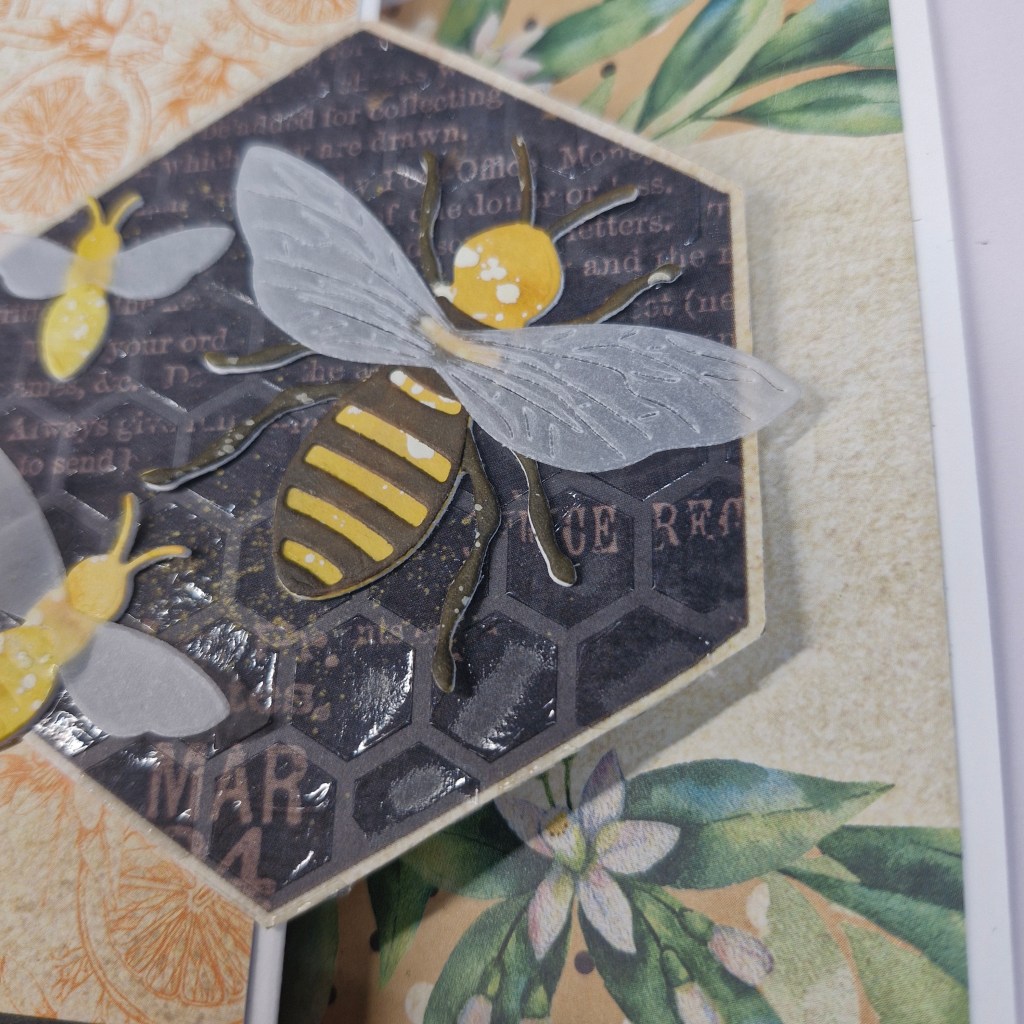
The next step was to create some wildflowers, and for this I turned to a Tim Holtz die set. I die cut them out of white water-colour card stock, but left them in the panel. To colour them I used Distress water-colour pencils in varying shades, keeping the colouring quite ‘rough’ for want of a better word, and left them to dry.
I found a big loopy bow die in my stash, and pulled out a previously created wax seal.
All the elements were now ready for me to assemble the card.

I hope you can come and join us with your creations following our theme of wildflowers. xx
I shall be entering the following challenges:
Ellibelle’s Corner Garden Party – anything in or from the garden
Seize The Birthday – birthday – option of anything goes with wings not taken
We Love 2 Create – anything goes mixed media
AAA Birthday – birthday and die cuts