Hello again. The Alphabet Challenge has started a new challenge, having reached the letter ‘V’, Helen has chosen the theme of :
‘volume – use foam pads or gel to raise apart of you design’
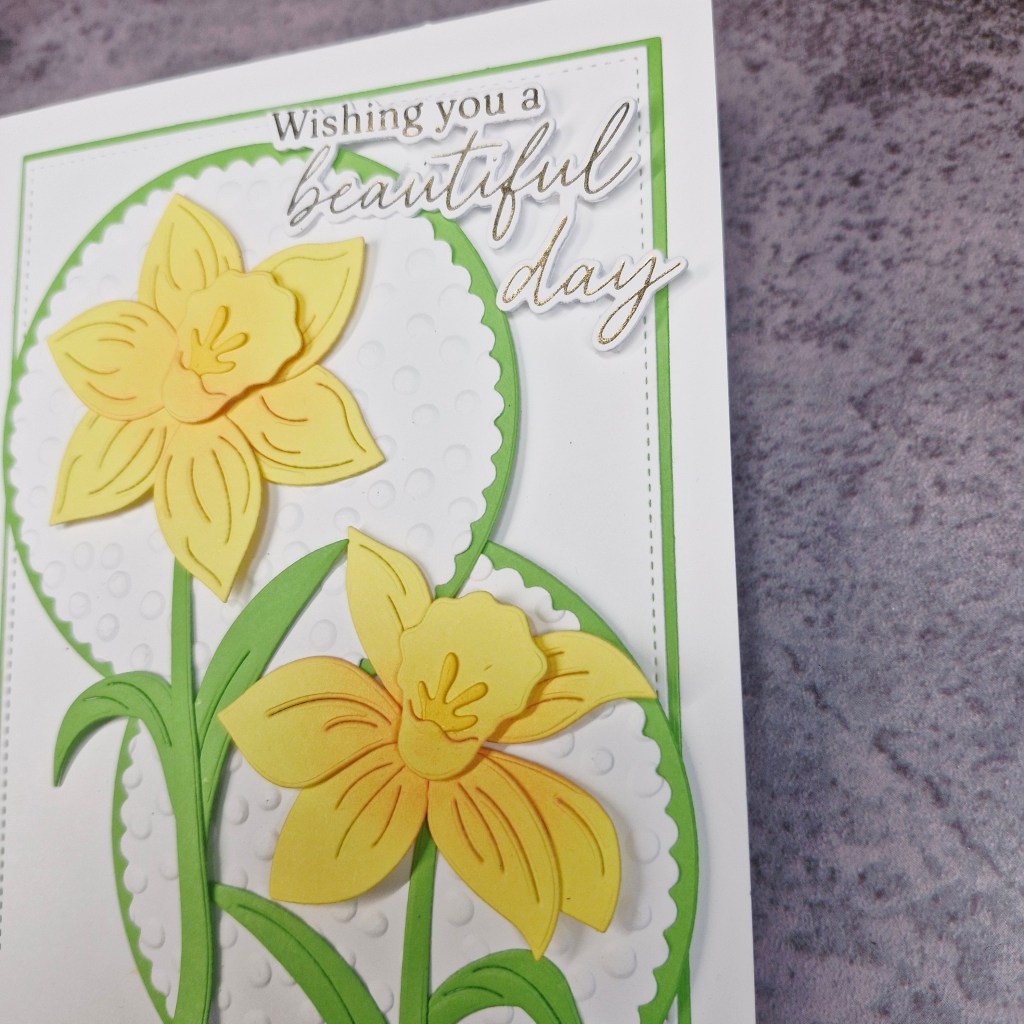
Here is my card:
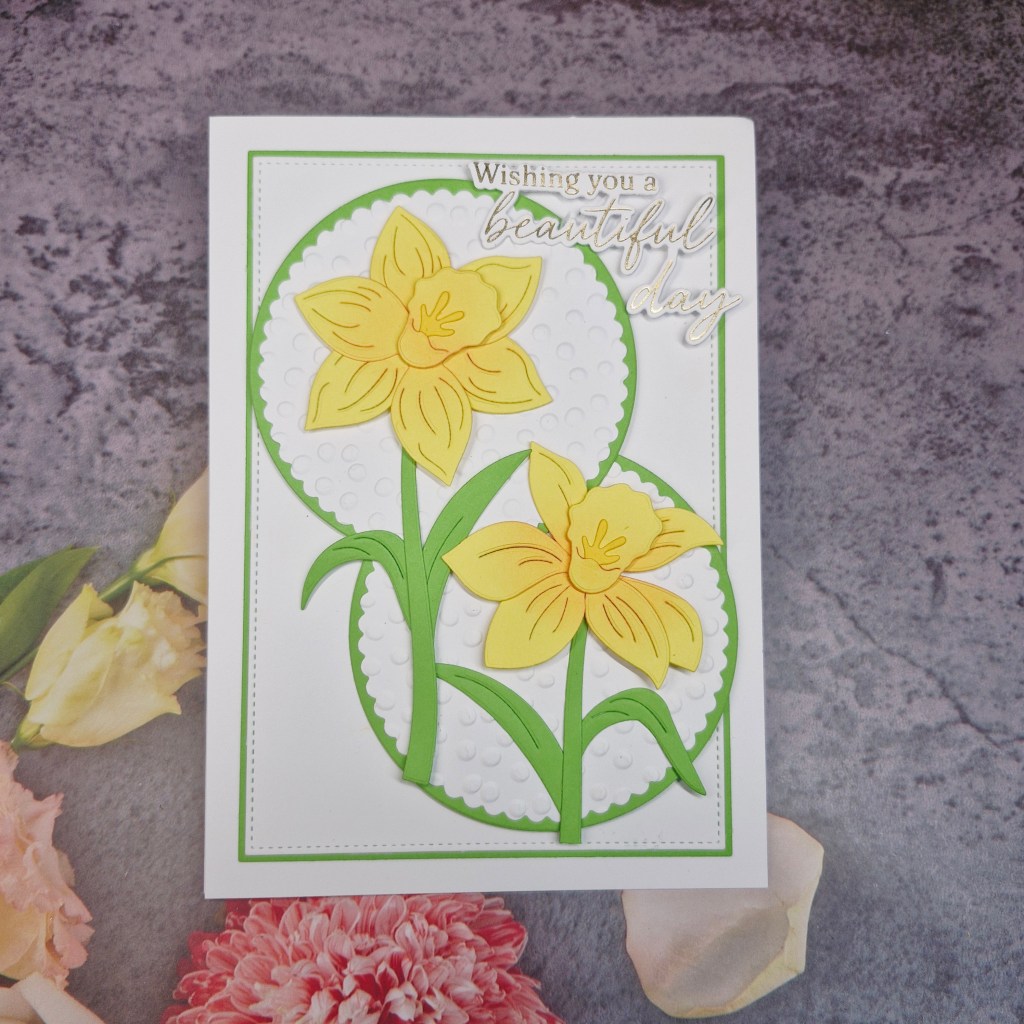
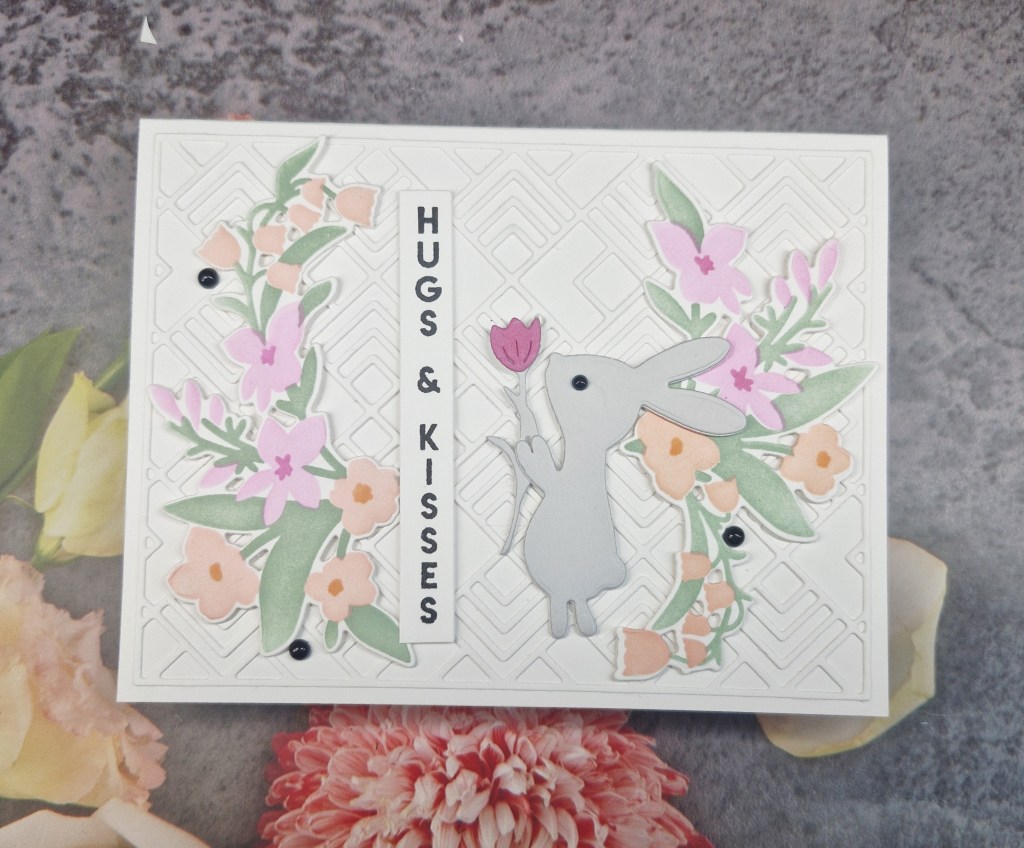
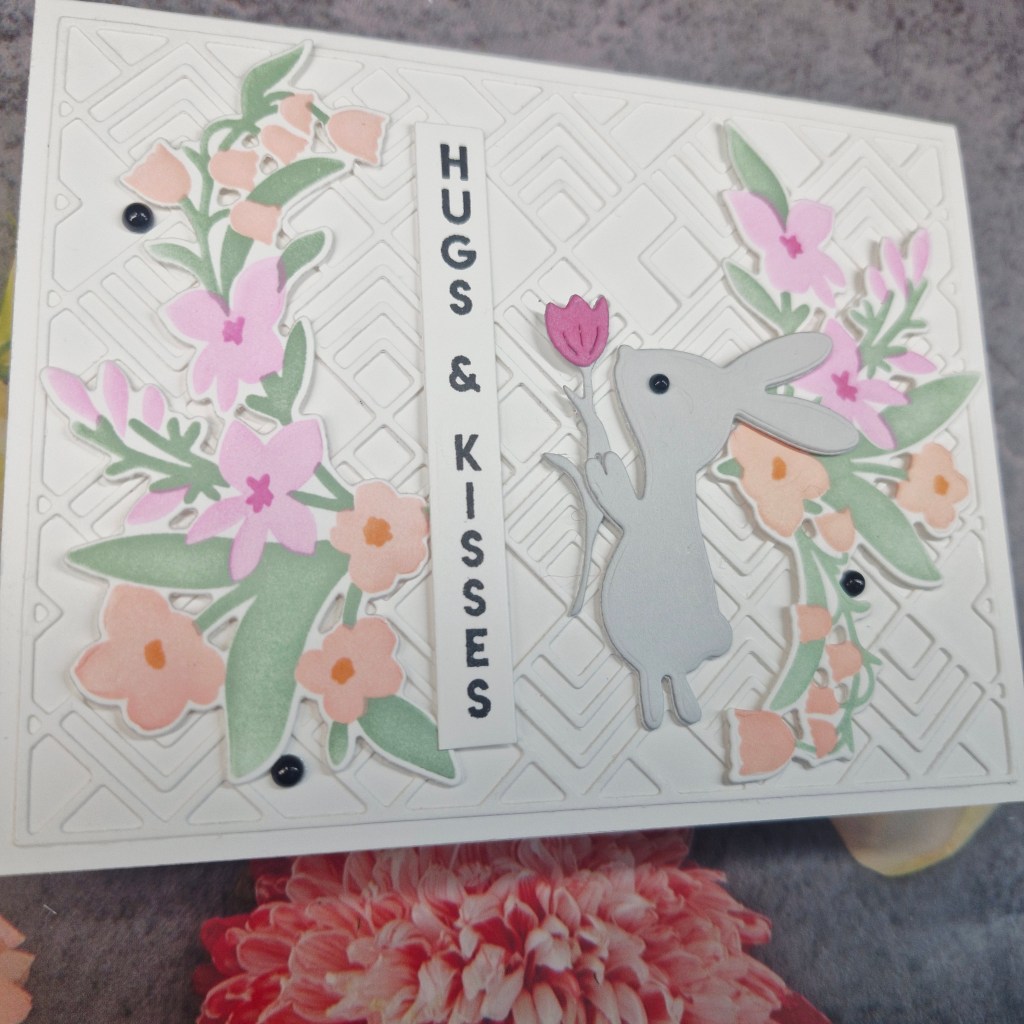
I decided to go with a springtime fell with these daffodils. Having had what seems like months of rain here in the UK, the snowdrops are appearing, and I felt a spring card was needed to encourage brighter weather.
The daffodils are from Hero Arts, die cut and then a little ink blending to the petals before adding the corona, which was attached with 3D foam pieces.
The background panels of green, then the stitched white layer were cut using a Gina K Designs Master Layouts set, and the green circles die cut with nesting dies to be slightly larger than the two white scalloped circles – also cut with a Gina K Designs die. Before attaching the white circles to the green, I ran them through an embossing folder to give a little more interest.
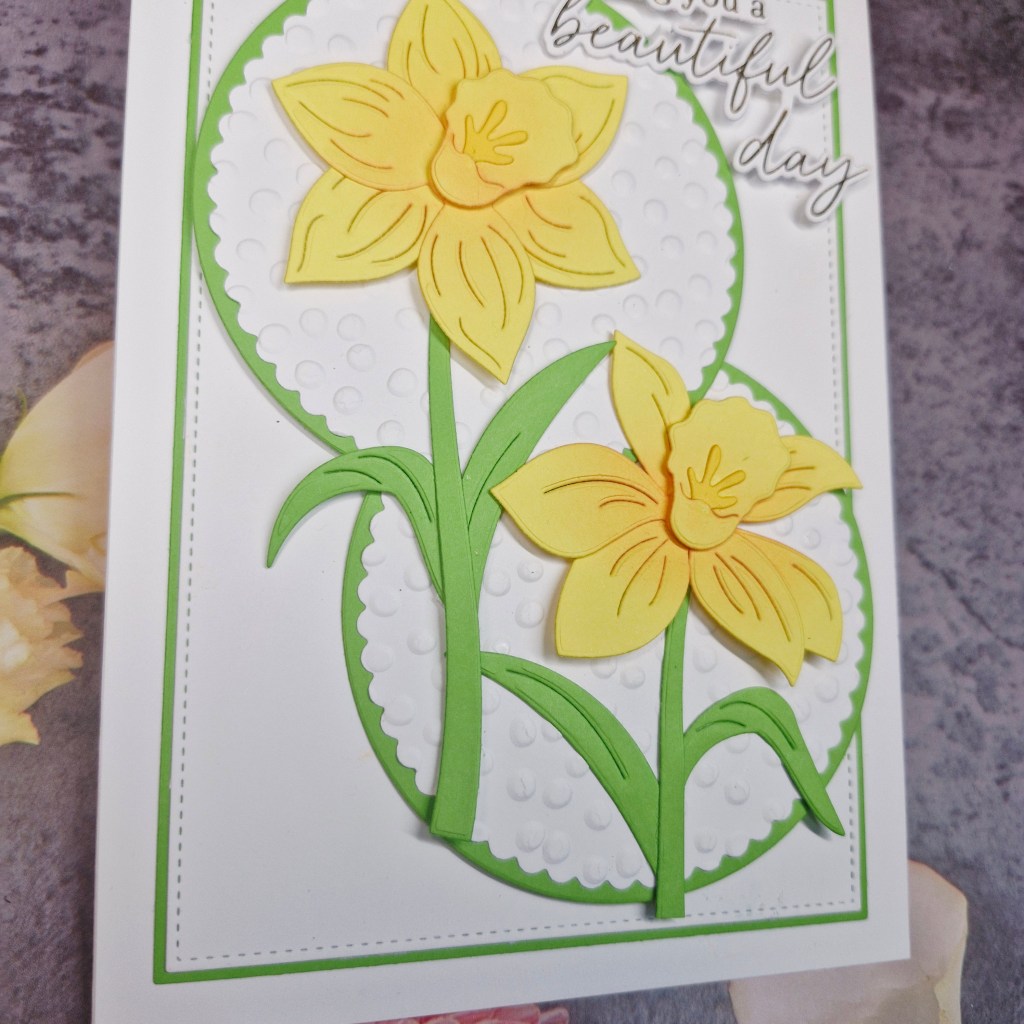
The sentiment is foiled and die cut from Pinkfresh Studio.
I hope you can come and join with your creations following our theme. xx
I shall be entering the following challenges:
Crafts Galore – anything goes
A Cut Above – anything goes with die cuts
Lil Patch Of Crafty Friends – anything goes
Craft Rocket – flowers