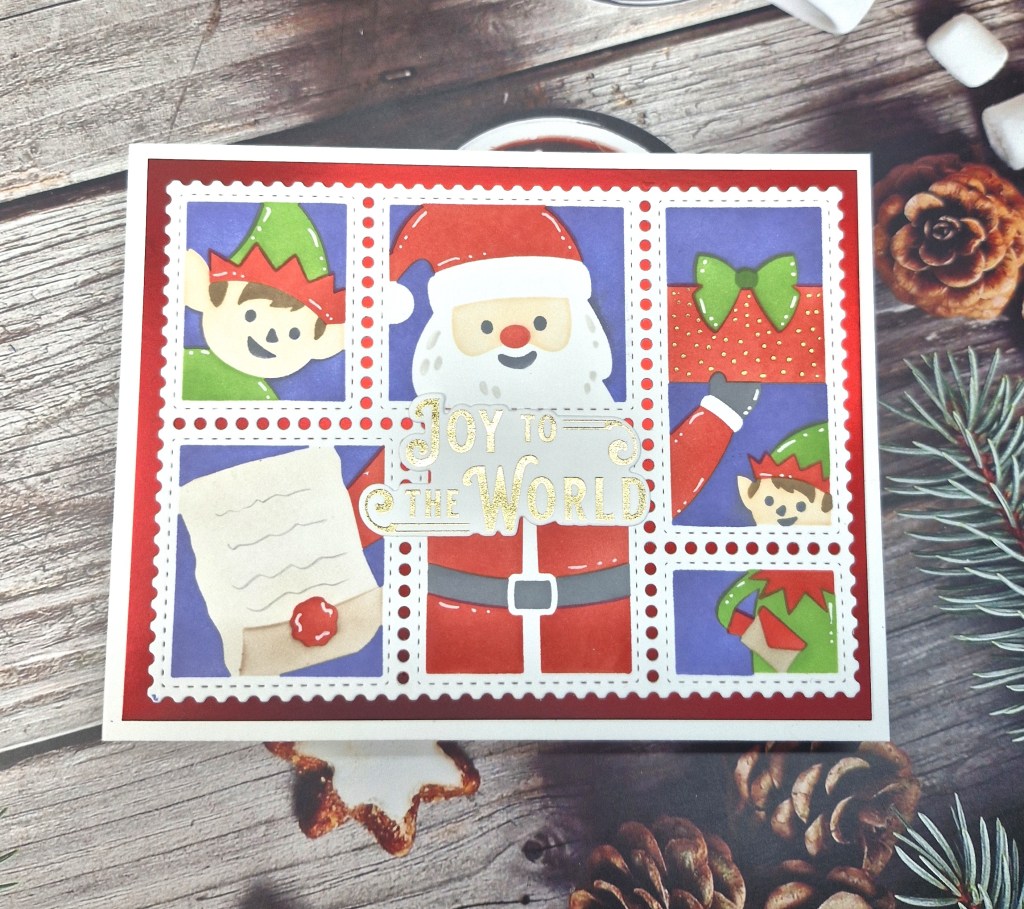
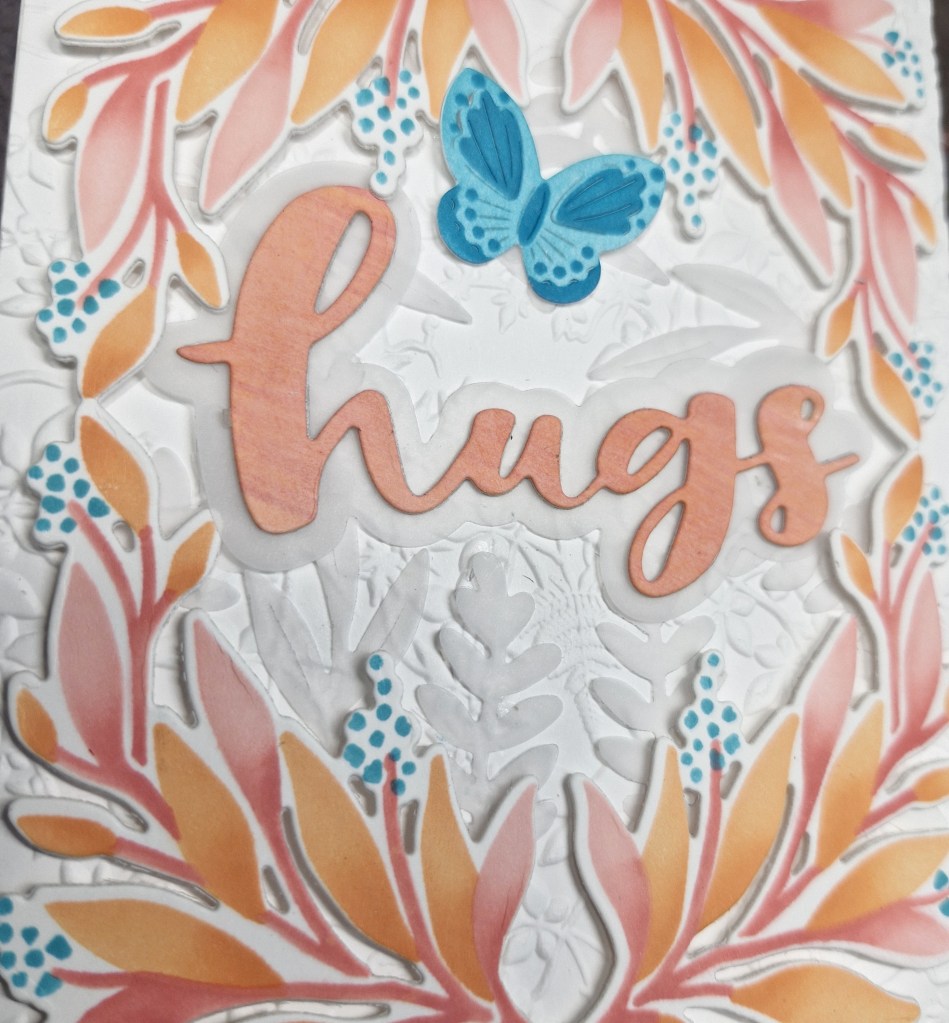
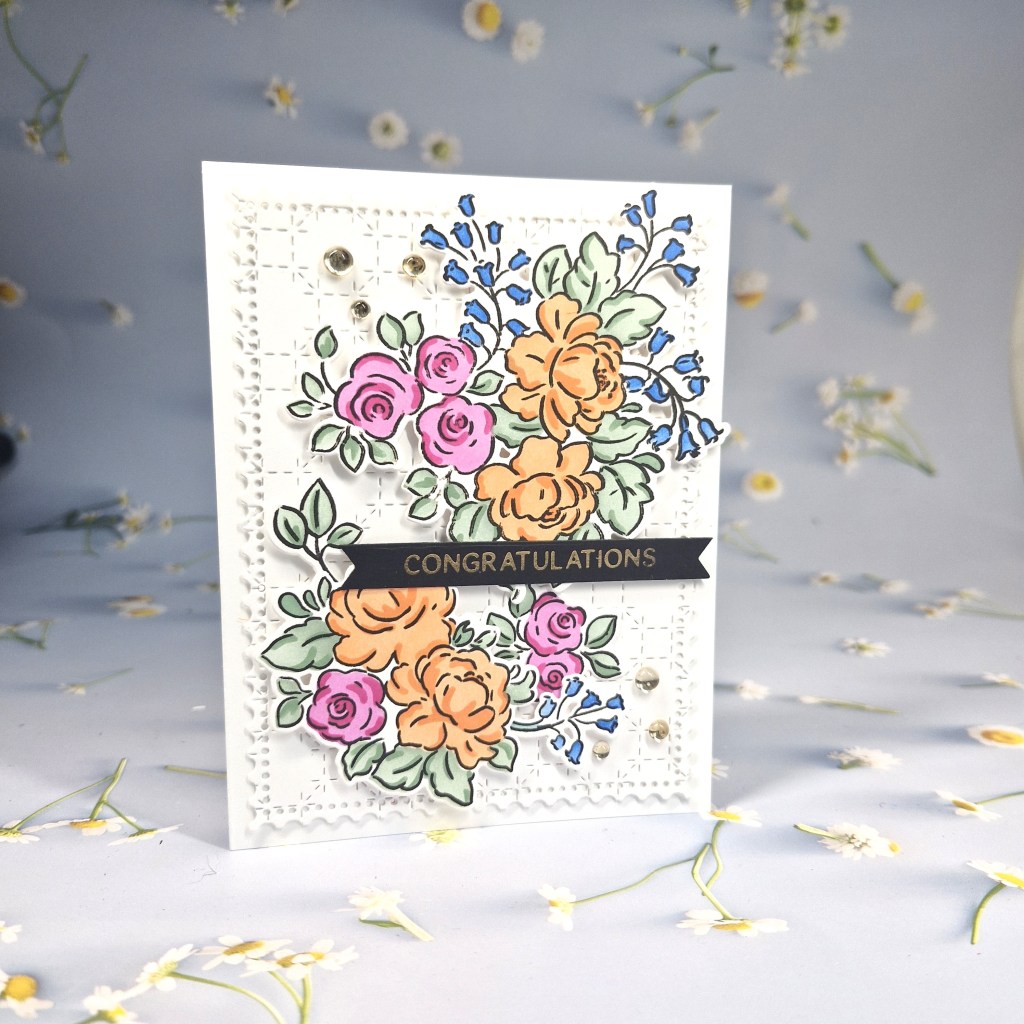
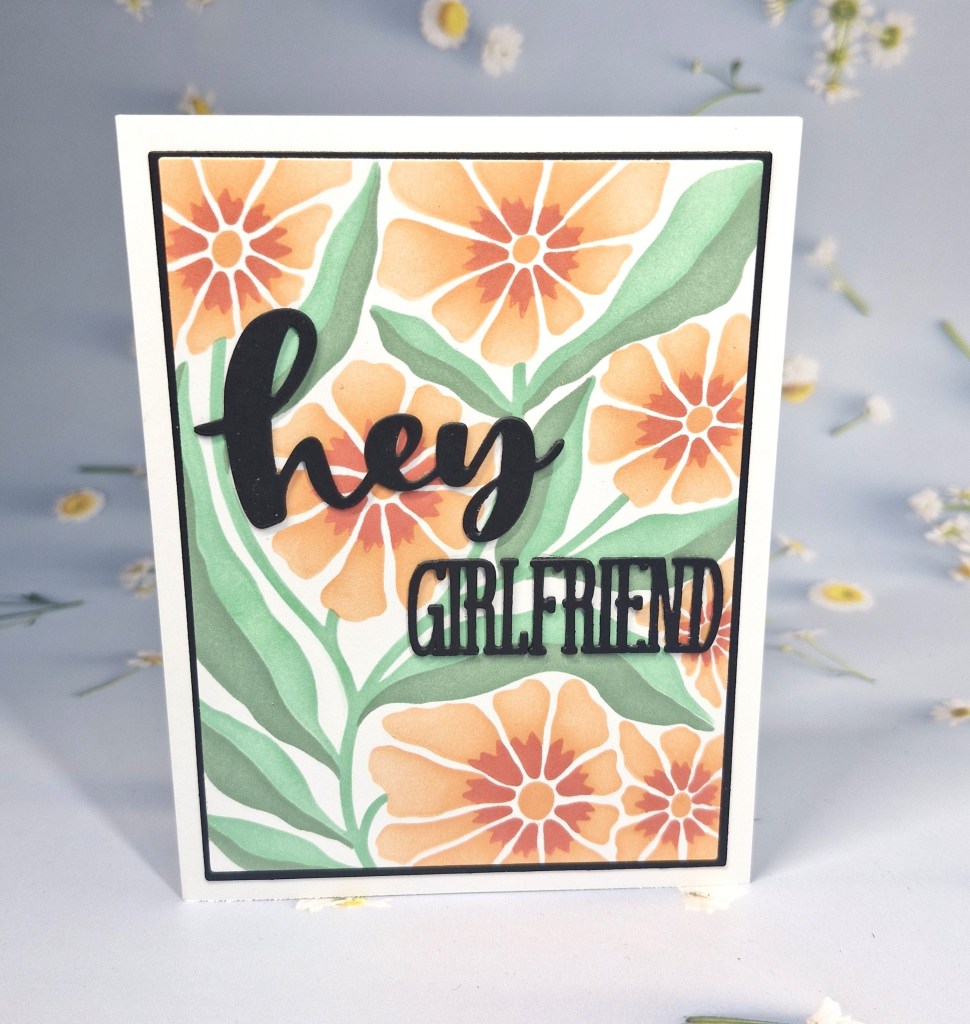
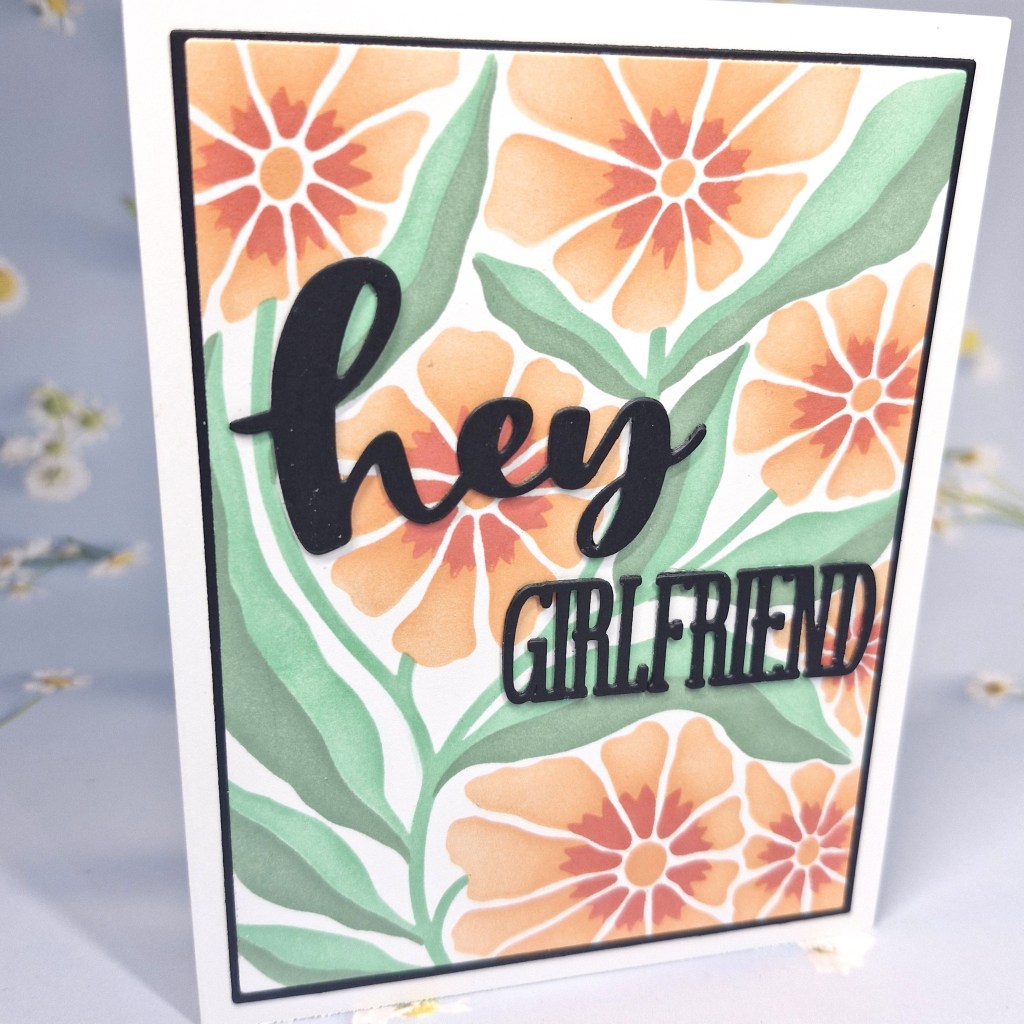
Hello again. The Alphabet Challenge has reached the letter K, and Helen has chosen the theme of ‘keep it simple’. Here is my card:
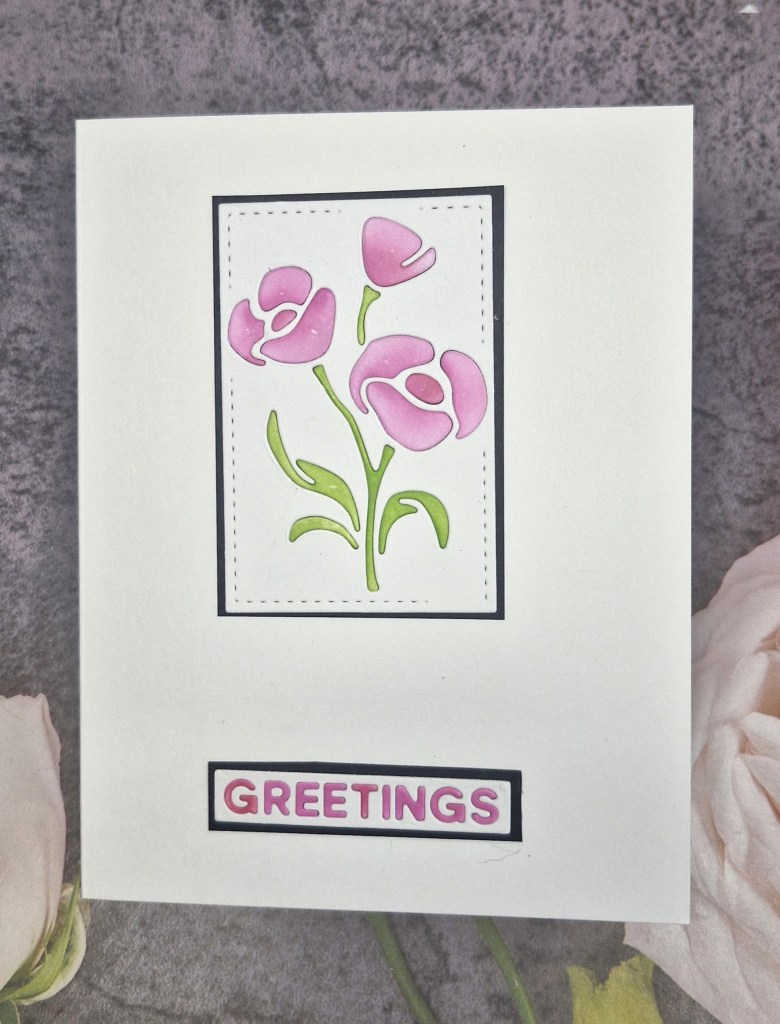
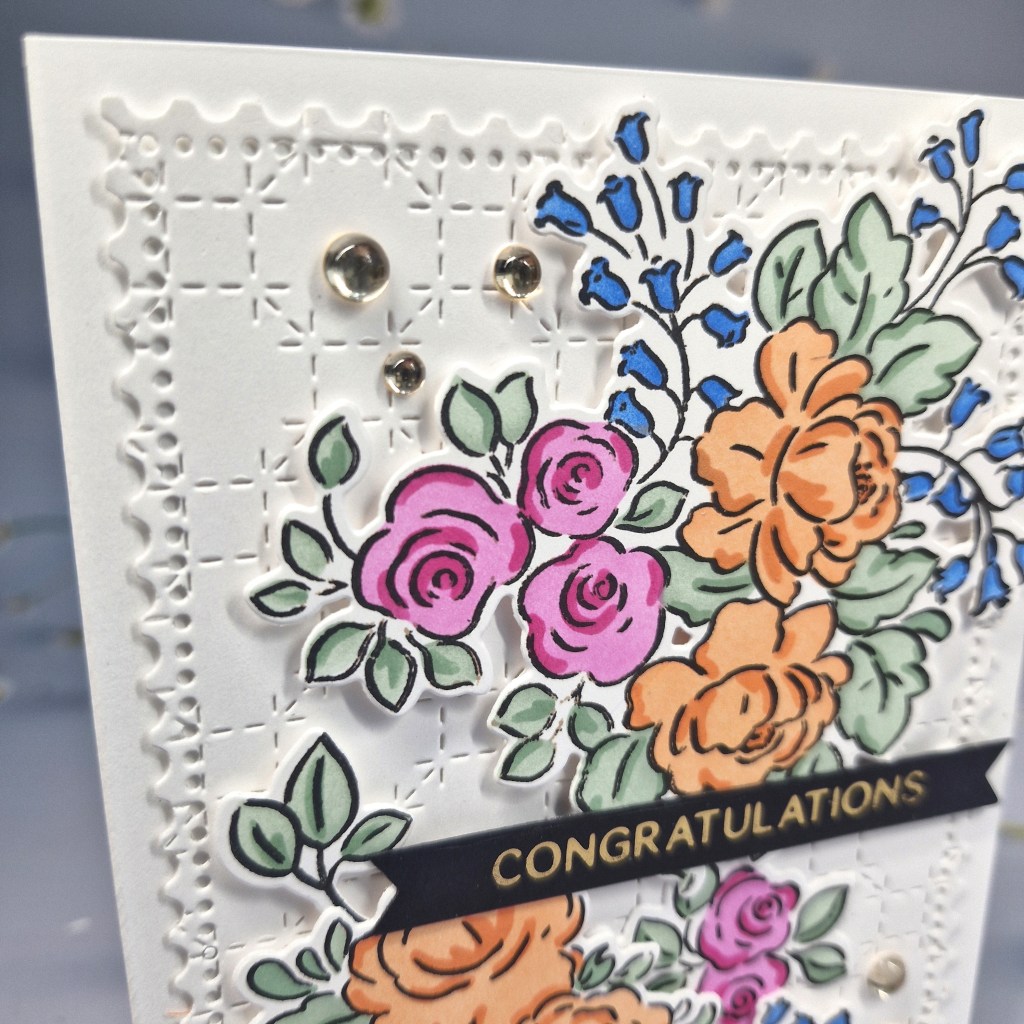
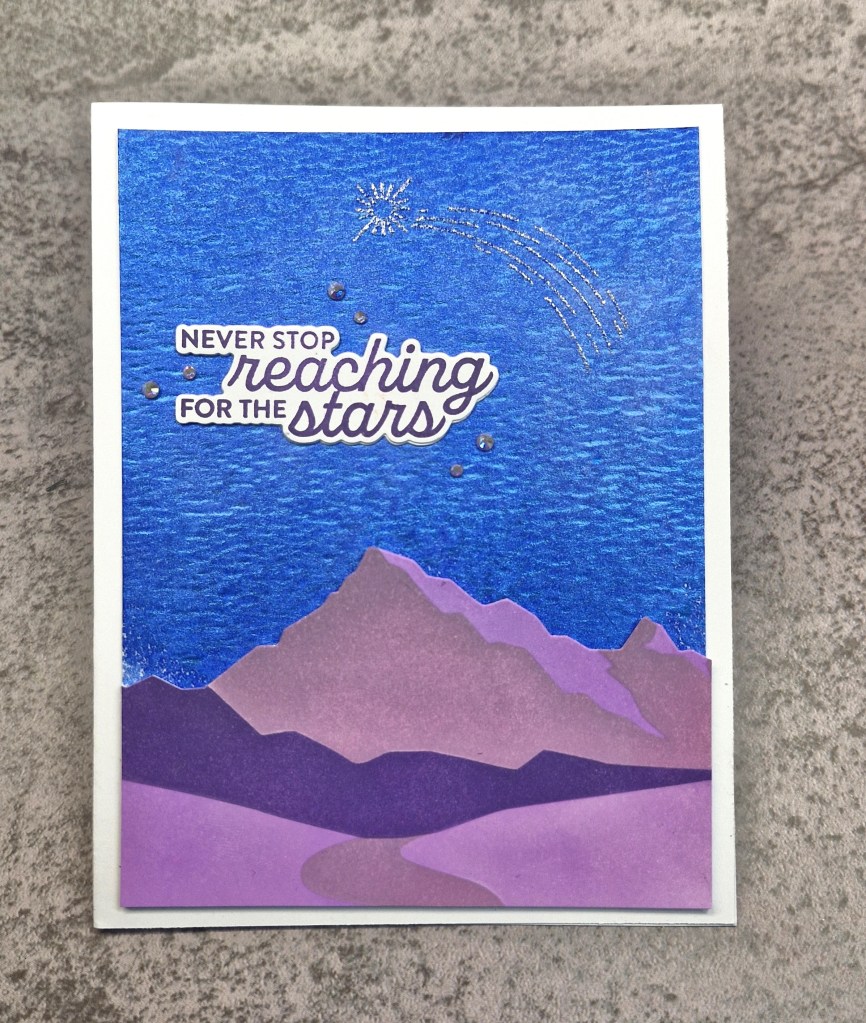
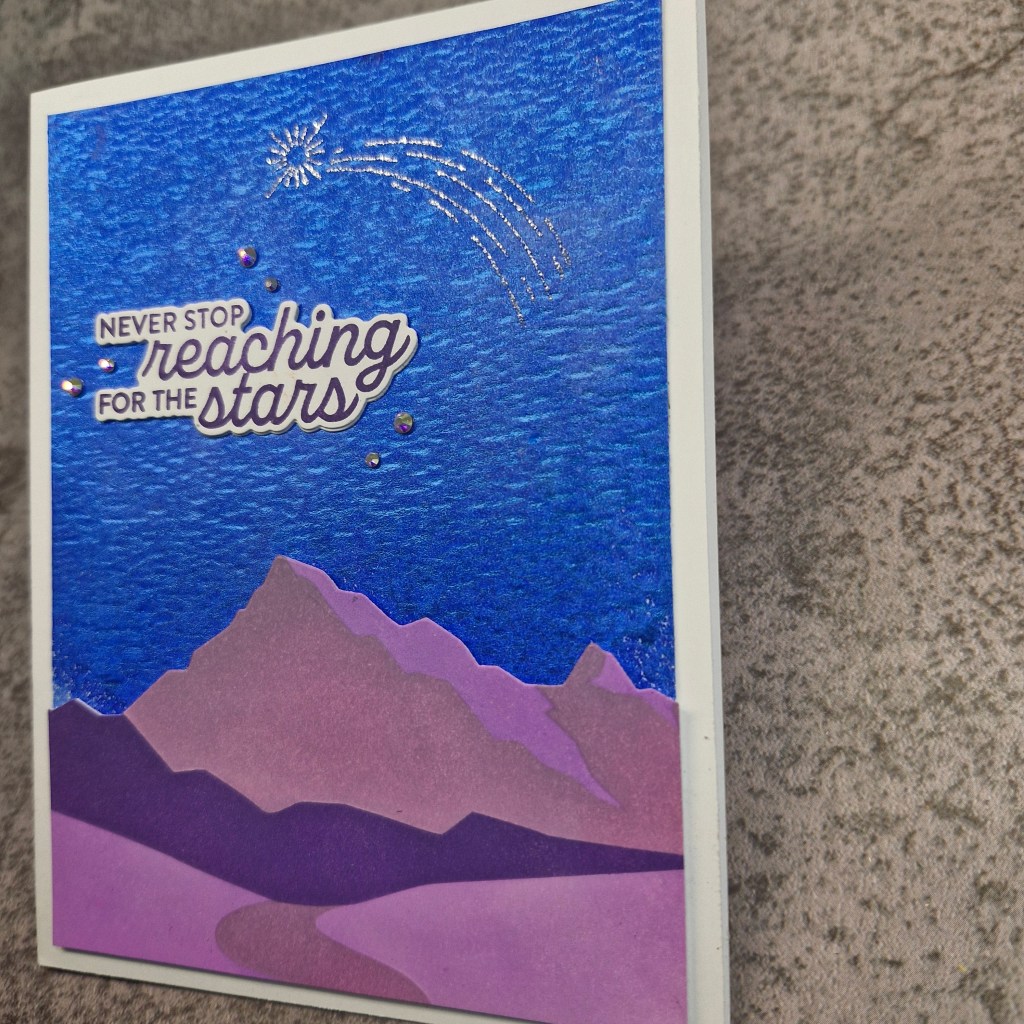
To make this card I used a die from ‘A Pocket Full Of Happiness’. This company is now being stocked in one of UK stores, and this die set is one of a few I bought.
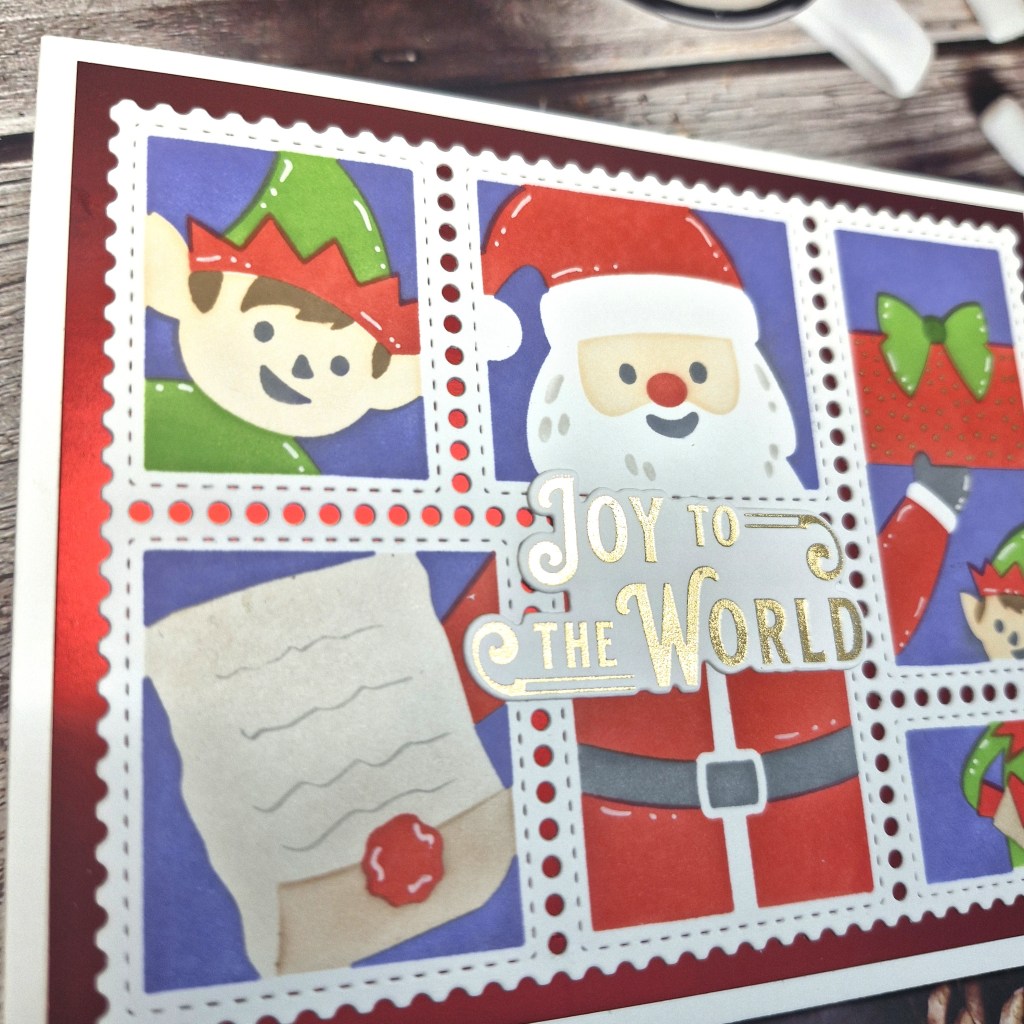
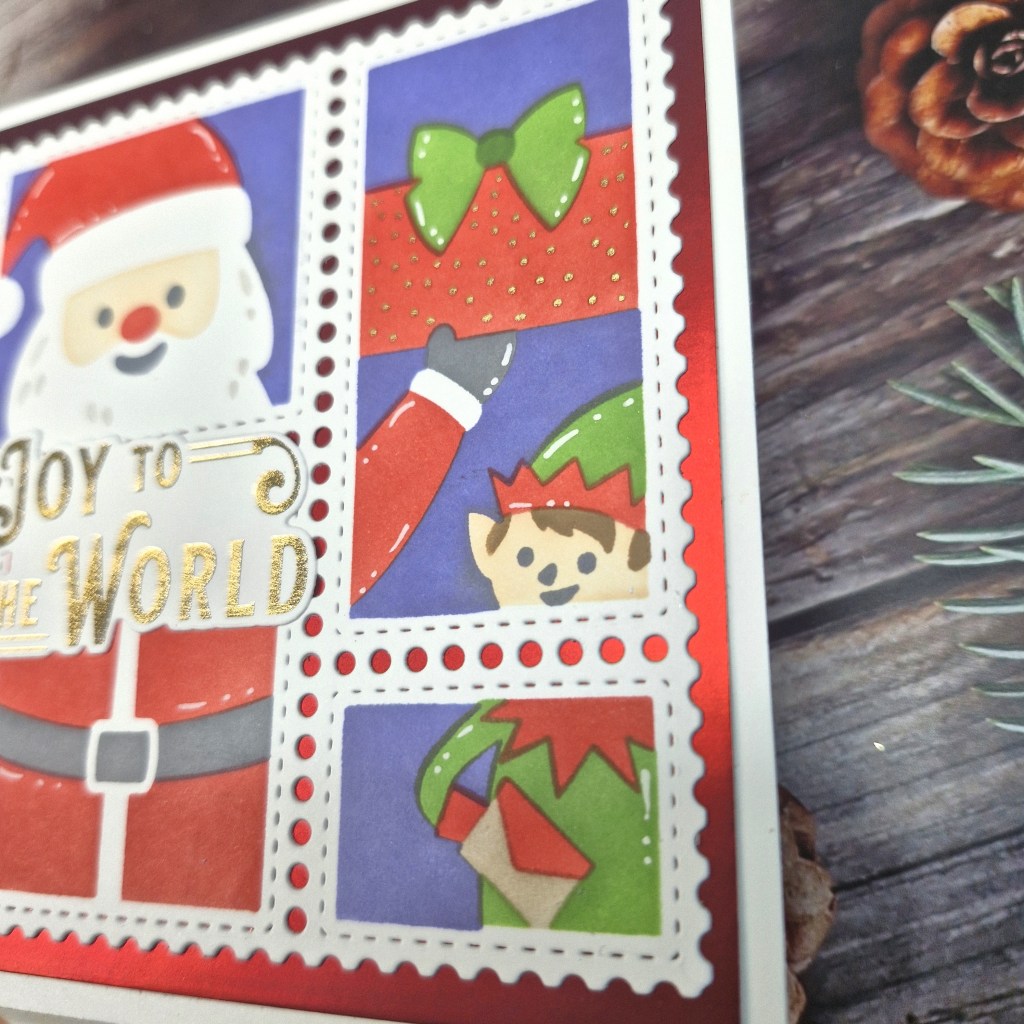
I used the die, then with each of the pieces which fell out, I ink blended, and then inlaid them back again. This was actually quite easy when using the Waffle Flower grip mat, and took very little time at all.
I chose to mat the white panel with black, and added to the front of the card base nearer the top, to make way for the sentiment.
The sentiment is also from the same floral die set, again die cut, then the fall-out letters ink blended and inlaid, matted again with a black piece of card.
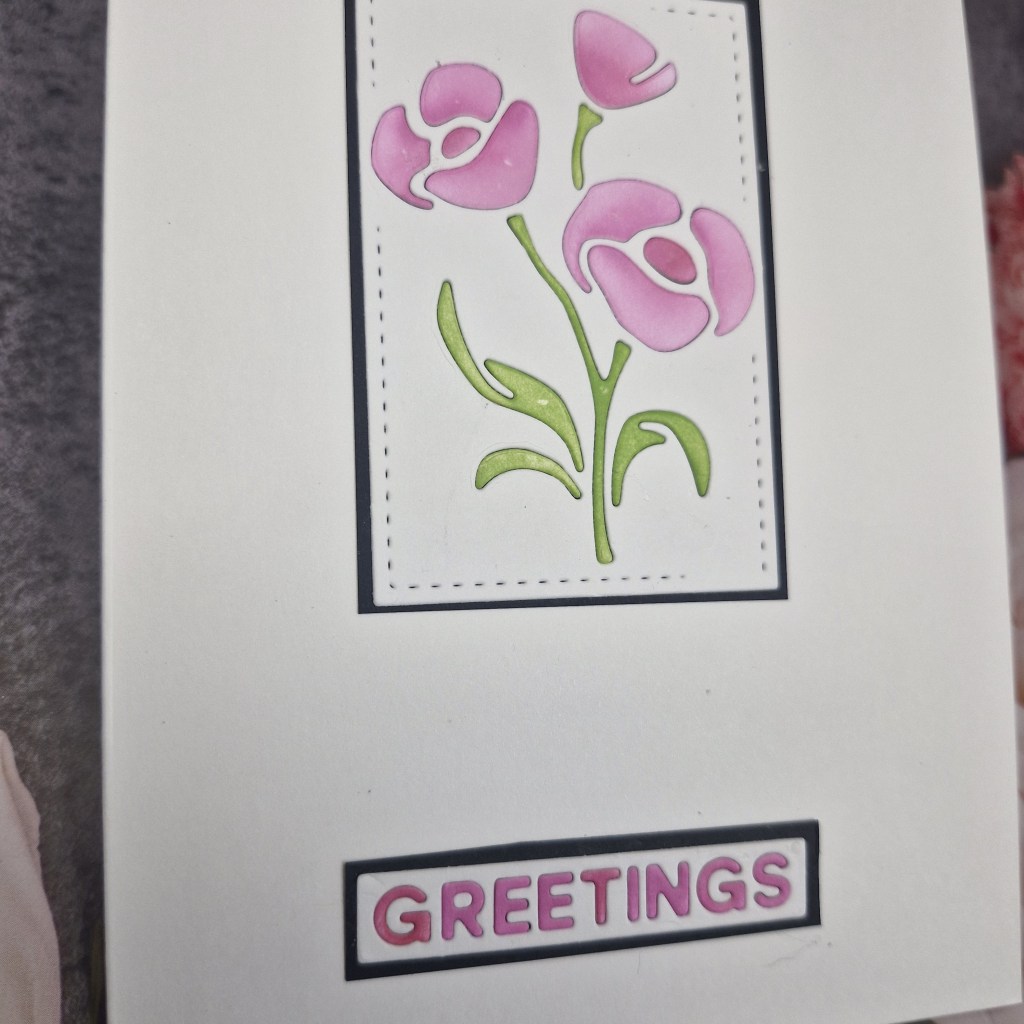
As you know, this is about as simple as I get – no embossing folder, no gems or jewels…..
I hope you can come and join us in our challenge with your ‘keep it simple; creations. xx
I shall be entering the following challenges:
Lil Patch Of Crafty Friends – anything goes
Everybody Art – anything goes
Addicted To Stamps & More – die cuts and/or stencils
Beautiful Blossoms – flowers – optional mood board
Die Cut Divas – anything goes with die cuts