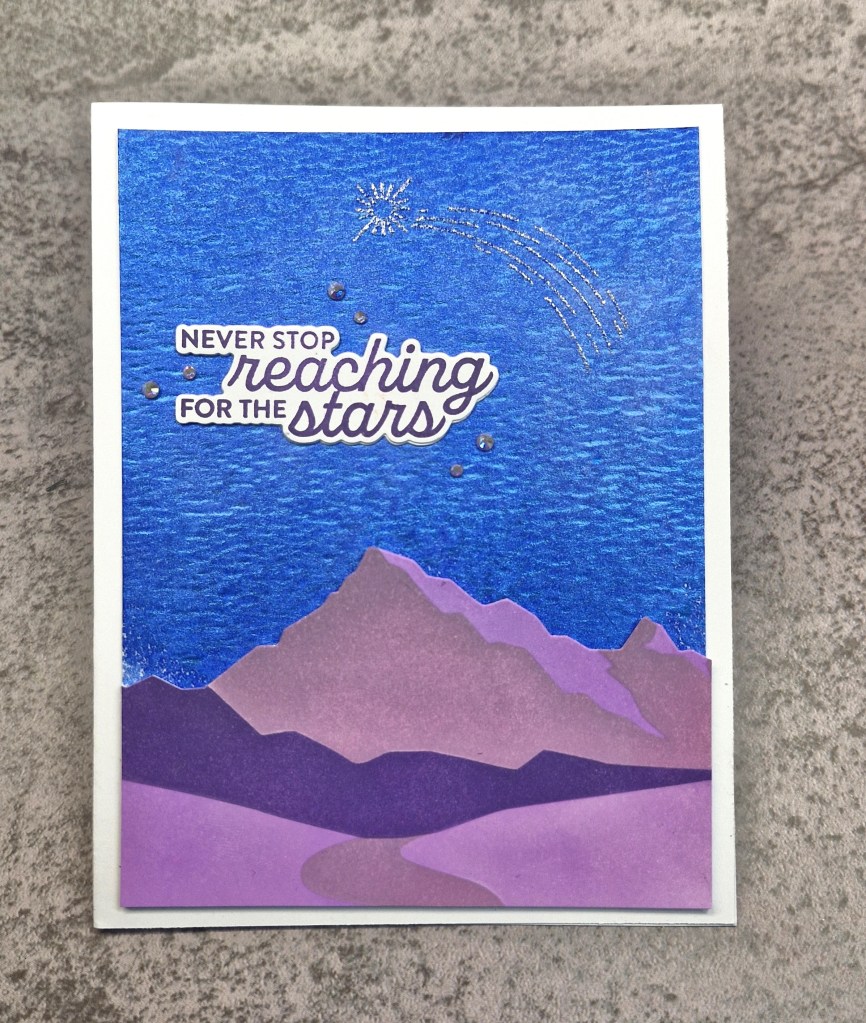
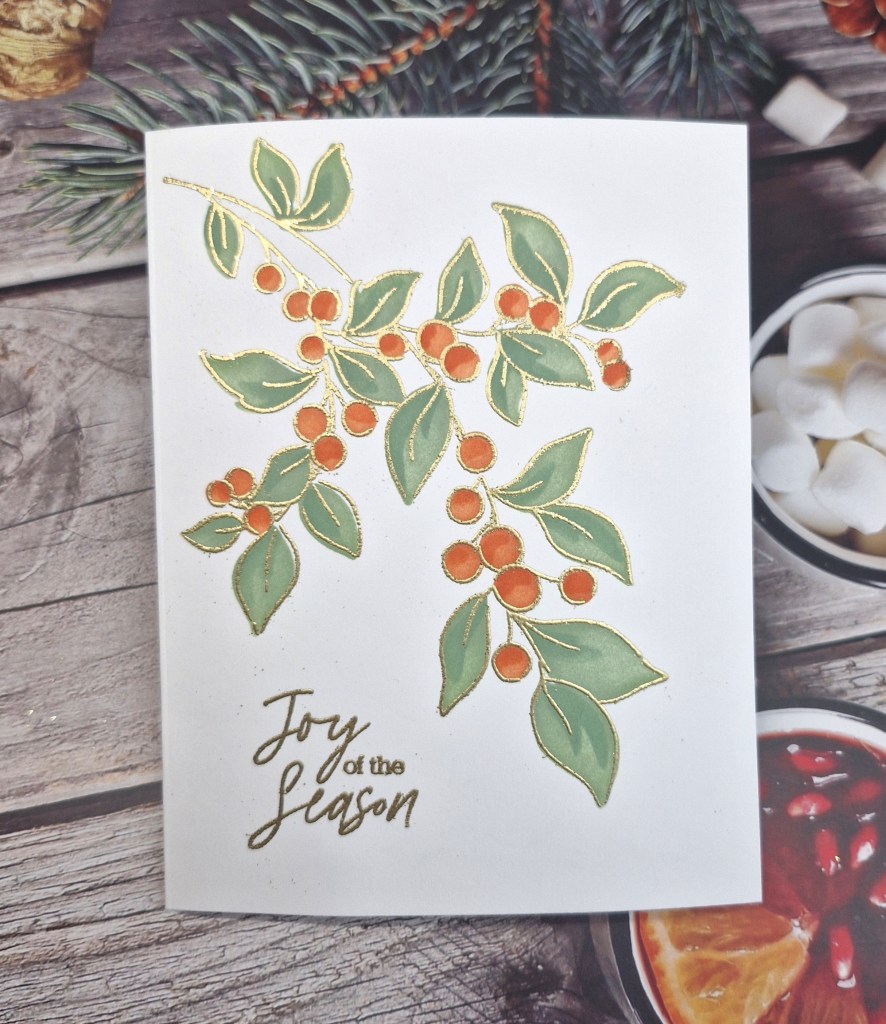
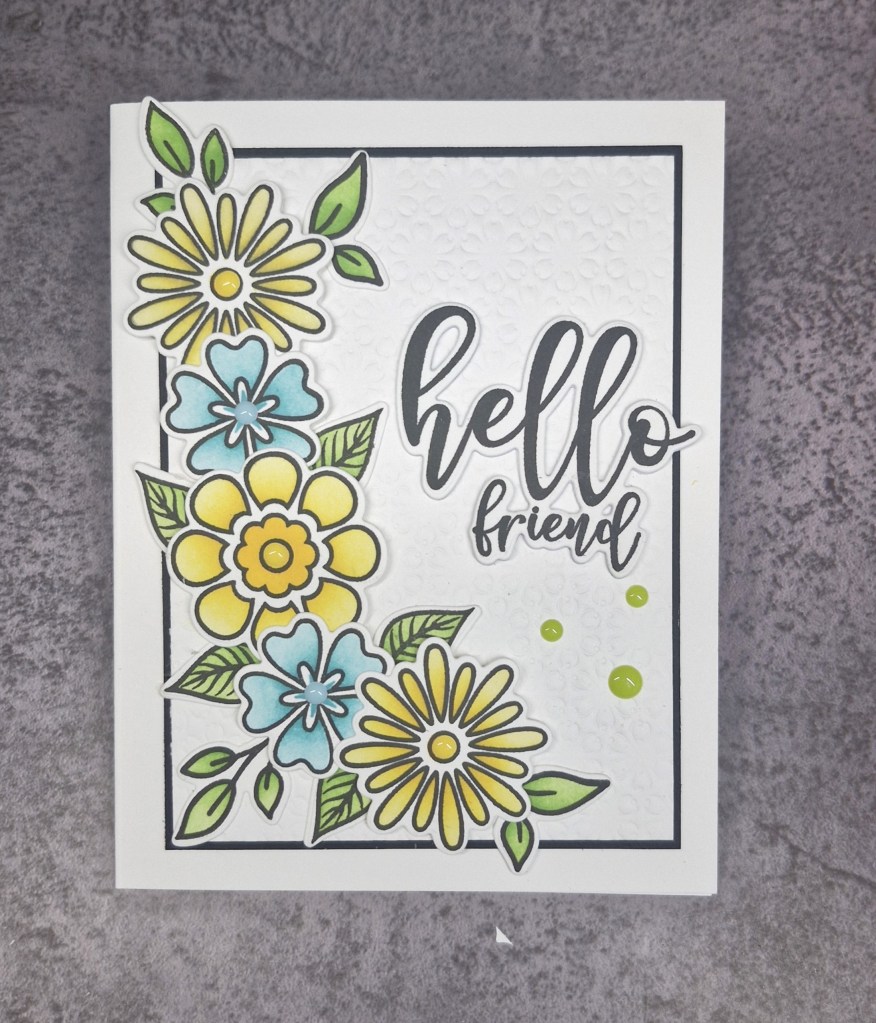
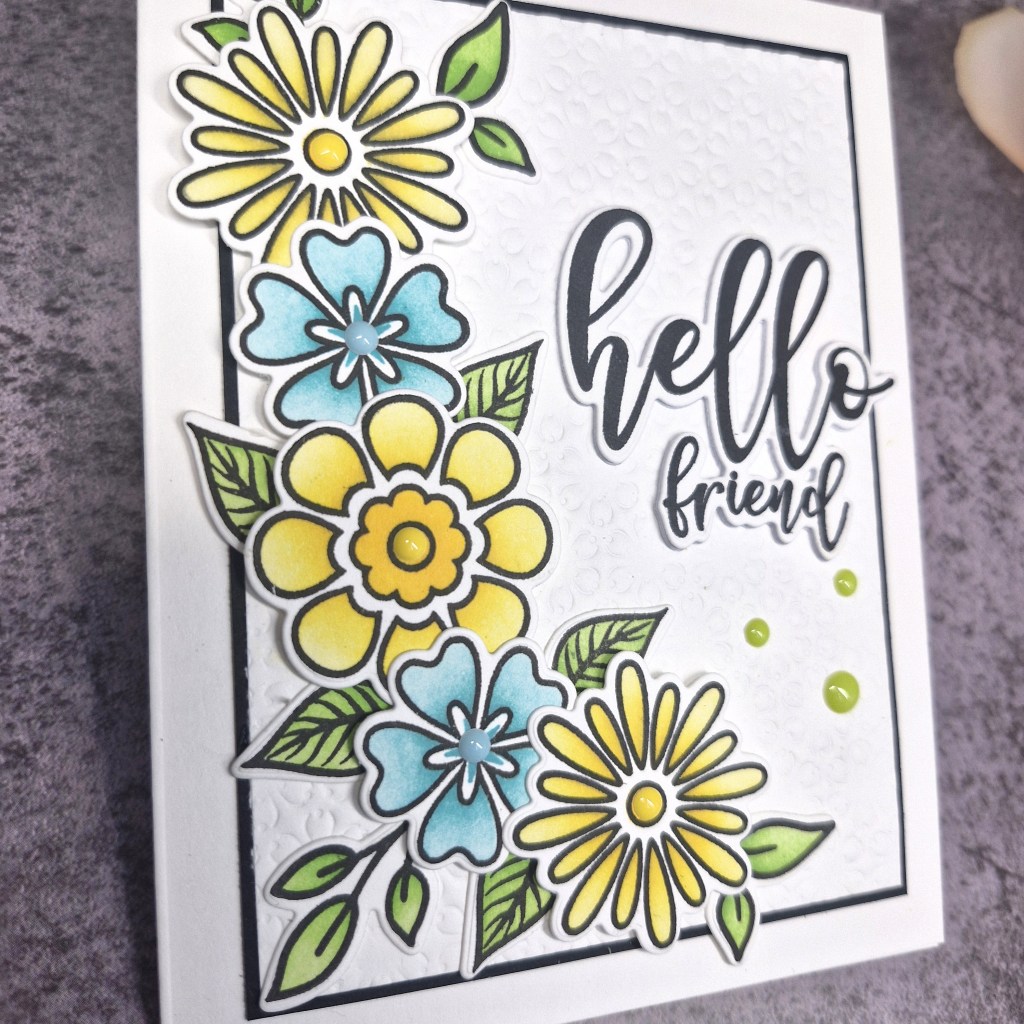
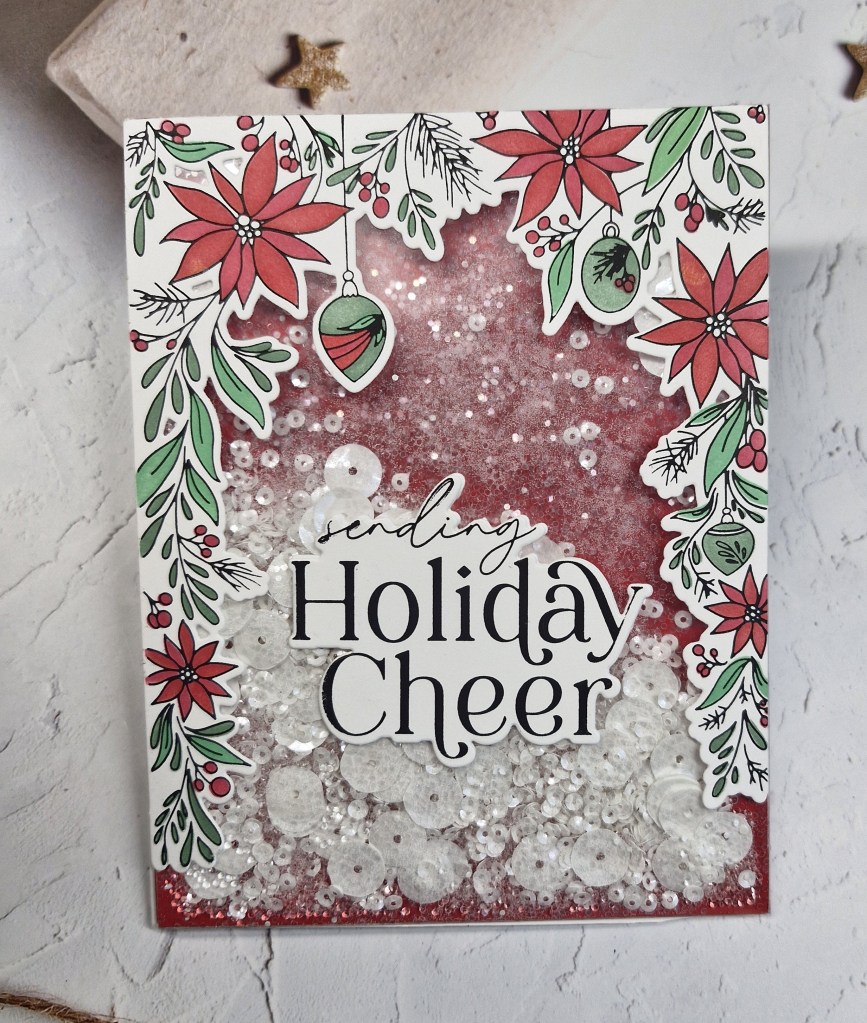
Hello once again. The Holly & Ivy Christmas Challenge has started a new challenge. The theme is always ‘anything goes Christmas’. Here is my card:
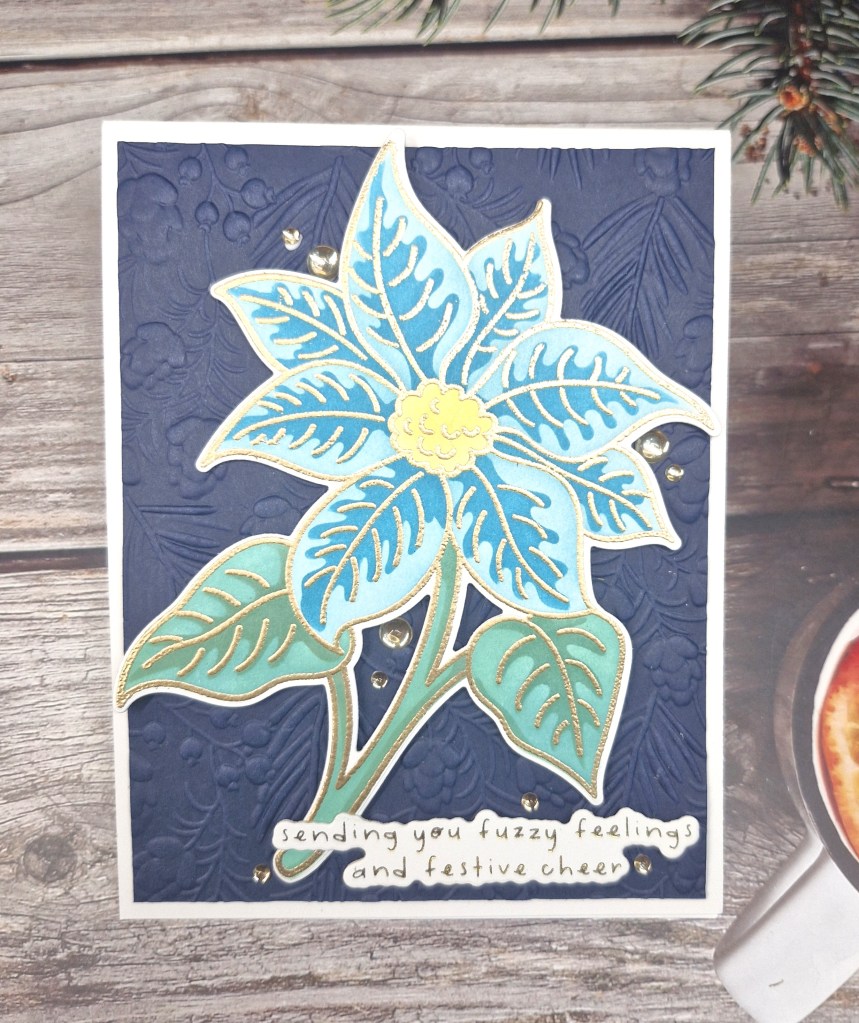
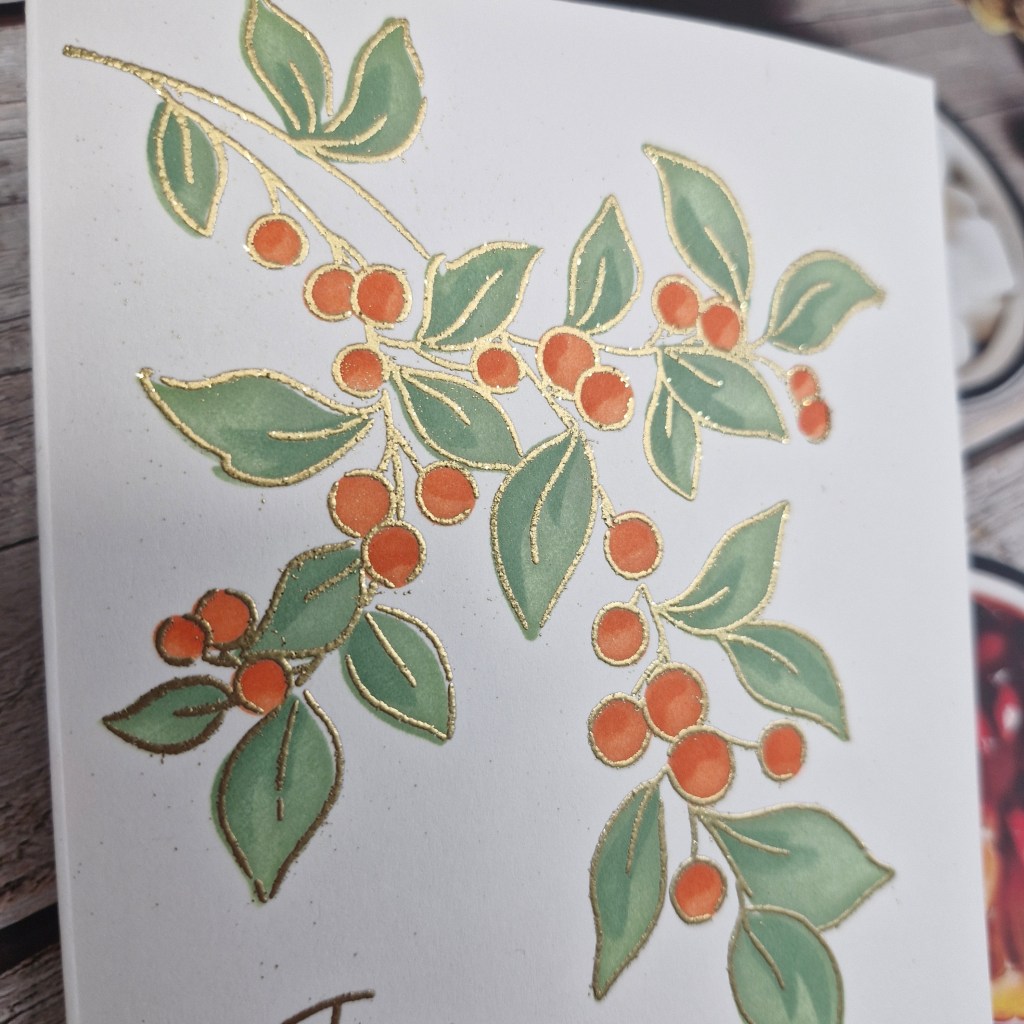
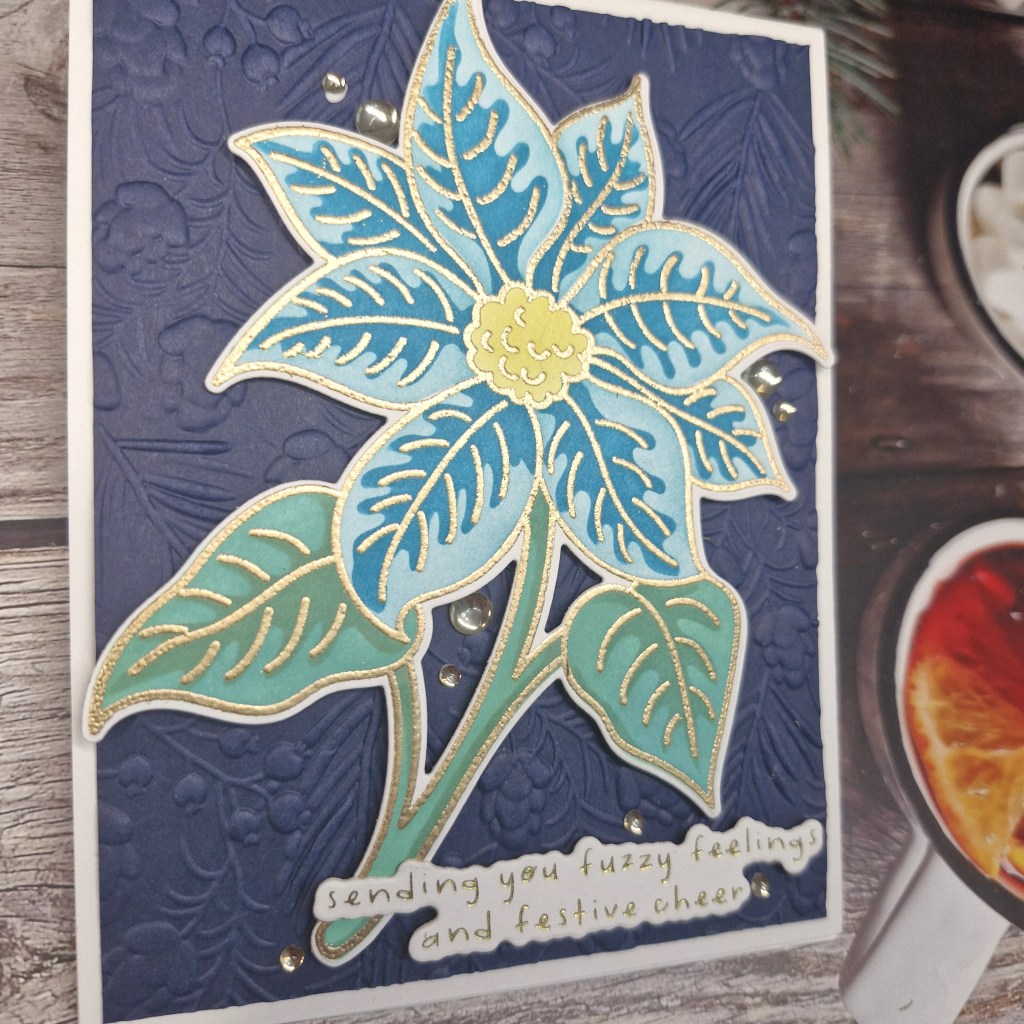
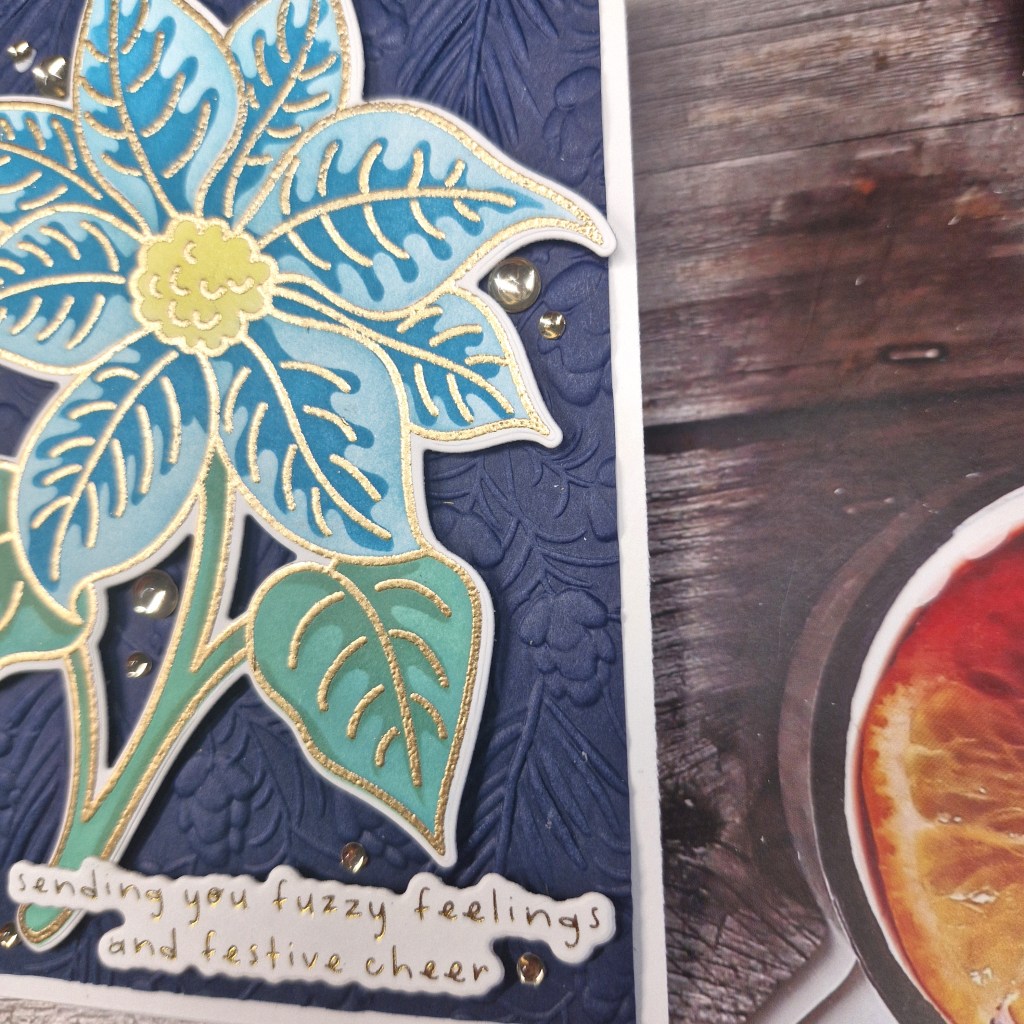
To create this card, I used the Waffle Flower Crafts ‘Sketched Poinsettia‘ stamp, die and stencil set. I first gold heat embossed the image with Altenew gold embossing powder, used the matching stencils to ink blend and colour the image in, then used the matching die to cut it out.
I used Pinkfresh Studio inks for the main floarl element.
For the background, I wanted a bold back-drop to the flower, so I used a dark blue card stock, and a Spellbinders embossing folder. This panel was cut slightly down to create a white edge.
The Spellbinders sentiment is gold foiled and die cut.
the elements were added as you see, and some dew drops added around and about.
I hope you can come and join, and I look forward to seeing you in our gallery. xx
I shall be entering the following challenges:
Die Cut Divas – anything goes with die cuts
A Cut Above – anything goes with die cuts
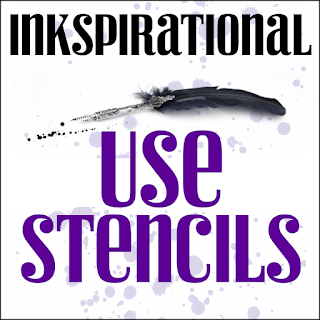
Stencil Fun – use stencils – option of nature taken
Merry Little Christmas Challenge – anything goes Christmas