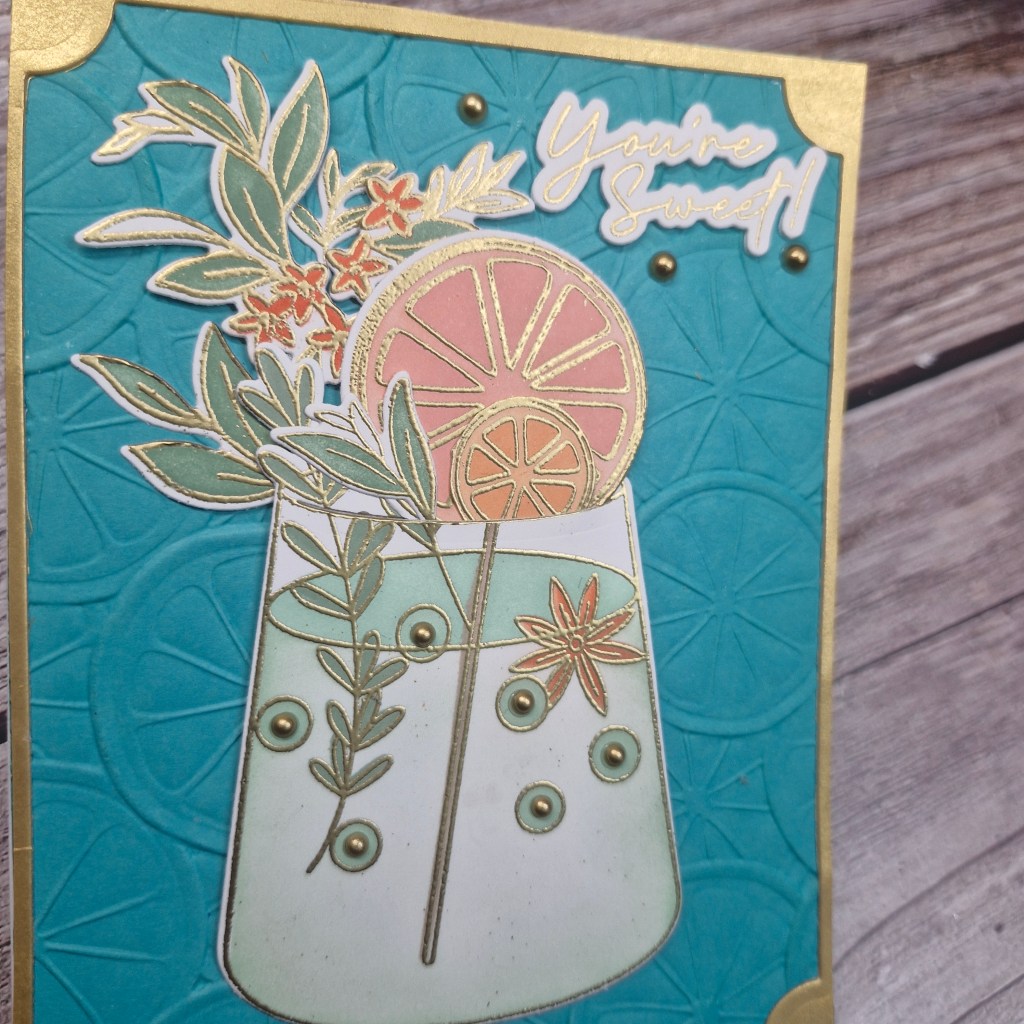
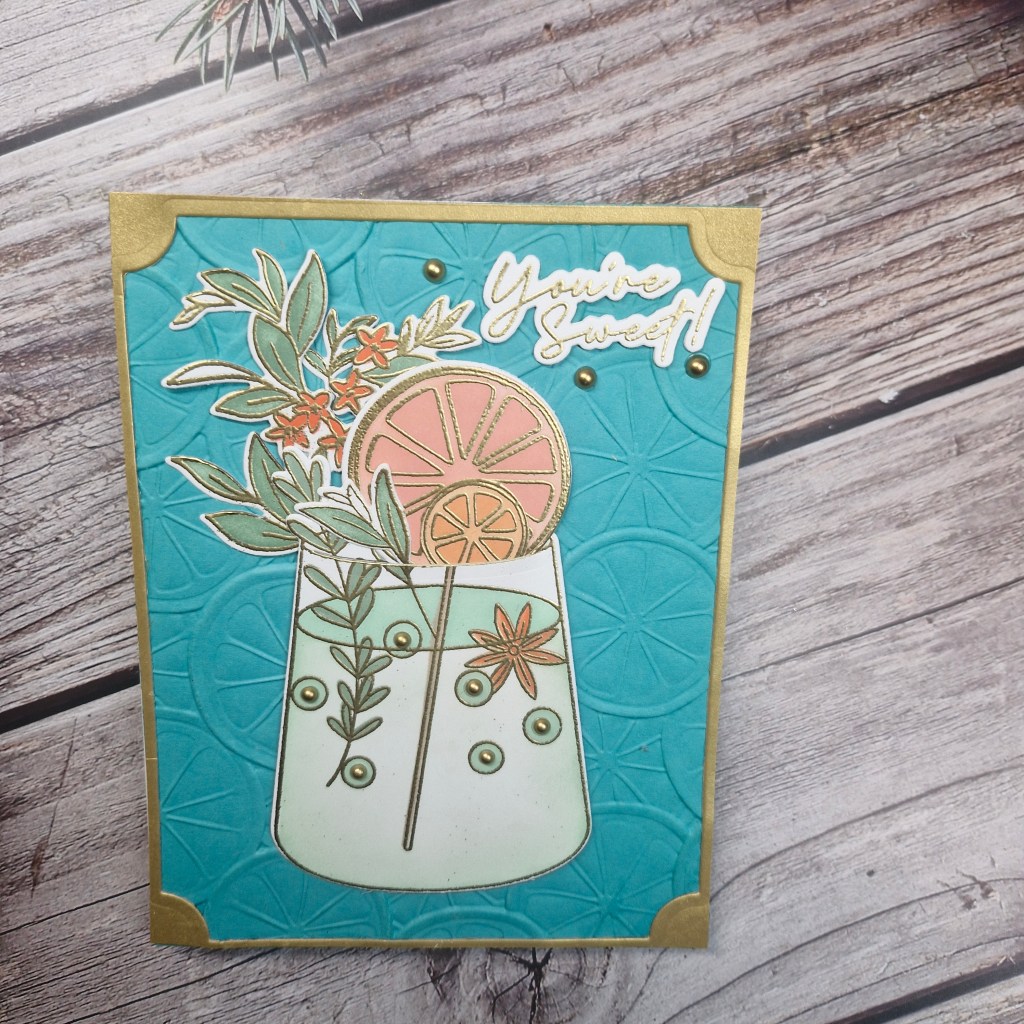
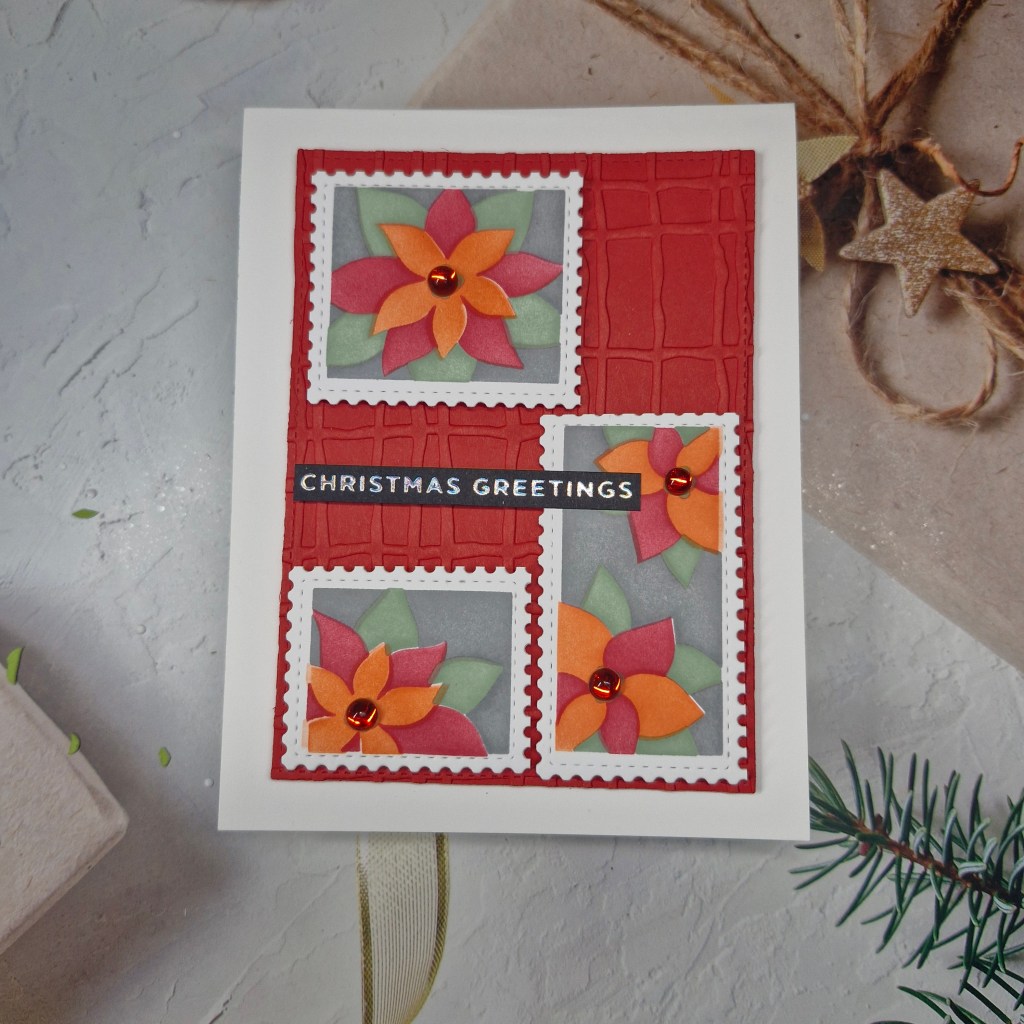
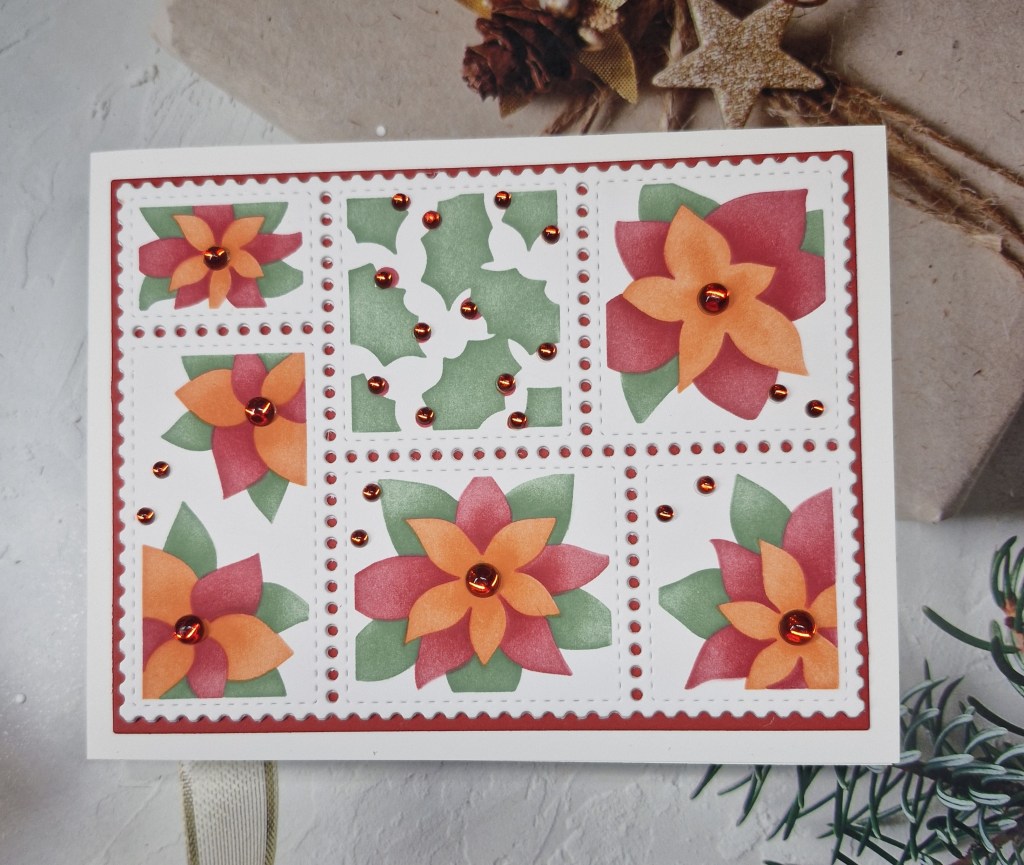
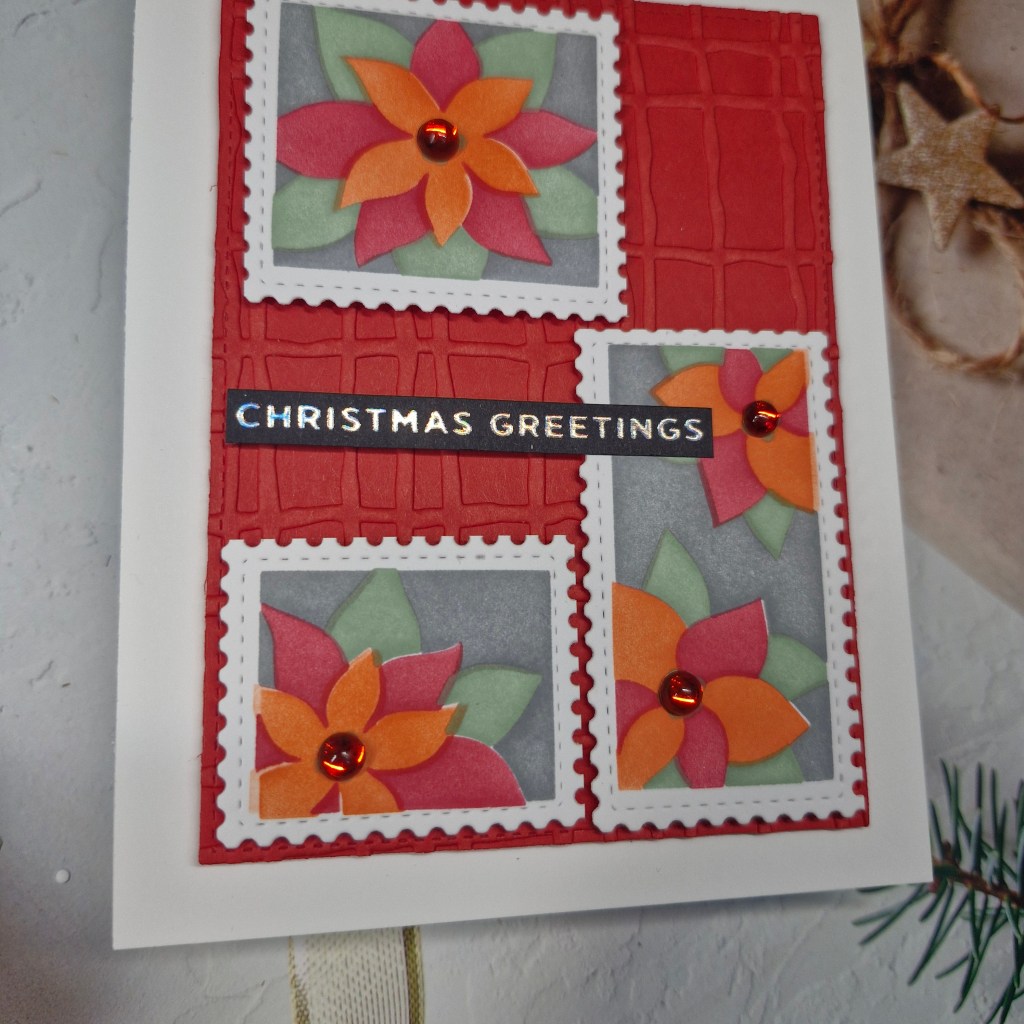
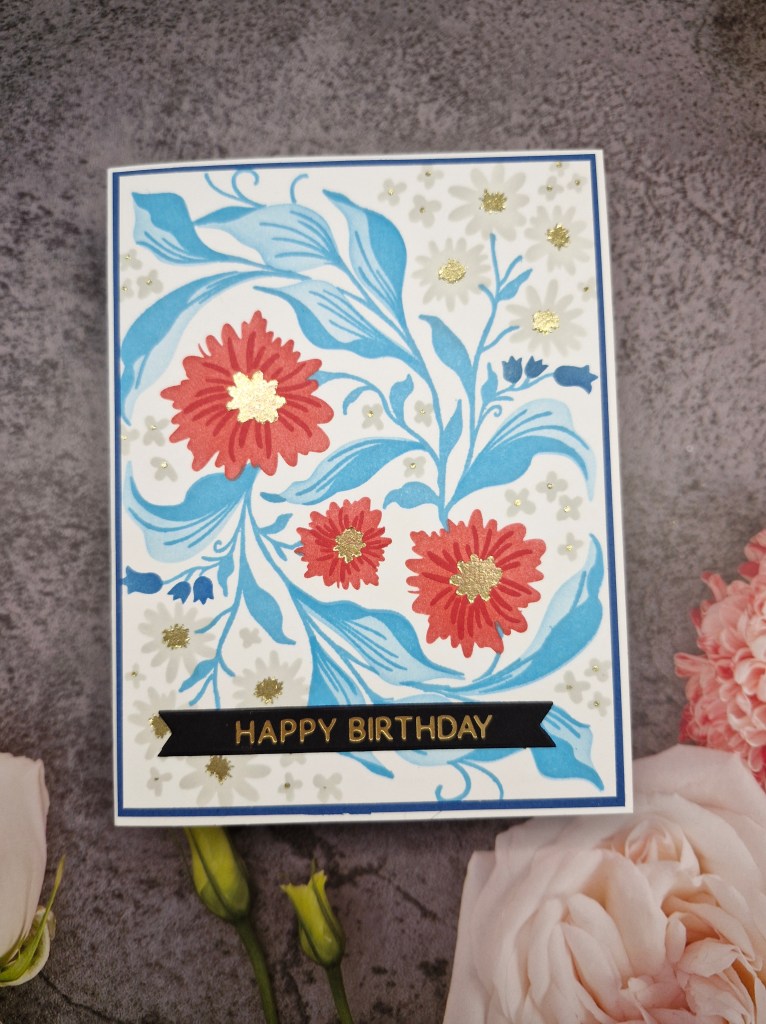
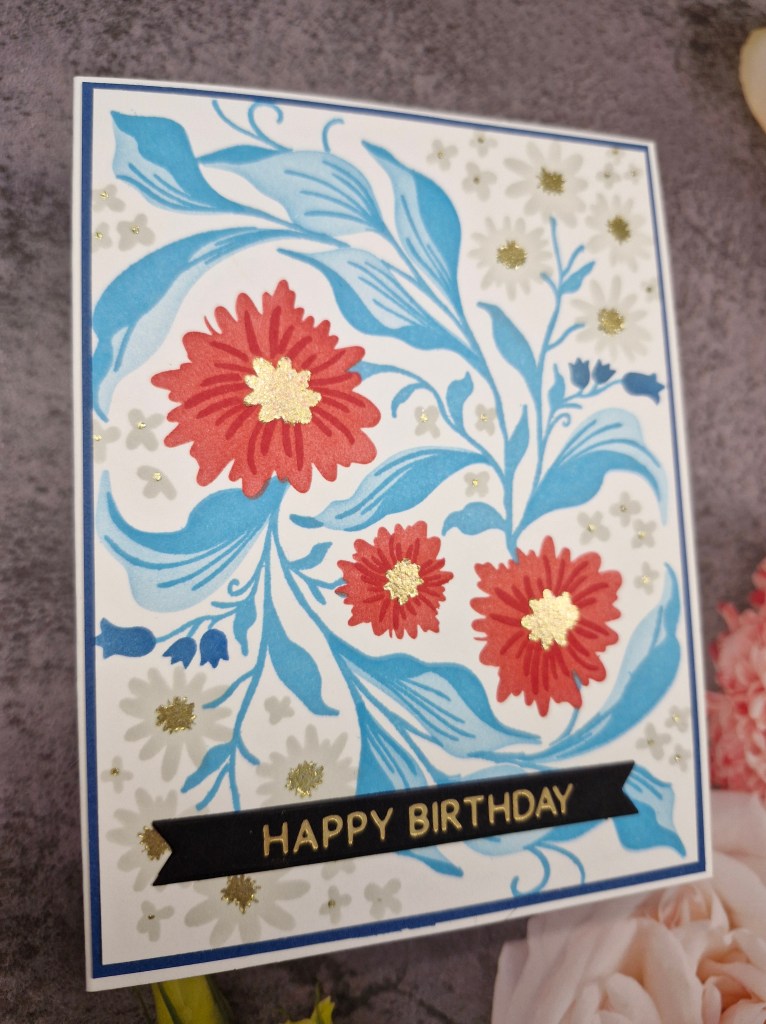
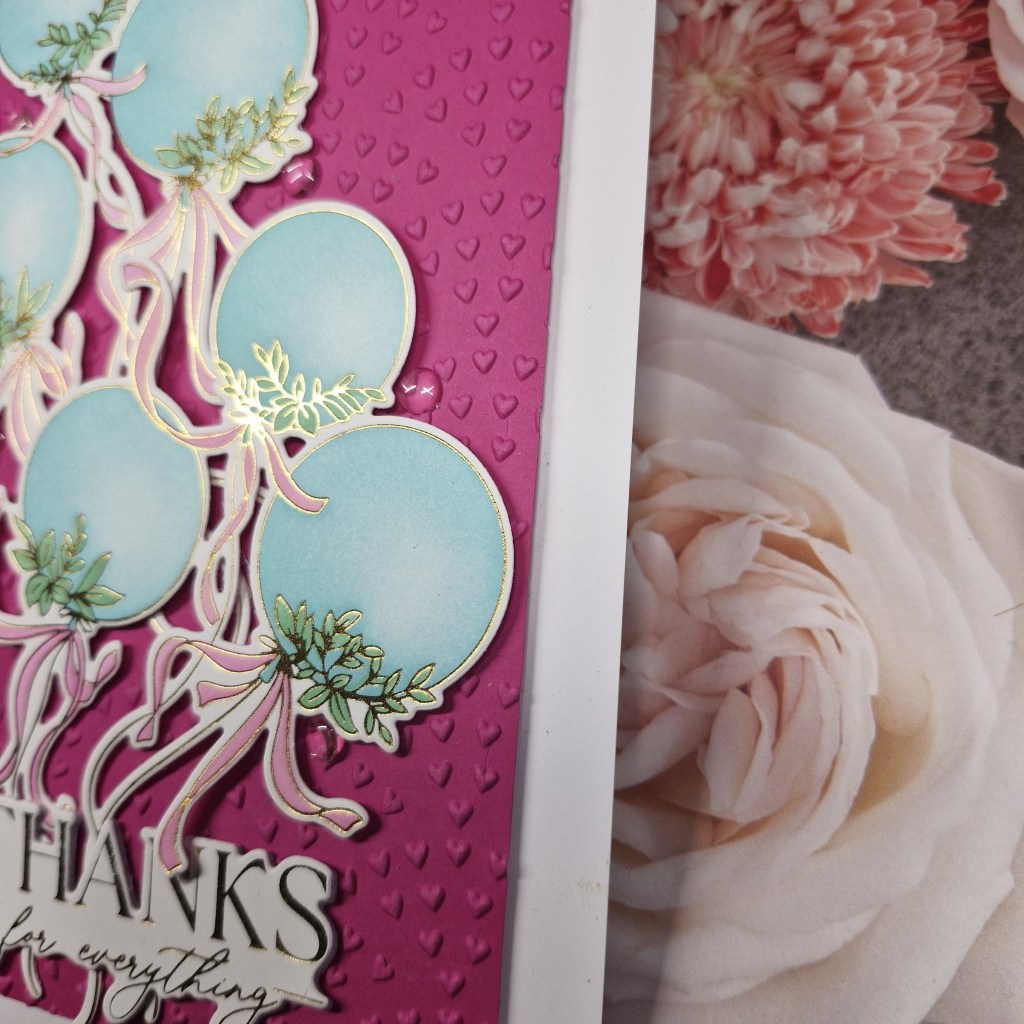
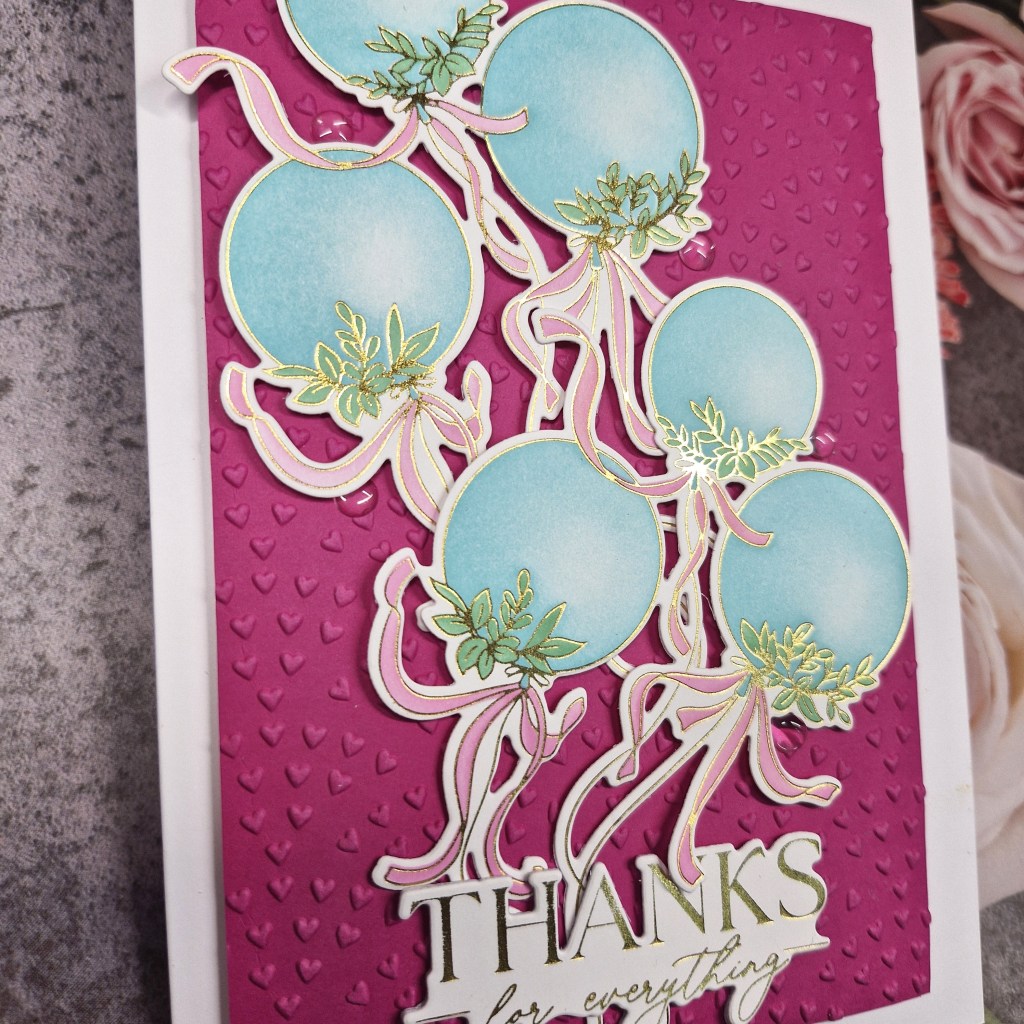
You’re Sweet

Hello everyone. I’m popping in to share a card created using the photo inspiration from the current Just Add Ink Challenge:

Here is the photo they used for inspiration:

And here is what I created:

I was inspired by the glass and the colour scheme, as well as the use of fruits.

I started by creating the background panel using Concord & 9th card stock and a Spellbinders embossing folder. This was then glued flat to a card base.

The glass, fruit, and foliage images are all from Pinkfresh Studio, and a mixture of a couple of sets.

The images were stamped then heat embossed with gold embossing powder, then all images coloured using the relevant layering stencils. I used Pinkfresh inks in a couple of coral and pink tones for the fruit, then a couple of green tones for the leaves.

The glass itself is actually from a Christmas/holiday set and was part of one of their virtual events, but I thought it would work for this and not be a Christmas card.

The glass has a notch cut into it near the top and into that I inserted the two pieces of fruit and a couple of leaves. The fruits all come die cut as one piece – several pieces altogether – so I cut them apart and picked the pieces I wanted.

I wanted to add a brushed gold frame, so die cut one out – then decided I liked the look of the ‘off cut’ from the frame – the outside piece we generally throw away – it seemed more suitable as it wasn’t too thick – thank goodness I centred in on the panel in the first place! The proper frame will be used on another project….

The glass and foliage were arranged on the panel, then I used low tack tape to pick the whole thing up – added thinner 3D foam to the back, then stuck it all down in one go. I little glue to some areas laying on the top.

The foiled sentiment was added – three layers altogether o make it more stable, and then brushed gold gems added as you see.

I shall be entering the following challenges:

Just Add Ink photo Inspiration

Love To Craftanything goes

Lil Patch Of Crafty Friendsanything goes

Crafty Catzanything goes – option to use a die taken

Creative Artiste anything goes mixed media

Using Stencils

Hello again. Cardz 4 Galz has started a new challenge. I am hosting this time round, and have chosen the theme of:

Use Stencils

Here is my card:

I chose to keep this a fairly simple design, but I did do quite a bit of masking and changing colours on the same stencil layer.

There are three layers to this stencil set, and I wanted each of the flowers to be different colours.

Once the flowers were complete, I then used a small blending brush and some light brown ink and went round the edges of each of the compartments, hoping to create a muted and vintage look to each of the small backgrounds. I then used the same light brown ink to splatter, and also to stamp some of the Royal Mail detail. I think it is great that Waffle Flower Crafts recognises us over here – love that idea.

Once dry, this was then die cut using the postage collage die.

I hope you can come and join us with your creations using stencils. xx

I shall be entering the following challenges:

Ally’s Angels anything goes

Beautiful Blossoms flowers/florals

A Perfect Time To Craftanything goes

Ellibelle’s Corneranything goes

Stencil Funuse stencils – option of hello/winter not taken

Stencilled Bauble

Hello once again. The Alphabet Challenge has reached the letter ‘R’, and Veronika has chosen the theme of:

R is for Round

Here is my card:

I used the Bibi Cameron ‘Snowflakes Ornament’ stencil set from Spellbinders.

The stencils were used direct onto the card base, and Pinkfresh Studio inks. There are several layers to each stencil, for different parts of the bauble. There are actually two bauble sizes, and I chose to do the largest.

Once the bauble was stencilled, I then used the mask over it and splattered with silver sparkle acrylic paint, and then again with one of the blue inks used for the stencilling.

The sentiment is foiled using a Lawn Fawn hot foil set, then die cut with the matching die and attached with wet glue. I then added some clear gems for a little more interest.

I hope you can come and join us following our theme. I shall be entering the following challenges:

12 Months of Christmas Link UpChristmas, option of stitched up not taken

Stencil Fun use stencils, option of sparkle or shine taken

Everybody Art Challengeblue tones

Crafty Catz Weekly Challengeanything goes, option of blue Christmas taken

Ally’s Angelsanything goes

Ellibelle’s Corner I Spy something for Christmas

Thinking Of You

I had more time to use some new products from Altenew yesterday:

The image is a combination of an embossing folder and layering stencils to colour the image. I tried a couple of ways of doing this – stencilling first then embossing, but for this version I used the embossing folder first, then used the stencils to colour. I liked how the embossing enabled some colour variation within the leaves themselves.

The leaves were ink blended with pink, and the Pinkfresh Studio frame was die cut using a teal card stock. The panel and frame were layered onto a white card base, the foiled sentiment added, and three silver Pinkfresh Studio silver gems also added for a little bling.

I shall be entering the following challenges:

Color Hues Pink and Aqua

Creative Fingersanything goes

A Perfect Time To Craft anything goes

CYHTPembossing folder – option of winter fun not taken

Poinsettia Collage

Hello there. I have been playing with a collage stencil from Waffle Flower Crafts:

Following the colour choices for the current Color Throwdown Challenge, I made a couple of variations.

The first card, I used all the stencils, including the background for each tile. Using Pinkfresh Studio inks, I stencilled the background with a medium grey, then used the orange, red, and green on the next layers. I cut apart the collage tiles, and chose the images I wanted for the card.

The background panel was cut down and then dry embossed using a Spellbinders embossing folder. The images were then laid out and attached with 3D foam pieces, before adding the foiled sentiment. The final touches were some red pearls in the centre of the flowers.

For the second card, I didn’t use the background stencil, only the three layers for the leaves and the flowers, and I also used the same three colours of inks.

I die cut the background collage die several more times and layered them together with the stencilled piece, instead of using 3D foam pieces.

The white card base, a red panel showing around the edge and through the holes of the collage die, and glued together.

I added more of the red pearls – the centre of the flowers, the red berries on the holly, and a few more for good luck……

Personally, I think I prefer the stencilling without the grey background – but that may be the colour choices I made. I will play around with colours a little more – loving the collage stencils – and perhaps post some more variations.

I shall be entering the following challenges:

Color Throwdownorange, moss, cranberry

Beautiful Blossomsflorals

Addicted To Stampsdie cuts and stencils

Creative Fingersanything goes

Polkadoodle anything goes

Aud Sentimentsglitter and/or Christmas and a sentiment

Christmas (or not) Bingo column O – stencilling, free, pearls

Love To Craft anything goes

Merry Little Christmas Challenge anything goes Christmas

Season’s Greetings

Hello once again. I have had a little play with some new layering stencils from The Greetery:

This was actually quite fiddly to do as I wanted different colours on the same stencil layer. It did take me quite a while for each layer, and the very small blending brushes did come in handy for all those smaller places. I used some low tack tape to mask areas off which were near to each other, but generally had fun with the colours.

I used Pinkfresh Studio inks, as they come in four shades of each colour-way – which also made things a little easier.

The sentiment is from Concord & 9th. It is a sentiment which is joined together, and instead of cutting the stamp apart, I used tape to mask off each of the words at a time, to stamp in the spaces. I really had to concentrate to remove the tape before stamping – a mistake I have made on previous cards – and one you don’t really forget!

I then cut the panel down slightly, matted it with a red card stock, then added to a white card base.

No additional elements, no bling, no gems – I think this looks good just as it is.

I shall be entering the following challenges:

12 Months Of Christmasanything goes Christmas, option to use chevrons not taken

Peace On EarthChristmas anything goes

Inkspirationalseasonal

Lil Patch Of Crafty Friendsanything goes

Simon Says Stamp Monday Challenge stencil it

Crafty Catz anything goes – option to use dies/punches not taken

Ally’s Angelsanything goes

Ice Skates and a Present

Hello again. It is my turn to host the new challenge at ABC Christmas Challenge. We have reached the letters ‘S‘ and ‘T‘ and we want to see your Christmas creations with the following themes:

S is for stencils, and T is for traditional Christmas Colours

I chose to create a card for each of the themes.

The first card is using some layering stencils from Spellbinders:

These stencils were created directly onto the card base, first ink blending the bow, then adding the mask to the bow and ink blending the foliage.


I added the foiled sentiment, then some purple gems around that sentiment.

The second card is also using Spellbinders:

The background panel was embossed using an embossing folder, then some light blue ink gently swiped across it. The snowflakes picking up a slight blue tinge.

The skates and the foliage were die cut and layered together, then all elements added to the card base until I was happy with the arrangement.

The finishing touches were the gems for the centre of the poinsettias, and a foiled sentiment.

I hope you can come and join us with your Christmas creations following one or both of our themes. I look forward to seeing you in our gallery. xx

Christmas Lantern

Hello once again everyone. ABC Christmas Challenge has reached the letters ‘L’ and ‘M’. The themes this time round are:

L is for Lanterns

and

M is for Music

Here is my card for the Lantern theme:

This card was made from the products received as part of the Pinkfresh Studio ‘Create and Connect’ February 2024 virtual event.

The background panel was created using a stitched panel, and glued down to the card base.

I then die cut the frame out of gold glitter card stock, adding it with 3D foam so I could tuck some elements beneath it.

The lantern and foliage were stamped and gold heat embossed, and then ink blended using the matching layering stencils.

A gold foiled sentiment then added to complete the card.

I hope you can come and join us with your Christmas creations following one or both of our two themes. xx

I shall be entering the following challenges:

Merry Little Christmas Challengeanything goes Christmas

Love To Craft anything goes

Mix It Up anything goes – option of inlaid die cut not taken

Lil Patch Of Crafty Friendsanything goes

Craft Rocketno designer paper

Sparkles Forum Christmas Christmas and use dies

MAWTTearly Christmas

Stencil Funuse stencils – option of birthday not taken


Birthday flowers

Hello again. A little time to craft today to create this card:

Using the colors for the current Color Throwdown Challenge, I used some new layering stencils from The Greetery. The inks are from Pinkfresh Studio, the same colour but stamped a couple of times to create a darker colour, and the centre of the flowers was using some gold Tonic Studios paste.

This panel was then cut down slightly layered with a blue card stock, then adhered to the card base.

I shall be entering the following challenges:

Color Throwdownred, gold, navy

Simon Says Stamp Wednesday Challengestencil it

Cupcake Inspirationsflowers

Addicted To Stamps and Moremake your mark

Triple B birds and/or butterflies and/or blooms

Stencil Fun use a stencil – option Spring/flowers taken

Beautiful Blossomsflowers

Cherry Blossom Birthday

Hello there. I have another floral card today, created by using some layering dies from Pinkfresh Studio:

This set consists of layering stencils and dies. All the flowers and leaves are on one stencil with the different layers labeled and segmented. The die is one piece to cut the whole of the images out.

I used some pink and green inks, with grey for the branch. After die cutting the panel, I decided to do another so I had more images to play with and cover the card panel.

The background is a die cut with matt gold layered behind.

Once the flowers were arranged, I snipped any that were hanging over the edge, and added them also into some more open areas.

The sentiment was added – a previously prepared foiled strip.

I shall be entering the following challenges:

Here Is A Place To Start anything goes

Addicted To Stamps any occasion

Cut It Updie cuts and Happy Birthday

Lil Patch Of Crafty Friends anything goes

Ally’s Angels – anything goes

Beautiful Blossoms flowers