ABC L & M

Hello everyone. We are starting a new challenge at ABC Christmas Challenge. Our challenge is all about Christmas, and getting your stash ready for the end of the year, and we always have themes to follow for each of the letters. This time, our themes for the two letters are:

L is for Let It Snow

&

M is for Mice

Here are my cards:

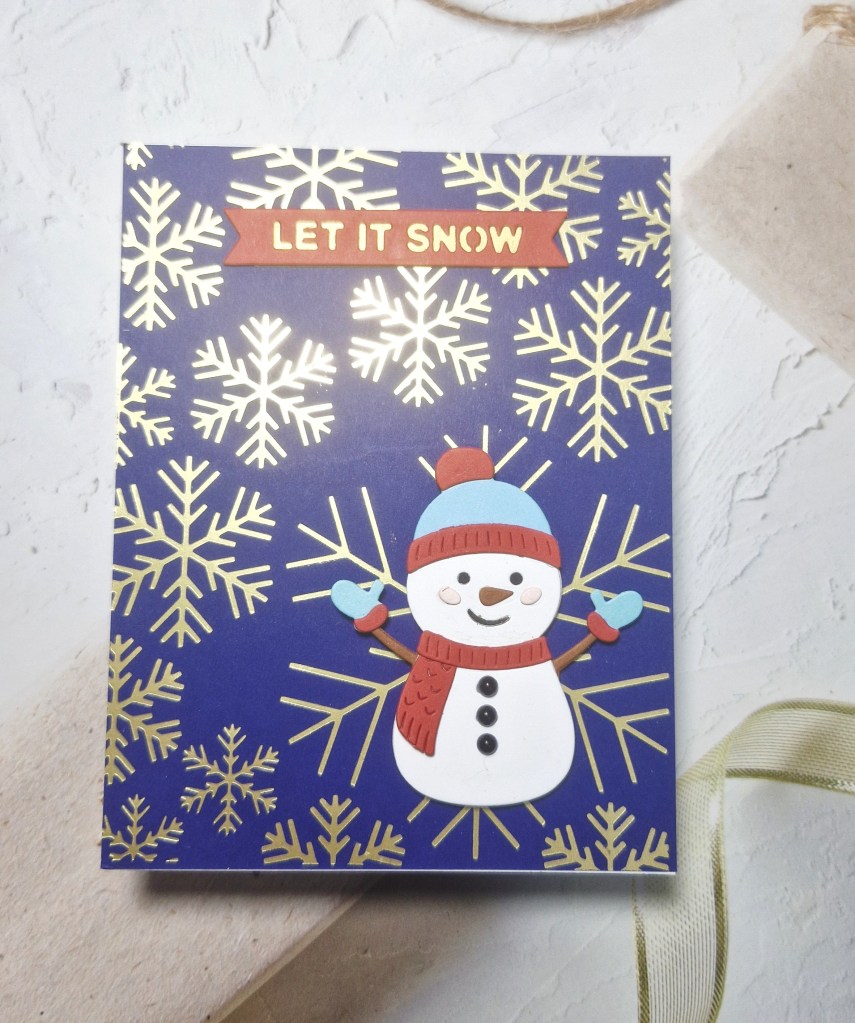
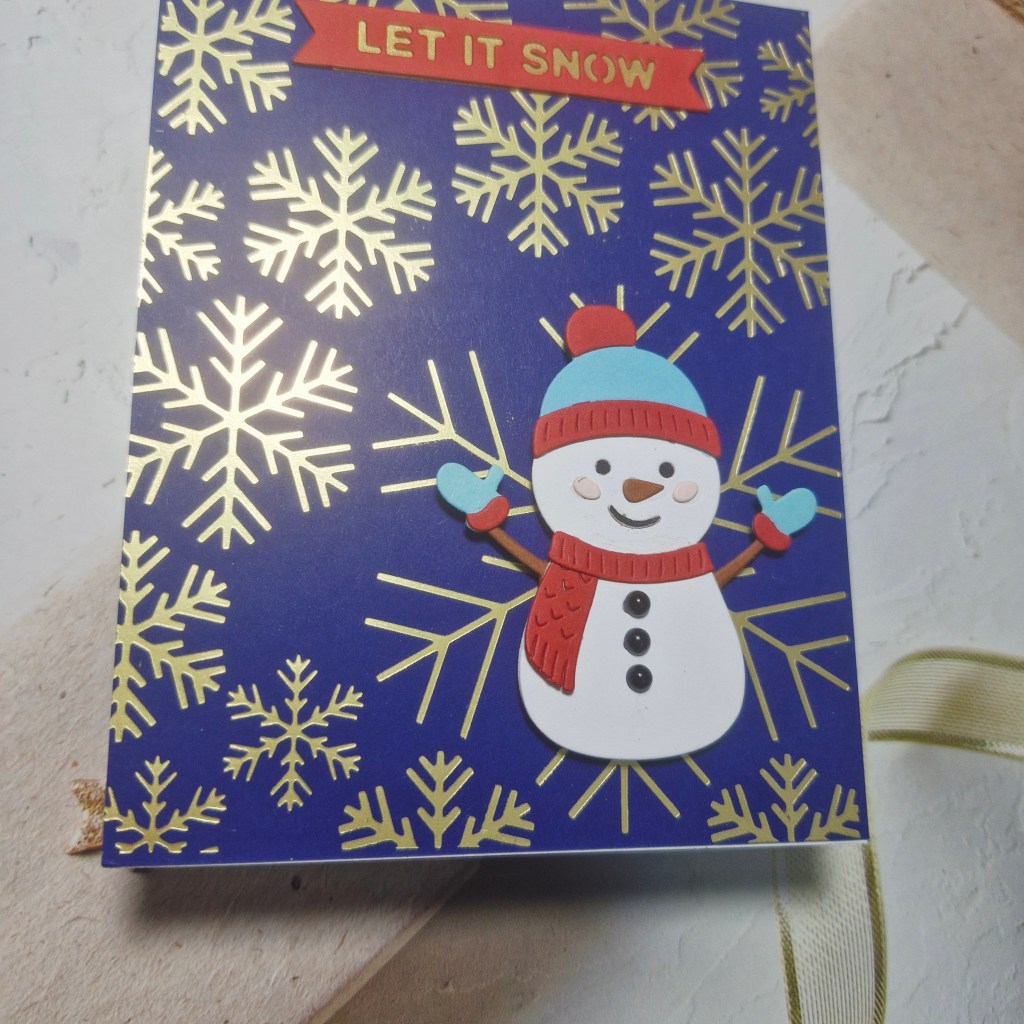
L is for Let It Snow

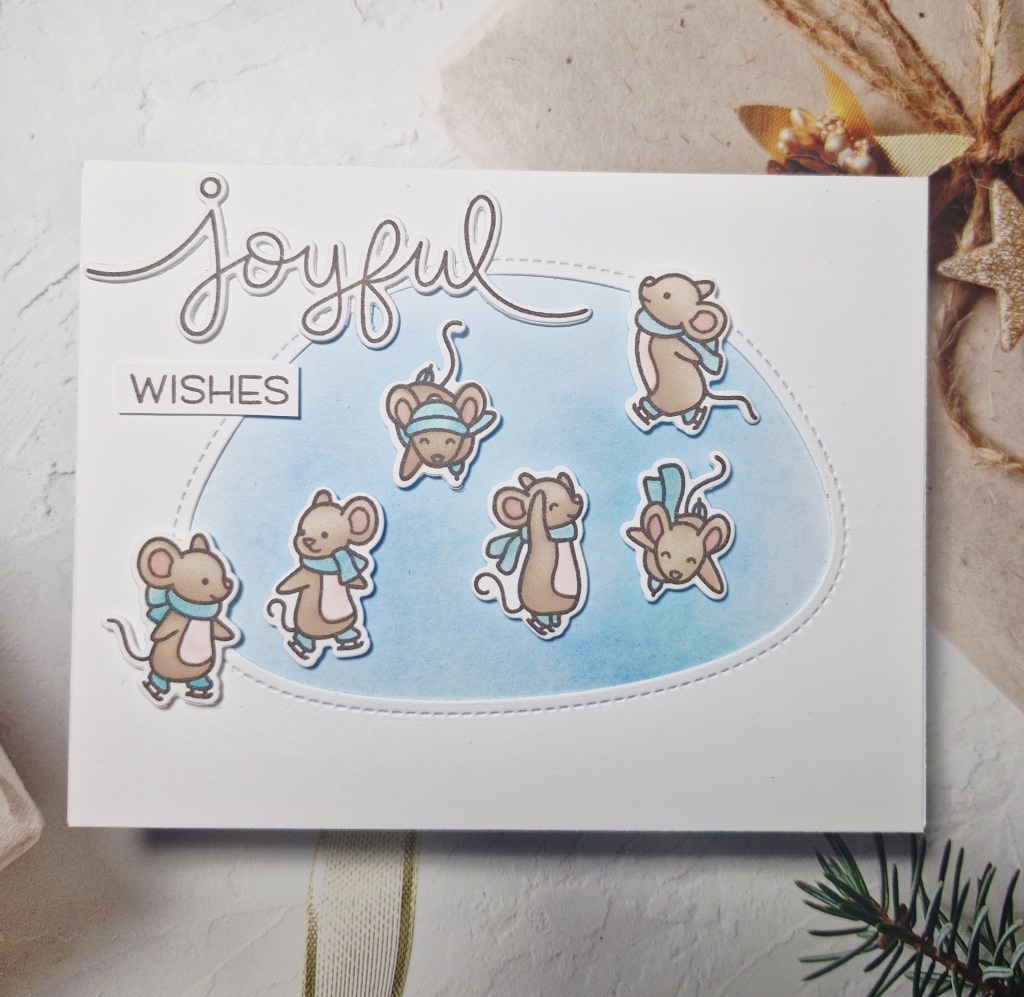
M is for Mice

For my first card, I used a Spellbinders hot foil plate and gold foil onto a dark blue panel. I also went around the edges of the panel after foiling with a lightly darker blue to create a halo effect.

The snowman is from a Simon Hurley/Spellbinders die set, and Concord & 9th card stock. The sentiment is also from the same die set, and backed with a piece of gold. Little black gems were added for the buttons on the snowman.

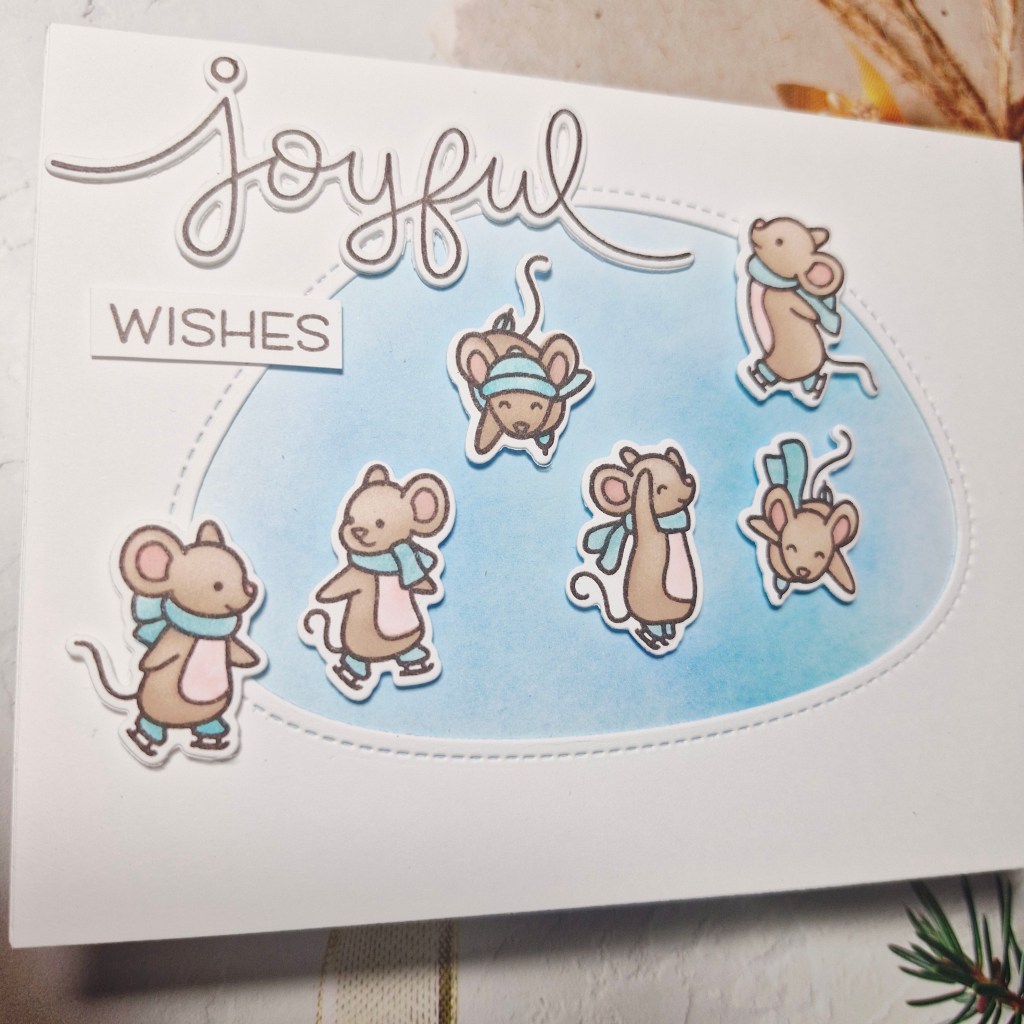
For my second card, I absolutely had to go with some Lawn Fawn mice and the stamp, die and layering colouring stencils called ‘Mice On Ice‘.

The images were stamped, then the stencils used to ink blend their colouring, then the matching dies to cut them out.

I also used one of their ‘Stitched Den‘ dies to create the opening in the white panel to represent iced lake, and backed that with a piece of light blue card stock which I ink blended slightly with a light blue ink.

The blue panel was adhered to the card base, the white layer added on top, then I played around with the placement of the mice until I was happy, adding them with 3D foam.

The sentiment was stamped and die cut then added as you see.

I hope you can come and join us with your Christmas creations following one of both of our themes. xx
I shall be entering the following challenges:

Snowman card:

Girlz Creative Christmas – anything goes Christmas

Merry Little Christmas Challenge – anything goes Christmas

Peace On Earth – anything goes Christmas

12 Months of Christmas Link-Up – anything goes Christmas, option of marble background not taken

Mice card:

Critter Crazy Challenge – anything goes with a critter

Crafty Animals – anything goes with an animal

Crafts Galore – anything goes

Peaches & Cream

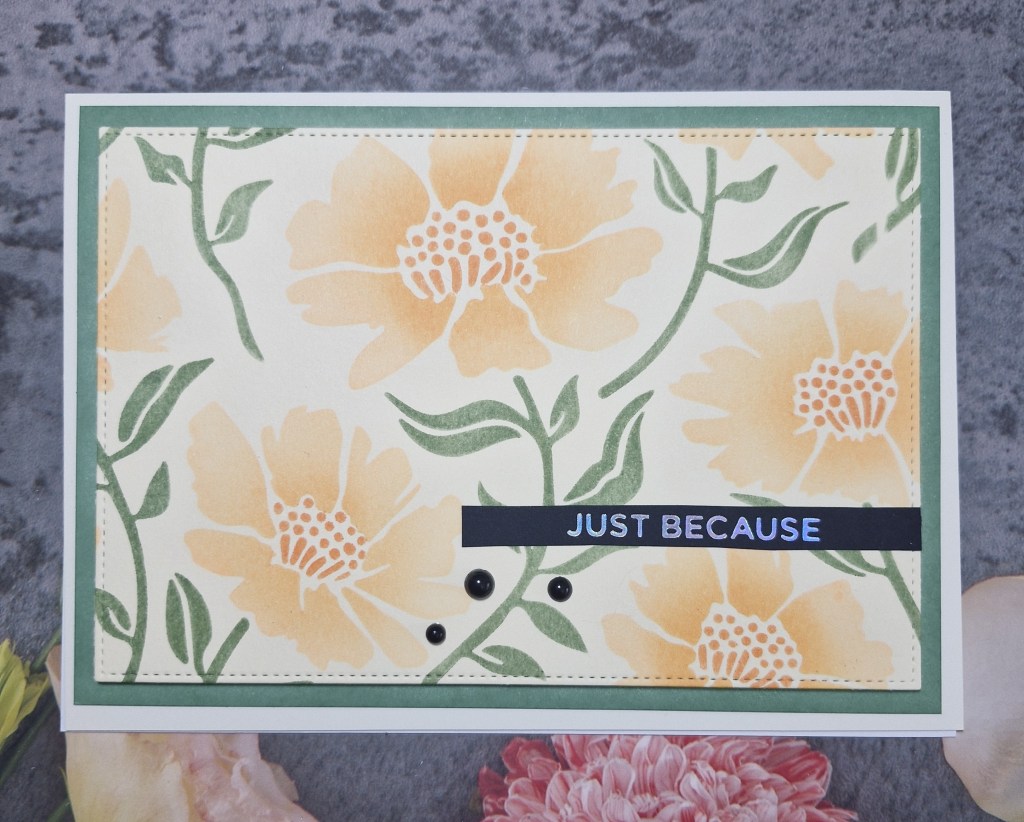
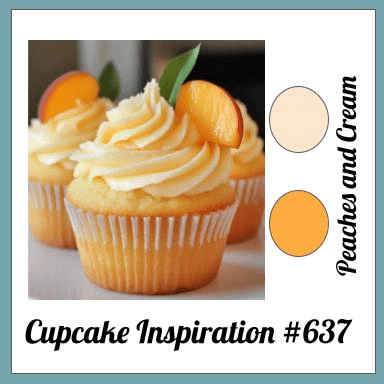
Hello once again. I have a card to share inspired by the colours at Cupcake Inspirations:

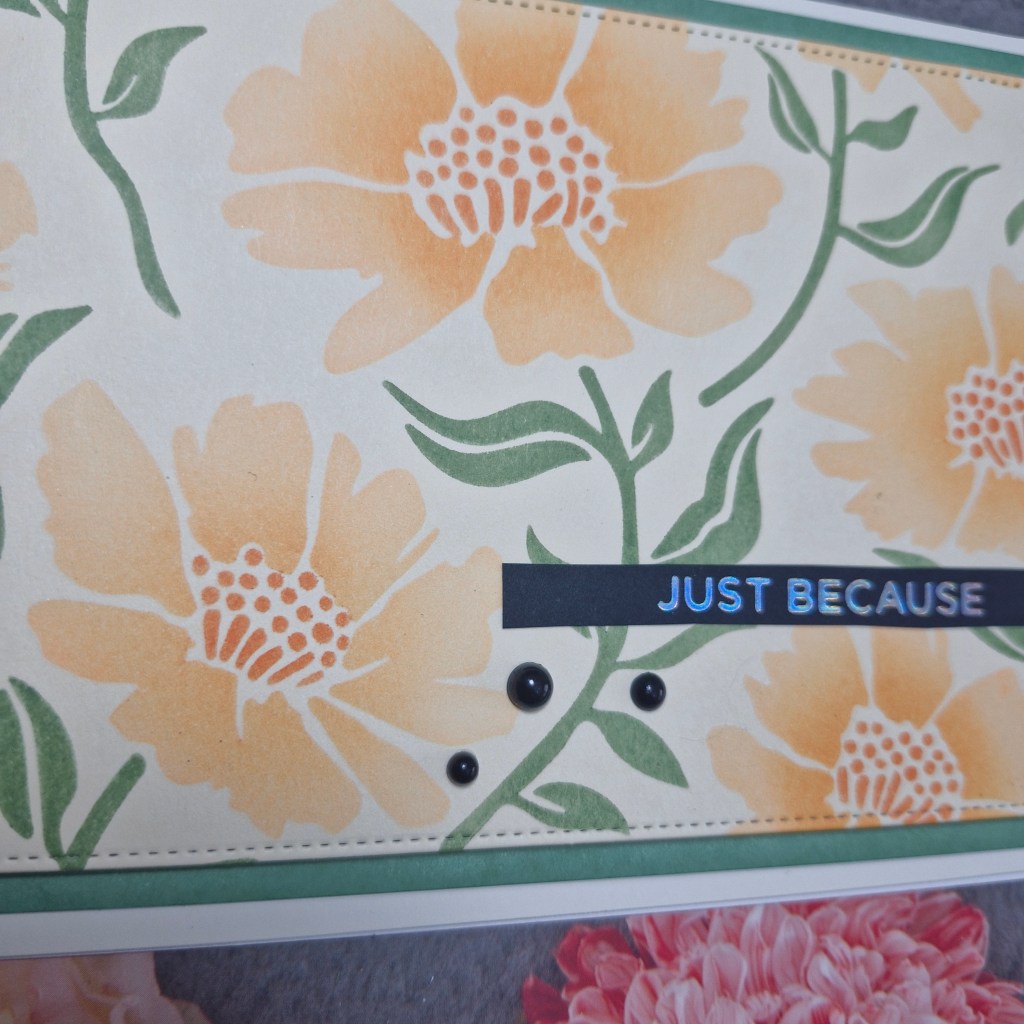
For the cream part of the theme, I used Ivory card stock from Concord & 9th, and stencilled the florals on using a Kristina Werner stamp and stencil set ‘Aubrey Blooms‘. I didn’t use the stamp, just stencilled the florals using two peach tones from Pinkfresh Studio, adding slightly darker blending towards the centre of the flowers.

For the green, I initially used Sage from Pinkfresh, but decided it wasn’t dark enough on the ivory card, so I used the next green up in the family – Eucalyptus.

The panel comes out even larger, and you can get two A2 pieces pout of the blended panel, but I created a 5X7 inch card so I could get as much of the design on there as possible.

I layered a piece of card onto the card base, and to match the green on the design, I ink blended around the edge of a piece of white card, then matted the design onto the top of that.

The foiled sentiment was added, silver foil on black for a little drama, and then added three enamel dots, to include items in the current Festive Friday challenge.

Even though the background card stock is not smooth enough for perfect ink blending, I felt the outcome gave an almost vintage feel.

I shall be entering the following challenges:

Cupcake Inspirations – Peaches & Cream

Allsorts – anything goes

Love To Craft – anything goes

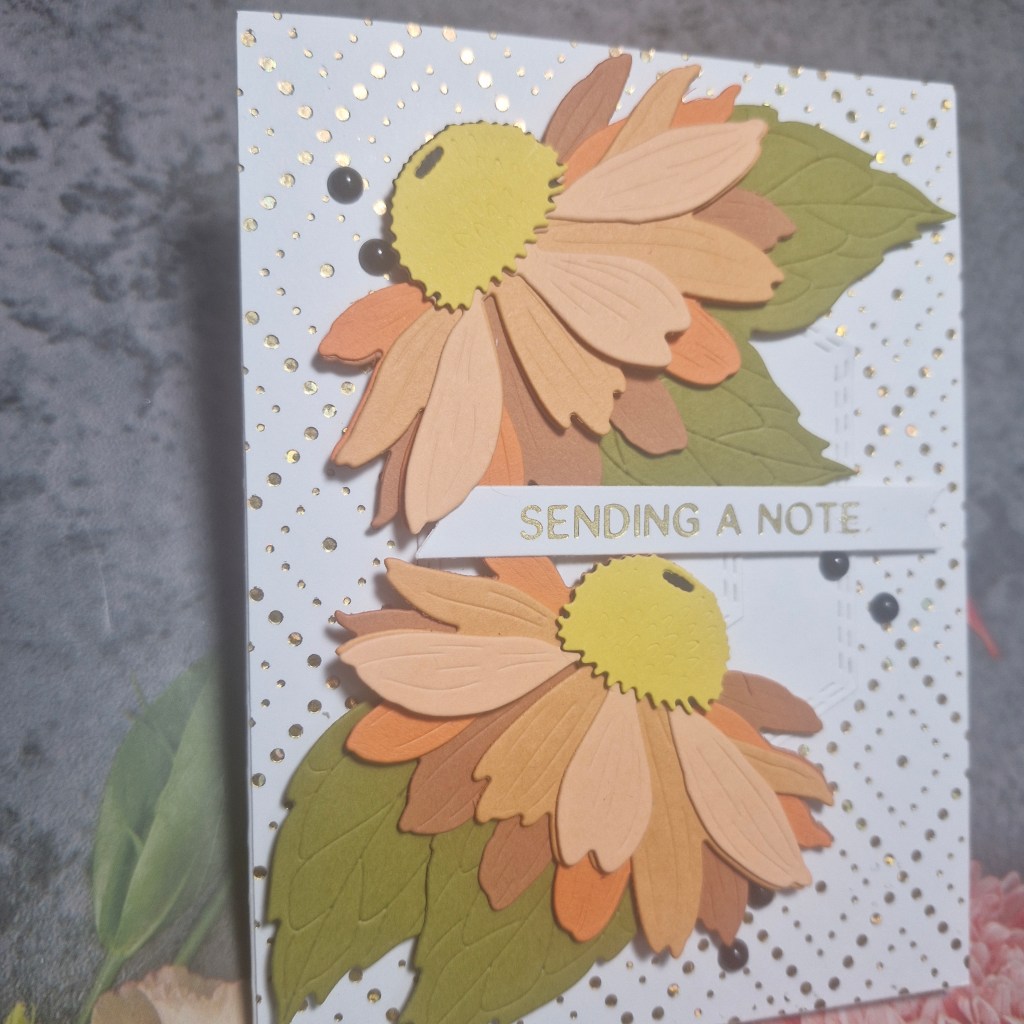
Sending A Coneflower Note

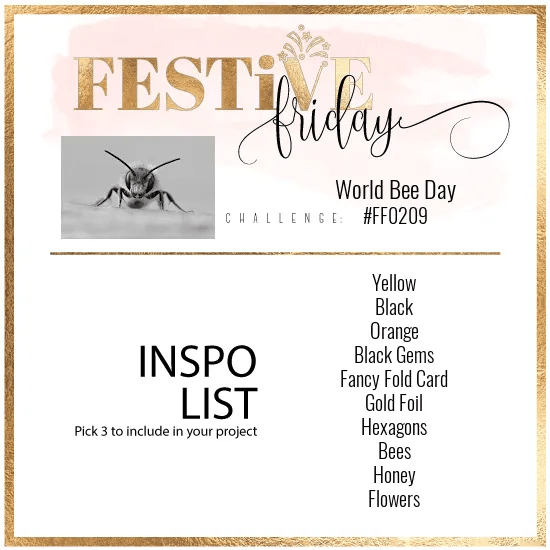
Hello. I have another card to share following the list of items from Festive Friday:

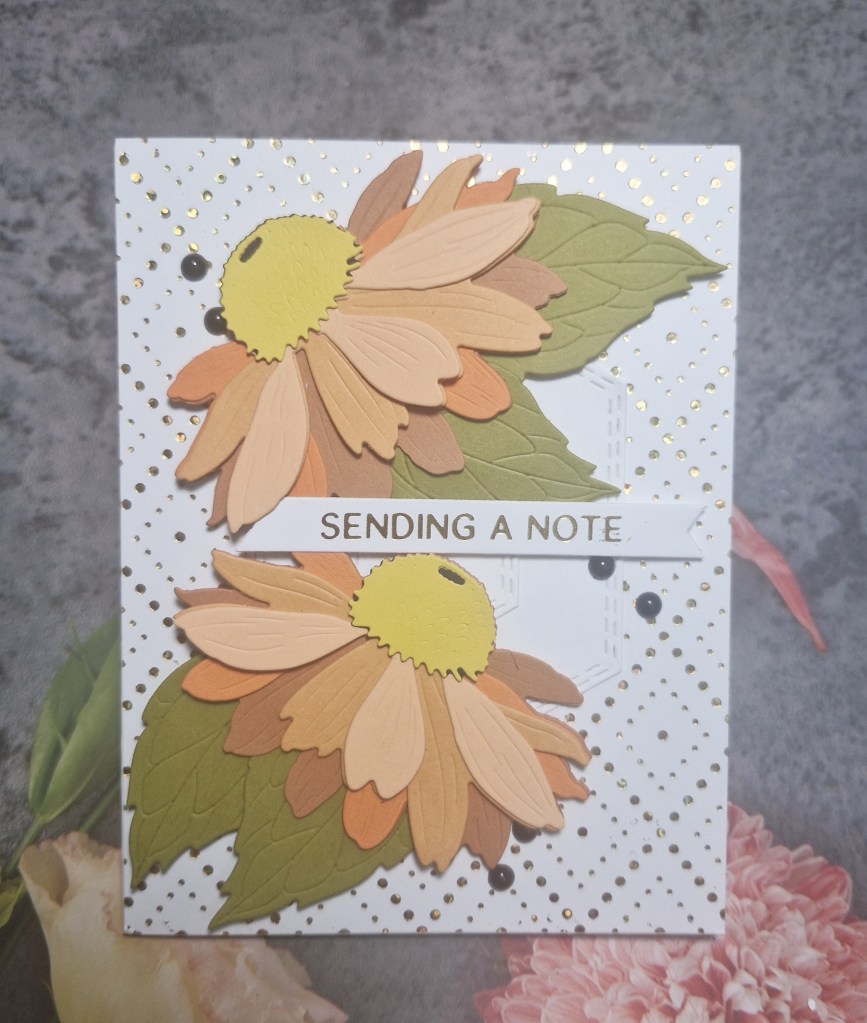
Looking at the list of items, I started with the golf foiled background panel. This was created using a hot foil plate from Spellbinders called ‘Dazzling Diamonds’.

The flowers were created using a layering die set from Honey Bee Stamps ‘Lovely Layers: Coneflower‘, with the layers of the flower die cut from Concord & 9th card stock – and including the ‘Marmalade‘ orange card stock which was retired a year or so ago. I have a stash of this colour as it is a gorgeous orange, and was sorry to see it go from their product line.

From darkest to lightest, I used ‘Spiced Cider‘, ‘Marmalade‘, ‘Clementine‘ and then ‘Creamsicle‘. The leaves were die cut from ‘Grasshopper‘. The centre of the flowers were a back layer of black, with a yellow upper layer from my stash of bits.

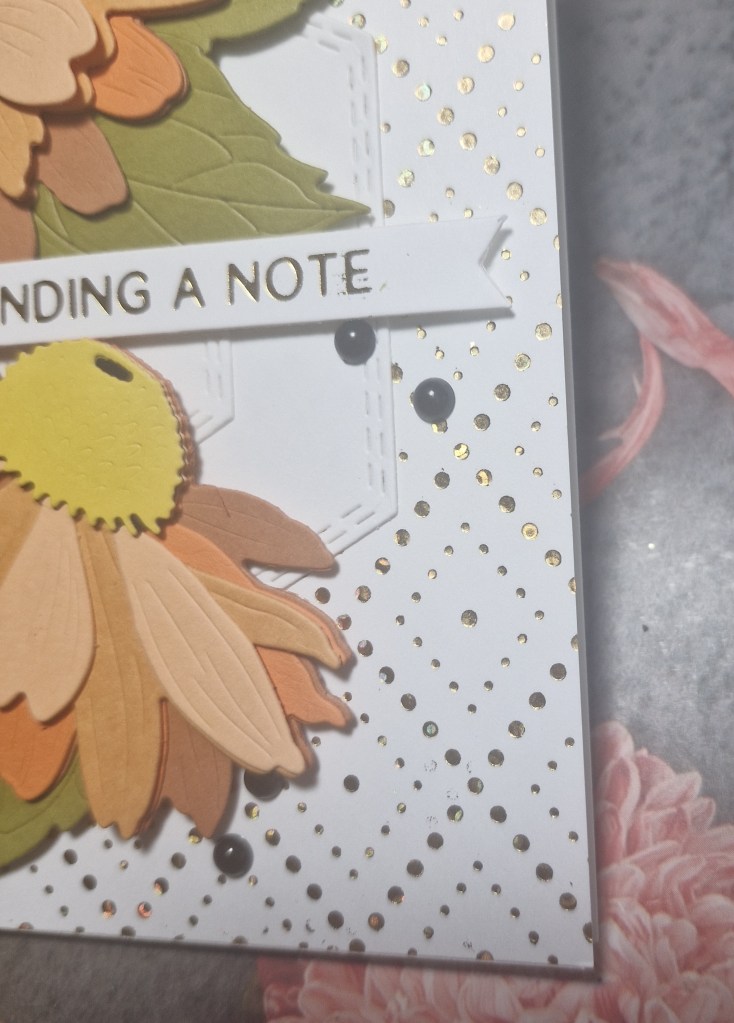
To include a hexagon, I die cut two of the Pinkfresh Studio ‘Nested hexagons: Double Stitched‘ – you can part of the two hexagons under the flowers.

The gold diamond panel was adhered to a white card base, the two hexagons adhered flat also – there are lots of layers to the flowers, therefore enough dimension.

I applied 3D foam to the flower heads and placed them onto the hexagons, then added two of the leaves for each flower – also with 3D foam.

The final steps were to add some black gems, then the foiled sentiment.

I shall be entering the following challenges:

Festive Friday – at least 3 items from the list – I used yellow/black/orange/black gems/gold foil/hexagons/flowers

Lil Patch Of Crafty Friends – anything goes

Dragonfly Dreams – use die cuts

Thinking Of You Today

Hello again. I have a card to share whilst trying to keep my mind busy after saying goodbye to one of my cats yesterday.

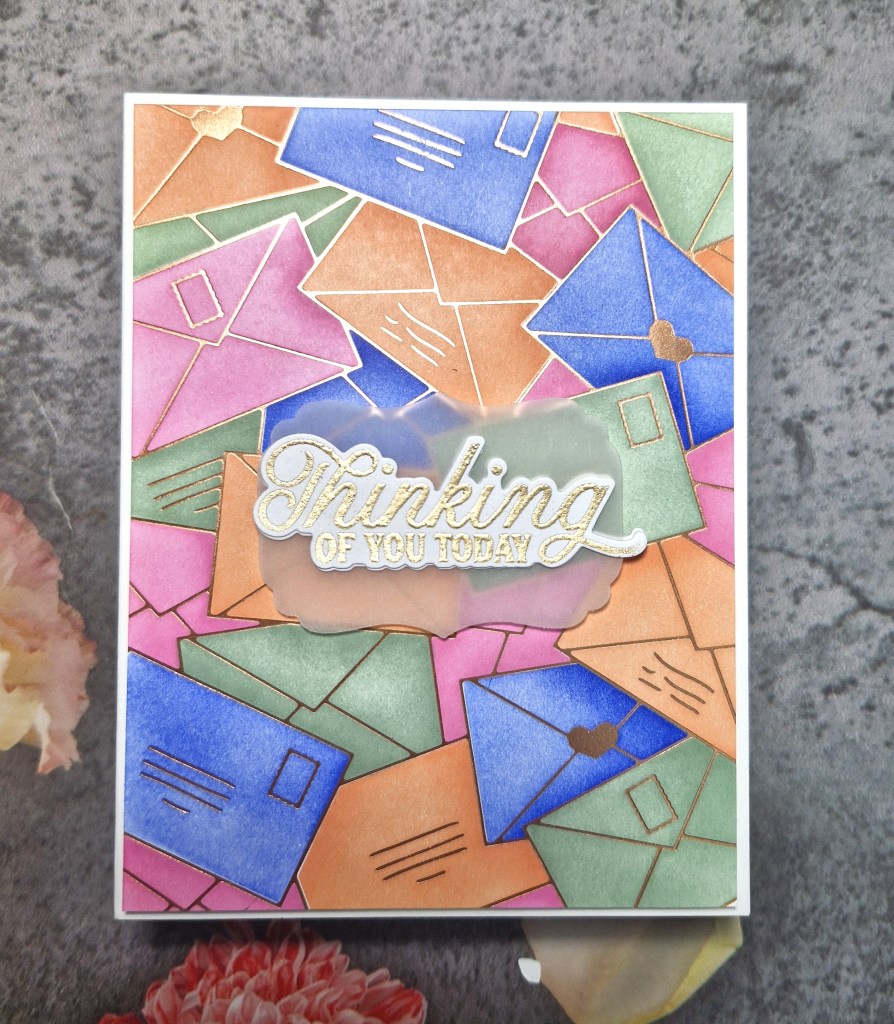
My starting point was the list at Festive Friday and searched my CML app for ‘envelope’. This Spellbinders hot foil plate came up, and with it were layering stencils, so out came my foil machine, and off I went.

I used a brass foil and Hammermill card stock. Now – I am not a fan of this card stock. I have not had great results when foiling or ink blending, but thought I would give it another go……..in future, I will stick with my Neenah for ink blending.

It did foil perfectly. I just don’t like how the card ‘grabs’ the brush, the ink doesn’t flow smoothly enough for me. I will use it for foiling or for stamping – but not for ink blending….

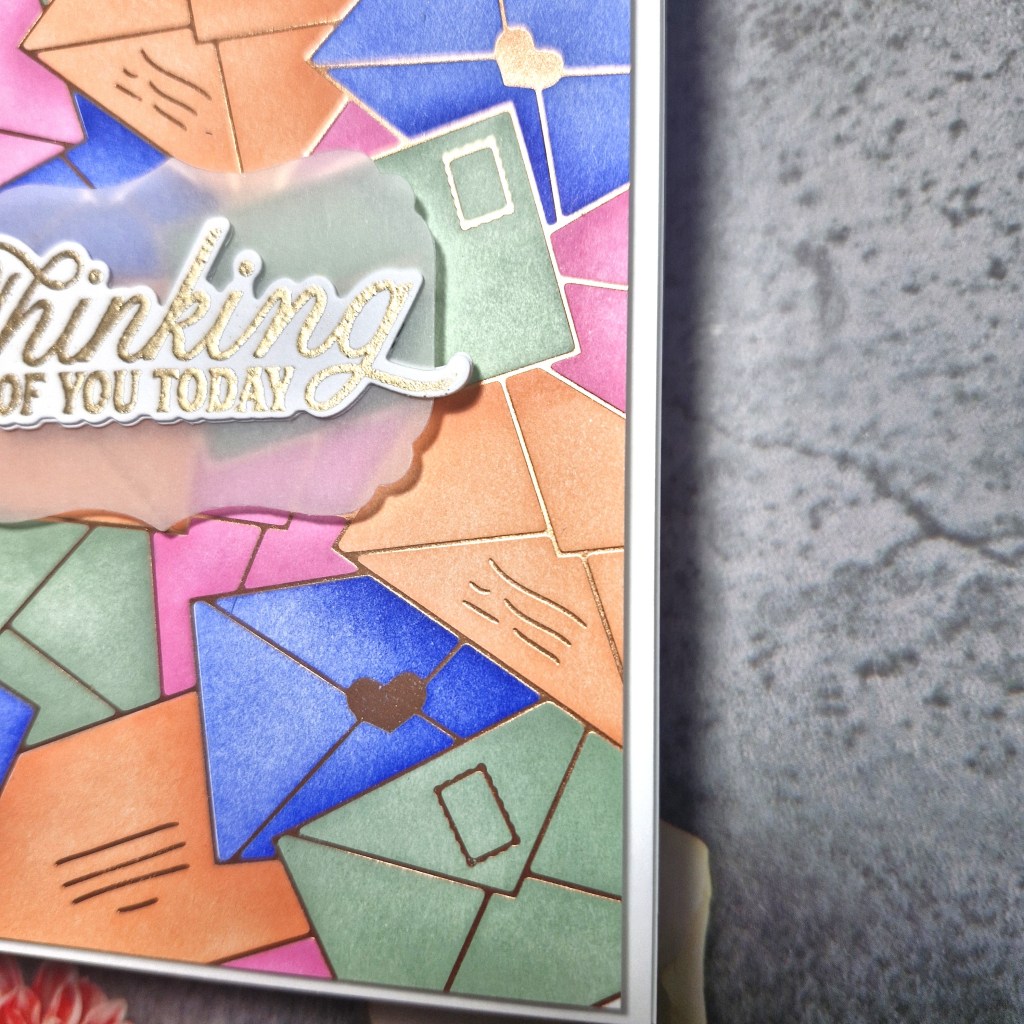
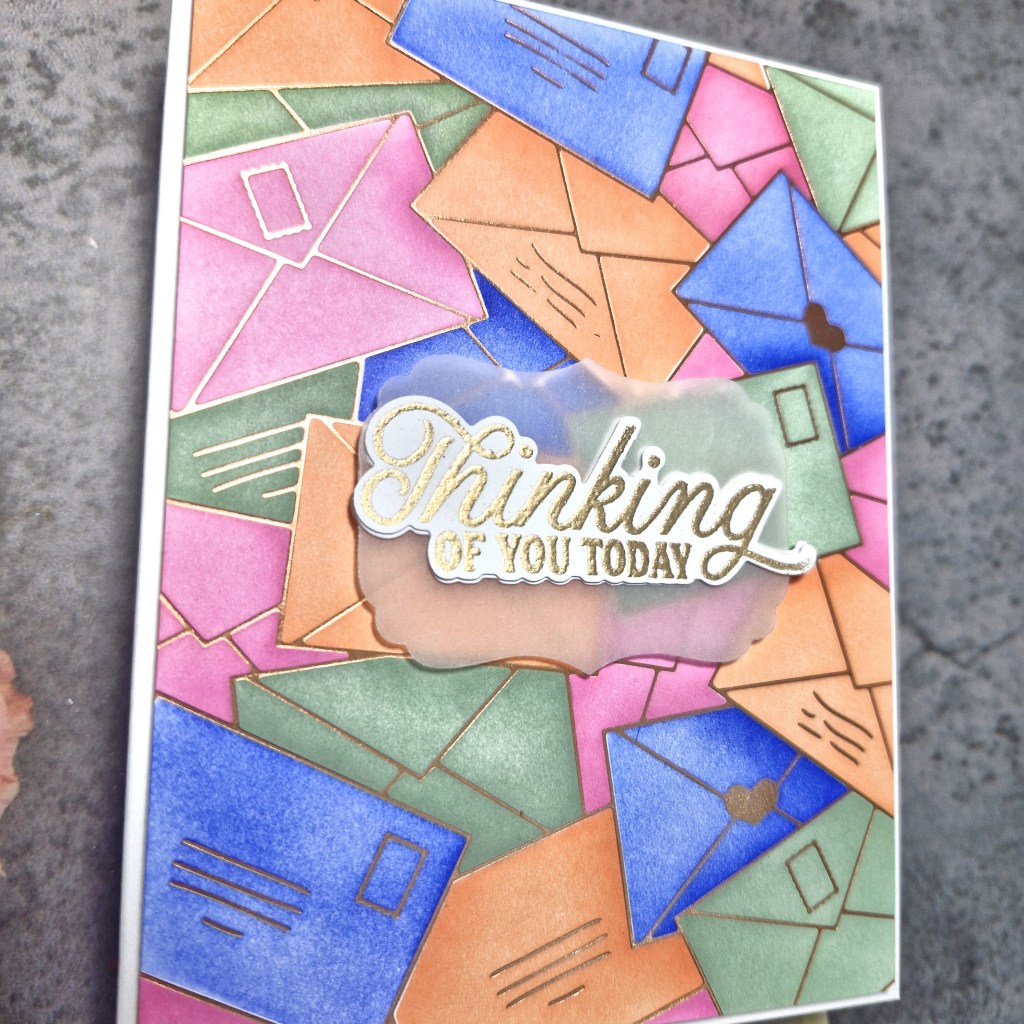
Anyhoo – onwards……I ink blended Pinkfresh Studio inks in the colours you see using all the layering stencils. I added a slightly darker blend to the areas of the envelopes I felt would be a little,in shadow under another envelope.

The panel was then cut down slightly to leave a white border showing on the card base.

The sentiment is from Pinkfresh and one of their recent virtual events, heat embossed in brass, then die cut with the matching die.

I created a die cut vellum label to go behind the sentiment, also from Pinkfresh Studio.

I can see that I shall be crafting over the next few days – in between cuddles with my other cats – that’s if they let me. They aren’t particularly a cuddly bunch. The weather in the UK seems to be a little brighter this next few days so I much venture out on my push bike…….

I shall be entering the following challenges:

Festive Friday – 3 items from the list – envelopes/vellum/thinking of you sentiment

Addicted to Stamps & More – die cuts and/or stencils – I used both

Stencil Fun – stencils, option of rainbow colours

Mixed Media Butterflies

Hello everyone. I am here to announce the new challenge starting at The Alphabet Challenge. We have reached the letter ‘Z‘, and Deborah has chosen the theme of:

Z is for Zoology

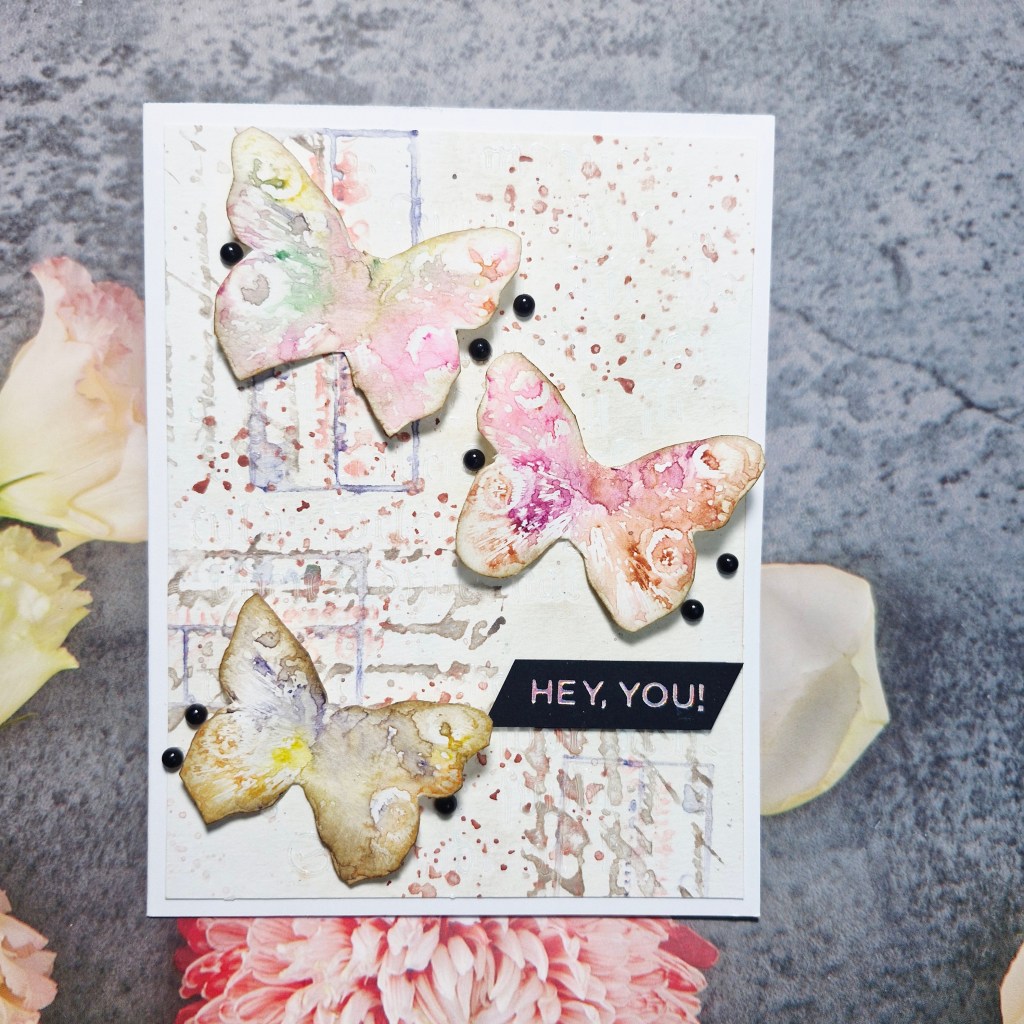
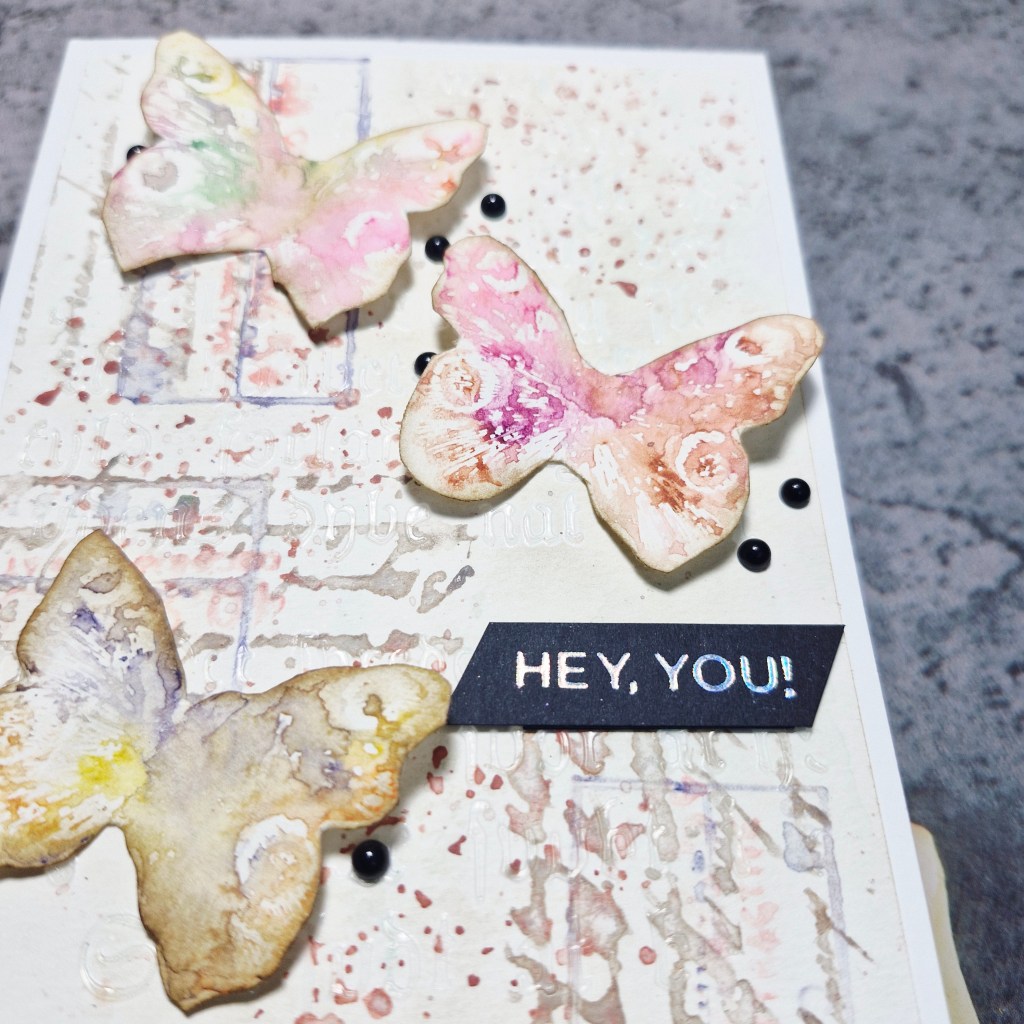
Here is my card:

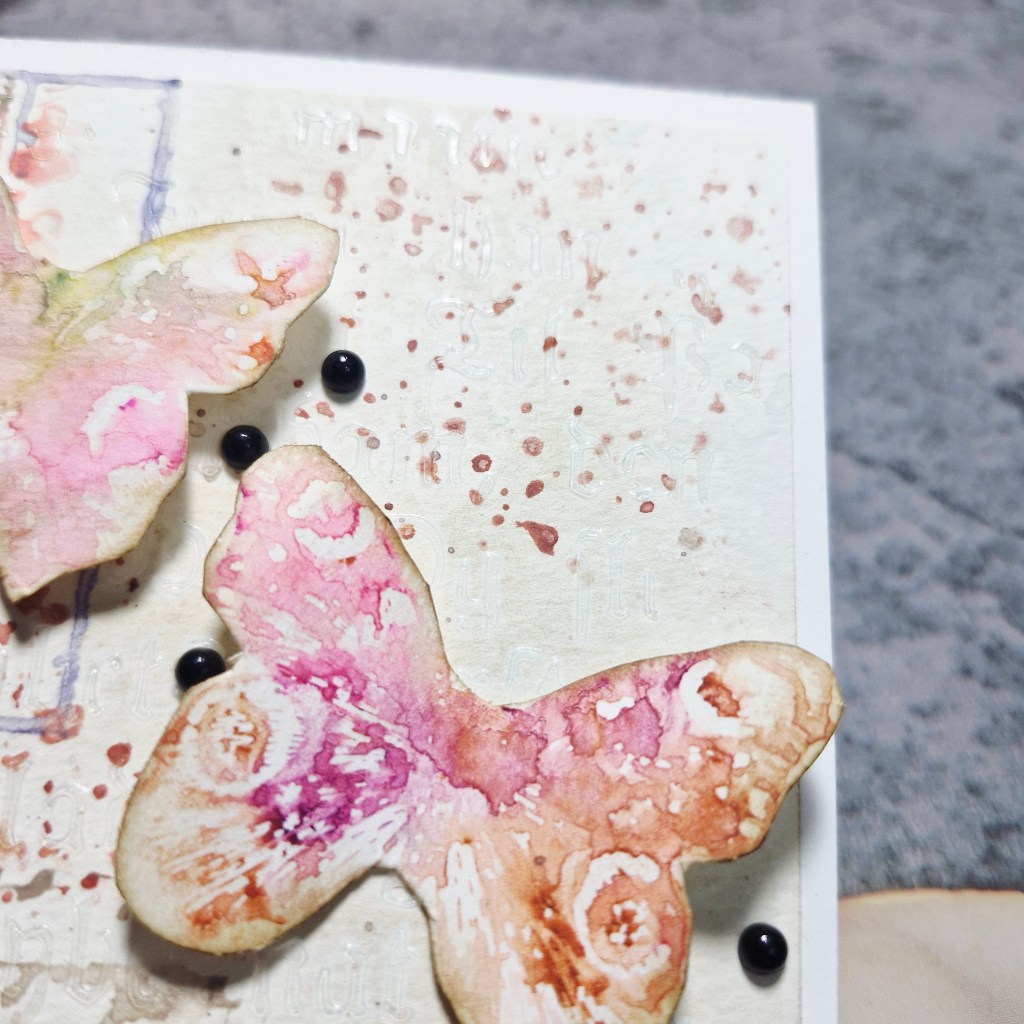
As you can see I chose butterflies, which – according to Google – are classed under the order of Lepidoptera.

I started by grabbing the Tim Holtz/Stampers Anonymous red rubber stamp set called ‘Flutter‘ and chose to go down the mixed media path.

I first grabbed my Distress Pencils, some water, and then coloured each butterfly stamp with the wet pencil nibs in a selection of colours, applied a spray of water to that, then stamped.

This gave a water-colour pattern, not precise, which is what I was going for. After that had dried, I fussy-cut them out…..yep, me, fussy-cutting…….!!

Now for the background panel.

This was created with a piece of Distress watercolour card, some script stamps, Distress pencils – using the same wet pencil to stamp technique, and stamped a couple of times.

This was left to dry whilst I hunted out more stamps I could use, and found a label stamp on which I used a light purple Distress pencil – same technique – wet nib then spritz.

Once the panel was dry, some splatters applied and left to dry – again.

I then used a stencil from Finnabair ‘Gothic’ script and some clear embossing paste – you can see a slight shine in some parts on the background.

Once everything was dry, I attached the background panel to a white card base, created a little curve in the butterfly wings and attached with glue – 3D foam under each wing to maintain dimension.

The foiled sentiment was added – silver on black – and little black gems stuck down as you see.

I hope you can come and join us with your projects following our theme. xx
I shall be entering the following challenges:

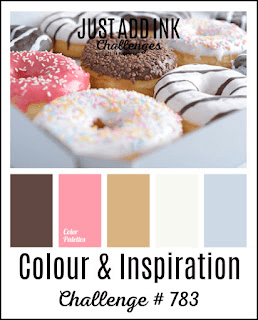
Just Add Ink – inspiration & colours – pink, brown – light and dark, white,

Addicted to Stamps & More – die cuts and/or stencils – stencil on background

Stamping Sensations – stamping and inspired by nature

Triple B – birds and/or butterflies and/or blooms

Ellibelle’s Corner Garden Party – anything in or from the garden

Cardinal Slimline

Hello everyone. I have a card to share for the new challenge at 52 Christmas Card Throwdown. I was lucky enough to be chosen as winner for their February 2026 technique challenge with THIS card, and as such invited to be Guest Design Team member for this challenge.

The theme is Christmas and slimline.

Here is my card:

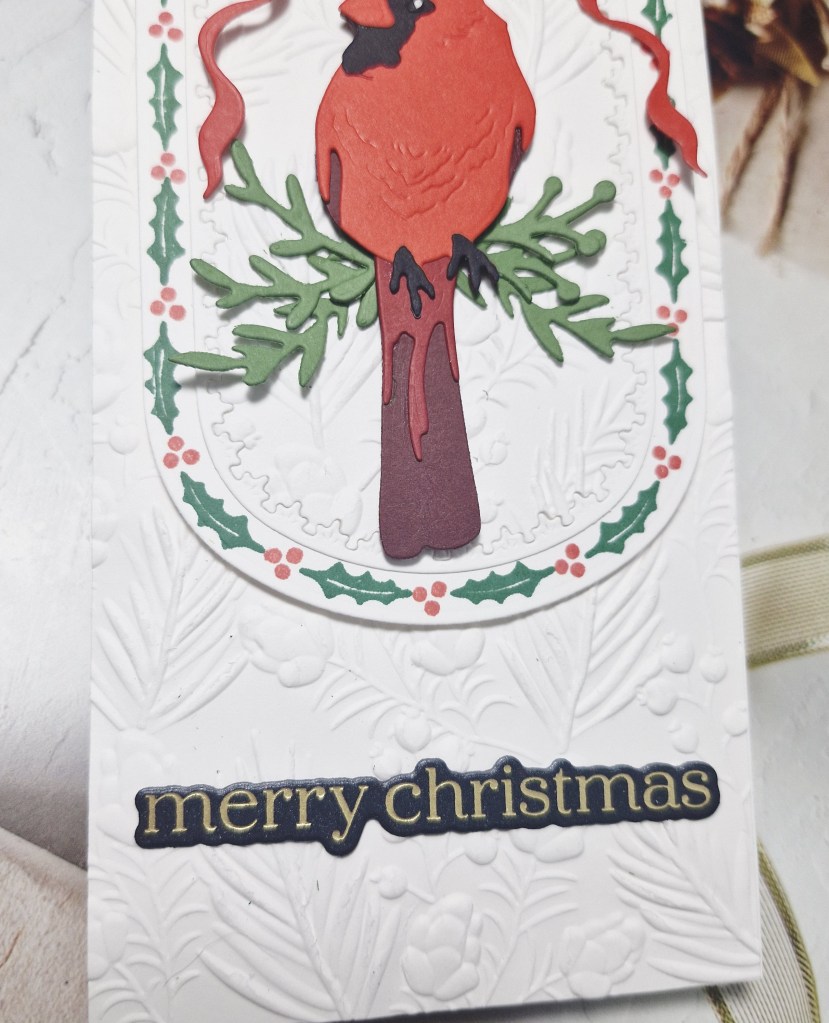
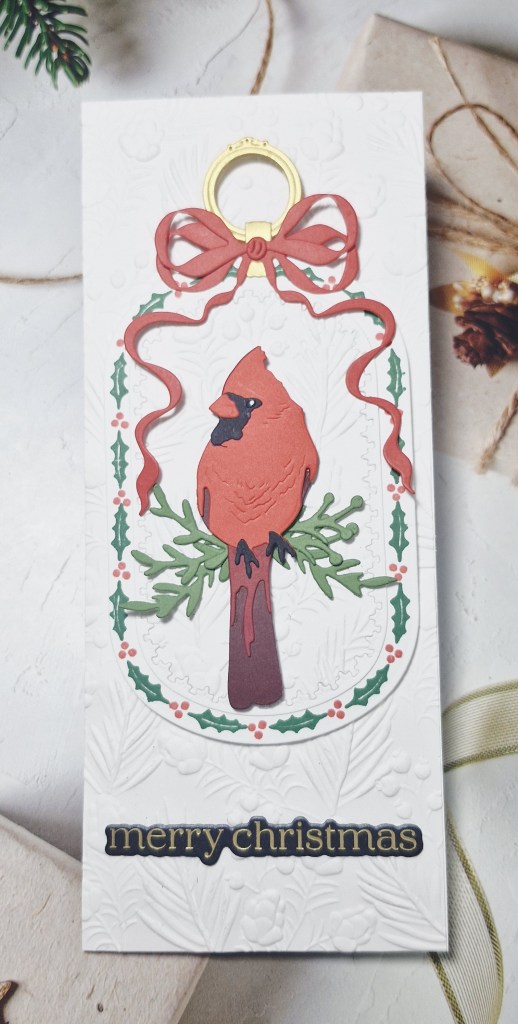
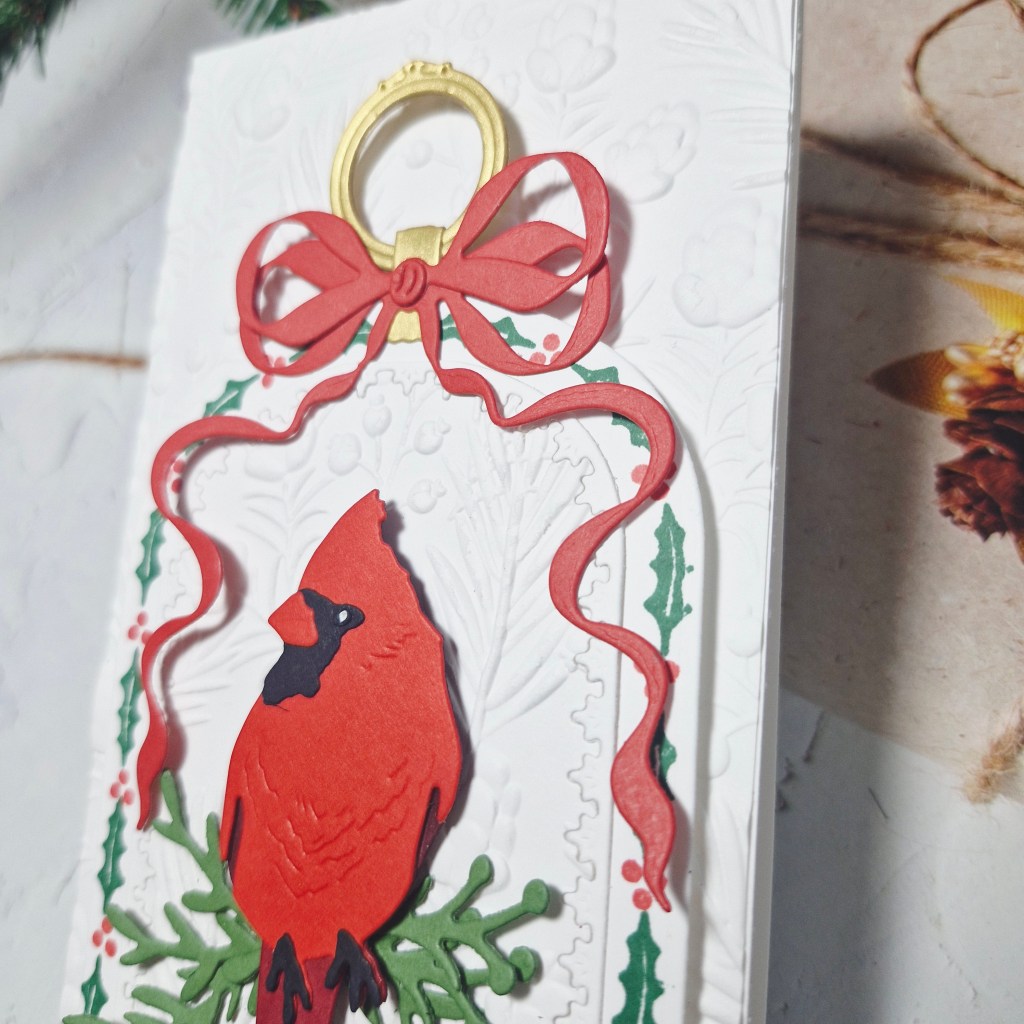
I wanted to use this cardinal layering die set from Honey Beet Stamps, so I first created him, using three tones of red card stock adding the black for the face and feet.

The slimline card base was created – 3.5 x 8.5 inches – then a separate piece of white card added for the background, which I ran through with a Spellbinders embossing folder.

I wanted the cardinal to be framed somehow, so search through the CML app, and saw this set from The Greetery.

I die cut the oval, then used the layering stamps to create the holly frame with the berries.

Something else was needed behind the bird, so I used a ‘Filigree Capsule Border‘ die, also from The Greetery to create the second smaller oval, and used the same embossing folder to add further detail.

I wanted to add more – you know me – so I also used other products from The Greetery – the ‘Hang It Up‘ die set using Spellbinders matt gold card stock, and the ‘Ornamental Tags‘ die set for the foliage.

I wanted even more, so I also used their ‘Regency Bow No 1‘….

I then thought I was done with the die cutting and started to put the card together.

I first added the embossed smaller oval to the larger oval, added the bird with 3D foam, nipped then tucked some of the foliage behind him. The tag hanger-up thingy was attached, then the bow on top of that.

The final step was to added the gold foiled sentiment, previously created on black card stock – to tie in with the black details on the cardinal.

I really enjoyed making this card, all the techniques – stamping, die cutting, embossing – make me happy…

I hope you can come and join the team with your Christmas creations following their theme. xx
I shall be entering the following challenges:

Triple B – birds and/or butterflies and/or blooms

Lil Patch of Crafty Friends – anything goes

Merry Little Christmas Challenge – anything goes Christmas

Mix It Up – anything goes – option of die cuts taken
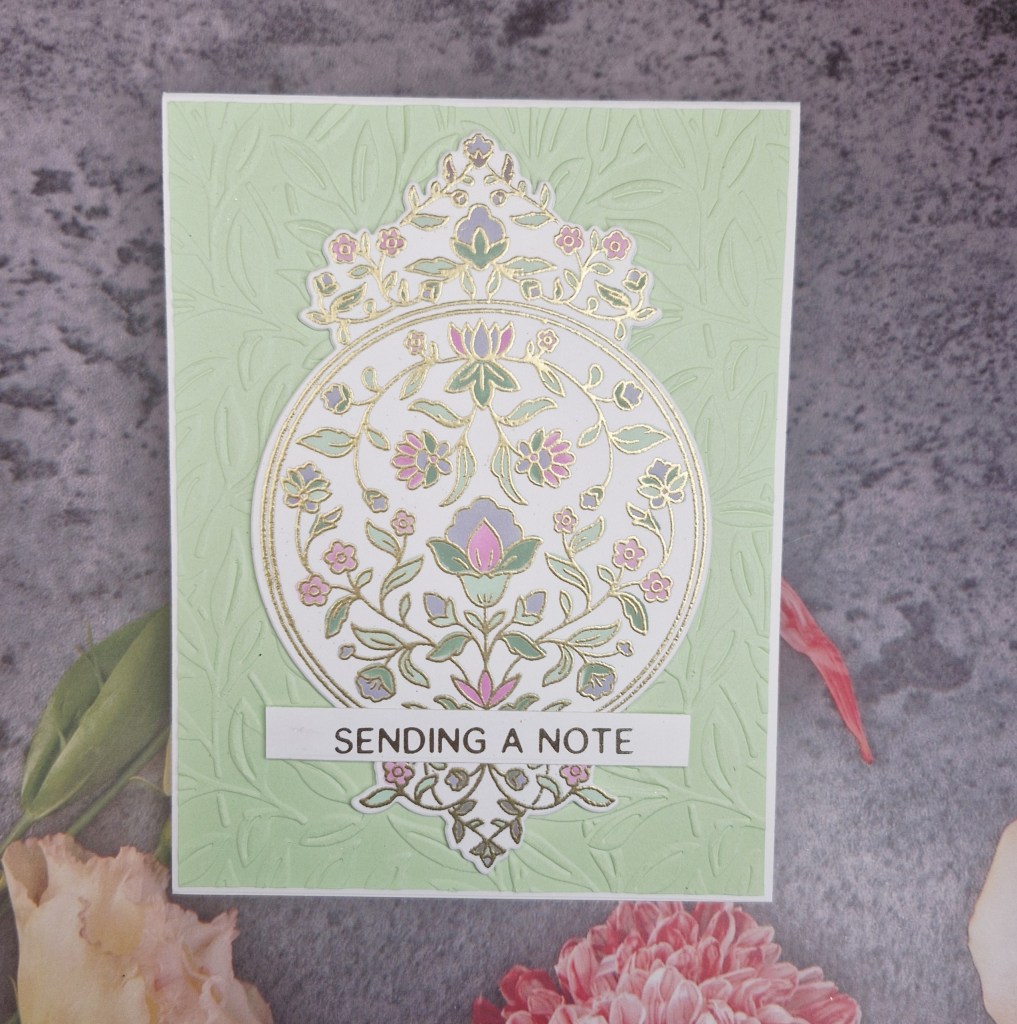
A Splash of Green

Hello everyone. A new challenge has started at Cardz 4 Galz, with the theme of ‘a splash of green‘ hosted by Pamela:

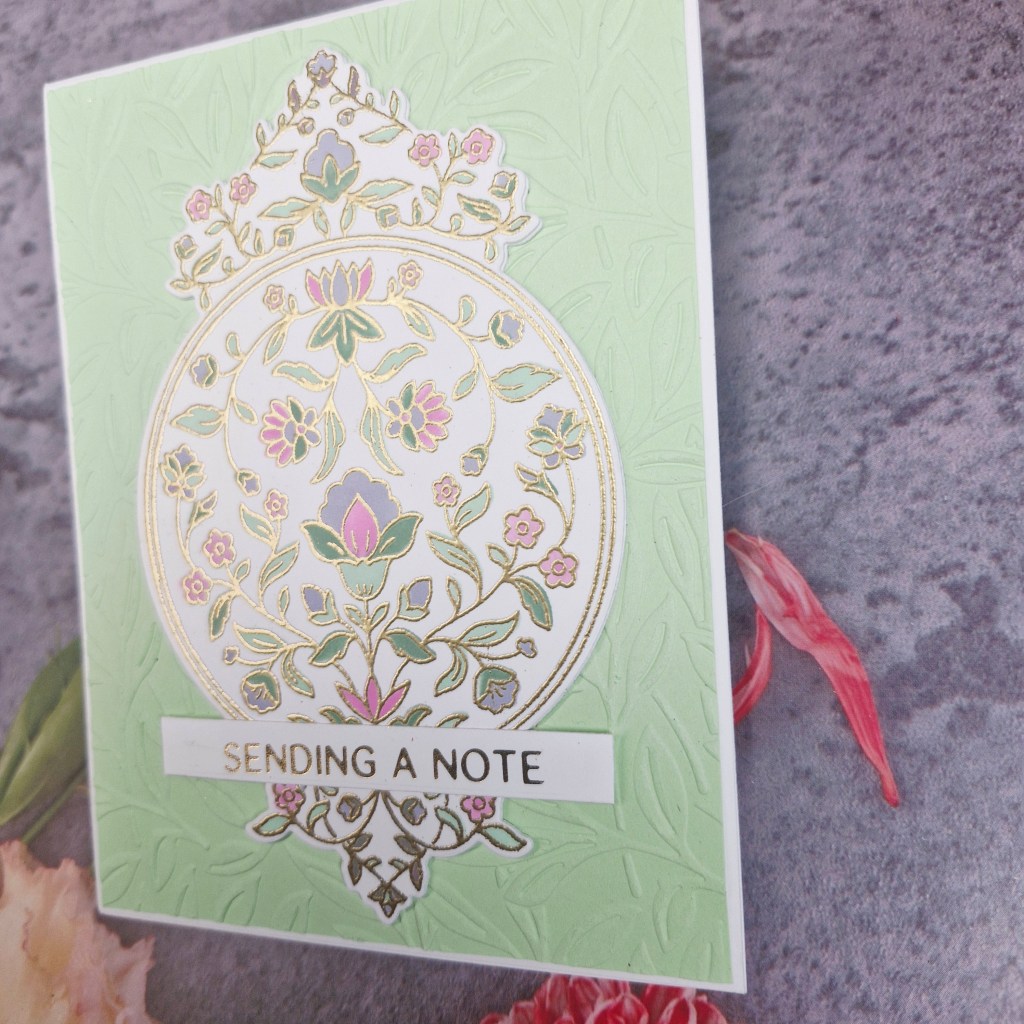
The centre image is from Pinkfresh Studio ‘Garden Tapestry’ and consists of a stamp, die, stencil, and hot foil plate. I didn’t use the hot foil plate this time round, and chose the stamp and gold heat emboss the main image.

Once heat embossed, I used the layering stencils to colour the image, choosing softer colours, then use the matching die to cut it out.

The background panel was created using some light green card stock and running it through with a Spellbinders embossing folder ‘branching out’, cutting it down slightly and attached to a white card base.

The die cut image was added with 3D foam, then the foiled sentiment attached.

I hope you can come and join us with your creations following our theme. xx

I shall be entering the following challenges:

CYHTP – embossing folder – option of sewing/sewing related not taken

Stencil Fun – use stencils – option of vine/vinery

Craft Rocket – no designer paper

Lil Patch Of Crafty Friends – anything goes

Thanks So Much

Hello everyone. The new challenge has started at Cardz 4 Galz, and Debbie has chosen the theme of:

embossing – heat or dry

Here is my card with dry embossing:

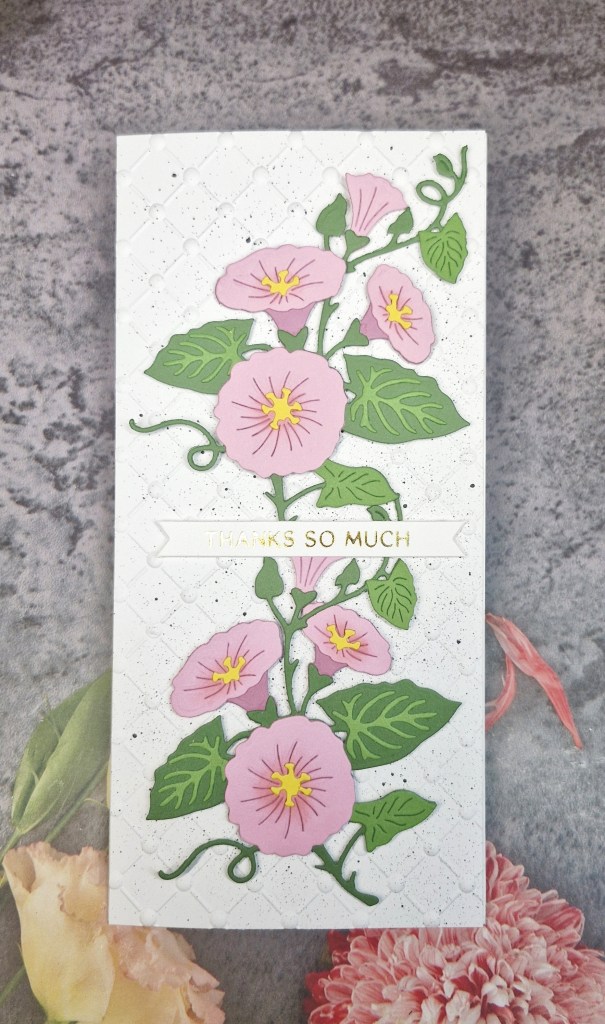
I chose to make a very tall card here, as I wanted to use two of the floral images. These florals are from The Greetery and are called ‘Botanicuts Morning Glory’.

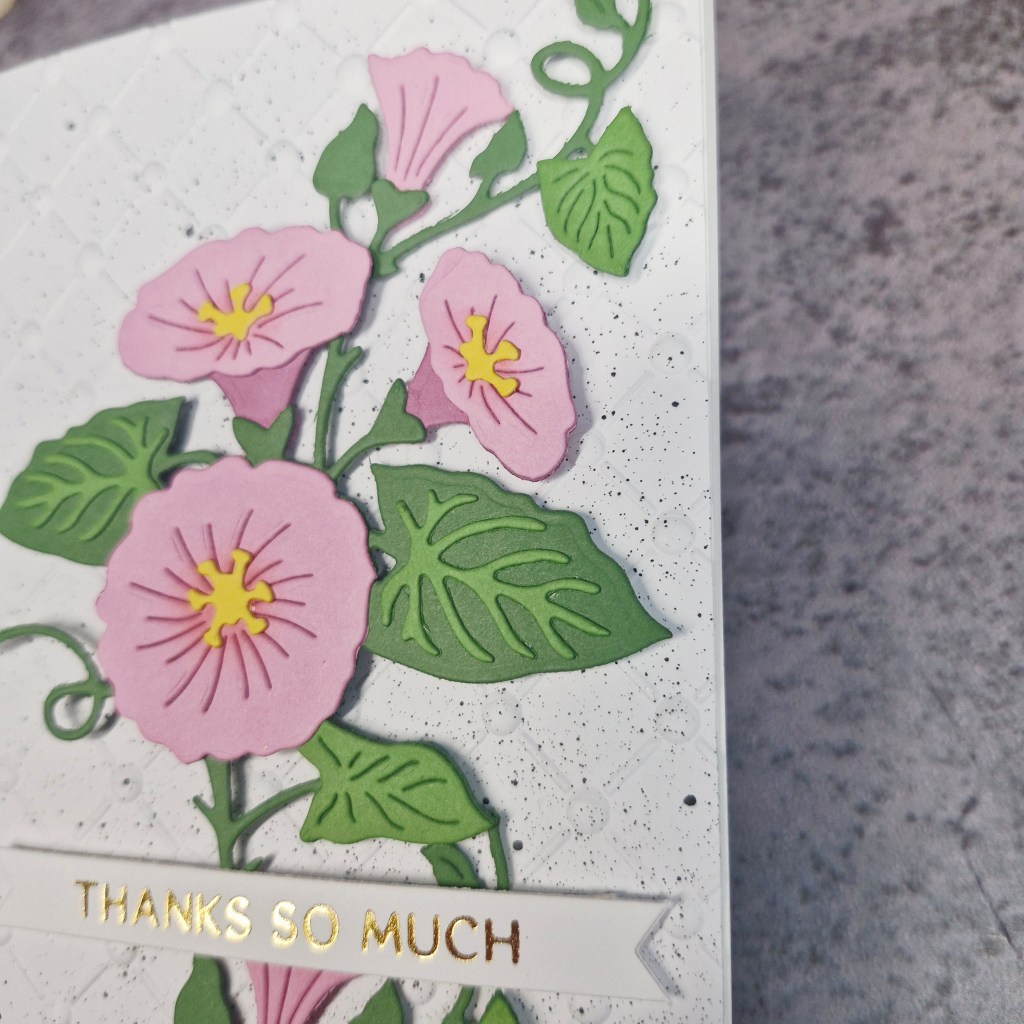
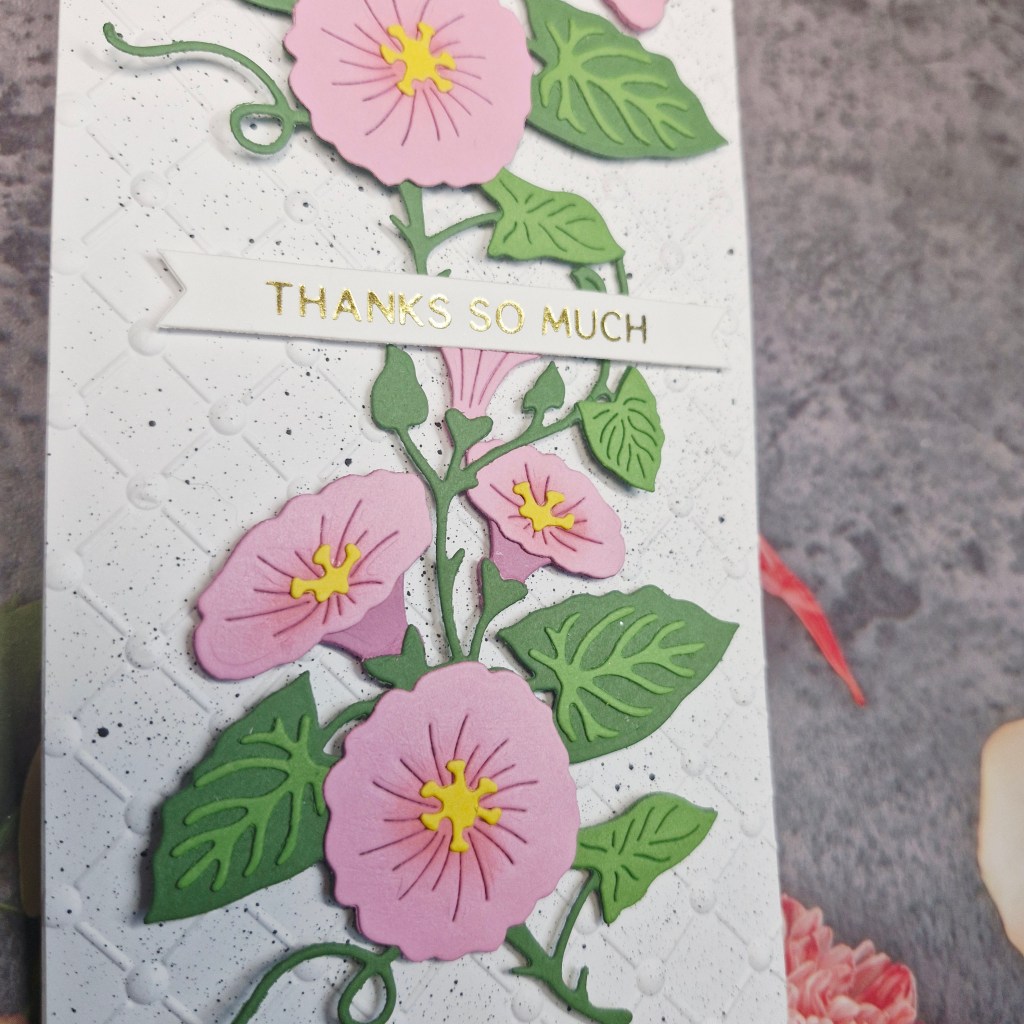
The layers were die cut and assembled, choosing to use a lighter green for the veins of the leaves instead a darker green. I don’t know why – it just looked pretty…..

I then took the slimline card base, cut a piece of white card the same size, and ran that through with a Spellbinder embossing folder.

When I placed everything down, I felt the background needed just a little something more, so I added some splatter – small splatters, not too much – just enough for interets.

I was happier with the look, so when it was dry – it didn’t take too long – I attached the images with 3D foam, and added the foiled sentiment:

I hope you can come and join with your dry or heat embossing creations. xx

I shall be entering the following challenges:

Lil Patch Of Crafty Friends – anything goes

A Cut Above – anything goes with a die cut

Triple B – birds and/or butterflies and/or blooms

Mix It Up – anything goes with the option of die cuts taken

Heat Emboss Resist Christmas

Hello. I thought I had posted this card a day or two ago – but obviously forgot to even write it – never mind post it.

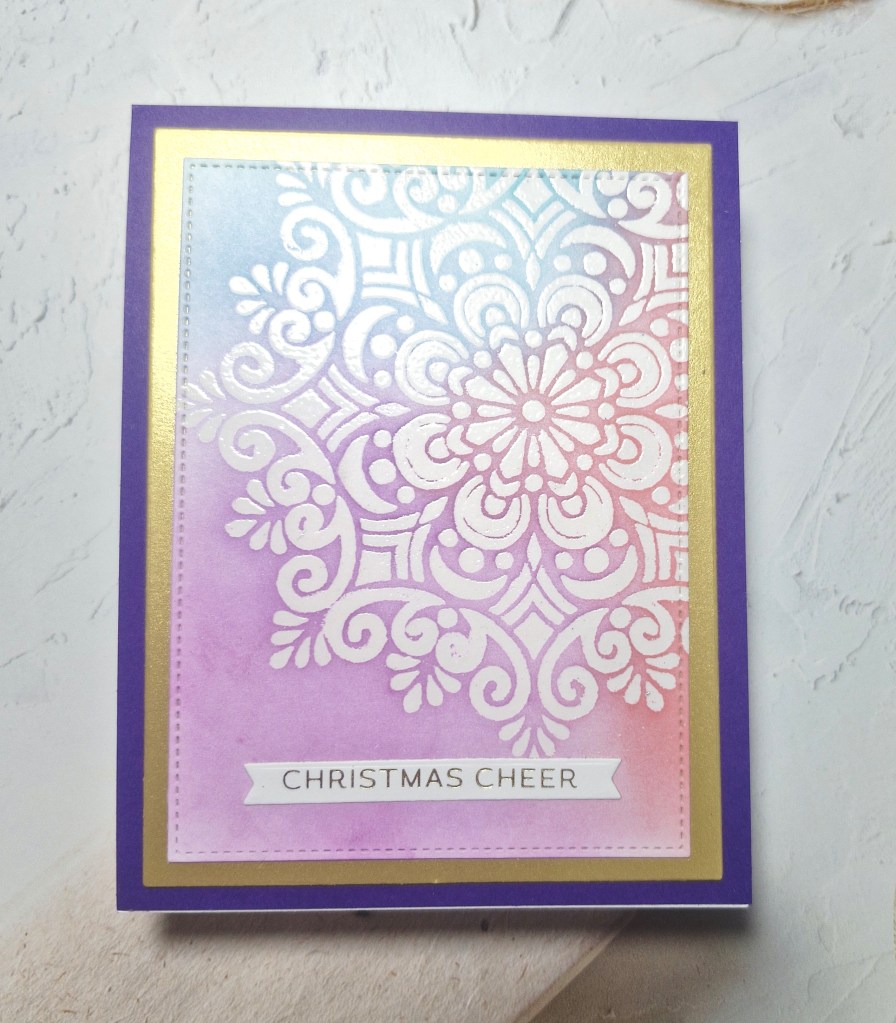
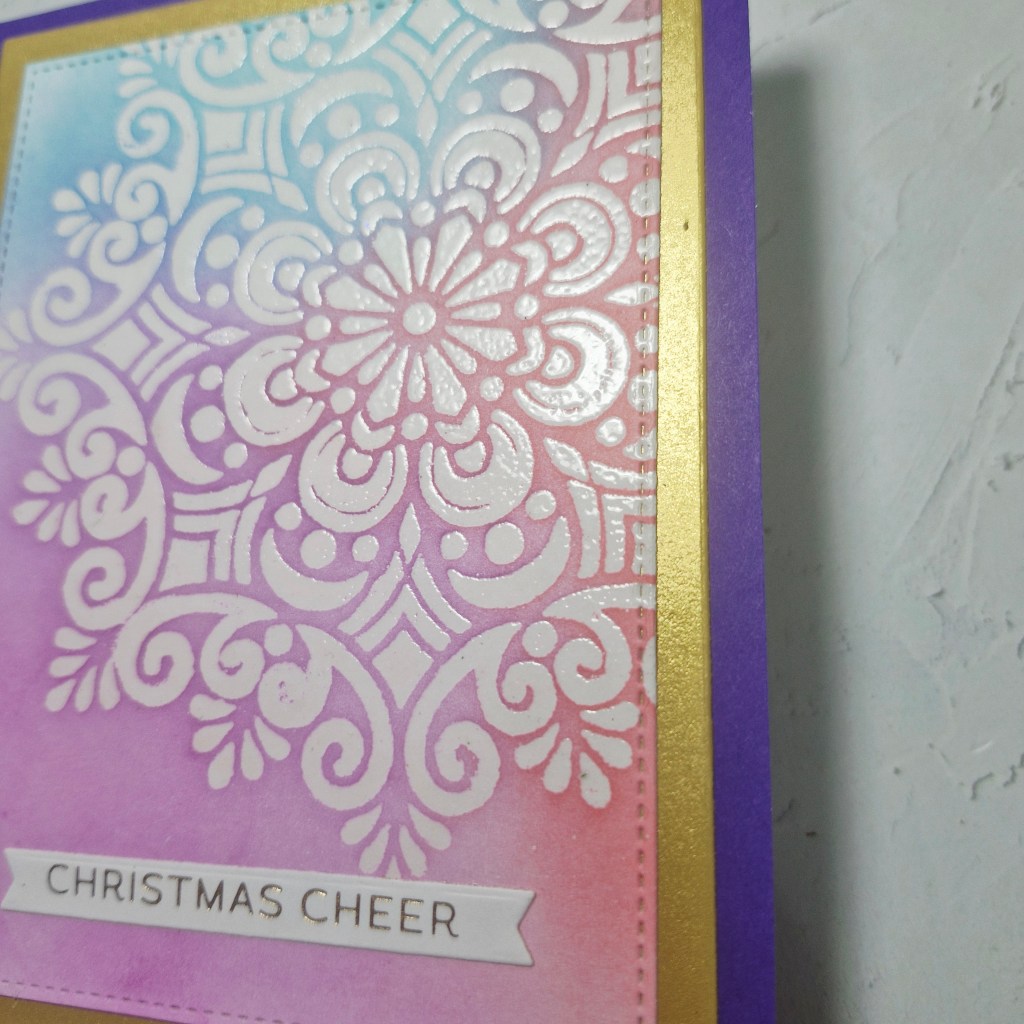
This card was created as I was intrigued by the current challenge at 52 CCT – their Christmas technique theme this time is for using heat emboss resist. I thought of a Gina K Designs stencil I had of a large snowflake, so decided to give it a go:

The first step was to tape the 6×6 inch stencil onto a piece of white card which measured slightly bigger, and pounce some embossing ink through it. I think I remember doing this on a previous virtual event, so I had a blending brush already set aside for using this embossing ink.

I first brushed some anti-static powder onto the card stock, then taped the stencil down round the edges. It took a little doing, a lot of pouncing instead of brushing, but I managed to get the whole image done, then used white embossing powder and heat set the design.

I then took three colours of Pinkfresh Studio inks and blended them all around, wiping it down between each colour to not cross-contaminate.

The blending was taken to the edge of the larger piece of card, so I could choose which part to use, and die cutting with a Gina K Designs Master Layout die set to get a stitched rectangle.

This rectangle was then matted with brushed gold card stock from Spellbinders, then a deep purple card, and attached to a white card base.

The foiled sentiment was then added.

I shall be entering the following challenges:

52 CCT – heat emboss resist

Inkspirational – use stencils – option of plaid not taken

Merry Little Christmas Challenge – anything goes Christmas

Daffodil Dimension

Hello again. The Alphabet Challenge has started a new challenge, having reached the letter ‘V’, Helen has chosen the theme of :

‘volume – use foam pads or gel to raise apart of you design’

Here is my card:

I decided to go with a springtime fell with these daffodils. Having had what seems like months of rain here in the UK, the snowdrops are appearing, and I felt a spring card was needed to encourage brighter weather.

The daffodils are from Hero Arts, die cut and then a little ink blending to the petals before adding the corona, which was attached with 3D foam pieces.

The background panels of green, then the stitched white layer were cut using a Gina K Designs Master Layouts set, and the green circles die cut with nesting dies to be slightly larger than the two white scalloped circles – also cut with a Gina K Designs die. Before attaching the white circles to the green, I ran them through an embossing folder to give a little more interest.

The sentiment is foiled and die cut from Pinkfresh Studio.

I hope you can come and join with your creations following our theme. xx

I shall be entering the following challenges:

Crafts Galore – anything goes

A Cut Above – anything goes with die cuts

Lil Patch Of Crafty Friends – anything goes

Craft Rocket – flowers